

Power Your Software Testing with AI Agents and Cloud
The Native AI-Agentic Cloud Platform to Supercharge Quality Engineering. Test Intelligently and Ship Faster.


- TestMu AI (Formerly LambdaTest)
- /
- Blog
- /
- What Is Selenium Grid? Setup and Docker Guide (2026)
What Is Selenium Grid? Setup and Docker Guide (2026)
Learn what Selenium Grid is, how its architecture routes tests, and how to set it up in standalone, hub and node, distributed, and Docker modes on Grid 4.46.
Last Updated on:
This article is a part of our Learning Hub.
Automated testing plays a pivotal role in modern release cycles, because it speeds up the entire process of cross browser compatibility.
Among all the frameworks used for automated browser testing, Selenium is considered one of the best test automation frameworks.
Out of the entire Selenium project, Selenium Grid has been extremely helpful for web automation enthusiasts as it allowed them to perform parallel testing with Selenium.
In this Selenium Grid tutorial, we look at what Selenium Grid is and then explore some of its benefits using Selenium testing.
Overview
Use Selenium Grid to execute automated test scripts in parallel across multiple browsers, operating systems, and machines. This open-source tool is best for reducing test execution times, while the broader Selenium WebDriver framework is best for programmatically interacting with web elements during end-to-end automation.
How is Selenium Grid different from Selenium WebDriver?
WebDriver is the API your test code calls to drive a browser. Selenium Grid is the infrastructure that decides which machine that browser runs on.
What are the deployment modes for Selenium Grid?
Grid 4 ships four ways to run the same six components, from one process to a whole cluster:
- Standalone: Every component in a single process on one machine. Fastest to start, least scalable.
- Hub and node: One hub accepts requests, separate node machines run the browsers.
- Fully distributed: Each component runs on its own, so any one of them can scale or restart independently.
- Docker or Kubernetes: The same roles as containers, with browser and driver versions pinned in the image.
What Is Selenium Grid
Selenium Grid is a smart proxy server that routes WebDriver commands from your test code to browsers on other machines, so one suite runs in parallel across many browser and OS combinations.
Practically, that means the browser definitions live in one place instead of being hard-coded into each test, and every machine you add becomes extra capacity behind the same URL.
Grid is one of the three parts of the Selenium project. Selenium IDE records and replays scripts in the browser, while Selenium WebDriver is the API your test code calls.
Selenium Grid is the infrastructure deciding which machine that browser runs on. You always use WebDriver. You add Grid when one machine stops being enough.
Each of those pieces is covered end to end in our Selenium tutorial hub.
The current release is Selenium Server (Grid) 4.46.0, published on July 11, 2026, and every language binding shares that version number.
Grid 4 replaced the JSON Wire Protocol with the Selenium 4 W3C WebDriver protocol, and folded the Hub and Node roles into one JAR, so two separate downloads are no longer needed.
For the full list of changes, see Selenium 3 vs Selenium 4.
The same walkthrough is available for other language bindings, including Selenium Java tutorial and getting started with Selenium Python.
How Does Selenium Grid Work
Selenium Grid works by putting a router between your test code and the browser running it, matching each session request to a registered Node offering the browser and platform you asked for.
Your test creates a RemoteWebDriver pointed at the Grid endpoint, which is http://localhost:4444 by default, instead of instantiating a local driver.
From there the Grid owns the routing. Your client never learns which physical machine answered, which is exactly why the same script works against one Node or fifty.
Walking through a single test run makes the sequence concrete:
- Your test sends a new session request to the Router on port 4444.
- The Router hands it to the New Session Queue, which holds requests in first-in-first-out order.
- The Distributor picks the request up and looks for a free Node whose capabilities match the request.
- The Node launches the browser, creates the session, and returns a session ID.
- The Session Map stores that session ID against the Node, letting the Router send later commands straight to the right machine.
- When the test calls quit(), the Node closes the browser and releases the slot back to the Grid.
Nothing in your test logic changes between one machine and fifty.
Only two things differ: the URL you hand to RemoteWebDriver, and how many Nodes sit behind it. Moving an existing suite onto a Grid is a configuration change, not a rewrite.
What Are the Components of Selenium Grid
Selenium Grid 4 is built from six components: the Router, Distributor, Session Map, New Session Queue, Node, and Event Bus. Each one owns a single step in getting a test request onto a real browser.
In standalone mode all six run inside a single process. Fully distributed mode runs each one separately, letting a Grid scale past one host and survive a component restart.
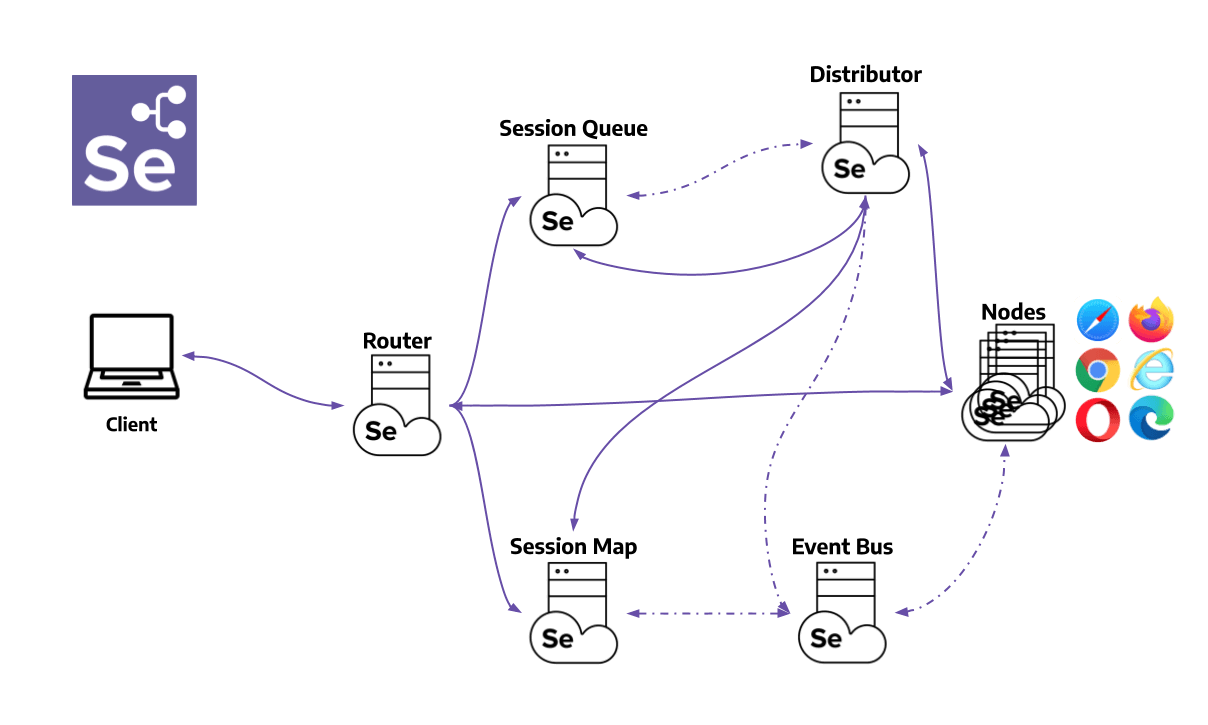
The key components of Selenium Grid are:
- Router: The Grid's first point of contact. It receives every incoming request and directs it to the right component.
- Distributor: Tracks Node registrations and capabilities, then pulls pending requests from the Session Queue and assigns each to a suitable Node.
- Session Map: Stores the link between a Session ID and the Node running it, so the Router can direct requests correctly.
- Session Queue: Holds incoming session requests in FIFO order, with configurable timeouts and retry intervals. Requests exceeding their timeout are rejected.
- Node: Executes the tests. Each Node registers with the Distributor and advertises its configuration, so matching requests get routed to it.
- Event Bus: Carries internal messages between Nodes, Distributor, Session Queue, and Session Map. Start it first in fully distributed mode.
With the architecture clear, the next step is getting a Grid running on your own machines and pointing your test scripts at it.
How to Download and Set Up Selenium Grid
Setting up Selenium Grid takes one JAR file and one command, and the exact command depends on whether you want standalone mode, a hub with nodes, or a fully distributed deployment.
Standalone suits a single machine, hub and node suits a small fleet, and fully distributed is for when each component needs to scale on its own.
The commands below use Selenium Server (Grid) 4.46.0, released on July 11, 2026, which is the current stable release.
Any recent 4.x build behaves the same way, so pin whichever version your CI image already caches.
Prerequisites:
To set up Selenium Grid, we will need to ensure we have the following prerequisites:
- Install Oracle JDK (Java Development Kit) or OpenJDK (Open Java Development Kit).
- Install the browsers you intend to test on, since a Node can only offer what is present on its machine.
- Install Eclipse IDE or IntelliJ IDE for running test scripts. You may consider checking out this blog on how to download Selenium.
- Set up the TestNG framework in the IDE for running test scripts.
- Download and extract the Selenium Server (Grid) JAR files to start with the Selenium Grid.
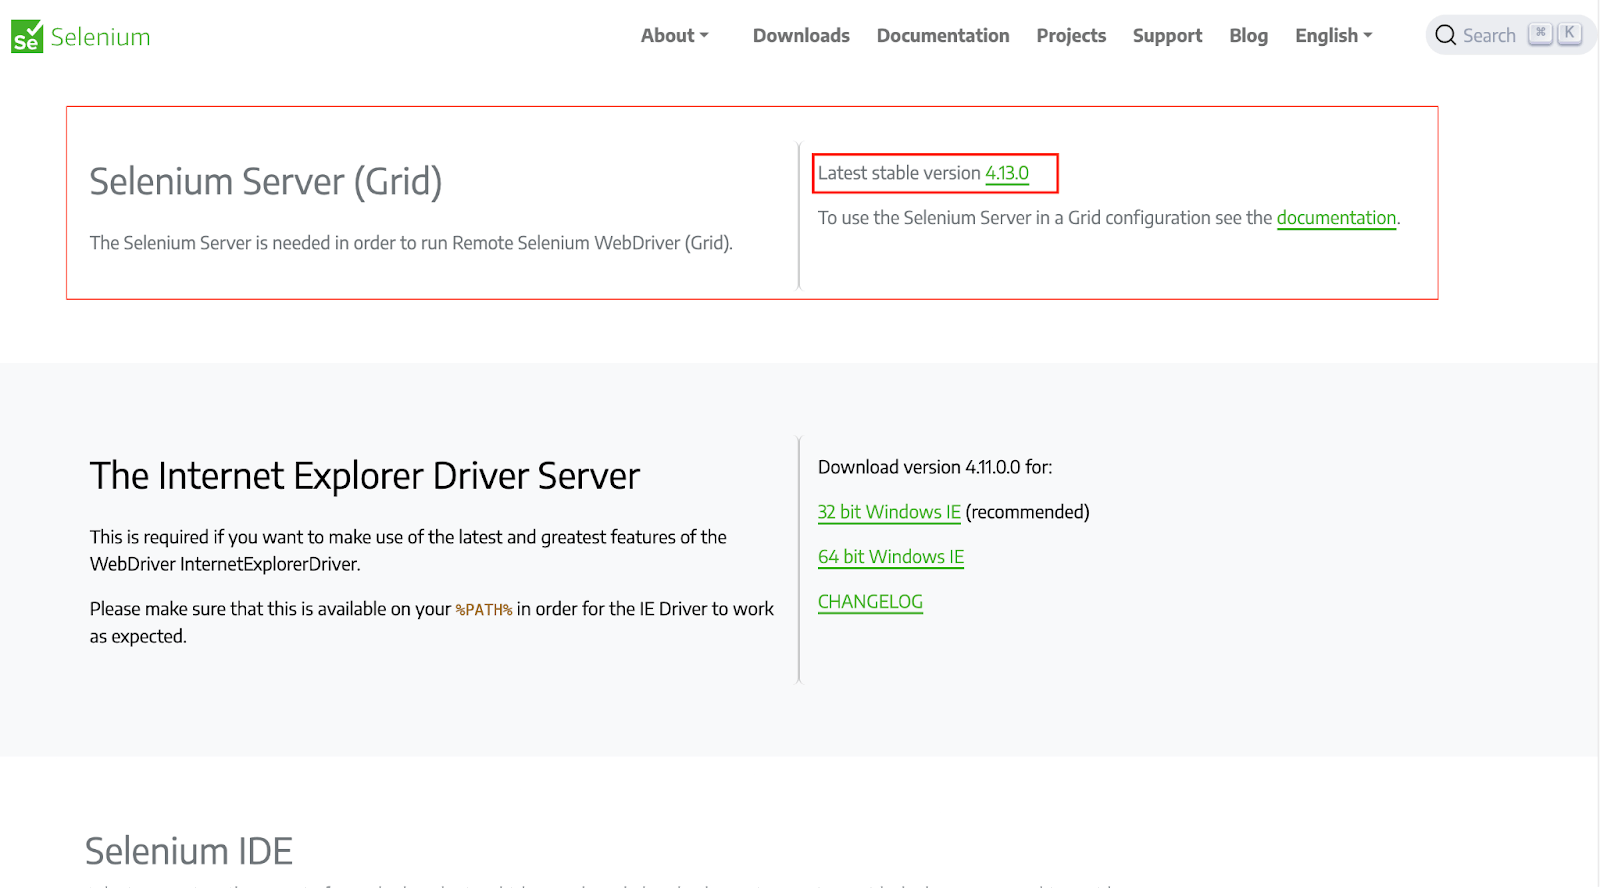
Selenium Grid can be set up in the following modes:
- Standalone
- Hub and Node
- Distributed
Each mode is covered below, in increasing order of how much you have to run yourself.
Standalone
Standalone is a single-node Grid where every component runs on the same machine. It is the easiest way to start, and also the least scalable and flexible.
Running a Grid in standalone mode gives you a complete, operational Grid environment from one command, all within a single process.
The command to start the Selenium Grid in standalone mode:
java -jar selenium-server-<version>.jar standalone
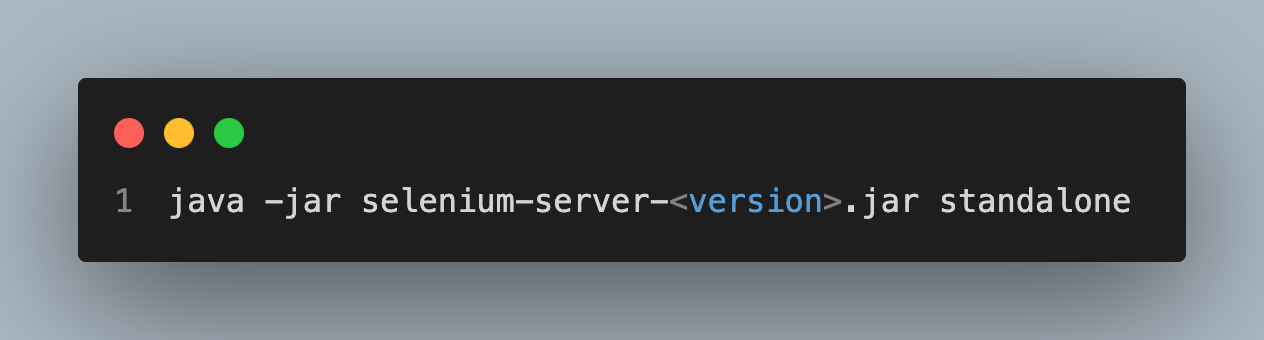
Note: Replace <version> with the latest version of the Selenium Server (Grid) file. Selenium Manager will configure the drivers automatically if you add --selenium-manager true.
Hub and Node
The Hub and Node roles combine machines into a single Grid, including varying operating systems and browser versions.
Together they establish a centralized entry point for running WebDriver tests across different environments.
Hub
The first step of a Selenium Grid setup would be to create a Hub. Open a command prompt or terminal and navigate to the directory where the Selenium Standalone Server jar file is saved.
Run the below command to start the Hub.
java -jar selenium-server-<version>.jar hub
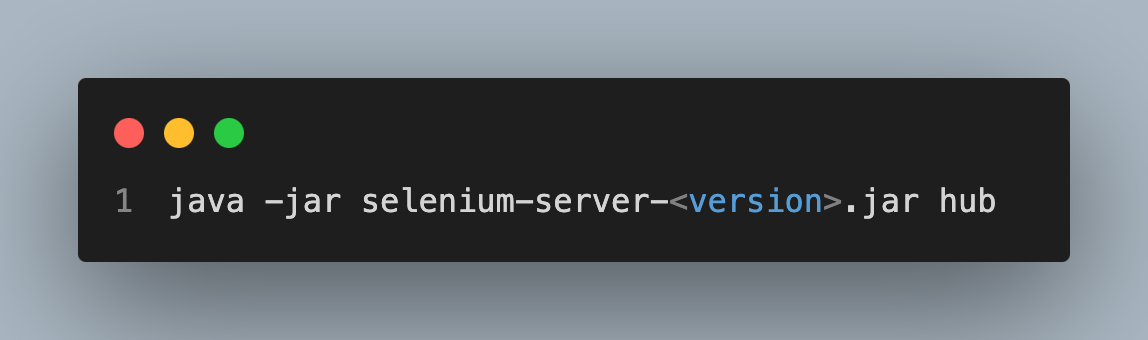
Note: Replace <version> with the latest version of the Selenium Server (Grid) file.
Node
Open a command prompt or terminal in the node machine and navigate to the directory where we have created our project.
java -jar selenium-server-<version>.jar node
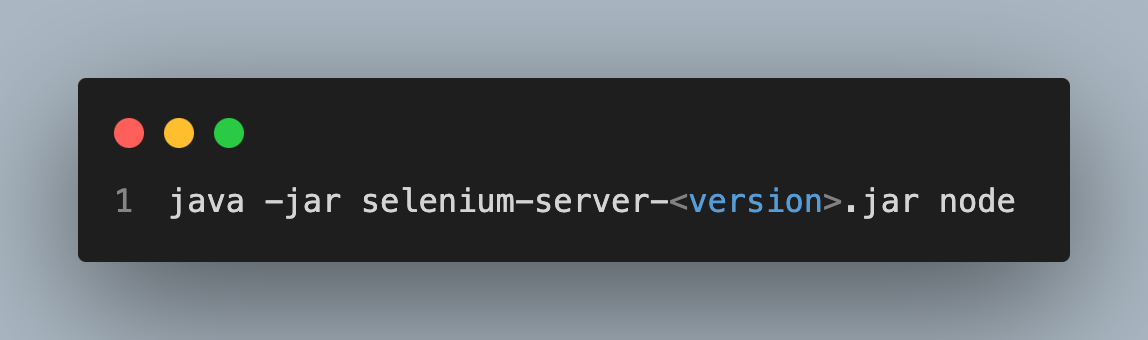
Note: Replace <version> with the latest version of the Selenium Server (Grid) file.
You may face an error when adding --selenium-manager true, which is used for the automatic setup of the driver for Selenium.
Selenium Manager is a command-line utility written in Rust that offers automated driver and browser administration for Selenium.
You do not need to download it, add anything to the code, or take any other action, because Selenium bindings already use it by default.
Run the below command to start the node.
java -jar selenium-server-<version>.jar node --selenium-manager true
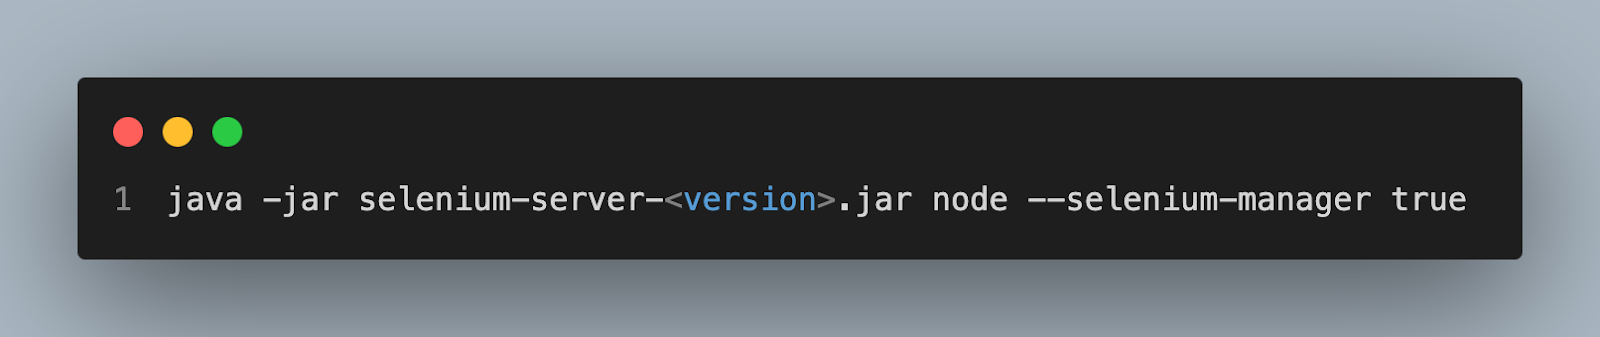
Note: Replace <version> with the latest version of the Selenium Server (Grid) file.
Specify the port when starting a node if you want to run more than one node on a single machine.
Suppose we have two nodes. We will use ports 5555 and 7777 to start both.
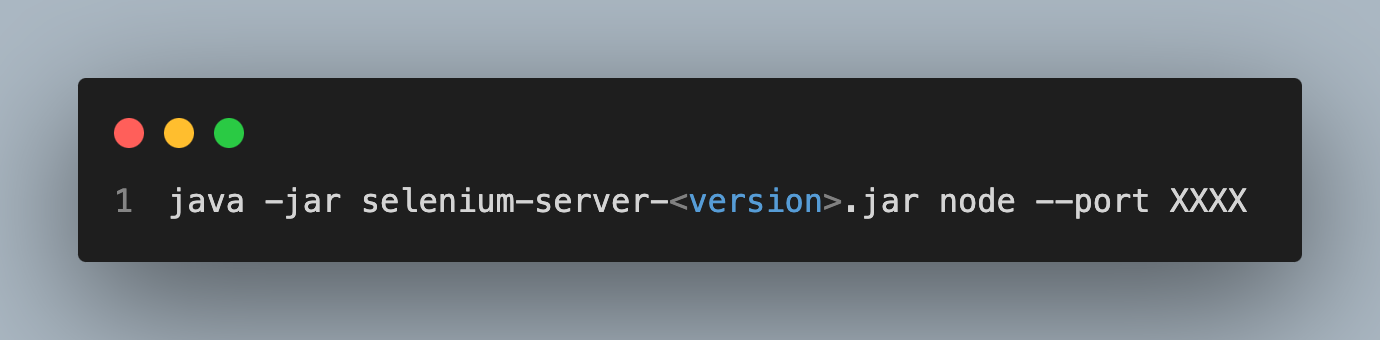
Node 1:
java -jar selenium-server-<version>.jar node --port 5555
Node 2:
java -jar selenium-server-<version>.jar node --port 7777
Distributed
In a Distributed Grid setup, each component is started independently, ideally on separate machines.
Start them in the order below, because every other component needs the Event Bus already listening before it can register:
- Event Bus: Handles communication between Grid components. Default ports are 4442, 4443, and 5557.
java -jar selenium-server-<version>.jar event-bus --publish-events tcp://<event-bus-ip>:4442 --subscribe-events tcp://<event-bus-ip>:4443 --port 5557
java -jar selenium-server-<version>.jar sessionqueue --port 5559
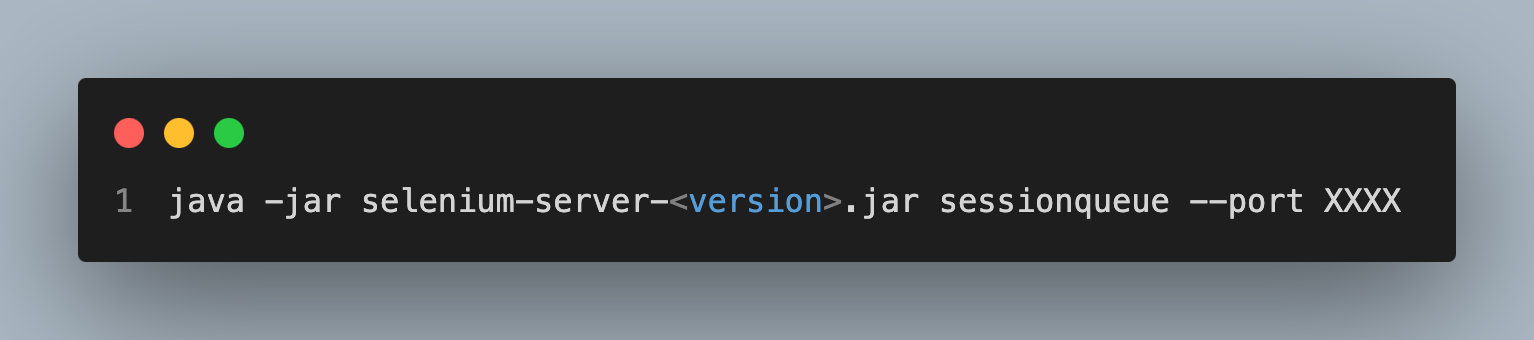
Note: Replace <version> with the Selenium Server (Grid) version you downloaded.
- Session Map: Links Session IDs to the Node running each session. Default port is 5556. Start it with:
java -jar selenium-server-<version>.jar sessions --publish-events tcp://<event-bus-ip>:4442 --subscribe-events tcp://<event-bus-ip>:4443 --port 5556
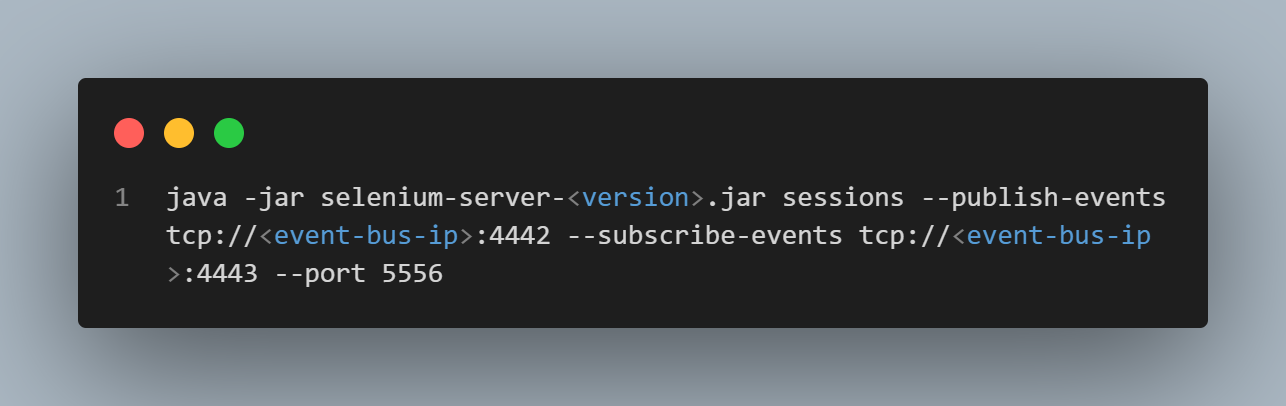
Note: Replace <event-bus-ip> with the IP address of the machine running the Event Bus.
- Distributor: Identifies a suitable node for test execution. Default port is 5553. Start it with:
java -jar selenium-server-<version>.jar distributor --publish-events tcp://<event-bus-ip>:4442 --subscribe-events tcp://<event-bus-ip>:4443 --sessions http://<sessions-ip>:5556 --sessionqueue http://<new-session-queue-ip>:5559 --port 5553 --bind-bus false
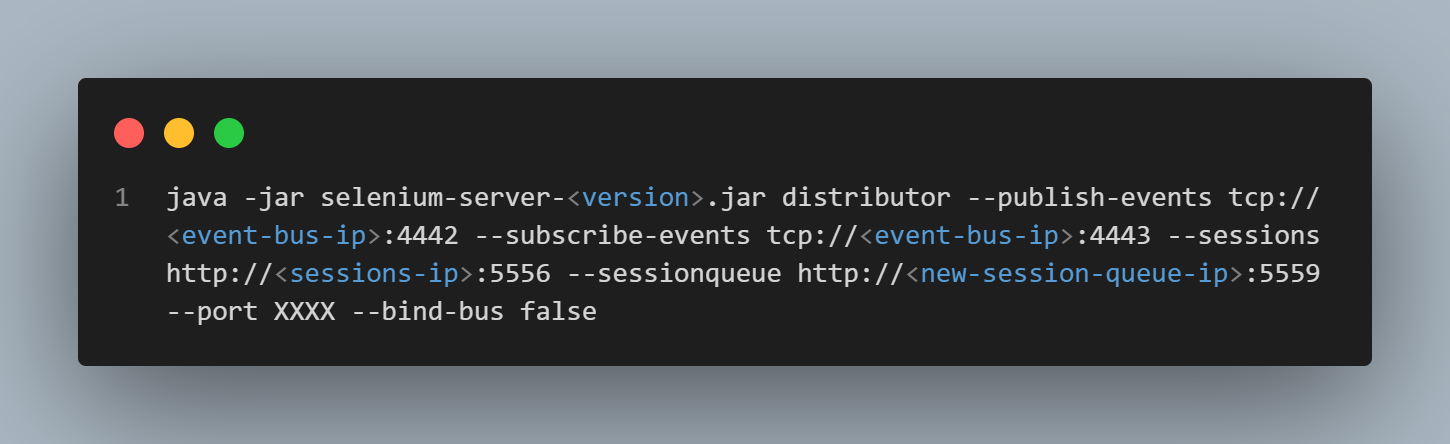
Note: Replace <event-bus-ip>, <sessions-ip>, and <new-session-queue-ip> with the IP addresses of the Event Bus, Session Map, and New Session Queue.
- Router: Accepts every incoming session request. Default port is 4444. Start it with:
java -jar selenium-server-<version>.jar router --sessions http://<sessions-ip>:5556 --distributor http://<distributor-ip>:5553 --sessionqueue http://<new-session-queue-ip>:5559 --port 4444
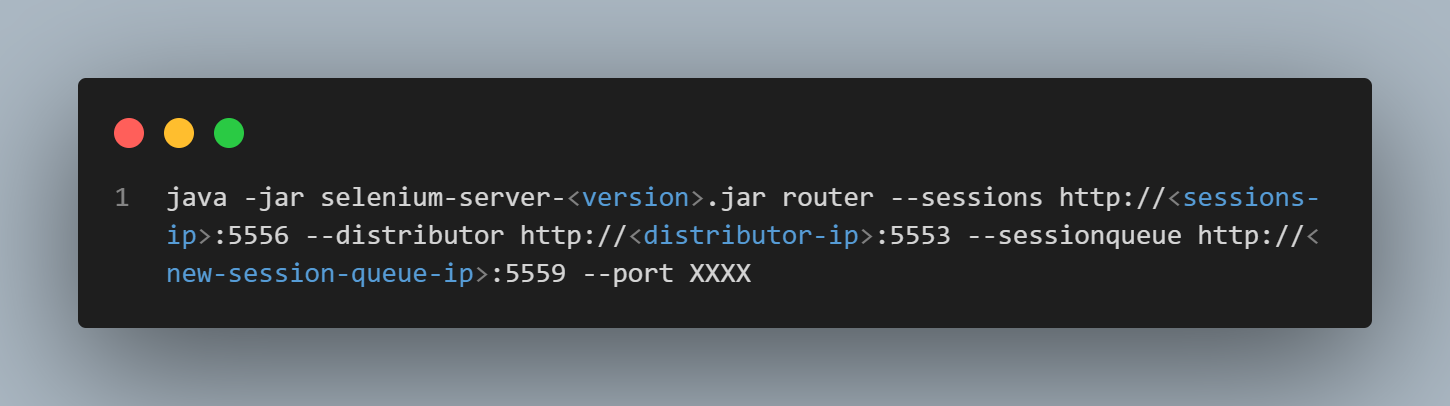
Note: Replace <sessions-ip>, <distributor-ip>, and <new-session-queue-ip> with the IP addresses of the machines running the Session Map, Distributor, and New Session Queue.
- Node: The machine where test execution actually happens. Default port is 5555. Start it with:
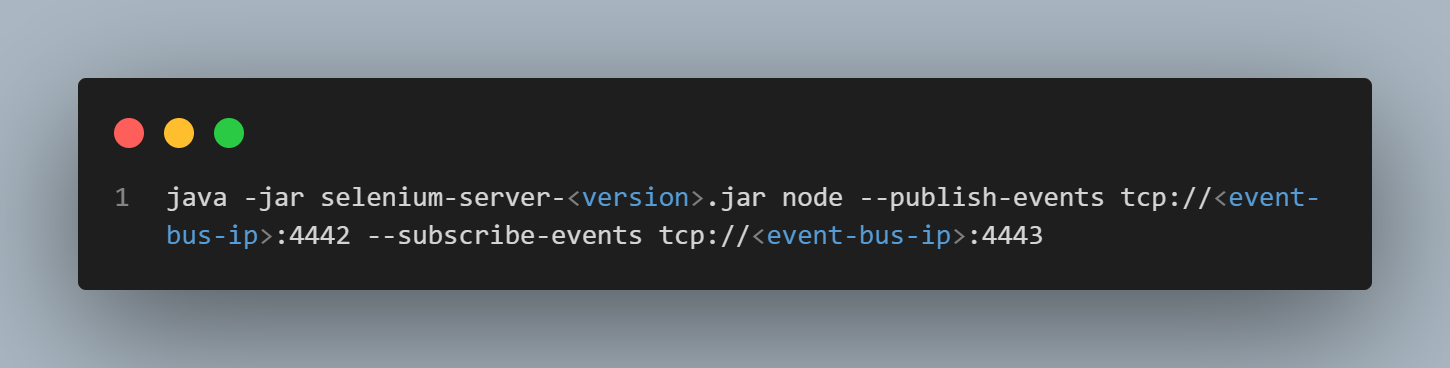
java -jar selenium-server-<version>.jar node --publish-events tcp://<event-bus-ip>:4442 --subscribe-events tcp://<event-bus-ip>:4443
That covers every way to start a Grid from the JAR. Docker removes most of this setup work entirely, so it is worth seeing before we run any tests.
How to Run Selenium Grid With Docker
Running Selenium Grid with Docker removes the two jobs that make a self-hosted Grid painful: installing browsers on every machine, and keeping every driver version in step with them.
The official docker-selenium images ship the browser, its matching driver, and the Grid role together, so a Node becomes a container you start rather than a machine you maintain.
The fastest route is Docker Compose. Create a docker-compose.yml with a Hub and two browser Nodes:
services:
  selenium-hub:
    image: selenium/hub:4.46.0
    container_name: selenium-hub
    ports:
      - "4442:4442"
      - "4443:4443"
      - "4444:4444"
  chrome:
    image: selenium/node-chrome:4.46.0
    shm_size: 2gb
    depends_on:
      - selenium-hub
    environment:
      - SE_EVENT_BUS_HOST=selenium-hub
      - SE_EVENT_BUS_PUBLISH_PORT=4442
      - SE_EVENT_BUS_SUBSCRIBE_PORT=4443
      - SE_NODE_MAX_SESSIONS=1
  edge:
    image: selenium/node-edge:4.46.0
    shm_size: 2gb
    depends_on:
      - selenium-hub
    environment:
      - SE_EVENT_BUS_HOST=selenium-hub
      - SE_EVENT_BUS_PUBLISH_PORT=4442
      - SE_EVENT_BUS_SUBSCRIBE_PORT=4443
      - SE_NODE_MAX_SESSIONS=1
Bring the whole Grid up with one command:
docker compose up -d
The Grid console is then served at http://localhost:4444/ui, and your tests keep pointing at the same http://localhost:4444 endpoint they used for the JAR-based setup. Two settings matter as soon as you go past a demo:
- SE_NODE_MAX_SESSIONS: Sets how many browsers one Node runs at once. Keep it at or below the container's CPU core count.
- CPU contention: Past that count browsers fight for CPU and time out rather than finish faster. Most flakiness I see starts here.
- shm_size: Defaults to 64 MB, which starves Chrome. Tabs die mid-test with no useful error, so set 2gb per browser Node.
To add capacity, change the replica count instead of editing the file:
docker compose up -d --scale chrome=5 --scale edge=2
If you only need a throwaway Grid for a single run, the standalone images skip Compose entirely and give you a Hub and one browser in a single container:
docker run -d -p 4444:4444 --shm-size=2g selenium/standalone-chrome:4.46.0
Selenium Grid on Kubernetes
Docker Compose runs a Grid on one host. Kubernetes runs it across a cluster, which is the answer when the New Session Queue rather than the browsers is your bottleneck.
The Selenium project maintains an official Helm chart in the same docker-selenium repository. It ships with KEDA-based autoscaling, so browser pods appear as the session queue grows and disappear once it drains.
That elasticity is the real draw, because a Grid sized for your worst-case regression run sits idle most of the day.
Having run both, the honest threshold is team size: below roughly twenty parallel sessions, Compose on one beefy host is less work and more predictable.
The trade-off is worth stating plainly: you now operate a Kubernetes cluster, an autoscaler, and a browser fleet on top of maintaining a test suite. Teams that would rather not run that fleet can use TestMu AI's HyperExecute, which replaces the hub-and-node model with just-in-time virtual machines that run each test next to its browser.
Check the chart documentation in the docker-selenium repository for the current install command and values, since the chart moves faster than the Grid itself.

Note: Skip the container maintenance entirely. Run the same Selenium suite across 10,000+ real browsers and operating systems. Try TestMu AI Today!
How Do You Run Test Scripts on Selenium Grid
You run a test on Selenium Grid by pointing RemoteWebDriver at the Grid URL rather than a local driver. The same script then works against all three Grid modes without any edits at all.
Only the Grid you start beforehand changes, because RemoteWebDriver always talks to the same http://localhost:4444 endpoint however the components behind it are arranged.
Test Scenario
The test itself is deliberately trivial, so the only moving part on show is the Grid:
- Navigate to the eCommerce Playground.
- Locate the search bar.
- Enter the key iphone in the search bar.
Three files drive it: the test class, the Maven pom.xml, and the TestNG suite definition.
Note: Replace <version> with the Selenium Server (Grid) build you downloaded. The console output below was captured on an earlier 4.x release, so the version string differs from yours.
package project;
import java.net.MalformedURLException;
import java.net.URL;
import java.time.Duration;
import org.openqa.selenium.By;
import org.openqa.selenium.Capabilities;
import org.openqa.selenium.WebDriver;
import org.openqa.selenium.chrome.ChromeOptions;
import org.openqa.selenium.remote.RemoteWebDriver;
import org.testng.annotations.AfterMethod;
import org.testng.annotations.BeforeMethod;
import org.testng.annotations.Test;
public class Demo {
	protected static ThreadLocal<RemoteWebDriver> driver = new ThreadLocal<RemoteWebDriver>();
	public static String remote_url = "http://localhost:4444/";
	public Capabilities capabilities;

	@BeforeMethod
	public void setDriver() throws MalformedURLException {
		// Setting the Browser Capabilities
		capabilities = new ChromeOptions();

		driver.set(new RemoteWebDriver(new URL(remote_url), capabilities));
		// Directing to the Testing Website
		driver.get().get("https://ecommerce-playground.lambdatest.io/");
		// Maximizing the Window
		driver.get().manage().window().maximize();
		driver.get().manage().timeouts().pageLoadTimeout(Duration.ofSeconds(10));
		}

	public WebDriver getDriver() {
		return driver.get();
		}
	@Test
	public void validCredentials() {
		getDriver().findElement(By.name("search")).sendKeys("iphone");
		}


	@AfterMethod
	// To quit the browser
	public void closeBrowser() {
		driver.get().quit();
		driver.remove();
		}
	}
<project xmlns="http://maven.apache.org/POM/4.0.0" xmlns:xsi="http://www.w3.org/2001/XMLSchema-instance"
  xsi:schemaLocation="http://maven.apache.org/POM/4.0.0 http://maven.apache.org/xsd/maven-4.0.0.xsd">
  <modelVersion>4.0.0</modelVersion>
  <groupId>Lambdatest</groupId>
  <artifactId>Project</artifactId>
  <version>0.0.1-SNAPSHOT</version>
  <packaging>jar</packaging>
  <name>Project</name>
  <url>http://maven.apache.org</url>

  <properties>
    <project.build.sourceEncoding>UTF-8</project.build.sourceEncoding>
  </properties>
  <dependencies>
    <dependency>
      <groupId>junit</groupId>
      <artifactId>junit</artifactId>
      <version>3.8.1</version>
      <scope>test</scope>
    </dependency>

    <dependency>
    <groupId>org.seleniumhq.selenium</groupId>
    <artifactId>selenium-manager</artifactId>
    <version>4.46.0</version>
    </dependency>
<!-- https://mvnrepository.com/artifact/org.seleniumhq.selenium/selenium-chrome-driver -->
	<dependency>
    <groupId>org.seleniumhq.selenium</groupId>
    <artifactId>selenium-chrome-driver</artifactId>
    <version>4.46.0</version>
	</dependency>

	<dependency>
    <groupId>org.seleniumhq.selenium</groupId>
    <artifactId>selenium-remote-driver</artifactId>
    <version>4.46.0</version>
	</dependency>
<!-- https://mvnrepository.com/artifact/org.testng/testng -->
	<dependency>
    <groupId>org.testng</groupId>
    <artifactId>testng</artifactId>
    <version>7.8.0</version>
    <scope>test</scope>
	</dependency>
  </dependencies>
</project>
<?xml version="1.0" encoding="UTF-8"?>
<!DOCTYPE suite SYSTEM "https://testng.org/testng-1.0.dtd">
<suite name="Suite">

   <test name="Chrome Test">
    <parameter name ="browser" value="chrome"/>
    <classes>
      <class name="project.Demo"/>
    </classes>
  </test>  <!-- Test -->
</suite> <!-- Suite -->
Code Walkthrough:
Create a package with the name project.
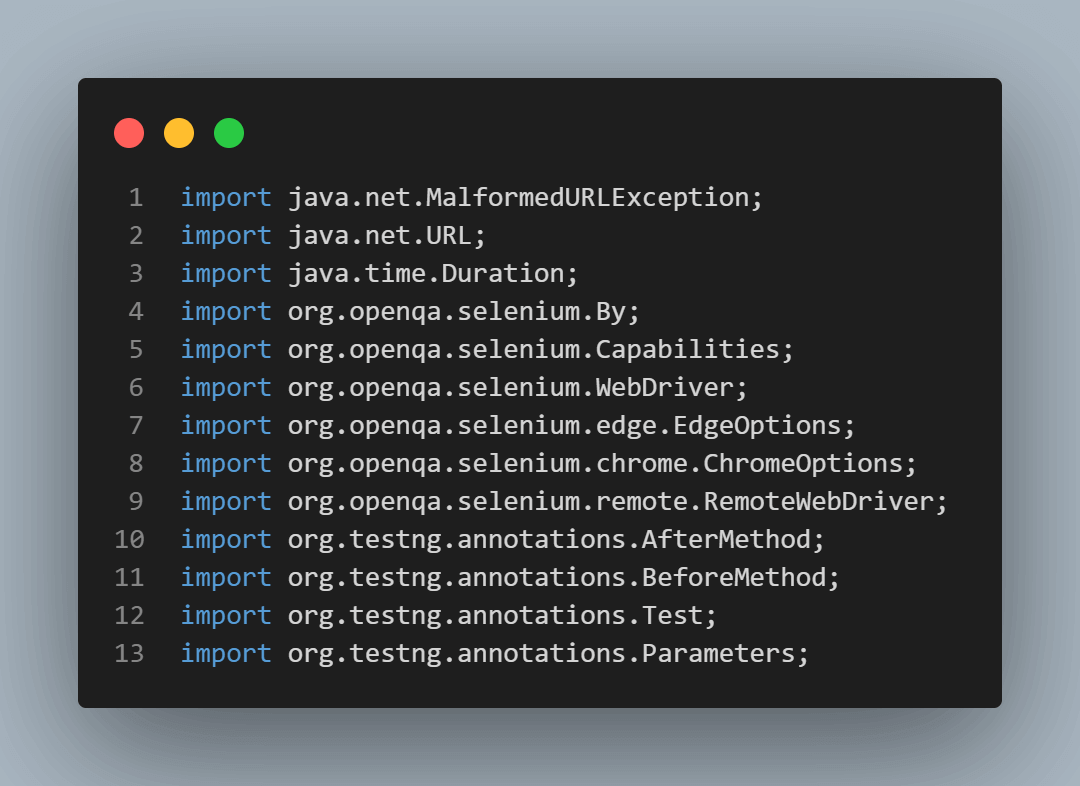
Import all the necessary libraries to perform parallel testing using Selenium Grid.
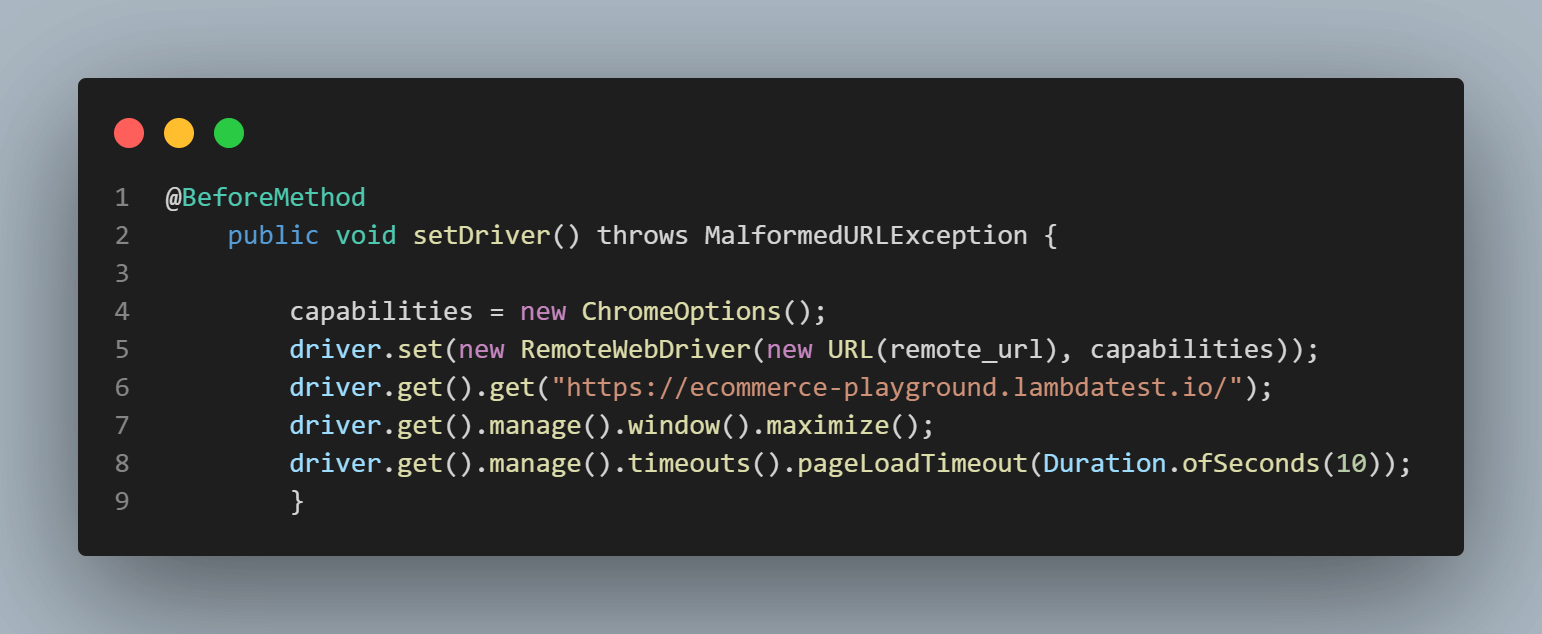
The code under @BeforeMethod, one of the TestNG annotations for Selenium WebDriver, sets the browser capabilities for Chrome. A RemoteWebDriver instance is created and executed on Selenium Grid, with the Hub address set to http://localhost:4444.
The driver then navigates to the eCommerce Playground website, maximizes the window, and manages the page load timeout.
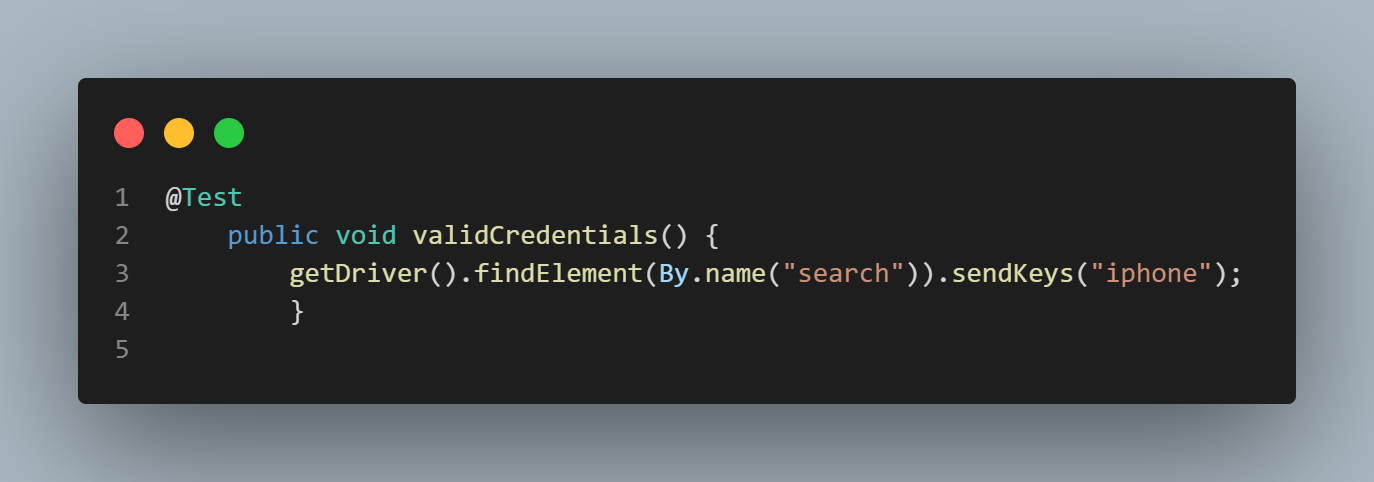
The test case is executed under @Test annotation. Using the CSS element, locate the search bar and send the key iphone.
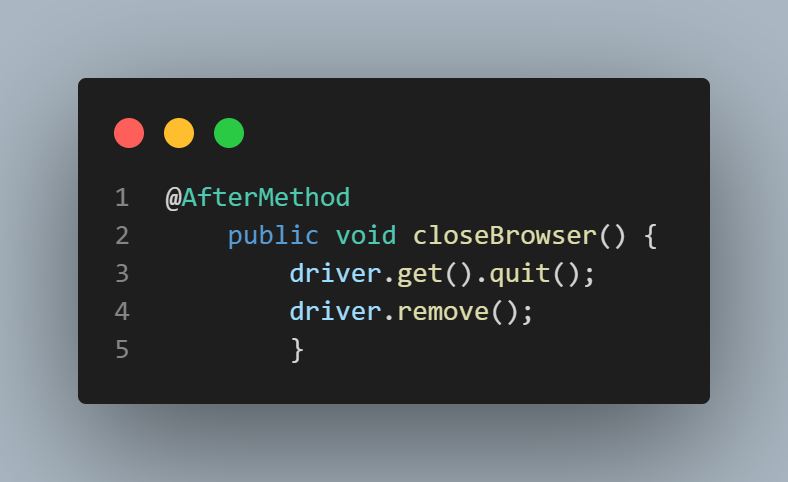
The code under the @AfterMethod annotation is used to quit the browser.
Run the test with the same code on distinct Grid configurations, encompassing Standalone Selenium Grid, Hub and Node Selenium Grid, and Distributed Selenium Grid.
Standalone Selenium Grid
When operating in Standalone mode, the Selenium server handles all tasks within a single process.
Start it with a single terminal command:
java -jar selenium-server-<version>.jar standalone --selenium-manager true
Selenium Grid will automatically identify the web browsers present on the system. Run the above command to start the standalone Grid.
Console Output:

The server is actively listening at http://localhost:4444/, matching the address specified in the configuration of the Remote WebDriver. The WebDriver for Chrome is successfully registered within the Grid when the test code is executed.
Run the test code to check whether the test case passes or fails.
Output:

Also, get the Session ID on the command line terminal and confirm whether the session is created by visiting http://localhost:4444/status.
Console Output:

You can see the session in the above output; it is the same as that created on http://localhost:4444/status.
"sessionId": "e62abeb4ff22c5a162a95ec896df7962",
              "start": "2023-09-29T03:56:01.197573200Z",
              "stereotype": {
                "browserName": "chrome",
                "goog:chromeOptions": {
                  "args": [
                    "--remote-allow-origins=*"
                  ]
                },
                "platformName": "Windows 10"
              },
              "uri": "http://192.168.43.189:4444"
            },
            "stereotype": {
              "browserName": "chrome",
              "goog:chromeOptions": {
                "args": [
                  "--remote-allow-origins=*"
                ]
              },
              "platformName": "Windows 10"
            }
          }
Hub and Node Selenium Grid
Selenium test automation uses the Grid and comprises two key components, the Hub and multiple Nodes.
If the Hub and Nodes are hosted on the same machine, you can initiate them using the provided commands:
Run the following command to start the Hub:
java -jar selenium-server-<version>.jar hub
Console Output:

Run the following command to start the Node.
java -jar selenium-server-<version>.jar node --selenium-manager true
Once the Hub is initiated, it establishes XPUB and XSUB sockets that bind to tcp://0.0.0.0:4442 and tcp://0.0.0.0:4443, respectively.
Console Output:
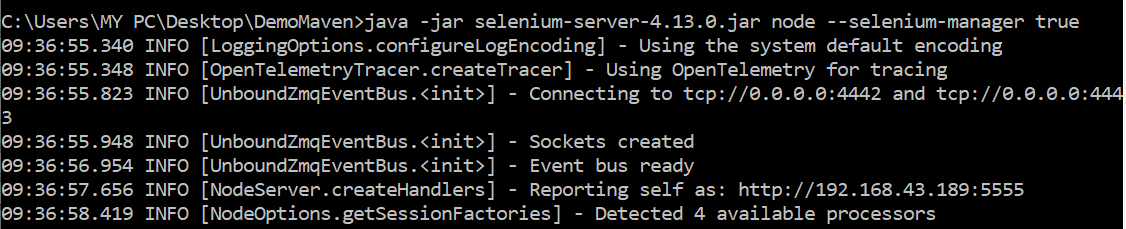
After initiating the node with the provided command, it connects to the same address (tcp://0.0.0.0:4442 and tcp://0.0.0.0:4443).
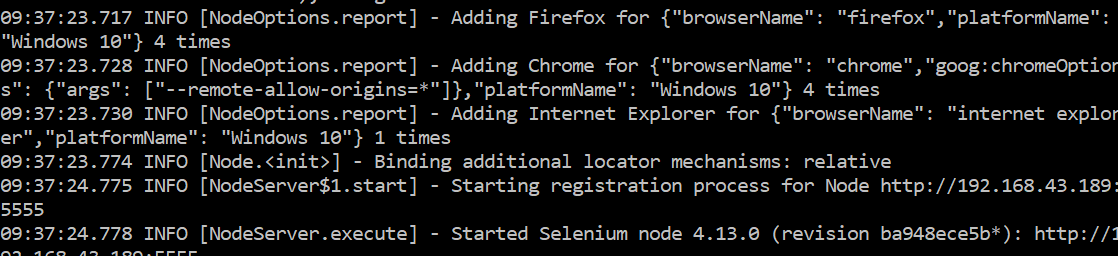
The option --selenium-manager true automatically identifies the Selenium WebDriver available in the system. Upon instantiating the Chrome WebDriver instance, it promptly registers itself on the Grid.
Console Output:
Now, again, if we run the test code, we will see the session with the Session ID was created.
Console Output:
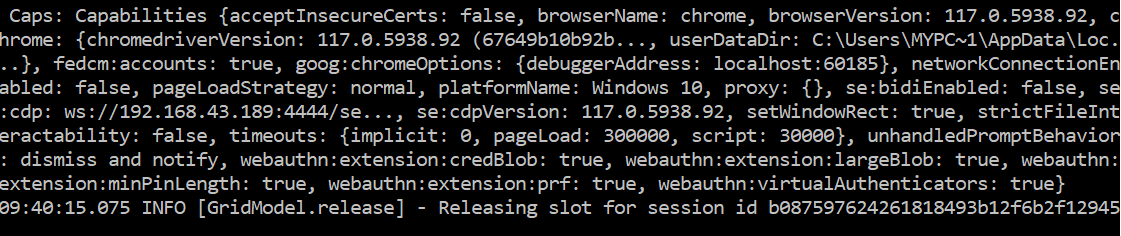
We can again see the session in the above output; it is the same as created on http://localhost:4444/status.
"sessionId": "b087597624261818493b12f6b2f12945",
              "start": "2023-09-29T04:18:31.669923700Z",
              "stereotype": {
                "browserName": "chrome",
                "goog:chromeOptions": {
                  "args": [
                    "--remote-allow-origins=*"
                  ]
                },
                "platformName": "Windows 10"
              },
              "uri": "http://192.168.43.189:4444"
            },
            "stereotype": {
              "browserName": "chrome",
              "goog:chromeOptions": {
                "args": [
                  "--remote-allow-origins=*"
                ]
              },
              "platformName": "Windows 10"
            }
          }
Distributed Selenium Grid
Running a test against a distributed Grid means starting each component yourself first. The order matters: the Event Bus goes up before anything that needs to talk over it.
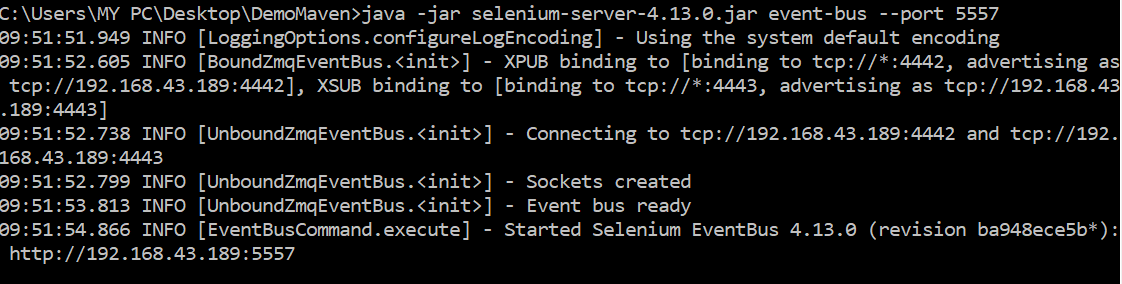
Step 1: Start the Event Bus
The command to start the Event Bus is:
java -jar selenium-server-<version>.jar event-bus --port 5557
Console Output:
Step 2: Start the Session Queue
The command to start the Session Queue is:
java -jar selenium-server-<version>.jar sessionqueue --port 5559
Console Output:

Step 3: Start the Sessions Map
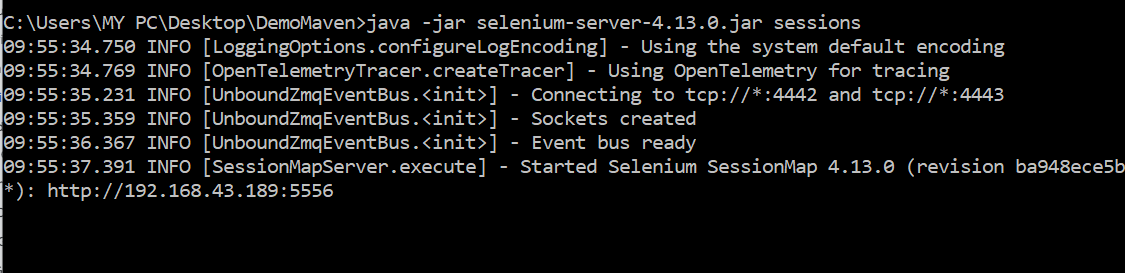
The command to start the sessions map is:
java -jar selenium-server-<version>.jar sessions
Console Output:
Step 4: Start the Distributor
The command to start the Distributor is:
java -jar selenium-server-<version>.jar distributor --publish-events tcp://<event-bus-ip>:4442 --subscribe-events tcp://<event-bus-ip>:4443 --sessions http://<sessions-ip>:5556 --sessionqueue http://<new-session-queue-ip>:5559 --port 5553 --bind-bus false
Note: Specify the <event-bus-ip> , <sessions-ip>, <new-session-queue-ip> from the above commands.
Console Output:

Step 5: Start the Router
The command to start the Router is:
java -jar selenium-server-<version>.jar router --sessions http://<sessions-ip>:5556 --distributor http://<distributor-ip>:5553 --sessionqueue http://<new-session-queue-ip>:5559 --port 4444
Note: Specify the <sessions-ip>, <distributor-ip>, <new-session-queue-ip> from the above commands.
Console Output:

Step 6: Start the Node
The command to start the Node is:
java -jar selenium-server-<version>.jar node --publish-events tcp://<event-bus-ip>:4442 --subscribe-events tcp://<event-bus-ip>:4443
Note: Specify the <event-bus-ip> from the above commands.
Console Output:

Now, run the test scripts, and we will see the session with the Session ID was created.

Running one test through the Grid proves the plumbing works. Parallel execution is what makes the Grid worth running at all.

How to Use Selenium Grid for Parallel Execution
Selenium Grid runs tests in parallel by registering several Nodes against one Hub, then letting a TestNG suite dispatch multiple browser sessions at once through the same RemoteWebDriver URL.
Parallel testing works the same way across any browser combination the Grid has Nodes for.
There are two steps to set up Selenium Grid for parallel test execution.
- Create a Hub.
- Define the Nodes and connect to that Hub.
Note: Ensure the Hub and Nodes run on a local host before parallel testing, as seen in the above section of this Selenium grid tutorial.
We are using Eclipse IDE for testing. First, create a test that opens a connection to the Selenium RemoteWebDriver client.
Point the URL at the location of the server hosting our tests, then specify the desired capabilities to alter our settings.
The example of creating a RemoteWebDriver object below points to the remote web server where our tests run on Chrome and Edge. To pass the browser names to the tests, we use the @Parameters annotation.
package project;
import java.net.MalformedURLException;
import java.net.URL;
import java.time.Duration;
import org.openqa.selenium.By;
import org.openqa.selenium.Capabilities;
import org.openqa.selenium.WebDriver;
import org.openqa.selenium.edge.EdgeOptions;
import org.openqa.selenium.chrome.ChromeOptions;
import org.openqa.selenium.remote.RemoteWebDriver;
import org.testng.annotations.AfterMethod;
import org.testng.annotations.BeforeMethod;
import org.testng.annotations.Test;
import org.testng.annotations.Parameters;
public class DemoClass {
	protected static ThreadLocal<RemoteWebDriver> driver = new ThreadLocal<RemoteWebDriver>();
	public static String remote_url = "http://localhost:4444/";
	public Capabilities capabilities;

	@Parameters({"browser"})
	@BeforeMethod
	public void setDriver(String browser) throws MalformedURLException {
		// Setting the Browser Capabilities
		System.out.println("Test is running on "+browser);
		if (browser.equals("chrome")) {
			capabilities = new ChromeOptions();
			}
		else if (browser.equals("edge")) {
			capabilities = new EdgeOptions();
			}
		driver.set(new RemoteWebDriver(new URL(remote_url), capabilities));
		// Directing to the Testing Website
		driver.get().get("https://ecommerce-playground.lambdatest.io/");
		// Maximizing the Window
		driver.get().manage().window().maximize();
		driver.get().manage().timeouts().pageLoadTimeout(Duration.ofSeconds(10));
		}

	public WebDriver getDriver() {
		return driver.get();
		}
	@Test
	public void validCredentials() {
		getDriver().findElement(By.name("search")).sendKeys("iphone");
		}


	@AfterMethod
	// To quit the browser
	public void closeBrowser() {
		driver.get().quit();
             driver.remove();
		}
	}
The DemoClass.java file above is configured through the XML file, which carries the parameter values passed into DemoClass.java.
That XML also builds a suite of different classes that run in parallel.
<?xml version="1.0" encoding="UTF-8"?>
<!DOCTYPE suite SYSTEM "https://testng.org/testng-1.0.dtd">
<suite name="Suite" parallel="tests" thread-count="2">
  <test name="Chrome Test">
    <parameter name ="browser" value="chrome"/>
    <classes>
      <class name="project.DemoClass"/>
    </classes>
  </test> <!-- Test -->
  <test name="Edge Test">
    <parameter name ="browser" value="edge"/>
    <classes>
      <class name="project.DemoClass"/>
    </classes>
  </test> <!-- Test -->
</suite> <!-- Suite -->
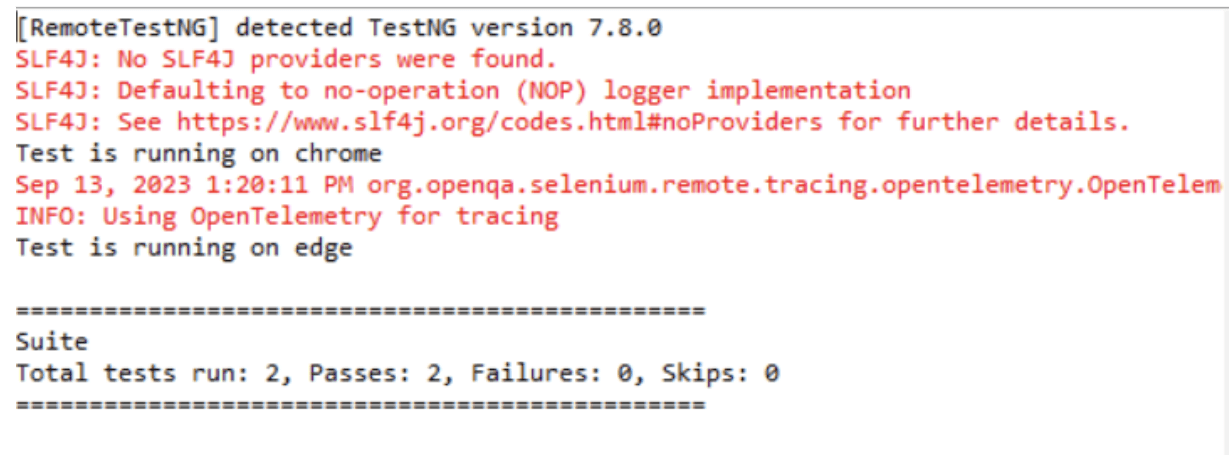
Run the testng.xml file by right-clicking it and selecting Run As > TestNG Suite.
Output Screen:
Code Walkthrough:Create a class DemoClass inside the package project, and for thread safe execution, use ThreadLocal Map. Also, create a variable that will store the url of the Hub.
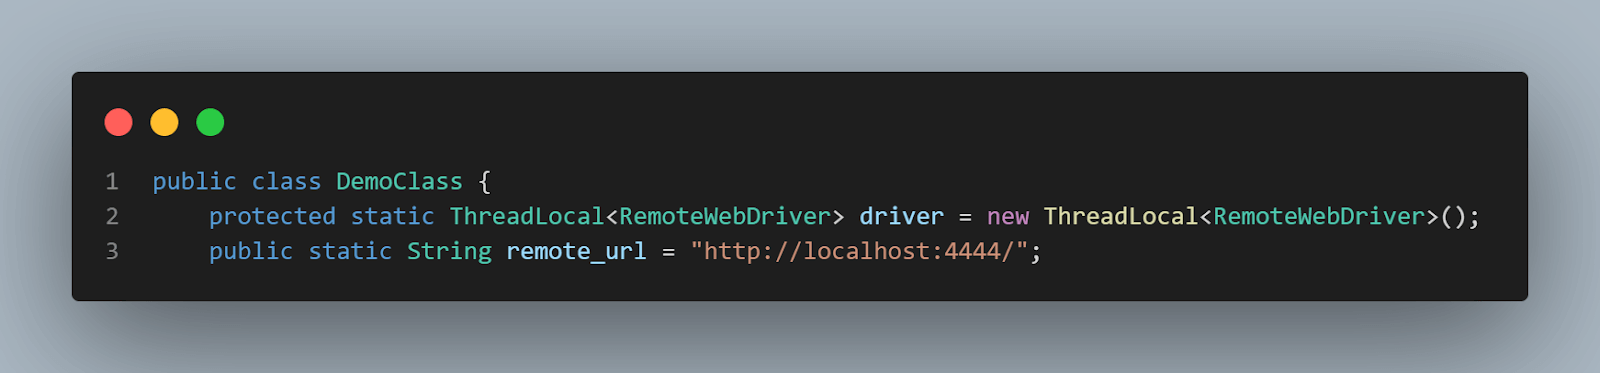
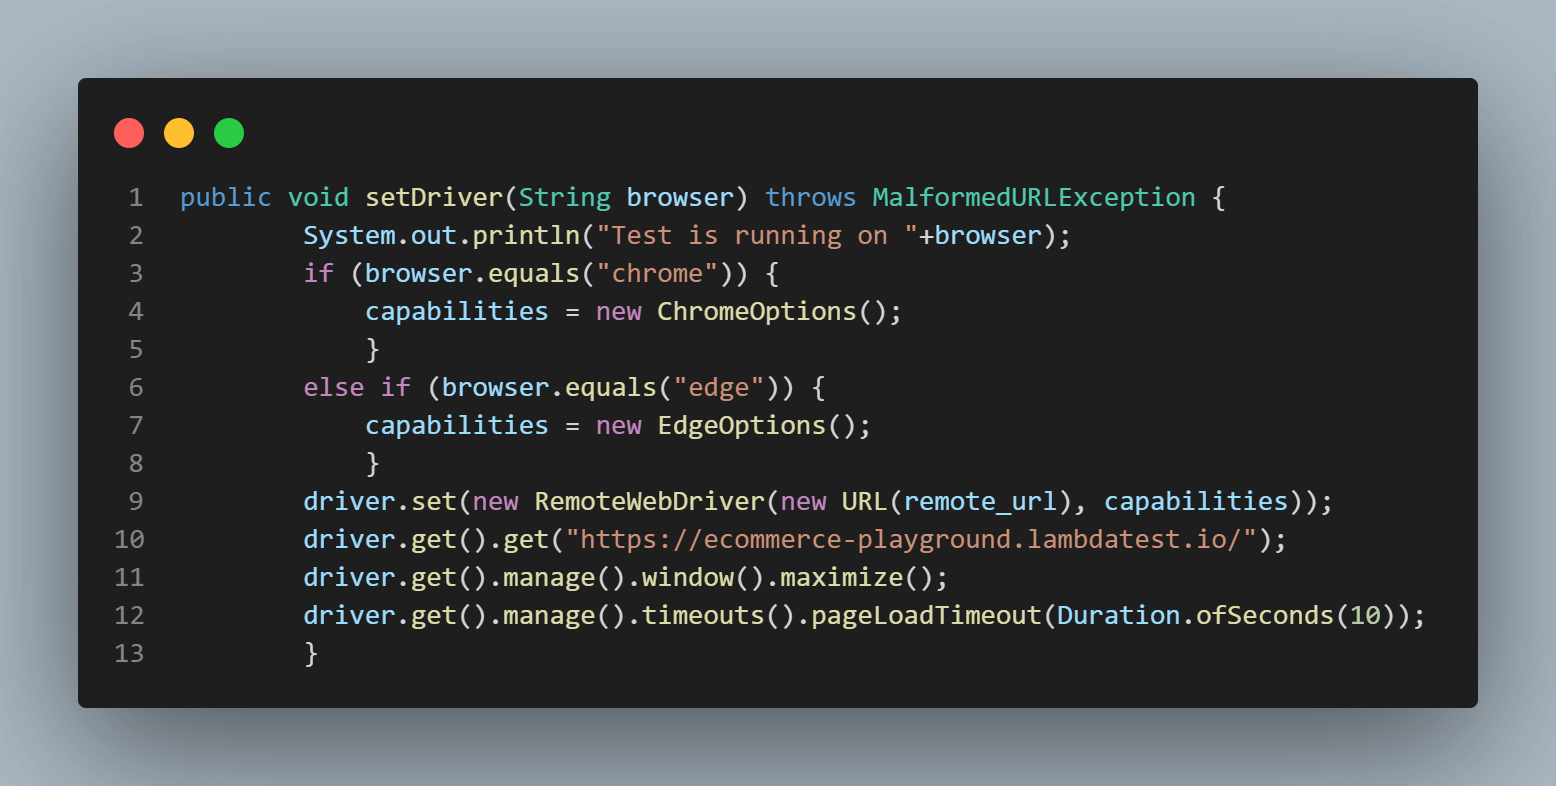
Create a setDriver() to set the capabilities according to the browser, navigate to the testing website, and maximize the window.
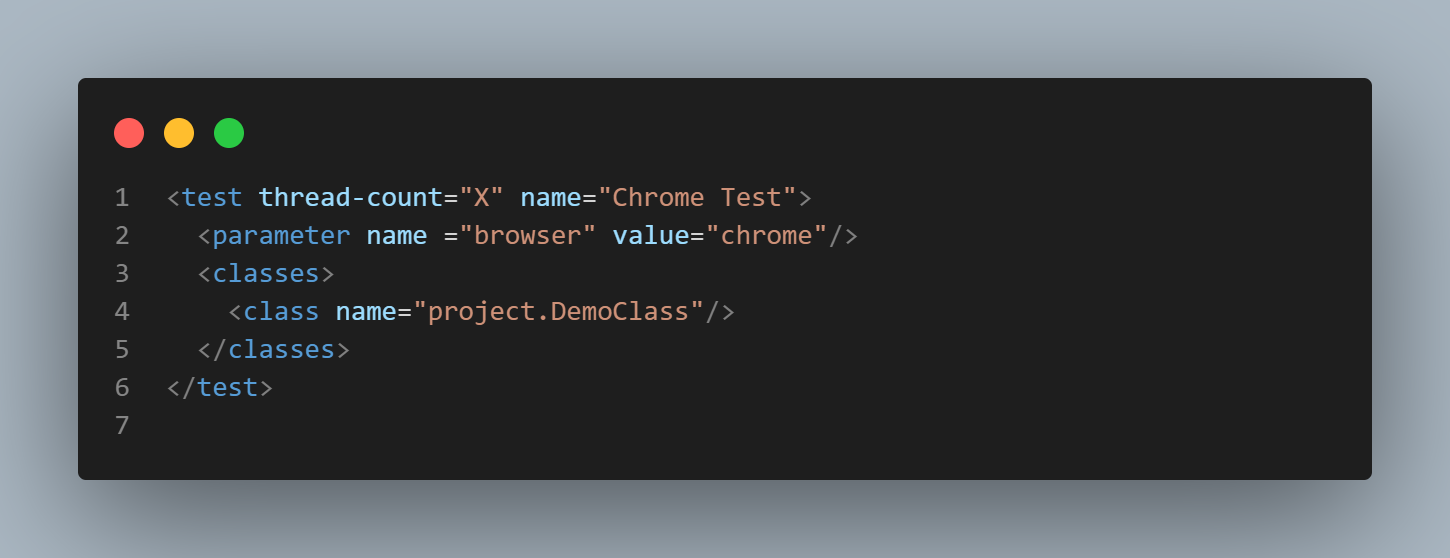
Parallelism comes from two attributes on the suite element, not one. parallel="tests" tells TestNG to run each test block concurrently, and thread-count caps how many run at once.
Everything above assumes Grid 4. If you have inherited an older Grid, the next section shows exactly what changed and what a migration involves.
What Changed Between Selenium Grid 3 and Grid 4
Grid 4 swapped the JSON Wire Protocol for native W3C WebDriver, split two roles into six components, and added Docker images, a Grid UI, and TOML config. Grid 3 is no longer maintained now.
Grid 4 is a rewrite rather than an upgrade, so it helps to see exactly what changed before planning a migration.
| Area | Selenium Grid 3 | Selenium Grid 4 |
|---|---|---|
| Protocol | JSON Wire Protocol, with W3C translation in between | Native W3C WebDriver, no translation layer |
| Architecture | Two roles, Hub and Node | Six components: Router, Distributor, Session Map, New Session Queue, Node, Event Bus |
| Deployment modes | Hub and Node only | Standalone, Hub and Node, and fully distributed |
| Start command | java -jar selenium-server-standalone.jar -role hub | java -jar selenium-server-4.46.0.jar hub |
| Driver management | Manual driver downloads on every Node | Selenium Manager resolves drivers automatically |
| Configuration | JSON config files | TOML config files and command line flags |
| Observability | Basic console page | Grid UI at /ui, GraphQL endpoint, and OpenTelemetry tracing |
| Docker support | Community images | Officially maintained images and a Helm chart |
The migration itself is usually less work than it looks. Capability objects move from DesiredCapabilities to browser-specific Options classes, the start commands change, and the endpoint stays the same.
If your tests throw an invalid argument error mentioning the legacy OSS JSON wire protocol, that is the Grid 3 capability change surfacing, not a bug in your suite.
I have watched that error get triaged as a broken test suite twice. Both times the fix was one Options class.
Why Is Selenium Grid Used
Selenium Grid is used to cut total test execution time and widen browser coverage without buying every tester a second machine, which is what makes browser tests viable on every commit.
A regression suite taking ninety minutes on one laptop takes roughly twenty-five across four Nodes. That difference decides whether browser tests run on every pull request or only overnight.
Centralization is the second reason. Instead of each engineer maintaining their own browser and driver versions, the Grid holds the environment definitions in one place.
A test that passes on the Grid then passes the same way for everyone, and a CI pipeline gets one stable endpoint rather than a fleet of individually configured machines.
What Are the Advantages of Selenium Grid
Every advantage of Selenium Grid follows from one property: it decouples the machine that writes a test from the machine that runs it. Speed, coverage, and reuse all fall out of that split.
- Faster suites: Total run time drops toward the duration of the slowest single test rather than the sum of all of them.
- Real cross-browser coverage: One suite hits Chrome, Firefox, Safari, and Edge on Windows, macOS, and Linux without a separate project per browser.
- No change to test code: Grid is reached through RemoteWebDriver, so identical scripts run locally and remotely with one endpoint change.
- Language and framework freedom: Java, Python, JavaScript, C#, and Ruby bindings all reach the same Grid through their own parallel runners.
- CI/CD fit: A Grid exposes one URL, all a Jenkins job or GitHub Actions workflow needs to run browser tests per commit.
- Better hardware use: Idle desktops, spare VMs, and container hosts can all register as Nodes, so existing capacity does the work.
- Free and open source: There is no license cost, and the project ships regular releases backed by an active maintainer group.
Worth being clear about what is not on that list.
Grid does not make an individual test faster, it does not fix flaky tests, and it will not give you browser versions you have never installed. It parallelizes what you already have.
When to Use Selenium Grid
Reach for Selenium Grid at three specific moments: when your browser matrix outgrows one machine, when the suite must finish inside a CI window, and when the regression set keeps growing.
Here are some key situations where Selenium Grid can make a difference:
- Cross-Browser and Cross-Platform Testing: Run tests across browsers, operating systems, and machines at once to validate every browser-OS combination your users have.
For example, say your web application must support users on Chrome, Firefox, Safari, and Edge.
Running tests concurrently on those browsers through Selenium Grid validates all four at once, and surfaces any CSS browser compatibility issues early.
- Parallel Test Execution: The suite stops being a queue. Wall-clock time starts tracking Node capacity rather than test count.
That time saving matters most when a pull request is waiting on the suite, because faster feedback on code changes shortens the whole release cycle.
Scalability for Large-Scale Testing: Selenium Grid becomes essential for scalable test automation as your suite grows in complexity and size.
Distributing tests across multiple machines is what accommodates large-scale scenarios without stretching a single host.
Whether you're dealing with an extensive regression suite or testing across various environments, Selenium Grid ensures that your test infrastructure can scale effectively to meet the demands of your scaling application.
What Are the Limitations of Selenium Grid
Selenium Grid gives you parallel execution and hands you an infrastructure to run in exchange. Configuration, resource use, version drift, security, and upkeep are where the cost shows up.
- Complex Configuration: Hub-Node networking is hard without a networking background, and Grid, WebDriver, and browser versions must all stay compatible.
- Resource Intensive: Running several Nodes needs enough CPU, memory, and network capacity, which raises infrastructure cost.
Nodes spread across physical locations strain network capacity, which shows up as congestion and slower runs rather than as an obvious error.
- Compatibility and Stability Issues: Coordinating WebDriver executables, the Selenium server, and browser versions is fiddly. Mismatches cause failures or crashes.
Selenium Grid may experience stability issues under high demand, particularly when running many tests simultaneously. The stability issues may cause Node crashes or periodic failures.
- Security Issues: Sensitive-data environments need secure communication protocols, encryption, and access controls around the Grid.
Also, giving testers remote access to Nodes could cause security issues. Proper access controls and secure communication routes must be developed to avoid unwanted access.
- Maintenance Costs: Node status monitoring, health checks, and performance tuning are ongoing work, and every extra Node adds to it.
Putting high availability failover measures in place for the Hub can be challenging.
Careful design and configuration are necessary so a backup Hub smoothly replaces the primary one when it fails.
Proper version tracking and prompt upgrades are necessary to guarantee compatibility between various browser and WebDriver versions across Nodes. Failure to do so can cause compatibility issues and erratic test executions.
Why Run Tests on a Cloud Grid
Run tests on a cloud Grid when you need browser versions and operating systems you do not own, because a self-hosted Grid can only offer whatever is installed on your own machines.
Targeting Chrome 112 when only Chrome 116 is installed makes the script error out. The same happens when the target operating system differs from the one on our test machines.
Investing in new Windows and macOS environments every time an OS launches is also expensive.
When automation has to cover many browsers, browser versions, and operating systems, a Cloud Grid is the practical answer.
According to the Future of Quality Assurance Survey by TestMu AI, nearly half of organizations still rely on local machines or in-house grids for their automation testing.
That preference carries a cost. High flakiness, scalability limits, and the hours spent maintaining test infrastructure all strain the team.
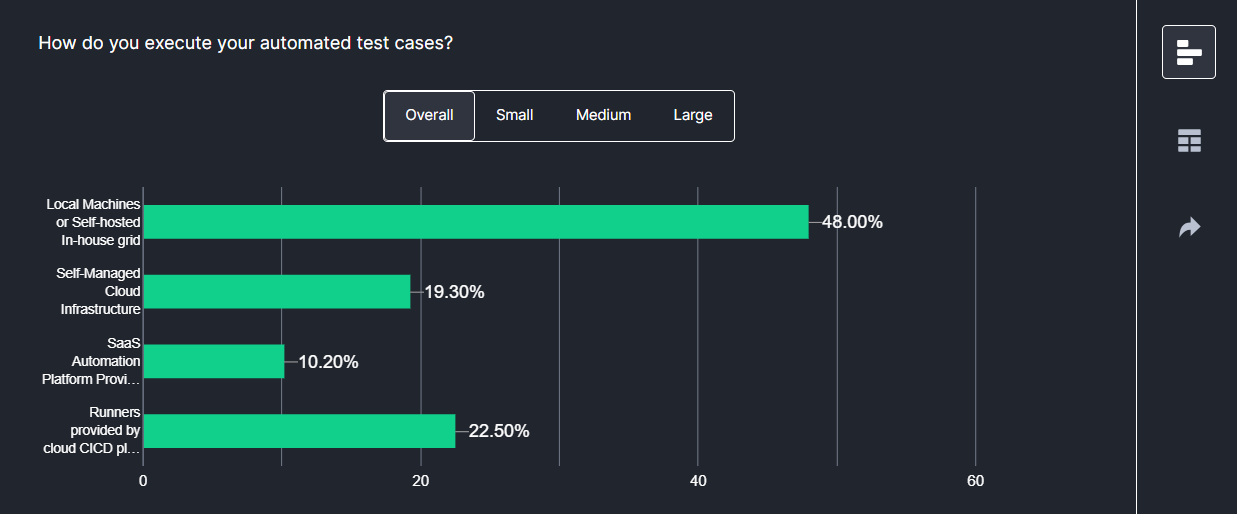
A Cloud Grid gives you access to real and virtual machines, each with its own configuration, operating system, and browser.
That range makes accurate testing possible across situations you could not reproduce locally, and providers typically add high availability and redundancy to reduce downtime during testing.
We recommend using the cloud-based testing platform that offers Selenium Grid setup on-cloud, such as TestMu AI.
It is an AI-powered test orchestration and execution platform that runs automation testing at scale across 10,000+ real desktop environments.
Teams stop maintaining their own Selenium Grid setup and spend that time on code automation instead, with parallel Grid execution handled on the cloud.

What Is the Difference Between Selenium Grid and Cloud Grid
A self-hosted Selenium Grid and a cloud Grid expose the same RemoteWebDriver endpoint, so test code is identical. What differs is who owns, scales, and patches the machines behind it.
| Features | Selenium Grid | Cloud Grid |
|---|---|---|
| Configuration | Requires manual setup | Offers automated scaling |
| Deployment | On-premises | On cloud |
| Scalability | Limited by available machines. | Remotely unlimited |
| Concurrency and Parallelism | Limited by available local machines. | Offers extensive parallelism and concurrency options. |
| Operating System Compatibility | Limited to the local network's OS availability. | Supports a wide range of operating systems. |
| Browser Variety | Limited to local resources. | Offers wide browser coverage. |
| Resource Control | Limited to local network | Accessible globally |
| Maintenance | Requires in-house management. | Managed by the cloud provider. |
| Geographic Reach | Local or limited to specific data centers. | Global availability |
| Redundancy and Failover | Reliant on local backup solutions and redundancy strategies. | Often includes built-in redundancy and failover capabilities provided by the cloud service. |
Note: Not sure which side of this table you belong on? Walk through your own suite with the team before you migrate. Book a TestMu AI demo
How Do You Run Tests on a Cloud Selenium Grid
Running tests on a cloud Selenium Grid means swapping the local hub URL for the provider endpoint and passing your credentials in the capabilities. The test logic itself does not change.
TestMu AI is an AI-powered test orchestration and execution platform offering a Selenium Grid online for automated browser testing in parallel.
For a team already running Grid locally, these are the parts that change:
- Online Selenium Grid: Point an existing RemoteWebDriver suite at a hosted hub URL. No nodes to provision, register, or keep patched.
- 10,000+ real desktop environments: Cover browser and OS combinations you cannot install locally, including older browser versions.
- Parallel execution: Raise concurrency without adding machines, so regression runs finish inside the CI feedback window.
- Live debugging output: Watch video of each run alongside per-command screenshots, logs, and any exceptions raised.
- Pipeline and tracker integrations: Trigger runs from CI and log bugs straight into Jira, Trello, Asana, Mantis, or GitHub.
Setup reference: TestNG with Selenium running Java automation scripts on TestMu Selenium Grid.
It also integrates with popular CI/CD tools, project management tools, and codeless testing tools for a faster go-to-market launch.
Follow these easy steps before running automated tests using Selenium with Java on TestMu AI:
- Create an account on TestMu AI.
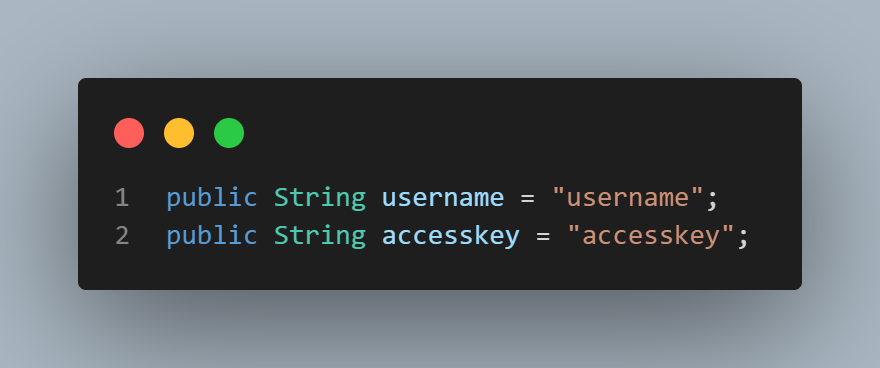
- Open your profile icon at top-right, then Account Settings > Password and Security, and copy your Username and Access Key.
In the below test script, we will only modify the DemoClass.java file. Below is the Java test script that uses the TestNG framework.
package project;
import java.net.MalformedURLException;
import java.net.URL;
import java.time.Duration;
import org.openqa.selenium.By;
import org.openqa.selenium.Capabilities;
import org.openqa.selenium.WebDriver;
import org.openqa.selenium.edge.EdgeOptions;
import org.openqa.selenium.chrome.ChromeOptions;
import org.openqa.selenium.remote.RemoteWebDriver;
import org.testng.annotations.AfterMethod;
import org.testng.annotations.BeforeMethod;
import org.testng.annotations.Test;
import org.testng.annotations.Parameters;
public class DemoClass {
	public String username = "username";
	public String accesskey = "accesskey";
	public String gridURL = "@hub.lambdatest.com/wd/hub";
	protected static ThreadLocal<RemoteWebDriver> driver = new ThreadLocal<RemoteWebDriver>();
	public static String remote_url = "http://localhost:4444/";
	public Capabilities capabilities;

	@Parameters({"browser"})
	@BeforeMethod
	public void setDriver(String browser) throws MalformedURLException {
		// Setting the Browser Capabilities
		System.out.println("Test is running on "+browser);
		if (browser.equals("chrome")) {
			capabilities = new ChromeOptions();
			}
		else if (browser.equals("edge")) {
			capabilities = new EdgeOptions();
			}
		driver.set(new RemoteWebDriver(new URL("https://" + username + ":" + accesskey + gridURL), capabilities));
		// Directing to the Testing Website
		driver.get().get("https://ecommerce-playground.lambdatest.io/");
		// Maximizing the Window
		driver.get().manage().window().maximize();
		driver.get().manage().timeouts().pageLoadTimeout(Duration.ofSeconds(10));
		}

	public WebDriver getDriver() {
		return driver.get();
		}
	@Test
	public void validCredentials() {
		getDriver().findElement(By.name("search")).sendKeys("iphone");
		}


	@AfterMethod
	// To quit the browser
	public void closeBrowser() {
		driver.get().quit();
		//driver.remove();
		}
	}
The testng.xml file is unchanged from the local run. Only the driver URL and capabilities move to the cloud, which is the whole point of the RemoteWebDriver abstraction.
<?xml version="1.0" encoding="UTF-8"?>
<!DOCTYPE suite SYSTEM "https://testng.org/testng-1.0.dtd">
<suite name="Suite" parallel="tests" thread-count="2">
  <test name="Chrome Test">
    <parameter name ="browser" value="chrome"/>
    <classes>
      <class name="project.DemoClass"/>
    </classes>
  </test> <!-- Test -->
  <test name="Edge Test">
    <parameter name ="browser" value="edge"/>
    <classes>
      <class name="project.DemoClass"/>
    </classes>
  </test> <!-- Test -->
</suite> <!-- Suite -->
Run the testng.xml file again with Run As > TestNG Suite.
Our test case specifics can be seen under Automation > Web Automation. To learn more about the implementation, click on the First test.
Output:
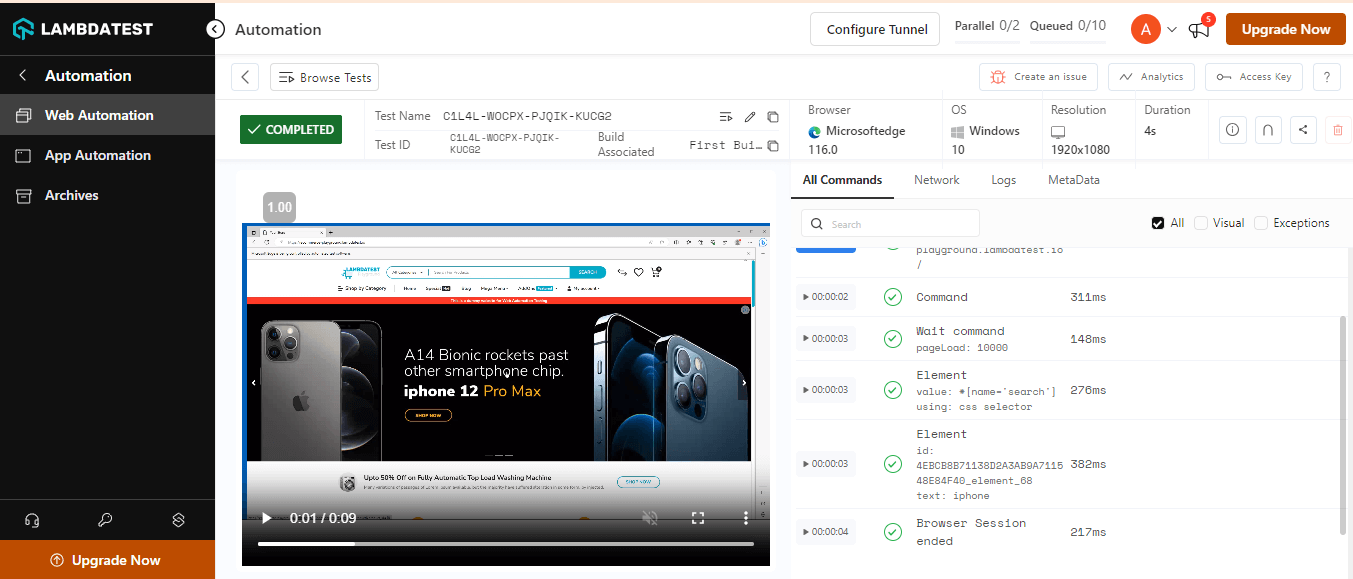
Code Walkthrough:
Provide the username and access key to perform parallel testing over the TestMu AI Cloud Selenium Grid.
Provide the remote URL for parallel execution in the DemoClass.java file.
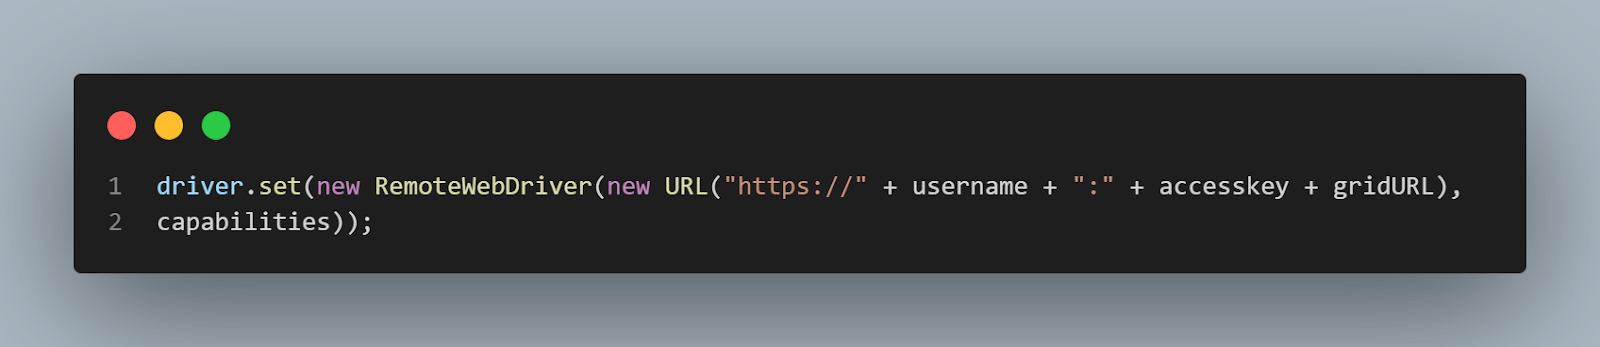
That completes parallel execution across browsers and operating systems with no Hub to create and no Nodes to launch on separate ports.
While the test runs on a Selenium Grid, you can watch live video streaming of the run in the Web Automation Dashboard shown above.
The same view carries per-command detail, including a screenshot for every command the script issued, plus logs and any exceptions raised.
You can also create a team and run automated tests together, with results visible to every member added to that team.
Through single-click integration, teammates log any bug found during a cross browser testing session straight into Jira, Trello, Asana, Mantis, or GitHub.

Conclusion
Selenium Grid solves one problem well. It takes a test suite that runs sequentially on one machine and spreads it across many.
Grid 4 made that easier than it used to be, with a single JAR, W3C-native capabilities, official Docker images, and a Grid UI you can actually read.
What it does not solve is ownership. Every Node is a machine with browsers, drivers, and a memory limit that someone has to keep current.
That maintenance grows faster than the Grid does. Start with standalone mode to learn the moving parts, then move to Docker as soon as you need more than one browser.
Move to a cloud Grid at the point where maintaining the infrastructure costs more attention than the tests it runs.
Testμ 2026 had a session on exactly this, Who provides the most reliable cloud testing grid for reduced manual effort?.
Author

Ayush Mishra
Blogs: 6

Ayush Mishra is a Tech Community Contributor and Specialist Programmer at Infosys with over four years of experience. He works on software testing, automation, and quality assurance, along with front-end web development and machine learning. On TestMu AI (formerly LambdaTest), he has authored testing articles on Selenium Grid, Selenium RC, root cause analysis, and end-to-end versus integration testing, and he publishes companion Selenium automation code on GitHub.
Reviewer

Shahzeb Hoda
Reviewer
Shahzeb Hoda is the Associate Director of Marketing and a Community Contributor at TestMu AI, leading strategic initiatives in developer marketing, content, and community growth. With 10+ years of experience in quality engineering, software testing, automation testing, and e-learning, he has authored and reviewed 70+ technical articles on software testing and automation. Shahzeb holds an M.Tech in Computer Science from BIT, Mesra, and is certified in Selenium, Cypress, Playwright, Appium, and KaneAI. He brings deep expertise in CI/CD pipeline automation, cross-browser testing, AI-driven testing practices, and framework documentation. On LinkedIn, he is followed by 3,700+ engineers, developers, DevOps professionals, tech leaders, and enthusiasts.
On This Page
- What Is Selenium Grid
- How Does Selenium Grid Work
- Components of Selenium Grid
- How to Set Up Selenium Grid
- Selenium Grid With Docker
- Running Test Scripts
- Parallel Execution on Selenium Grid
- Selenium Grid 3 vs Grid 4
- Why Is Selenium Grid Used
- Advantages of Selenium Grid
- When to Use Selenium Grid
- Shortcomings of Selenium Grid
- Why Run Tests on a Cloud Grid
- Selenium Grid vs Cloud Grid
- Running Tests on a Cloud Grid
Selenium Grid FAQs
Did you find this page helpful?
More Related Blogs
TestMu AI forEnterprise
Get access to solutions built on Enterprise
grade security, privacy, & compliance
- Advanced access controls
- Advanced data retention rules
- Advanced Local Testing
- Premium Support options
- Early access to beta features
- Private Slack Channel
- Unlimited Manual Accessibility DevTools Tests