

Power Your Software Testing with AI Agents and Cloud
The Native AI-Agentic Cloud Platform to Supercharge Quality Engineering. Test Intelligently and Ship Faster.


- TestMu AI (Formerly LambdaTest)
- /
- Learning Hub
- /
- Playwright tutorial: Automating Date Pickers
Playwright tutorial: Automating Date Pickers
Read this tutorial to learn how to automate date pickers or calendars in the Playwright automation framework.
Last Updated on:
Date pickers are one essential UI for many websites where we pick data by writing or selecting. And if it does not function well, data can get fumbled; you don't want problems like someone’s birth year registered on your website being 2024 while 2022 is ongoing, right? Automating date pickers can be tricky however, Playwright frameworks provide various methods to automate date pickers for web automation easily.
Playwright is an automation tool for an end to end testing of websites on browsers such as Chromium, Firefox, and WebKit. Playwright automation framework is gaining more and more popularity in the testing domain. One survey by the State of JS shows that Playwright’s awareness has gone up to 34% in a mere span of 2 years since it was made live by Microsoft in 2020. It is because Playwright is faster than Selenium or other frameworks, Supports various languages such as JavaScript, Python, and .NET, makes it more favorable to developers, and is deployed by Microsoft, which gives unshaken credibility.
In this Playwright tutorial, you will learn two different methods for automating date pickers or calendars using the Playwright automation framework and with the help of TestMu AI’s Selenium Playground.
TL;DR
- Some date pickers accept typed text, while others are calendar widgets a test has to click through.
- Playwright can fill a date input directly when the field accepts text in a known format.
- Clicking through a calendar means locating the month and year controls, then the day cell.
- Moment.js compares the target month with the current one to decide whether to click previous or next.
- A loop over the month and year header text reaches any month without hardcoding how many clicks it takes.
- Running the same date picker suite in parallel on a cloud grid covers browsers you do not have locally.
Automating date pickers with the fill method
fill() command in Playwright is used to fill the field with some test data. It is used for inputting values in inboxes, text areas, and other elements of web pages. You can add a locator of an element, and it will prompt an input event with given test data.
TestMu AI Selenium playground provides a date picker demo with two calendars, both using the “DD-MM-YYYY” date format. The first navigates with up and down arrows and the second with left and right arrows; they behave the same way, and only the UI differs.
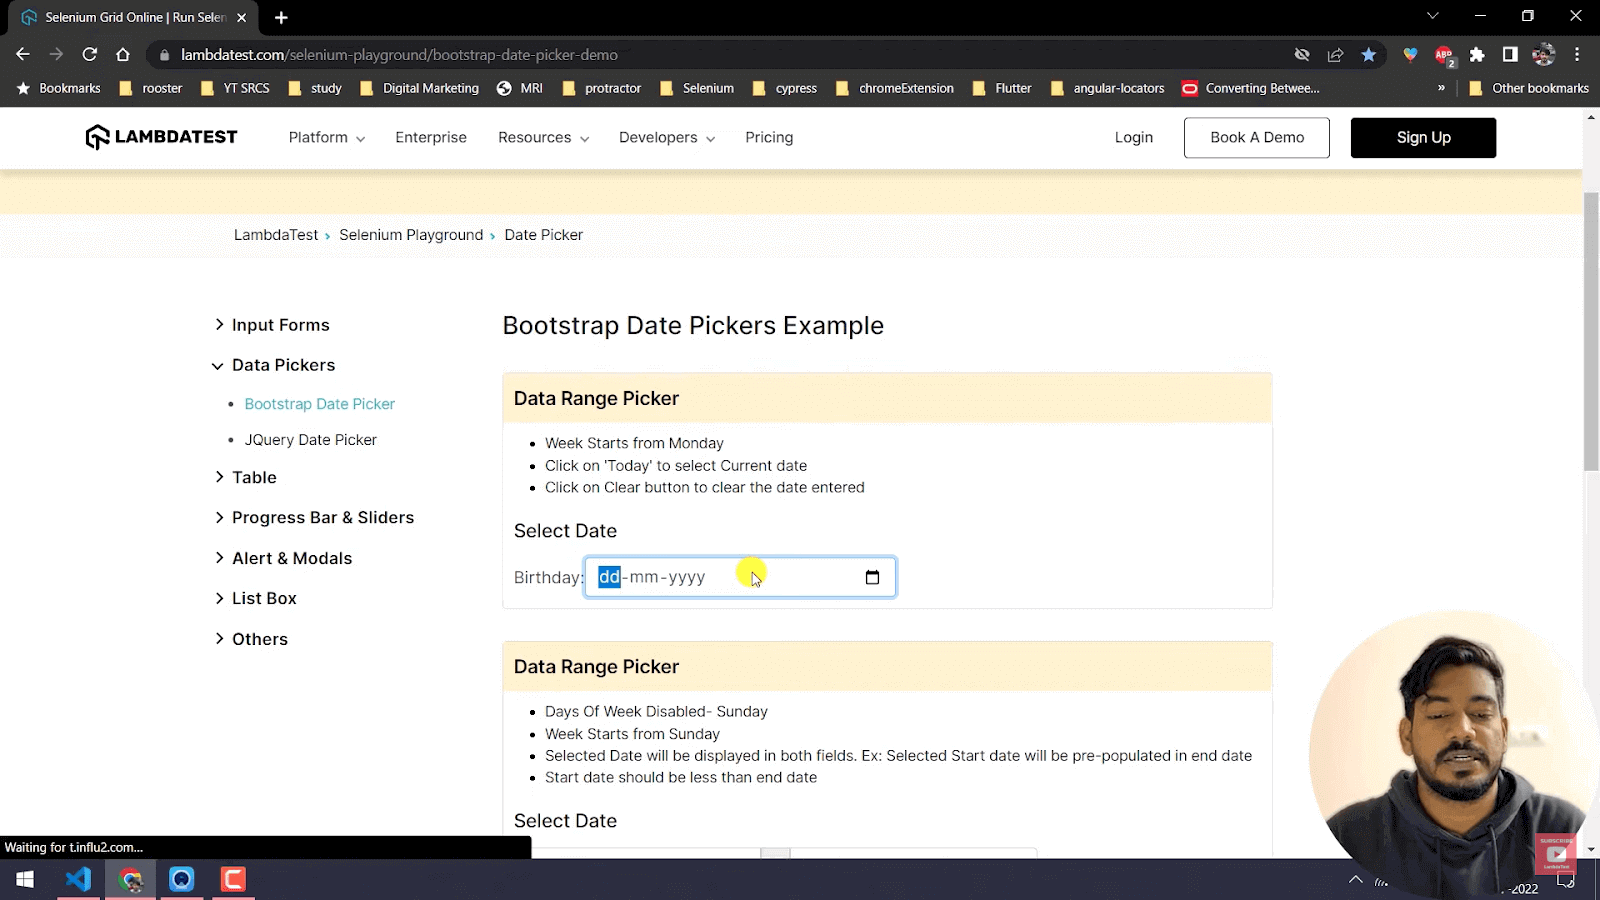
Automating date pickers with the fill() command is an easier and short method. All you have to do is pass the date with the fill() function. Here are the steps for this method.
Test scenario:
- Go to the Date Pickers page on TestMu AI Selenium Playground.
- Add a date in the inbox and pass the text.
Here’s the test script for automating the date picker with the fill() command.
import { test } from "@playwright/test";


test("Calendar demo using fill function", async ({ page }) => {
await page.goto("https://www.testmuai.com/selenium-playground/bootstrap-date-picker-demo");
let date = "2026-01-13"

await page.fill("id=birthday", date);
await page.waitForTimeout(3000)
})
Here are step-by-step explanations of how it has been done.
Step 1: Pass the import statement to the import Playwright. Create a test block and add the URL of the page.
Step 2: Pass the test data with the help of the “let” function. Keep the data type as a “date”.
test("Calendar demo using fill function", async ({ page }) => {
await page.goto("https://www.testmuai.com/selenium-playground/bootstrap-date-picker-demo");
let date = "2026-01-13"
Step 3: Now, to add that data to an inbox, use the fill() command to pass our test id and test data.
await page.fill("id=birthday", date);
await page.waitForTimeout(3000)
})
Note: You can get a failure while testing because date formation is not similar to the expected format.
To search the expected format for the date in a webpage, go to the console log and type this:
document.getElementById("birthday").value
It will give you value that is present in a particular ID.
In this example, our date formation is set as “YYYY-MM-DD.” So use the same formation while adding test data.
Run the test, and you can use waitForTimeout to see the execution slowly.

Automating date pickers with Playwright and Moment.js
Moment.js is an open and free JavaScript tool that helps to tackle issues with date and time. It is a package of native JavaScript date objects which helps to manipulate or display date/time in JavaScript easily.
The fill method is easier, where we just inserted data in the inbox, and we got results. However, to create a perfect test case for date pickers, there is another method where we will use the previous and next buttons to select months and years and perform a clicking action on a date. Here we will understand, step by step, how to pick dates from the current month, the previous month, and the next month.
Test scenario:
- Go to the Bootstrap Date Pickers page on TestMu AI Selenium Playground.
- Open the calendar with click action on the date picker switch.
- Find a date in the calendar for that month.
Test script for automating date pickers with the moment method:
 async function selectDate(date: number, dateToSelect: string) {
await page.click("//input[@placeholder='Start date']")

const mmYY = page.locator("(//table[@class='table-condensed']//th[@class='datepicker-switch'])[1]");
const prev = page.locator("(//table[@class='table-condensed']//th[@class='prev'])[1]");
const next = page.locator("(//table[@class='table-condensed']//th[@class='next'])[1]");

await prev.click();
await page.click("//td[@class='day'][text()='4']")
Here are the steps for performing the test for the current month:
Step 1: Define the URL with the help of the goto command.
Step 2: Now, for picking the date, you need first to perform a click action on the inbox. Find its element from inspect and perform a click action to open the calendar.
await page.click("//input[@placeholder='Start date']")
Step 3: When the calendar opens, select the month. For that, first, grab elements for the “previous button,” “next button,” and “date picker switch”.
Elements for date picker switch:
Inspect the date picker switch because there are five different date picker buttons. You have to write a collection-based XPath of it, which will pick an element for the specific switch you are testing on.
const mmYY = page.locator("(//table[@class='table-condensed']//th[@class='datepicker-switch'])[1]")
Here in the locator, first define the elements table where the button is and then define the button.
Elements for previous/next buttons:
Elements for the previous and next buttons are in the same table; simply make changes in class for the previous and next buttons.
const prev = page.locator("(//table[@class='table-condensed']//th[@class='prev'])[1]");
const next = page.locator("(//table[@class='table-condensed']//th[@class='next'])[1]");
Step 4: Now, for example, you want to select the 4th date of the previous month. For that, you have to perform the click action on the previous button and then click for the date 4th.
await prev.click();
await page.click("//td[@class='day'][text()='4']")
Note: While finding XPath for a date, there is a text “4” for every month, but their “class” will be different, for a current month it will be ‘day,’ and for next month it will be ‘new day.’ We are focusing on the current month so that it will be ‘day’.
This one was a basic idea of this test, to check it ran the test.
Run Automated Playwright Tests Online. Try TestMu AI Now!
Picking dates for the other months or years
In the previous example, you picked dates from the current month. Now let's move ahead and write a test script for picking a date from another month.
Test scenario:
- Go to the Bootstrap Date Picker Page on TestMu AI Selenium Playground.
- Find “May 2019” by clicking the action on the previous button.
- Find the date once you get the month.
You can continue with the same test because the defined elements for buttons are the same.
async function selectDate(date: number, dateToSelect: string) {
await page.click("//input[@placeholder='Start date']")

const mmYY = page.locator("(//table[@class='table-condensed']//th[@class='datepicker-switch'])[1]");
const prev = page.locator("(//table[@class='table-condensed']//th[@class='prev'])[1]");
const next = page.locator("(//table[@class='table-condensed']//th[@class='next'])[1]");

let dateToSelect: string = "May 2019"

while (await mmYY.textContent() != dateToSelect) {

await prev.click();

await prev.click();
await page.click("//td[@class='day'][text()='4']").
Here are additional changes needed for this test.
- Add a string and change its name to “dateToSelect.”
- Now in a normal way, you have to keep pressing the previous button until we dont get “May 2019” in the date picker switch, which is not the right way; instead, use the while condition to create a loop.
 let dateToSelect: string = "May 2019"

while (await mmYY.textContent() != dateToSelect) {

await prev.click();
Here is the explanation:
- mmYY is a locator for the date picker switch, and we used textContent with it, which will fetch the text from that element.
- It will try to receive a text from the element and check if it is similar to the “dateToSelect” string.
- When it is not similar to the string, it will perform a click action on the “previous” button. Run a test to verify that condition is true.
With date pickers, locating UI elements can be challenging due to dynamic attributes and varying structures.
Playwright’s robust locators and loops simplify handling such elements, ensuring accurate interactions. Follow the video below to learn how to handle UI elements in Playwright.

Picking dates for the next month or year
After writing the test case for the previous month, you have to make certain additional changes to make this test script eligible for testing on next month's date or on any date. Also, you will need to call the moment.js library to execute tests on date pickers for different months or years.
Test scenario:
- Go to the Bootstrap Date Pickers page on TestMu AI Selenium Playground.
- Find months given in the data set by clicking action on the previous or next button.
- Find the date in that month and click.
Here is the modified test script required to perform this test.
async function selectDate(date: number, dateToSelect: string) {
await page.click("//input[@placeholder='Start date']")

const mmYY = page.locator("(//table[@class='table-condensed']//th[@class='datepicker-switch'])[1]");
const prev = page.locator("(//table[@class='table-condensed']//th[@class='prev'])[1]");
const next = page.locator("(//table[@class='table-condensed']//th[@class='next'])[1]");

// let dateToSelect: string = "May 2019";
const thisMonth = moment(dateToSelect, "MMMM YYYY").isBefore();
console.log("this month? " + thisMonth);
while (await mmYY.textContent() != dateToSelect) {
if (thisMonth) {
await prev.click();
} else {
await next.click();
}
}
Let's continue with a similar test case and add some steps:
- Import the “moment” package from the moment library.
import { test } from "@playwright/test";
import moment from "moment";- If data is from the previous month, it will show true.
- And if it's from next month, it will show false.
const thisMonth = moment(dateToSelect, "MMMM YYYY").isBefore();
console.log("this month? " + thisMonth);- So when a condition is false, it shows that the given data is in the next month so that it will perform a click action for the “next” button.
- If a condition is true, data belongs to previous months so that it will perform a click action for the “previous” button.
- If data is from the current month, it will be true and won't move to the while condition because textContent will be equal to dateToSelect.
while (await mmYY.textContent() != dateToSelect) {
if (thisMonth) {
await prev.click();
} else {
await next.click();
}
}
await page.click("//td[@class='day'][text()='4']");
}
Making reusable date-picking function
Here, with the help of the previous script, you can select any year, month, or date, but it's not organized. Month and year at another place while the date is at another command line. Create one new function which is organized and reusable. Here are the following steps:
async function selectDate(date: number, dateToSelect: string) {

await page.click("//input[@placeholder='Start date']")

const mmYY = page.locator("(//table[@class='table-condensed']//th[@class='datepicker-switch'])[1]");
const prev = page.locator("(//table[@class='table-condensed']//th[@class='prev'])[1]");
const next = page.locator("(//table[@class='table-condensed']//th[@class='next'])[1]");

// let dateToSelect: string = "May 2019";
const thisMonth = moment(dateToSelect, "MMMM YYYY").isBefore();
console.log("this month? " + thisMonth);
while (await mmYY.textContent() != dateToSelect) {
if (thisMonth) {
await prev.click();
} else {
await next.click();
}
}
await page.click("//td[@class='day'][text()='${date}']");
}
})
Test execution
Step 1: Select the whole script; once you select it, you will find the bulb icon from where you can create a new function. Give it the name “SelectDate”.
Step 2: This “new function” will sync with the selected script.
Step 3: Before making changes for month and year, comment on the previous code line for month and year.
// let dateToSelect: string = "May 2019";
Step 4: Add the dateToSelect string in a new function. So when you can add the value of month and year in a new function, It will put the value in the “while” loop, and the rest of the process will be the same as the previous test.
async function selectDate(date: number, dateToSelect: string)
Step 5: Code line where you have defined the element for a date, make changes, and add “date” with $ sign to connect with the “selectDate” function.
await page.click("//td[@class='day'][text()='${date}']");Reporting
Finally, you are ready to launch your new test script to automate date pickers.
Scale Playwright Testing with the TestMu AI Cloud
TestMu AI is a continuous quality cloud testing platform with an automation testing grid of 3,000+ browser and OS combinations that help you scale your Playwright test execution effortlessly. With TestMu AI, you can.
- Debug Playwright tests from various logs, such as network logs, command logs, and full video recordings.
- Execute Playwright tests 70% faster than any testing cloud by leveraging HyperExecute, the fastest end-to-end test orchestration cloud by TestMu AI.
- Run Playwright tests in parallel on multiple configurations and trim down your test execution by multiple folds.
- Organize your test analytics by creating a custom dashboard and widgets with TestMu AI Test Analytics.
- Integrate seamlessly with your CI/CD pipelines.
- Apart from Playwright, TestMu AI’s automation testing cloud supports all major browser testing frameworks such as Selenium, Cypress, Puppeteer, etc.
You can execute the Playwright test on the TestMu AI platform with desired capabilities such as browser name, version, OS, etc., and some advanced capabilities such as command logs and network logs, etc. Here is the config.ts file for executing the Playwright test on the TestMu AI platform.
You can access all those tests from the Playwright tutorial from this GitHub repo.
Conclusion
So that’s it, folks! After compiling this tutorial, I hope you get a good insight into automating date pickers and calendars. Also, you learned about the moment library and how to use it to simplify automation in Playwright. We will continue our learning in the next tutorial.
The Playwright automation framework is fast, reliable, and easy compared to other frameworks and supports all major browsers. That's why its popularity propelled over time. To learn Playwright automation testing, follow the TestMu AI YouTube channel.
Author

Mehul Gadhiya
Blogs: 6


Mehul Gadhiya is a Community Contributor with experience in creating content and strategies around software testing, automation, and emerging technologies. At TestMu AI, he has worked on initiatives spanning product messaging, sales enablement, and lifecycle campaigns, supporting testing solutions like KaneAI and HyperExecute. He has also contributed to community-focused efforts, including the Testμ Conference, building awareness and collaboration across the QA and developer ecosystem
Reviewer

Parth Mistry
Reviewer
Parth Mistry is a Member of Technical Staff at TestMu AI (formerly LambdaTest), building SmartUI, the visual regression testing product. He developed and owns the SmartUI CLI, a modular TypeScript tool built on Playwright for multi-browser automation, and built the Storybook CLI for visual regression of UI components. He maintains cross-language SDKs in Python, Java, Ruby, C#, and Node.js, and engineered a Node-based visual rendering service on Kafka, Redis, MySQL, and S3. His migration of that service to an event-driven, KEDA-autoscaled architecture improved execution speed by 60% and cut annual infrastructure cost by $9,600. He also built the end-to-end SmartUI integration with KaneAI. Parth is a Google Summer of Code 2024 contributor and an alumnus of IIT Jodhpur.
Date Pickers in Playwright FAQs
Did you find this page helpful?
More Related Learning Hubs
TestMu AI forEnterprise
Get access to solutions built on Enterprise
grade security, privacy, & compliance
- Advanced access controls
- Advanced data retention rules
- Advanced Local Testing
- Premium Support options
- Early access to beta features
- Private Slack Channel
- Unlimited Manual Accessibility DevTools Tests