

Power Your Software Testing with AI Agents and Cloud
The Native AI-Agentic Cloud Platform to Supercharge Quality Engineering. Test Intelligently and Ship Faster.


- TestMu AI (Formerly LambdaTest)
- /
- Blog
- /
- Using TestNG In Selenium With Examples: A Detailed Guide
How To Automate Using TestNG In Selenium
TestNG is a robust Java-based testing framework. Streamline parallel testing and leverage comprehensive reporting while harnessing the power of TestNG in Selenium.
Last Updated on:
Automation testing is vital for quick, accurate, and repetitive testing. It speeds up testing, improves accuracy, and reduces manual effort. Detecting and fixing issues early enhances software quality.
However, finding an automation testing tool that works efficiently with easy-to-use features is challenging. Though various tools are available, including Selenium, Cypress, Playwright, etc., the criteria for selecting the tool depend upon your project requirements.
Selenium stands out among various automation testing tools due to its Java support. Teaming it with Java-based testing frameworks like TestNG boosts its capabilities for effective test automation. TestNG is easy to use, offers extensive reporting, and supports parallel testing, making it a top choice. Its compatibility with Selenium WebDriver and Java makes it a powerful tool for developers and organizations, ensuring efficient testing processes.
In this guide on TestNG in Selenium, we will delve into different aspects of TestNG, covering its methods, annotations, types, and attributes. Additionally, we will explore initiating work with TestNG in Selenium by setting up the framework locally and If you are preparing for an interview you can learn more through TestNG interview questions.
Let’s get started.
Overview
To automate web testing, integrate the TestNG framework with Selenium WebDriver to structure, execute, and report on your test cases. TestNG manages test execution flow through annotations and XML configuration, while Selenium handles browser interactions, enabling scalable, parallel, and data-driven automation.
Why TestNG Matters for Selenium Automation
- Efficient Test Management: TestNG organizes Selenium automation by grouping, prioritizing, and sequencing test execution, which improves control over the test flow and enhances overall framework maintainability.
- Parallel Execution: TestNG reduces test cycle times by running multiple Selenium test cases simultaneously across different browsers and environments, significantly improving execution efficiency.
- Detailed Reporting: TestNG automatically generates comprehensive HTML and XML reports for Selenium test runs, helping testing teams analyze results, identify failures, and debug issues effectively.
- Dependency Handling: TestNG manages dependencies between test methods in Selenium, ensuring that critical test cases execute in the correct, specified order for consistent and reliable outcomes.
- Integration Flexibility: TestNG integrates seamlessly with build and CI/CD tools like Maven and Jenkins, enabling continuous testing and faster delivery cycles for Selenium automation suites.
Core Pillars of TestNG in Selenium
- Test Annotations: TestNG uses annotations such as @Test, @BeforeSuite, and @AfterMethod to define setup, execution, and teardown phases, establishing a clear test flow in Selenium.
- Test Grouping: TestNG organizes Selenium test cases into logical groups, allowing teams to perform modular, selective, and highly efficient test execution based on specific criteria.
- XML Configuration: TestNG manages test priorities, dependencies, and parameters through the testng.xml file, providing flexible and highly customized test runs for Selenium suites.
- Scalable Execution: TestNG executes Selenium tests either sequentially or in parallel across multiple browsers and environments, enhancing the overall speed and scalability of the automation framework.
- Execution Reporting: TestNG generates detailed execution reports that enable teams to track Selenium test performance, quickly analyze results, identify issues, and maintain software quality.
What is the TestNG Framework?
TestNG, where NG stands for Next Generation, is a testing framework developed by Cedric Beust. It is an open-source automation testing framework built on the capabilities of JUnit and NUnit. The robust framework provides awesome features like TestNG annotations, grouping, parameterizations, etc. that help keep tests well-structured and easy to maintain.
The TestNG framework is designed to simplify a broad range of testing needs, from unit testing (testing a class in isolation of the others) to integration testing (testing entire systems made of several classes, several packages and even several external frameworks, such as application servers).
Features of TestNG:
- Provides HTML Reports in an efficient, easy-to-read format, thus catering to WebDriver’s limitation in generating such reports.
- Supports grouping multiple test cases to be executed whenever that particular group is invoked.
- Prioritizes test cases to decide which test case must be executed first.
- Provides the ability to execute only the failed cases with the help of testng-failed.xml.
- Supports cross browser testing, data parameterization, and parallel testing.
- Provides annotations, which help control the execution sequence in automation script without a static main method.
- Handles uncaught exceptions inherently, thus preventing sudden test termination.
Watch this video to gain all the essential knowledge needed to get started with TestNG in Selenium.

Why use TestNG with Selenium?
TestNG is widely used with Selenium for web-based automation testing. It enhances the capabilities of Selenium by providing a robust and flexible testing framework, making it easier to manage, organize, and execute automated tests.
Using TestNG with Selenium, we can:
- Produce in-depth HTML reports that include detailed information about test execution. This includes the number of test cases run and which tests passed, failed, or were skipped. Additionally, include stack traces and other relevant information in the reports.
- Define, manage, and control the flow of Selenium tests using annotations. For test methods, setup methods, and teardown methods, respectively, different annotations such as @Test, @BeforeTest, and @AfterTest can be used.
- Group test cases using the groups attribute and testng.xml. This can be useful for running specific cases, organizing them based on functionality and priority, or any other criteria.
- Execute the same test case multiple times without needing loops using the invocation count attribute of the @Test annotation.
- Perform parallel execution and cross-browser testing. This is essential in test automation, especially when dealing with many test cases, as it can save time and allow tests to be executed on multiple browsers simultaneously.
Advantages of TestNG in Selenium
Although TestNG is built on the capabilities of JUnit, it is much more advanced and powerful in automation frameworks. It has many advantages over JUnit, making it a superior choice for developers to use this testing framework. Here are a few of the advantages of TestNG in Selenium over JUnit.
- Rich in Annotations
Compared to JUnit, TestNG in Selenium provides a more extensive set of annotations. These annotations, such as @BeforeSuite, @AfterSuite, @BeforeTest, @AfterTest, @BeforeGroups, @AfterGroups, @BeforeClass, and @AfterClass, offer more flexibility and functionality. They allow users to define the test execution flow with greater control and granularity.
- Parallel Execution Support
TestNG’s built-in parallel execution support lets you run tests in parallel across multiple threads, classes, or test suites. This can significantly reduce overall test execution time.
- Flexible Test Execution and Configuration
TestNG offers more flexibility in configuring test execution through XML files, in addition to the groups attribute of the @Test annotation. This allows for the categorization of test cases and selective execution. On the other hand, JUnit does not support XML-based execution configurations and relies solely on annotations.
TestNG in Selenium also supports test prioritization and the ability to specify test dependencies between test cases, which are not supported in all versions of JUnit.
- Parameterization and Data-driven testing
TestNG in Selenium supports parameterization and data-driven testing. The @DataProvider annotation allows you to pass different data sets to the same test for execution. This is unavailable in JUnit, requiring additional code to support data-driven testing.
To learn more about it, go through this blog on parameterization in TestNG for Selenium automation testing.
- Enhanced Reporting
TestNG in Selenium generates HTML reports with more detailed information about test execution, including test results, failures, and errors. JUnit, on the other hand, generates simpler text-based reports.
- Support for Soft Asserts
Unlike JUnit, which uses hard assertions that halt test execution after the first failure, TestNG in Selenium also supports soft assertions. Using the SoftAssert class, TestNG allows the performance of multiple assertions in a test execution, collecting all the passed and failed results and only marking the case as failed in the end, listing all the failures.

Note: Take your automation testing to the next level with TestNG in Selenium. Try TestMu AI Today!
Now that we have learned about TestNG and its advantages, let’s dive deeper into understanding TestNG in Selenium by installing the required dependencies.
Installation and Setup of TestNG in Selenium
Having understood the features of TestNG in Selenium, the next step is to learn how to set it up on the system before diving deep into practical demonstrations. In this tutorial on TestNG in Selenium, I will cover the installation process for two of the most commonly used Integrated Development Environments (IDEs) – Eclipse and IntelliJ.
Eclipse users install the TestNG plugin from the Eclipse Marketplace and create the project through the New Project wizard. Both steps have their own chapters, install TestNG in Eclipse and TestNG project in Eclipse, and the TestNG Maven dependency chapter covers the pom.xml and Gradle route.
How to install TestNG in IntelliJ?
In this section of the TestNG in Selenium tutorial, I will guide you through installing IntelliJ. The installation involves downloading the TestNG JAR file from the Maven Repositories website and incorporating it into your IntelliJ project. This step is crucial for using TestNG’s powerful features in your Selenium automation testing within the IntelliJ IDE.
Before adding the JAR, ensure that IntelliJ is installed on your system. If not, you can download IntelliJ by visiting the JetBrains. Having IntelliJ installed is a prerequisite for seamlessly integrating TestNG into your development environment and setting up TestNG in Selenium using IntelliJ.
Step 1: Visit Maven Repositories, search for TestNG, and select a stable, widely used version (i.e., 7.12.0). In this tutorial on TestNG in Selenium, we will use the same TestNG version. Hence, the POM file I will use for demonstration will have traces of TestNG 7.8.0.
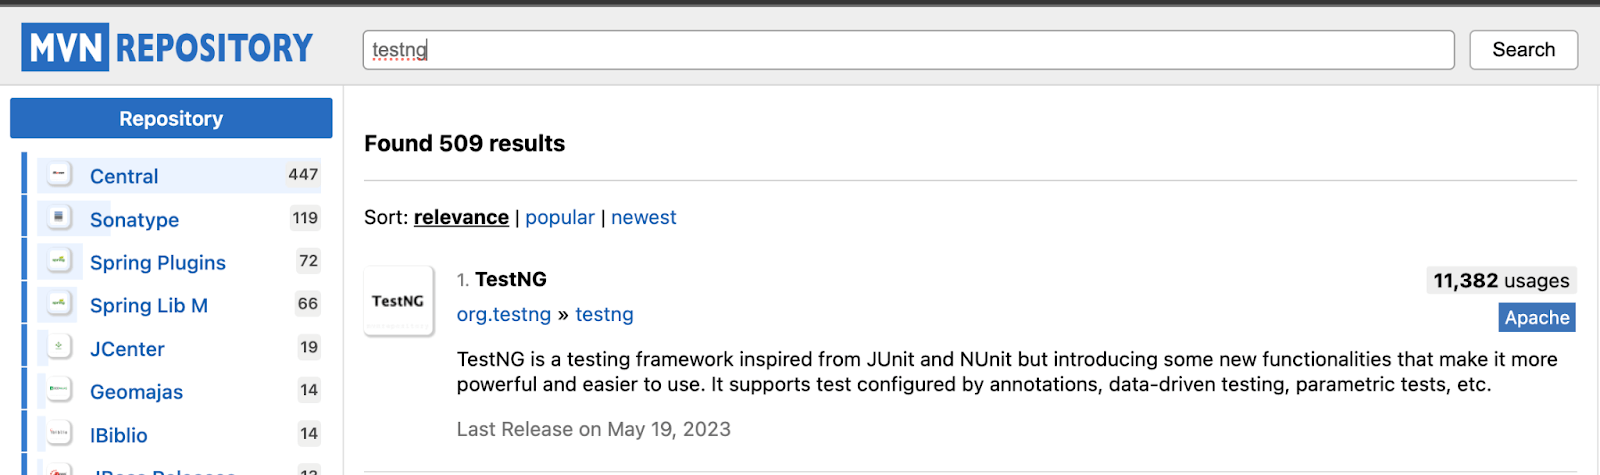
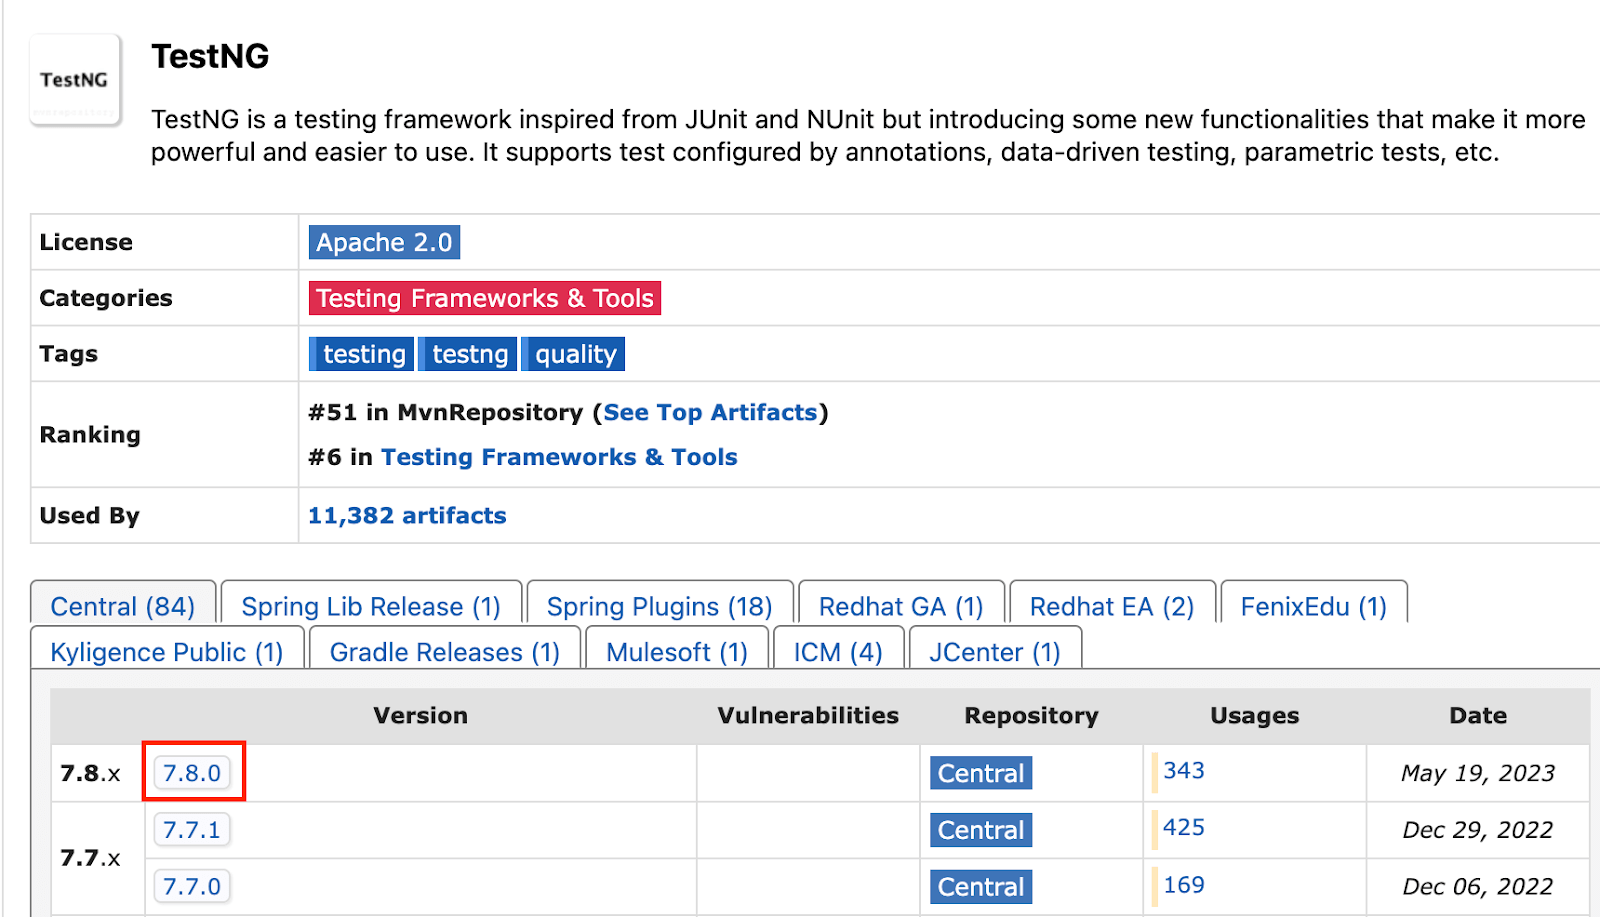
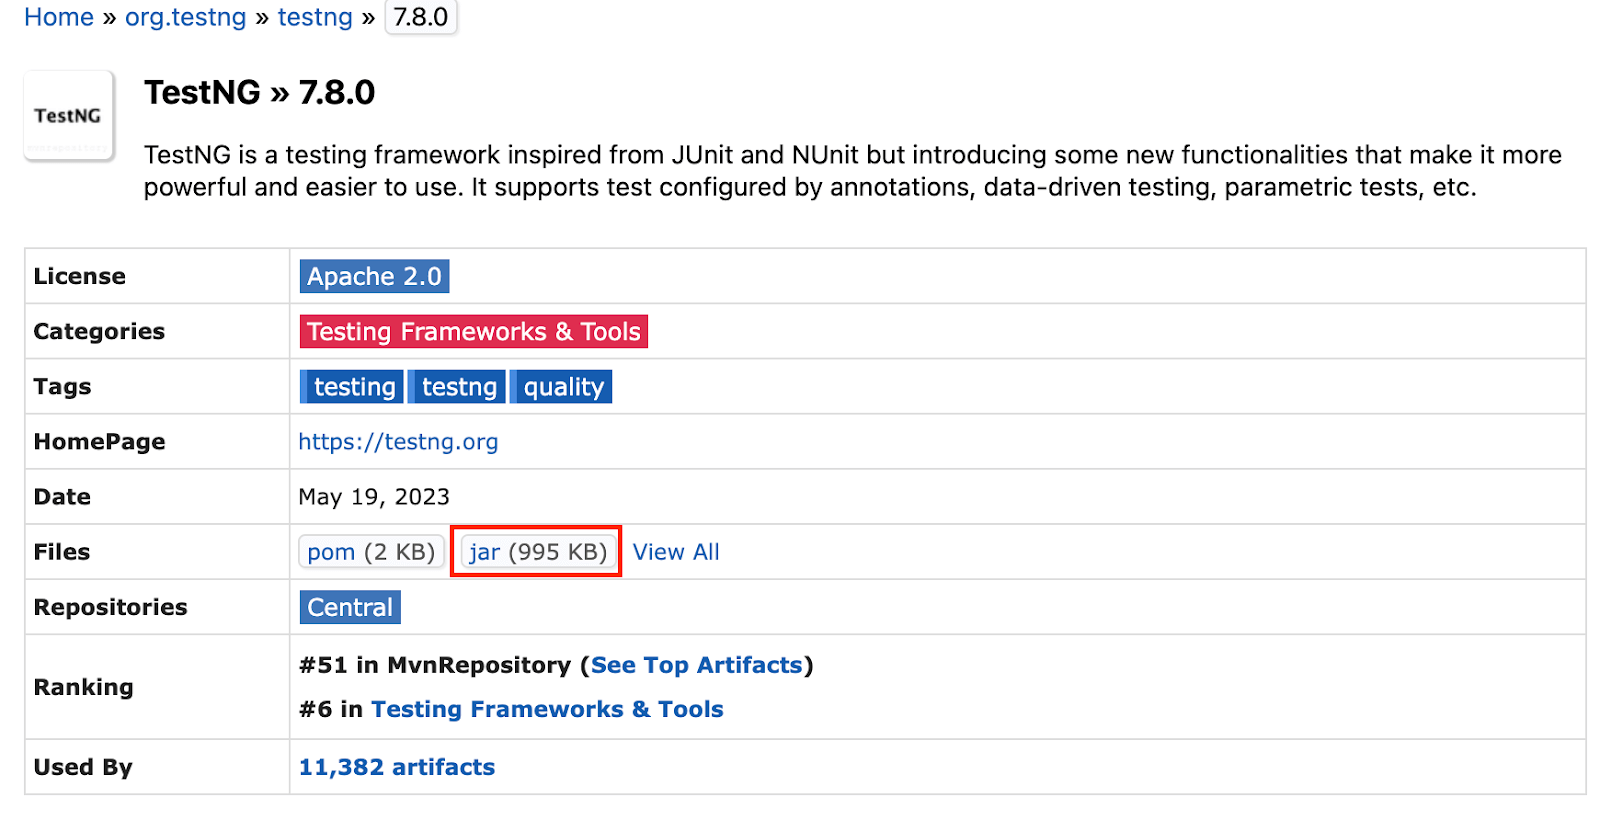
Step 2: Select and download the jar file. We will be adding this jar to IntelliJ.
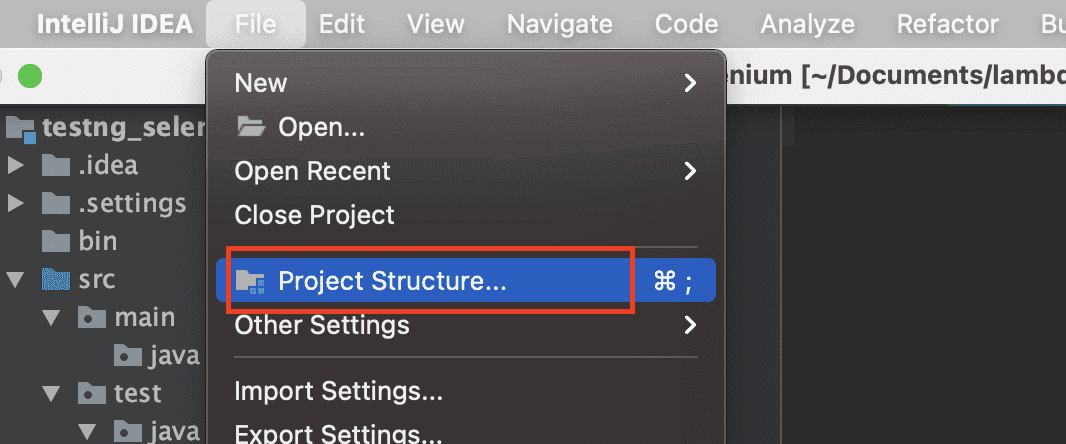
Step 3: Launch IntelliJ, open the File menu, and select Project Structure.
Step 4: Open the Modules panel, go to the Dependencies tab, click + sign, and choose JARs or directories.
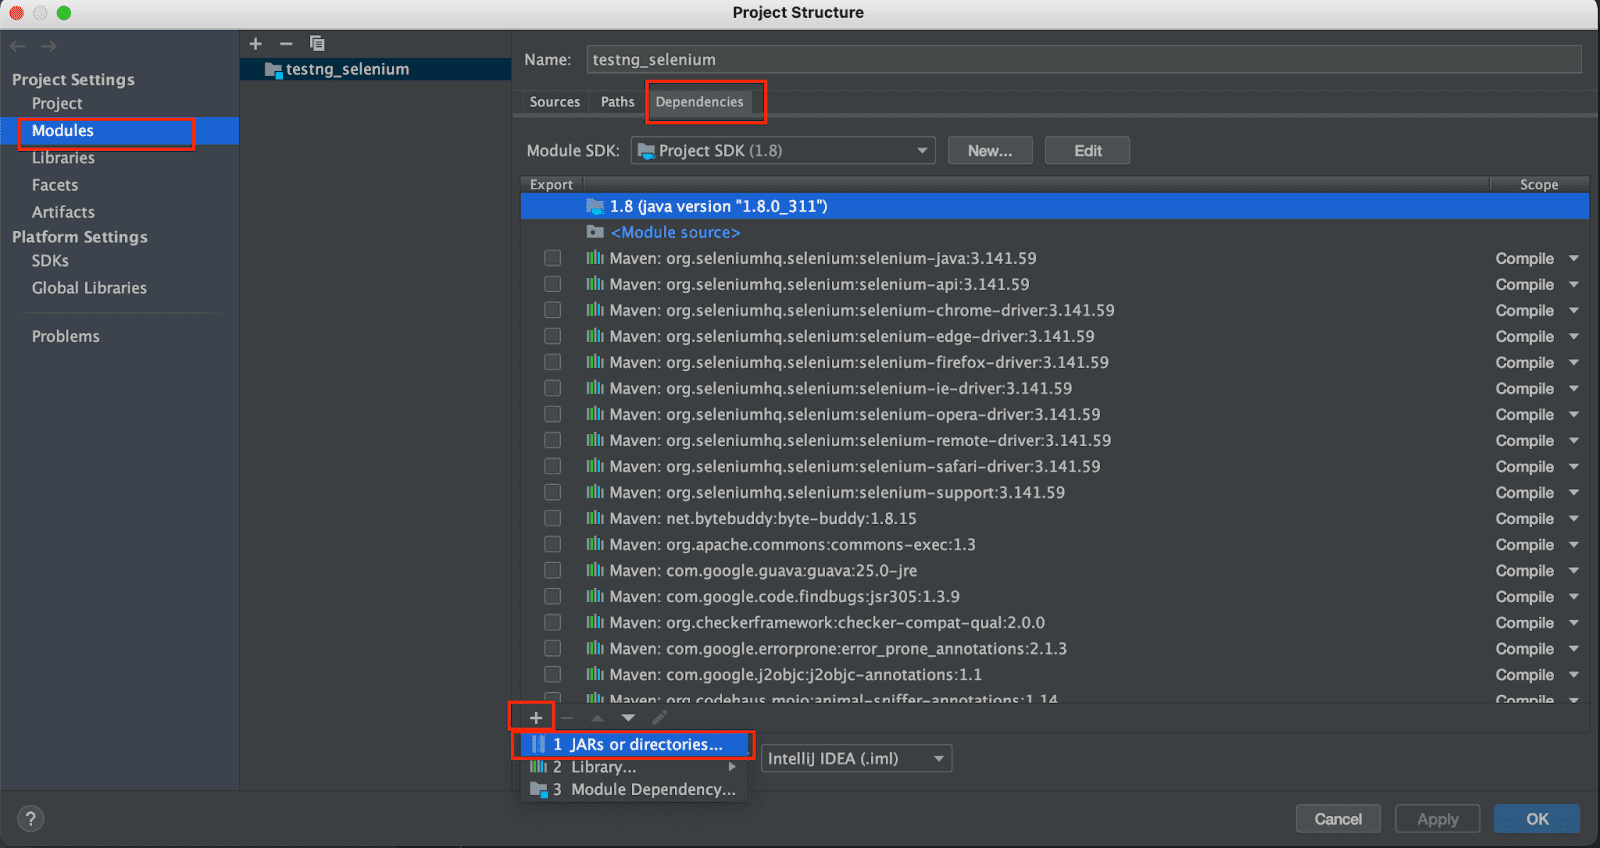
Step 5: Navigate to the path where we have the downloaded jar from previous steps and select it.
Step 6: It would appear on the list of dependencies. Just check it and click the Apply button, followed by the OK button.
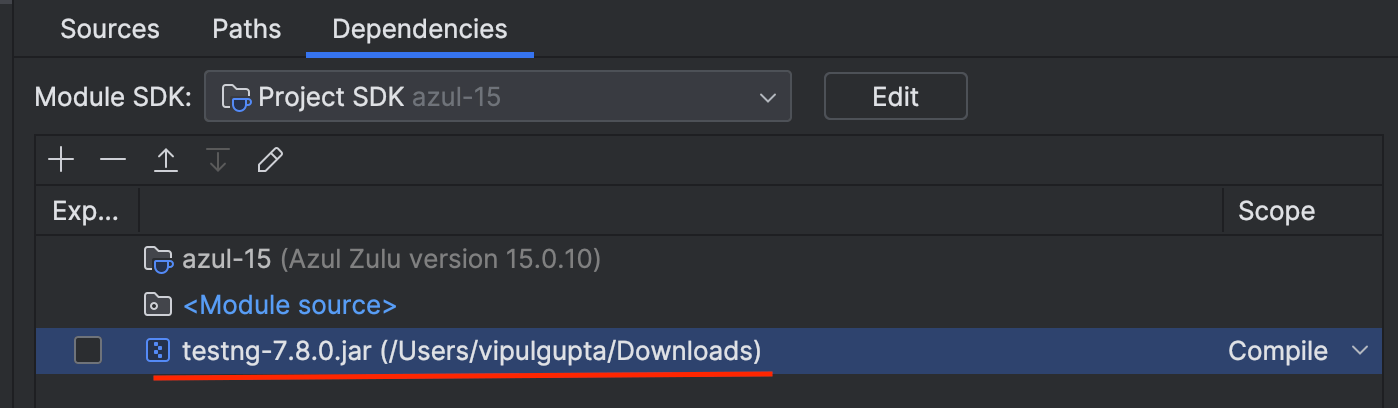
With this, we have completed the installation process on IntelliJ and Eclipse. Let’s set up the project in one of the IDEs. In this case, we will be using Eclipse as the IDE, but feel free to use any IDE that is already installed on your system. The following steps will guide you through configuring the project to use the capabilities of TestNG in Selenium for automation testing.
TestNG Annotations and Attributes
Annotations in programming typically refer to notes or comments within code that provide additional information or instructions. Similarly, TestNG annotations are crucial in Selenium automation testing by assigning meaning and controlling the execution flow of test scripts.
While using TestNG in Selenium, annotations are predefined keywords that play a vital role in shaping the behavior of functions within the test script. It’s essential to note that any test not annotated in TestNG will be ignored during test execution. Therefore, including the required annotations for test cases is mandatory to ensure proper test execution.
Here’s an example to illustrate this concept.
package test;

import org.testng.annotations.Test;

public class UnAnnotatedTestExample {

@Test
public void testWithAnnotation()
{
System.out.println("This test is annotated");
}

public void testWithoutAnnotation()
{
System.out.println("This test is not annotated");
}
}
As you can see, in the above example, we have added two test cases, one with @Test annotation and one without it. So, the expectation is that only the one with annotation is executed, and another is skipped. Let’s execute the class and verify this.
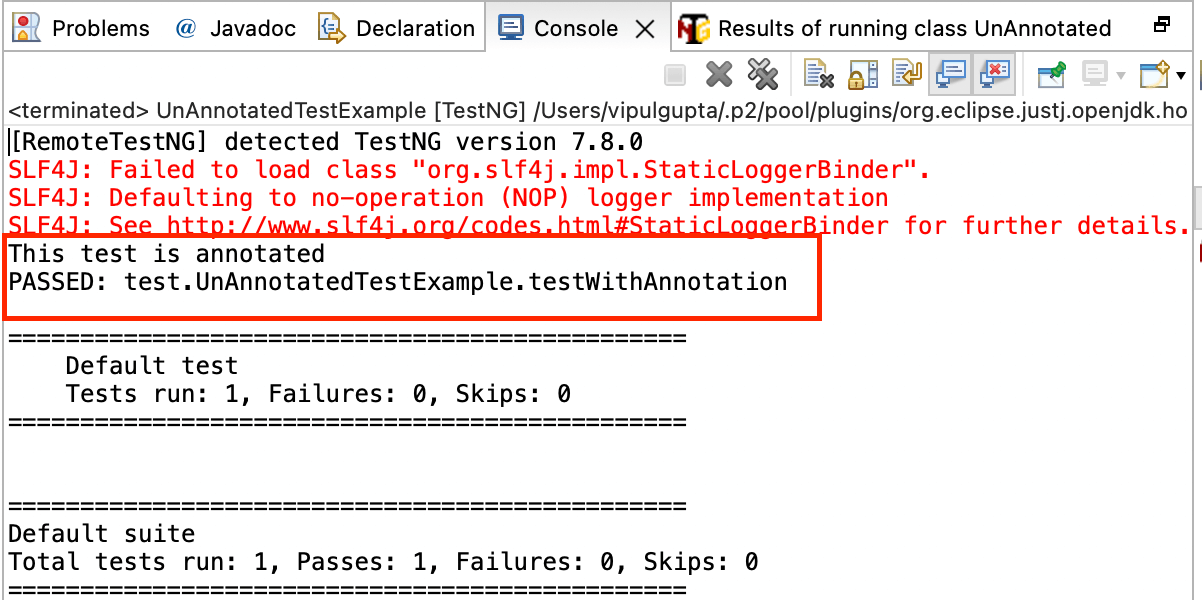
The output shows that only the test case with the annotation was executed. Additionally, it’s noteworthy that the TestNG test run summary in the output displays the total number of test cases as 1. This is because TestNG determines the number of test cases based on the presence of the @Test annotation, and in this case, we had only one annotated test case in the file.
TestNG annotations not only control test execution but also provide relevant information about the method, class, or test suite with which they are associated. These annotations are identified by the @ prefix. In this tutorial on using TestNG in Selenium, let’s explore these annotations individually and understand how they are crucial in structuring and executing Selenium test scripts.
The full list of annotations, their order of execution, and the attributes each one accepts, such as priority, groups, dependsOnMethods, enabled, timeOut, and invocationCount, are covered with examples in the TestNG annotations chapter.
TestNG Priorities
By default TestNG runs the test methods of a class in alphabetical order. The priority attribute on @Test overrides that: lower numbers run first, and methods that share a priority fall back to alphabetical order. Use it sparingly, because tests that depend on running in sequence cannot run in parallel. The prioritizing tests with TestNG in Selenium chapter shows the syntax, the edge cases with equal priorities, and what happens when priority meets dependsOnMethods.
DataProviders in TestNG
A DataProvider is a method that returns an Object[][]; TestNG runs the test once per row and reports each run separately, which is how one login test covers twenty credential sets without twenty methods. The DataProviders in TestNG chapter covers method-aware providers, Excel-backed data, and parallel providers.
TestNG Assertions
Assertions in TestNG provide a mechanism to verify if the actual and expected results of the test case execution match, determining the outcome of the test case—whether it is a pass or fail. They are extensively used to validate results in any TestNG script for Selenium.
An example of TestNG assertions could be validating the username on the dashboard after a user logs into a website.
The syntax for TestNG assert:
Assert.Method(actual, expected, message)
- actual: the actual value fetched from the test case as a part of the execution.
- expected: the expected value we want to compare with the actual value.
- message: string message to be displayed in case of assert failure.
Hard asserts stop the test at the first failure; SoftAssert collects every failure and reports them together at assertAll. Both, with assertion messages and exception assertions, are covered in the TestNG assertions chapter.
Demonstration: Using TestNG in Selenium
By now, this TestNG in Selenium tutorial has covered almost all the main features of the TestNG framework that you would need to write your first Java automation script. The following code example will combine all the annotations, attributes, priorities, data providers, and assertions we have learned.
The following test scenario will be executed by this code (to print and verify the sum of 2 numbers)
Test Scenario:
- Create a dataProvider that passes values as firstValue, secondValue, and expectedSum.
- Navigate to https://www.testmuai.com/selenium-playground/simple-form-demo/.
- Run Test 1 with the first set of values, {1, 4, 5}. This test should pass as the expected sum is correct.
- Clear the old values from the form.
- Run Test 2 with the second set of values, {2, 4, 7}. This test should fail as the expected sum is not correct. We intentionally pass incorrect expected values to see the differences in output and test reports for passed and failed cases. Always remember that ideally, the expected should always be the correct value.
- Execute the code and analyze the reports.
In addition to this test case, we will add two more test cases with priority to showcase the usage, along with one of them having an invocationCount attribute to show the case getting executed multiple times as per priority.
package test;


import java.net.MalformedURLException;
import java.net.URL;
import org.openqa.selenium.By;
import org.openqa.selenium.remote.*;
import org.testng.Assert;
import org.testng.annotations.*;
import java.util.HashMap;
import org.openqa.selenium.chrome.ChromeOptions;


public class SeleniumTestNGExample {


   public RemoteWebDriver driver = null;
   String username = System.getenv("LT_USERNAME") == null ? "<lambdatest_username>" : System.getenv("LT_USERNAME");
   String accessKey = System.getenv("LT_ACCESS_KEY") == null ? "<lambdatest_accesskey>" : System.getenv("LT_ACCESS_KEY");


   @BeforeSuite
   public void setUp() {
       ChromeOptions chromeOptions = new ChromeOptions();
       chromeOptions.setPlatformName("Windows 10");
       chromeOptions.setBrowserVersion("121.0");

       HashMap<String, Object> ltOptions = new HashMap<String, Object>();
       ltOptions.put("username", username);
       ltOptions.put("accessKey", accessKey);
       ltOptions.put("project", "TestNG Selenium");
       ltOptions.put("build", "TestNG Selenium Demonstration");
       ltOptions.put("selenium_version", "4.0.0");
       chromeOptions.setCapability("LT:Options", ltOptions);


       try {
           driver = new RemoteWebDriver(
                   new URL("https://" + username + ":" + accessKey + "@hub.lambdatest.com/wd/hub"), chromeOptions);
       } catch (MalformedURLException e) {
           System.out.println("Invalid grid URL");
       }
       System.out.println("The driver setup process is completed using BeforeSuite");
   }


   @BeforeTest
   public void browserProfile() {
       driver.manage().window().maximize();
       System.out.println("The browser profile is updated using BeforeTest");


   }


   @BeforeClass
   public void navigateToUrl() {
       driver.get("https://www.testmuai.com/selenium-playground/simple-form-demo/");
       System.out.println("Navigated to URL using BeforeClass");
   }


   @Test(description = "Test case with priority", priority = 1)
   public void testPriotity()
   {
       System.out.println("This case has priority 1");
   }

   @Test(description = "Test case with priority and invocation count", priority = 2, invocationCount = 2)
   public void testInvocationCount()
   {
       System.out.println("This case has priority 2 and invocation count");
   }


   @DataProvider(name = "SanityTestData")
   public Object[][] sanityTestDataProvider() {
       String[][] testData = { { "1", "4", "5" }, { "2", "4", "7" } };
       return testData;
   }

   @Test(dataProvider = "SanityTestData", description = "Test case with group and data provider but without priority", alwaysRun = true, groups = { "sanity" })
   public void testSumOfTwoValues(String firstValue, String secondValue, String expectedSum) {
       // to enter data and submit
       driver.findElement(By.id("sum1")).sendKeys(firstValue);
       driver.findElement(By.id("sum2")).sendKeys(secondValue);
       driver.findElement(By.xpath("//button[text()='Get Sum']")).click();


       // to fetch actual result
       String actualSum = driver.findElement(By.id("addmessage")).getText();


       // to assert actual and expected result
       Assert.assertEquals(actualSum, expectedSum,
               "Expected and actual results do not match. Expected : " + expectedSum + " and Actual : " + actualSum);


   }


   @AfterMethod()
   public void clearOldData() {
       driver.findElement(By.id("sum1")).clear();
       driver.findElement(By.id("sum2")).clear();
   }


   @AfterClass
   public void closeDriver() {
       driver.quit();
       System.out.println("Quit the driver using AfterClass");
   }


   @AfterTest
   public void testReporting() {
       System.out.println("Test Report generated using AfterTest");
   }
}

In the provided code, you can observe the integration of various TestNG features such as annotations, DataProviders, assertions, priorities, and attributes. This code exemplifies how these elements can be effectively combined while working with automation scripts for TestNG in Selenium, showcasing their cohesive use to maximize the potential of the testing framework.
In this TestNG in Selenium tutorial, a Selenium RemoteWebDriver instance has been created, emphasizing the optimal utilization of TestNG with a cloud Selenium Grid. Using Selenium Grid, specifically a cloud Grid service like TestMu AI, offers several advantages. These include the ability to execute multiple test cases across various browsers and operating systems, ensuring thorough cross-browser testing. Additionally, a cloud Selenium Grid provides advantages in terms of speed, scalability, and enhanced debugging and troubleshooting support.
In the above code example, execution is intended to run on TestMu AI, a Selenium Cloud Grid, demonstrating the seamless integration of TestNG with cloud testing platforms for efficient and scalable cross-browser testing.
TestMu AI is an AI-powered test orchestration and execution platform that lets you run manual and automated tests at scale with over 3000+ real devices, browsers, and OS combinations. Like other automation testing tools, TestMu AI provides interactive reporting dashboards for results analysis, various logs, and integrations with the best CI/CD tools, project management tools, etc.
Code Walkthrough:
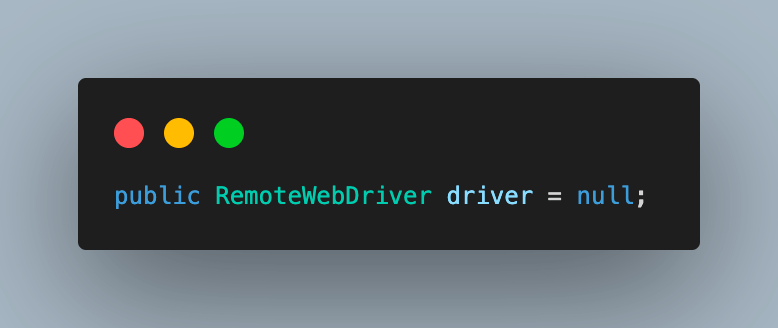
Step 1. Create an instance of RemoteWebDriver, which will execute the code on the TestMu AI cloud grid.
Step 2. Navigate to the TestMu AI Account Settings > Password & Security section to fetch the username and access key once you create your account. These will be used to make a connection to the TestMu AI grid.

Using the following commands, You can configure the username and access key as environment variables and directly fetch them in code.
For macOS and Linux:
export LT_USERNAME=LT_USERNAME
export LT_ACCESS_KEY=LT_ACCESS_KEY
For Windows:
set LT_USERNAME=LT_USERNAME
set LT_ACCESS_KEY=LT_ACCESS_KEY
Step 3. Add the first method as setUp() and annotate it with @BeforeSuite. TestMu AI browser capabilities are set inside this method, and a remote grid is launched to execute the run.
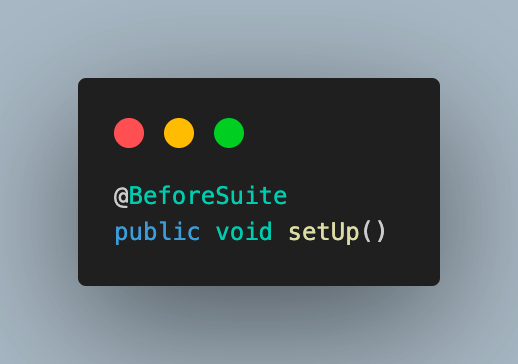
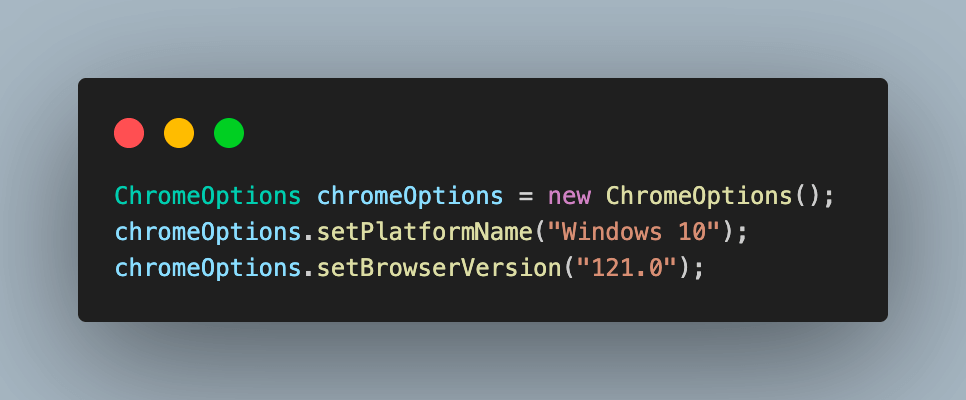
In this TestNG in Selenium guide, we have used Selenium 4, which supports the ChromeOptions class. This function creates an object to define browser properties like browser version, OS version, etc.
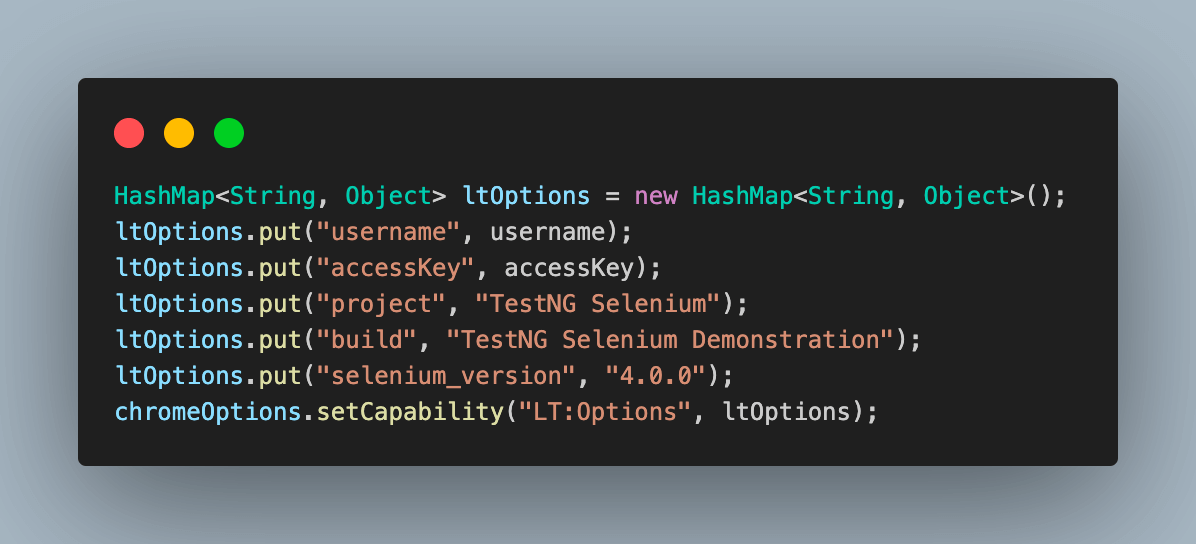
It also accepts the variables required for TestMu AI execution as a capability using a HashMap. These variables are used to set values like build, name, or any other browser property, which will help to identify the run on the TestMu AI Automation Dashboard or modify behavior.
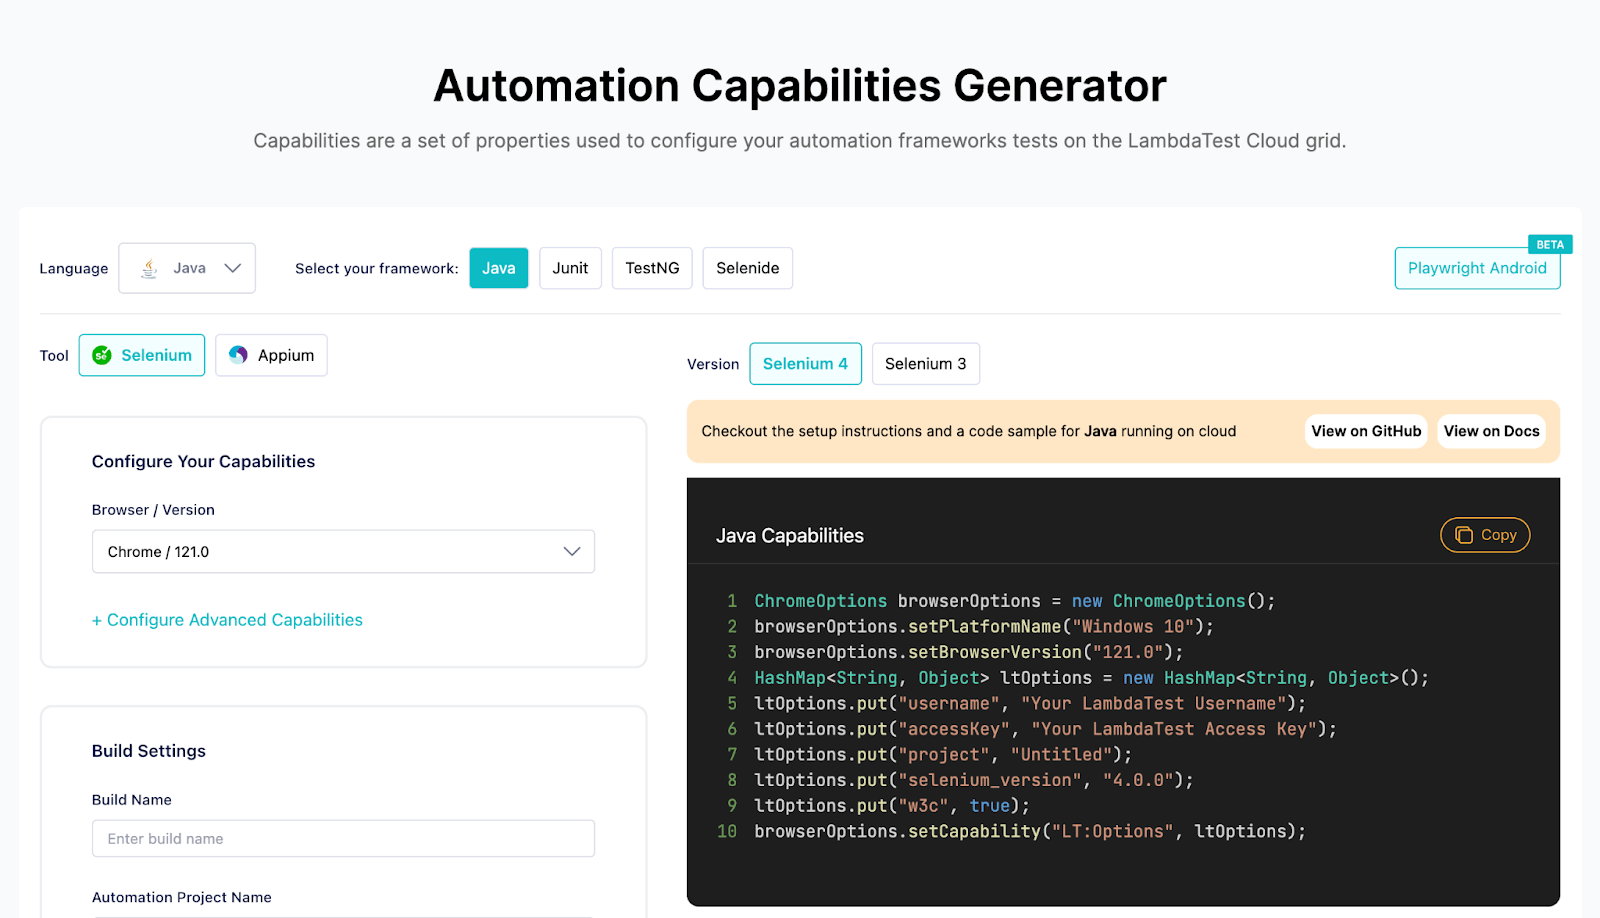
We can also fetch the required browser capabilities to use the TestMu AI platform by navigating to their Automation Capabilities Generator. This helps by offering ready-to-use code for setting up browser capabilities that can be used in execution.
Finally, we use the instance of RemoteWebDriver created initially to connect to the TestMu AI Cloud grid using the chromeOptions, and your TestMu AI credentials.
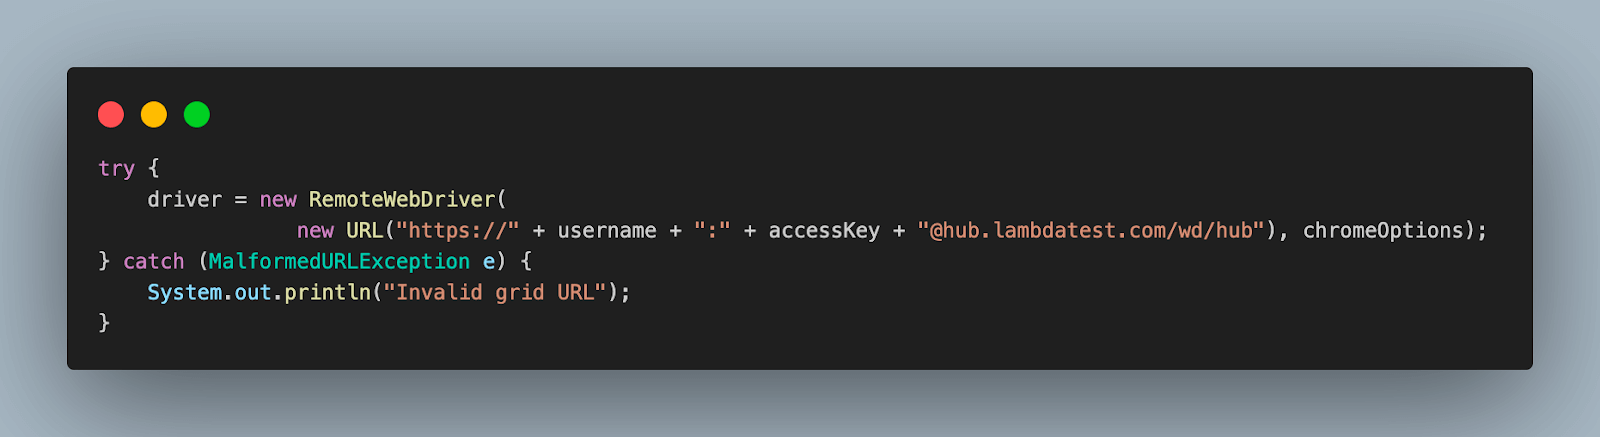
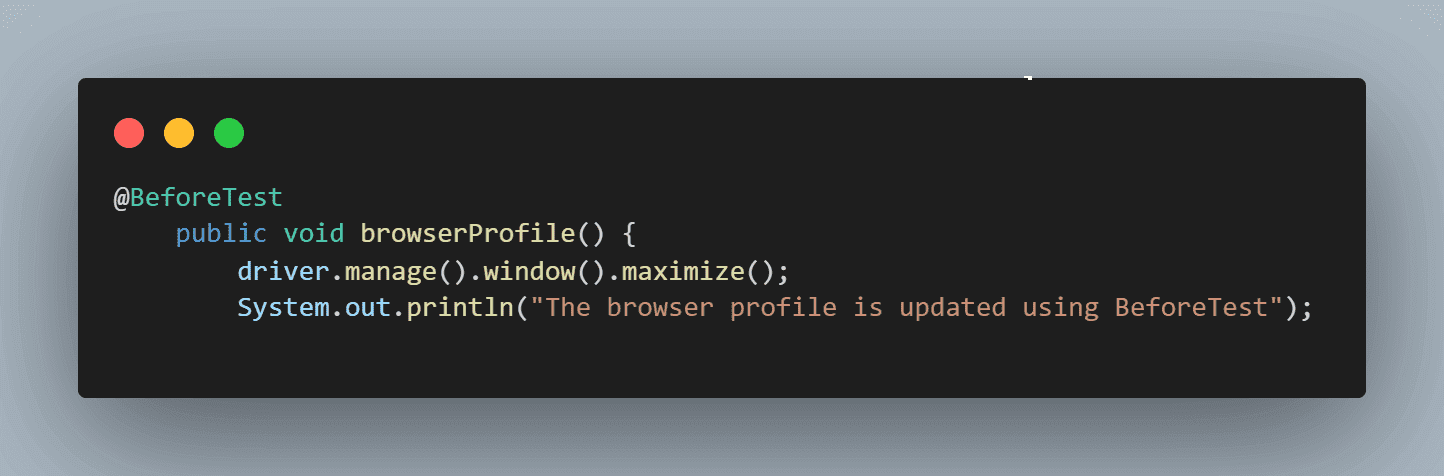
Step 4. Add a new method browserProfile(), and annotate with @BeforeTest. This will help execute the step to maximize the browser window once launched.
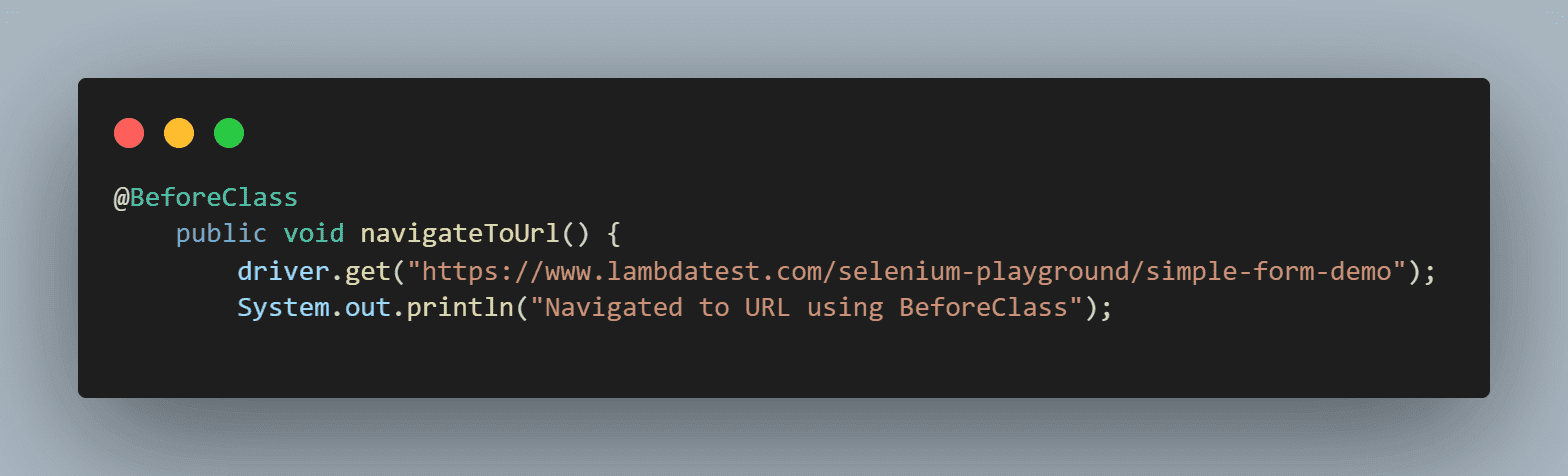
Step 5. We have used the navigateToUrl() method to open the website on which the test would be executed. This method is annotated with @BeforeClass to execute it accordingly.
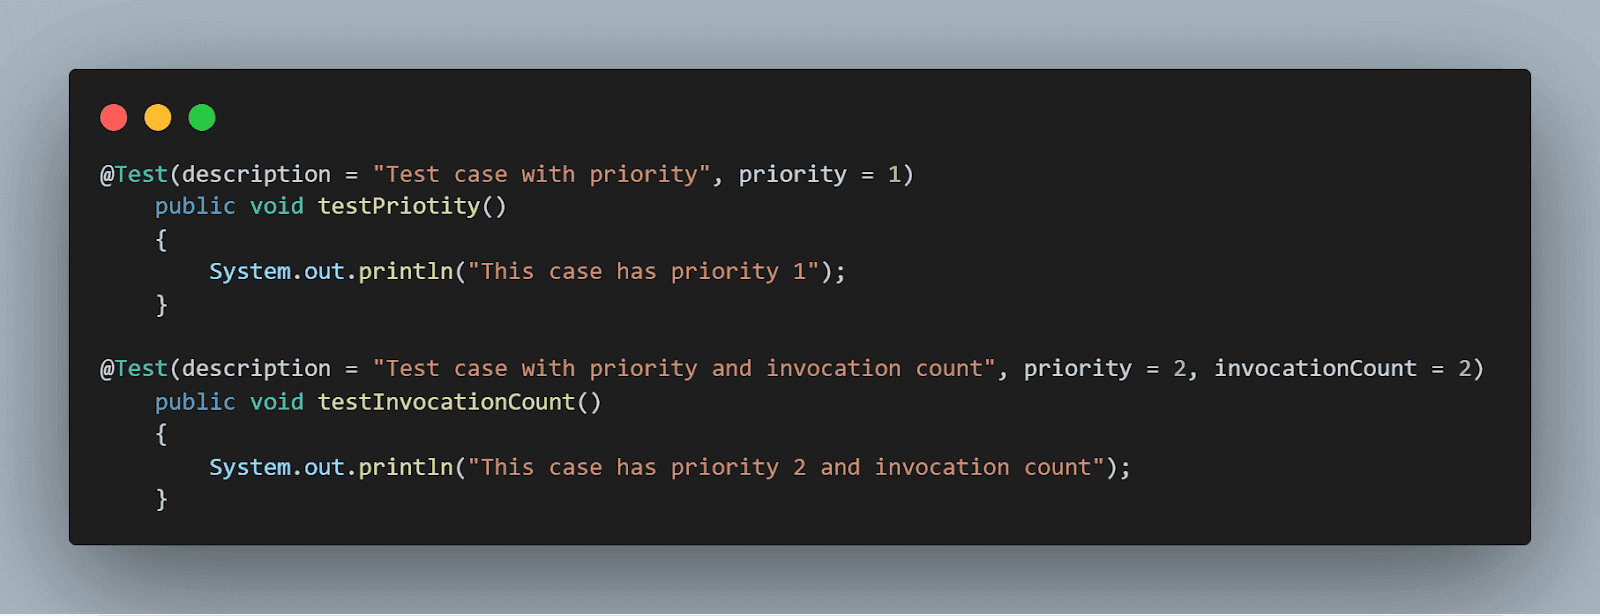
Step 6. Next, we have added two test cases that will run locally only to showcase the usage of priority and invocationCount usage, namely testPriotity() and testInvocationCount().
Step 7. Next, add a DataProvider and name it as sanityTestDataProvider(). This provides two sets of test data on which the next test method would be executed, of which one should pass, and the other should fail, as already stated in the test scenario.
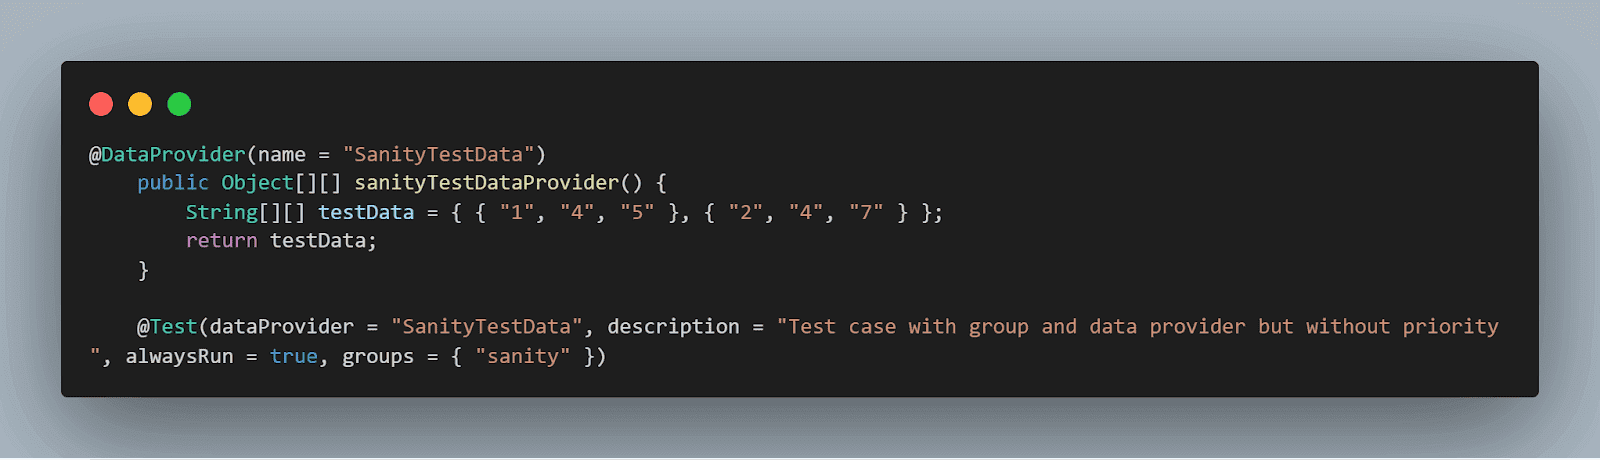
Step 8. Add a test case method testSumOfTwoValues(). It takes test data input from the DataProvider created in the previous step. This method is executed once for each type of test data and helps to decide whether it is a pass or fail using assert.

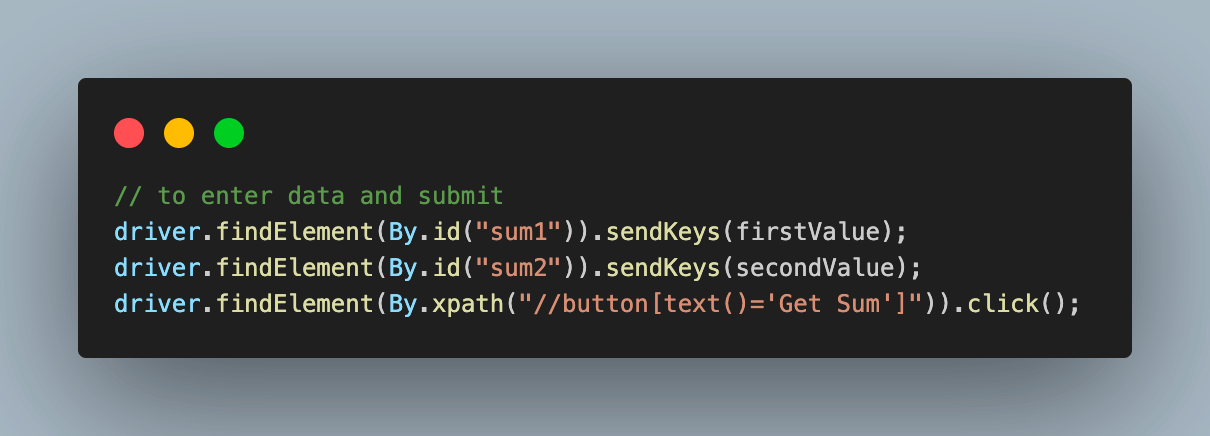
Step 9. Enter the values and click on the button to get the results.
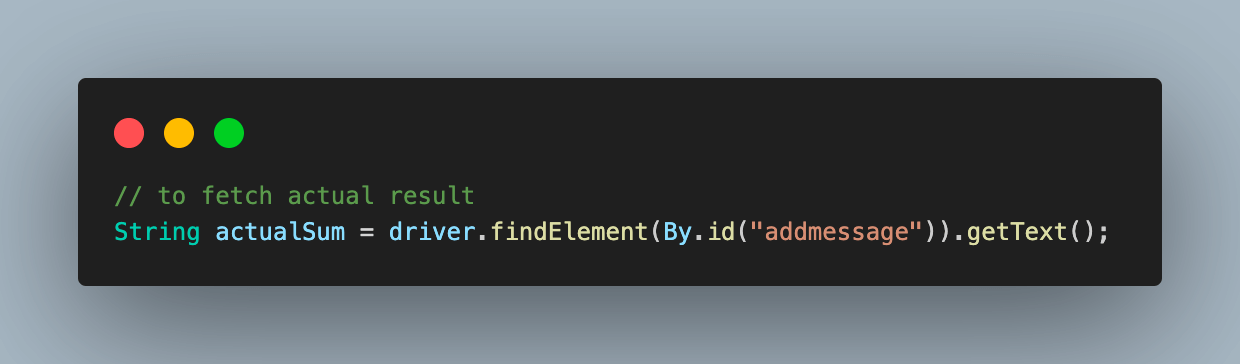
Step 10. Next, to fetch the result of execution, we use the getText() method with the identifier and store it as a String.
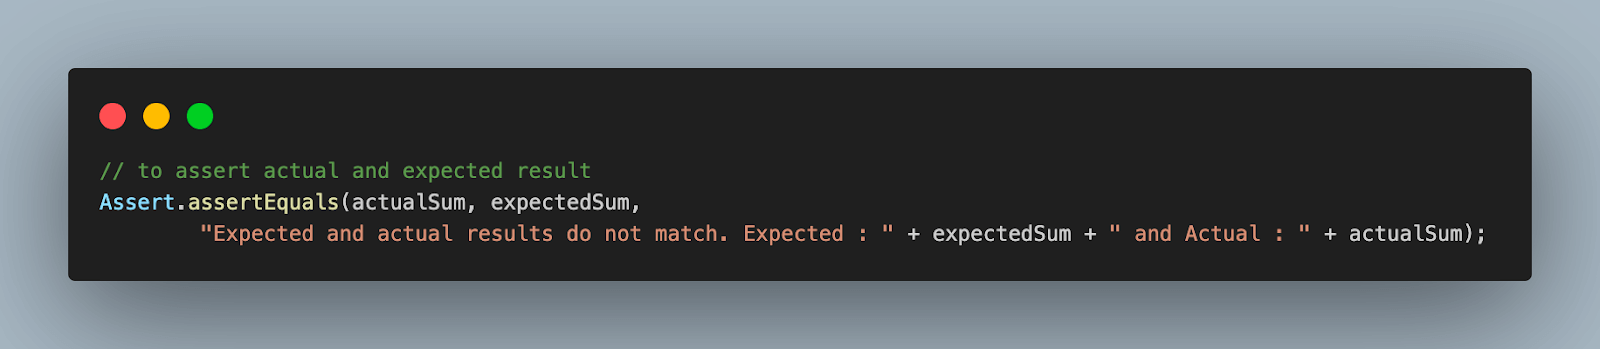
Step 11. Implement assertEquals() to compare the results and print a message if there is a mismatch.
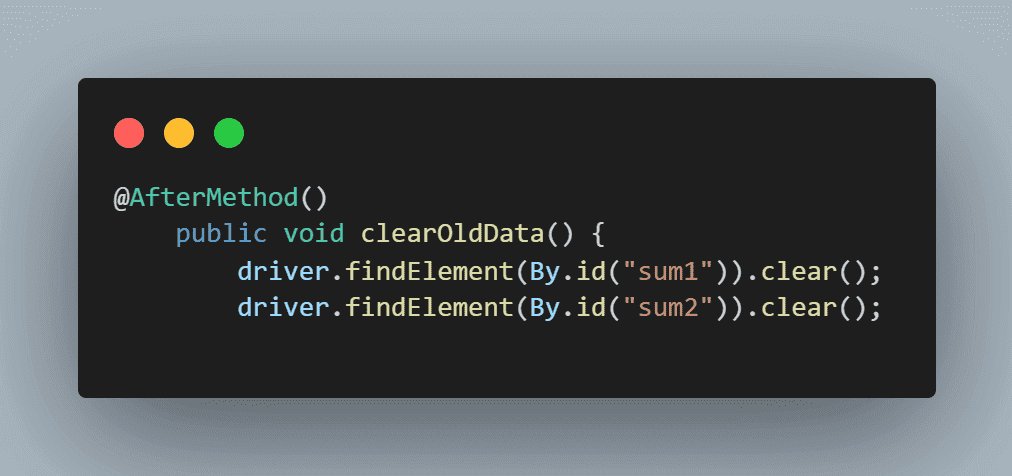
Step 12. The clearOldData() function helps to clear the data filled in the input text boxes as a part of previous test execution. Annotate it with @AfterMethod to execute after each test execution.
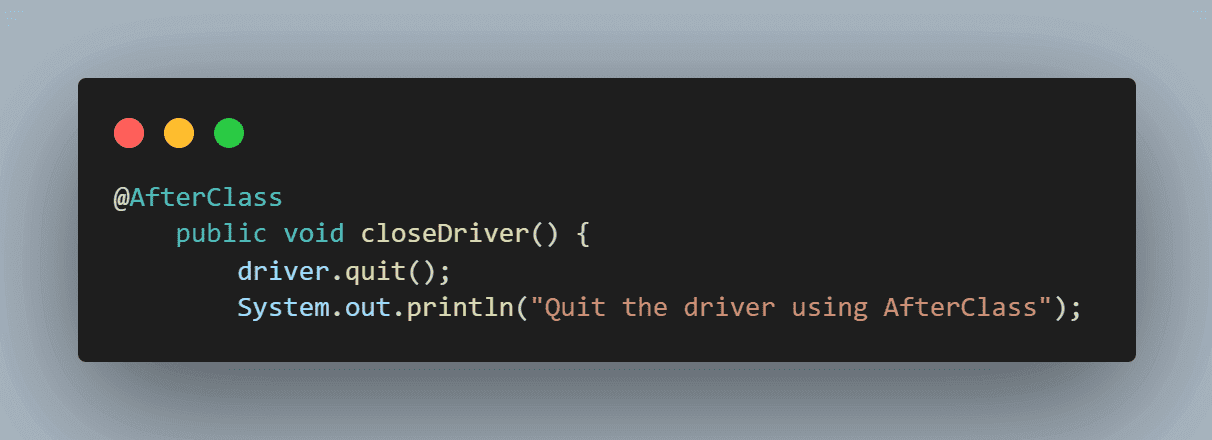
Step 13. To close the WebDriver instance after each execution, the closeDriver() method is added with @AfterClass annotation.
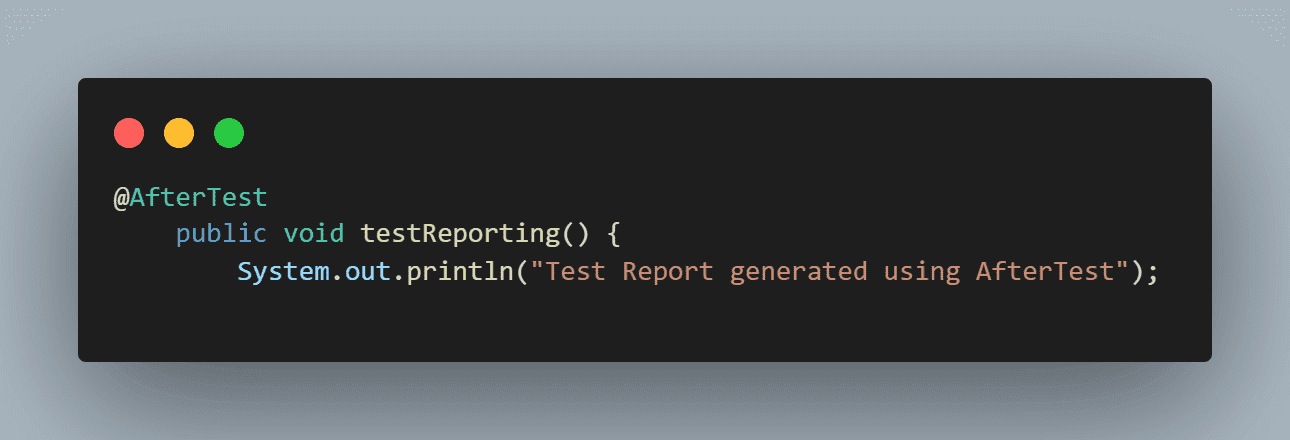
Step 14. Lastly, add a method testReporting() to signify the completion of the executed test run and provide the tester with a message that the test report is ready to be analyzed.
The two most important parts of the sample code above are the DataProvider method and the main test method.
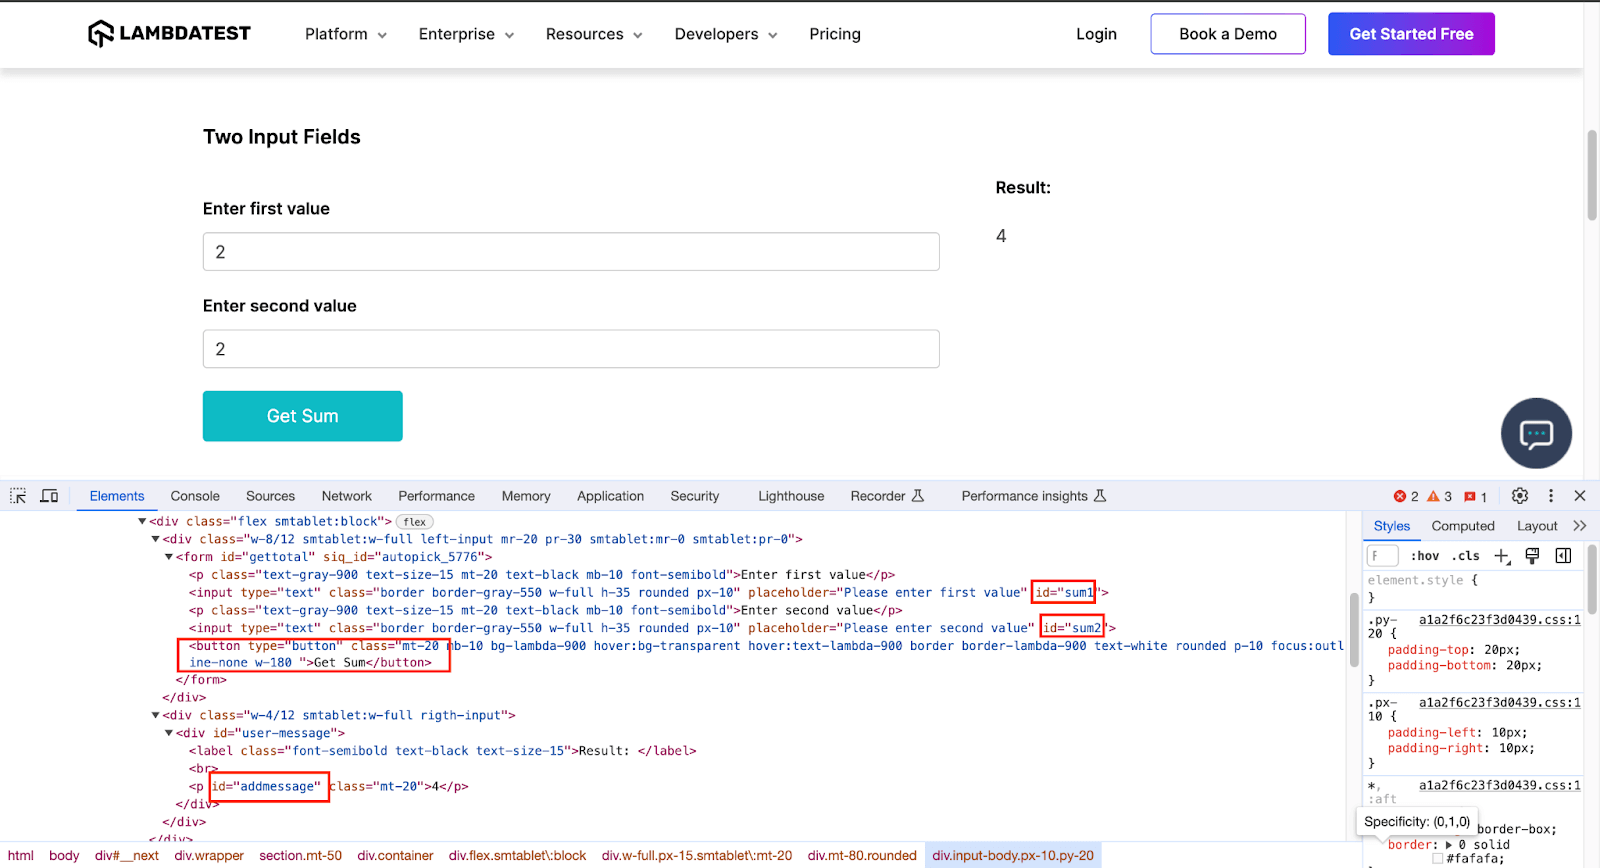
The above helps to find the web elements and enter data in the input boxes by clicking the button. To fetch web element locators, we navigate to the page, right-click, and then Inspect to find the locators as desired by any strategy like ID, XPath, CSS, etc.
This Selenium testing tutorial will help beginners interact with web elements in Selenium WebDriver.

You can Subscribe to the TestMu AI YouTube Channel and stay updated with the latest Selenium testing, Cypress testing, Playwright testing, and more tutorials.
Having understood the sample code, execute the class as a TestNG test to get output.
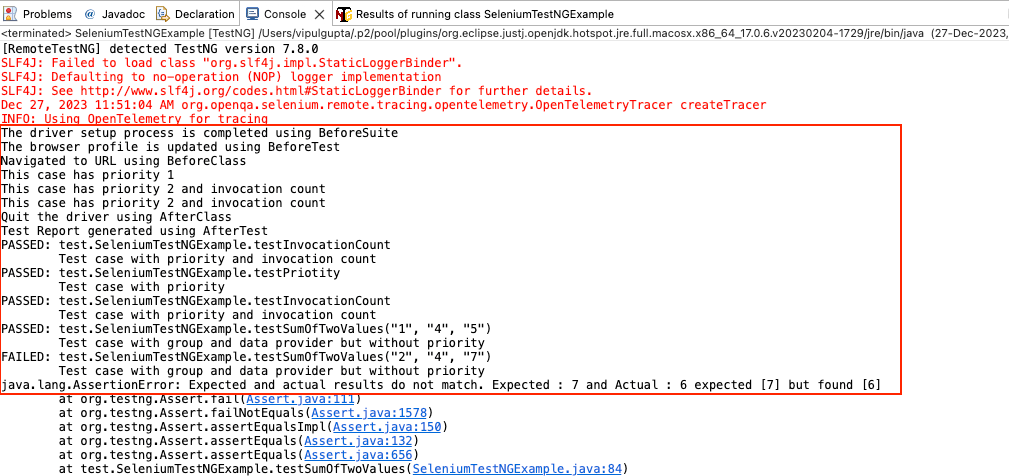
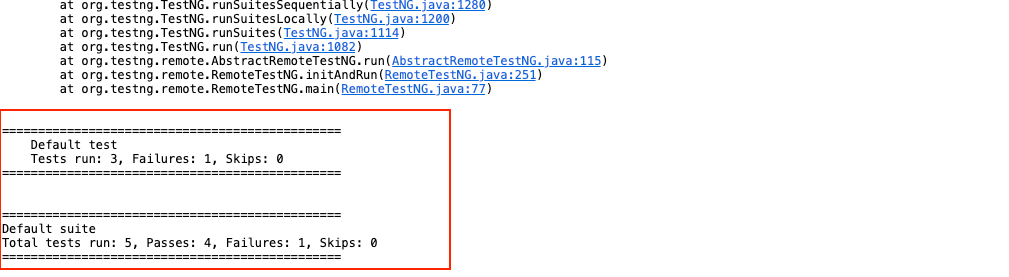
In these screenshots, we can see the test case gets executed as per priority, and the one with an invocation count of 2 gets executed two times.
You can see that Default test numbers show total Tests run: 3 since we have three @Test annotated test cases in the class, of which 1 has failures and hence Failures: 1.
However, the Default suite section shows the actual number of test cases along with the actual passed and failed number of cases.
Total tests run 5 -> testPriotity() executed 1 time + testInvocationCount() executed 2 times + testSumOfTwoValues() executed once for each data set (total 2 times) -> 1 + 2 + 2 = 5
For the failed test case, the log shows the message we added on the assert to appear in case of failure: Expected and actual results do not match. Expected: 7 and Actual: 6
Also, we can log in to the TestMu AI Dashboard to check the execution results for the automation script we have executed under the Automation > Web Automation tab.
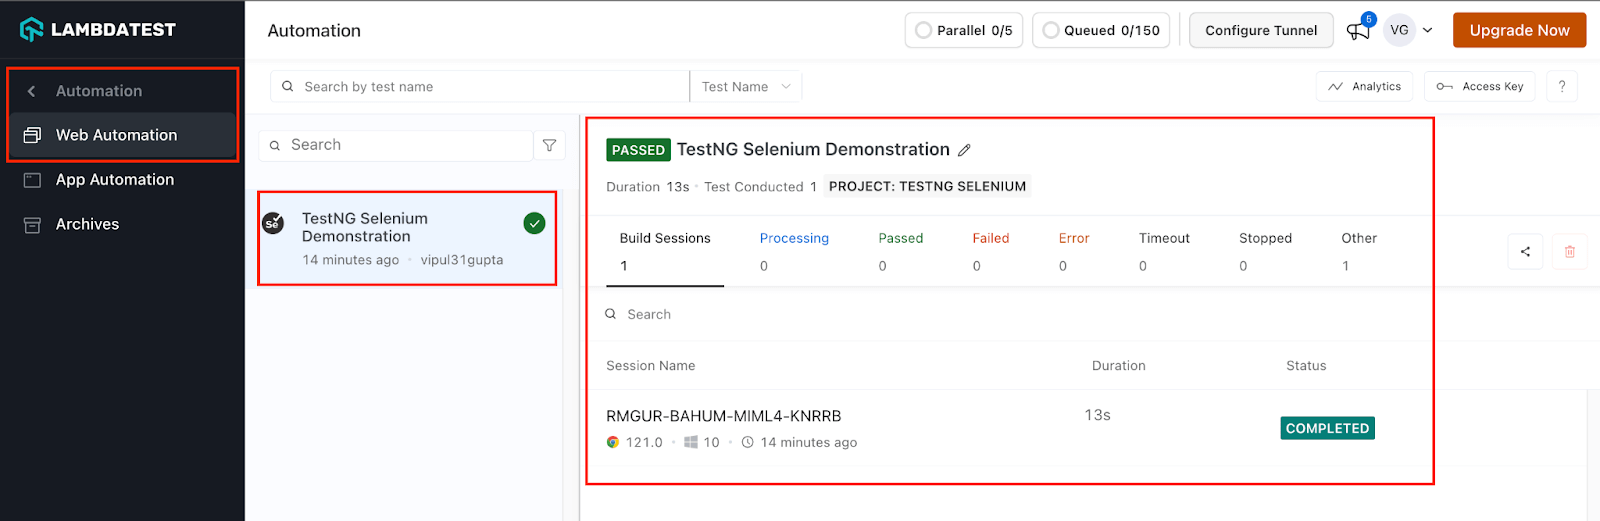
You can see more detailed logs and reporting for this run by clicking on the recent test run.
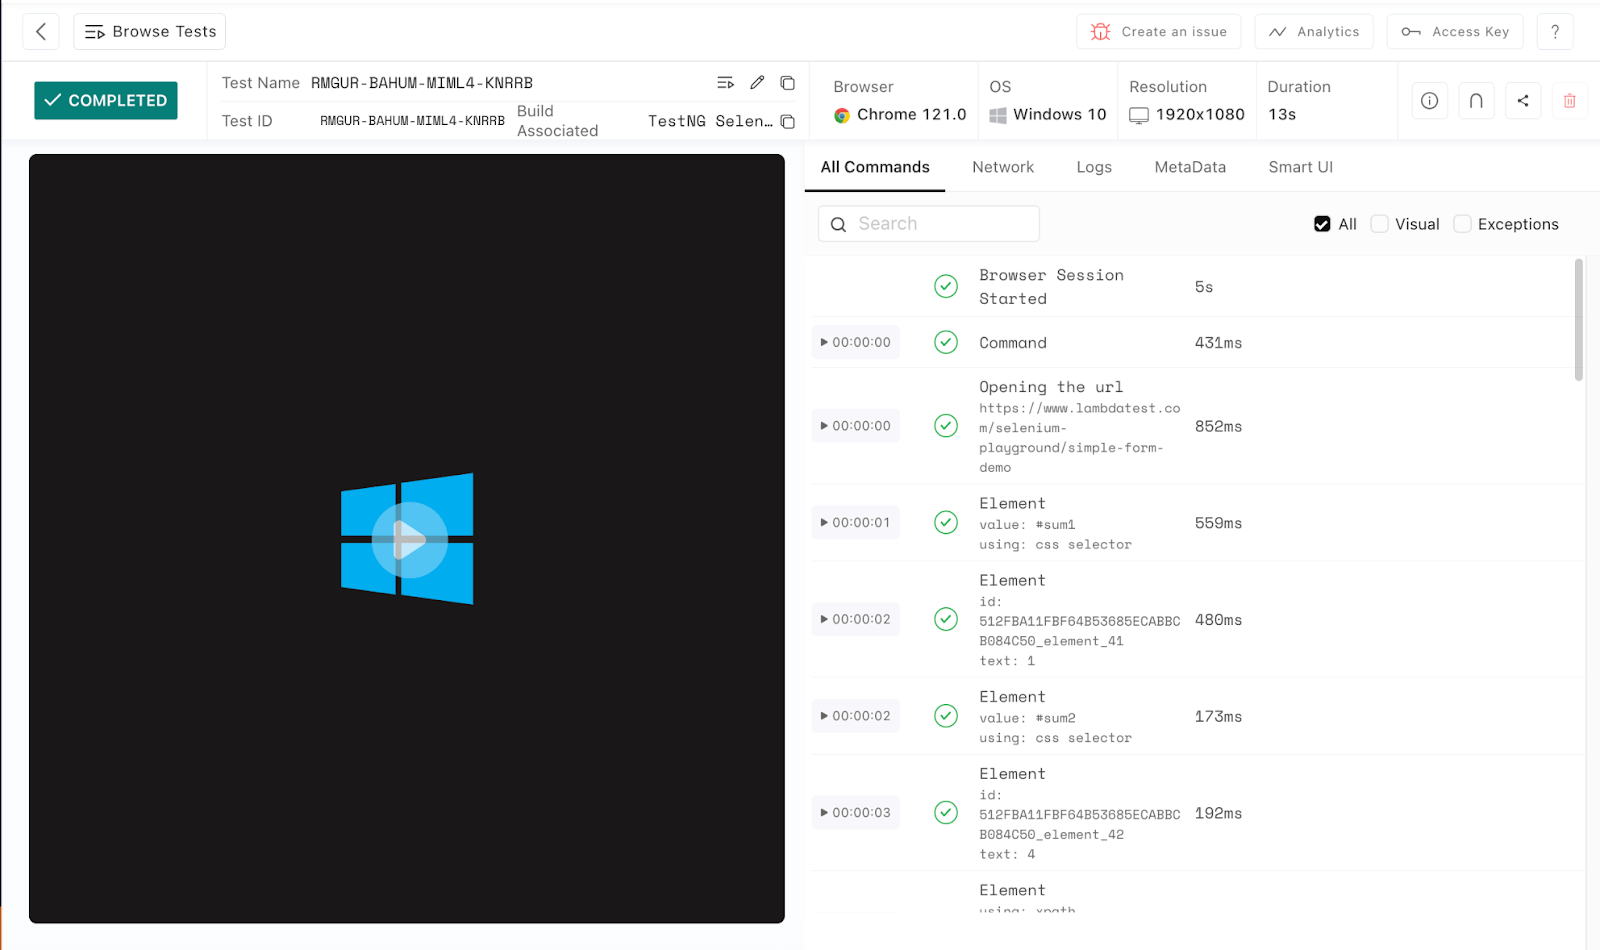
In addition to the Automation Logs and related info, the TestMu AI Dashboard now provides users with more detailed analytical views and data about test case execution and associated trends in graphical representation through the TestMu AI Analytics Dashboard available under the Insights > Analytics Tab.
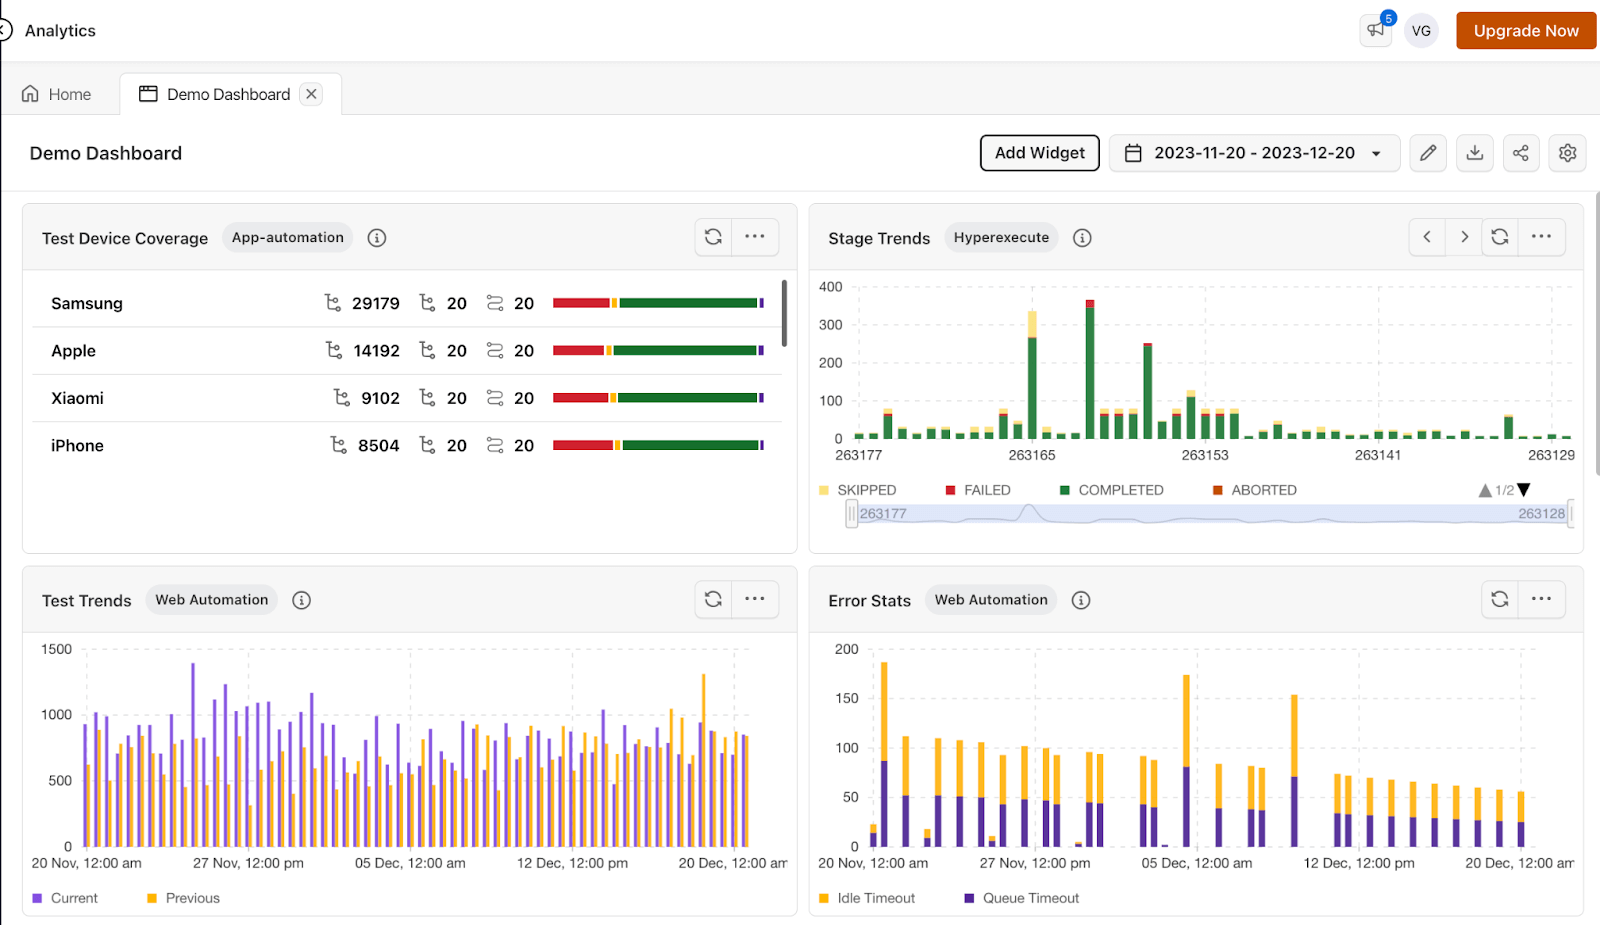
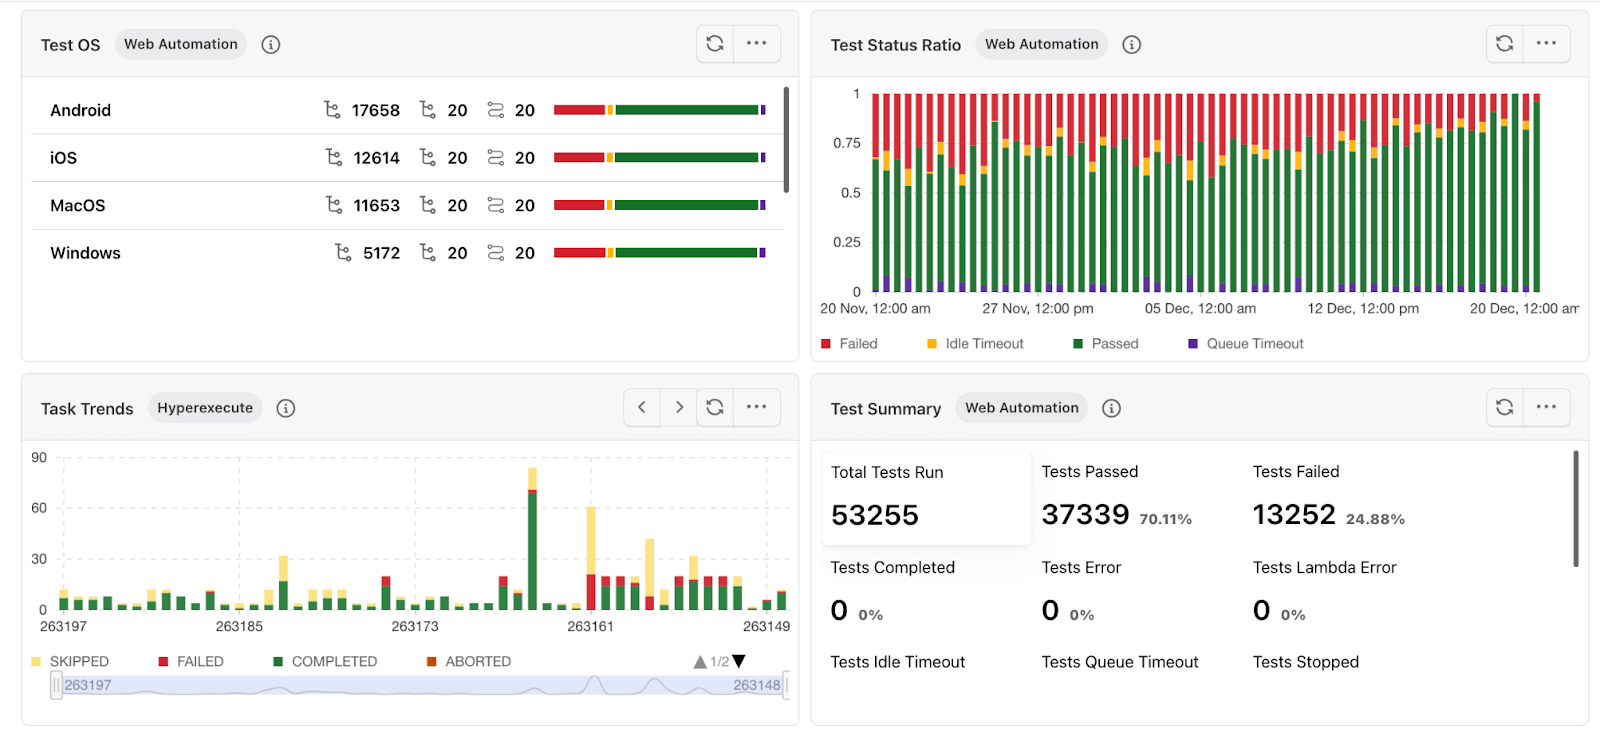
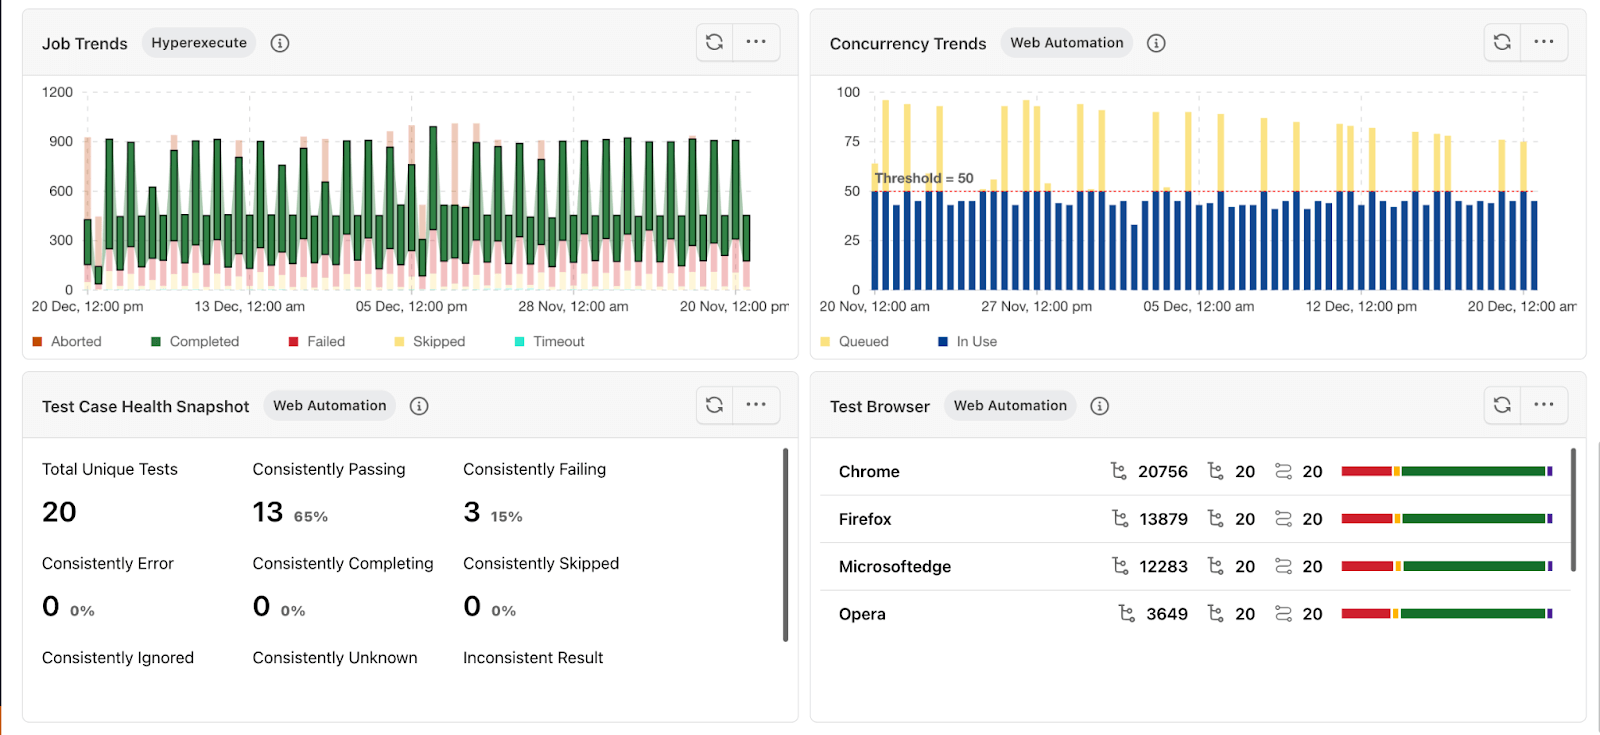
Analytics allows you to analyze test trends, resource utilization, error stats, and other useful QA metrics.

TestNG Reports Generation in Selenium
Every run writes index.html, emailable-report.html, and testng-results.xml into the test-output folder, or into target/surefire-reports under Maven, with no configuration. The TestNG reports chapter explains each file and how to publish them from Jenkins.
How Do AI Agents Work With TestNG Test Suites Now?
AI coding agents can now generate TestNG's @Test methods and @DataProvider data sets from a plain-language prompt, then parse the testng-results.xml report to decide which failed test to rerun.
This turns TestNG's XML-based reporting, built for a person to read, into a data source an agent can act on directly.
- Natural-language test generation: GitHub Copilot and Cursor draft @Test methods, @BeforeMethod setup, and @DataProvider arrays from a prompt describing the scenario, cutting first-draft time on repetitive suites.
- Report parsing: an MCP-connected agent reads testng-results.xml or the emailable-report.html file TestNG generates after a run, then decides the next action, such as rerunning only the entries listed in testng-failed.xml.
- Pipeline triggers: an agent wired into CI can invoke a TestNG suite through Maven or Gradle on its own, without a person starting the build.
The real limitation is test design, not execution. An agent that reads a failure report cannot tell whether a test failed because of a genuine defect or a flaky dependsOnMethods chain; TestNG only reports that an assertion did not match, not why the test was structured that way. Generating annotations and parsing reports automates the TestNG mechanics. Deciding which test cases the suite actually needs is still a human call.
Conclusion
With this TestNG in Selenium tutorial, we can easily conclude that using TestNG in Selenium makes the tests more structured and easy to maintain. Moreover, with the support of its additional features like reporting, DataProviders, more robust annotations, etc., over its predecessors, TestNG makes the automation testing experience user-friendly. Having said that, it is time for you to get started with your first TestNG in Selenium automation project, and remember to use the annotations wisely as they are to make life easier.
Happy Testing!!
Author

Vipul Gupta
Blogs: 24


Vipul Gupta is a Sr. Lead SDET at Zupee with over 9 years of experience in functional and automation testing. He has built 10+ automation projects from scratch covering web, API, and mobile applications. Vipul is skilled in Selenium, Appium, Rest Assured, Playwright, Java, Python, Pytest, BDD, TDD, Maven, Jenkins, TestNG, and JUnit. He has successfully led end-to-end QA efforts, including setting up teams from scratch and managing a 15-member QA team to ensure manual and automation testing run in parallel from day one. Vipul graduated in B.Tech CSE from CGC College of Engineering and is followed by 3,000+ QA and SDET professionals on LinkedIn, reflecting his strong influence in the testing community.
Reviewer

Srinivasan Sekar
Reviewer
Srinivasan Sekar is Director of Engineering at TestMu AI (formerly LambdaTest), where he leads engineering and open-source initiatives behind the Selenium and Appium automation grid and owns TestMu AI's MCP Server. A committer to Appium and a contributor to Selenium, WebdriverIO, Taiko, and AppiumTestDistribution, he brings over 15 years of experience in quality engineering and open-source technologies. He is the author of the Apress book 'The MCP Standard: A Developer's Guide to Building Universal AI Tools with the Model Context Protocol,' a Certified Kubernetes and Cloud Native Associate, and an international conference speaker. Before TestMu AI he spent over eight years at Thoughtworks as a Principal Consultant and Quality Architect. Srinivasan holds a B.Tech in Information Technology from Anna University.
On This Page
- What is the TestNG Framework?
- Why use TestNG with Selenium?
- Advantages of TestNG
- Installation and Setup of TestNG in Selenium
- TestNG Annotations and Attributes
- TestNG Priorities
- DataProviders in TestNG
- TestNG Assertions
- Demonstration: Using TestNG in Selenium
- TestNG Reports Generation in Selenium
- AI Agents and TestNG Suites
TestNG in Selenium FAQs
Did you find this page helpful?
More Related Blogs
TestMu AI forEnterprise
Get access to solutions built on Enterprise
grade security, privacy, & compliance
- Advanced access controls
- Advanced data retention rules
- Advanced Local Testing
- Premium Support options
- Early access to beta features
- Private Slack Channel
- Unlimited Manual Accessibility DevTools Tests