

Power Your Software Testing with AI Agents and Cloud
The Native AI-Agentic Cloud Platform to Supercharge Quality Engineering. Test Intelligently and Ship Faster.


- TestMu AI (Formerly LambdaTest)
- /
- Blog
- /
- Handling Alerts and Popups in Appium
Handling Alerts and Popups in Appium
In this tutorial, understand what are alerts and popups and how to handle alerts and popups in Appium for mobile automation testing.
Last Updated on:
It is common for any mobile application to show alerts and popups. These alerts and popups prompt users to grant various permissions, like contacts, notifications, etc. However, they need to be handled when performing mobile application testing. Though there are many approaches to handling these interactions, choosing the right tool and technique is important to ensure a seamless mobile app testing experience.
Handling alerts and popups in Appium is essential for achieving efficient test execution, enhanced test coverage, and more. In this Appium tutorial, let’s understand the different types of alerts and popups in Appium and how to handle them in our mobile automated tests.
Key Takeaways
- Mobile app alerts are small windows with limited options such as OK or Cancel, while popups are separate windows over the app that can contain forms, videos, or other interactive elements.
- An unhandled popup holds focus until the popup is accepted or dismissed, so an Appium test that tries to find the next app element fails with a NoSuchElementException.
- Setting the Appium capability autoGrantPermissions to true grants all permissions to an Android app after installation, but autoGrantPermissions does not work when noReset is set to true.
- On iOS, setting the Appium capability autoAcceptAlerts to true accepts all app permission popups automatically, and setting autoDismissAlerts to true dismisses those popups instead.
- Appium's openNotifications() method works only with AndroidDriver, so iOS tests open the notification panel with a swipe gesture built from the PointerInput and Sequence classes.
- Appium tests verify alert notifications by locating the alert element and asserting its text, either directly on the alert message or after opening the notification panel.
- TestMu AI runs Appium tests for alerts and popups on an online device farm of real Android and iOS devices, and the App Automation Dashboard shows step-by-step details with a test video.
What is Appium?
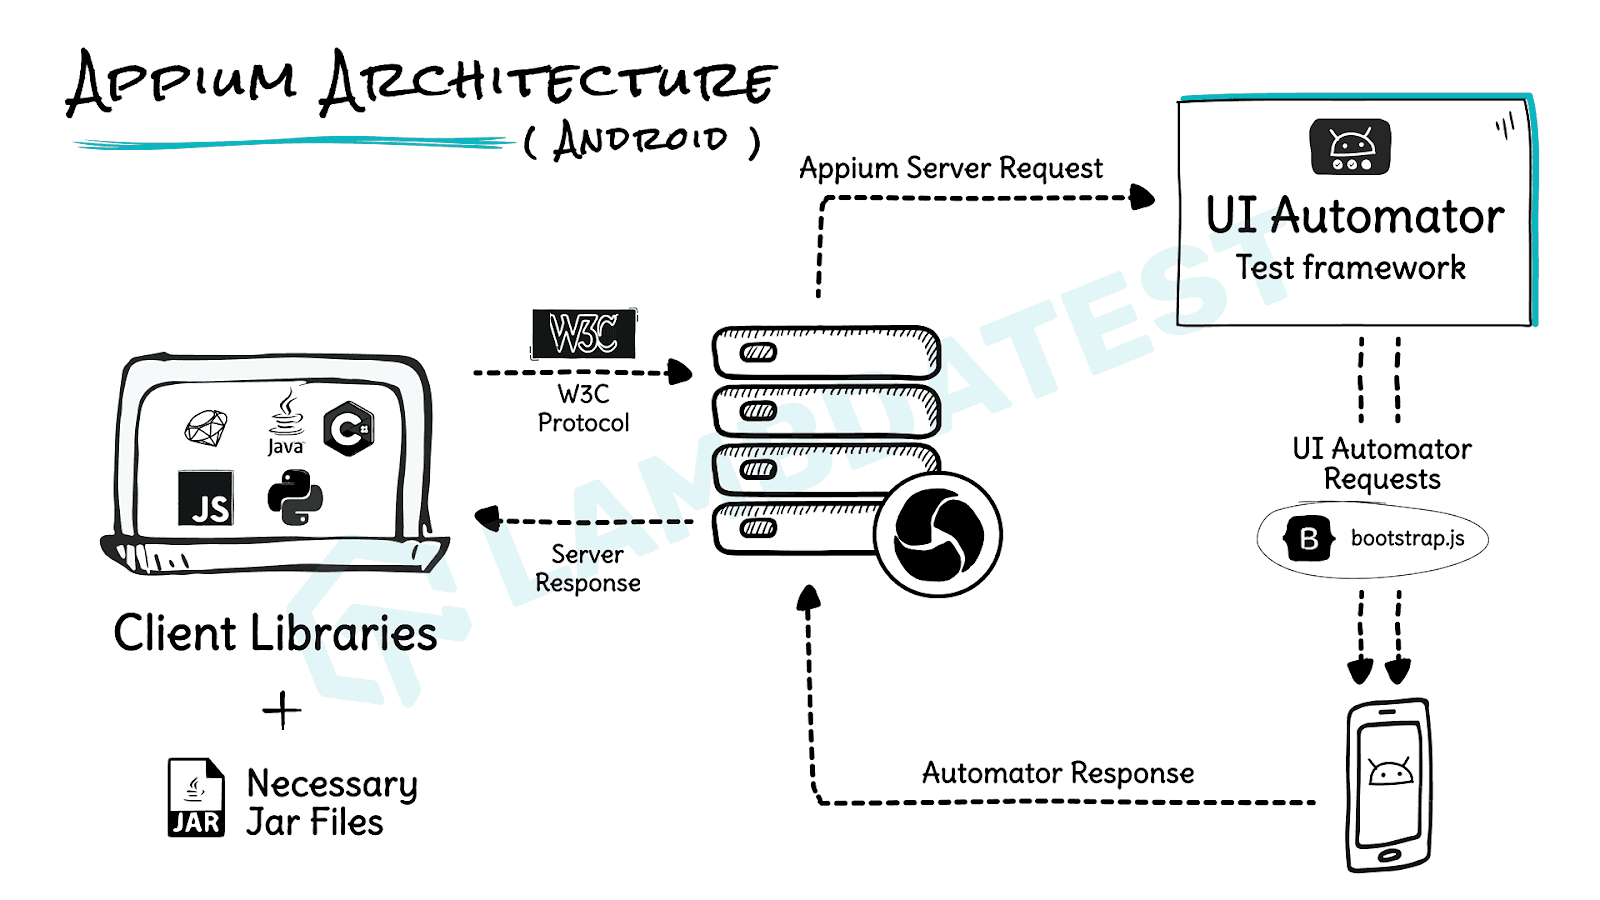
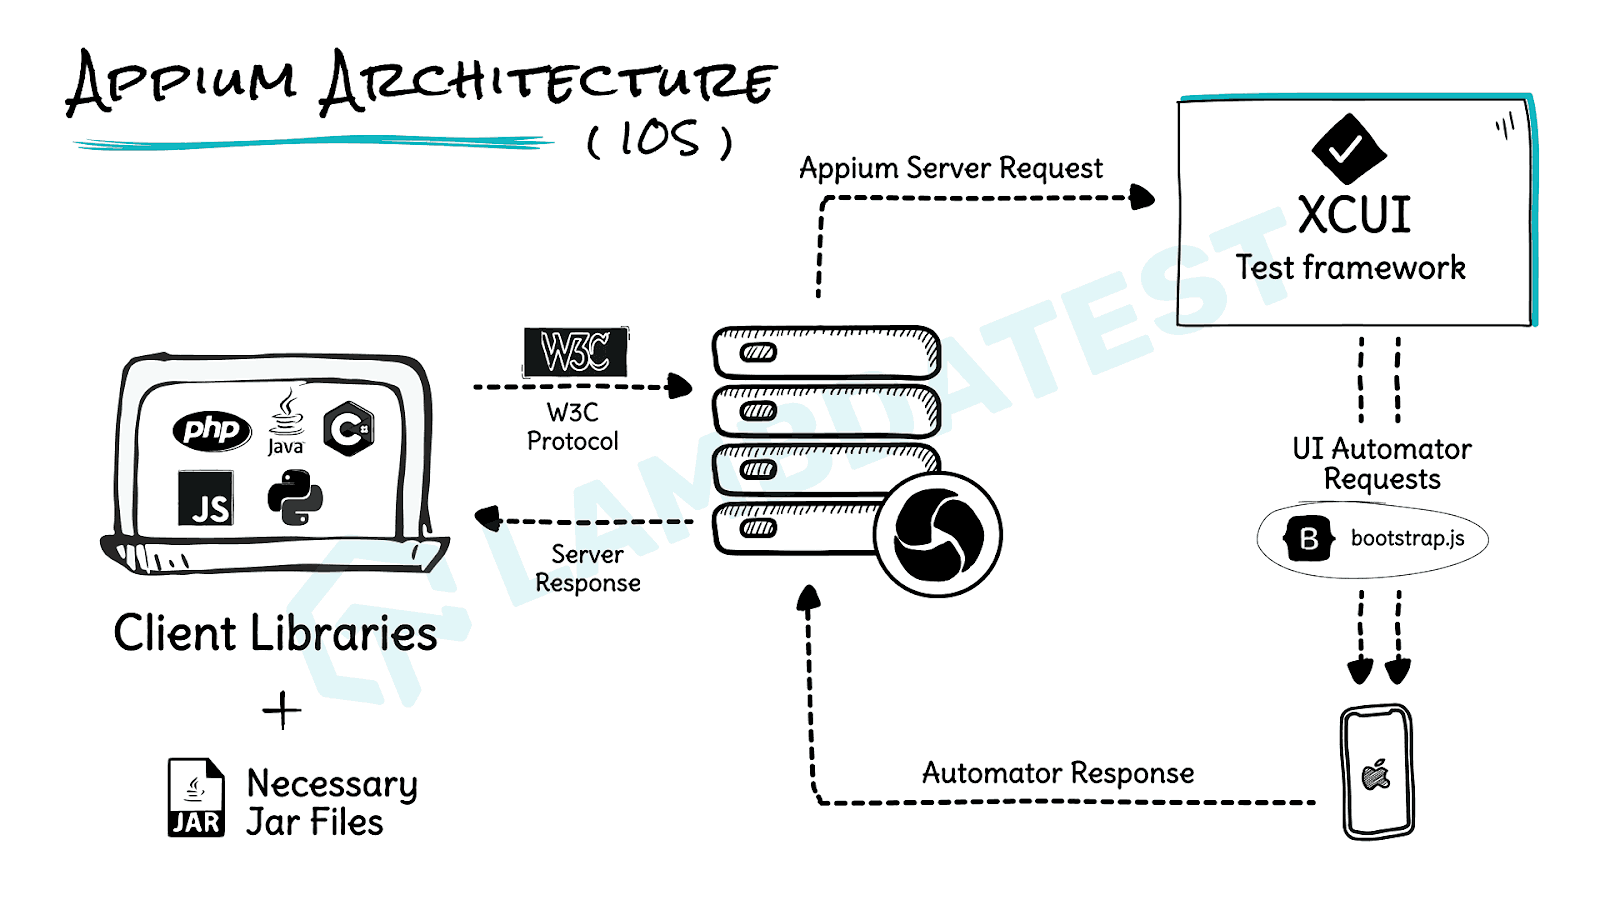
Appium is an open-source test automation framework used to write automated tests for mobile applications. It works like a client/server setup, where the server launches different mobile apps, and the client is used to write the test scripts in the desired programming languages.
It supports multiple languages like Java, JavaScript, Python, etc., enabling testers to write test scripts for Android and iOS environments. This makes it a great solution to automate the mobile app testing process.
The Appium architecture for Android and iOS is shown below.
Android:
iOS:
Moreover, Appium offers advanced features like automating touch actions, swipe, zoom, pinch, etc., which makes it a great choice for mobile automation tests. It supports physical and virtual devices so that testers can run the tests on real and emulated mobile devices.
If you are looking to get started with Appium for mobile app testing, check out the below mobile app testing tutorial that covers how to perform Appium automation with examples.
Subscribe to our TestMu AI YouTube Channel for the latest updates on tutorials around mobile app testing, real device cloud, and more.
Alerts and Popups: An Overview
Before handling alerts and popups in Appium, let’s first understand what they are and how they appear in Android and iOS applications.
- Alerts: These are small windows that appear on the screen to display a message or confirmation. They typically have limited options, like “OK” or “Cancel.”
- Popups: Separate windows that appear on top of the current app or web page. Popups can be more complex, containing forms, videos, or other interactive elements.
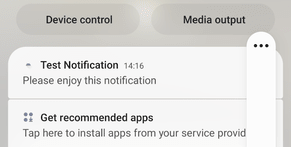
Alerts in Android
Below is an example of alerts from the Proverbial app by TestMu AI.
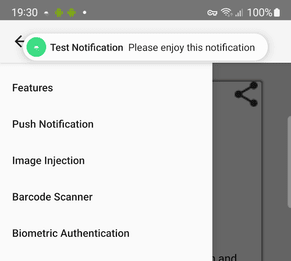
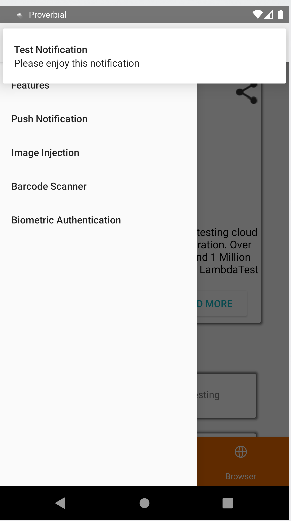
You can also notice the alert notifications appearing in the notification panel.
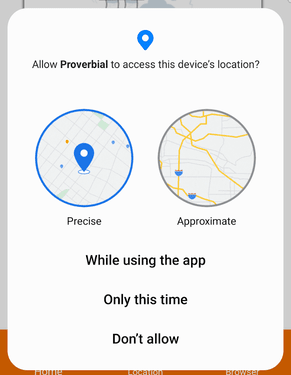
Popups in Android
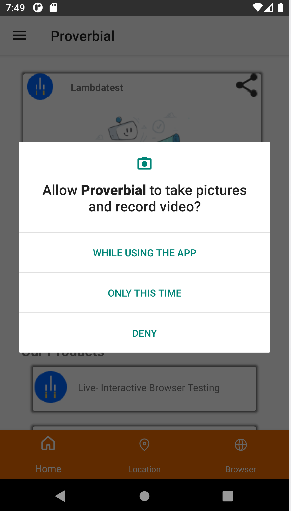
Below is an example of popups asking for permission from the user.
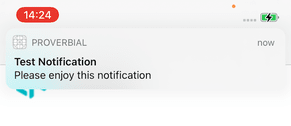
Alerts in iOS
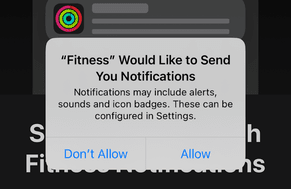
Popups in iOS

Note: Test alerts and popups in Appium on real Android and iOS devices. Try TestMu AI Today!
Why Handle Alerts and Popups?
In the case of popups, when the mobile application starts, the focus is set on the popup window, and until the popup is accepted or dismissed, the focus is not set on the actual application.
These popups need to be handled to move the control to the app so we can simulate the actual user actions on the mobile application. The same thing applies to alerts.
We can handle alerts and popups in the following ways.
- Grant all permission for the Android application.
- Allow or deny all permissions for the iOS application.
- Allow or deny the alert/popup by locating the element and clicking on it accordingly.
Handling alerts and popups is equally important and critical when testing mobile applications. However, it is a tedious task when done manually. To reduce manual efforts, Appium, one of the popular mobile app testing tools, provides a wide range of functionalities and methods to handle alerts and popups in an automated way.
In the next section, we will look at how to handle alerts and popups in Appium.
How to Handle Alerts and Popups in Appium?
Before demonstrating alerts and popups in Appium, let’s look at the tools used in writing and running the tests:
- Programming language: Java
- Mobile automation framework: Appium (Server Version 2.5.4, Appium Java client 9.2.2)
- Test runner: TestNG
- Build tool: Maven
- Application under test: Android Proverbial app and iOS Proverbial app
To run the tests, we will leverage cloud-based testing platforms like TestMu AI. It is an AI-powered test orchestration and execution platform that lets you perform mobile automation testing at scale on an online device farm of real Android and iOS devices. Other than Appium, you can also automate mobile apps using frameworks like Espresso and XCUITest.

Test Scenario
Let’s discuss the test scenario to demonstrate handling alerts and popups in Appium.
- Upon loading the application, the first step is to accept any initial popup alert that may appear. This ensures that the automated test begins without interruption.
- Click on the hamburger menu (three lines) on the left top to open the menu. Click on the Push Notifications menu. It will generate an alert, which will be displayed at the top of the application. We need to check if this alert is generated.
- Next, we will verify the text of the alert notification by opening the notification panel.
Setup
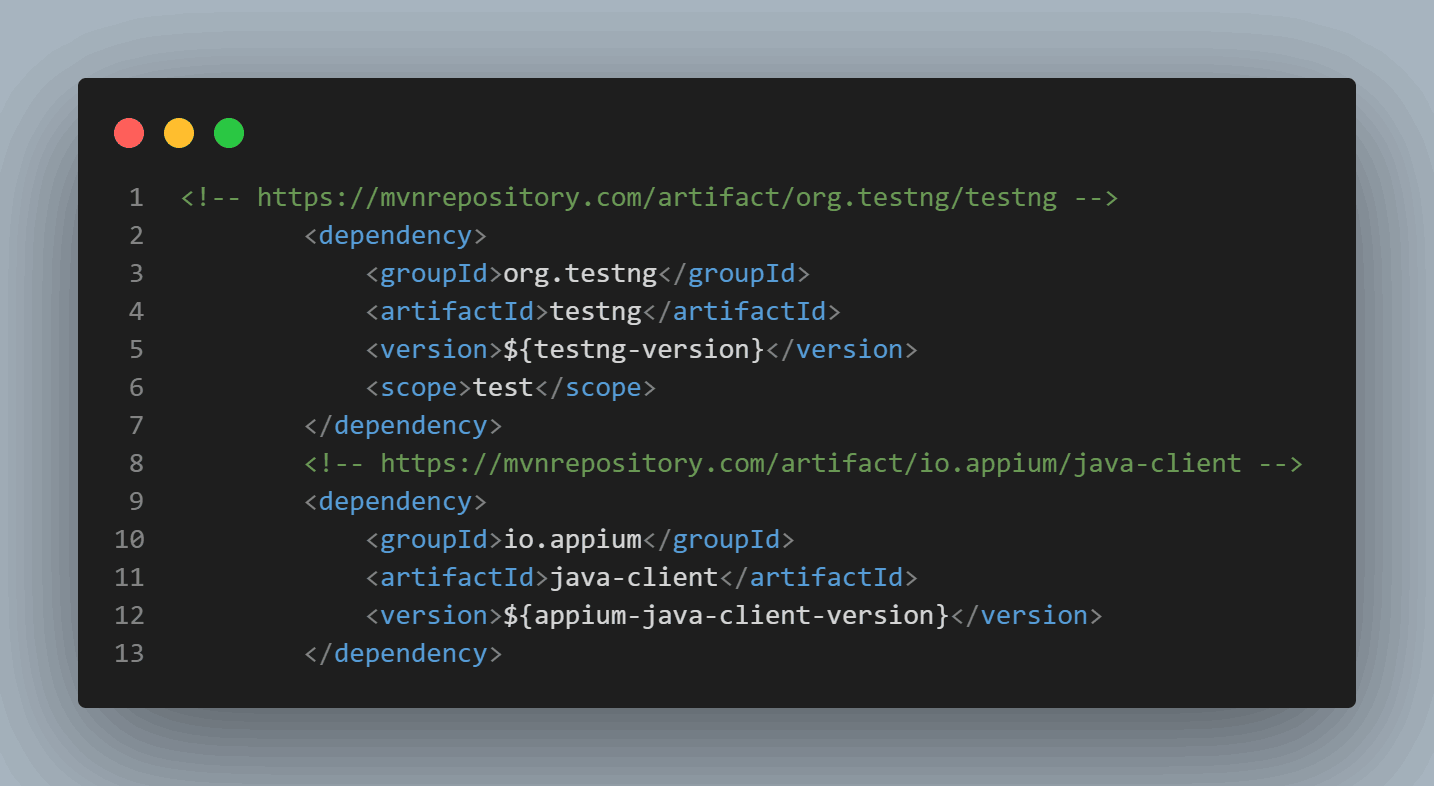
First, create a Maven project and add the Appium Java client and TestNG dependencies.
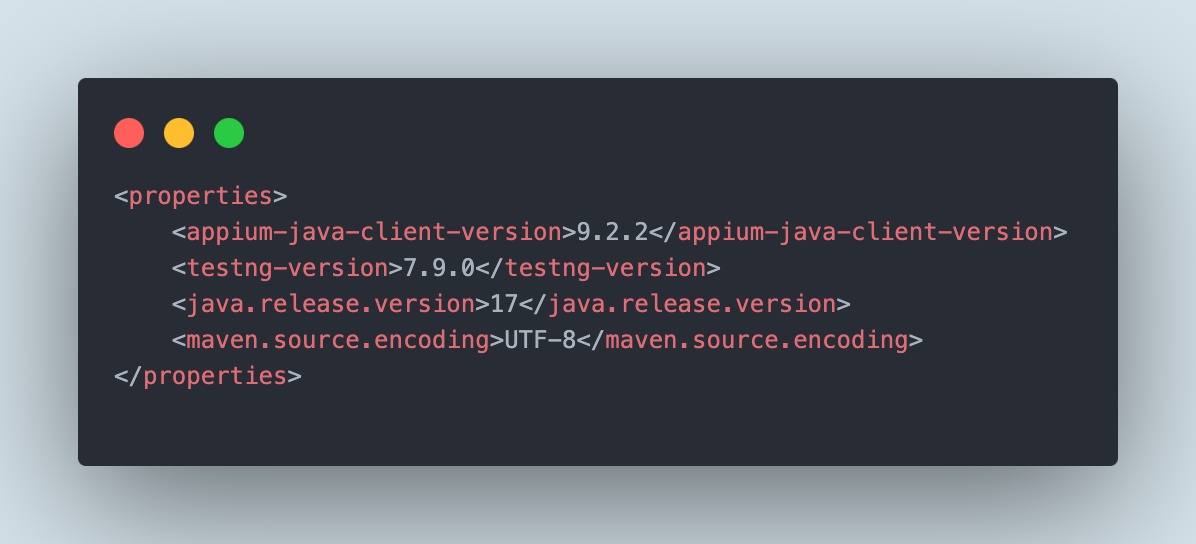
The versions of the dependencies are set in a separate <properties> block.
When the app starts, a popup message asks the user to provide permission to take pictures and record videos. We can only use the app once we accept this popup. This helps maintain the versions, so if we need to update them, we can do it easily without searching through the pom.xml file.
<?xml version="1.0" encoding="UTF-8"?>
<project xmlns="http://maven.apache.org/POM/4.0.0"
        xmlns:xsi="http://www.w3.org/2001/XMLSchema-instance"
        xsi:schemaLocation="http://maven.apache.org/POM/4.0.0 http://maven.apache.org/xsd/maven-4.0.0.xsd">
   <modelVersion>4.0.0</modelVersion>

   <groupId>io.github.mfaisalkhatri</groupId>
   <artifactId>react-native-app-mobile-testing</artifactId>
   <version>1.0-SNAPSHOT</version>

   <properties>
       <appium-java-client-version>9.2.2</appium-java-client-version>
       <testng-version>7.9.0</testng-version>
       <lombok-version>1.18.32</lombok-version>
       <maven.compiler.version>3.13.0</maven.compiler.version>
       <surefire-version>3.2.5</surefire-version>
       <commons-io.version>2.16.0</commons-io.version>
       <java.release.version>17</java.release.version>
       <maven.source.encoding>UTF-8</maven.source.encoding>
       <suite-xml>testng.xml</suite-xml>
       <argLine>-Dfile.encoding=UTF-8 -Xdebug -Xnoagent</argLine>
       <project.build.sourceEncoding>UTF-8</project.build.sourceEncoding>
   </properties>

   <dependencies>
       <!-- https://mvnrepository.com/artifact/org.testng/testng -->
       <dependency>
           <groupId>org.testng</groupId>
           <artifactId>testng</artifactId>
           <version>${testng-version}</version>
           <scope>test</scope>
       </dependency>
       <!-- https://mvnrepository.com/artifact/io.appium/java-client -->
       <dependency>
           <groupId>io.appium</groupId>
           <artifactId>java-client</artifactId>
           <version>${appium-java-client-version}</version>
       </dependency>
       <!-- https://mvnrepository.com/artifact/org.projectlombok/lombok -->
       <dependency>
           <groupId>org.projectlombok</groupId>
           <artifactId>lombok</artifactId>
           <version>${lombok-version}</version>
           <scope>provided</scope>
       </dependency>
       <!-- https://mvnrepository.com/artifact/commons-io/commons-io -->
       <dependency>
           <groupId>commons-io</groupId>
           <artifactId>commons-io</artifactId>
           <version>${commons-io.version}</version>
       </dependency>
   </dependencies>

   <build>
       <plugins>
           <plugin>
               <groupId>org.apache.maven.plugins</groupId>
               <artifactId>maven-compiler-plugin</artifactId>
               <version>${maven.compiler.version}</version>
               <configuration>
                   <release>${java.release.version}</release>
                   <encoding>${maven.source.encoding}</encoding>
                   <forceJavacCompilerUse>true</forceJavacCompilerUse>
               </configuration>
           </plugin>
           <plugin>
               <groupId>org.apache.maven.plugins</groupId>
               <artifactId>maven-surefire-plugin</artifactId>
               <version>${surefire-version}</version>
               <executions>
                   <execution>
                       <goals>
                           <goal>test</goal>
                       </goals>
                   </execution>
               </executions>
               <configuration>
                   <useSystemClassLoader>false</useSystemClassLoader>
                   <properties>
                       <property>
                           <name>usedefaultlisteners</name>
                           <value>false</value>
                       </property>
                   </properties>
                   <suiteXmlFiles>
                       <suiteXmlFile>${suite-xml}</suiteXmlFile>
                   </suiteXmlFiles>
                   <argLine>${argLine}</argLine>
               </configuration>
           </plugin>
       </plugins>
   </build>

</project>
Once the dependencies are updated, we will proceed to write the automated tests.

Implementation
In this section, we will look at how to handle alerts and popups in Android and iOS applications.
Handling Alerts in the Android Application
As mentioned earlier in the test scenario, after the application opens, we will click on the hamburger menu to open the left menu bar. Then, we will click on the Push Notifications menu.
It will show a push notification alert on the top of the screen.
We will check if the alert is displayed. Finally, the notification text will be verified by opening the notification panel and swiping down the screen.
Here is the @Test method:
public class ProverbialAppNotificationTests extends BaseTest {

   @Test
   public void testNotification () {
       HomePage homePage = new HomePage (driverManager);
       homePage.openMenu ();
       homePage.clickPushNotificationMenu ();
       NotificationPage notificationPage = new NotificationPage (driverManager);
       notificationPage.openNotificationPanel ();
       assertEquals (notificationPage.getFirstNotificationTitle (), "Test Notification");
       assertEquals (notificationPage.getFirstNotificationText (), "Please enjoy this notification");
   }

}
The automation script written to test the alert is quite clear. The following lines of code will open the hamburger menu from the HomePage. Click on the Push Notification link to generate a new alert notification and display it at the top of the app.
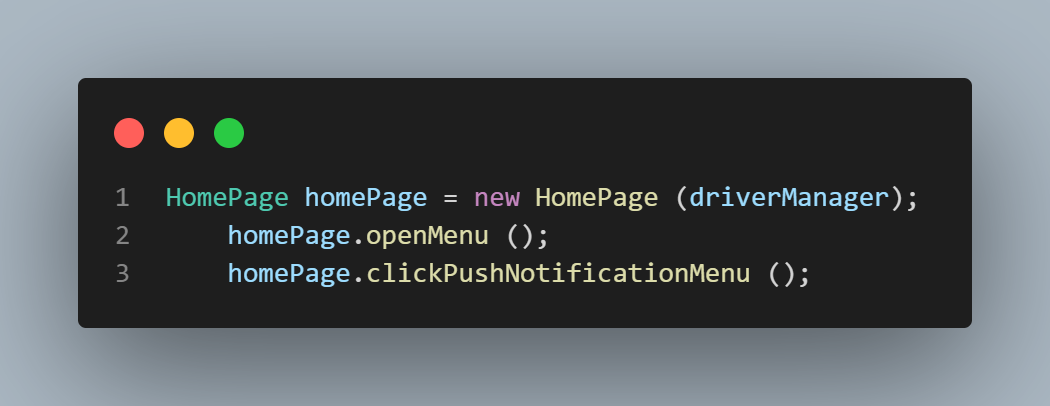
Next, the following line of code will open the notification panel and assert the text of the alert message.
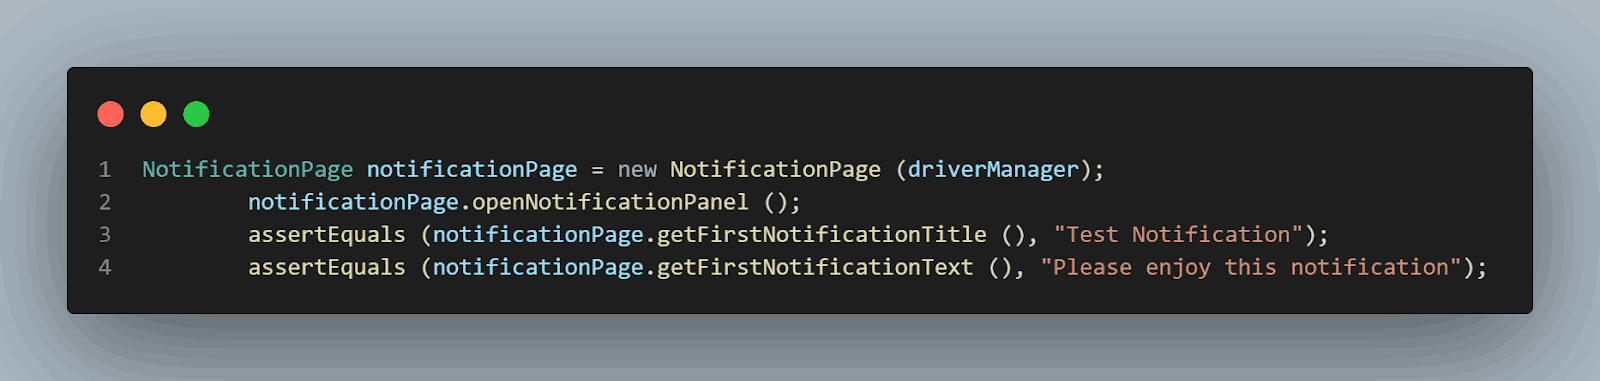
The code snippet below helps open the notification panel.
The code snippet shows the working of the openNotificationPanel() method.
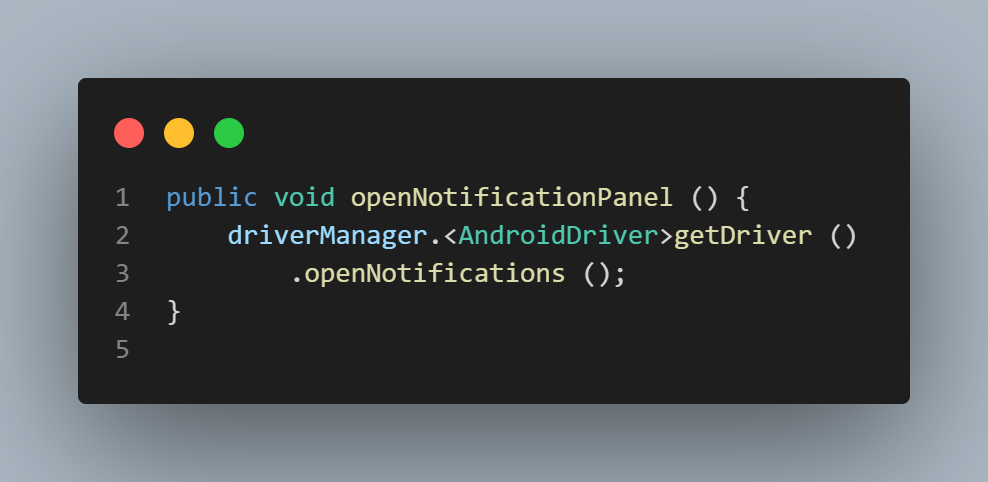
Note: The openNotifications() method is available for AndroidDriver only, but it does not work with iOSDriver.
Handling Popups in the Android Application
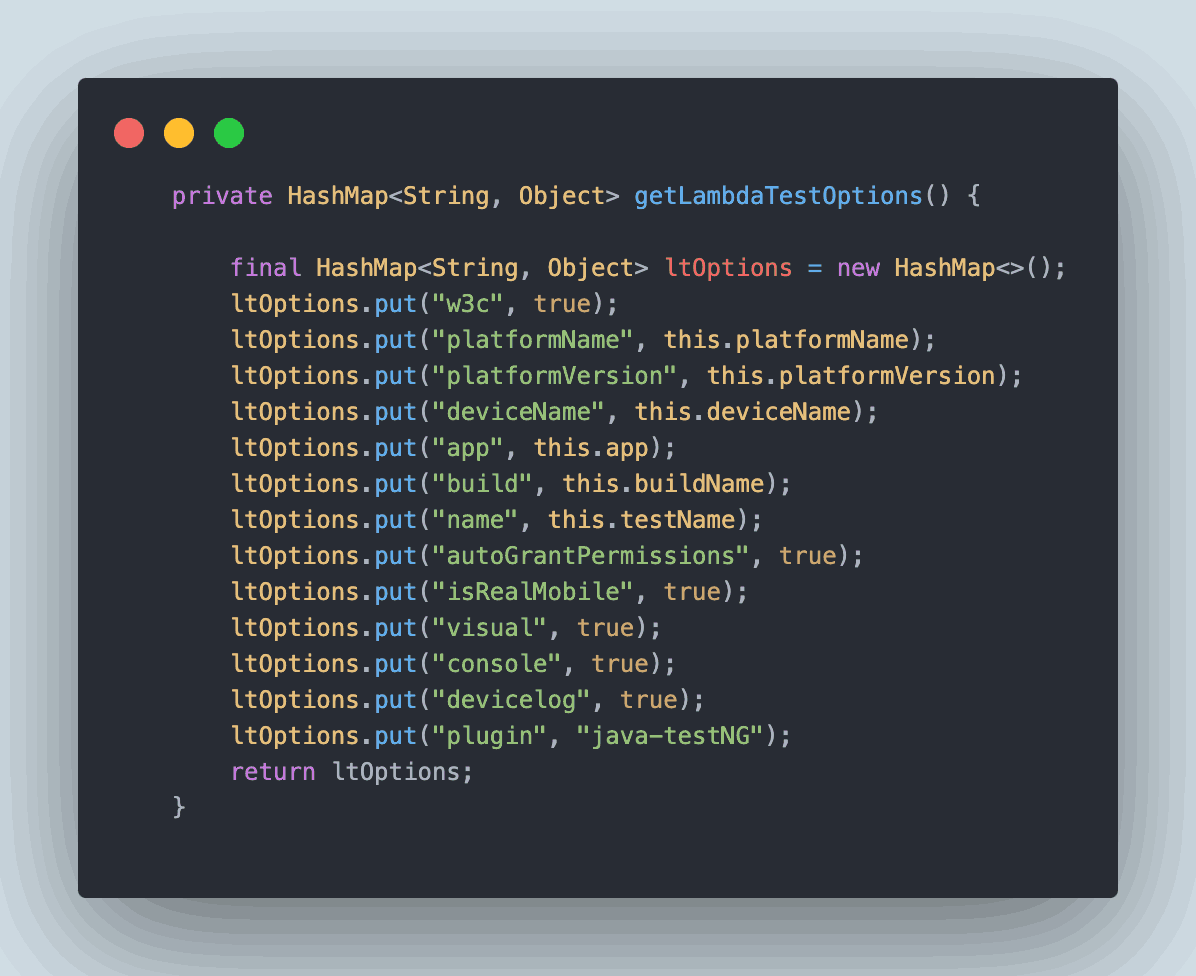
You can handle popups using the Appium desired capabilities autoGrantPermissions to true. This capability will automatically grant all the permissions to the Android app after it is installed on the respective device.
This capability can be added to the automated tests configuration using the DesiredCapabilities class. Appium uses W3C Protocol with its latest versions. Hence, we can set these capabilities using the W3C protocol. The desired capabilities can be set as follows:
private HashMap<String, Object> getLambdaTestOptions() {

   final HashMap<String, Object> ltOptions = new HashMap<>();
   ltOptions.put("w3c", true);
   ltOptions.put("platformName", this.platformName);
   ltOptions.put("platformVersion", this.platformVersion);
   ltOptions.put("deviceName", this.deviceName);
   ltOptions.put("app", this.app);
   ltOptions.put("build", this.buildName);
   ltOptions.put("name", this.testName);
   ltOptions.put("autoGrantPermissions", true);
   ltOptions.put("isRealMobile", true);
   ltOptions.put("visual", true);
   ltOptions.put("console", true);
   ltOptions.put("devicelog", true);
   ltOptions.put("plugin", "java-testNG");

   return ltOptions;
}
You can use the TestMu AI Automation Capabilities Generator, which comes in handy for setting the desired capabilities. It supports all the capabilities and provides an auto-generated code as we set the capabilities from the UI. It also supports the latest Appium 2 version with W3C Protocol.
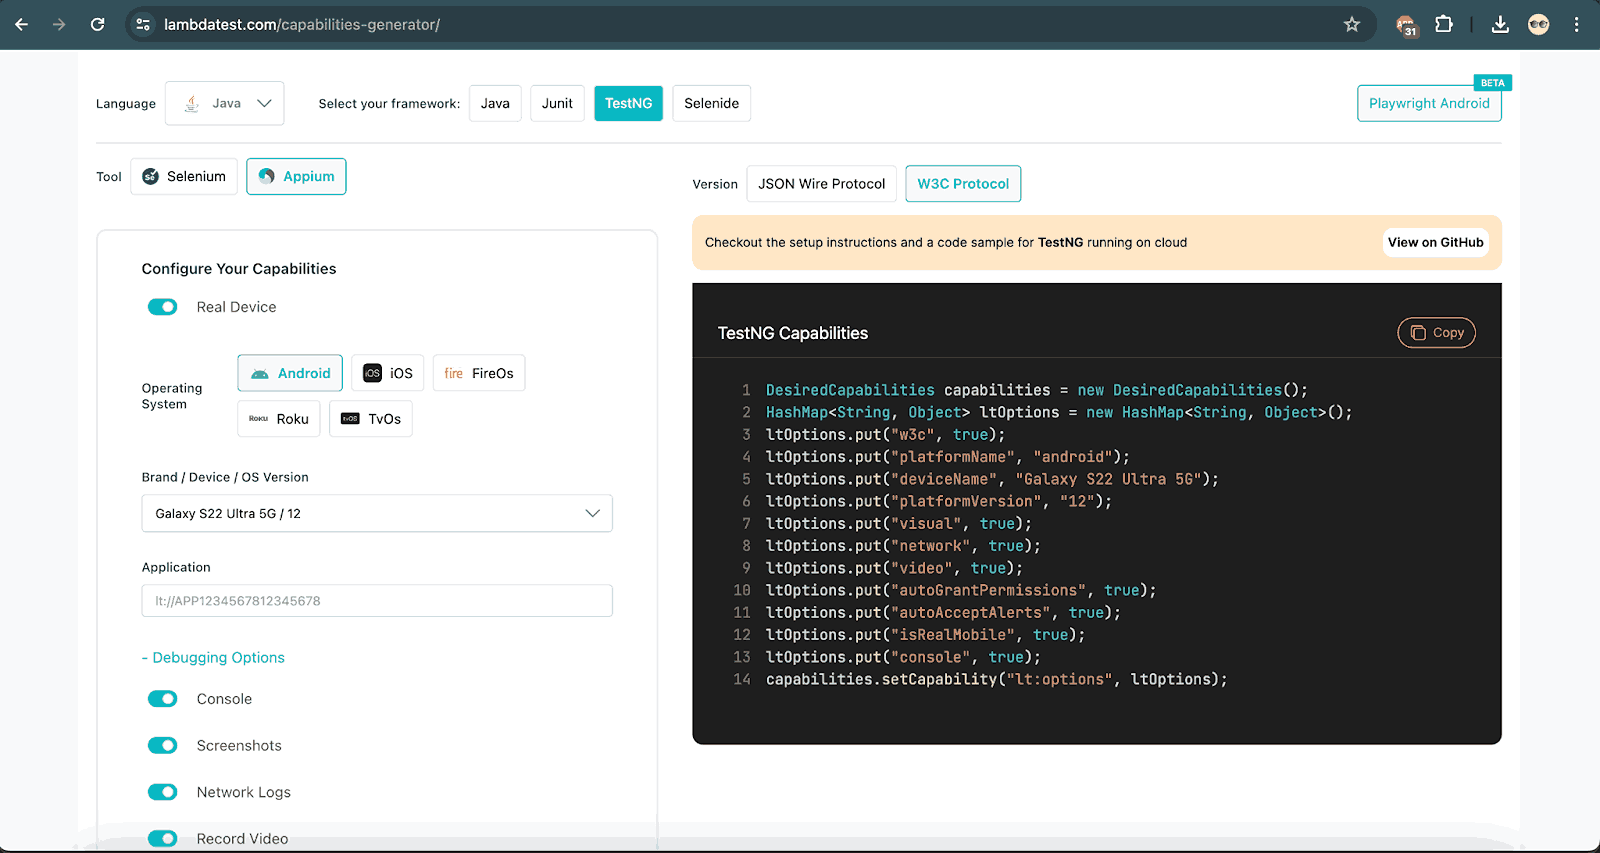
Looking at the code above, you will notice that we have used the following line of code to grant all permissions.
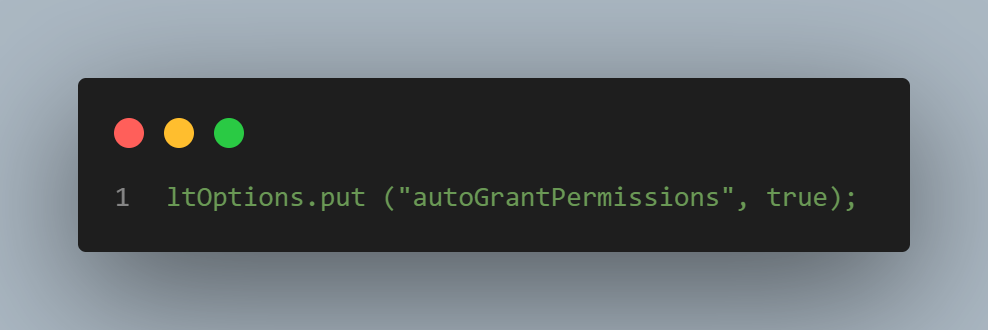
Note: If the noReset capability is set to true, the autoGrantPermissions capability doesn’t work. Hence, it should be noted that we don’t provide the noReset capability along with autoGrantPermissions.
Handling Alerts in the iOS Application
Let’s now write a test to verify the alert in the iOS application. We will perform the same steps we did for the Android application.
Here is the @Test method:
@Test
public void notificationTest () {
   clickOn (homePage.notificationBtn ());
   assertTrue (homePage.notificationBar ()
       .isDisplayed ());
   NotificationPage notificationPage = new NotificationPage (driverManager);
   notificationPage.openNotificationPanel ();
   assertTrue (notificationPage.getNotificationText ()
       .contains ("Test Notification, Please enjoy this notification"));

}
We will click the notification button to assert that the alert notification is present.
The following lines of code help us achieve this:
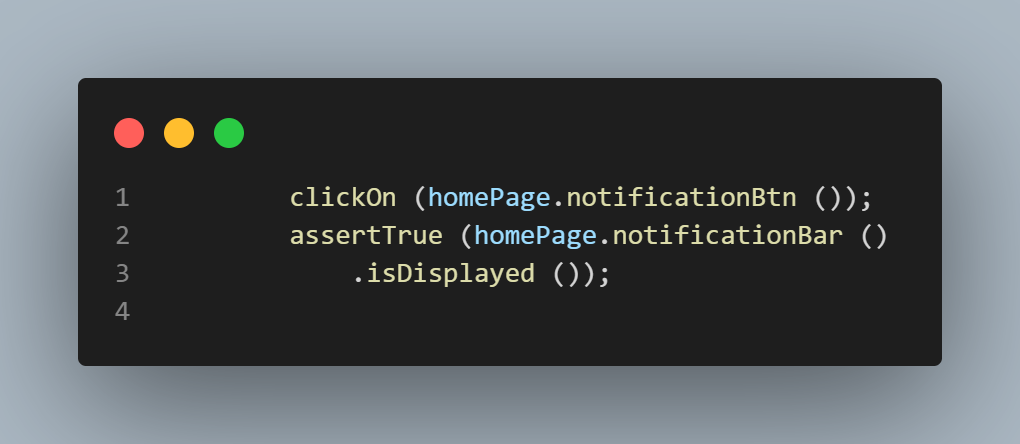
Next, we will open the notifications panel and check if it contains the text Test Notification, Please enjoy this notification.
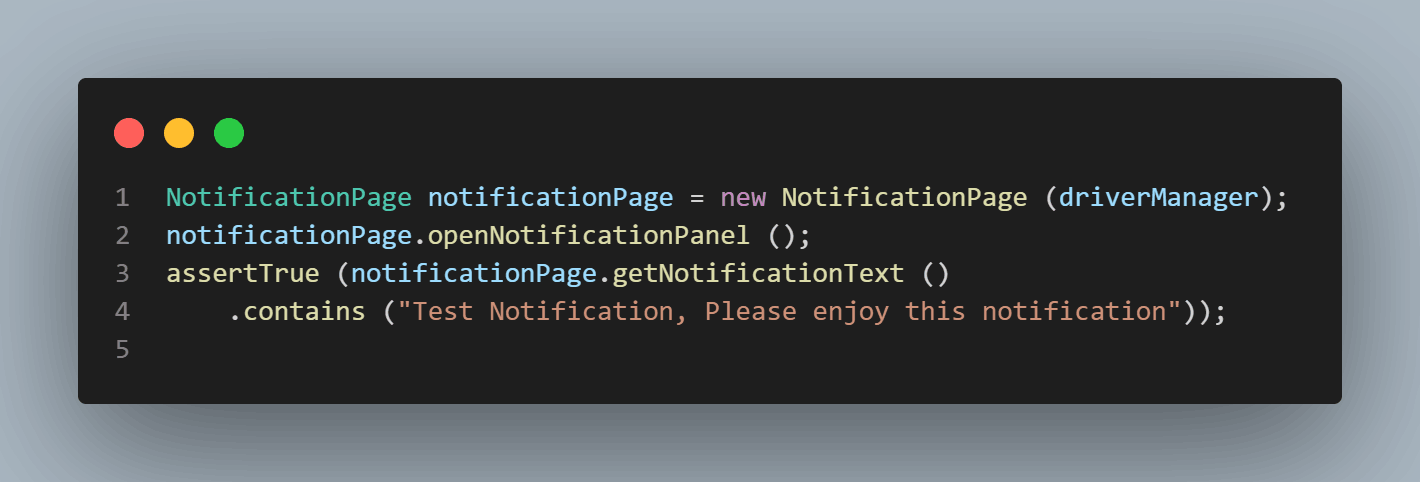
As mentioned earlier, the openNotifications() method is available for AndroidDriver only. Hence we will have to create a method to perform a swipe on the iOS device and open the notifications panel.
Here is the method that will perform the swipe action:
public void openNotificationPanel () {
   Thread.sleep (5000);
   var screenSize = driverManager.getDriver ()
       .manage ()
       .window ()
       .getSize ();
   var yMargin = 5;
   var xTop = screenSize.width;
   var top = new Point (xTop, yMargin);
   var bottom = new Point (xTop, screenSize.height - yMargin);

   PointerInput finger = new PointerInput (PointerInput.Kind.TOUCH, "finger");
   Sequence swipe = new Sequence (finger, 1);
   swipe.addAction (
       finger.createPointerMove (Duration.ofMillis (0), PointerInput.Origin.viewport (), top.x, top.y));
   swipe.addAction (finger.createPointerDown (PointerInput.MouseButton.LEFT.asArg ()));
   swipe.addAction (
       finger.createPointerMove (Duration.ofMillis (1000), PointerInput.Origin.viewport (), bottom.x, bottom.y));
   swipe.addAction (finger.createPointerUp (PointerInput.MouseButton.LEFT.asArg ()));
   driverManager.getDriver ()
       .perform (List.of (swipe));

}
We need to get the screen size for setting the top and bottom coordinates passed as parameters to the Point class. The bottom of the screens is derived using the screen width and (height minus the yMargin), which is taken as hardcoded 5.
The PointerInput class is used to define the finger touch action. Using Sequence class, we define the swipe interaction.
To perform a swipe, we will first place and press a finger on a specific location on the screen, perform a swipe, and then remove our finger from the screen. The following lines of code perform the same actions:
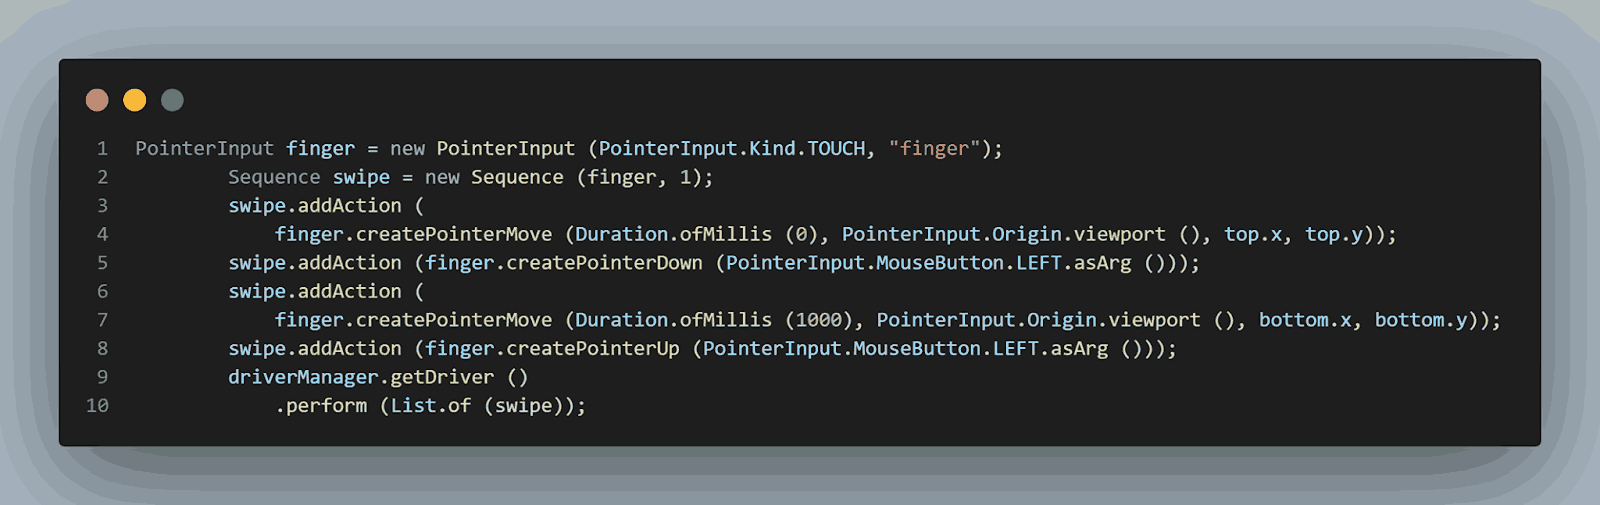
Once the swipe action is complete, we will get the notification text from the notification panel, which can be used to verify the alert text.
Handling Popups in the iOS Application
This can be handled using the Appium desired capabilities autoAcceptAlerts to true. This capability will automatically accept all permission popups.
We can pass this capability in the automated tests configuration by adding the following line:
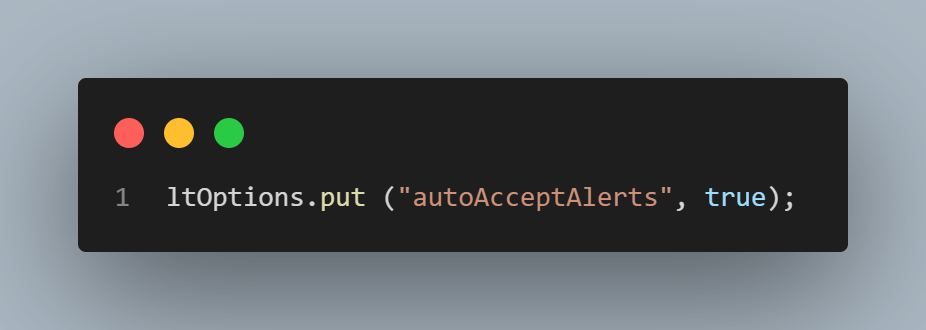
Both of the above statements perform the same action to automatically accept the iOS app-related permission popups.
Likewise, to dismiss a popup, we can use the autoDismissAlert and set it to true.
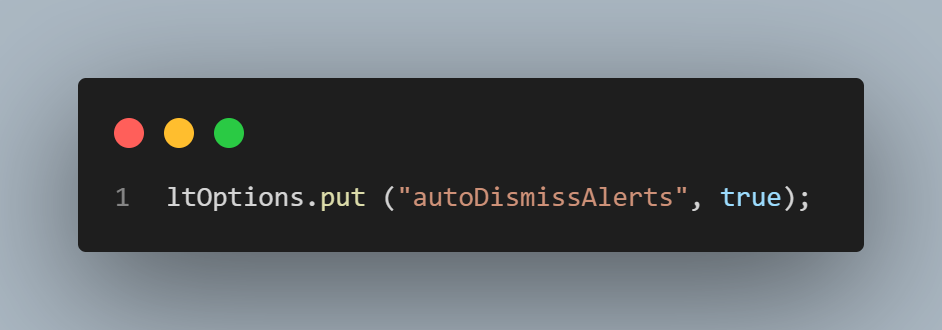
The above statements perform the same action to dismiss the iOS app-related permission popups automatically. This capability can be added to the automated tests configuration using the DesiredCapabilities class.
Test Execution
There are two methods to execute the tests:
- Using TestNG directly from the Integrated Development Environment (IDE).
- Using Maven from the Command Line Interface (CLI).
Using TestNG
TestNG is used as a test runner. Hence, testng.xml has been created, using which we will run the tests by right-clicking on the file and selecting the option Run ‘…\testng.xml’.
<?xml version="1.0" encoding="UTF-8"?>
<!DOCTYPE suite SYSTEM "http://testng.org/testng-1.0.dtd">
<suite name="Lambda tests Mobile automation test suite">
    <test name="Proverbial app - iOS Mobile Automation tests for popup">
        <parameter name="buildName" value="IOS Build"/>
        <parameter name="testName" value="Find My App tests"/>
        <parameter name="app" value="lt://APP10160531401673434634013700"/>
        <parameter name="platformName" value="IOS"/>
        <parameter name="version" value="13"/>
        <parameter name="device" value="iPhone 8 Plus"/>
        <classes>
            <class name="io.github.mfaisalkhatri.mobileautomation.tests.IOSTests">
                <methods>
                    <include name="notificationTest"/>
                </methods>
            </class>
        </classes>
    </test>
    <test name="Proverbial app - Android Mobile Automation">
        <parameter name="buildName" value="Android Build"/>
        <parameter name="testName" value="Latest Proverbial app tests"/>
        <parameter name="app" value="lt://APP10160531401673546544779159"/>
        <parameter name="platformName" value="ANDROID"/>
        <parameter name="version" value="11"/>
        <parameter name="device" value="Galaxy S20 Plus "/>
        <classes>
            <class name="io.github.mfaisalkhatri.mobileautomation.tests.ProverbialAppNotificationTests">
                <methods>
                    <include name="testNotification"/>
                </methods>
            </class>
        </classes>
    </test>
</suite>
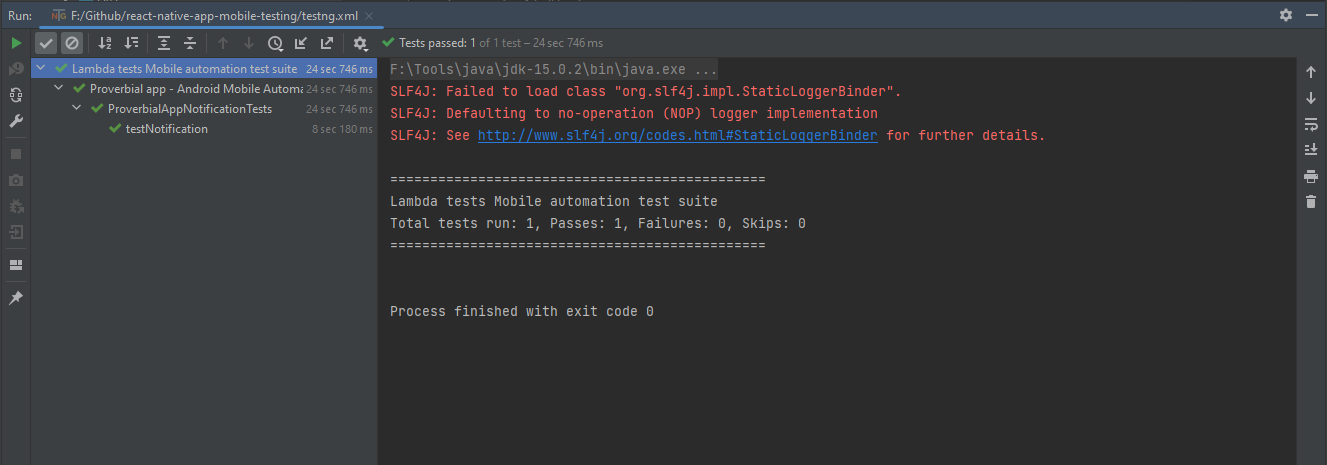
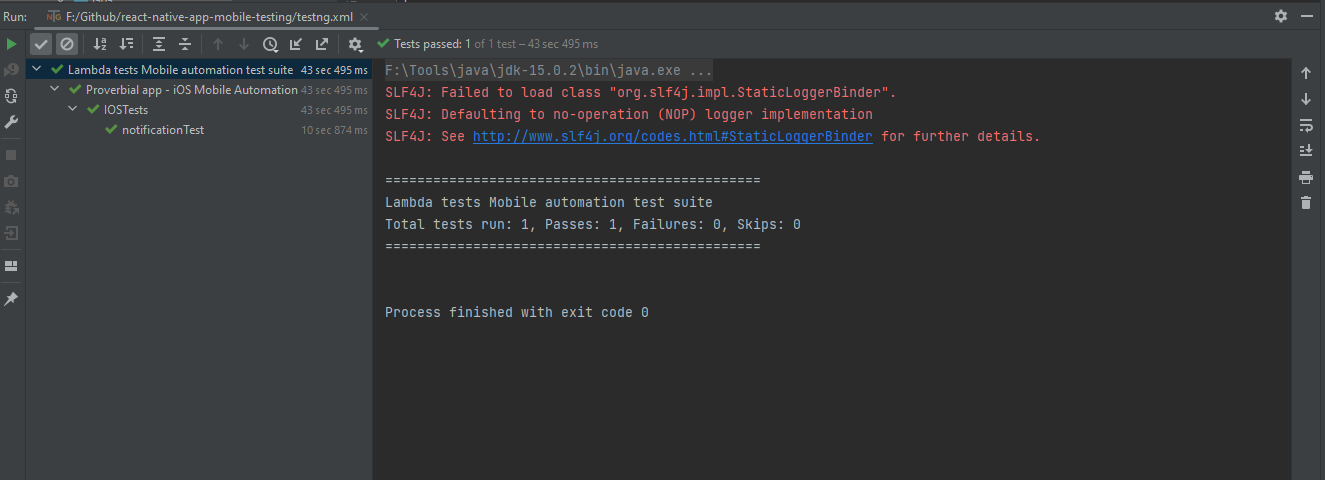
Here is the screenshot of the locally executed test run using IntelliJ IDE.
Android:
iOS:
Using Maven
To run the tests using Maven, the following steps need to be run:
- Open the Command Prompt.
- Navigate to the root folder of the project.
- Type the command on the terminal:
mvn clean test -DLT_USERNAME=<LambdaTest username> -DLT_ACCESS_KEY=<LambdaTesttoken>
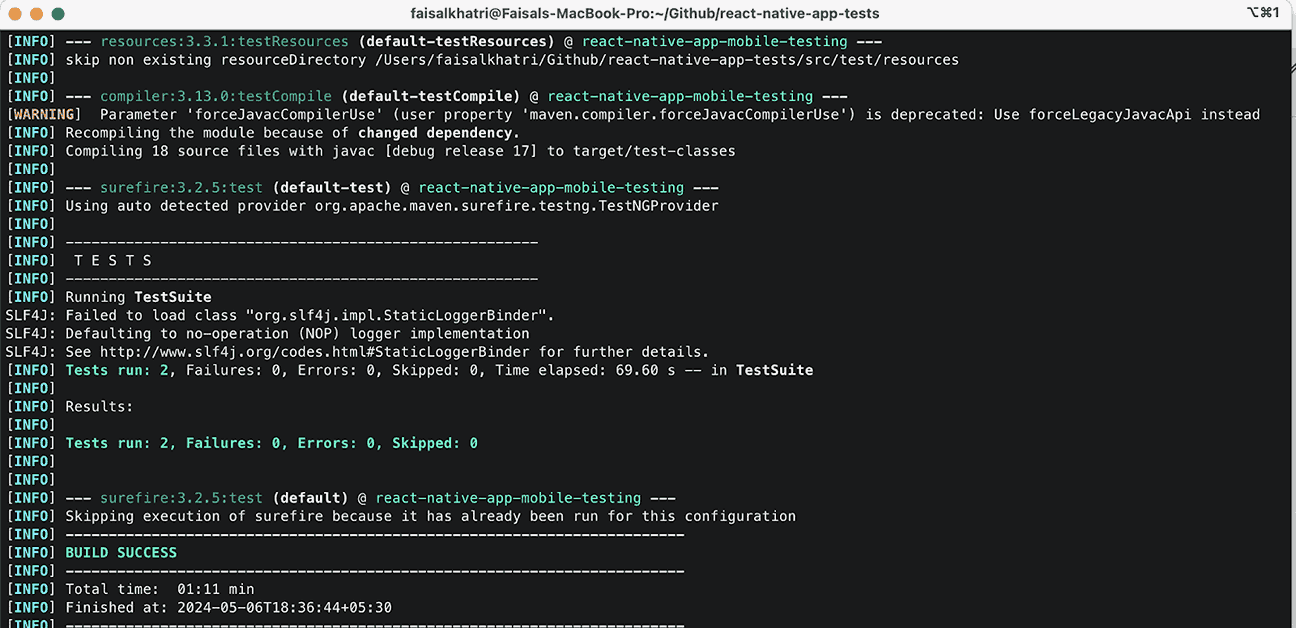
Here is the screenshot of the test results after tests were run locally using Command Prompt:
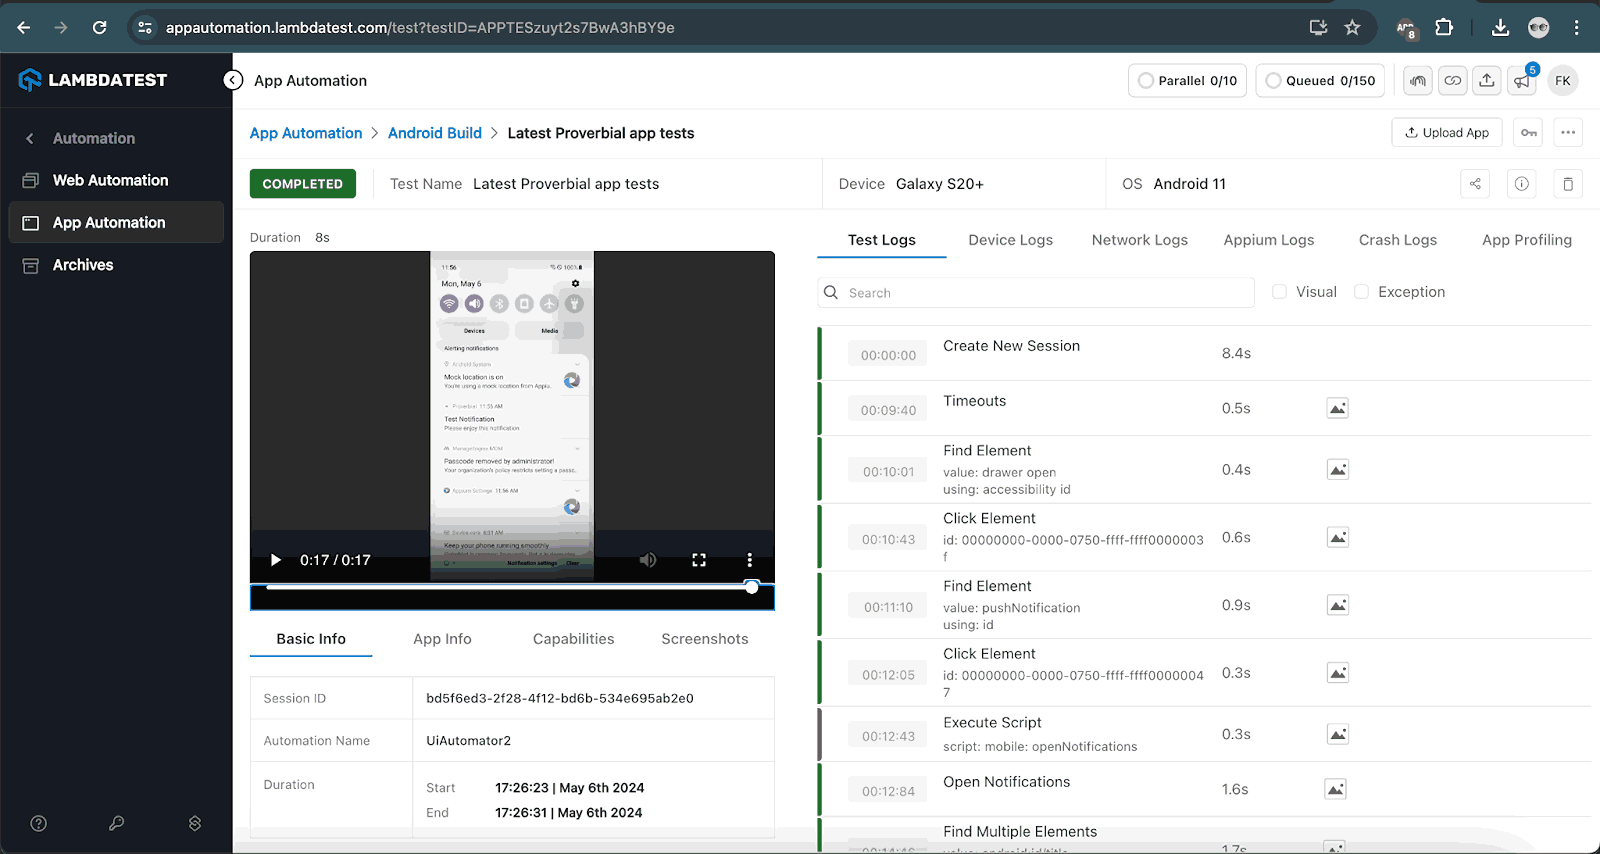
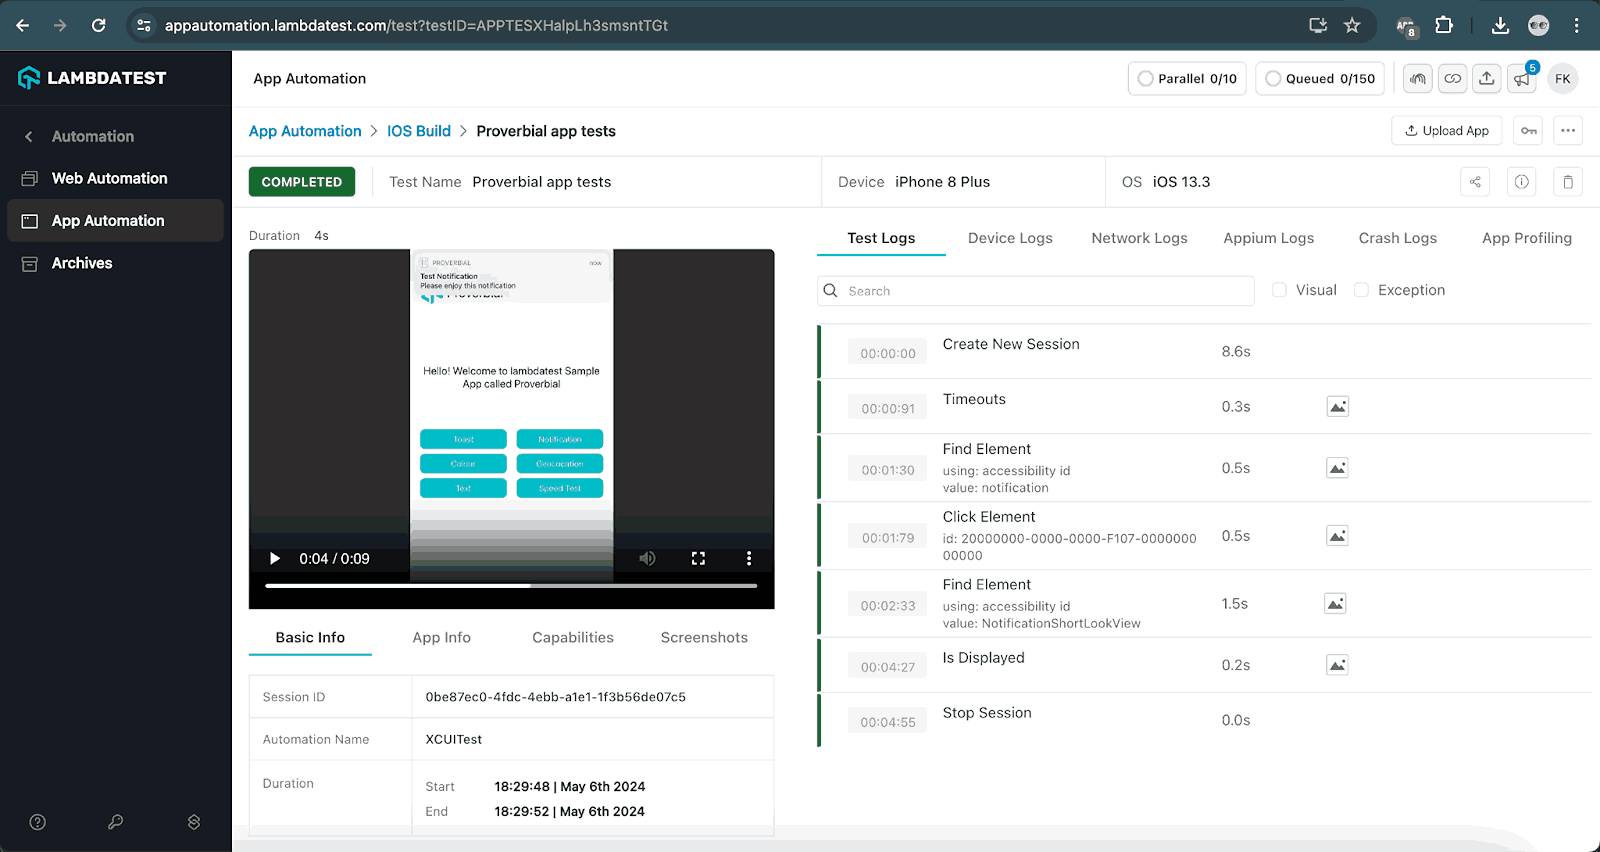
The same test execution details are on the TestMu AI App Automation Dashboard.
It provides step-by-step test execution details with the platform name, device name, and version, as well as a video of the test execution.
Android:
iOS:
When the popup message displayed in the app is not handled in that case, the popup will appear and remain as it is. However, the test will move ahead and execute the next line of code to find the element and perform an interaction with it, and will fail.
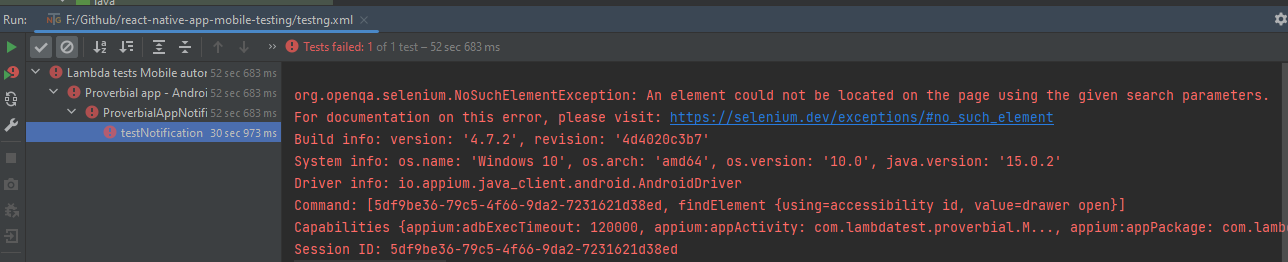
We have the alert notification test, so in this case, when the initial popup message for granting permission for the app is not handled, the test would fail with a NoSuchElementException as due to the popup message, the app could not move further to the next screen to locate the element.
Following is the screenshot of the failed test with exception, displayed when the popup is not handled:
This brings us to the end of this tutorial on handling alerts and popups in Appium.
If you want to enhance your skills and knowledge in Appium further, you can take the Appium 101 certification from TestMu AI. It can provide you with validation of your expertise and may open up new opportunities in your career.
Conclusion
In summary, to handle popup permission messages in the app using Appium desired capabilities, we need to include the following configurations:
- For Android: AUTO_GRANT_PERMISSIONS
- For iOS (Accept Alert): AUTO_ACCEPT_ALERTS
- For iOS (Dismiss Alert): AUTO_DISMISS_ALERTS
Regarding alert notifications displayed in the app, we can locate the respective alert element and assert its text. This can be done directly on the alert message or by navigating to the notification panel, reading the text displayed, and asserting it accordingly.
Author

Navin Chandra
Blogs: 5

Navin Chandra is a Member of Technical Staff at TestMu AI (formerly LambdaTest), building the open-source automation that powers its Selenium and Appium cloud grid. A committer to both Selenium and Appium, he implemented WebDriver BiDi support in Selenium for real-time browser events and bidirectional control and is developing Apple's iOS RemoteXPC protocol in Appium to enable low-level wireless communication with iOS system services. He contributes to Selenium across multiple language bindings as a member of the Selenium GitHub organization. He has served as a Google Summer of Code mentee and mentor at openSUSE and an LFX mentee at CNCF's KubeArmor, and is a SUSE Certified Deployment Specialist. Navin holds a B.Tech in Computer Science.
Reviewer

Sai Krishna
Reviewer
Sai Krishna is Director of Engineering at TestMu AI (formerly LambdaTest), where he leads agentic AI for quality engineering, building AI agents that autonomously drive mobile and conversational test automation. His current focus is Agent Testing and Model Context Protocol (MCP) support for mobile. He is a core contributor and member of the Appium open-source project and the creator of AppiumTestDistribution and appium-device-farm. With over 14 years of experience including more than 9 years at Thoughtworks as a Principal Consultant, he holds a BSc in Electronics and speaks regularly at TestMu and Appium Conf on Appium, mobile automation, and agentic AI in testing.
Frequently asked questions
Did you find this page helpful?
More Related Blogs
TestMu AI forEnterprise
Get access to solutions built on Enterprise
grade security, privacy, & compliance
- Advanced access controls
- Advanced data retention rules
- Advanced Local Testing
- Premium Support options
- Early access to beta features
- Private Slack Channel
- Unlimited Manual Accessibility DevTools Tests