

Power Your Software Testing with AI Agents and Cloud
The Native AI-Agentic Cloud Platform to Supercharge Quality Engineering. Test Intelligently and Ship Faster.


- TestMu AI (Formerly LambdaTest)
- /
- Learning Hub
- /
- Mocha JS Tutorial – A Detailed Guide on Mocha Testing
Mocha JS Tutorial – A Detailed Guide on Mocha Testing
Master Mocha JS Testing with our detailed tutorial! Learn essential steps for performing Mocha JS testing on cloud testing and parallel test execution.
Last Updated on:
Mocha JS is an open-source JavaScript testing framework that provides a simple and flexible interface for automating testing. This JavaScript automation testing framework is widely used for testing Node.js and browser-based applications. It makes it easy for developers or testers to write and execute tests to ensure that their code or applications are of high quality and reliable.
Overview
To run clean and maintainable automated JavaScript tests, use the Mocha JS framework for Node.js and browser environments, and execute them on TestMu AI's cloud Selenium Grid for scalable cross-browser testing. Mocha JS provides flexible test structures, while TestMu AI enables parallel execution across thousands of real environments.
Benefits of Using the Mocha JS Testing Framework
- Best for flexible JavaScript testing: Mocha JS - This open-source testing framework supports both Behavior-Driven Development (BDD) and Test-Driven Development (TDD) methodologies across Node.js and browser environments.
- Best for flexible assertions: Chai - This assertion library integrates with Mocha JS to provide readable validation styles for verifying test outcomes and application states.
- Best for expressive assertions: Should.js - This compatible assertion library allows developers to write highly readable, chainable assertions within their Mocha JS test suites.
- Best for minimalist assertions: Expect.js - This compatible assertion library provides a simple, BDD-style syntax for validating test expectations in Mocha JS.
Running Automated Tests Using Mocha JS on a Cloud Selenium Grid
- Best for cloud-based execution: TestMu AI - This AI-driven platform executes Mocha JS tests in parallel across more than 3,000 real desktop and mobile environments to maximize test coverage.
- Best for UI automation: Selenium - This tool integrates with Mocha JS to automate user interface actions, allowing testers to simulate real user flows like account creation and checkout on web applications.
Overview of Mocha JS Testing Framework
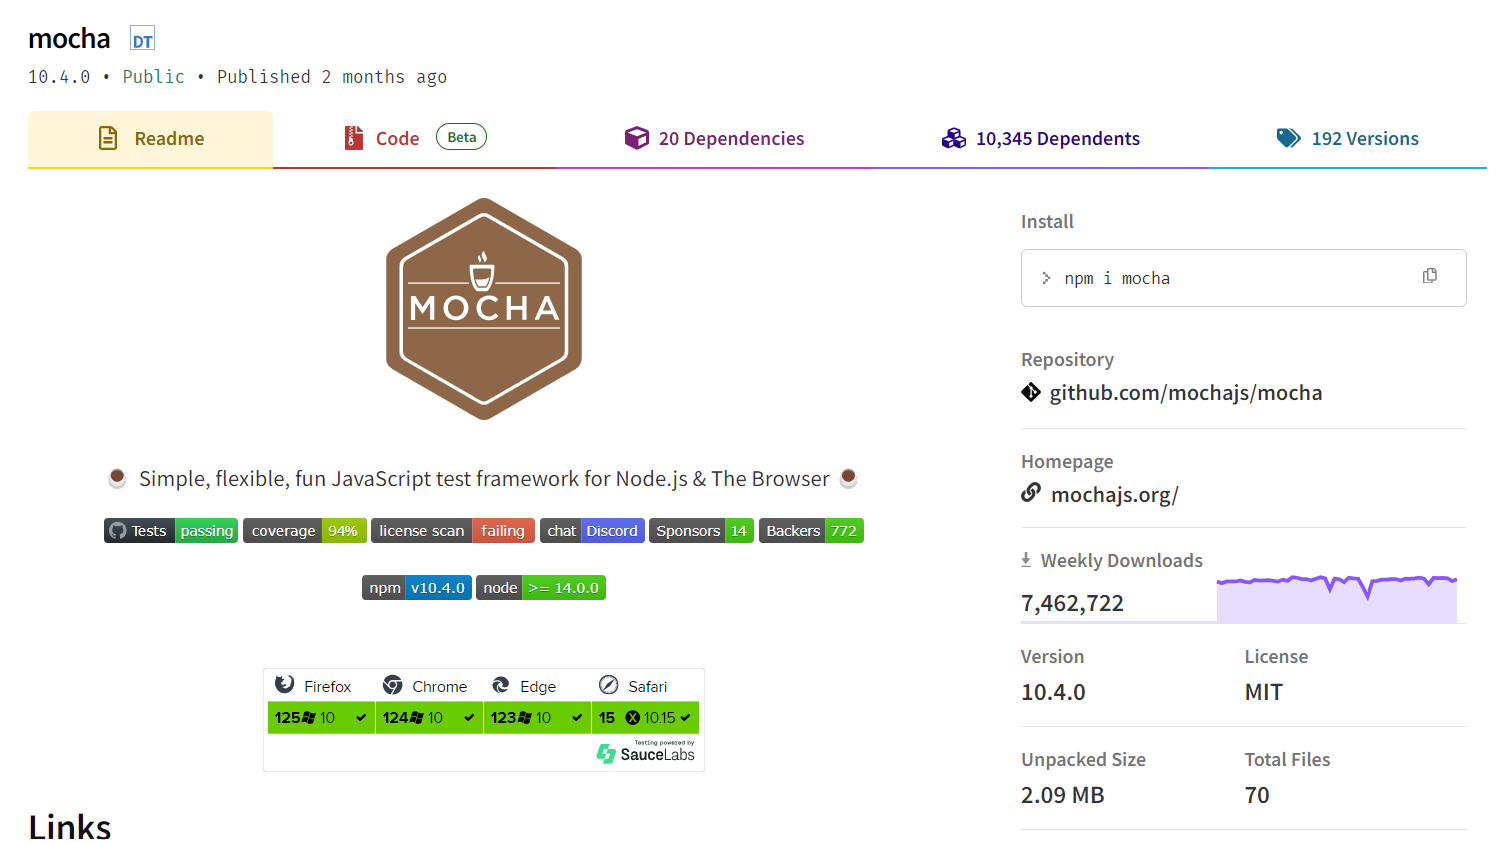
According to GitHub and NPM trends, Mocha is a popular JavaScript testing framework. Data obtained from the Mocha GitHub repository proves its popularity where it has:
- Stars: 22.5K
- Contributors: 484+
- Forks: 3K
- Releases: 79
- Used by: 2.4M
When writing this, the Mocha JavaScript testing framework had 7,462,722 weekly downloads on npmjs.
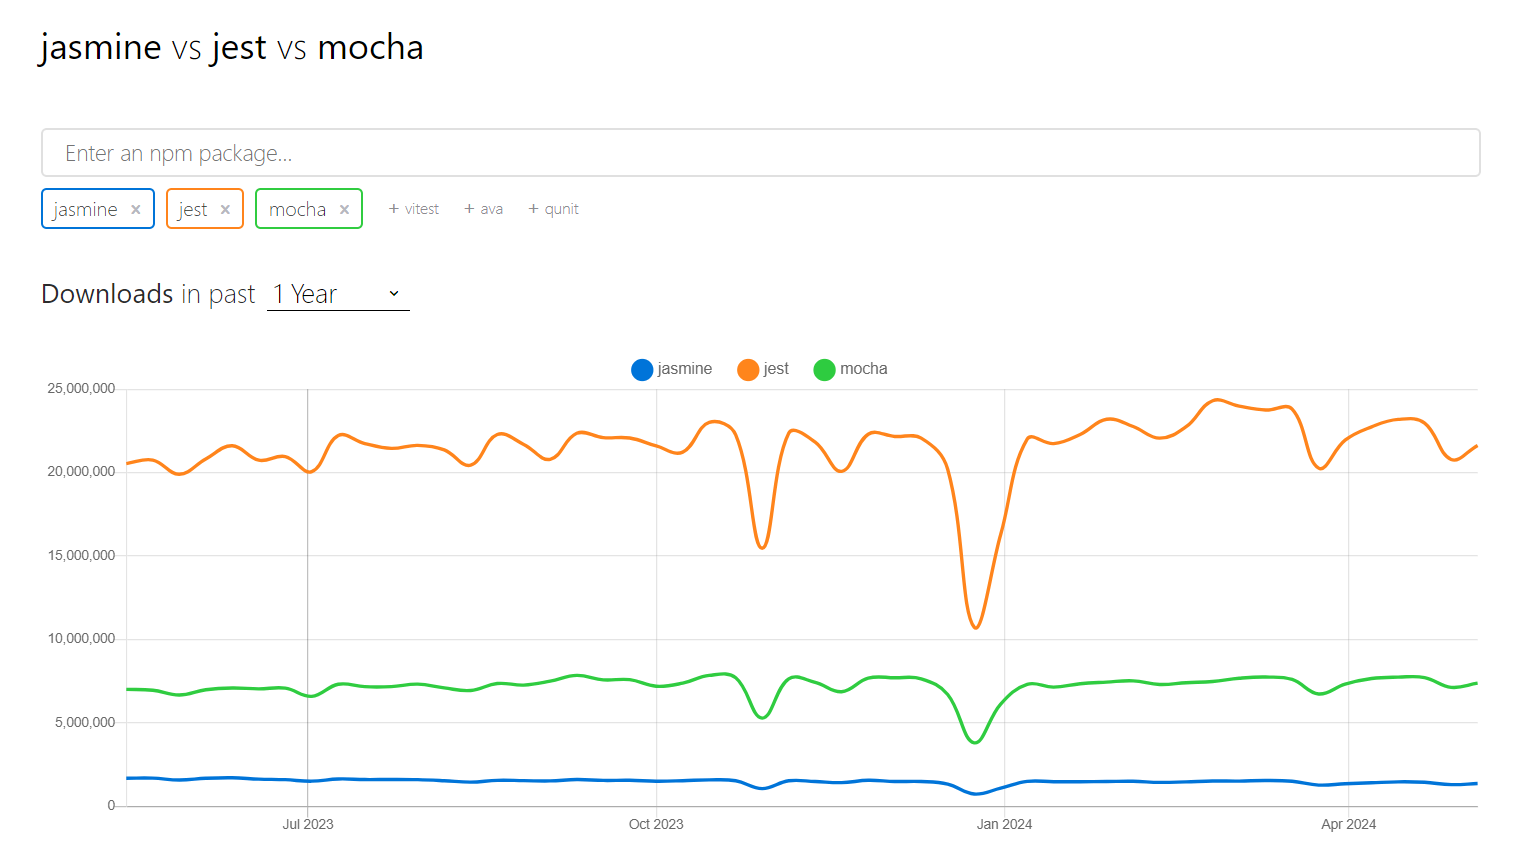
The Mocha automation testing framework downloads graph in the past year is shown below according to NPM trends. It also shows how Mocha compares with other popular JavaScript testing frameworks, such as Jest and Mocha, in the past year.
Learn more about Mocha JS through this complete JavaScript test automation tutorial:
You can also subscribe to the LambdaTest YouTube Channel and stay updated with the latest tutorials on automation testing frameworks like Selenium, Playwright, Cypress, Appium, and more.
Benefits of Using the Mocha JS Testing Framework
The Mocha JavaScript testing framework offers several benefits for automation testing. Below are some of the key benefits of using the Mocha JS testing framework:
Ease of use
Mocha JS has a clean syntax that makes writing and executing tests easy. This lowers the barrier to entry for developers new to test automation.
Browser and Node.js Compatibility
Mocha JS supports Node.js environments and all major web browsers, allowing you to write tests for various application parts.
BDD and TDD support
Mocha JS supports both Behavior-Driven-Development (BDD) and Test-Driven-Development (TDD) methodologies, which allows you to adapt any testing approach according to your specific project needs.
Parallel test execution
Mocha JS enables you to run tests in parallel, drastically reducing the time spent executing tests, especially when dealing with large test suites.
Compatibility with assertion libraries
Mocha JS allows you to use any assertion library you wish. You can use assertion libraries such as should.js, expect.js, and chai.
Testing asynchronous code
Mocha JS supports testing asynchronous code, which makes it well-suited for testing modern JavaScript applications.
Support community
Mocha JS has a strong support community, which allows you to find ample documentation, tutorials, and resources if you encounter any issues.

Note: Run your Mocha JS test scripts over 3000+ environments. Try LambdaTest Now!
Getting Started With Mocha JS and Selenium
Let's create a simple test case using Mocha JS and Selenium WebDriver. This test will navigate to a sample form page, enter two values into the form, submit the values, and verify whether the sum of the two values was correct based on the displayed sum.
To start with Mocha JS testing, you need an IDE (e.g., Visual Studio Code), Node.js, and Node Package Manager (NPM) installed on your local machine. The steps below show how to install and use Mocha to run automated tests using Selenium WebDriver.
Step 1: Create a project folder called MochaTests and open it on Visual Studio Code or the text editor of your choice. Then, run the command below on the command line to install Mocha JS in your project, along with an assertion library, Chai.
npm install --save-dev mocha chaiStep 2: Install Selenium WebDriver by running the command below on the command line.
npm install selenium-webdriverStep 3: Install Chrome WebDriver by running the command below on the command line.
npm install chromedriverStep 4: Set up your test environment in the package.json file, as shown below.
{
                                  "type": "module",
                                  "scripts": {
                                    "test": "mocha"
                                  },
                                  "devDependencies": {
                                    "chai": "^5.1.0",
                                    "mocha": "^10.4.0"
                                  },
                                  "dependencies": {
                                    "chromedriver": "^123.0.3",
                                    "selenium-webdriver": "^4.19.0"
                                  }
                                }
Step 5: Inside the project folder, create a folder called tests. Then, create a file called main.test.js inside the tests folder and add the following code:
import { Builder, By, Key, until } from "selenium-webdriver";
                                import { expect } from "chai";
                                import { describe, it } from "mocha";

                                describe("Form Input Test", function () {
                                  // Extend timeout for async browser operations
                                  this.timeout(30000);

                                  let driver;

                                  it("Setup WebDriver", async function () {
                                    driver = await new Builder().forBrowser("chrome").build();
                                  });

                                  it("should input values in a form and check their sum", async function () {
                                    // Navigate to a form page
                                    await driver.get(
                                      "https://www.testmuai.com/selenium-playground/simple-form-demo"
                                    );
                                    await driver.findElement(By.id("sum1")).sendKeys(2);
                                    await driver.findElement(By.id("sum2")).sendKeys(3);
                                    await driver
                                      .findElement(By.xpath("//button[normalize-space()='Get Sum']"))
                                      .click();

                                    // Wait for navigation and check if login was successful
                                    let sum = await driver.wait(
                                      until.elementLocated(By.id("addmessage")),
                                      10000
                                    );
                                    let sumNo = await sum.getText();
                                    expect(sumNo).to.include("5");
                                  });

                                  it("Cleanup: Close the browser", async function () {
                                    await driver.quit();
                                  });
                                });
Step 6: To run the test, run the command below on the command line.
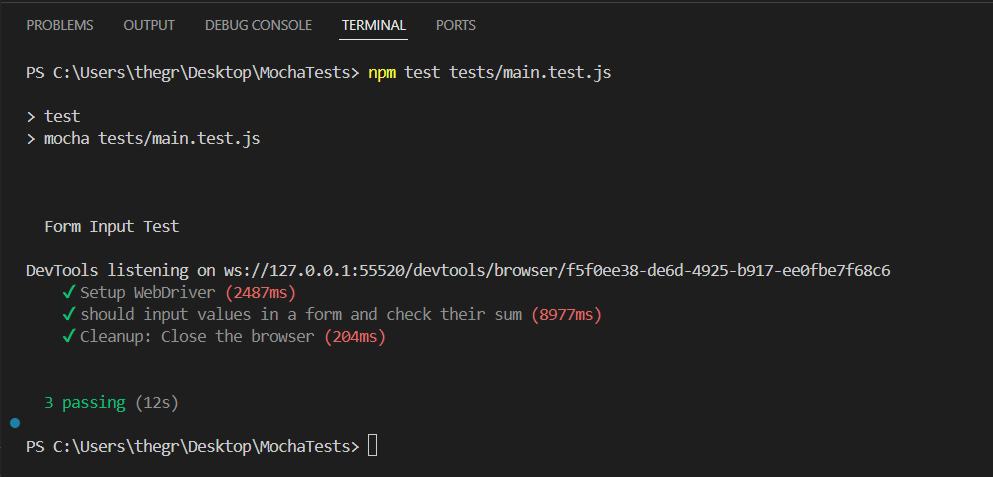
npm test tests/main.test.jsOnce the command is done running, you should be able to see the test results on the command line, as shown below.
Mocha Test Hooks
Test hooks in Mocha JS are a powerful feature that allows you to set up and tear down conditions for your tests. The test hooks set the preconditions and the postconditions that run before and after your tests. The test hooks available in Mocha are before(), beforeEach(), after(), and afterEach().
Here are some examples of how to use these hooks:
before() hook
The before() hook is used to prepare the testing environment, where it runs once before all the tests in a describe block. For example, you can use the before() hook to set up the WebDriver before executing all your tests.
Below is how to use the before() hook.
Step 1: Create a file called beforehook.test.js in the tests folder and add the following code.
import { Builder, By, Key, until } from "selenium-webdriver";
                                import { expect } from "chai";
                                import { describe, it } from "mocha";

                                describe("Simple Form Demo Title Test", function () {
                                  // Extend timeout for async browser operations
                                  this.timeout(30000);

                                  let driver;

                                  before(async function () {
                                    driver = await new Builder().forBrowser("chrome").build();
                                  });

                                  it("should Navigate to Simple Form Demo and verify title", async function () {
                                    // Navigate to a form page
                                    await driver.get("https://www.testmuai.com/selenium-playground/simple-form-demo");

                                    let title = await driver.getTitle();
                                    expect(title).to.include("Selenium Grid Online | Run Selenium Test On Cloud");
                                  });

                                  it("Cleanup: Close the browser", async function () {
                                    await driver.quit();
                                  });
                                });
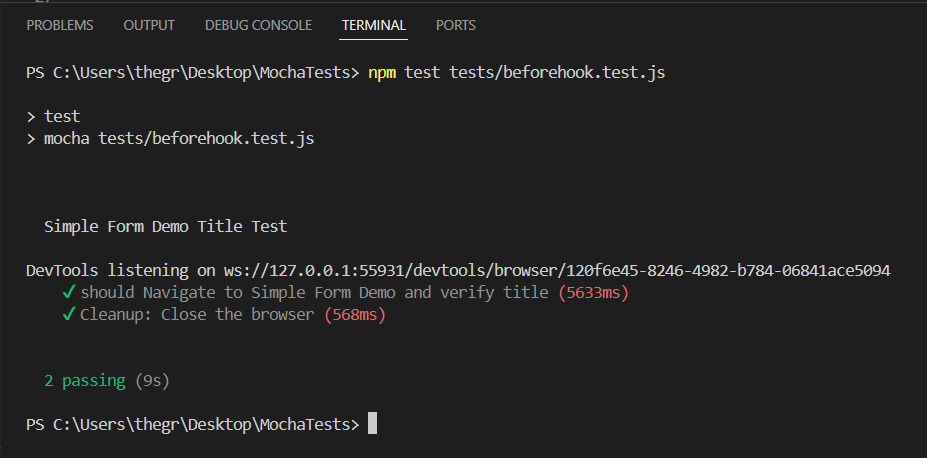
Step 2: Run the command below on the command line to run the test.
npm test tests/beforehook.test.jsOnce the command runs, you should see that the test was executed successfully.
beforeEach() hook
The beforeEach() hook runs once before each test and isolates tests so they do not affect each other. For example, if you have to visit a specific URL for a couple of tests, you can use a beforeEach() hook to open the URL page before each test is executed.
Below is how to use the beforeEach() hook.
Step 1: Create a file called beforeEachhook.test.js in the tests folder and add the following code:
import { Builder, By, Key, until } from "selenium-webdriver";
                                import { expect } from "chai";
                                import { describe, it } from "mocha";

                                describe("Simple Form Demo Test", function () {
                                  // Extend timeout for async browser operations
                                  this.timeout(30000);

                                  let driver;

                                  before(async function () {
                                    driver = await new Builder().forBrowser("chrome").build();
                                  });

                                  beforeEach(async function () {
                                    await driver.get("https://www.testmuai.com/selenium-playground/simple-form-demo");
                                  });

                                  it("should Navigate to Simple Form Demo and verify title", async function () {
                                    let title = await driver.getTitle();
                                    expect(title).to.include("Selenium Grid Online | Run Selenium Test On Cloud");
                                  });

                                  it("should input values in a form and check their sum", async function () {
                                    await driver.findElement(By.id("sum1")).sendKeys(2);
                                    await driver.findElement(By.id("sum2")).sendKeys(3);
                                    await driver.findElement(By.xpath("//button[normalize-space()='Get Sum']")).click();


                                    let sum = await driver.wait(until.elementLocated(By.id("addmessage")),10000);
                                    let sumNo = await sum.getText();
                                    expect(sumNo).to.include("5");
                                  });

                                  it("Cleanup: Close the browser", async function () {
                                    await driver.quit();
                                  });
                                });
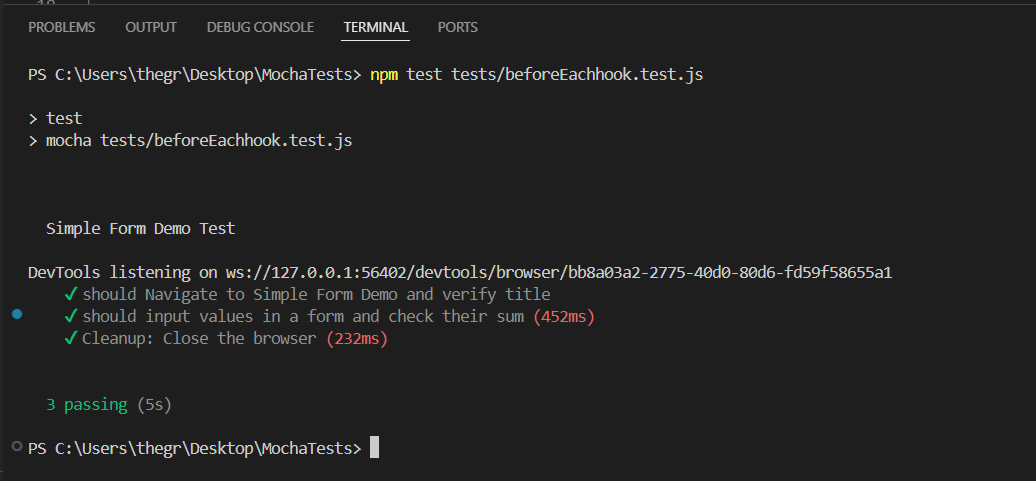
Step 2: Run the command below on the command line to run the test.
npm test tests/beforeEachhook.test.jsOnce the command runs, you should see that the tests were executed successfully.
after() hook
The after() hook runs once after the execution of all the tests and is used to perform cleanup actions after all the tests are executed. For example, if you want to close the WebDriver after the tests have been executed, you can use the after() hook.
Below is how to use the after() hook.
Step 1: Create a file called afterhook.test.js in the tests folder and add the following code:
import { Builder, By, Key, until } from "selenium-webdriver";
                                import { expect } from "chai";
                                import { describe, it } from "mocha";

                                describe("Simple Form Demo Test", function () {
                                  // Extend timeout for async browser operations
                                  this.timeout(30000);

                                  let driver;

                                  before(async function () {
                                    driver = await new Builder().forBrowser("chrome").build();
                                  });

                                  beforeEach(async function () {
                                    await driver.get("https://www.testmuai.com/selenium-playground/simple-form-demo");
                                  });

                                  it("should Navigate to Simple Form Demo and verify title", async function () {
                                    let title = await driver.getTitle();
                                    expect(title).to.include("Selenium Grid Online | Run Selenium Test On Cloud");
                                  });

                                  it("should input values in a form and check their sum", async function () {
                                    await driver.findElement(By.id("sum1")).sendKeys(2);
                                    await driver.findElement(By.id("sum2")).sendKeys(3);
                                    await driver.findElement(By.xpath("//button[normalize-space()='Get Sum']")).click();


                                    let sum = await driver.wait(until.elementLocated(By.id("addmessage")),10000);
                                    let sumNo = await sum.getText();
                                    expect(sumNo).to.include("5");
                                  });

                                  after( async function () {
                                    await driver.quit();
                                  });
                                });
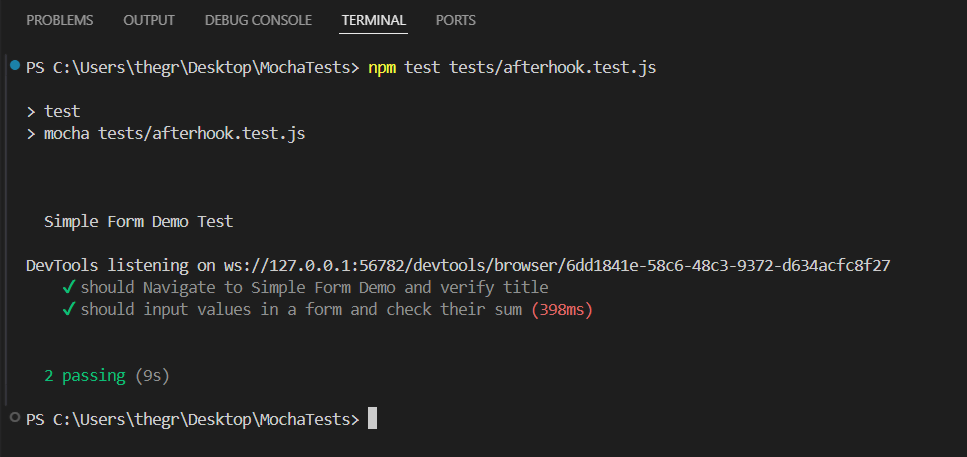
Step 2: Run the command below on the command line to run the test.
npm test tests/afterhook.test.jsOnce the command runs, you should see that the tests were executed successfully.
afterEach() hook
The afterEach() hook is run once after each test. It is used to perform cleanup actions after each test. For example, if you want to clear cookies after each test, you can use an afterEach() hook.
Step 1: Create a file called afterEachhook.test.js in the tests folder and add the following code:
import { Builder, By, Key, until } from "selenium-webdriver";
                                import { expect } from "chai";
                                import { describe, it } from "mocha";

                                describe("Simple Form Demo Test", function () {
                                  // Extend timeout for async browser operations
                                  this.timeout(30000);

                                  let driver;

                                  before(async function () {
                                    driver = await new Builder().forBrowser("chrome").build();
                                  });

                                  beforeEach(async function () {
                                    await driver.get("https://www.testmuai.com/selenium-playground/simple-form-demo");
                                  });

                                  it("should Navigate to Simple Form Demo and verify title", async function () {
                                    let title = await driver.getTitle();
                                    expect(title).to.include("Selenium Grid Online | Run Selenium Test On Cloud");
                                  });

                                  it("should input values in a form and check their sum", async function () {
                                    await driver.findElement(By.id("sum1")).sendKeys(2);
                                    await driver.findElement(By.id("sum2")).sendKeys(3);
                                    await driver.findElement(By.xpath("//button[normalize-space()='Get Sum']")).click();


                                    let sum = await driver.wait(until.elementLocated(By.id("addmessage")),10000);
                                    let sumNo = await sum.getText();
                                    expect(sumNo).to.include("5");
                                  });

                                  after( async function () {
                                    await driver.quit();
                                  });

                                  afterEach(function () {
                                    driver.manage().deleteAllCookies();
                                  });
                                });
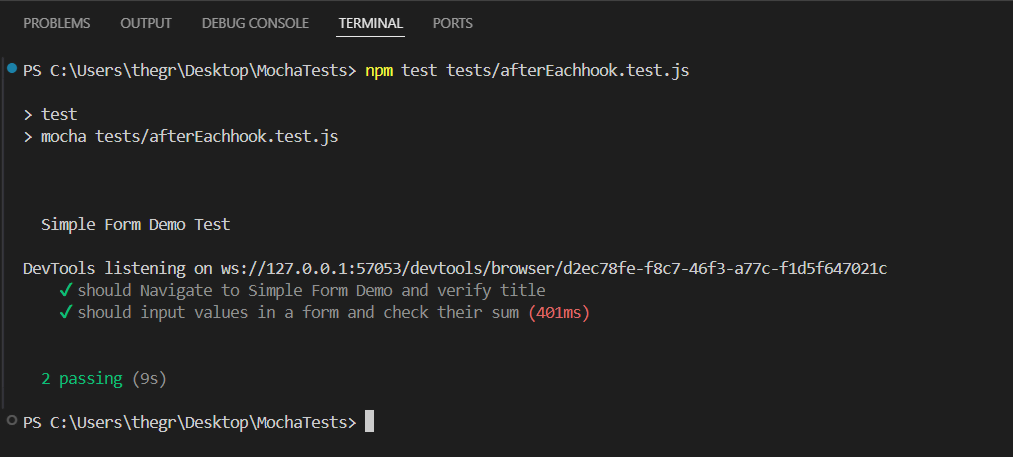
Step 2: Run the command below on the command line to run the test.
npm test tests/afterEachhook.test.js Once the command runs, you should see that the tests were executed successfully.
Getting Started With Automation Testing Using Mocha JS and Selenium
Consider an online eCommerce platform that sells electronics. When a customer visits the eCommerce store, they can add the items to the cart, but before checking out, they need to create an account.
If adding an item to the cart, checking out the item, or creating a user account functionalities fail to work as expected, the customer will have a poor user experience, which may lead them to find alternative eCommerce stores. In return, this will lead to a loss of revenue for the eCommerce store.
To avoid these problems and failures, as a tester, you can employ automated testing to help you find and fix such issues. Therefore, it is necessary to conduct tests to verify the compatibility of the store with different browsers and operating systems to provide a seamless digital experience to customers.
However, digital experience for the eCommerce store on all these browsers and operating systems can lead to spending a fortune on the infrastructure needed to run the tests. To ensure the eCommerce store functions work as expected on all these browsers and operating systems, you can go for the TestMu AI continuous quality cloud testing platform.
TestMu AI is an AI-driven test orchestration and execution platform that lets you perform the automation testing of your eCommerce store with Mocha JS on a cloud Selenium Grid across 3,000+ different browsers and operating systems.
What does TestMu AI offer?
- Run Selenium, Cypress, Puppeteer, Playwright, and Appium tests over scalable automation testing cloud with 3000+ real desktop and mobile environments.
- Live interactive cross browser testing in different environments.
- Perform mobile app testing on real device cloud.
- Perform 70% faster test execution with HyperExecute.
- AI-native visual regression testing on the cloud to identify visual regressions.
- LT Browser - for responsive testing across 53+ pre-installed mobile, tablet, desktop, and laptop viewports.
- Capture full-page automated screenshots across multiple browsers in a single click.
- Test your locally hosted web and mobile apps with TestMu AI tunnel.
- Test for accessibility testing using Accessibility DevTools Chrome extension.
- Test across multiple geographies with a Geolocation testing feature.
- 120+ third-party integrations with your favorite tool for CI/CD, Project Management, Codeless Automation, and more.

Running Automated Tests Using Mocha JS on a Cloud Selenium Grid
In this section, let us create and run automated tests that test the logical flow between creating an account, adding items to a cart, and checking them out in an eCommerce store.
We will run the tests on multiple browser versions and operating system combinations. We can use three browser versions and operating system combinations in this case. The browser and operating system combinations can be:
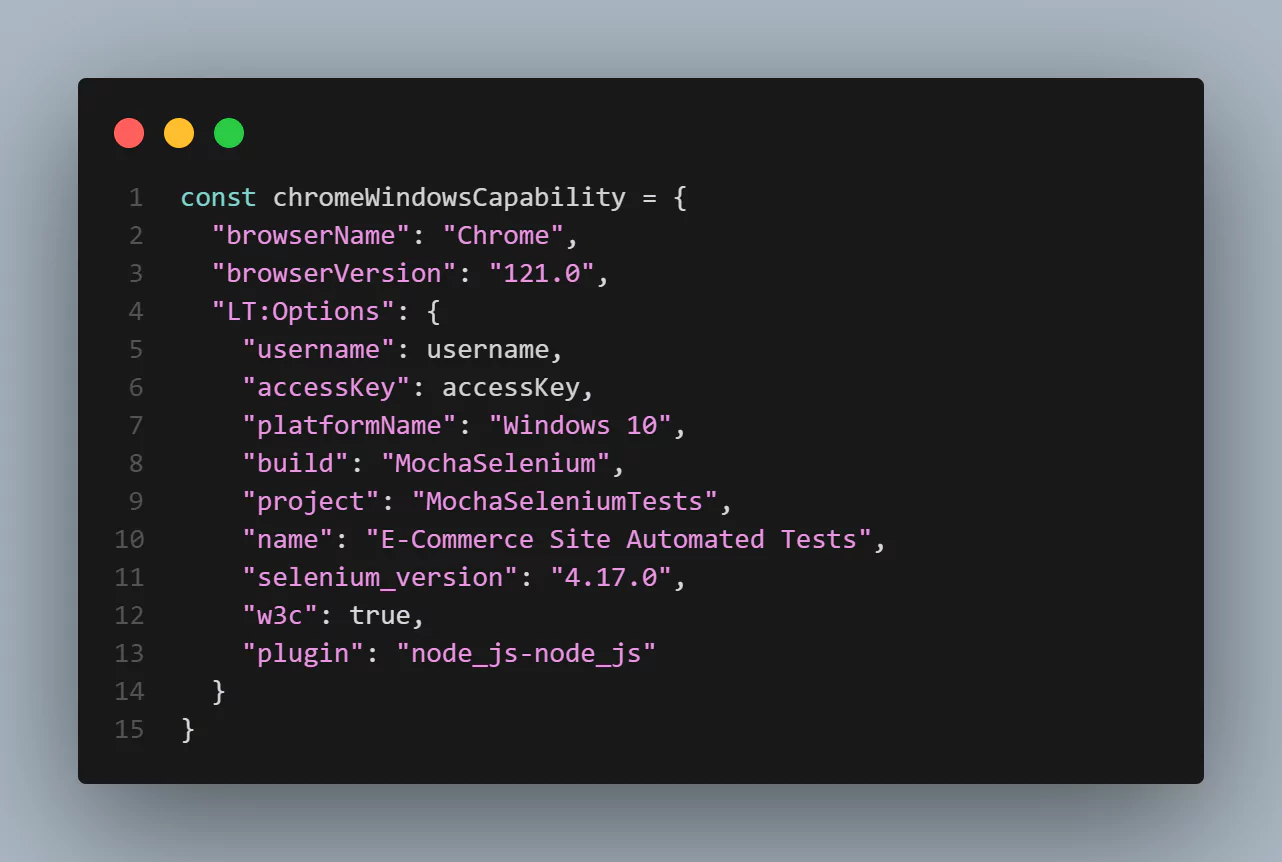
- Chrome 121.0 + Windows 10
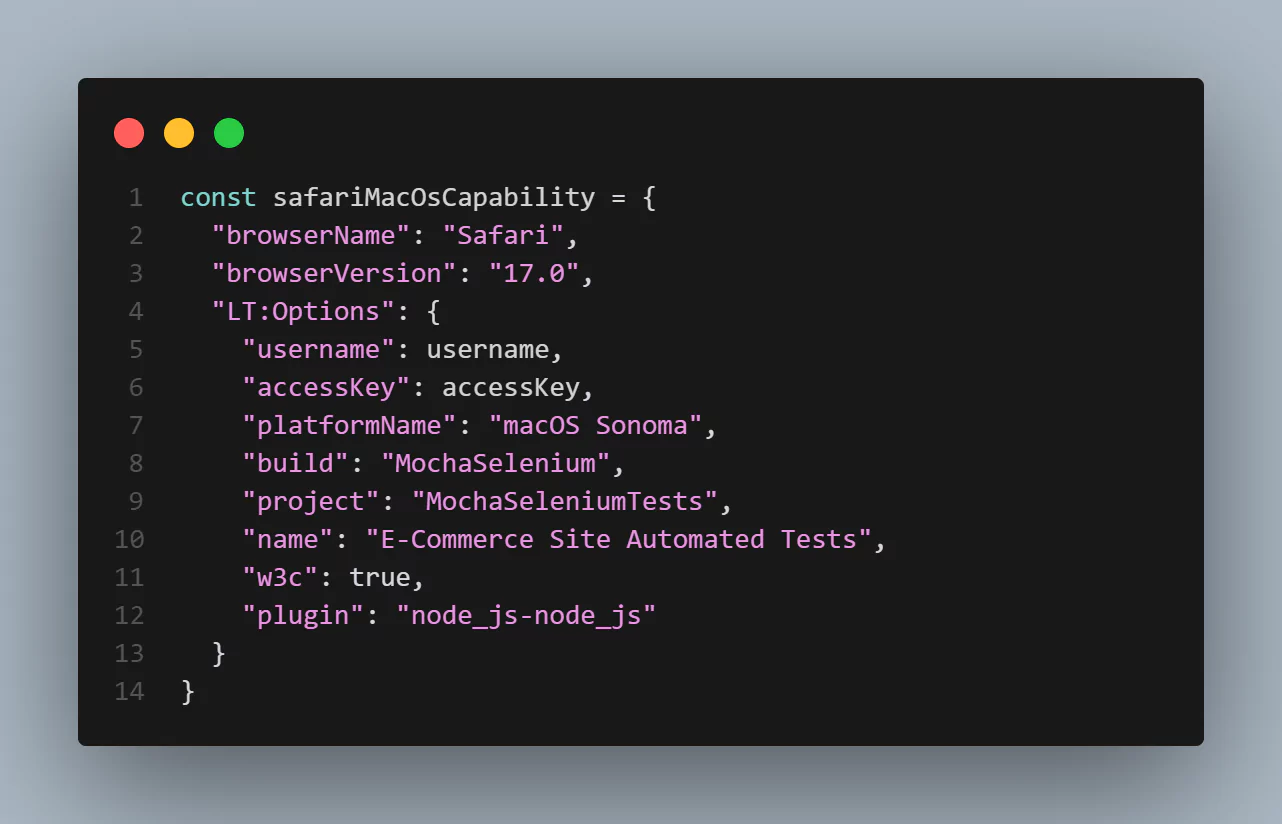
- Safari 17.0 + macOS Sonoma
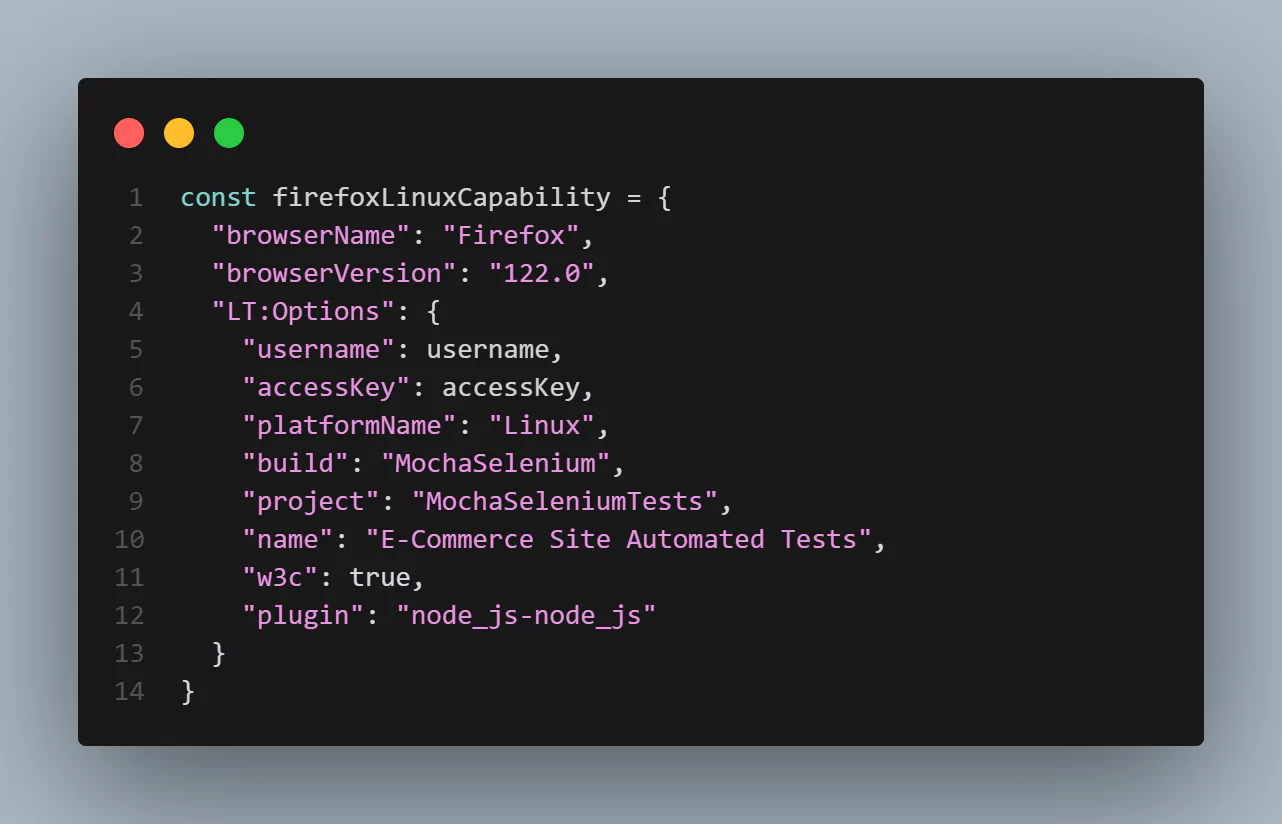
- Firefox 123.0 + Linux
To define your desired browser and operating system combinations, you can use TestMu AI Capabilities Generator.
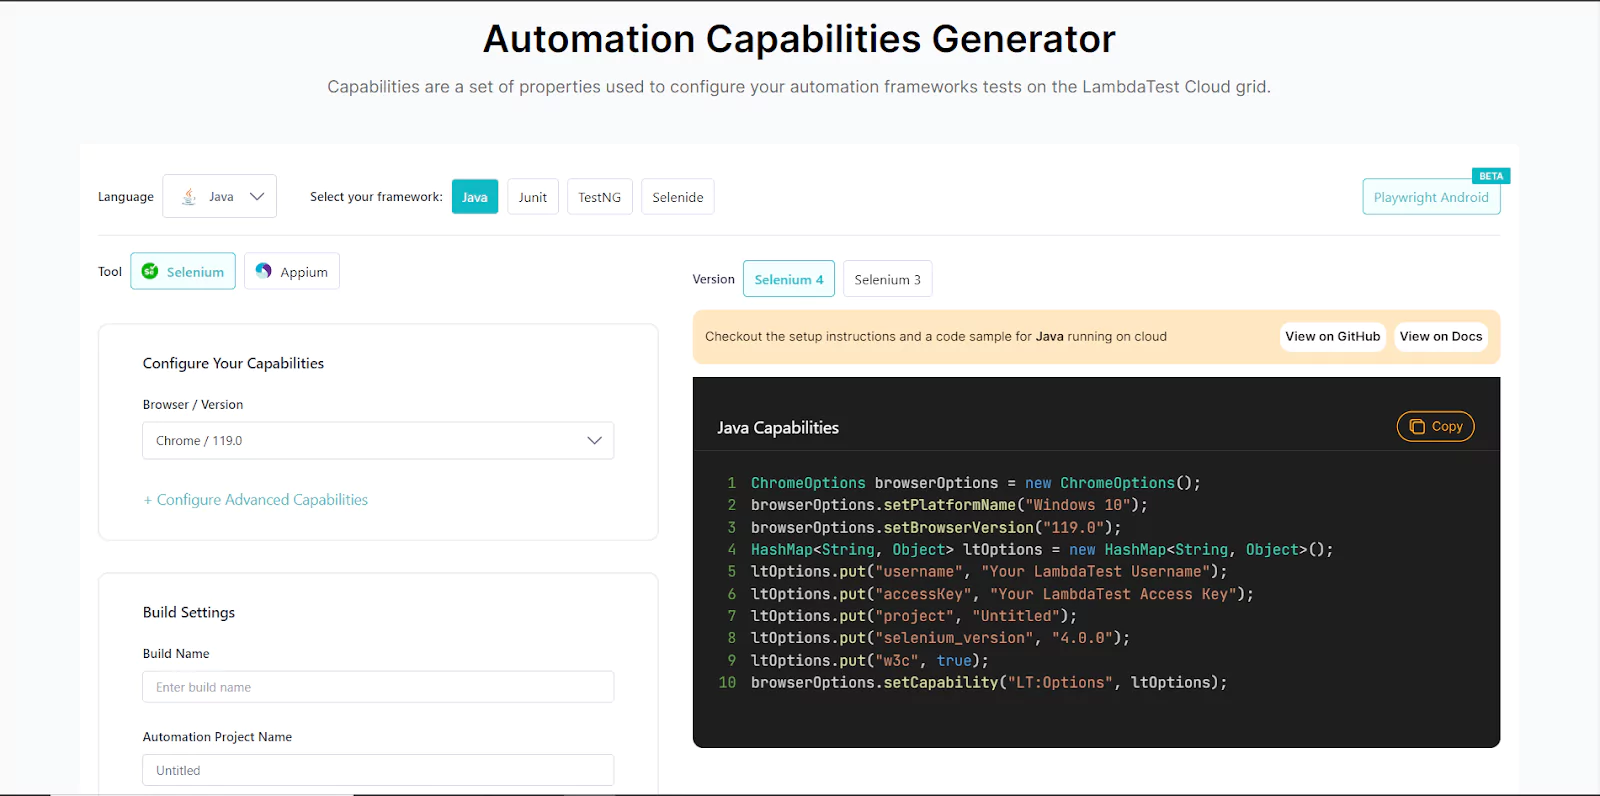
Follow the steps below to generate browser and operating system combinations:
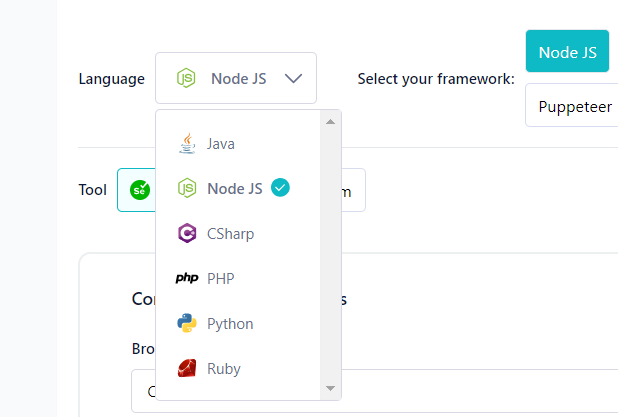
Step 1: On the Capabilities Generator Page, select the programming language you are using to run your tests. In this case, we use JavaScript and can select Node JS, a JavaScript framework.
Step 2: Select Selenium as the tool you will be using to run the end-to-end tests.

Then select Selenium 4 on the right.

Step 3: Configure Your Capabilities by selecting a browser and browser version.
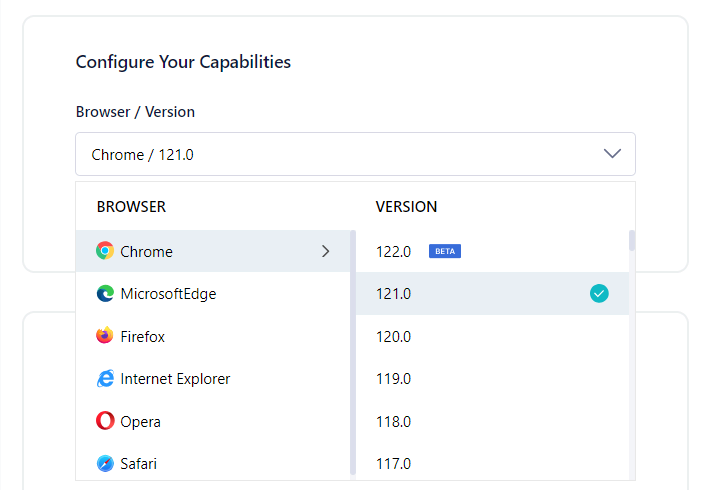
Step 4: Click Configure Advanced Capabilities and select the operating system.
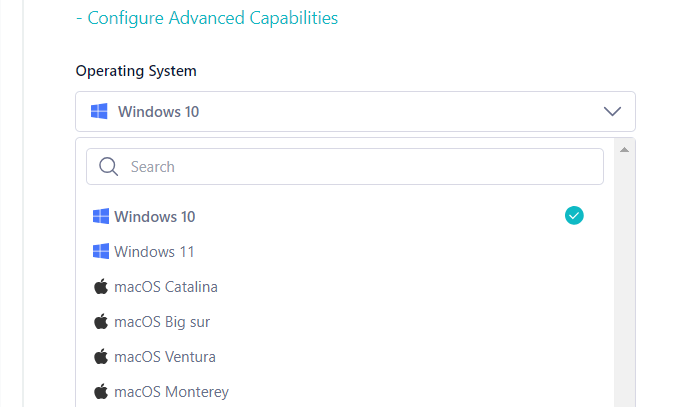
Step 5: Scroll down to the Build Settings section and fill out the input fields as shown below.
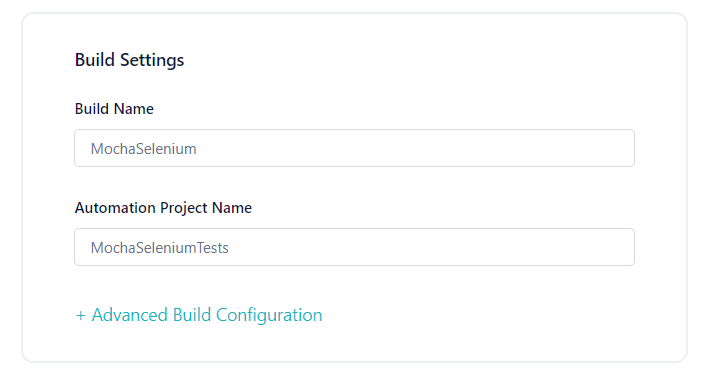
Step 6: Scroll down to the Test Configuration section and fill out the input field as shown below. On the right, you can now see the capabilities presented in a code format that you can copy and use in your test script.
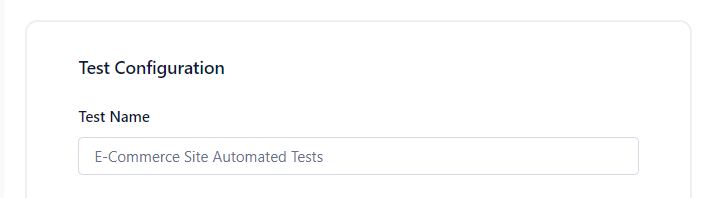
On the right, you can now see the capabilities presented in a code format that you can copy and use in your test script.
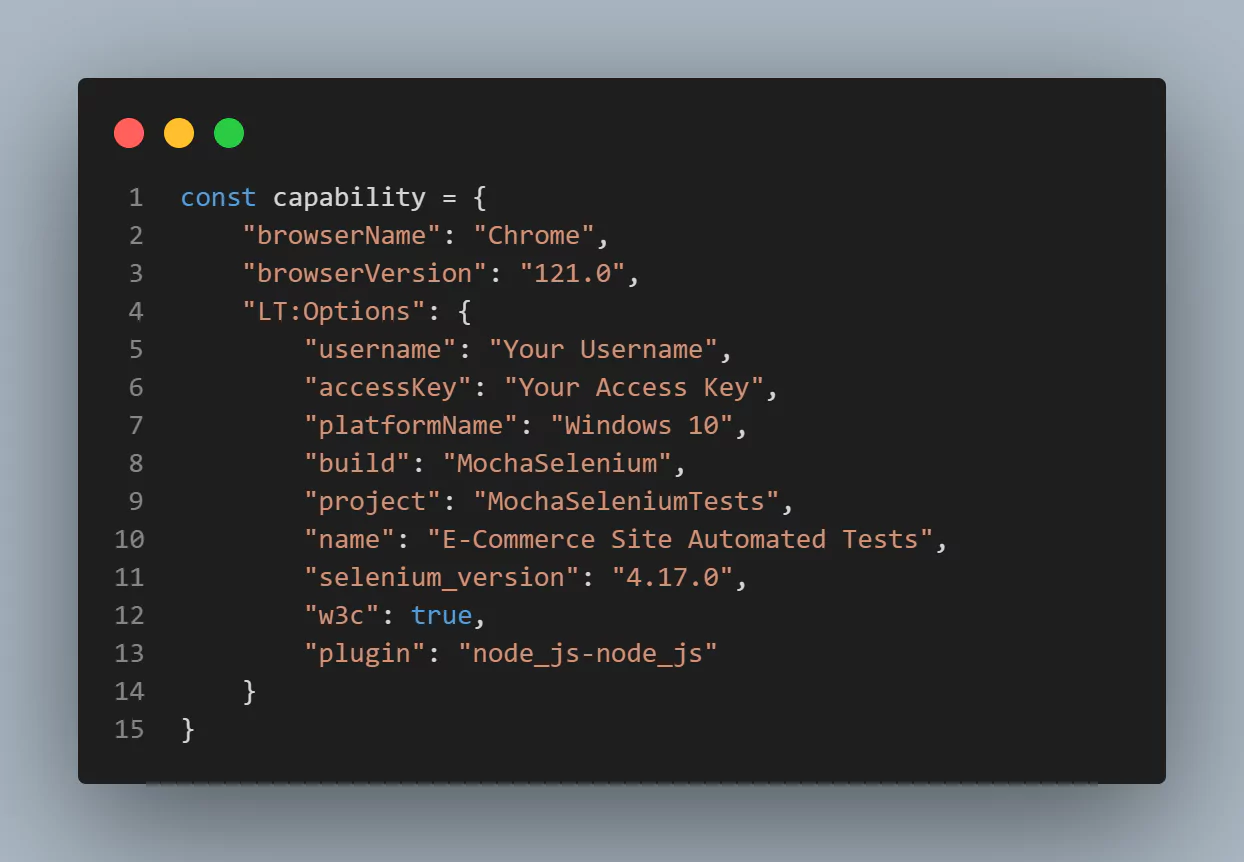
For our test cases, below are capabilities for browser and operating system combinations we want to test on an eCommerce website, such as adding an item to the cart and checkout functionality.
Chrome 121.0 + Windows 10
Safari 17.0 + macOS Sonoma
Firefox 122.0 + Linux
Test Case Scenarios
In this case, we will run three test case scenarios to test whether a user can visit an eCommerce website, create an account, add an item to the cart, and then check out the item.
Below are the test case scenarios:
Test Scenario 1:
|
Test Scenario 2:
|
Test Scenario 3:
|
Creating and Running Test Script Using Page Object Model
The Page Object Model, or POM, is a design pattern used in software testing to create maintainable and readable automated test code. POM creates an object for each web page in an application. Then, page objects interact with the web page to perform actions such as filling out input fields, clicking buttons, or checking some text.
Follow the steps below to create and run a test script using the Page Object Model.
Step 1: Create a folder called MochaSeleniumTests. In the folder, create a folder called pageModel and test. Then, run the command below on the command line to install Mocha JS in your project and an assertion library, Chai.
npm i --save-dev mocha chaiStep 2: Install the latest version of the Selenium WebDriver in the project folder by running the command below on the command line.
npm install selenium-webdriverStep 3: Run the command below on the command line to install cross-env so you can have a single command without worrying about setting or using the environment variable properly for your project.
npm i cross-envStep 4: Create a file called .env in the project folder. Then, add the Username and Access Key obtained from the capabilities generator to the environment variables, as shown below.
LT_USERNAME="Your Username"
                                LT_ACCESS_KEY="Your Access Key"
Step 5: Configure the npm test script to run the Mocha JS tests when the command npm test is executed. To do that, update the package.json file and add a script section, as shown below.
"scripts": {
                                    "test": "mocha"
                                  },
The package.json file code should now look as shown below.
{
                                  "type": "module",
                                  "scripts": {
                                    "test": "mocha"
                                  },
                                  "dependencies": {
                                    "chai": "^5.0.3",
                                    "dotenv": "^16.4.1",
                                    "mocha": "^10.2.0",
                                    "selenium-webdriver": "^4.17.0"
                                  }
                                }
Step 6: In the PageModel folder, create four files named main.js, createAccount.main.js, addToCart.main.js, and checkout.main.js, as shown below.
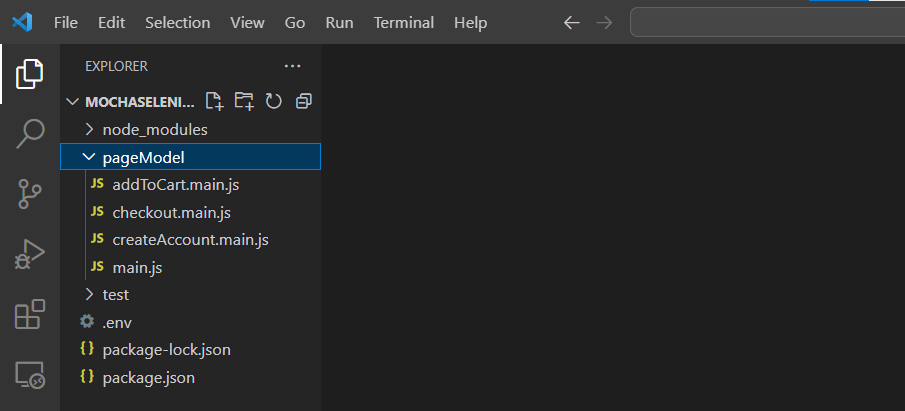
The naming convention .main.js of the files means that the main.js file is the parent file while the other files are child files. This means the child files will inherit some methods from the parent file.
Step 7: In the main.js file, add the following code:
import { By, until, Builder } from "selenium-webdriver";
                                import selenium from "selenium-webdriver";
                                import "dotenv/config";

                                const username = process.env.LT_USERNAME;
                                const accessKey = process.env.LT_ACCESS_KEY;

                                var remoteHub = "https://" + username + ":" + accessKey + "@hub.lambdatest.com/wd/hub";

                                const chromeWindowsCapability = {
                                    "browserName": "Chrome",
                                    "browserVersion": "121.0",
                                    "LT:Options": {
                                        "username": username,
                                        "accessKey": accessKey,
                                        "platformName": "Windows 10",
                                        "build": "MochaSelenium",
                                        "project": "MochaSeleniumTests",
                                        "name": "E-Commerce Site Automated Tests",
                                        "selenium_version": "4.17.0",
                                        "w3c": true,
                                        "plugin": "node_js-node_js"
                                    }
                                }

                                const getElementById = async (driver, id, timeout = 8000) => {
                                  const el = await driver.wait(until.elementLocated(By.id(id)), timeout);
                                  return await driver.wait(until.elementIsVisible(el), timeout);
                                };

                                const getElementByXpath = async (driver, xpath, timeout = 8000) => {
                                  const el = await driver.wait(until.elementLocated(By.xpath(xpath)), timeout);
                                  return await driver.wait(until.elementIsVisible(el), timeout);
                                };

                                const seleniumDriver = new selenium.Builder()
                                  .usingServer(remoteHub)
                                  .withCapabilities(chromeWindowsCapability)
                                  .build();

                                class Main {
                                  constructor() {
                                    this.driver = seleniumDriver;
                                    this.byId = getElementById;
                                    this.byXpath = getElementByXpath;
                                  }

                                  async quitB() {
                                    await this.driver.quit();
                                  }
                                }

                                export default Main;
Code Walkthrough:
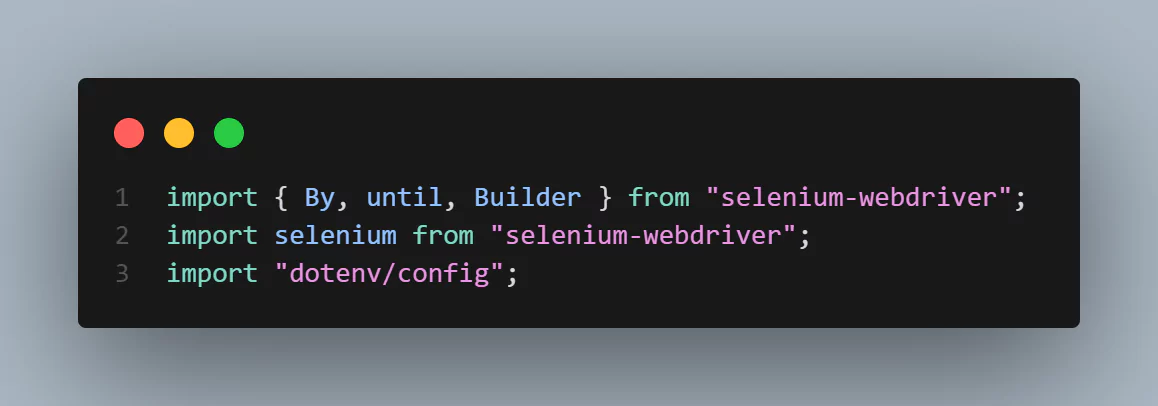
- Since we are using Selenium to run the tests, Selenium WebDriver, until, and By are imported, as shown below:
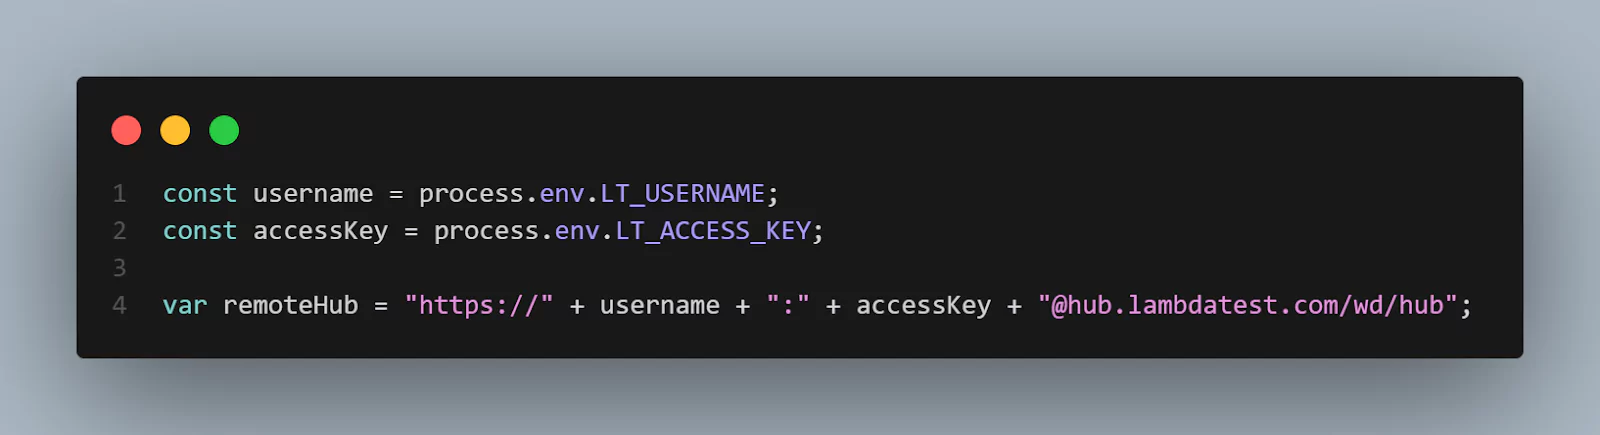
- Variables username, accessKey, and remoteHub to be used in the test case are set.
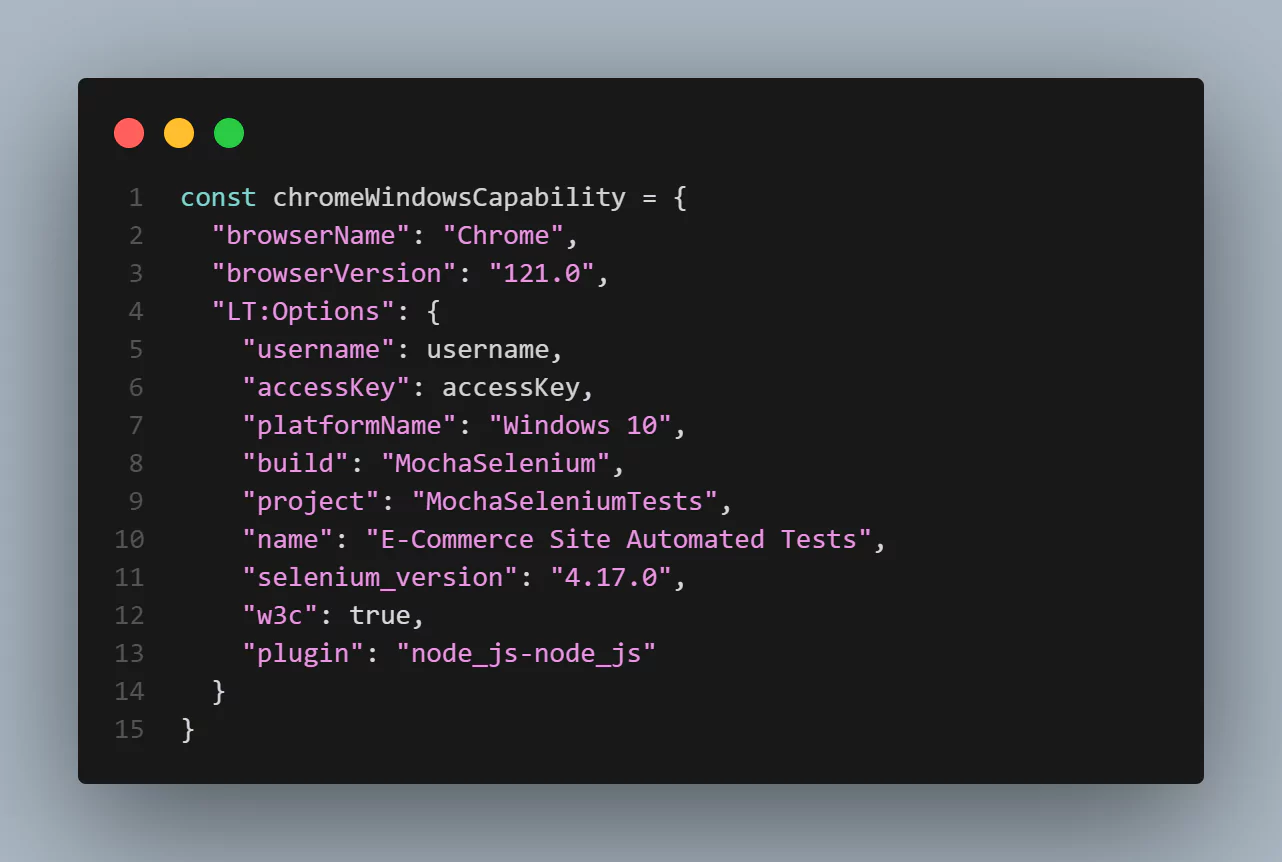
- Test capabilities are configured by passing browser, browser version, and operating system information with TestMu AI Selenium Grid Capabilities through the capabilities object.
- An async function called getElementById, which takes driver, id, and timeout parameters, is declared.
- An async function called getElementByXpath with parameters driver, XPath, and timeout set to 8000 milliseconds is declared.
- A new instance of a Selenium WebDriver is initialized using the Builder Design Pattern.
- A JavaScript class called Main is created where the class has a constructor method, a special method called when an object of the class is created. The constructor method initializes the properties of the class.
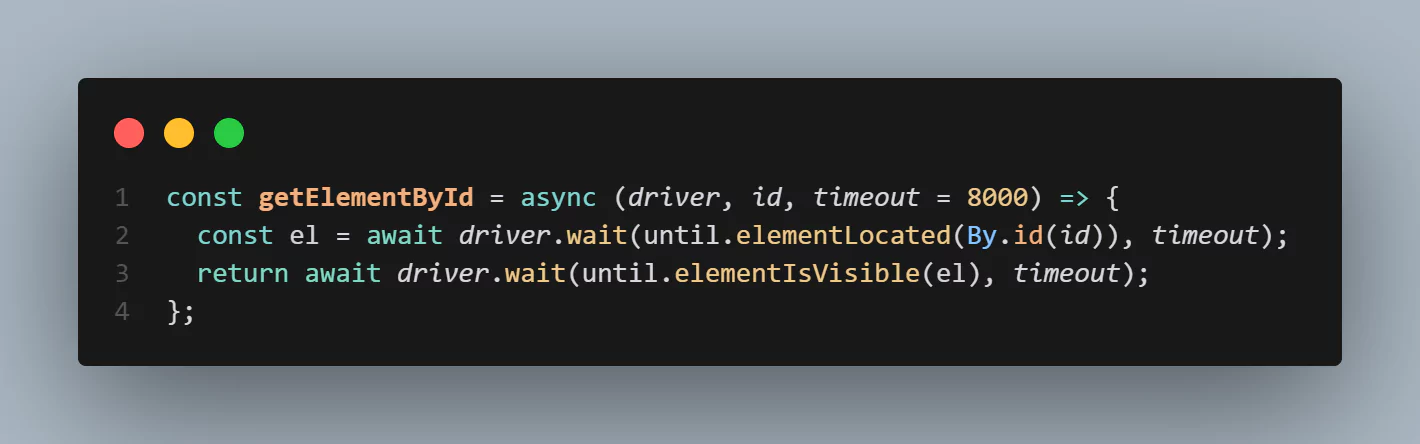
The driver parameter is an instance of a Selenium WebDriver used to control a browser. The id parameter is the ID of the HTML element you want to interact with. The timeout parameter is the maximum time in milliseconds that the getElementById function will wait for the element to become visible.
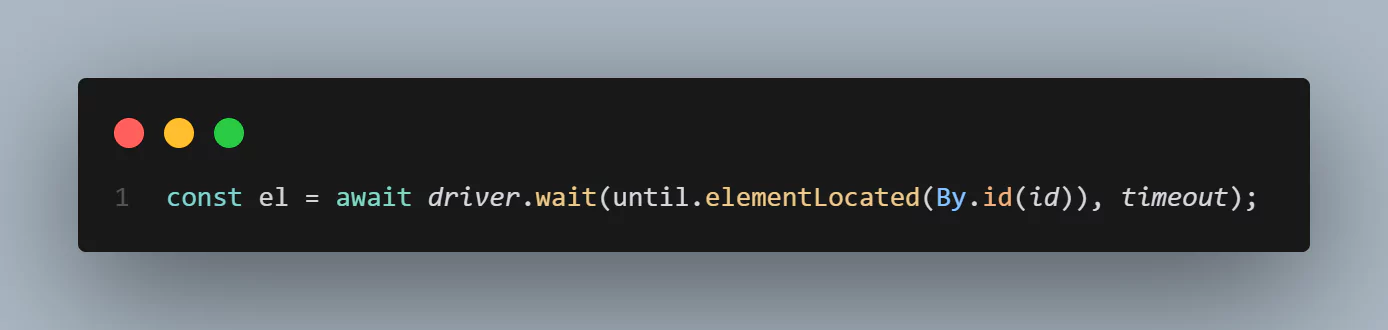
Inside the async function, a variable called el is declared. The variable value instructs the Selenium WebDriver to wait until the element with the targeted ID is on the test URL. The elementLocated() method is used here.
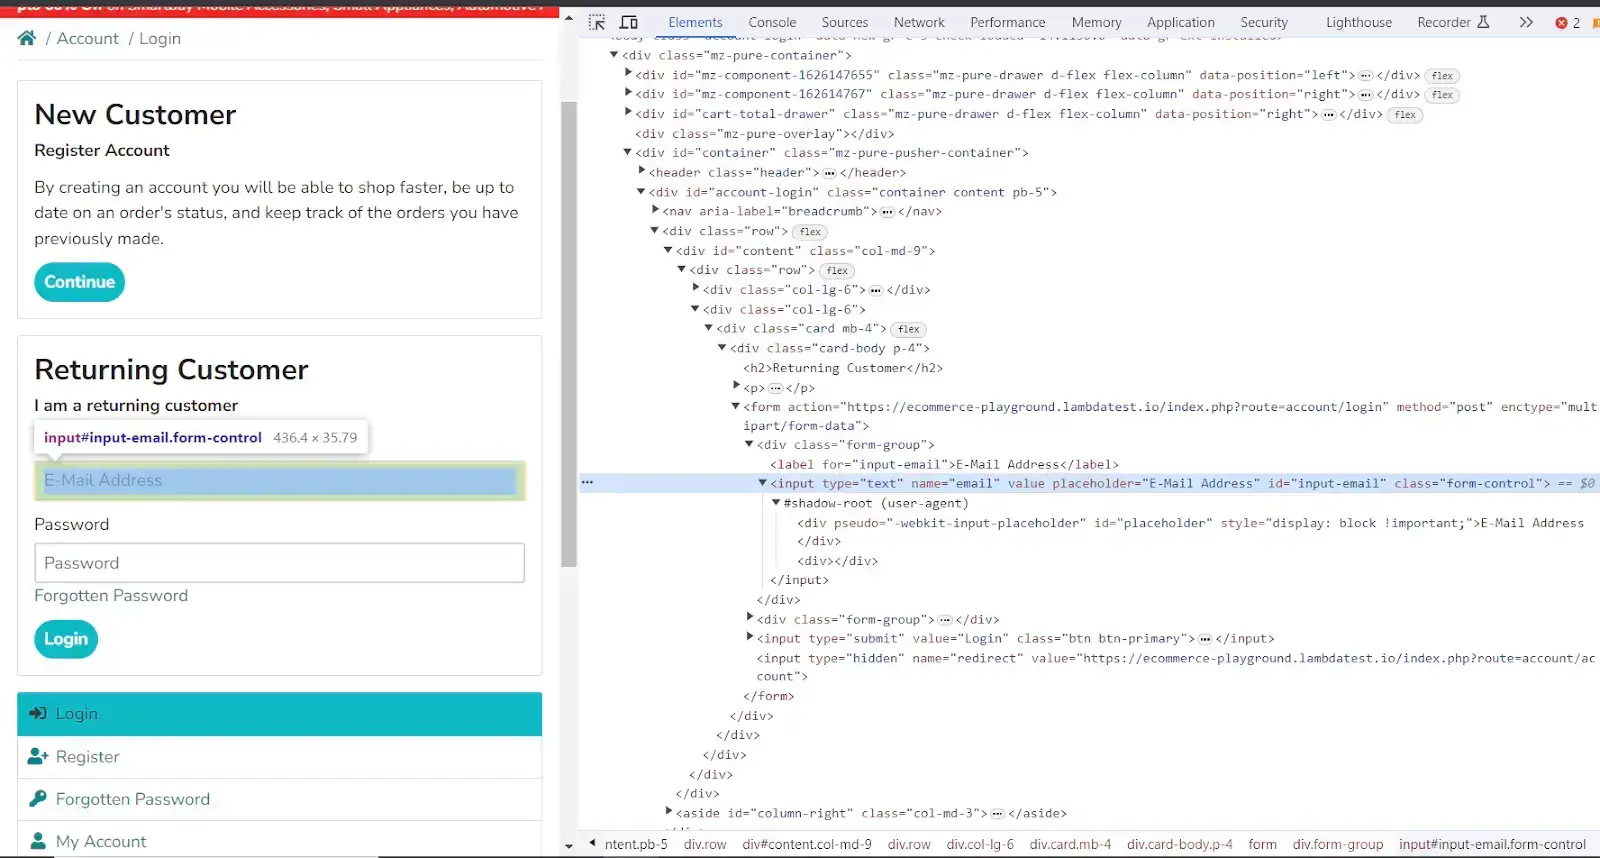
Below is how the ID locator locates an element.
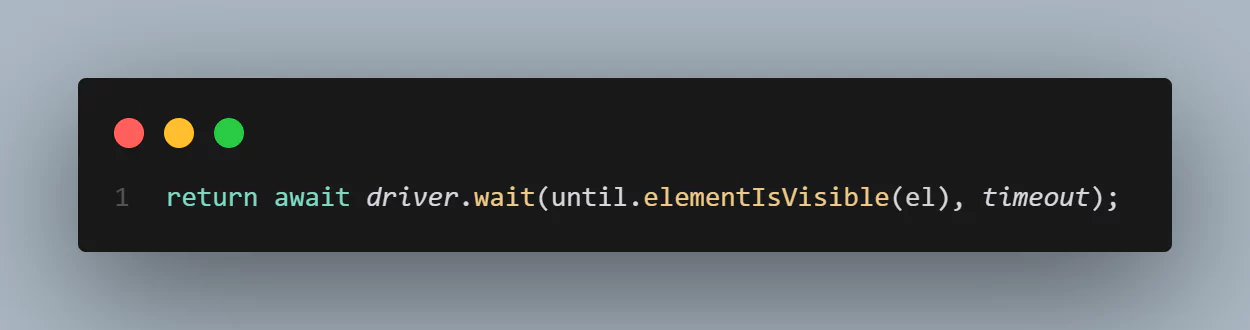
An object returned by the getElementById async function instructs the Selenium WebDriver to wait until the element targeted by ID is visible on the DOM. Visibility means that the element is not only displayed but also has a height and width that is greater than zero. The elementIsVisible() method is used here.
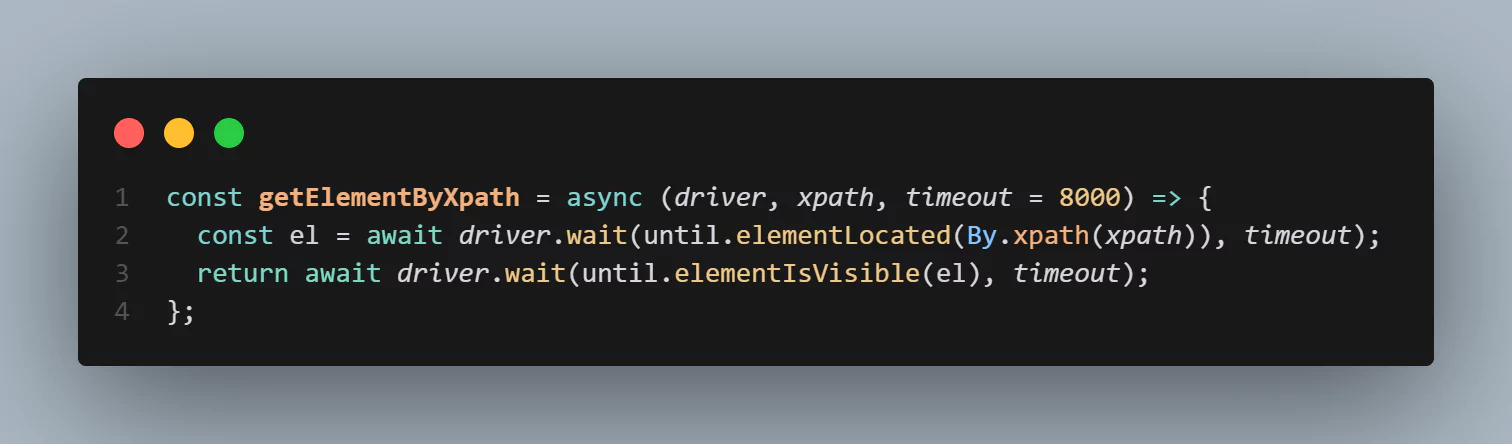
Inside the async function, a variable called el is declared, where the variable value instructs the Selenium driver to wait until the element with the targeted XPath is located on the registration page of the eCommerce website, the elementLocated() method is used here.
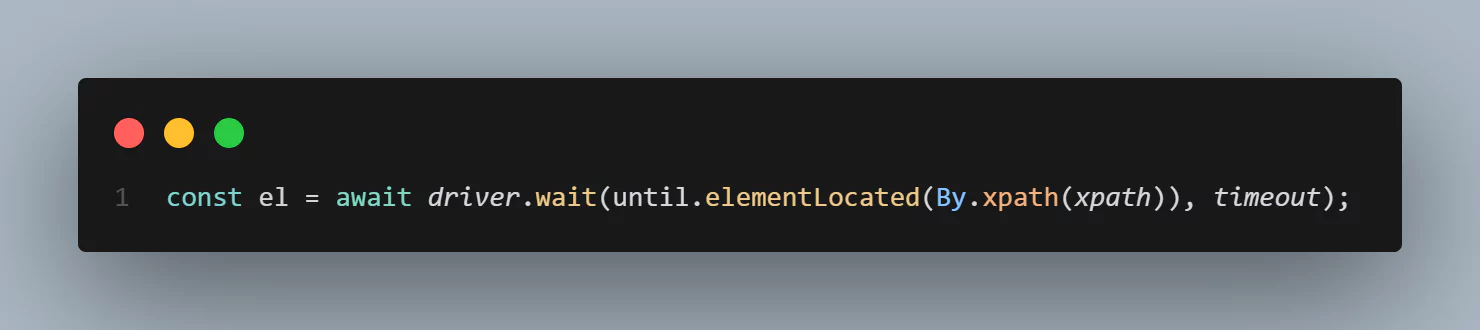
Below is how an element is located by XPath.
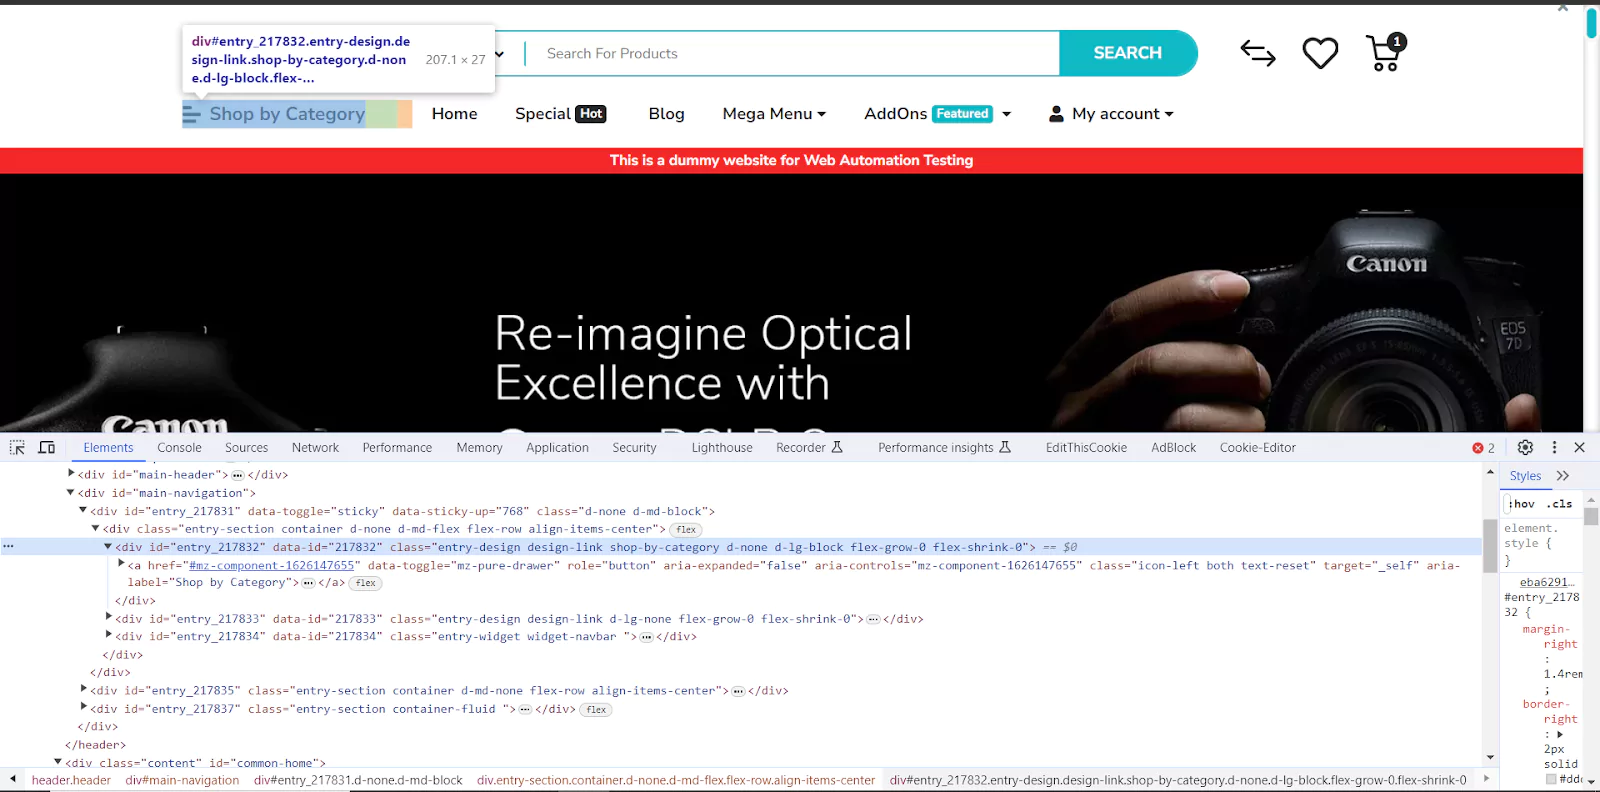
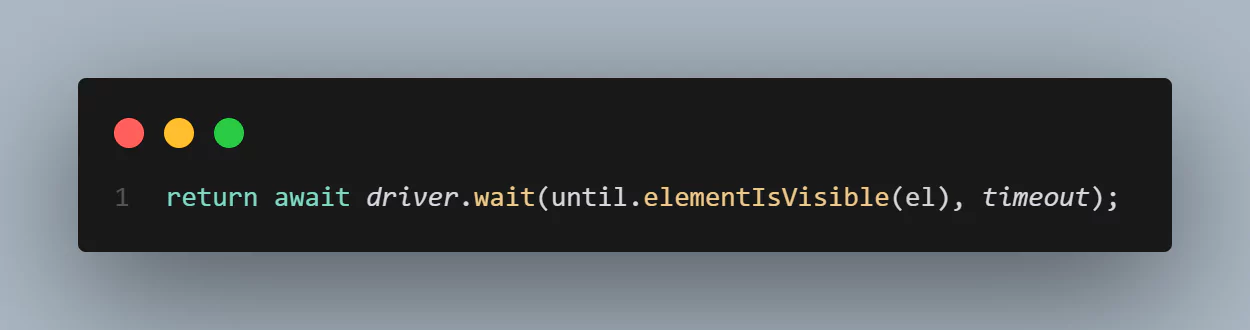
An object returned by the getElementByXpath async function instructs the Selenium WebDriver to wait until the element we are targeting by XPath is present on the DOM of the registration page and visible. The elementIsVisible() method is used here.
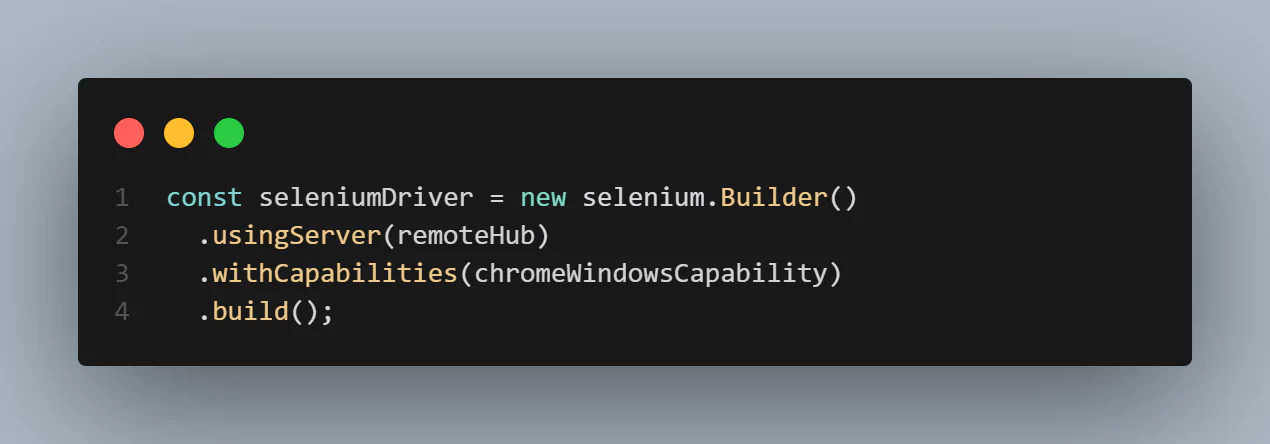
The const declares a constant variable named seleniumDriver, which will hold the created Selenium WebDriver instance. The new selenium.Builder() creates a new instance of the Builder class provided by the Selenium library.
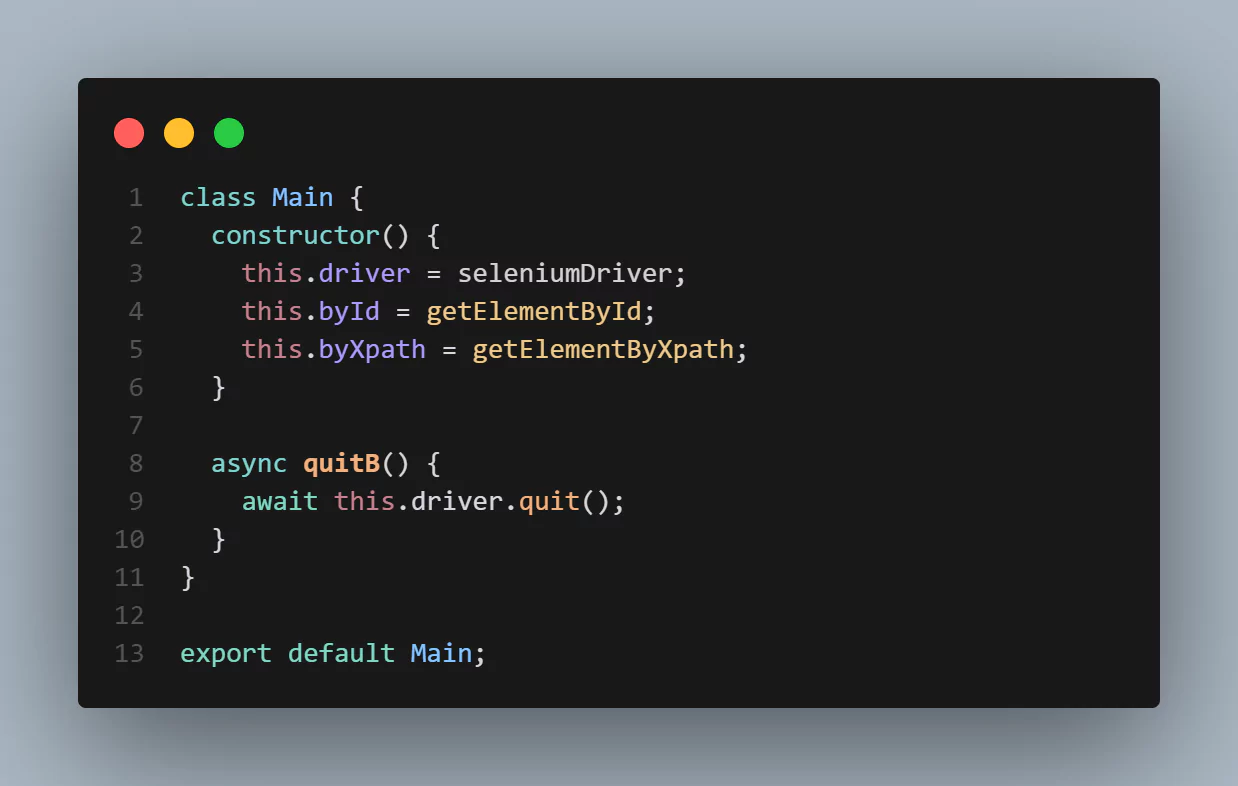
A value of seleniumDriver is assigned to this.driver property, a value of getElementById to this.byId property, and a value of getELementByXpath to this.byXpath property in this constructor method.
Finally, an async function quitB() is created. The async function ends the browser session. Also, the Main class is exported for use in other files.
Step 8: In the createAccount.main.js file, add the following code:
import Main from "./main.js"

                                const signupUrl = "https://ecommerce-playground.lambdatest.io/index.php?route=account/register";

                                class SignupPage extends Main {
                                constructor() {
                                super();
                                this.url = signupUrl;

                                this.firstNameInput = "input-firstname";
                                this.lastNameInput = "input-lastname";
                                this.emailInput = "input-email";
                                this.telephoneInput = "input-telephone";
                                this.passwordInput = "input-password";
                                this.confirmPasswordInput = "input-confirm";
                                this.agreePolicyBtn = '//label[@for="input-agree"]';
                                this.submitButton = '//input[@value="Continue"]';
                                this.successMessageText = '//h1[@class="page-title my-3"]';
                                }

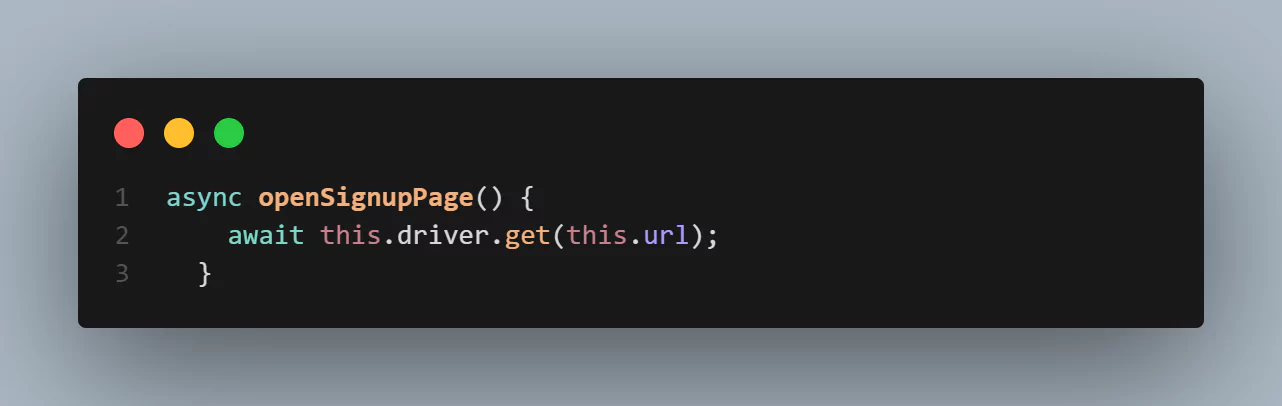
                                async openSignupPage() {
                                await this.driver.get(this.url);
                                }

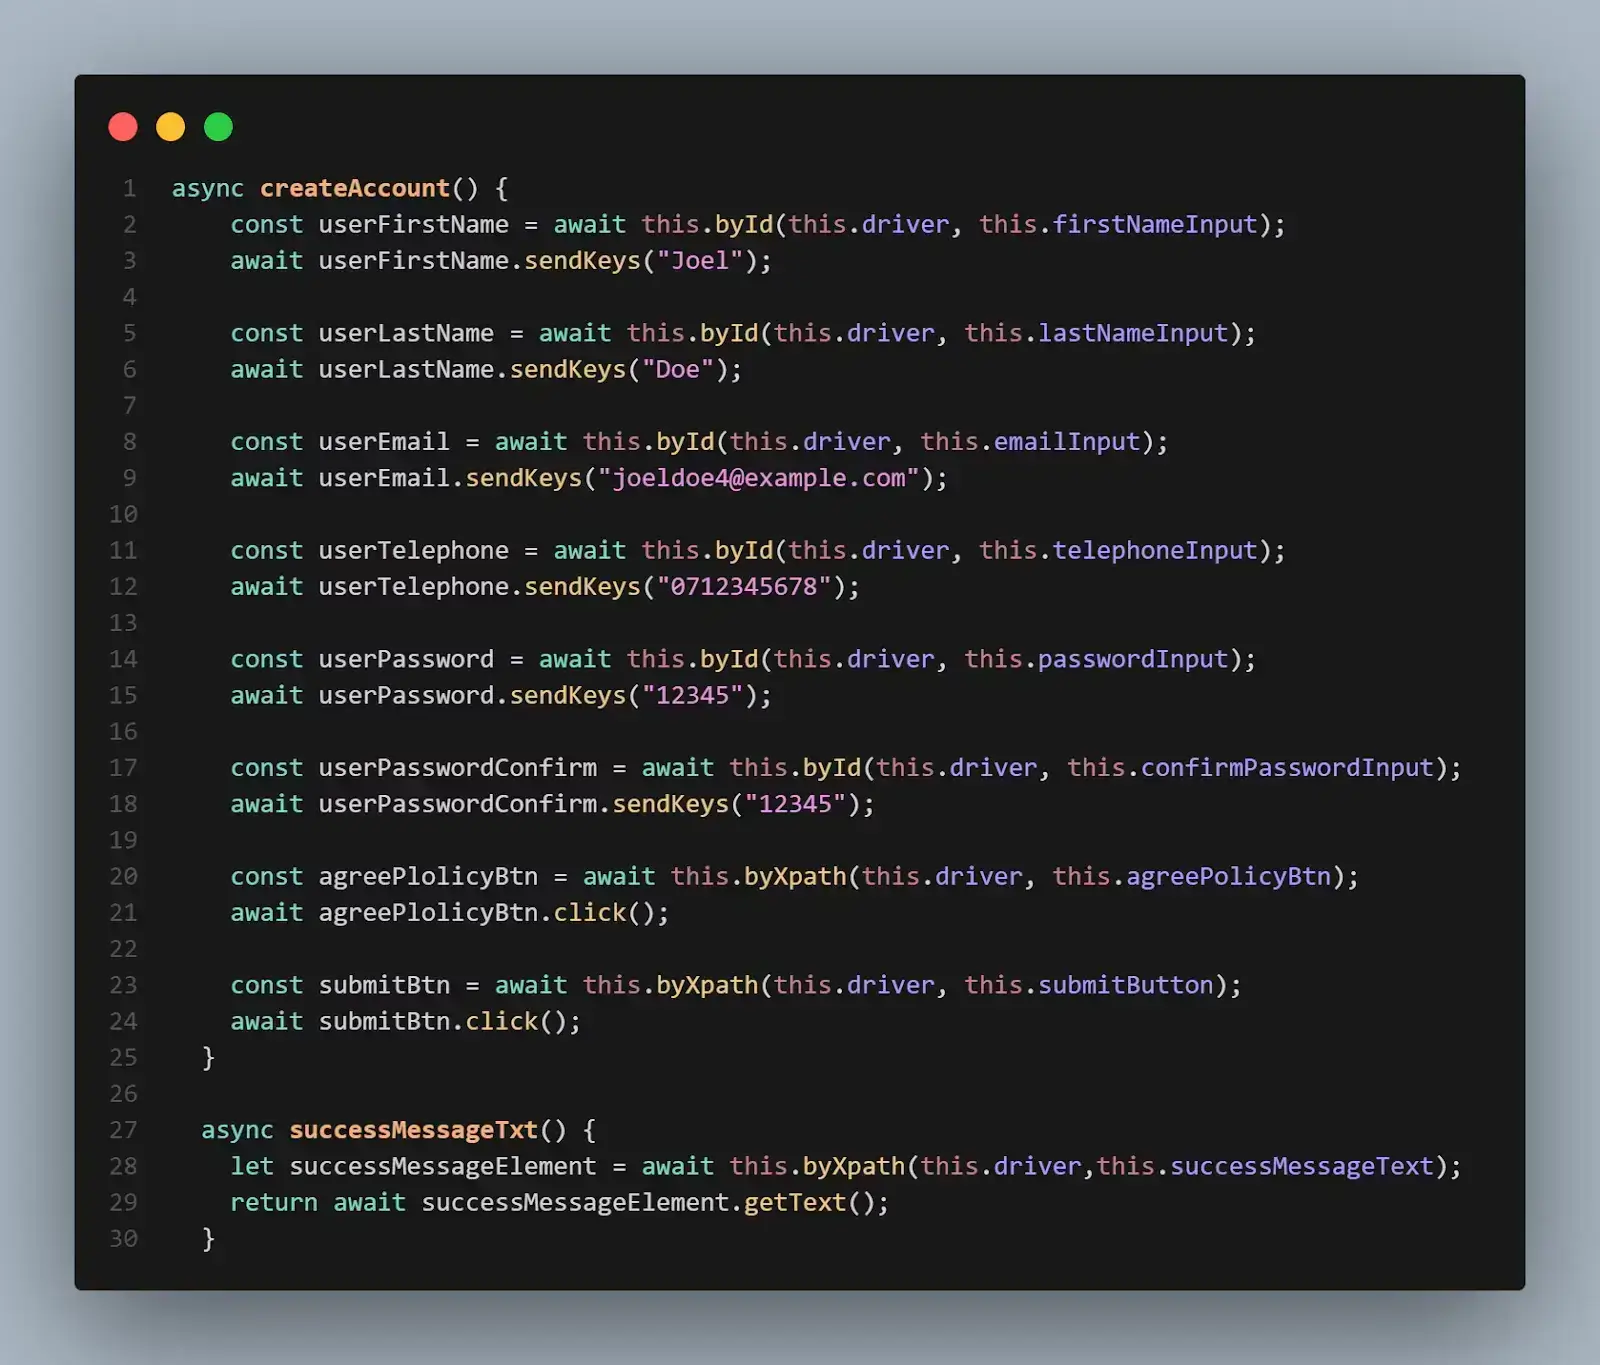
                                async createAccount() {
                                const userFirstName = await this.byId(this.driver, this.firstNameInput);
                                await userFirstName.sendKeys("Joel");

                                const userLastName = await this.byId(this.driver, this.lastNameInput);
                                await userLastName.sendKeys("Doe");

                                const userEmail = await this.byId(this.driver, this.emailInput);
                                await userEmail.sendKeys("joeldoe4@example.com"); //Use different email

                                const userTelephone = await this.byId(this.driver, this.telephoneInput);
                                await userTelephone.sendKeys("0712345678");

                                const userPassword = await this.byId(this.driver, this.passwordInput);
                                await userPassword.sendKeys("12345");

                                const userPasswordConfirm = await this.byId(this.driver, this.confirmPasswordInput);
                                await userPasswordConfirm.sendKeys("12345");

                                const agreePlolicyBtn = await this.byXpath(this.driver, this.agreePolicyBtn);
                                await agreePlolicyBtn.click();

                                const submitBtn = await this.byXpath(this.driver, this.submitButton);
                                await submitBtn.click();
                                }

                                async successMessageTxt() {
                                let successMessageElement = await this.byXpath(this.driver,this.successMessageText);
                                return await successMessageElement.getText();
                                }
                                }

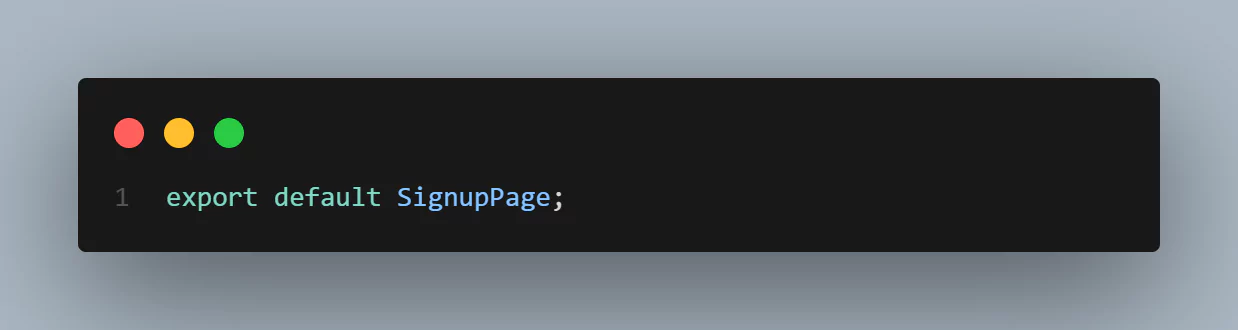
                                export default SignupPage;
Code Walkthrough:
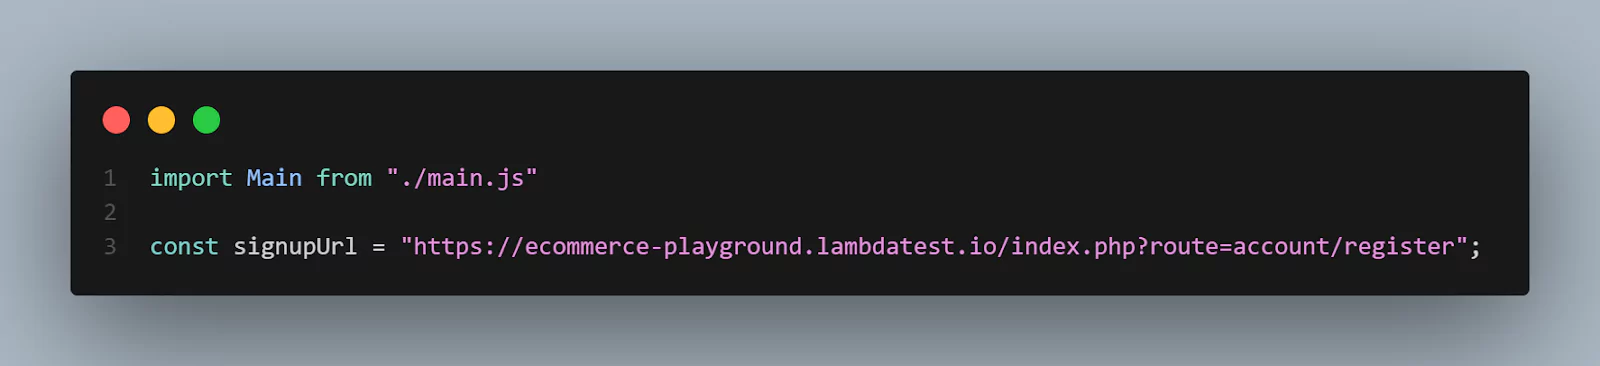
- Variable Main is assigned the value of the Main class imported from the main.js file. Then, the variable signupUrl is assigned the eCommerce website's register account URL.
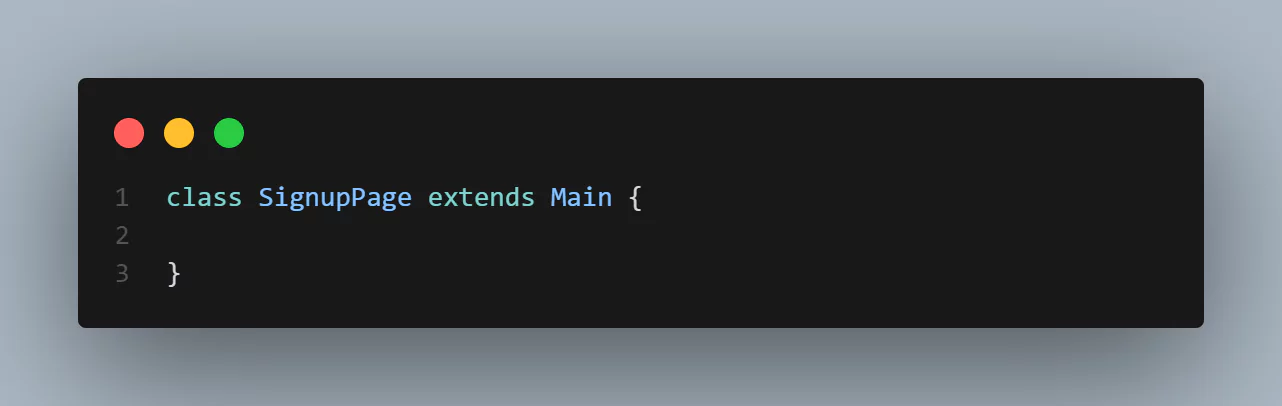
- The child class of the parent class Main, called SignupPage, is created using the extends keyword. The SignupPage class will inherit all the methods from the Main class.
- The SignupPage class constructor() method is created, using the super() method to call the constructor of the parent class Main. In the constructor method, this.url property is assigned the value of the variable signupUrl.
- The async function openSignupPage() is created where the get() method loads the eCommerce website’s register page URL.
- The async function createAccount() defines the paths for web elements, input fields, texts, and buttons to be tested when creating an account.
- Finally, the SignupPage class is exported for use in other files.
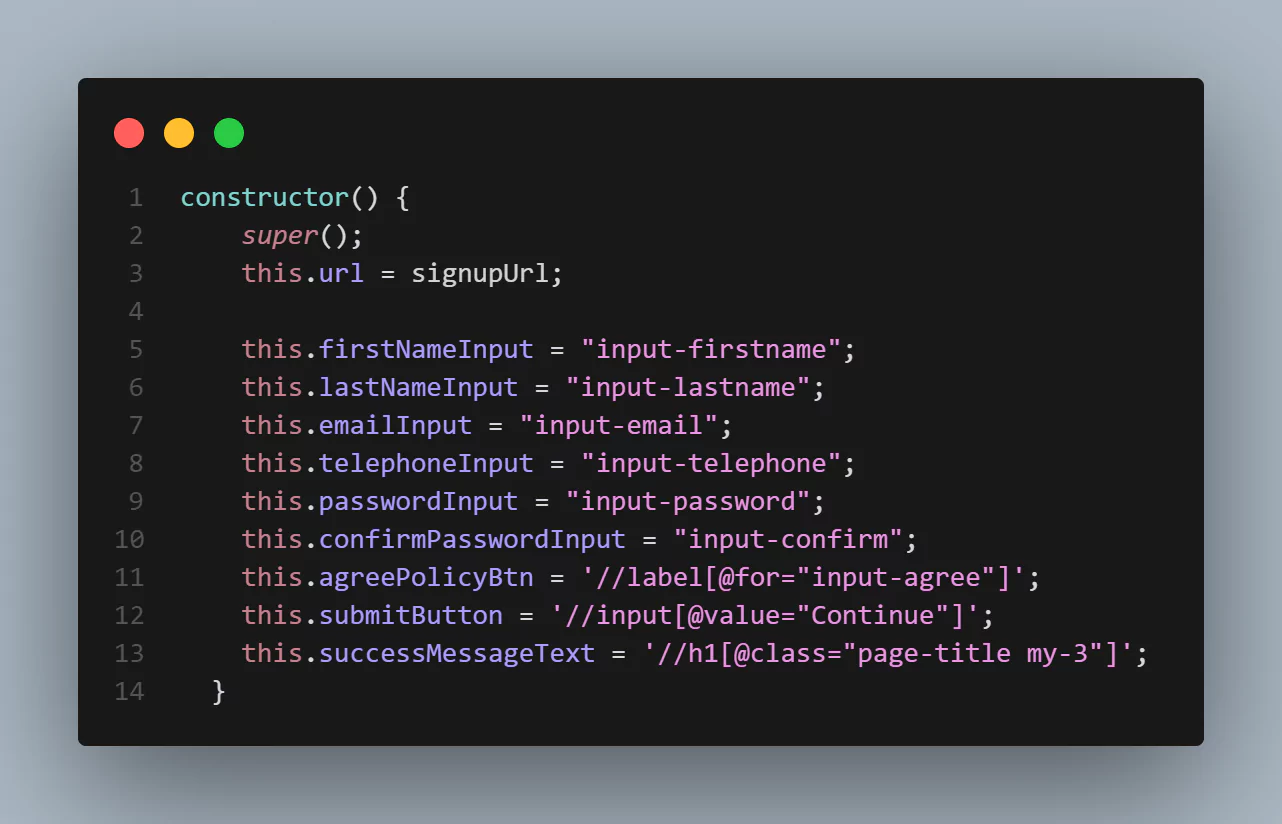
Properties this.firstNameInput, this.lastNameInput, this.emailInput, this.telephoneInput, this.passwordInput, this.confirmPasswordInput, this.agreePolicyBtn, this.submitButton, and this.successMessageText are assigned selector values that will be used to find or select registration page form inputs, buttons, or text.
Step 9: In the addToCart.main.js file, add the following code:
import Main from "./main.js";

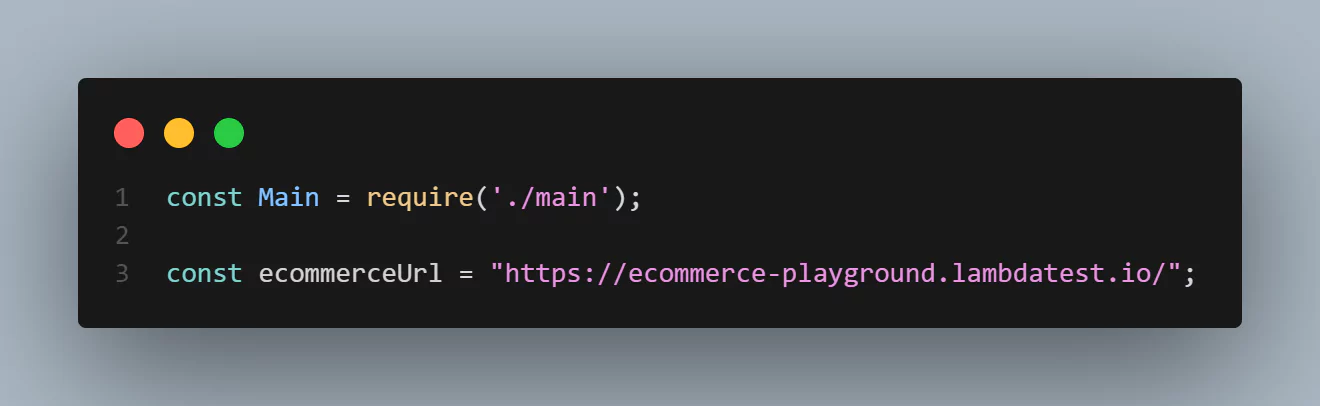
                                const ecommerceUrl = "https://ecommerce-playground.lambdatest.io/";

                                class AddToCart extends Main {
                                constructor() {
                                super();
                                this.url = ecommerceUrl;

                                this.categoryButton = '//a[normalize-space()="Shop by Category"]';
                                this.phonesCategoryButton = '//span[normalize-space()="Phone, Tablets & Ipod"]';
                                this.iPhoneButton = '//div[@class="carousel-item active"]//img[@title="iPhone"]';
                                this.addToCartButton = '//div[@id="entry_216842"]//button[@title="Add to Cart"][normalize-space()="Add to Cart"]';
                                this.cartButton = '//a[@class="btn btn-primary btn-block"]';
                                this.itemNameText = '//td[@class="text-left"]//a[contains(text(),"iPhone")]';
                                }

                                async openEcomSite() {
                                await this.driver.get(this.url);
                                }

                                async addToCart() {
                                const categoryBtn = await this.byXpath(this.driver, this.categoryButton);
                                await categoryBtn.click();

                                const phonesCategoryBtn = await this.byXpath( this.driver, this.phonesCategoryButton);
                                await phonesCategoryBtn.click();

                                const iPhoneBtn = await this.byXpath(this.driver, this.iPhoneButton);
                                await iPhoneBtn.click();

                                const addToCartBtn = await this.byXpath(this.driver, this.addToCartButton);
                                await addToCartBtn.click();

                                const cartBtn = await this.byXpath(this.driver, this.cartButton);
                                await cartBtn.click();
                                }

                                async getPhoneText() {
                                let itemMessageElement = await this.byXpath(this.driver, this.itemNameText);
                                return await itemMessageElement.getText();
                                }
                                }

                                export default AddToCart;
Code Walkthrough:
- Variable Main is assigned the value of the Main class imported from the main.js file. Then, the variable ecommerceUrl is assigned the eCommerce website URL.
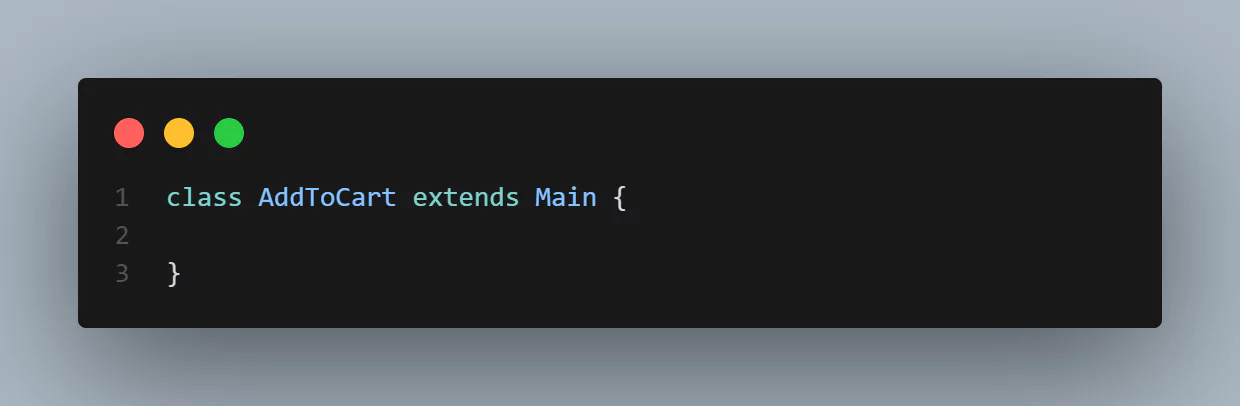
- The child class of the parent class Main, called AddToCart, is created using the extends keyword. The AddToCart class will inherit all the methods from the Main class.
- The AddToCart class constructor() method is created using a super() method to call the constructor of the parent class Main. In the constructor method, this.url property is assigned the value of the variable ecommerceUrl.
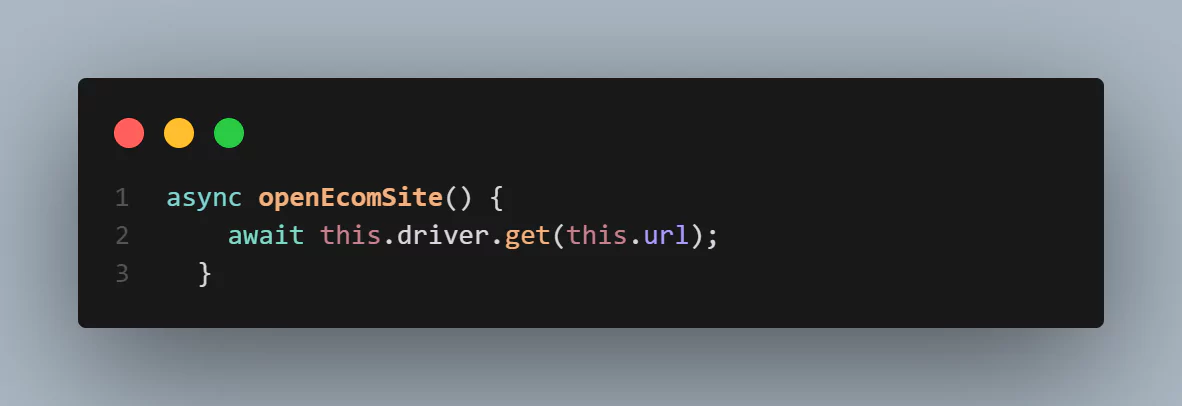
- The async function openEcomSite() is created where the get() method is used to load the URL of the eCommerce store.
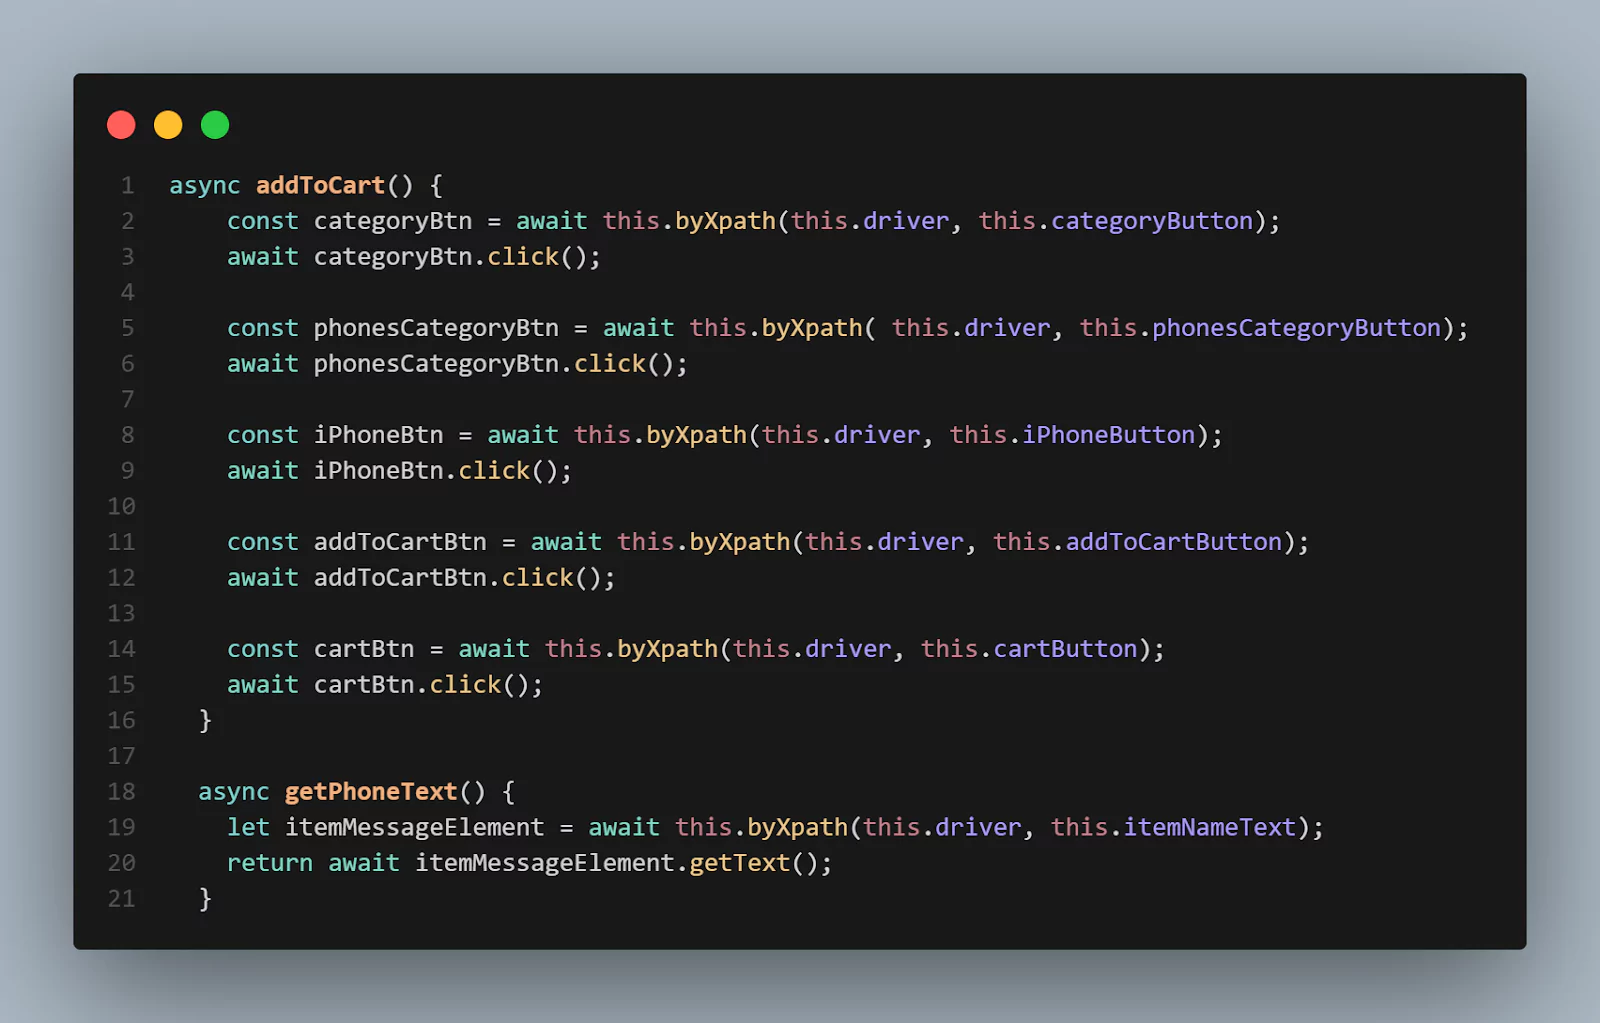
- The async function addToCart() is created where the paths for web elements, texts, and buttons to be tested when adding an item to a cart are defined.
- Finally, the AddToCart class is exported to be used in other files.
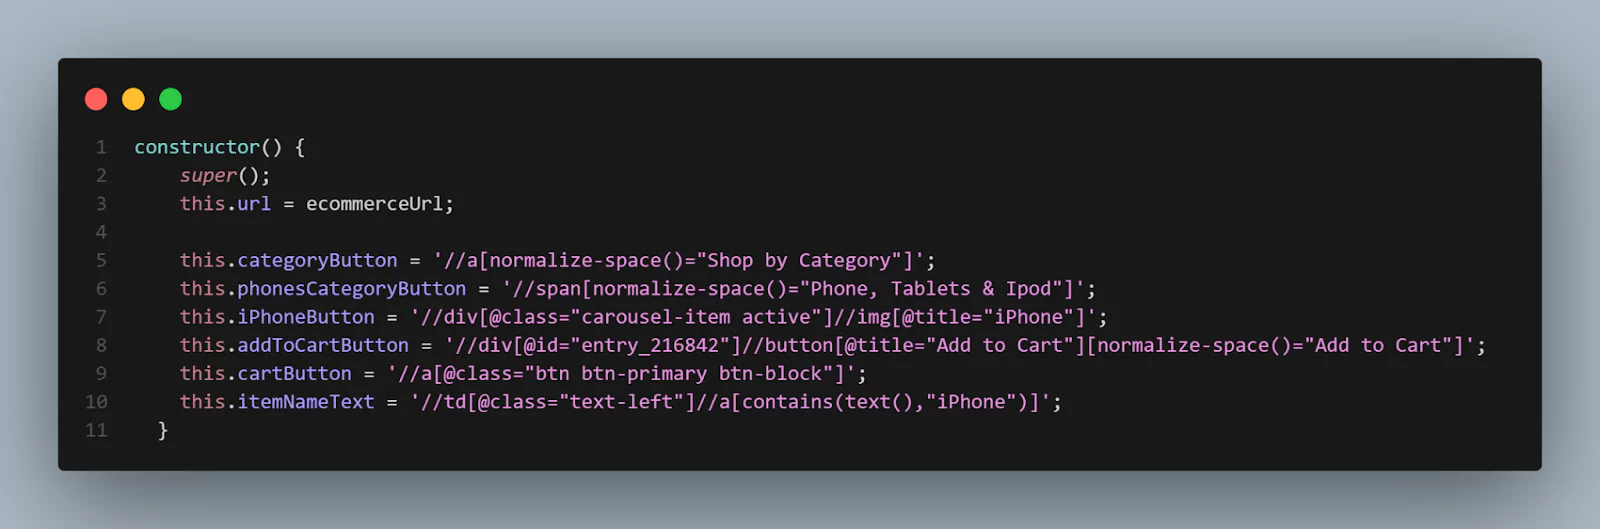
Properties this.categoryButton, this.phonesCategoryButton, this.iPhoneButton, this.addToCartButton, this.cartButton, and this.itemNameText are assigned selector values that will be used to find or select buttons or text to add an item to a cart.
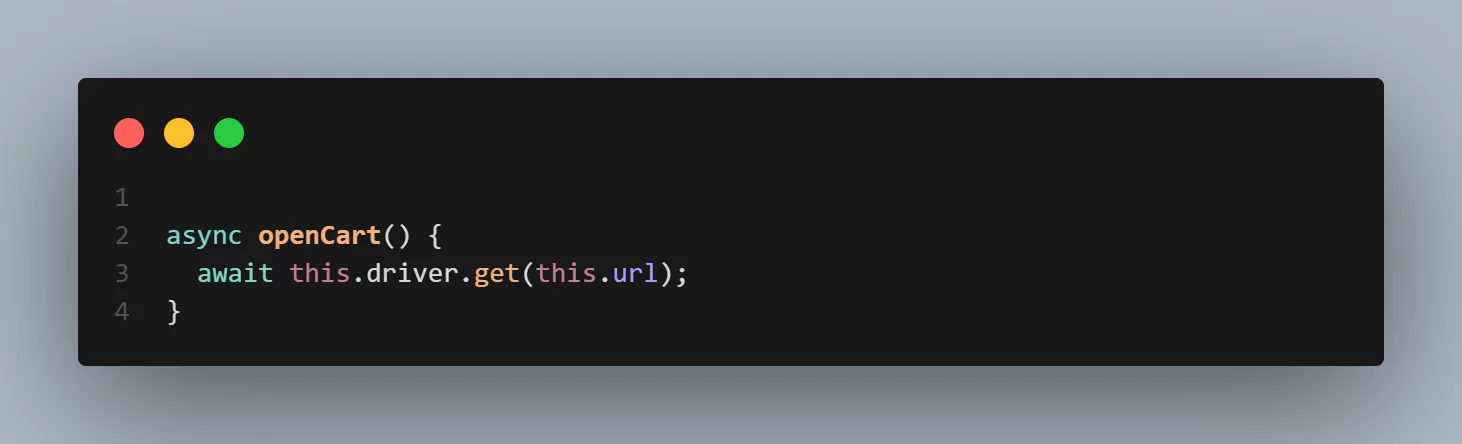
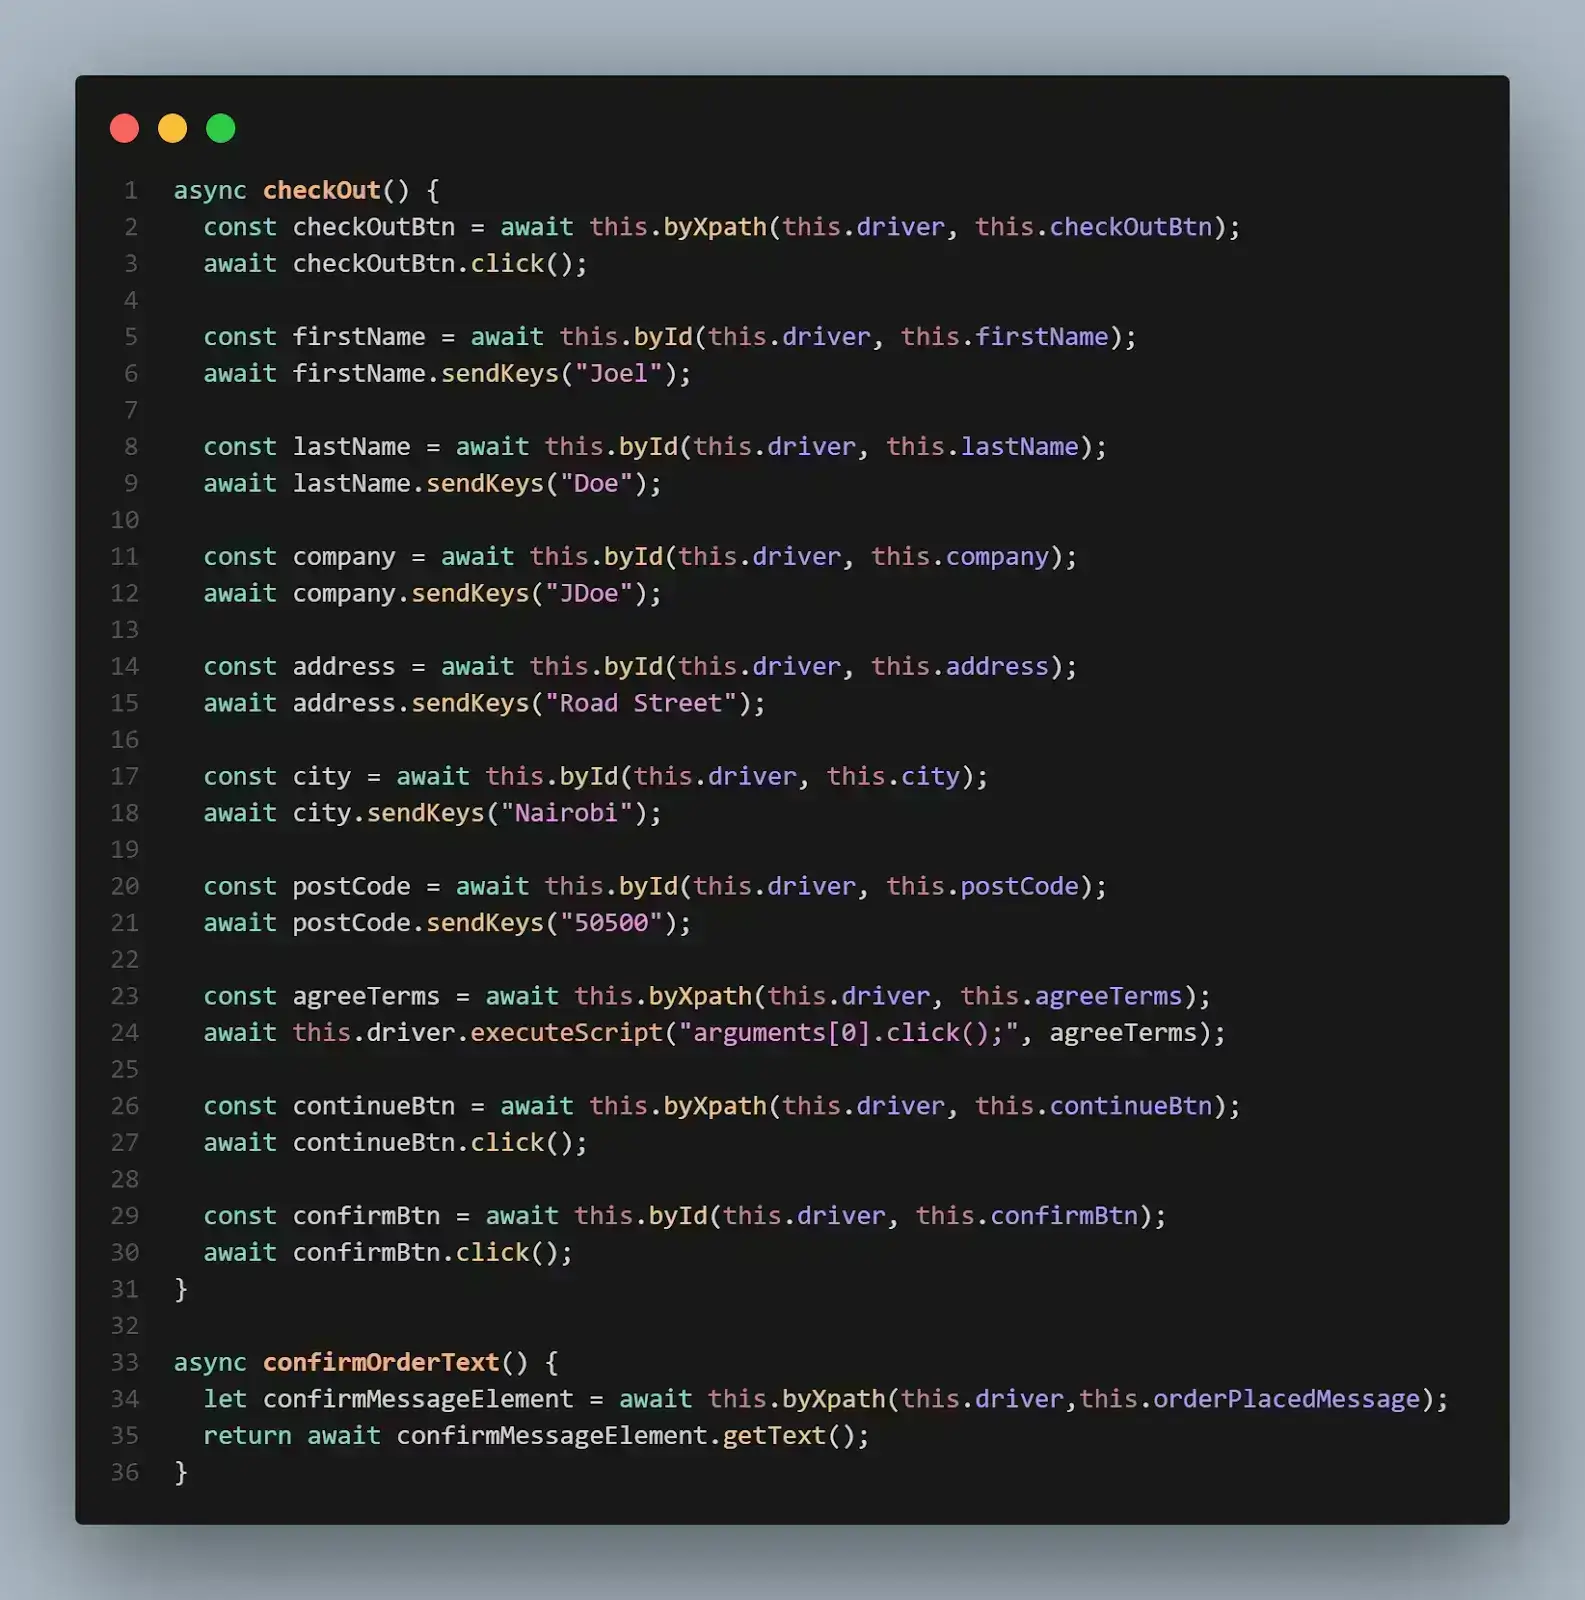
Step 10: In the checkout.main.js file, add the following code:
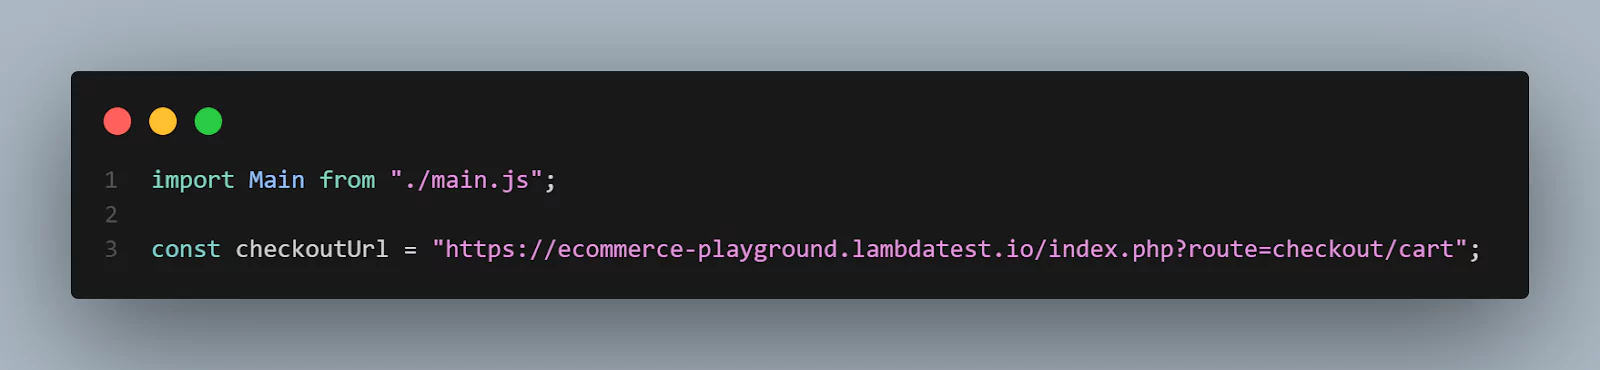
import Main from "./main.js";

                                const checkoutUrl = "https://ecommerce-playground.lambdatest.io/index.php?route=checkout/cart";

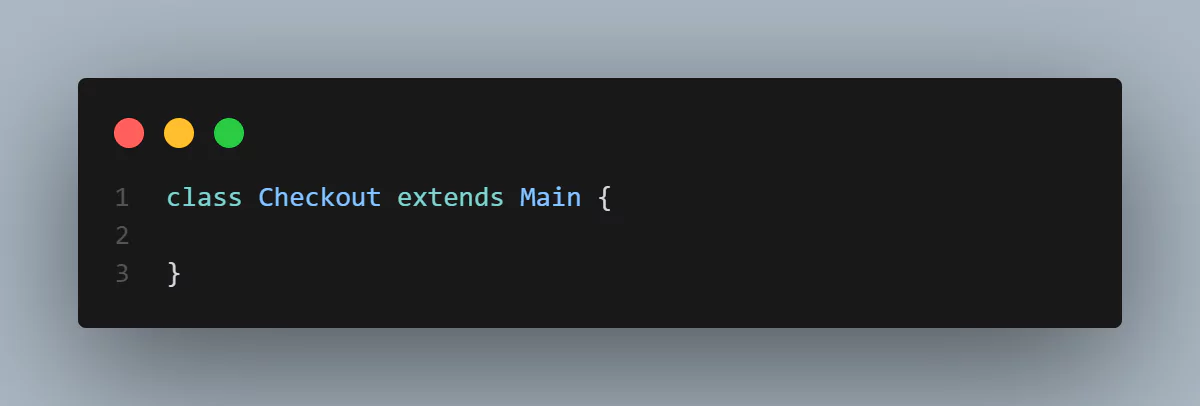
                                class Checkout extends Main {
                                constructor() {
                                super();
                                this.url = checkoutUrl;

                                this.checkOutBtn = '//a[@class="btn btn-lg btn-primary"]';
                                this.guestCheckOut = "//label[@for='input-account-guest']";
                                this.firstName = "input-payment-firstname";
                                this.lastName = "input-payment-lastname";
                                this.email = "input-payment-email";
                                this.telephone = "input-payment-telephone";
                                this.company = "input-payment-company";
                                this.address = "input-payment-address-1";
                                this.city = "input-payment-city";
                                this.postCode = "input-payment-postcode";
                                this.country = "input-payment-country";
                                this.zone = "input-payment-zone";
                                this.agreeTerms = "//label[@for='input-agree']";
                                this.continueBtn = "//button[@id='button-save']";
                                this.confirmBtn = "button-confirm";
                                this.orderPlacedMessage = "//h1[@class='page-title my-3']";
                                }

                                async openCart() {
                                await this.driver.get(this.url);
                                }

                                async checkOut() {
                                const checkOutBtn = await this.byXpath(this.driver, this.checkOutBtn);
                                await checkOutBtn.click();

                                const firstName = await this.byId(this.driver, this.firstName);
                                await firstName.sendKeys("Joel");

                                const lastName = await this.byId(this.driver, this.lastName);
                                await lastName.sendKeys("Doe");

                                const company = await this.byId(this.driver, this.company);
                                await company.sendKeys("JDoe");

                                const address = await this.byId(this.driver, this.address);
                                await address.sendKeys("Road Street");

                                const city = await this.byId(this.driver, this.city);
                                await city.sendKeys("Nairobi");

                                const postCode = await this.byId(this.driver, this.postCode);
                                await postCode.sendKeys("50500");

                                const agreeTerms = await this.byXpath(this.driver, this.agreeTerms);
                                await this.driver.executeScript("arguments[0].click();", agreeTerms);

                                const continueBtn = await this.byXpath(this.driver, this.continueBtn);
                                await continueBtn.click();

                                const confirmBtn = await this.byId(this.driver, this.confirmBtn);
                                await confirmBtn.click();
                                }

                                async confirmOrderText() {
                                let confirmMessageElement = await this.byXpath(
                                this.driver,
                                this.orderPlacedMessage
                                );
                                return await confirmMessageElement.getText();
                                }
                                }

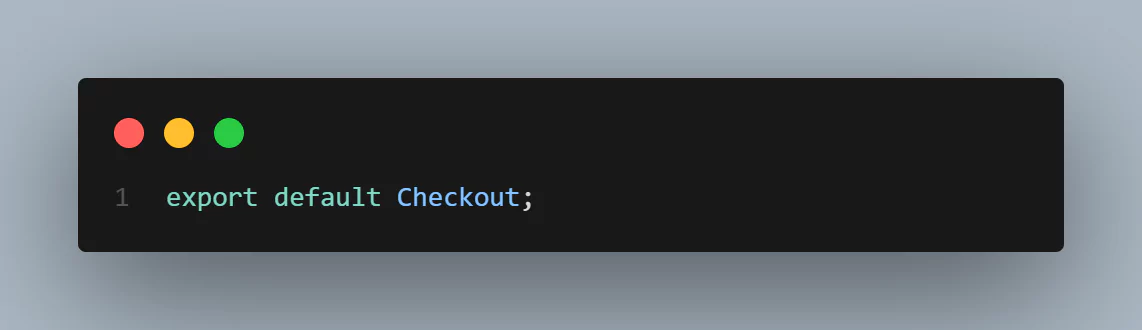
                                export default Checkout;
Code Walkthrough:
- Variable Main is assigned the value of the Main class imported from the main.js file. Then variable checkoutUrl is assigned the eCommerce website checkout URL.
- The child class of the parent class Main, called Checkout, is created using the extends keyword. The Checkout class will inherit all the methods from the Main class.
- The Checkout class constructor() method is created where it uses super() method to call the constructor of the parent class Main. In the constructor method, this.url property is assigned the value of the variable checkoutUrl.
- The async function openCart() is created where the get() method is used to load the eCommerce store cart page URL.
- The async function checkOut() is created where the paths for web elements, texts, and buttons to be tested when checking out an item are defined.
- Finally, the Checkout class is exported to be used in other files.
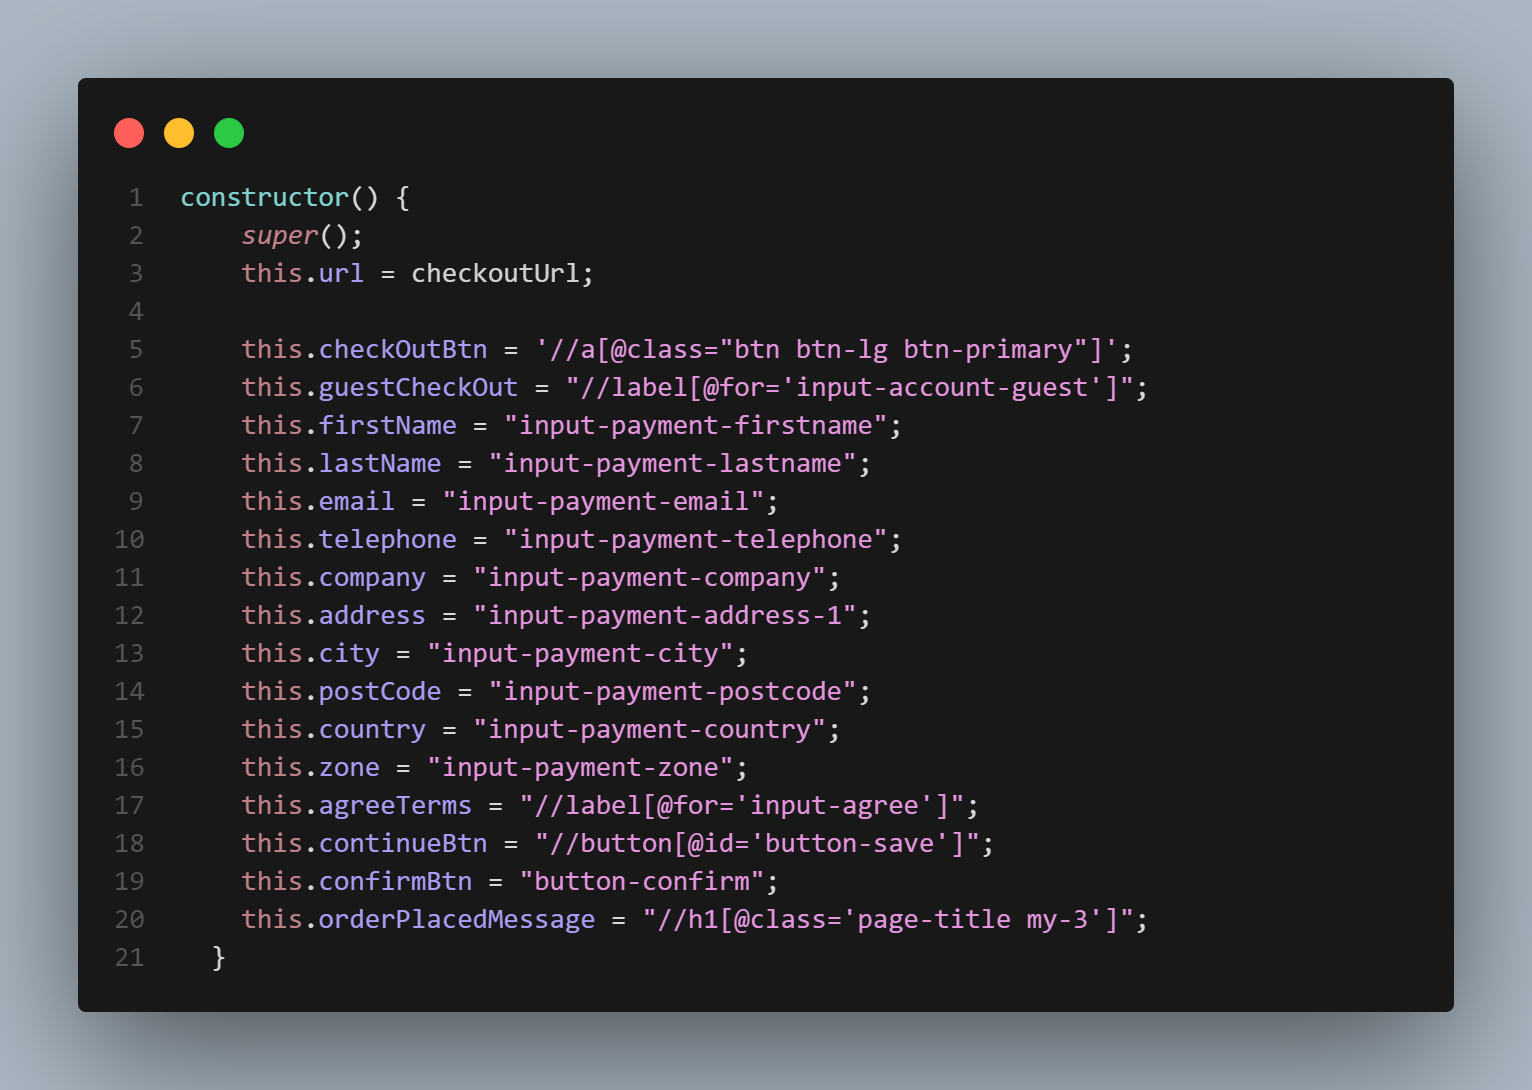
Properties this.checkOutBtn, this.guestCheckOut, this.firstName, this.lastName, this.email, this.telephone, this.company, this.address, this.city, this.postCode, this.country, this.zone, this.agreeTerms, this.continueBtn, this.confirmBtn, and this.orderPlacedMessage are assigned selector values that will be used to find or select buttons or text to checkout an item.
Step 11: In the Test folder, create a file called maintest.js and add the following code:
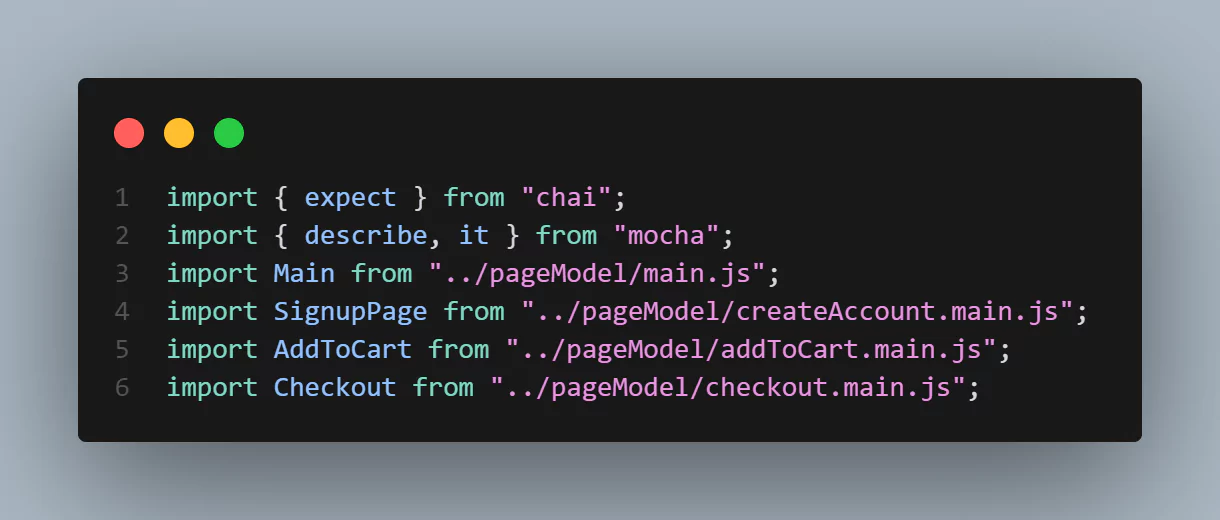
import { expect } from "chai";
                                import { describe, it } from "mocha";
                                import Main from "../pageModel/main.js";
                                import SignupPage from "../pageModel/createAccount.main.js";
                                import AddToCart from "../pageModel/addToCart.main.js";
                                import Checkout from "../pageModel/checkout.main.js";

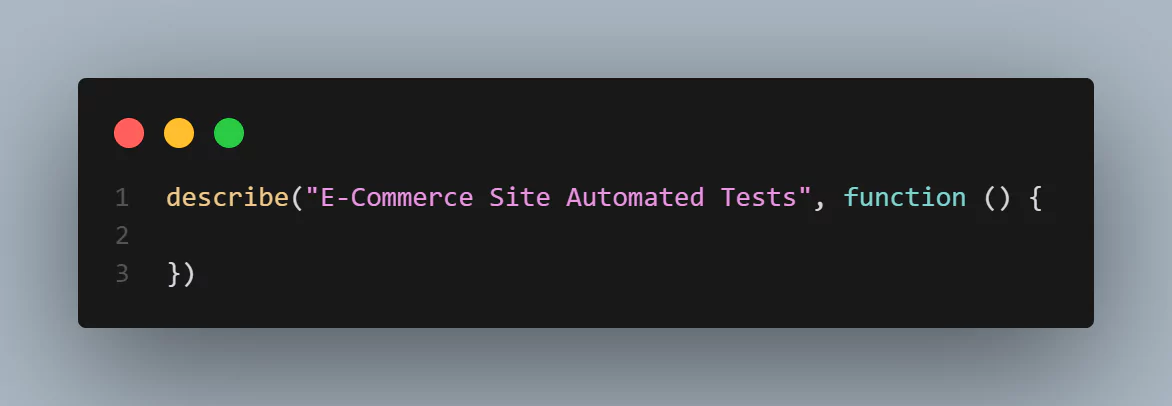
                                describe("E-Commerce Site Automated Tests", function () {
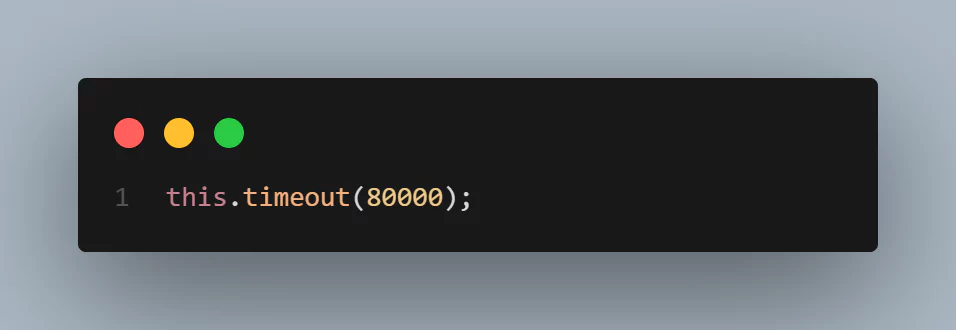
                                this.timeout(80000);

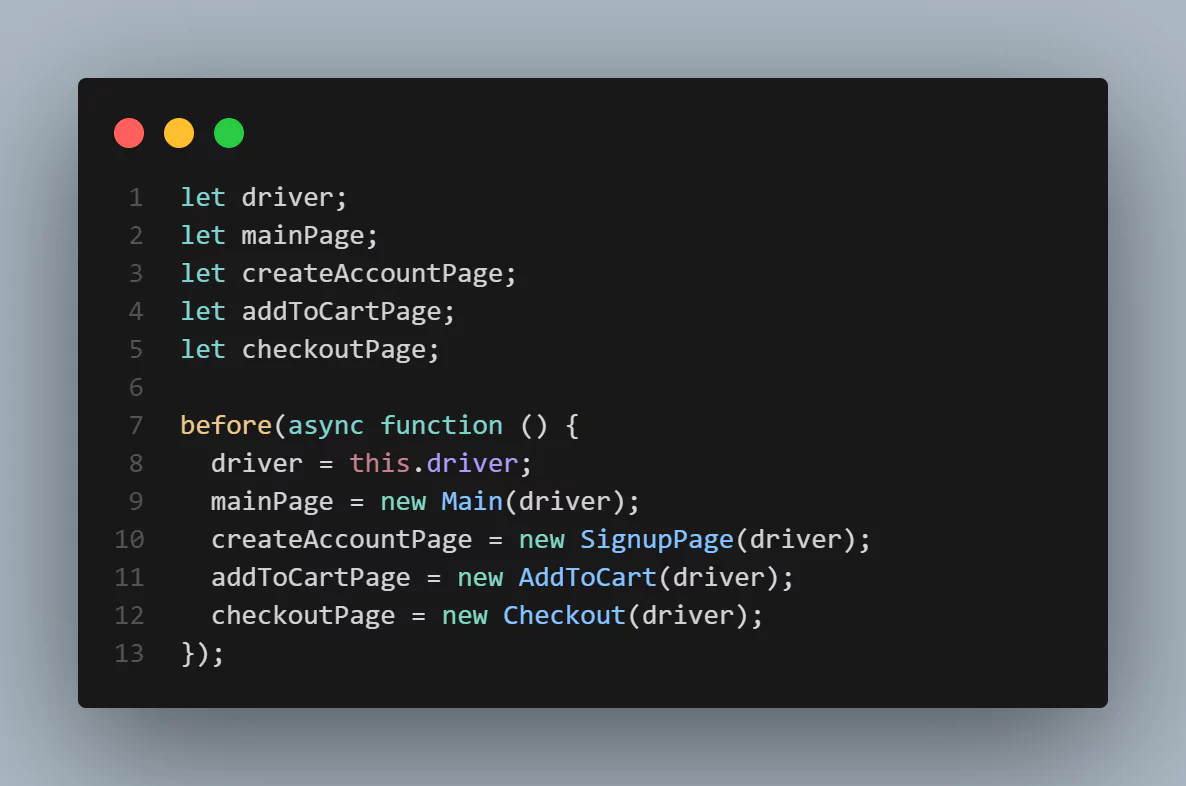
                                let driver;
                                let mainPage;
                                let createAccountPage;
                                let addToCartPage;
                                let checkoutPage;

                                before(async function () {
                                driver = this.driver;
                                mainPage = new Main(driver);
                                createAccountPage = new SignupPage(driver);
                                addToCartPage = new AddToCart(driver);
                                checkoutPage = new Checkout(driver);
                                });

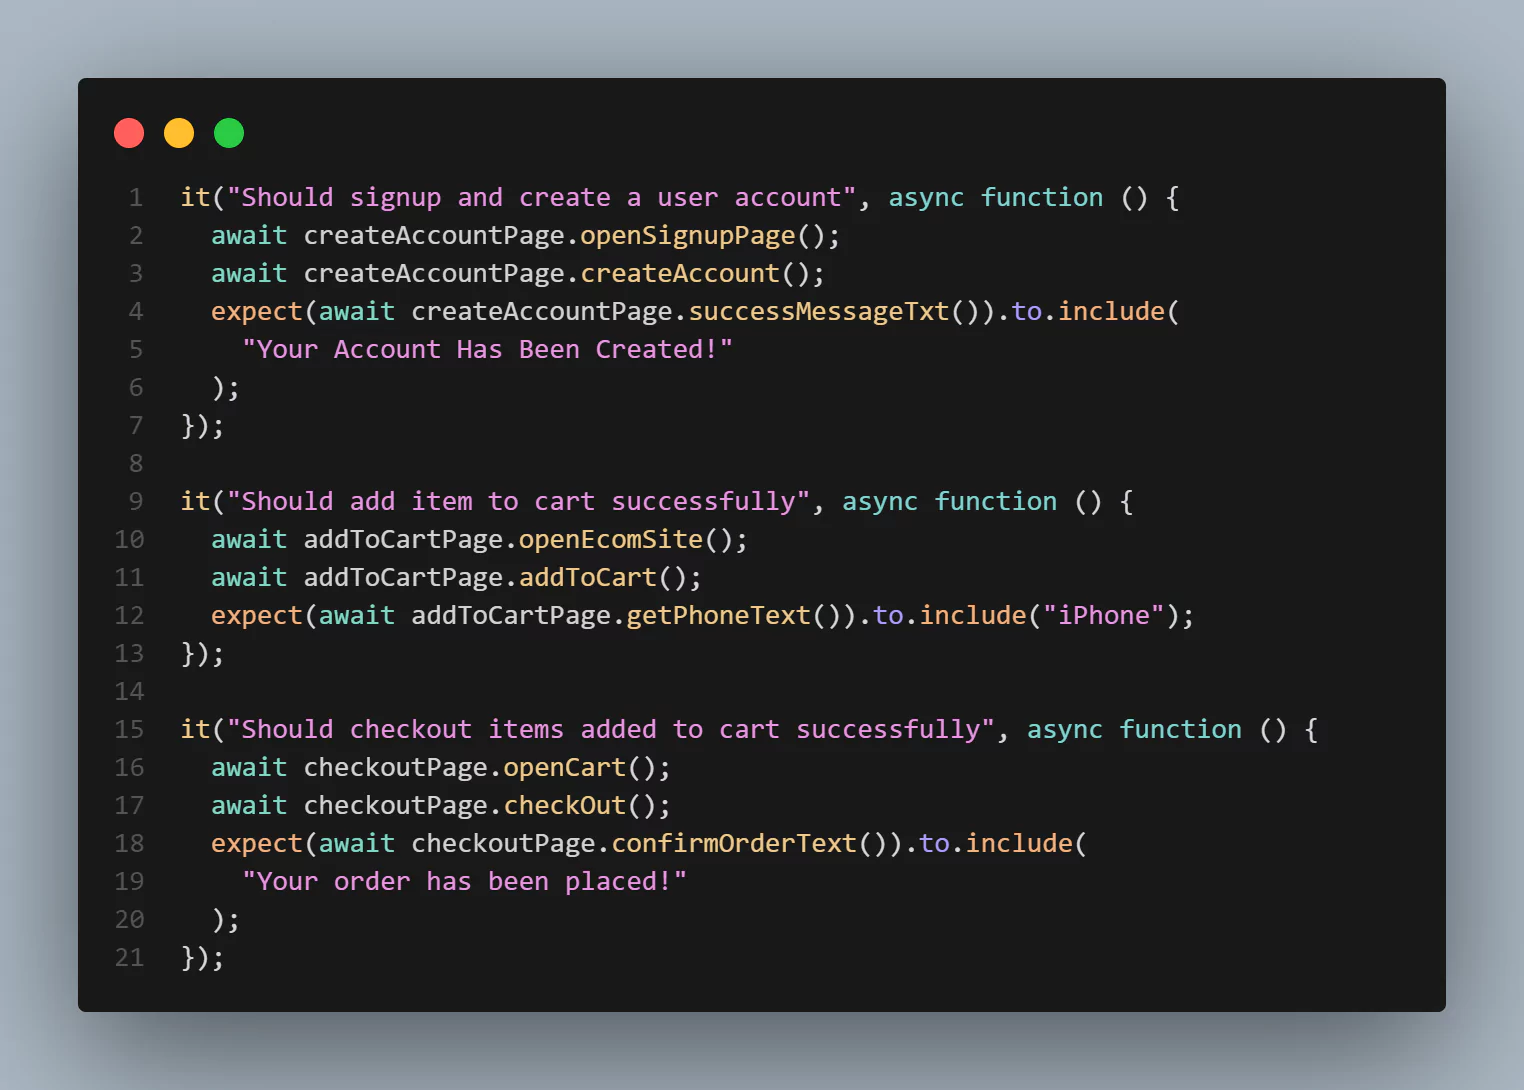
                                it("Should signup and create a user account", async function () {
                                await createAccountPage.openSignupPage();
                                await createAccountPage.createAccount();
                                expect(await createAccountPage.successMessageTxt()).to.include(
                                "Your Account Has Been Created!"
                                );
                                });

                                it("Should add item to cart successfully", async function () {
                                await addToCartPage.openEcomSite();
                                await addToCartPage.addToCart();
                                expect(await addToCartPage.getPhoneText()).to.include("iPhone");
                                });

                                it("Should checkout items added to cart successfully", async function () {
                                await checkoutPage.openCart();
                                await checkoutPage.checkOut();
                                expect(await checkoutPage.confirmOrderText()).to.include(
                                "Your order has been placed!"
                                );
                                });

                                after(async function () {
                                mainPage.quitB();
                                });
                                });
Code Walkthrough:
- Modules and files to be used in the test script are imported.
- A describe block function called E-Commerce Site Automated Tests, where all the tests for the web application are written, is defined.
- Inside the describe block, the default test timeout interval is set.
- Variables driver, mainPage, createAccountPage, addToCartPage, and checkoutPage are declared. Then, an async function before() is created and it starts a browser session.
- Three test cases are defined. The it function is used to define a single test case, and it takes two arguments: the first is a string that describes the test case, and the second is a function that contains the test logic.
Step 12: Run the command below on the command line to run the tests
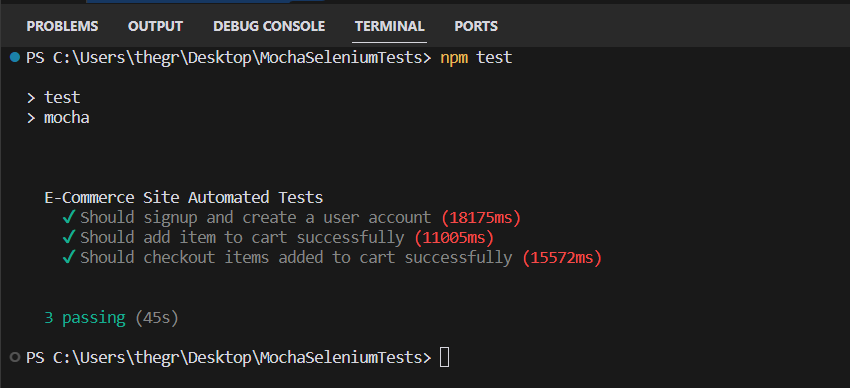
npm testOnce the commands run, you should see that the tests have passed successfully on your command line.
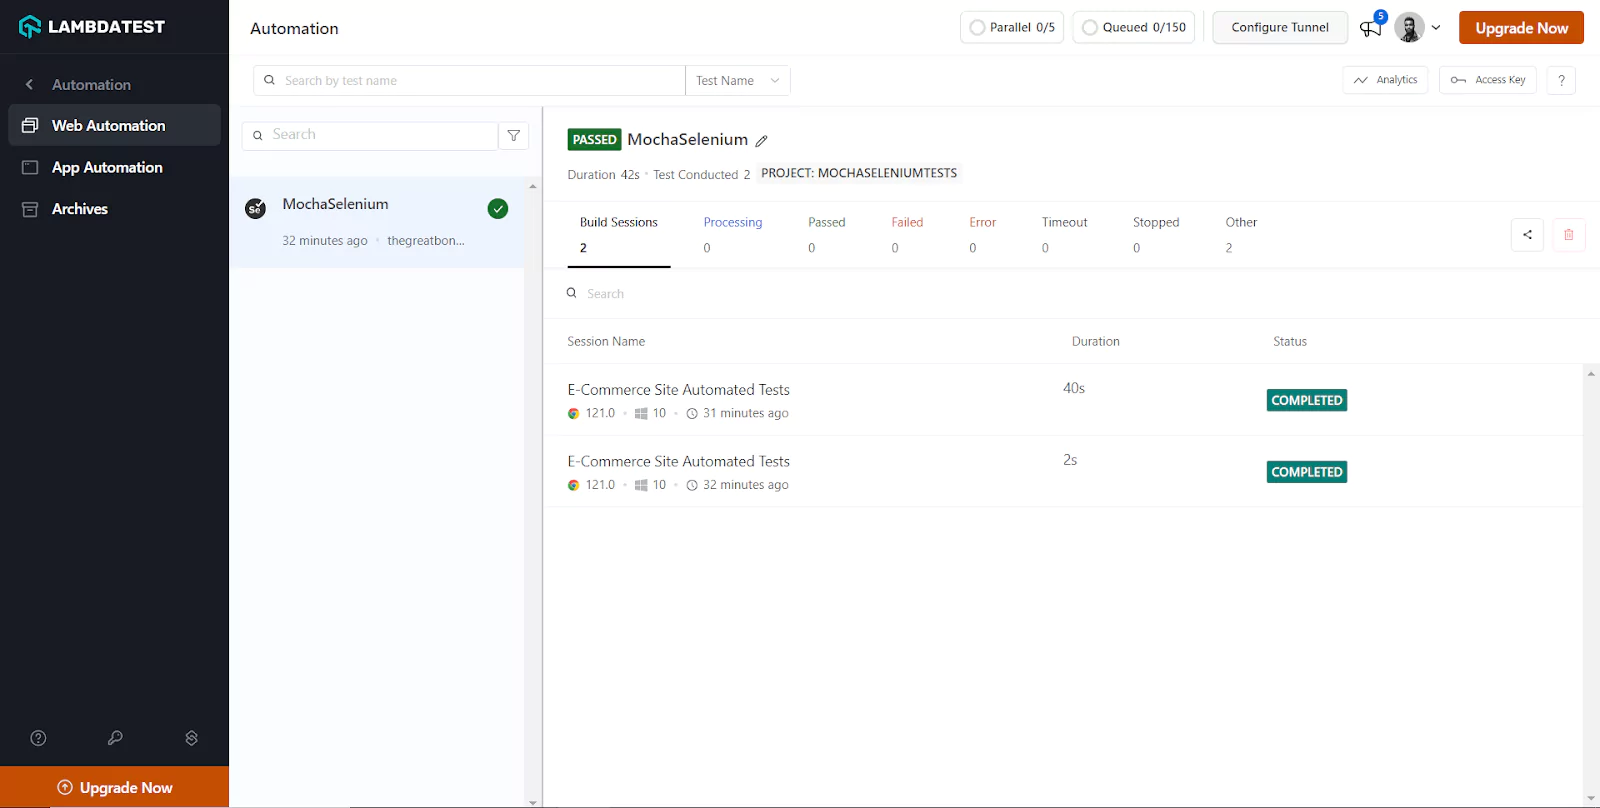
Step 13: Visit your TestMu AI Web Automation Dashboard, and you should be able to see your recent tests, as shown below.
Step 14: Click on one of the tests to be redirected to the Test Automation Dashboard, as shown below.
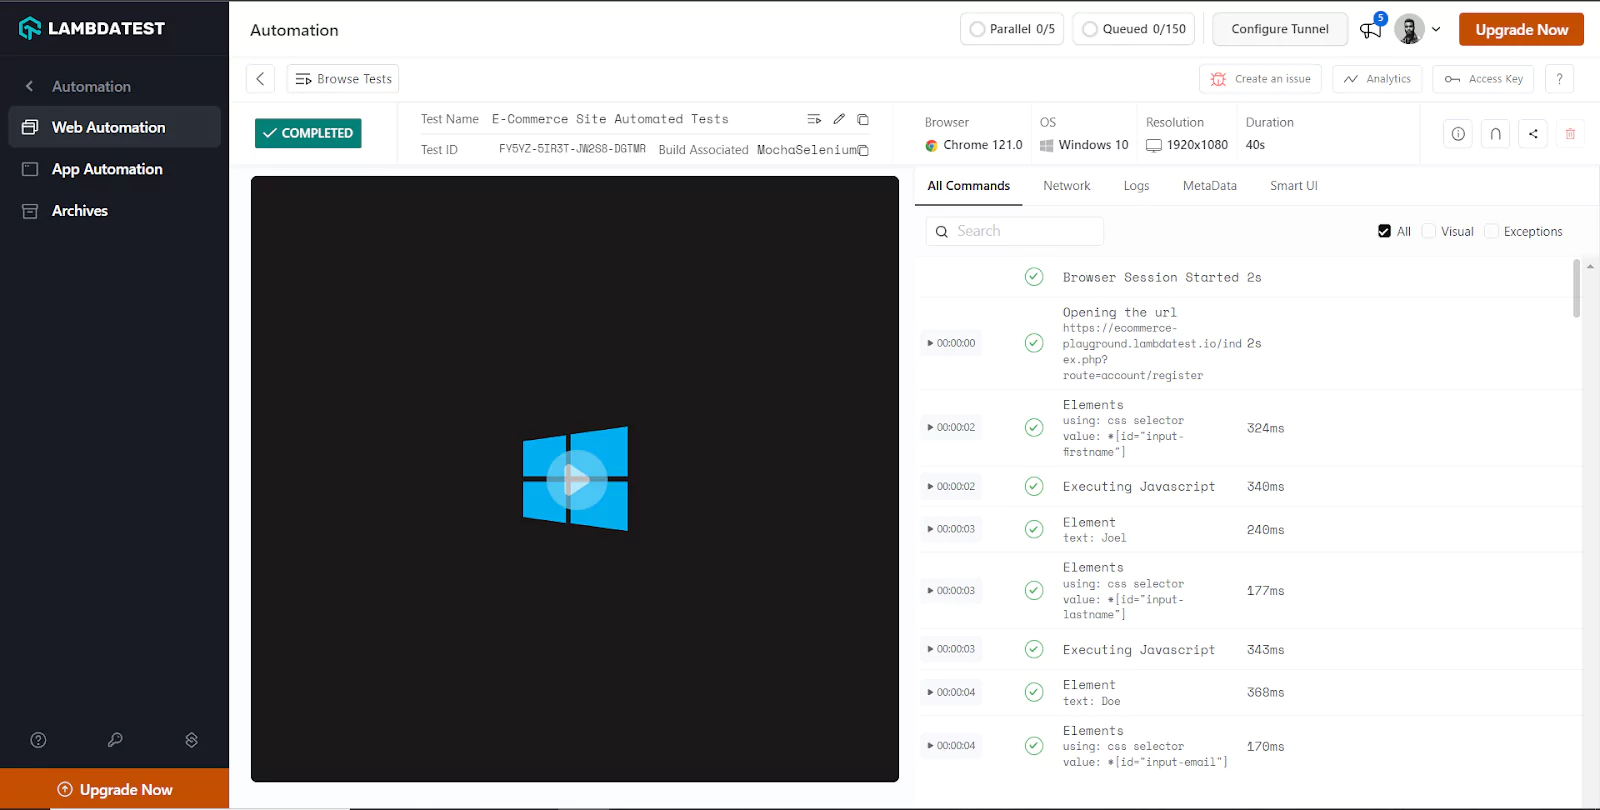
The Automation Dashboard has all the information about the test, including a video and a screenshot showing how the test went.
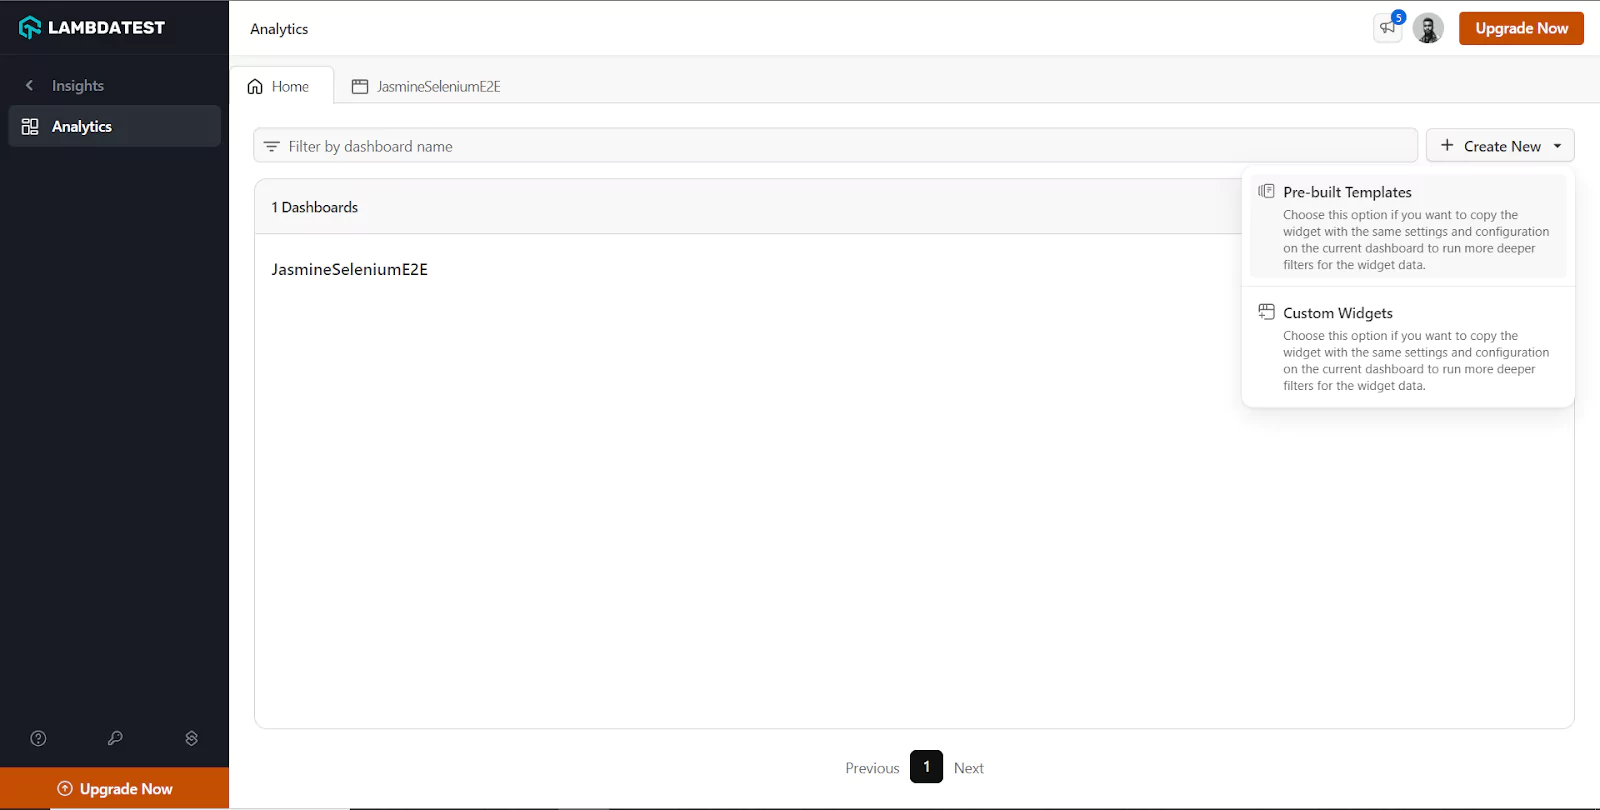
Step 15: To see all the details and metrics related to your tests, navigate to the Analytics Dashboard. Click the Create New drop-down menu and select Pre-built Templates, as shown below.
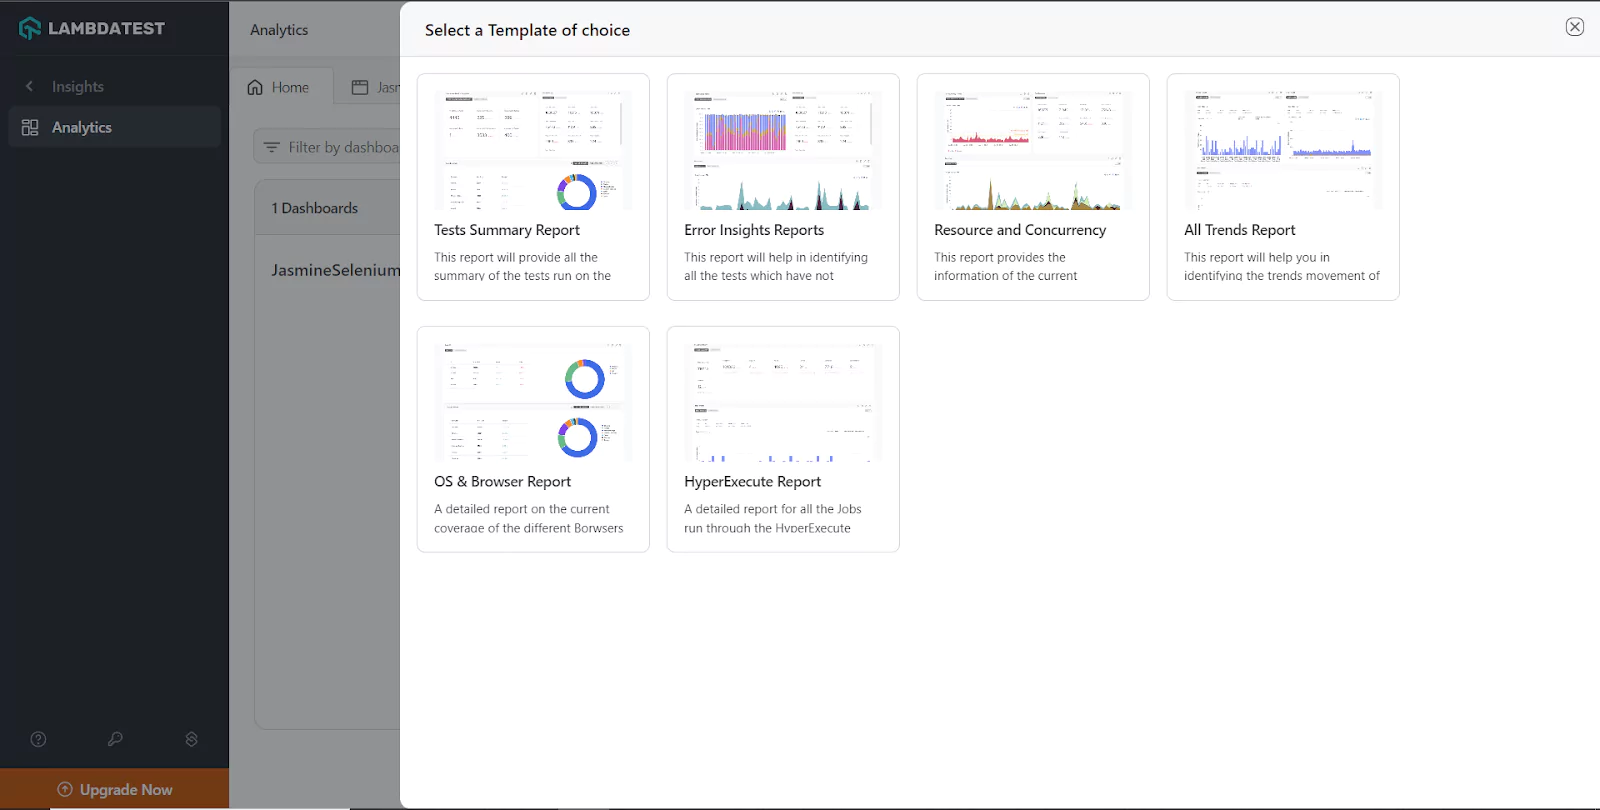
Step 16: You will be prompted to select a template of choice. In this case, you can choose the Tests Summary Report template that provides all the summaries of the tests run on the TestMu AI Cloud Selenium Grid.
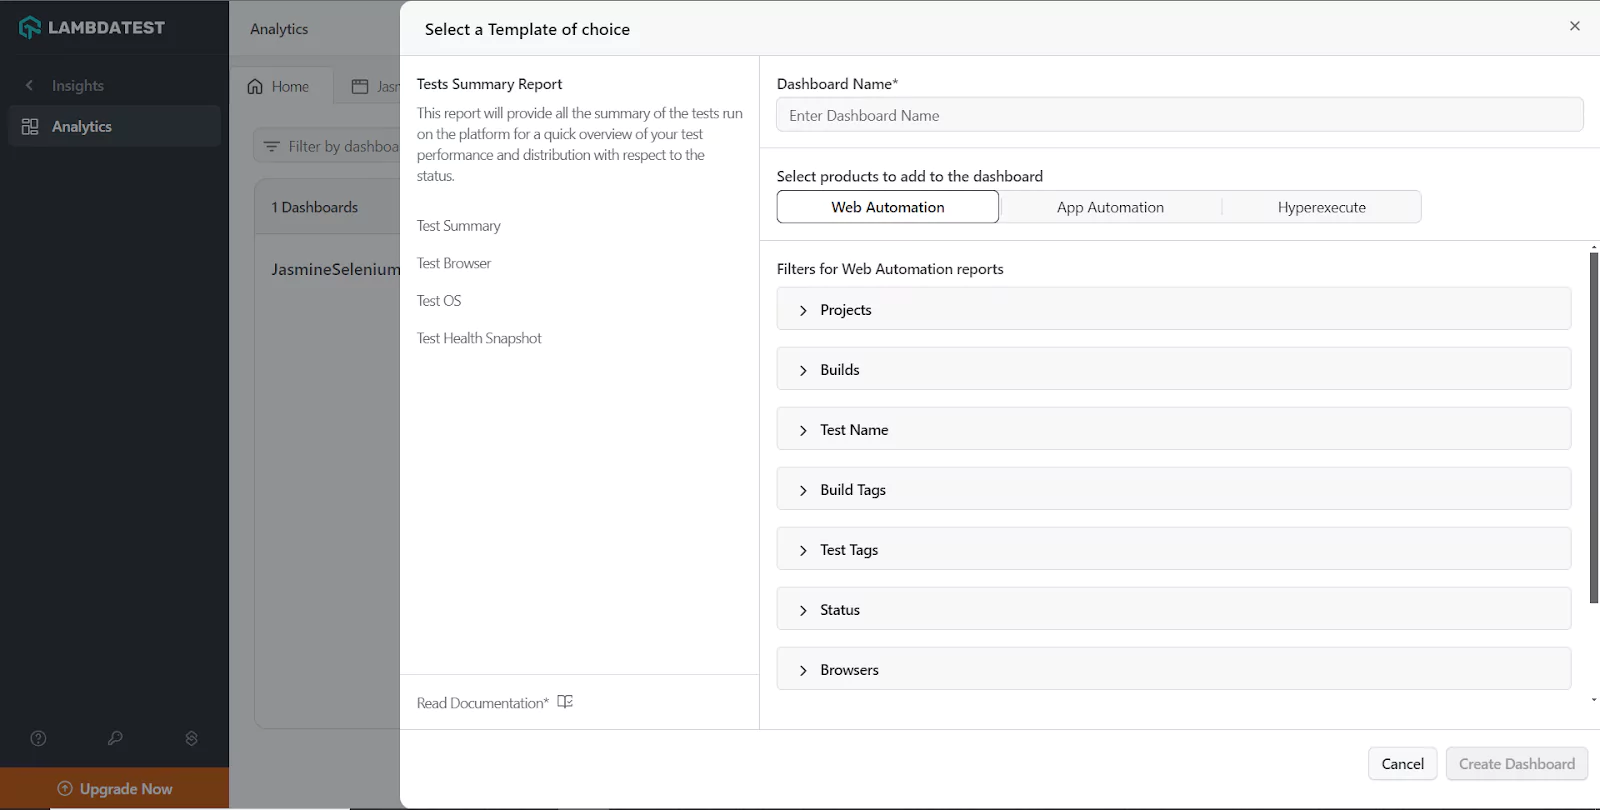
Step 17: On the right side of your page, you are prompted to create a dashboard where the test analytics will be displayed.
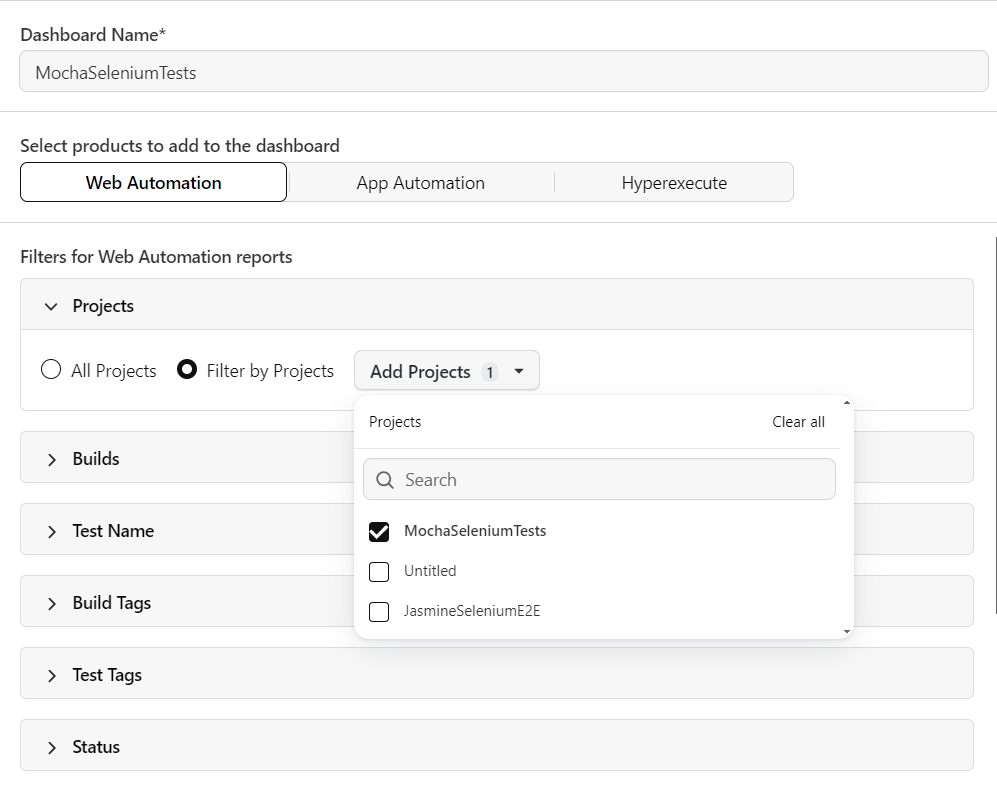
Step 18: The first thing you need to do is give the dashboard a name. In this case, you can name the dashboard MochaSeleniumTests. Then, filter the web automation reports you want to be displayed on the MochaSeleniumTests dashboard. In this case, you can filter the reports by Projects and then add the Projects, as shown below.
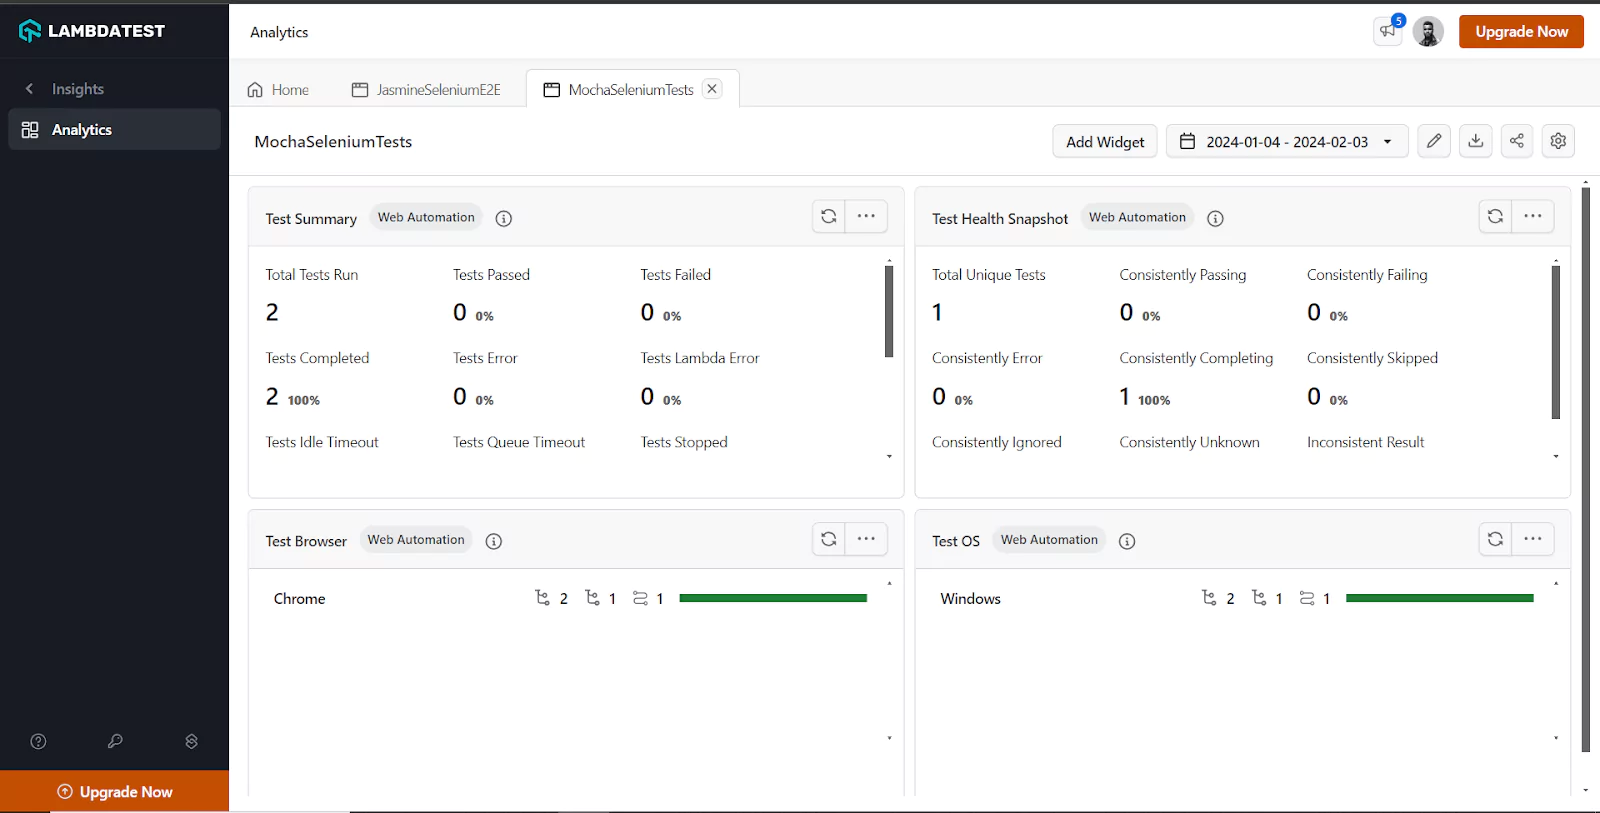
Step 19: Finally, click the Create New Dashboard button at the bottom. You will then be redirected to the MochaSeleniumTests dashboard, as shown below.
Parallel Test Execution in Mocha JS
Parallel testing is a process where multiple tests are executed simultaneously/in parallel. Mocha JS allows you to execute multiple tests simultaneously instead of running them sequentially.
To run tests in parallel in Mocha, you must pass the --parallel flag to the scripts command in the package.json file.
Below is an example of how to run tests in parallel in Mocha.
Step 1: Create a file called parallel.test.js in the tests folder and add the following code:
import { Builder, By, Key, until } from "selenium-webdriver";
                                import { expect } from "chai";
                                import { describe, it } from "mocha";

                                describe("Simple Form Demo Parallel Test", function () {
                                // Extend timeout for async browser operations
                                this.timeout(30000);

                                let driver;

                                before(async function () {
                                driver = await new Builder().forBrowser("chrome").build();
                                });

                                beforeEach(async function () {
                                await driver.get("https://www.testmuai.com/selenium-playground/simple-form-demo");
                                });

                                it("should Navigate to Simple Form Demo and verify title", async function () {
                                let title = await driver.getTitle();
                                expect(title).to.include("Selenium Grid Online | Run Selenium Test On Cloud");
                                });

                                it("should input values in a form and check their sum", async function () {
                                await driver.findElement(By.id("sum1")).sendKeys(2);
                                await driver.findElement(By.id("sum2")).sendKeys(3);
                                await driver.findElement(By.xpath("//button[normalize-space()='Get Sum']")).click();


                                let sum = await driver.wait(until.elementLocated(By.id("addmessage")),10000);
                                let sumNo = await sum.getText();
                                expect(sumNo).to.include("5");
                                });

                                after( async function () {
                                await driver.quit();
                                });

                                afterEach(function () {
                                driver.manage().deleteAllCookies();
                                });
                                });
Step 2: Pass the --parallel flag to the scripts command in the package.json file, as shown below.
{
                                "type": "module",
                                "scripts": {
                                "test": "mocha --parallel"
                                },
                                "devDependencies": {
                                "chai": "^5.1.0",
                                "mocha": "^10.4.0"
                                },
                                "dependencies": {
                                "chromedriver": "^123.0.3",
                                "selenium-webdriver": "^4.19.0"
                                }
                                }
Step 3: Run the command below on the command line to run the test.
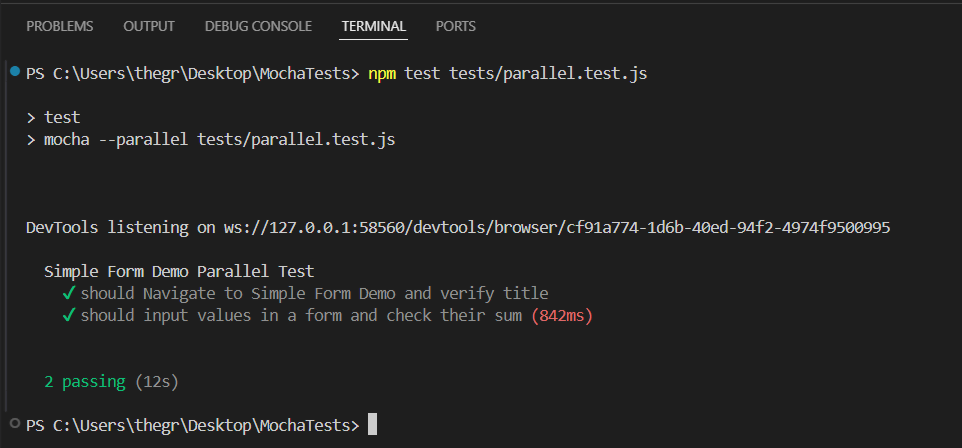
npm test tests/parallel.test.jsOnce the command runs, you should see that the tests were executed in parallel, and from here you can take the same suite further and orchestrate Mocha runs on HyperExecute to shrink your total execution time across the cloud grid.
Conclusion
Mocha JS is a powerful testing framework that empowers developers to create and execute tests efficiently. Its intuitive interface, comprehensive reporting, and real-time feedback make it easy to identify and fix bugs swiftly, ensuring optimal performance and reliability. With support for multiple test interfaces, assertion libraries, and both synchronous and asynchronous testing, Mocha JS offers flexibility and compatibility.
The tests performed above provide the perfect way to write and maintain tests using the test runners of JavaScript. As such, by utilizing automation frameworks like Mocha JS and a cloud-based web automation platform such as TestMu AI Cloud Selenium Grid to implement, you can ensure a web application performs as expected when accessed by users.
Author

Bonnie
Blogs: 5


Bonnie is a software developer, Community Contributor, and co-founder of Tech Content Marketers with 10+ years experience across AI, software development, and software testing technology. She has worked with organizations like TestMu AI, DbVis Software, and CopilotKit, authoring technical content that bridges complex technology with practical insights. Bonnie actively contributes to global tech communities through writing and AI innovation.
On This Page
- Overview of Mocha JS Testing Framework
- Benefits of Using the Mocha JS Testing Framework
- Getting Started With Mocha JS and Selenium
- Mocha Test Hooks
- Getting Started With Automation Testing Using Mocha JS and Selenium
- Running Automated Tests Using Mocha JS on a Cloud Selenium Grid
- Creating and Running Test Script using Page Object Model
- Parallel Test Execution in Mocha JS
- Frequently Asked Questions
Frequently asked questions
Did you find this page helpful?
More Related Learning Hubs
TestMu AI forEnterprise
Get access to solutions built on Enterprise
grade security, privacy, & compliance
- Advanced access controls
- Advanced data retention rules
- Advanced Local Testing
- Premium Support options
- Early access to beta features
- Private Slack Channel
- Unlimited Manual Accessibility DevTools Tests