

Power Your Software Testing with AI Agents and Cloud
The Native AI-Agentic Cloud Platform to Supercharge Quality Engineering. Test Intelligently and Ship Faster.


- TestMu AI (Formerly LambdaTest)
- /
- Blog
- /
- A Complete Guide on how to run Mocha npm Testing with Node.js
A Complete Guide on how to run Mocha npm Testing with Node.js
In this Mocha NodeJS tutorial, learn how to effectively test your NodeJS modules using Mocha npm testing, a popular JavaScript test framework.
Last Updated on:
To get started with Mocha, a JavaScript test framework for Node.js, install it globally with npm install -g mocha, write your function in app.js, then create app.test.js using describe and it blocks with Node's assert module, and run the suite with mocha app.test.js. Mocha handles both synchronous and asynchronous tests.
Overview
- Mocha framework: Mocha is a JavaScript test runner for Node.js and browser environments that organizes unit and UI tests. It provides a simple syntax using describe and it functions to structure test suites and handles asynchronous testing.
- Node.js assert module: The Node.js assert module is an assertion library that verifies test conditions by throwing an AssertionError if a condition evaluates to false. It supports functions like assert.equal and assert.notEqual.
- TestMu AI: TestMu AI is a continuous quality cloud platform used to run Selenium automation scripts. It allows developers to execute cross-browser testing on an online Selenium Grid of 3,000+ browser/OS combinations.
- Jenkins: Jenkins is a continuous integration tool that integrates with the Mocha framework to automate the execution of test suites within software development pipelines.
- GitHub Actions: GitHub Actions is a continuous integration tool that integrates with Mocha to automate test workflows, allowing developers to run automated test suites directly from their repositories.
- Running Mocha tests: Developers run Mocha tests by installing the framework globally with npm, creating test files like app.test.js, and executing the mocha command in the terminal to view structured results.
What are Assertions?
Assertions are test conditions that must be verified to determine whether certain software development objectives are being met. The inclusion of “conditions” in this definition indicates that it encapsulates some testable logic that should be verified as specified about a target under the test.
So to verify a particular behavior, we can assert a series of logical conditions that satisfy the design of that behavior.
For instance, to verify the behavior of a carting system, we may simply assert:
- that adding a product to the cart increases the total price of the cart by the amount of the product added.
- that removing a product from the cart reduces the cart’s total price by the amount of the product removed.
To verify that the function conforms to the requirement of adding two numbers.

Common Asserts with NodeJS assert module
The assert module provides a set of assertion functions to verify testing expressions. If the functions provided by this module evaluate to 0 or false, the function raises an exception, AssertionError, which might cause the program to terminate if not handled.
assert.equal
It tests the shallow, coercive equality between two parameters using the == operator.
Syntax:
assert.equal(actual, expected[, message]);
Example:
try {
	// ...
  const cartIconProductCount = await cartIcon.getText(); // from selenium driver
  assert.equal(cartIconProductCount.trim(), "1");
} catch (err) {
  console.log(err);
}
assert.notEqual
It tests the shallow, coercive inequality between two parameters using the != operator.
Syntax:
assert.notEqual(actual, expected[, message])
Example:
try {
	// ...
  const cartIconProductCount = await cartIcon.getText(); // from selenium driver
  assert.notEqual(cartIconProductCount.trim(), "1");
} catch (err) {
  console.log(err);
}
assert.deepEqual
It tests for deep equality between the actual and expected arguments.
Syntax:
assert.deepEqual(actual, expected[, message])
Example:
try {
	// ...
	const mockedAPIResponse = await mockResponse() // returns an object
  assert.deepEqual(mockedAPIResponse.data,
		{"username": "user_1", "email": "user_1@app.com" }
	); // AssertionError: Expected values to be loosely deep-equal
} catch (err) {
  console.log(err);
}
assert.notDeepEqual
It verifies that deep equality exists between the actual and expected arguments.
Syntax:
assert.notDeepEqual(actual, expected[, message])
Example:
try {
	// ...
	const mockedAPIResponse = await mockResponse() // returns an object
  assert.deepEqual(mockedAPIResponse.data,
		{"username": "user_77", "email": "user_77@app.com" }
	); // AssertionError: Expected values to be loosely deep-equal
} catch (err) {
  console.log(err);
}
assert.match
It tests for a regular expression match between the actual and expected arguments.
Syntax:
assert.match(string, regexp[, message])
Example:
try {
	// ...
  const cartIconProductCount = await cartIcon.getText(); // from selenium driver
  assert.match(cartIconProductCount.trim(), "1");
} catch (err) {
  console.log(err);
}
assert.doesNotMatch
It tests that there’s no regular expression match between the actual and expected arguments.
Syntax:
assert.doesNotMatch(string, regexp[, message])
Example:
try {
	// ...
  const cartIconProductCount = await cartIcon.getText(); // from selenium driver
  assert.doesNotMatch(cartIconProductCount.trim(), "one");
} catch (err) {
  console.log(err);
}
assert.ok
It tests if a value is truthy.
Syntax:
assert.ok(value[, message])
Example:
assert.throws
It expects a function to throw an error.
Syntax:
assert.throws(fn[, error][, message])
Example:
function mockFunction() { /* ... */ };
class MockedError extends Error { /* ... */ };

try {
	// ...
  assert.throws(mockFunction, new MockedError());
} catch (err) {
  console.log(err);
}
assert.doesNotThrow
It verifies that a function does not throw an error.
Syntax:
assert.doesNotThrow(fn[, error][, message])
Example:
function mockFunction() { /* ... */ };
class MockedError extends Error { /* ... */ };

try {
	// ...
  assert.doesNotThrow(mockFunction, new MockedError());
} catch (err) {
  console.log(err);
}
What is Mocha framework?
Mocha is a feature-rich JavaScript test framework running on NodeJS and the browser. With Mocha, you can label test cases and group them in test suites, allowing for flexible and accurate reporting while mapping uncaught exceptions to the correct test cases.

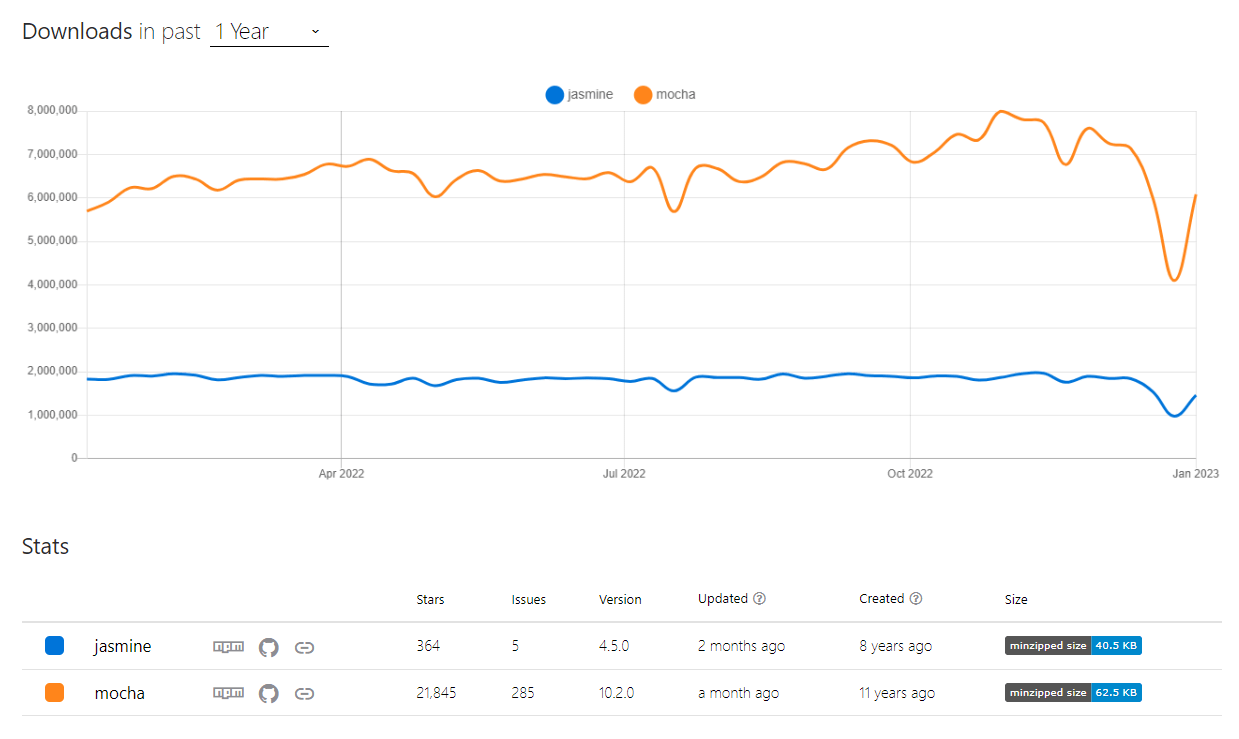
Mocha is a test runner similar to Jasmine. Mocha was created 11 years ago, three years before Jasmine. With higher downloads over Jasmine for the past year. Mocha has a large number of community members who regularly contribute to making the project better.
This package fits perfectly into the AAA (Arrange, Act, Assert) practice which is a common practice for writing unit tests:
- Arrange – This section describes the setup required to execute the test. With Mocha, we can arrange and label different test cases, teardowns, setup mocks, etc.
- Act – This section executes the unit being tested, with the output being a store for evaluation. Mocha can run operations like UI interactions, running functions, mocks, etc.
- Assert – This section verifies whether the tests behaved as per expectations. This is where we use the NodeJS assert library.
Mocha allows us to use any library of our choice for assertions, so we use the NodeJS assert module. As of the time of writing this Mocha NodeJS tutorial, the version of Mocha is v10.2.0. If you are looking to run unit tests with Mocha, You can refer to our guide on Mocha unit testing.

Note: Accelerate JavaScript Automation with Mocha. Try TestMu AI Now!
Installing Mocha and Running a Sample Test
To install Mocha, you will first need to have NodeJS and npm (Node Package Manager) installed on your computer.
Prerequisites
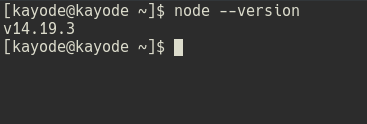
- NodeJS: This can be downloaded from here. We can verify if NodeJS is installed on our machine by running this command (
node --version) in our terminal: - IDE: Although I will be using Visual Studio Code, you can use any code editor of your choice.
Once you have those installed, you can install Mocha globally by running the following command in your terminal:
$ npm install -g mocha
The -g flag will install the package globally so that you can use the package as an executable command in your terminal.
We will write a function, sum to add two numbers, and export it from an app.js file.
// app.js
function sum(a, b) {
  return a + b;
}
exports.sum = sum;
Next, we define the test structure in app.test.js as below.
// app.test.js
const { sum } = require("./app");

describe("sum function", () => {
  it("sum of 2 and 3 should be 5", () => {
    sum(2, 3);
  });

  it("sum of 2 and 3 should not be 5", () => {
    sum(2, 3);
  });
});
The describe and it functions are globals provided by Mocha used to set up test suites and also for preconditions and clean-ups after tests. If we run the test, Mocha would pass it because Mocha would not fail unless it gets an exception.
Now, the assert library can help us test some conditions and throw an exception if the results are false. So we will update the test.
// app.test.js
const assert = require("assert");
const { sum } = require("./app");

describe("sum function", () => {
  it("sum of 2 and 3 should be 5", () => {
    assert.equal(sum(2, 2), 4);
    sum(2, 3);
  });

  it("sum of 2 and 3 should not be 3", () => {
    assert.notEqual(sum(2, 3), 3);
    sum(2, 3);
  });
});
Run the test by running this command in our terminal.
$ mocha app.test.js
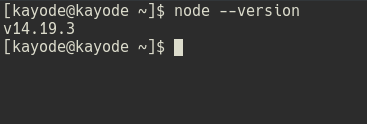
Add we get a result as such:
Writing a cross browser test using NodeJS Asserts
In this section of the Mocha NodeJS tutorial, we will look at how to write a cross browser test using NodeJS asserts.
Having the setups required for this Mocha NodeJS tutorial, we can write a cross browser test using Selenium to run on a Cloud Grid infrastructure.
We verify the behaviors of an eCommerce web application by running tests that match the test scenarios listed below.
Test Scenario 1 (Add product to cart)
- Go to https://ecommerce-playground.lambdatest.io/.
- Click on the MacBook Pro product.
- Add the product to the cart.
- Verify that the number on the cart icon is 1.
Test Scenario 2 (Not Register Account With Existing Account)
- Go to https://ecommerce-playground.lambdatest.io/index.php?route=account/login.
- Click on the Register button.
- Fill out the registration form.
- Check the terms and conditions checkbox.
- Submit the registration form.
- Verify that no account successful creation message is displayed.
Test Scenario 3 (Register Account With Existing Account)
- Go to https://ecommerce-playground.lambdatest.io/index.php?route=account/login.
- Click on the Register button.
- Fill out the registration form.
- Check the terms and conditions checkbox.
- Submit the registration form.
- Verify that an account is created.
Test Setup
For this Mocha NodeJS tutorial, we will create a new directory called ecommerce_test in any directory of your choice by running the command below in your terminal:
mkdir ecommerce_test
To use the cloud Selenium Grid provided by TestMu AI, we need an access key from the TestMu AI Dashboard.
With TestMu AI continuous quality cloud platform, you can run Selenium automation scripts over an online Selenium Grid of 3000+ real desktop and mobile browsers. It helps you test on a wide range of Windows and macOS platforms, along with legacy and latest browsers.

Please subscribe to the TestMu AI YouTube Channel and stay updated with the latest tutorials on Selenium testing, Cypress testing, CI/CD, and more.
However, it’s not recommended to keep secret keys tracked by Git, so we would create a .env file in the root of ecommerce_test/ by running the command below:
cd ecommerce_test
touch .env
Copy the code below to the .env file replacing
LT_USERNAME=<your username>
LT_ACCESS_KEY=<your access key>
To embed the value from .env as an environment variable, we would use the package dotenv by running the commands below:
npm init -y
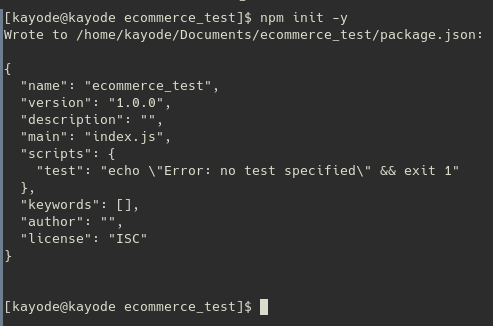
The command above creates a package.json in our root directory while the -y flag accepts the defaults for the command’s prompt. check this software testing question to update dependencies in package.json.
Then we will install dotenv by running the command:
npm install dotenv
We also need to install selenium-webdriver, which we will use to interact with a web application we are testing. Install the package by running the command:
npm install selenium-webdriver@3
The file structure of the project should look similar to this:
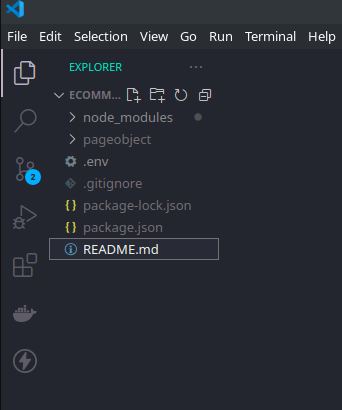
Implementation
In this Mocha NodeJS tutorial, we will run the tests directly using a Selenium Cloud Grid to take advantage of using the benefits of cross browser testing on the cloud.
First, we’d create a single.conf.js file to configure how the cloud grid would run our tests to utilize its features. Then copy the code below into the single.conf.js file:
// ./single.conf.js
require("dotenv").config()

exports.LT_USERNAME = process.env.LT_USERNAME;
exports.LT_ACCESS_KEY = process.env.LT_ACCESS_KEY;

exports.capabilities = {
  build: "[DEMO - 1] ASSERT MODULE",
  name: "Your Test Name",
  platform: "Windows 11",
  browserName: "Chrome",
  version: "latest",
  resolution: "1280x800",
  visual: false,
  network: false,
  console: false,
  tunnel: false,
};
Then using the design pattern of the Page Object Model, we will create a class that can create an object repository of all web UI elements. In this object, methods are named according to the operation they are performing.
In the root of ecommerce_test, create a file called homepage.js and a directory named pageobject by running the command:
mkdir pageobject
cd pageobject
touch homepage.js
The project directory should look similar to this: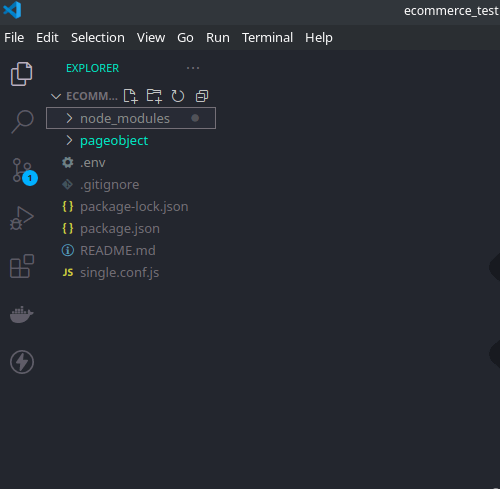
Then copy the code below into the homepage.js.
const webdriver = require("selenium-webdriver");

const demoUser = {
  firstname: "Demo",
  lastname: "User",
  email: "demouser1adas444@demo.com",
  telephone: "12345566",
  password: "demouser1234",
  confirm: "demouser1234",
};

class ECommerceHomePage {
  constructor(driver) {
    this.driver = driver;
    this.macBookProductSection = '[title="MacBook Pro"]';
    this.addToCartButton = "#entry_216842 > button";
    this.cartIcon = ".cart-icon";
    this.registerButton = "#column-right a:nth-child(2)";
    this.termsAgreementInput = 'label[for="input-agree"]';
    this.continueButton = 'input[value="Continue"]';
    this.successMessage = "#content > h1"
  }

  async goToUrl(url) {
    await this.driver.get(url);
  }

  async clickElement(selector) {
    await this.driver.findElement(webdriver.By.css(selector)).click();
  }

  async getElementTextContent(selector) {
    return (
      await this.driver.findElement(webdriver.By.css(selector))
    ).getText();
  }

  async addMacBookToCart() {
    await this.clickElement(this.macBookProductSection);
    await this.clickElement(this.addToCartButton);
  }

  async getCartIConTextContent() {
    return await this.getElementTextContent(this.cartIcon);
  }

  async getAccountRegistrationSuccessTextContent() {
      return await this.getElementTextContent(this.successMessage)
  }

  async goToRegisterPage() {
    await this.clickElement(this.registerButton);
  }

  async fillRegistrationForm() {
    Object.keys(demoUser).forEach(async (key) => {
      await this.driver
        .findElement(webdriver.By.name(key))
        .sendKeys(demoUser[key]);
    });

    await this.clickElement(this.termsAgreementInput)
    await this.clickElement(this.continueButton)
  }
}

exports.ECommerceHomePage = ECommerceHomePage;
Next in this Mocha NodeJS tutorial, we will create a new file, named ecommerce.test.js in a folder named __tests__, then copy the code below into the ecommerce.test.js file:
const assert = require("assert");
const webdriver = require("selenium-webdriver");
const { ECommerceHomePage, page } = require("../pageobject/homepage.js");
require("dotenv").config();

const caps = require("../single.conf.js").capabilities;

const LT_USERNAME = process.env.LT_USERNAME;
const LT_ACCESS_KEY = process.env.LT_ACCESS_KEY;

const buildDriver = function (caps) {
  return new webdriver.Builder()
    .usingServer(
      `https://${LT_USERNAME}:${LT_ACCESS_KEY}@hub.lambdatest.com/wd/hub`
    )
    .withCapabilities(caps)
    .build();
};

describe("E-Commerce Sample " + caps.browserName, function () {
  let driver;
  this.timeout(0);

  beforeEach(function (done) {
    caps.name = this.currentTest.title;
    driver = buildDriver(caps);
    done();
  });

  it("can add to shopping cart", async function () {
    const page = new ECommerceHomePage(driver);
    await page.goToUrl("<https://ecommerce-playground.lambdatest.io>");
    await page.addMacBookToCart();
    const cartIconProductCount = await page.getCartIConTextContent();
    assert.equal(cartIconProductCount.trim(), "1");
  });

  it("should not register when username is taken", async function() {
    const page = new ECommerceHomePage(driver);
    await page.goToUrl(
      "<https://ecommerce-playground.lambdatest.io/index.php?route=account/login>"
    );
    await page.goToRegisterPage();
    await page.fillRegistrationForm();
    const accountRegistrationStatusMessage =
      await page.getAccountRegistrationSuccessTextContent();
    assert.equal(
      accountRegistrationStatusMessage.trim(),
      "Register Account"
    );
  })

  // this test would fail because as the username provided is already in use
  it("should register a new user", async function () {
    const page = new ECommerceHomePage(driver);
    await page.goToUrl(
      "<https://ecommerce-playground.lambdatest.io/index.php?route=account/login>"
    );
    await page.goToRegisterPage();
    await page.fillRegistrationForm();
    const accountRegistrationStatusMessage =
      await page.getAccountRegistrationSuccessTextContent();
    assert.equal(
      accountRegistrationStatusMessage.trim(),
      "Your Account Has Been Created!"
    );
  });

  afterEach(function (done) {
    if (this.currentTest.isPassed()) {
      driver.executeScript("lambda-status=passed");
    } else {
      driver.executeScript("lambda-status=failed");
    }
    driver.quit().then(function () {
      done();
    });
  });
});
Code Walkthrough
The ./single.conf.js file is used to set up the configuration of our cloud grid, TestMu AI. We can utilize the various features of our cloud grid provider using the configuration file.
In this Mocha NodeJS tutorial, we leave it at a simple configuration running on a single process with a Chrome browser on a Windows 10 machine.
To learn more about TestMu AI configuration, you can check this document on Desired Capabilities.
The ./pageobject/homepage.js exports a ECommerceHomePage class, which is designed as a pattern of the Page Object Model. The class constructor initializes properties that are selectors for elements in the website we are testing together with asynchronous methods that perform very specific operations.
We got the selectors used in the test by inspecting the elements on our browser and selecting them using the webdriver.By.css() method. The webdriver.By.css() method takes a string argument similar to document.querySelector().
To get the selectors of the element:
- Right-click on the element and select Inspect.
- In the Element tab on Chrome DevTools, right-click on the HTML tag of the elements you are targeting.
- Hover over Copy option.
- Click on Copy selector to copy the selector of the particular element.
If you have control over the web application, I’d recommend passing a special attribute solely for testing. For instance;
<html>
	<head>
	<head>
	<body>
		<div class="main" data-testid="main-page">
			...
		</div>
	<body>
</html>
Then in tests, get the element using the attribute data-testid:
await driver.findElement(webdriver.By.css('[data-testid="main-page"]'));
The ECommerceHomePage constructor takes a Selenium WebDriver as an argument which provides methods, such as findElement() and click(), used to interact with the website under test.
To pass a Selenium WebDriver to ECommerceHomePage, we created a function in the file ./__tests__/ecommerce.test.js and created a function called buildDriver:
const assert = require("assert");
const webdriver = require("selenium-webdriver");
const { ECommerceHomePage, page } = require("../pageobject/homepage.js");
require("dotenv").config();

const caps = require("../single.conf.js").capabilities;

const LT_USERNAME = process.env.LT_USERNAME;
const LT_ACCESS_KEY = process.env.LT_ACCESS_KEY;

const buildDriver = function (caps) {
  return new webdriver.Builder()
    .usingServer(
      `https://${LT_USERNAME}:${LT_ACCESS_KEY}@hub.lambdatest.com/wd/hub`
    )
    .withCapabilities(caps)
    .build();
};
buildDriver takes a capability object exported from a single.conf.js file and then uses the WebDriver Builder function to build the driver.
The pageobject/ directory contains files that export a class that implements Page Object Model.
Running the Test
Run the test using Mocha by running the command below in your terminal.
$ mocha ./__tests__/ecommerce.test.js
Then we can see the result in our terminal as such:
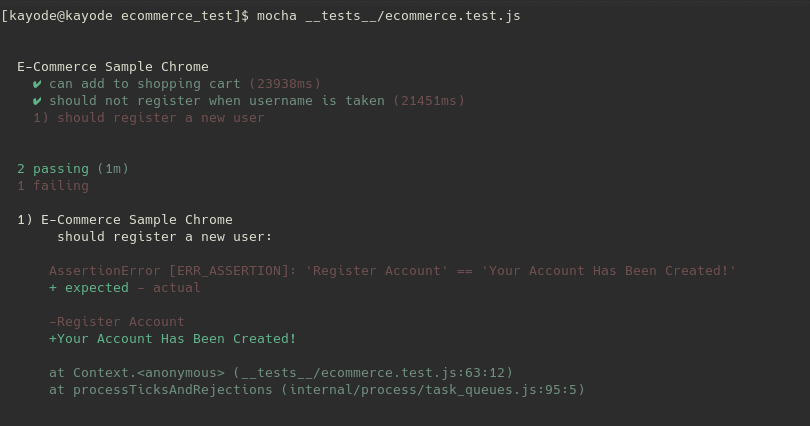
The tests labeled can add to shopping cart and should not register when username is taken passed while the last test failed because of an AssertError exception from the line below:
// ...
assert.equal(
	accountRegistrationStatusMessage.trim(),
	"Your Account Has Been Created!"
);
// ...
Because we are trying to create another account with the same user credentials used from the second test, the third test will fail to create an account causing the assert to fail.
Checking the test on TestMu AI
- Login to your TestMu AI Dashboard.
- Go to the Automate tab to view your tests.
You can see the status of each test case that ran and its duration:
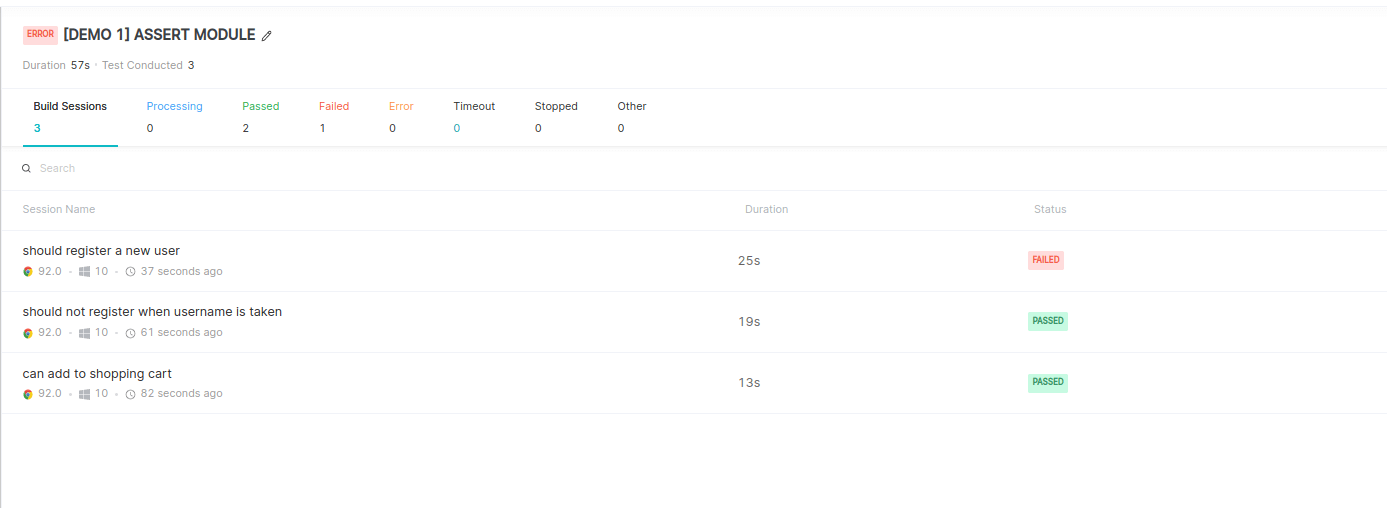
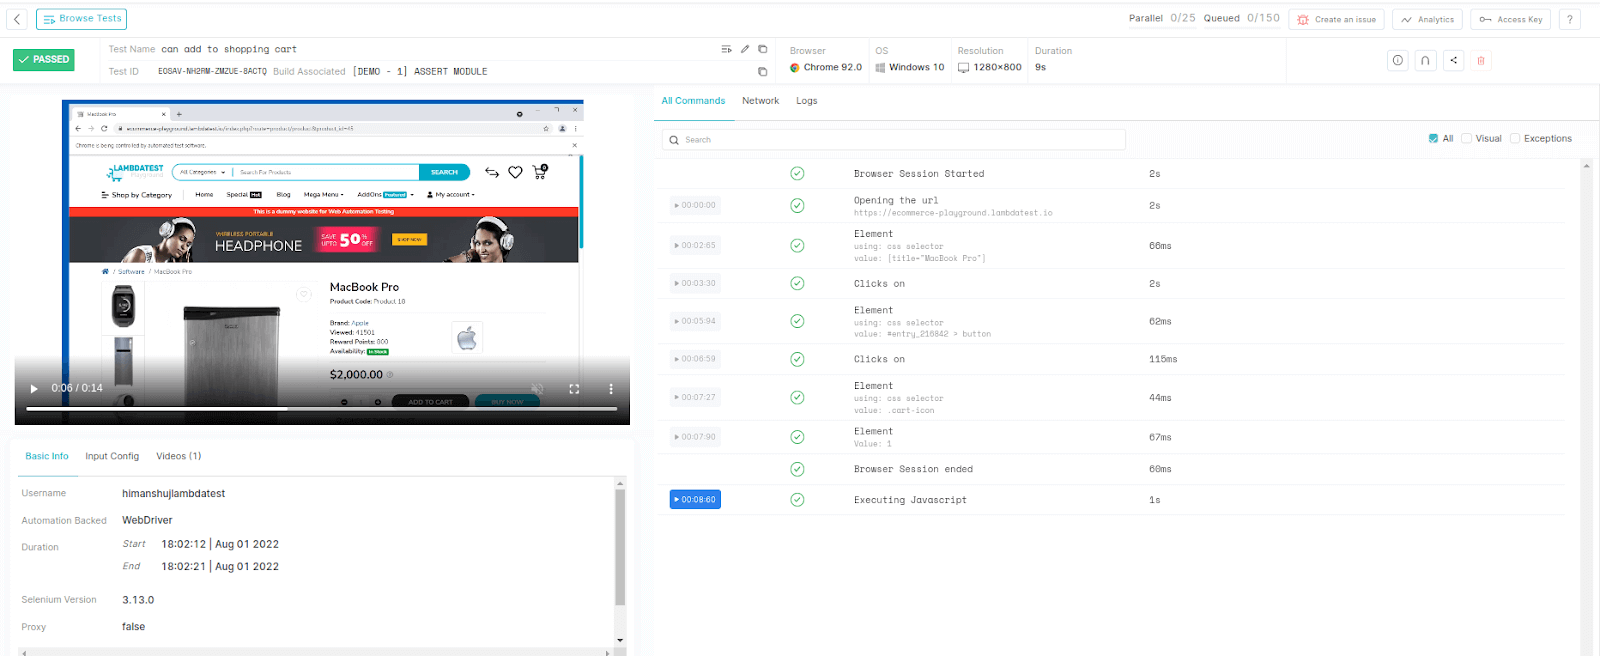
Click on a test case to further reveal more metrics and a video about the test.
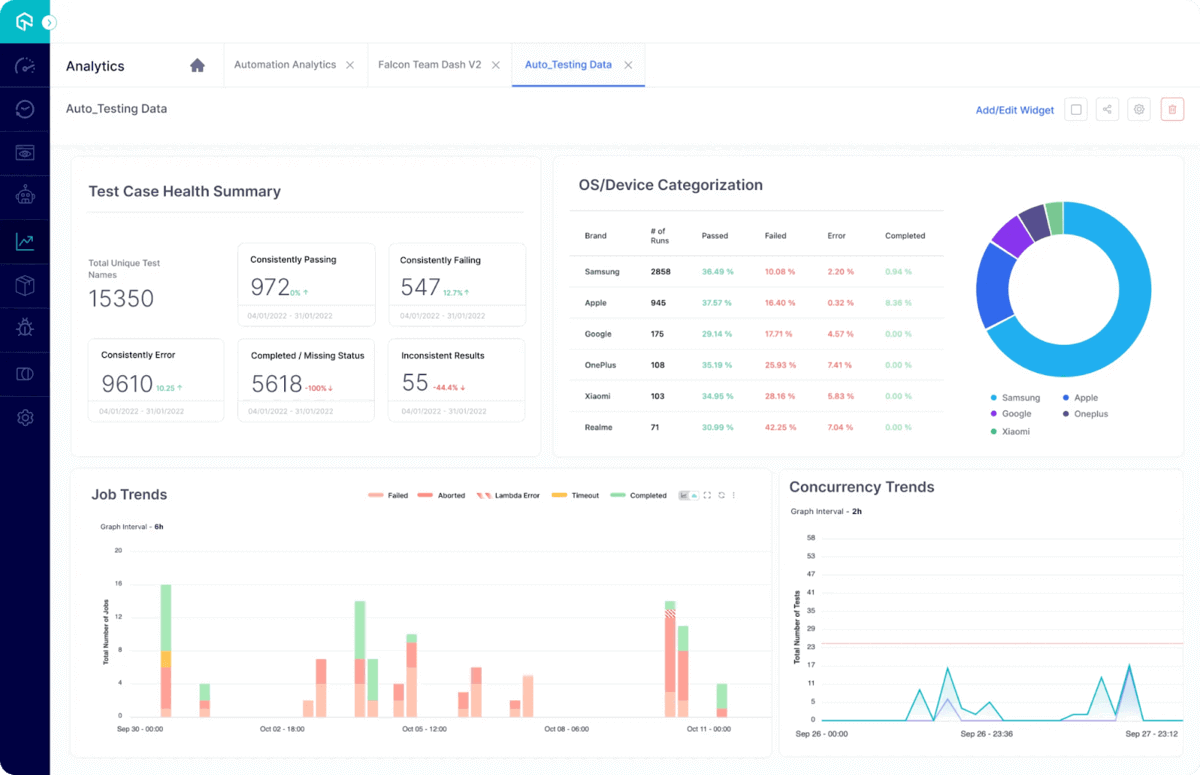
In addition, you can also evaluate high-impact quality issues with the TestMu AI Test Analytics platform – a detailed test analytics and observation suite. TestMu AI makes it fast and easier to unify all test data on a centralized analytics platform to help you make an informed decision.

If you want to excel in any JavaScript automation role, this certification will give you the in-depth knowledge and essential skills needed to be successful in automation testing as a JavaScript developer.
Conclusion
Assertions are integral to software testing. They constitute the third A in the triple-A(AAA) mechanism which stands for assertions. Assertions verify the logical conformance to software requirements.
At the end of this Mocha NodeJS tutorial, we explored what assertions are, wrote simple assertions using the NodeJS assert module, and learned some of the common NodeJS assert methods.
Then we wrote some automated UI tests using Selenium, performed operations, verified the result using some NodeJS assert methods, and ran the tests on a TestMu AI – our Selenium cloud grid provider.

Austin Siewert
Co-Founder, Steadfast Systems
Discovered @TestMu AI yesterday. Best browser testing tool I've found for my use case. Great pricing model for the limited testing I do 👏
2M+ Devs and QAs rely on TestMu AI
Deliver immersive digital experiences with Next-Generation Mobile Apps and Cross Browser Testing Cloud

Author

Kayode Oluwasegun
Blogs: 1


Oluwasegun Kayode is a community contributor with 4+ years of experience in software engineering and technical writing, building high-performance web applications and developer-focused content. He has hands-on experience across frontend and full-stack development, and has previously worked as a software tester, contributing to testing, validation, and quality-focused delivery workflows. Oluwasegun specializes in creating practical technical documentation and articles while working with JavaScript, TypeScript, Python, AWS, CSS, React and modern web frameworks. He holds a Bachelor’s degree in Computer Science.
Frequently asked questions
Did you find this page helpful?
More Related Blogs
TestMu AI forEnterprise
Get access to solutions built on Enterprise
grade security, privacy, & compliance
- Advanced access controls
- Advanced data retention rules
- Advanced Local Testing
- Premium Support options
- Early access to beta features
- Private Slack Channel
- Unlimited Manual Accessibility DevTools Tests