

Power Your Software Testing with AI Agents and Cloud
The Native AI-Agentic Cloud Platform to Supercharge Quality Engineering. Test Intelligently and Ship Faster.


- TestMu AI (Formerly LambdaTest)
- /
- Blog
- /
- Headless Browser in Python and Selenium
How to Run Headless Browser in Python and Selenium
A headless browser in Python functions without a graphical user interface and can be controlled programmatically. Learn how to run the headless browser with Python and Selenium.
Last Updated on:
Headless browsers execute web pages without rendering a visible graphical interface, cutting the system resources a full GUI browser needs during automation testing at scale. This lets a suite maintain consistent behavior across different environments and run faster test execution for platforms like Headless Chrome and Headless Firefox without needing separate physical or virtual machines.
This blog provides a comprehensive guide on leveraging headless browsers in Python for Selenium automation and web development tasks. It starts by discussing the benefits and practical applications of headless browsers.
Afterward, it delves into implementing headless browsing testing with Selenium in Python. The blog explains how to perform parallel testing with headless browsers and uses a cloud-based testing platform to illustrate these concepts.
TL;DR
- A headless browser runs without a visible window, which lowers resource use during automated testing.
- In Selenium Python, adding the --headless argument to Chrome or Firefox options starts a headless browser.
- In a test running four Chrome instances, headless mode lowered CPU use from 78% to 44%.
- In current Chrome versions, --headless runs the full browser, while the old lightweight mode ships as chrome-headless-shell.
- Headless browsers make visual debugging harder, so console logs are important for diagnosing failed headless tests.
Overview of Headless Browsers
Headless browsers, as the name suggests, are web browsers that operate without a visible interface. Unlike traditional browsers, which render web pages and display them in a graphical user interface, headless browsers perform the same operations behind the scenes without any visual representation.
They are particularly useful for tasks requiring web page interaction, data extraction, web scraping, automated testing, or any other scenario where a user interface is unnecessary. By running in a headless mode, these browsers can operate more efficiently, consume fewer resources, and provide enhanced scalability.
Consider a situation where we run a script that opens 4 Chrome browser instances and accesses a web page. Running this in Chrome consumes 78% of the CPU. In headless, Chrome consumes 44% of the CPU.
Chrome
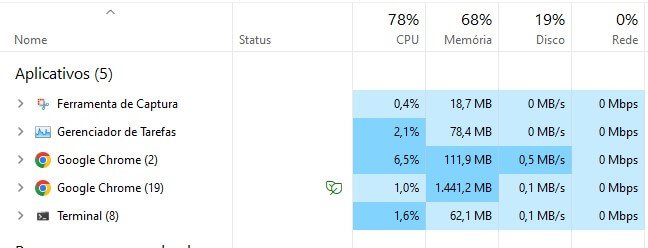
Chrome Headless
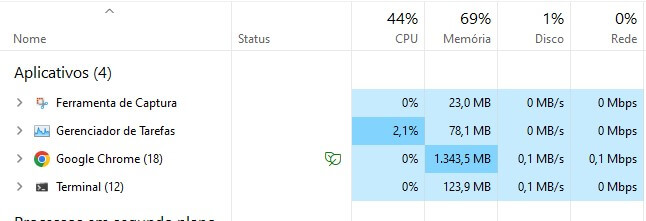
We know this may vary from machine to machine, but we want to present this in the blog to show a decrease of 43% in CPU consumption when using headless browsers.
Several popular headless browsers are available, each with its own features and capabilities. Some of the most notable ones include:
Headless Chrome
Headless Chrome is the headless mode of the Chrome browser. It provides the same capabilities as the regular Chrome browser but without a visible interface. Headless Chrome is widely used for automated testing, web scraping, and other tasks that require browser automation.
Headless Firefox
Headless Firefox is the headless mode of the Firefox browser. It offers similar functionalities to Headless Chrome and is known for its compatibility with web standards and support for complex web applications.
Puppeteer
Puppeteer is a Node.js library developed by Google that provides a high-level API for controlling headless Chrome or Chromium browsers. It offers powerful capabilities for automating browser tasks, generating screenshots and PDFs, and executing JavaScript code within web pages.
PhantomJS
PhantomJS is a headless browser built using the WebKit engine. It provides a JavaScript API for page manipulation and supports various web standards. However, it is worth noting that PhantomJS has been deprecated and is no longer actively maintained.
By leveraging headless browsers with the Python library in Selenium, developers and testers can automate browser actions, interact with web pages, extract data, and perform a wide range of tasks efficiently and effectively.
In the upcoming sections of this blog on headless browsers in Python, we will explore the advantages and disadvantages of headless browsers, focusing on the Headless Chrome and Headless Firefox browsers, dive into the details of running headless browsers in Python with Selenium, and explore advanced techniques for handling various web interactions.

Advantages and Shortcomings of Headless Browsers
Headless browsers offer several advantages that make them a valuable tool for various web-related tasks. While headless browsers provide numerous advantages, some disadvantages should be considered when deciding whether to use them.
Let’s explore some key advantages and disadvantages of using headless browsers.
Advantages
Improved performance and resource efficiency
Headless browsers operate without a visible GUI, reducing the overhead of visually rendering web pages. This translates to improved performance and resource efficiency, as they consume fewer system resources and require less memory.
Test automation can run faster with optimized resource utilization, resulting in faster and more efficient processes.
Scalability and parallel execution
Headless browsers enable parallel execution of tests and tasks, making them highly scalable. Multiple tests or tasks can run concurrently, saving time and increasing productivity.
This parallel execution capability is particularly useful in scenarios where there is a need to process a large volume of data or execute tests across multiple environments. It allows for faster feedback on the quality of the software being tested and improves the efficiency of the test automation process.
Server-side rendering and SEO optimization
Headless browsers can be leveraged for server-side rendering, which involves generating fully rendered HTML pages on the server before sending them to the client. This approach improves page load times and enhances search engine optimization (SEO), as search engine crawlers can easily index the pre-rendered content.
Headless browsers enable websites to provide pre-rendered content to users and search engine crawlers, resulting in better performance and improved visibility in search engine rankings.
Compatibility across multiple platforms
Headless browsers are compatible with various operating systems, making them ideal for cross-platform testing and automation. They can be used on platforms like Windows, Linux, and macOS without platform-specific configurations. This compatibility ensures consistent test execution and automation across different environments, saving time and effort in maintaining separate setups for each platform.
The compatibility may depend on the Chrome/Firefox version for Chrome and Firefox.
Shortcomings
Lack of visual rendering for debugging and testing
One major drawback of headless browsers is the absence of a graphical interface, making debugging and testing more challenging. Unlike traditional browsers, which display web pages visually, headless browsers do not visually represent the page during test execution.
This makes it difficult to identify visual issues or inspect elements visually. A good approach to address the limitation of the absence of a graphical interface in headless browsers is to leverage the browser’s built-in capabilities for logging and capturing console output. Headless browsers typically provide methods to log messages, errors, and warnings to the console, which can be invaluable for debugging purposes.
Increased complexity in handling JavaScript-based interactions
Many modern websites rely heavily on JavaScript to deliver dynamic content and interactivity. Headless browsers need to handle JavaScript execution to ensure the proper functioning of web applications during test automation or web scraping.
However, there may be specific differences or limitations in JavaScript handling, like incomplete DOM support, lack of visual rendering, differences in JavaScript engines, and limited support for browser-specific APIs compared to their GUI counterparts.
This could require additional attention and workarounds for JavaScript-dependent scenarios, like mocking or stubbing, custom JavaScript code, headless browser extensions, network interception and modification, and alternative validation techniques.
Developers and testers need to be aware of these complexities and ensure that their scripts account for any discrepancies, like JavaScript execution errors and timing and synchronization issues.
Limited support for certain browser-specific features
Headless browsers may have limited support for browser-specific features or behaviors, like CSS animations and transitions, JavaScript pop-ups, and video/audio playback. This can pose challenges when testing or automation scenarios that rely on these specific features. It is crucial to carefully consider the target browser’s requirements and limitations before opting for a headless approach.
Learning curve and setup requirements
Using headless browsers may require a learning curve, particularly for individuals accustomed to working with traditional browsers. Developers and testers need to familiarize themselves with the unique features, APIs, and limitations of the chosen headless browser.
For example, Chrome and Chrome Headless browsers have some differences, like:
- Visual rendering: Headless Chrome still renders pages, but shows no window, so layout problems are only visible through screenshots rather than on screen.
- Browser window size: Headless mode starts with a default viewport, so set the size explicitly with the --window-size argument when layouts depend on it.
- User interactions: In headless mode, direct user interactions are not possible since there is no graphical interface.
- Debugging capabilities: In headless mode, some debugging capabilities may differ or be more limited compared to the regular browser’s extensive debugging features.
- Headless-specific APIs: The Chrome Headless browser may provide additional APIs or command-line options that are specific to headless mode.
However, once the initial learning and setup phases are complete, the benefits of using headless browsers can outweigh these initial challenges.
It is important to weigh these advantages and shortcomings to determine whether headless browsers fit a specific project or use case. While they offer significant benefits in terms of performance, scalability, and compatibility, their limitations should be considered and addressed to ensure effective and efficient test automation and web-related tasks.

Key Takeaway: Headless browsers offer better performance, parallel execution, server-side rendering, and cross-platform support. Drawbacks include no visual rendering for debugging and extra complexity with JavaScript-based interactions.
Running Headless Browser in Python with Selenium
Running headless browsers with Python in Selenium opens up a world of possibilities for automating web interactions and performing tasks without a visible browser window.
This section will explore how to initialize a headless browser and navigate web pages using Selenium in Python. We’ll cover creating a WebDriver instance, configuring the headless mode, loading webpages, interacting with elements on the page, and extracting data from the page.
Prerequisites: Setup Process
To start our coding, we need to proceed with the following steps to prepare the environment.
Step 1: Download and Install Python
If not already installed, begin by installing Python from the official website.
Step 2: Install Selenium and pytest libraries
Once Python is installed, use the Python package manager, pip, to install Selenium and pytest. pip is a package management system written in Python used to install/manage packages and libraries.
If you do not have pip installed on your machine, you should follow the below steps for Windows:
- Download the get-pip.py script by visiting the official pip installation page.
- Save the get-pip.py file to your computer.
- Open a command prompt and navigate to the directory where you saved the get-pip.py file.
- Run the following command:
python get-pip.py
Then you can check the installation using the below command:
pip --version

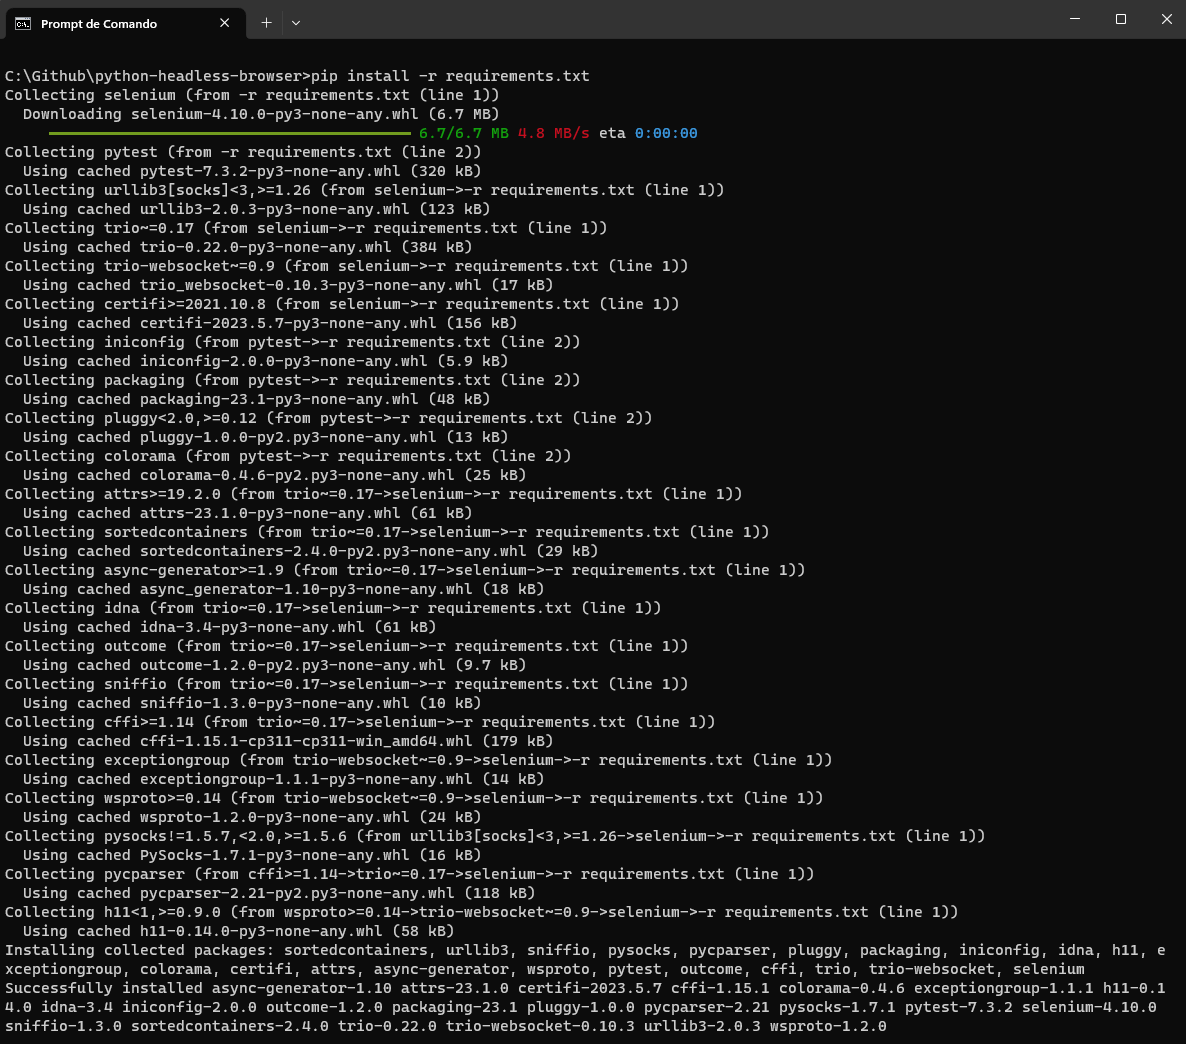
Now, you can install Selenium and pytest by running the following command:
pip install -r requirements.txt
requirements.txt contains the dependencies that we want to install.

After running it, you can see the output below.
Step 3: Download and Install Visual Studio Code
Visual Studio Code (VSC) will be the IDE we will use in this blog. However, you are free to use your preferred IDE.
Step 4: Configure pytest in Visual Studio Code
To finish the configuration, we need to instruct Visual Studio Code that pytest will be our test runner; you can do this by following the below instructions:
- Create a folder for your project (in our example python-headless-browser).
- Open the project folder in Visual Studio Code.
- Open the command palette (menu View > Command Palette), and type “Configure Tests.”
- Select pytest as the test framework.
- Select the root directory option.
Now, we are ready to start!
Initializing a Headless Browser
To run the headless browser with Python, we need to initialize a headless browser instance. This involves creating a WebDriver object and configuring it to run in headless mode.
Chrome
chrome_options.add_argument('--headless')
Firefox
firefox_options.add_argument('--headless')
In current Chrome versions, --headless runs the new headless mode, which is the full Chrome browser. The older, lighter implementation now ships separately as chrome-headless-shell.
Navigating Web Pages
Once we have a headless browser instance, we can navigate web pages, interact with elements, and extract data from the page. Let’s explore how to perform these tasks using Selenium with Python.
Loading a Webpage
To load a webpage in the headless browser, we use the get() method of the WebDriver object. Here’s an example:
# Load a webpage
    driver.get("https://www.testmuai.com/selenium-playground/simple-form-demo/")
The above code uses the get() method to load the webpage with the URL “https://www.testmuai.com/selenium-playground/simple-form-demo.” The headless browser will retrieve and render the page, allowing us to interact with its elements.
Interacting with Elements on the Page
With the headless browser loaded with a web page, we can interact with various elements on the page, such as typing in a field, clicking buttons, or extracting data. Selenium provides a wide range of methods and functions to perform these actions. Let’s see some examples:
# Find an input element by its ID and enter text
    input_element = driver.find_element(By.ID, "user-message")
    input_element.send_keys("This is a headless browser text!")
    # Find an element by its ID and click on it
    element = driver.find_element(By.ID, "showInput")
    element.click()
In the above code snippets, we use the find_element() method to locate elements on the page. These methods allow us to find elements using different strategies, such as by ID, name, class name, CSS Selector, and more. Once we have a reference to an element, we can interact with it using methods like click() or send_keys() in Selenium.
Extracting Data from the Page
Extracting data from a web page is common in web scraping and test automation. Selenium provides several methods to locate and extract data from elements on the page. Let’s take a look at this example:
# Find an element by its ID and extract its text
    element = driver.find_element(By.ID, "message")
    print(element.text)
In the code snippets above, we use the find_element() method to locate elements on the page. We then use methods like text to extract the desired data from the elements.
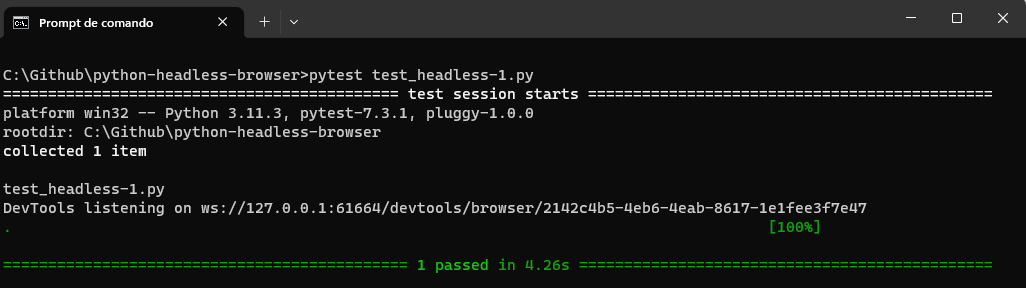
You can run the entire code using the below command:
pytest test_headless-1.py
Test Automation with Headless Browser in Python
Now, let’s automate a more complex test scenario. We want to automate the filling in the below register form of the TestMu AI eCommerce Playground website. This website provides a safe environment for developers to test their code and applications.
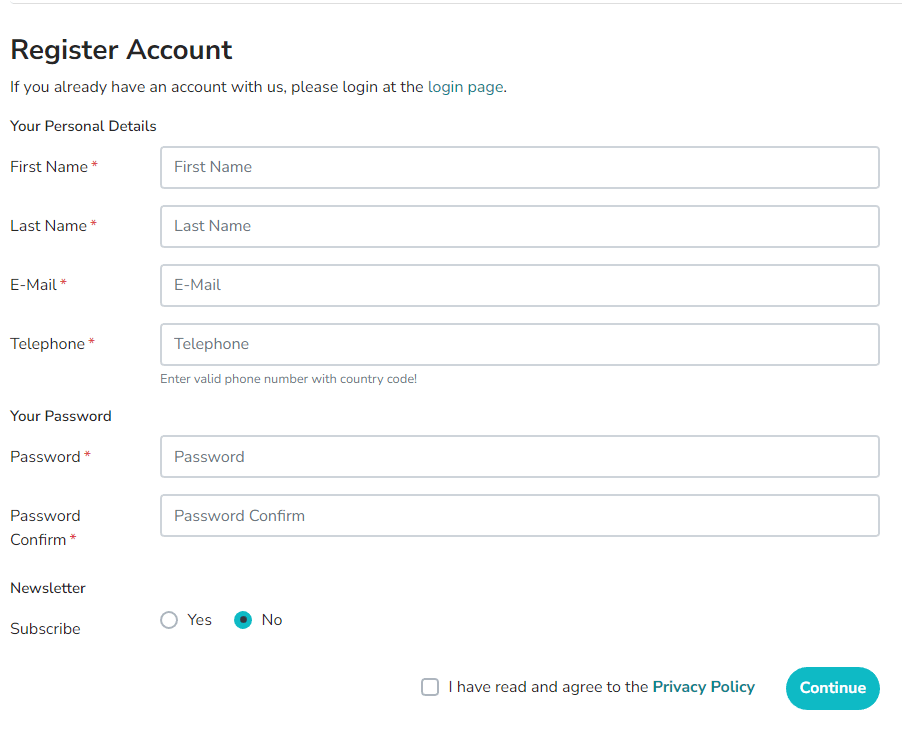
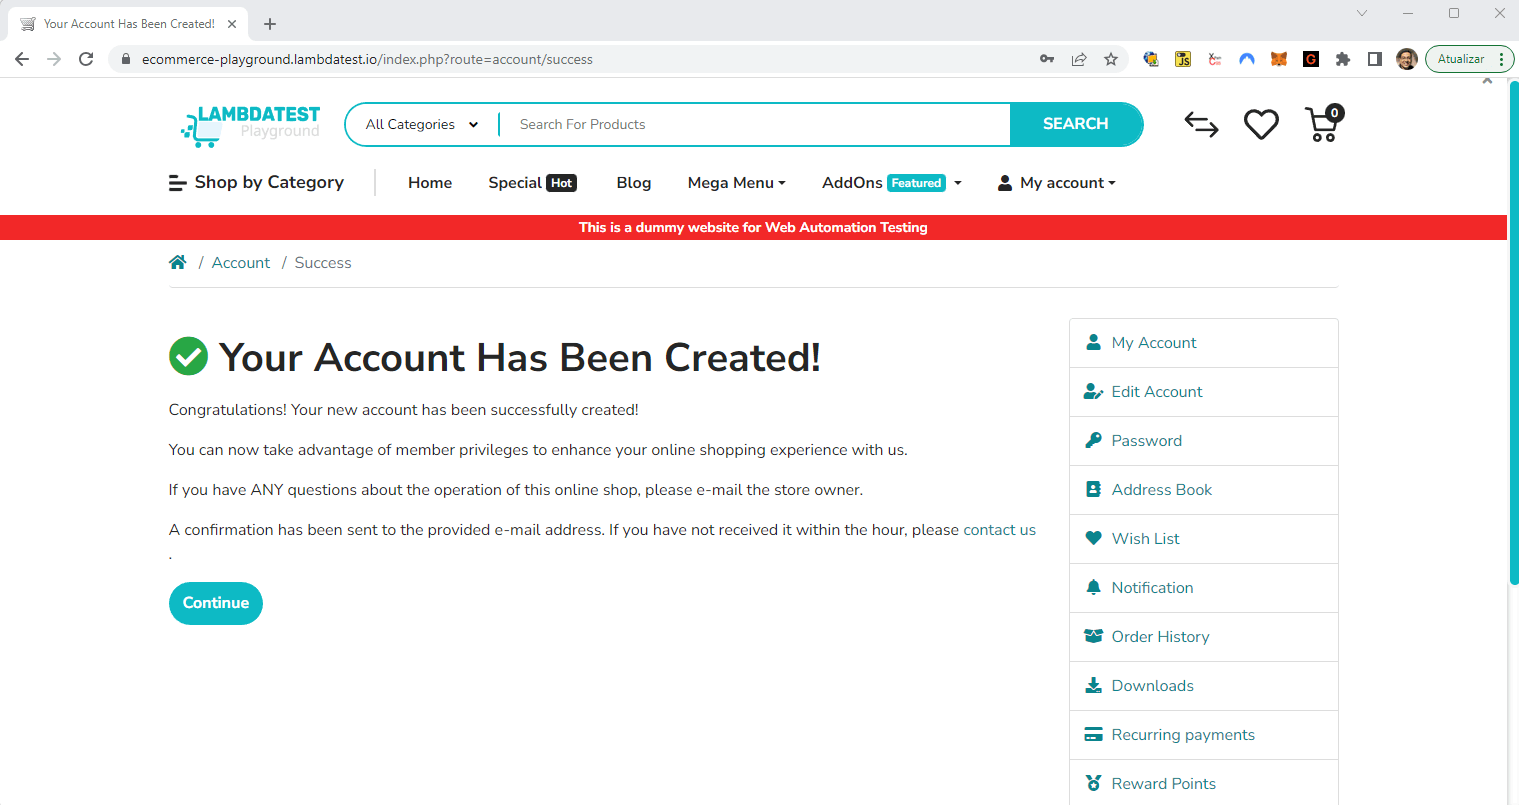
When filling out this form, we will see the screen below. Pay attention to the message displayed on the Chrome tab. This is the message we will assert at the end of our test case.
- Open the Register Account form in the TestMu AI eCommerce Playground.
- Fill in the personal details.
- Fill in the password.
- Subscribe to the newsletter.
- Accept the terms and conditions.
- Click the Continue button.
- Check that a success message is shown to the user in the browser tab.
Implementation
from selenium import webdriver
from selenium.webdriver.chrome.options import Options
from selenium.webdriver.common.by import By


def test_register_account_form():
    # Create an instance of ChromeOptions
    chrome_options = Options()
    # Configure ChromeOptions to run in headless mode
    chrome_options.add_argument('--headless')


    # Initialize the WebDriver with the configured ChromeOptions
    driver = webdriver.Chrome(options=chrome_options)


    driver.get("https://ecommerce-playground.lambdatest.io/index.php?route=account/register")


    first_name = driver.find_element(By.ID, "input-firstname")
    first_name.send_keys("FirstName")


    last_name = driver.find_element(By.ID, "input-lastname")
    last_name.send_keys("LastName")


    email = driver.find_element(By.ID, "input-email")
    email.send_keys("blogtest+222@example.com")


    telephone = driver.find_element(By.ID, "input-telephone")
    telephone.send_keys("+351999888777")


    password = driver.find_element(By.ID, "input-password")
    password.send_keys("123456")


    password_confirm = driver.find_element(By.ID, "input-confirm")
    password_confirm.send_keys("123456")


    newsletter = driver.find_element(By.XPATH, value="//label[@for='input-newsletter-yes']")
    newsletter.click()


    terms = driver.find_element(By.XPATH, value="//label[@for='input-agree']")
    terms.click()


    continue_button = driver.find_element(By.XPATH, value="//input[@value='Continue']")
    continue_button.click()


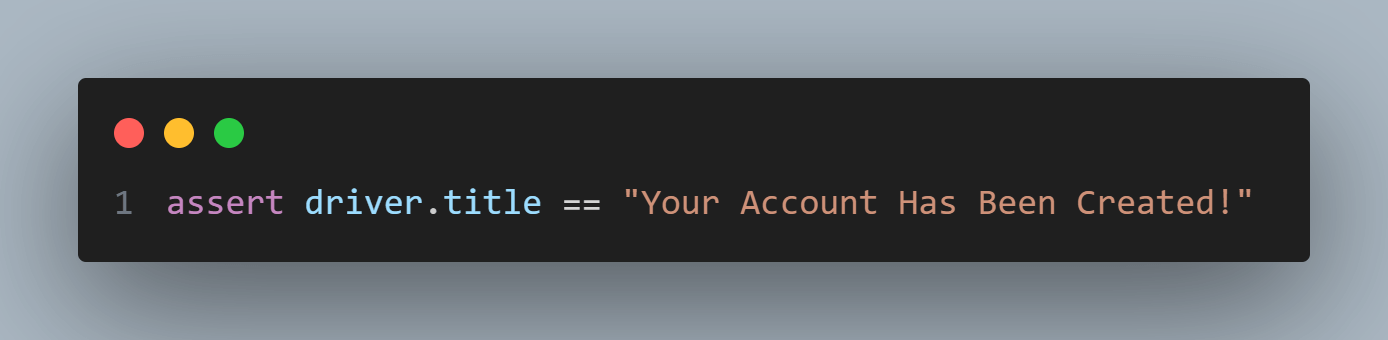
    assert driver.title == "Your Account Has Been Created!"
Code Walkthrough
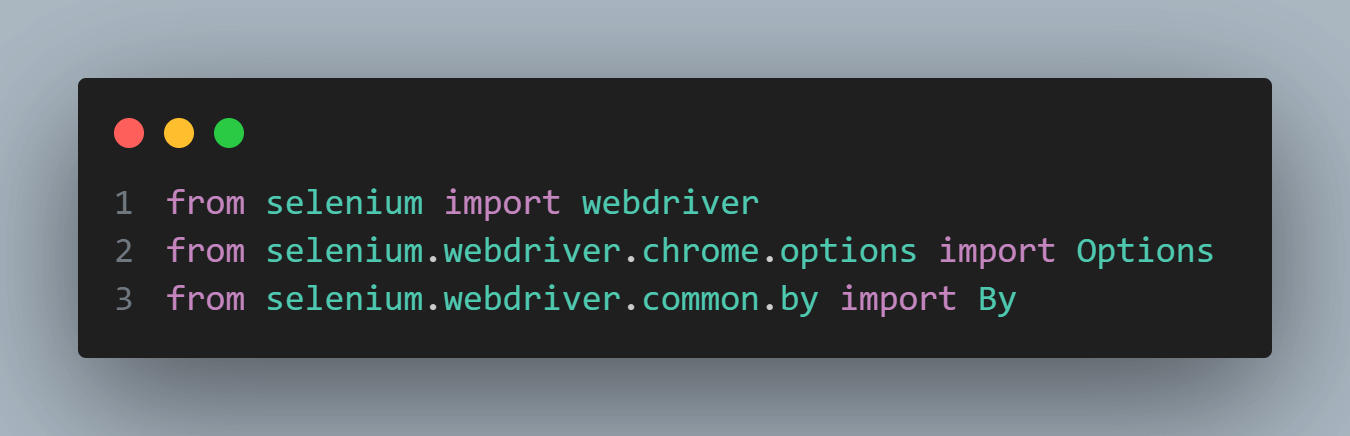
First, let’s set up the necessary imports for the code to work correctly. We import the webdriver module from the Selenium library and specific submodules like options from selenium.webdriver.chrome.options and By from selenium.webdriver.common.by. These modules provide us with the necessary tools to configure the Chrome browser, locate elements on the web page, and interact with them.
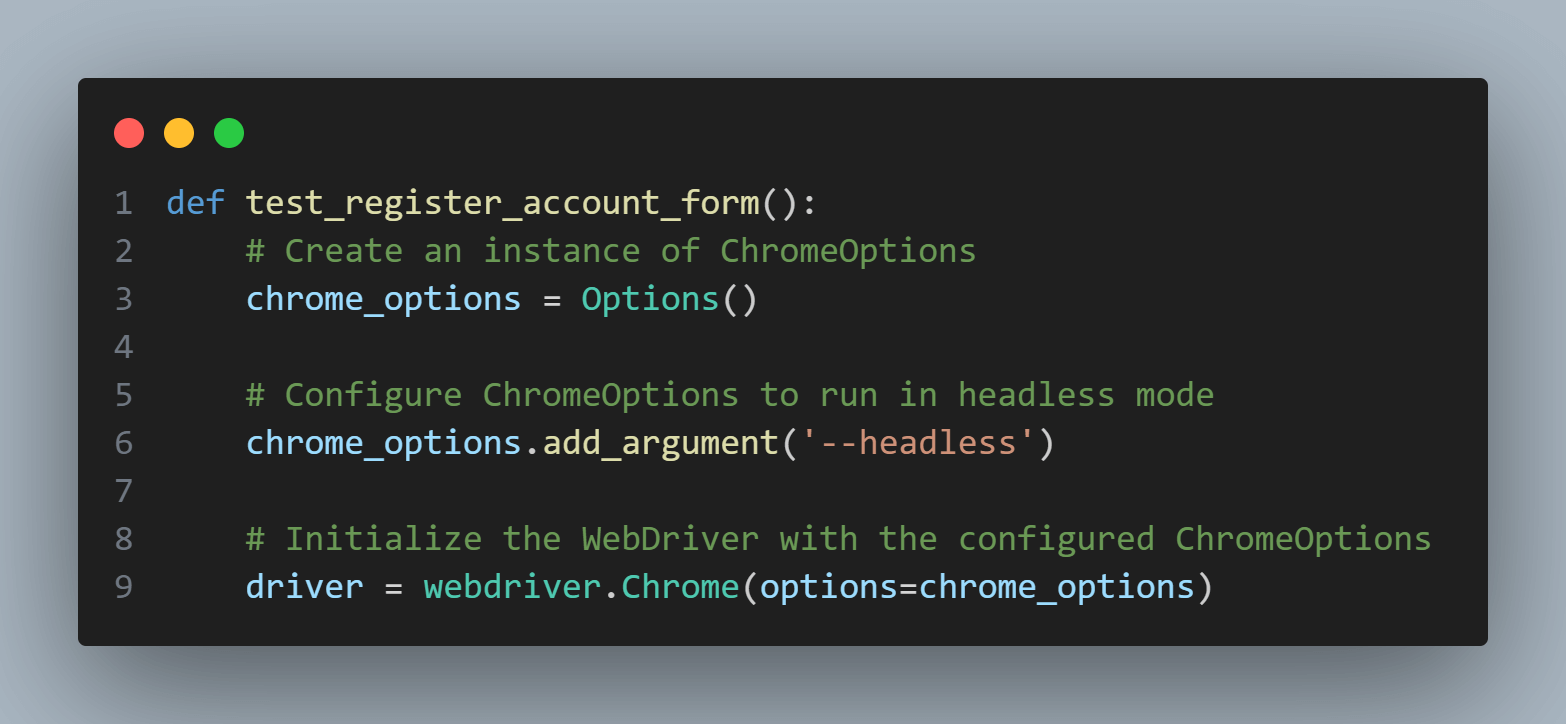
Next, we create a function called test_register_account_form, where inside it, we create an instance of ChromeOptions and assign it to the variable chrome_options. In this case, we want to run the browser in headless mode without a visible GUI. We achieve this by adding the --headless argument to chrome_options.
With the ChromeOptions configured, we initialize the WebDriver by creating an instance of webdriver.Chrome and passing in the options parameter set to chrome_options. This step creates a new Chrome browser instance with the specified options, including running in headless mode.
Now, we can start interacting with the web page. The driver.get() method is used to navigate to a specific URL.

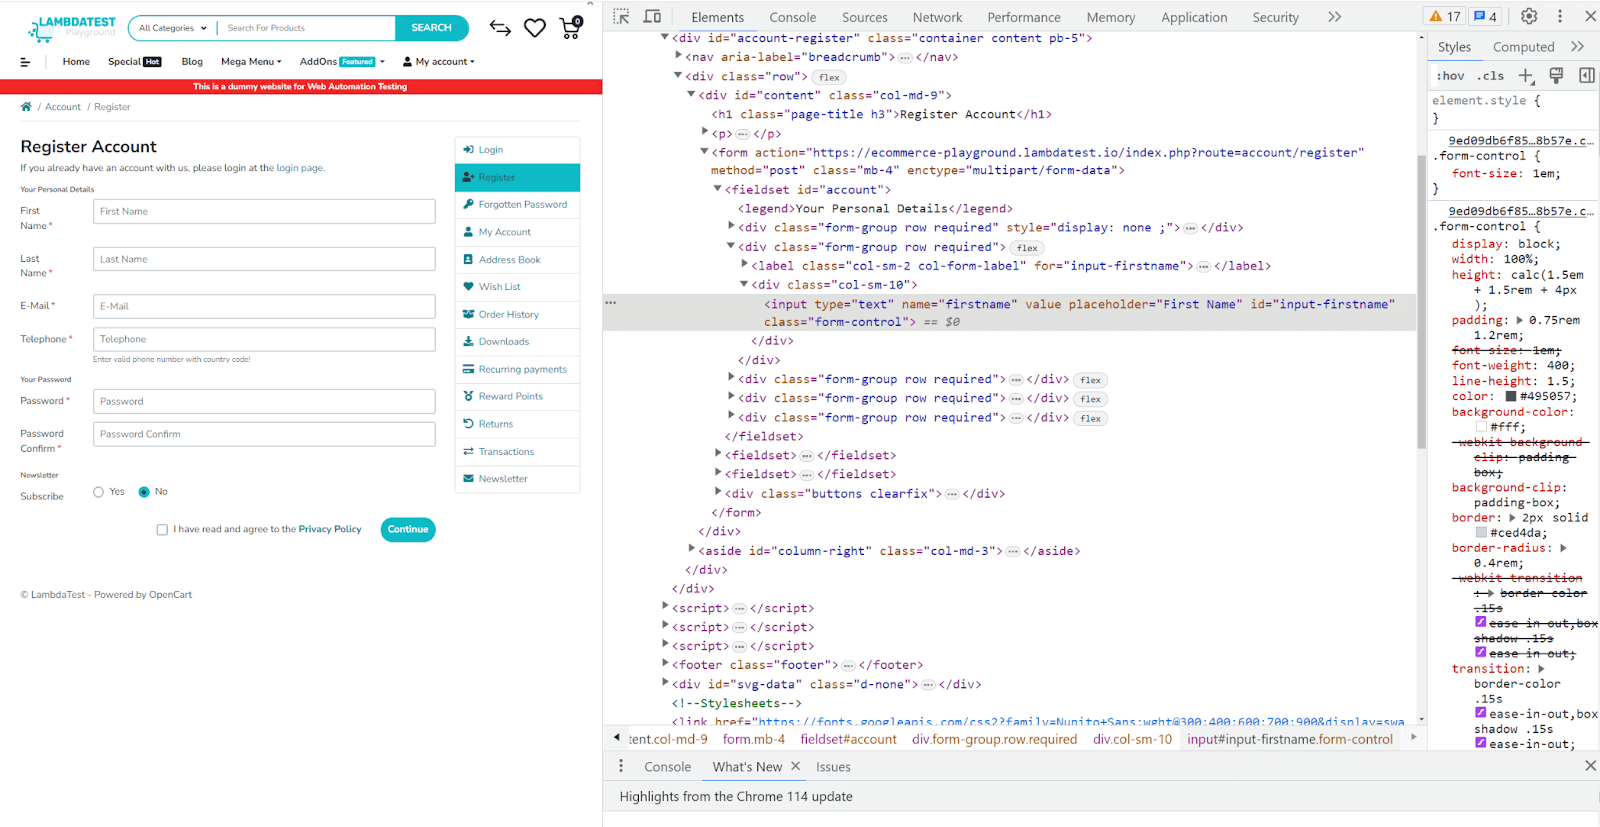
To fill out the registration form, we locate each form field element on the web page using the driver.find_element() method. We pass in the method By.ID as the locator strategy and the corresponding ID of the form field element as the value.
For example, first_name corresponds to the input field with the ID input-firstname.
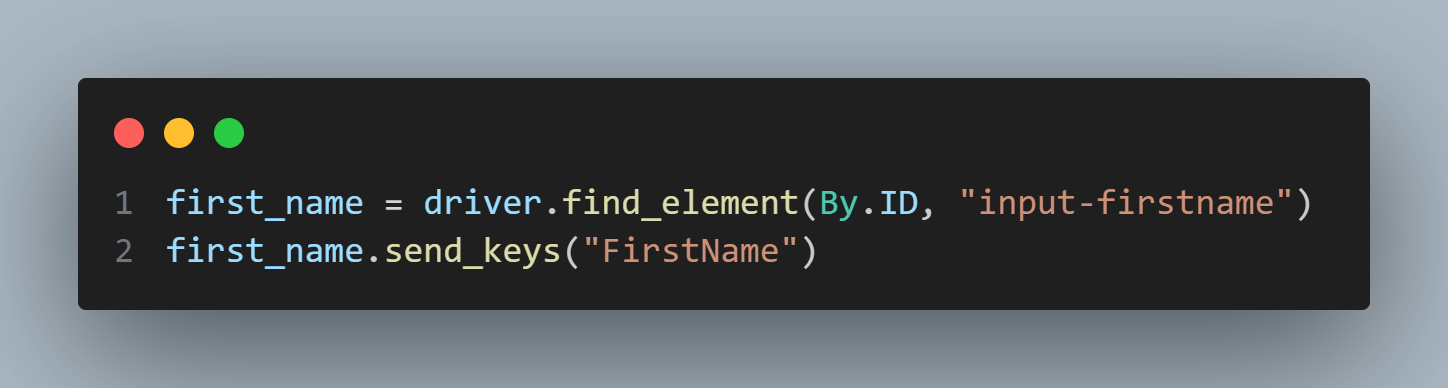
Once we have located the element, we use the send_keys() method to simulate typing in the desired input. In this case, we enter “FirstName” as the first name.
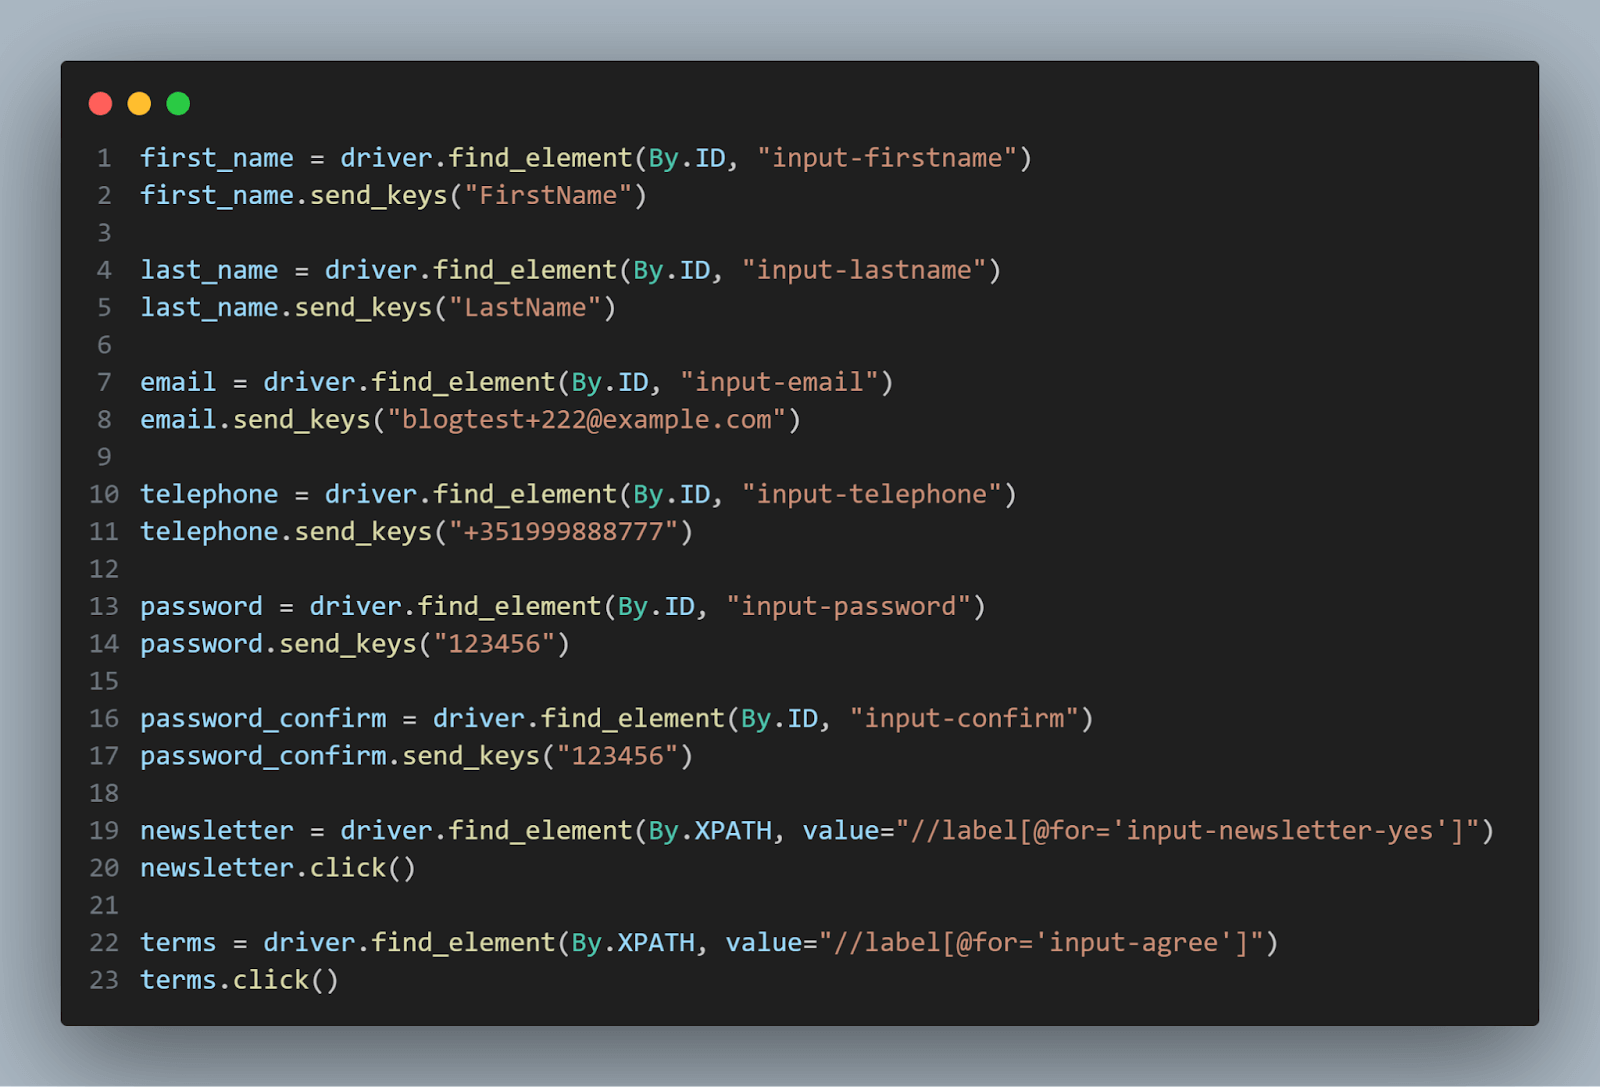
We repeat this process for other form fields such as last name, email, telephone, password, and password confirmation. Additionally, we interact with checkboxes for the newsletter subscription and terms agreement. We locate these elements using the By.XPATH locator strategy and provide the corresponding XPath value. Finally, we use the click() method to simulate a mouse click on the checkboxes.
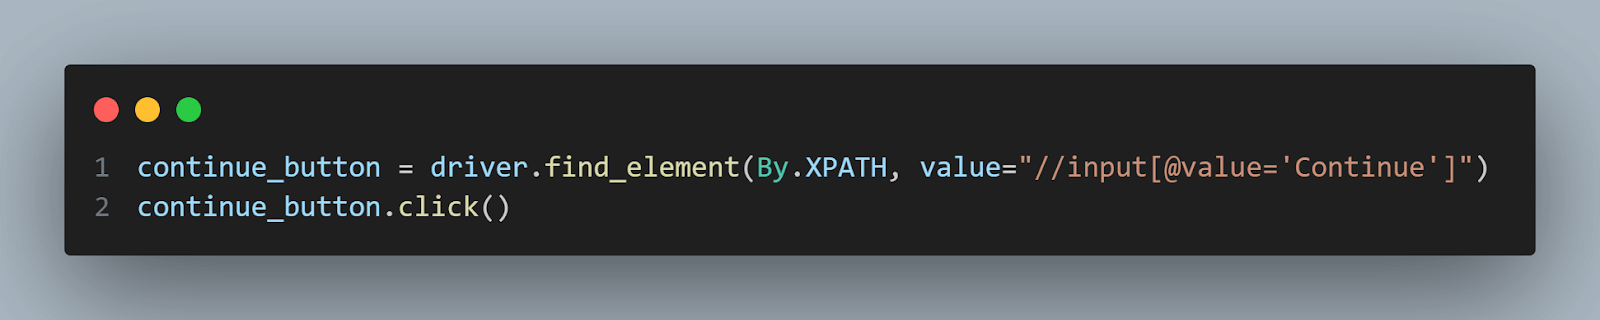
After filling out the form, we locate the Continue button using the By.XPATH locator and click on it to submit the form.
Lastly, we assert the resulting page title to ensure a successful registration. In this example, we assert that the page title is “Your Account Has Been Created!“. If the assertion fails, an exception will be raised, indicating that the registration process did not go as expected.
You can run the above code using the below command:
pytest test_headless-2.py
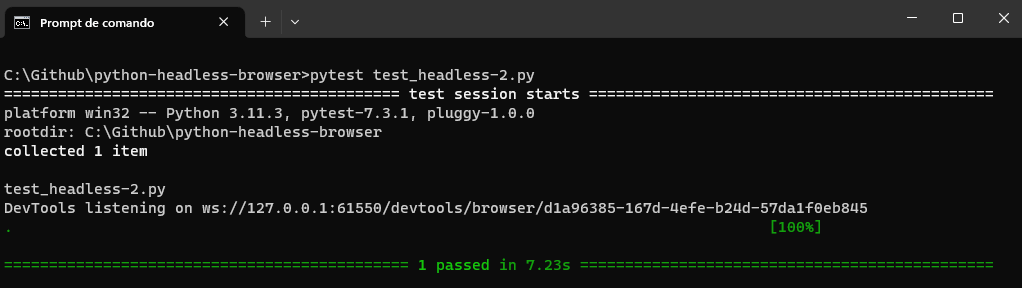
By leveraging the capabilities of headless browsers with Python and Selenium, we can automate web interactions, perform tests, and extract data from web pages effectively and efficiently.
In the next section of this blog on Python headless browsers, we will delve into parallel testing using a headless browser, which further enhances the capabilities and efficiency of our automation testing process.

Note: Run your Python tests using headless browsers on cloud. Try TestMu AI Today!
Parallel Testing Using Headless Browser in Python
This blog section on Python headless browsers will explore how to perform parallel testing with Selenium Python using a headless browser. Parallel testing allows us to run multiple test cases simultaneously, reducing the overall testing time and increasing efficiency.
We will discuss the steps to set up the testing environment, including installing Python and Selenium, configuring the Selenium WebDriver, and installing the necessary dependencies for parallel testing. Then, we can implement an example using a cloud-based Selenium grid.
The demonstration will be done on a cloud-based grid like TestMu AI, an AI-powered test orchestration and execution platform that helps developers and testers to perform Python automation testing of their websites or web applications on 3,000+ browser and operating system combinations.
While performing testing on TestMu AI, you can run your automated tests in parallel across multiple browsers and OS combinations, reducing the overall test execution cycles.
Subscribe to the TestMu AI YouTube Channel for more videos around headless testing with Selenium JavaScript and Cypress.
To perform Selenium Python testing on the TestMu AI cloud grid, you need to use the capabilities to configure the environment where the test will run.
In this Python headless browser tutorial, we will run the tests with the following characteristics:
Environment 1
- Browser: Chrome
- OS: Windows 11
Environment 2
- Browser: Firefox
- OS: macOS Ventura
We are going to execute the same test scenario automated in the previous section, which is again exposed below:
Test Scenario
- Open the Register Account form in the TestMu AI eCommerce Playground.
- Fill in the personal details.
- Fill in the password.
- Subscribe to the newsletter.
- Accept the terms and conditions.
- Click the Continue button.
- Check that a success message is shown to the user in the browser tab.
Setting up the Environment
Before diving into parallel testing, we need to ensure that our testing environment is properly set up. Here are the essential steps that we need. They were previously explained in the previous section:
- Install Python.
- Install Selenium WebDriver.
- Install pytest.
- Install your IDE, in our case, Visual Studio Code.
- Configure pytest in Visual Studio Code.
You need also to prepare the TestMu AI capabilities code to be inserted in our test script.
You can generate the capabilities code from the TestMu AI Capabilities Generator.
Then, you should get the “Username” and “Access Token” from your account in your TestMu AI Profile Section and set them as the LT_USERNAME and LT_ACCESS_KEY environment variables that the code reads.
With the environment set up, we can proceed to implement parallel testing using headless browsers.
Implementation of Parallel Testing on TestMu AI
from selenium import webdriver
from selenium.webdriver.common.by import By
import pytest
import os
import random


@pytest.fixture(params=["chrome-Windows11", "firefox-macOSVentura"],scope="class")
def driver(request):
    username = os.getenv("LT_USERNAME")
    accessToken = os.getenv("LT_ACCESS_KEY")
    gridUrl = "hub.lambdatest.com/wd/hub"


    if request.param == "chrome-Windows11":
        web_driver = webdriver.ChromeOptions()
        platform = "Windows 11"
    if request.param == "firefox-macOSVentura":
        web_driver = webdriver.FirefoxOptions()
        platform = "MacOS Ventura"


    lt_options = {
        "user": username,
        "accessKey": accessToken,
        "build": "your build",
        "name": "your test",
        "platformName": platform,
        "w3c": True,
        "browserVersion": "latest",
        "selenium_version": "latest",
        "headless": True
    }
    options = web_driver
    options.set_capability('LT:Options', lt_options)


    url = "https://"+username+":"+accessToken+"@"+gridUrl

    driver = webdriver.Remote(
        command_executor=url,
        options=options
    )


    yield driver

    driver.quit()


def test_register_account_form(driver):
    driver.get("https://ecommerce-playground.lambdatest.io/index.php?route=account/register")


    first_name = driver.find_element(By.ID, "input-firstname")
    first_name.send_keys("FirstName")


    last_name = driver.find_element(By.ID, "input-lastname")
    last_name.send_keys("LastName")


    random_number = str(random.randrange(1, 5000, 1))


    email = driver.find_element(By.ID, "input-email")
    email.send_keys("blogtest+" + random_number +"@example.com")


    telephone = driver.find_element(By.ID, "input-telephone")
    telephone.send_keys("+351999888777")


    password = driver.find_element(By.ID, "input-password")
    password.send_keys("123456")


    password_confirm = driver.find_element(By.ID, "input-confirm")
    password_confirm.send_keys("123456")


    newsletter = driver.find_element(By.XPATH, value="//label[@for='input-newsletter-yes']")
    newsletter.click()


    terms = driver.find_element(By.XPATH, value="//label[@for='input-agree']")
    terms.click()


    continue_button = driver.find_element(By.XPATH, value="//input[@value='Continue']")
    continue_button.click()


    assert driver.title == "Your Account Has Been Created!"
Code Walkthrough
We import the necessary modules: webdriver, By, pytest, os, and random. These modules provide the required functionality for configuring the WebDriver, locating web elements, performing assertions, supporting the test case, and managing test fixtures in pytest.

Next, we define a pytest fixture named driver. The fixture is responsible for setting up the WebDriver instance that will be used for the tests. It takes a parameter called request, which allows us to access the test parameterization. To understand parameterization better, look at this blog on Parameterization in pytest.
In this fixture, we want to run the tests in the environments mentioned before: Windows 11 + Chrome and macOS Ventura + Firefox.
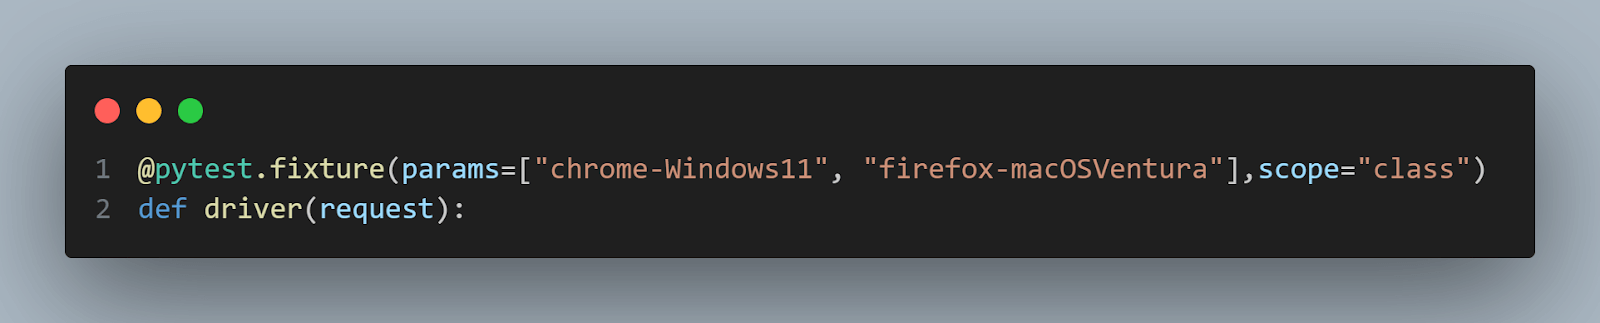
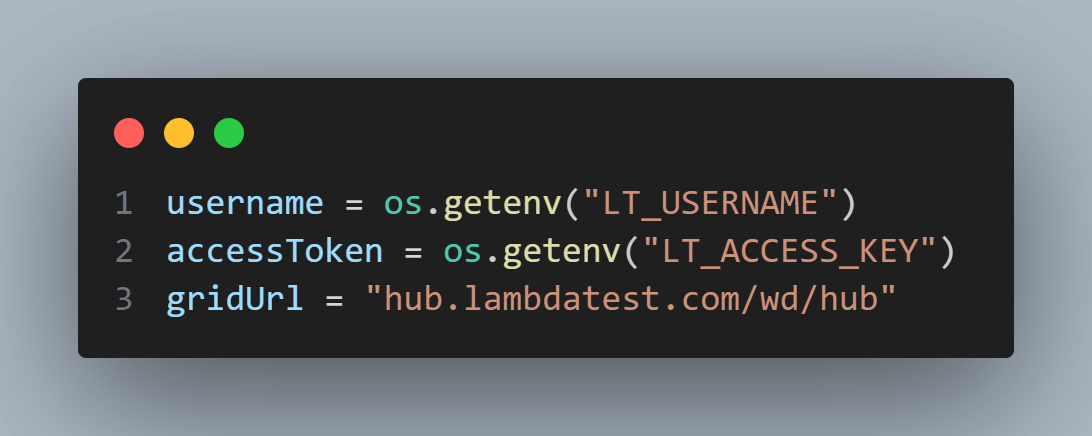
Inside the fixture, we retrieve the necessary environment variables, such as the TestMu AI username, accessToken, and the gridUrl. These credentials are used to authenticate and connect to the TestMu AI online Selenium grid.
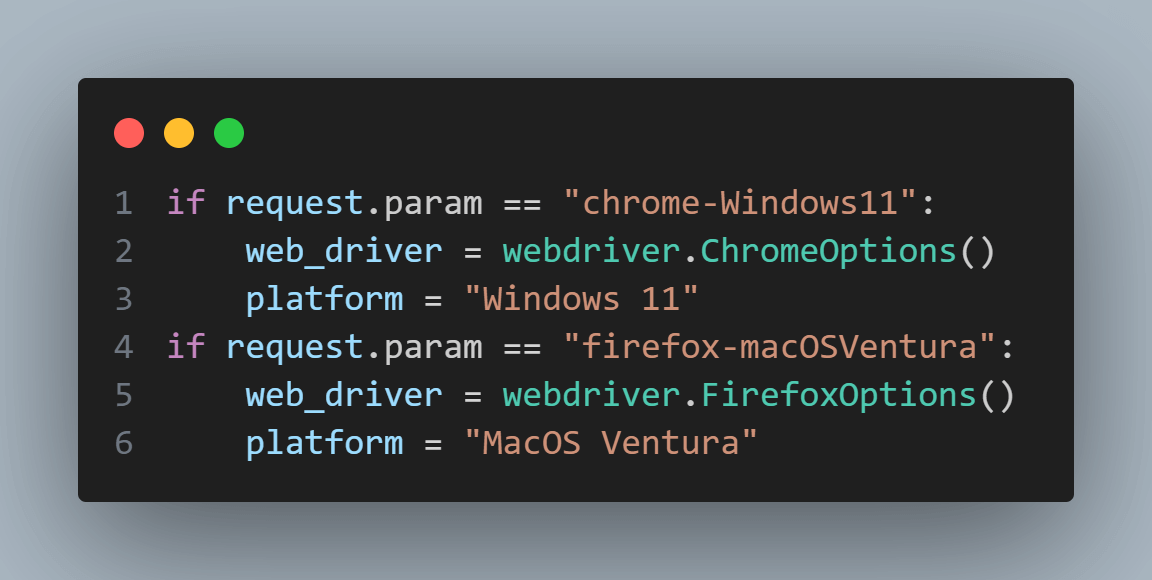
We then use the test parameter specified in the request.param to determine the desired browser and platform for the test. In this example, we have two test parameter options: chrome-Windows11 and firefox-macOSVentura. Based on the parameter value, we create an instance of webdriver.ChromeOptions or webdriver.FirefoxOptions accordingly. We also set the platform variable to represent the chosen platform.
The next step is configuring the TestMu AI options, such as the username, access key, build name, test name, platform name, browser name, browser version, Selenium version, and headless mode. These options are stored in a dictionary named lt_options.
We then assign the web_driver instance to the options variable and set the capability LT:Options to the lt_options dictionary. This capability ensures that the TestMu AI specific options are correctly passed to the WebDriver.
The headless: True parameter in the lt_options dictionary indicates that the tests will be executed in headless mode, meaning there will be no visible browser window during the test execution. This allows for testing using Selenium pytest without needing a graphical interface.

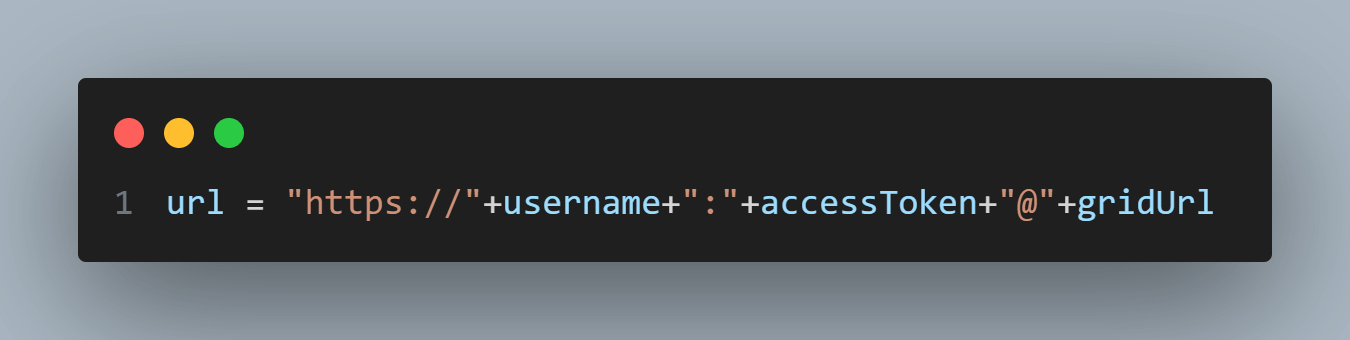
We construct the TestMu AI URL by combining the username, accessToken, and gridUrl. This URL will be used as the command_executor when creating the webdriver.Remote instance.
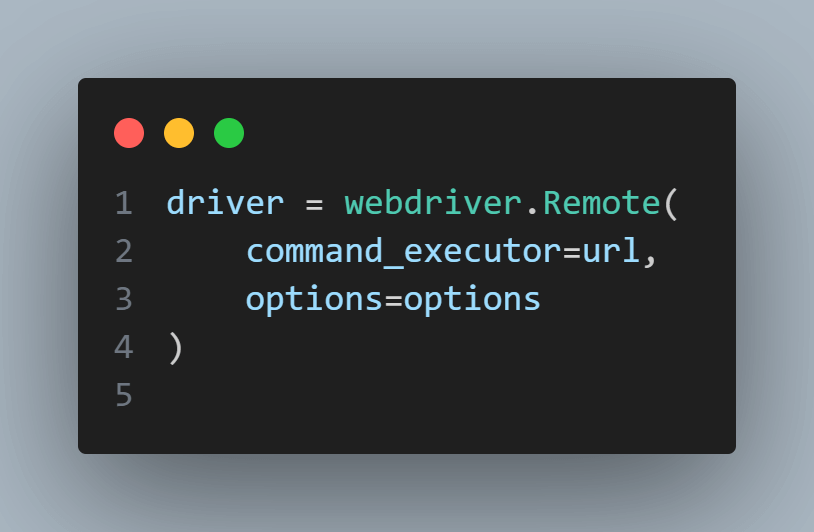
Finally, we create the WebDriver instance by calling webdriver.Remote() with the constructed URL and the options parameter. This sets up the connection to the TestMu AI Selenium Grid and initializes the WebDriver.
The driver fixture is then yielded, allowing the test function to utilize the WebDriver. After the test is completed, the driver.quit() method is called to gracefully close the WebDriver session.
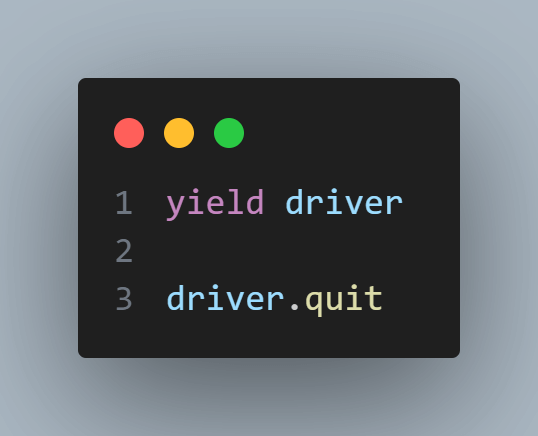
The test_register_account_form function is a test case that demonstrates how to interact with a web page using the WebDriver. The test opens a registration form, fills out the form fields with sample data, performs various actions, and submits the form. The code is almost identical to the one presented and explained in the previous section.
We just did one modification. Since we are running the tests multiple times in the same execution, we need to create a random way to have a different email in each execution. If you try to use the same email, the application under test will not allow it. This is the change done in the previous code.
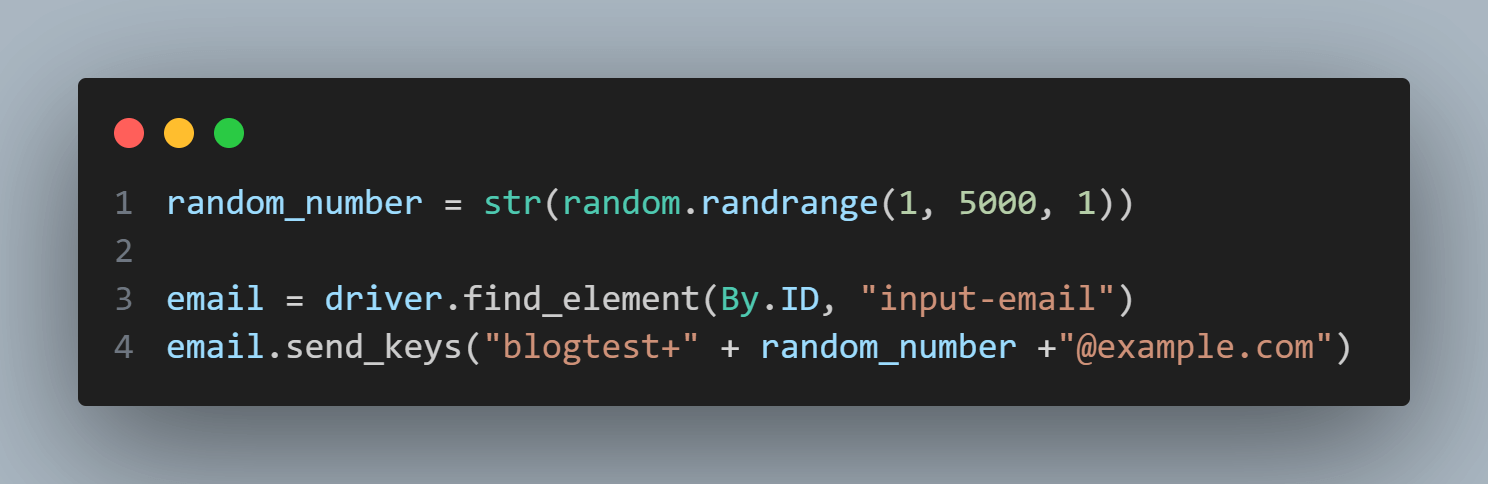
First, the line random_number = str(random.randrange(1, 5000, 1)) generates a random integer number between 1 and 5000. The random.randrange() function is used for this purpose, with the start value (inclusive) and the end value (exclusive). The third argument, 1, is the step size, indicating that the random number will be incremented by 1 each time.
Next, we locate the email input field as we did before. Once the element is located, we use the send_keys() method to enter the generated email address. The email address is constructed by concatenating the string “blogtest+” with the generated random number and the domain. This ensures that a unique email address is used each time the test runs.
The fixture runs each environment as a separate test. To run both at the same time rather than one after another, install pytest-xdist and pass the number of workers:
pip install pytest-xdist
pytest -n 2
When running the above code, we have the below results:
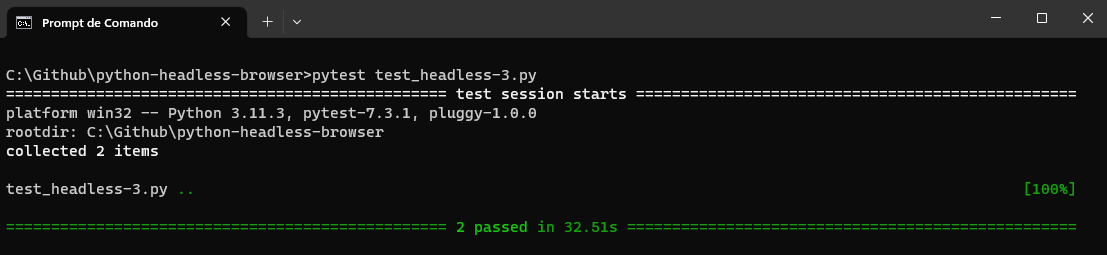
Also, we can see in the TestMu AI Web Automation Dashboard that for this test, we had two executions, exactly what we expected.
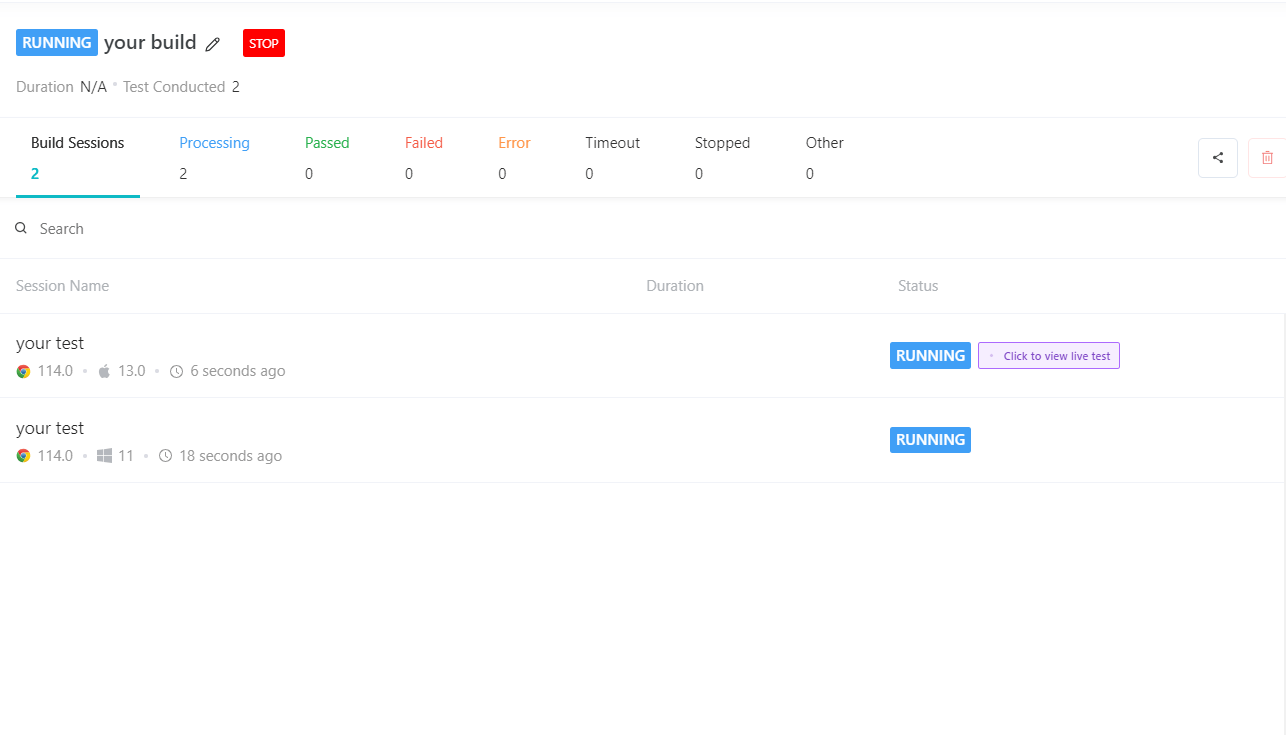
With the implementation of parallel testing using a headless browser on TestMu AI, you can significantly reduce the overall testing time while ensuring thorough test coverage across multiple browsers and platforms. Leveraging the power of headless browsers and the scalability of parallel testing, you can enhance your test automation workflow and efficiently deliver high-quality software.
Conclusion
Run headless by default where speed and scale matter: CI pipelines, parallel runs, and scraping jobs that never need a screen.
Switch back to a visible browser when a test fails on layout or interaction, because headless mode gives no visual rendering to debug from.
For suites that must cover several browser and OS combinations, run the same headless pytest fixture on a cloud grid instead of adding machines.
Author

Paulo Oliveira
Blogs: 16


Paulo is a Quality Assurance Engineer with more than 15 years of experience in Software Testing. He loves to automate tests for all kind of applications (both backend and frontend) in order to improve the team’s workflow, product quality, and customer satisfaction. Even though his main roles were hands-on testing applications, he also worked as QA Lead, planning and coordinating activities, as well as coaching and contributing to team member’s development. Sharing knowledge and mentoring people to achieve their goals make his eyes shine.
Reviewer

Navin Chandra
Reviewer
Navin Chandra is a Member of Technical Staff at TestMu AI (formerly LambdaTest), building the open-source automation that powers its Selenium and Appium cloud grid. A committer to both Selenium and Appium, he implemented WebDriver BiDi support in Selenium for real-time browser events and bidirectional control and is developing Apple's iOS RemoteXPC protocol in Appium to enable low-level wireless communication with iOS system services. He contributes to Selenium across multiple language bindings as a member of the Selenium GitHub organization. He has served as a Google Summer of Code mentee and mentor at openSUSE and an LFX mentee at CNCF's KubeArmor, and is a SUSE Certified Deployment Specialist. Navin holds a B.Tech in Computer Science.


Frequently asked questions
Did you find this page helpful?
More Related Blogs
TestMu AI forEnterprise
Get access to solutions built on Enterprise
grade security, privacy, & compliance
- Advanced access controls
- Advanced data retention rules
- Advanced Local Testing
- Premium Support options
- Early access to beta features
- Private Slack Channel
- Unlimited Manual Accessibility DevTools Tests