

Power Your Software Testing with AI Agents and Cloud
The Native AI-Agentic Cloud Platform to Supercharge Quality Engineering. Test Intelligently and Ship Faster.


- TestMu AI (Formerly LambdaTest)
- /
- Learning Hub
- /
- Appium Tutorial: Install, Write, and Run Your First Appium 3 Test
Appium Tutorial: Install, Write, and Run Your First Appium 3 Test
Appium tutorial for Appium 3: install the server and drivers, write a runnable first test, fix common errors, and run tests on real Android and iOS devices.
Last Updated on:
Appium automates a signed application binary on Android and iOS through one W3C WebDriver API, with no changes to the application source. That single property is why it survived a decade of mobile tooling churn.
This Appium tutorial covers Appium 3, released in 2025. By the end you will have the server and a driver installed, plus a first Python test that runs against a real element.
It also leaves you with a lookup table for the errors that break most Appium setups.
Key Takeaways
- To install Appium 3 on Node.js 20.19 or newer, run npm install -g appium, add a driver with appium driver install uiautomator2 or xcuitest, then verify the setup with appium driver doctor.
- Every Appium 3 test needs the appium vendor prefix on each non standard capability and a client pointed at the server root, because a URL ending in /wd/hub returns 404.
- Appium is an open source automation framework that drives the signed native, hybrid, or mobile web app you ship on Android and iOS through one W3C WebDriver API, without changing the application source.
- Accessibility id is the preferred Appium locator because one locator works on both Android and iOS, with resource id or iOS class chain as fallbacks and slow, brittle XPath as a last resort.
- Appium tests should wait with WebDriverWait and expected conditions instead of fixed sleeps, and keep the implicit wait at zero, because mixing implicit and explicit waits compounds the delay.
- Appium suits teams shipping one app on Android and iOS, while in process Espresso and XCUITest give faster, more stable results for frame accurate gaming input, deep OS level control, or sub second unit feedback.
What Is Appium?
Appium is an open source automation framework that drives native, hybrid, and mobile web apps on Android, iOS, and Windows through one W3C WebDriver API and platform specific drivers.
Dan Cuellar built the first version at Zoosk in 2011, and Jason Huggins put it behind the WebDriver wire protocol a year later. That decision is why Appium tests read like Selenium tests today.
The framework is a Node.js HTTP server. Your test sends WebDriver commands over HTTP, the server routes them to a driver, and the driver talks to the platform automation tool on the device.
With Appium you can automate three application types from the same suite:
- Native apps, installed on the device and built with the platform SDKs.
- Mobile web apps, opened in Chrome or Safari on the handset itself.
- Hybrid apps, where native shells wrap a webview rendering web content.
Hybrid apps are the ones that trip teams up. Appium exposes native and webview contexts separately, so a test has to switch context explicitly before webview elements become visible.
The split matters when you choose a locator strategy. For a breakdown of the three build models, see Web vs Hybrid vs Native Apps.
This short video walks through the same model visually.

Why Do Teams Choose Appium?
Teams pick Appium because it automates shipped app binaries without code changes, reuses one WebDriver API across Android and iOS, and supports Java, Python, JavaScript, Ruby, and C# clients.
That first property is the one that matters most in practice. Most alternatives compile a test agent into the application, which means the artifact you test is not the artifact you ship.

Four decision criteria come up repeatedly when teams evaluate mobile testing frameworks:
- One test suite covers both platforms, so page objects and helpers are shared.
- The W3C protocol is a standard, which keeps the API stable across driver upgrades.
- Your QA team writes tests in the language it already uses.
- Backend APIs and databases stay reachable from the test process for setup and teardown.
The honest tradeoff is speed. Appium adds an HTTP hop and a driver hop per command, so a suite runs slower than an in process framework on the same device.
Where that cost is worth paying is regression testing across a device matrix, because writing the suite twice costs far more than the extra runtime.
How Does the Appium Architecture Work?
Appium architecture has three parts: a client library in your language, an HTTP server that speaks W3C WebDriver, and a platform driver such as UiAutomator2 or XCUITest on the device.
A session begins when the client posts a capabilities object to the server. The server reads the capability values, picks a matching driver, and returns a session ID that scopes every later command.
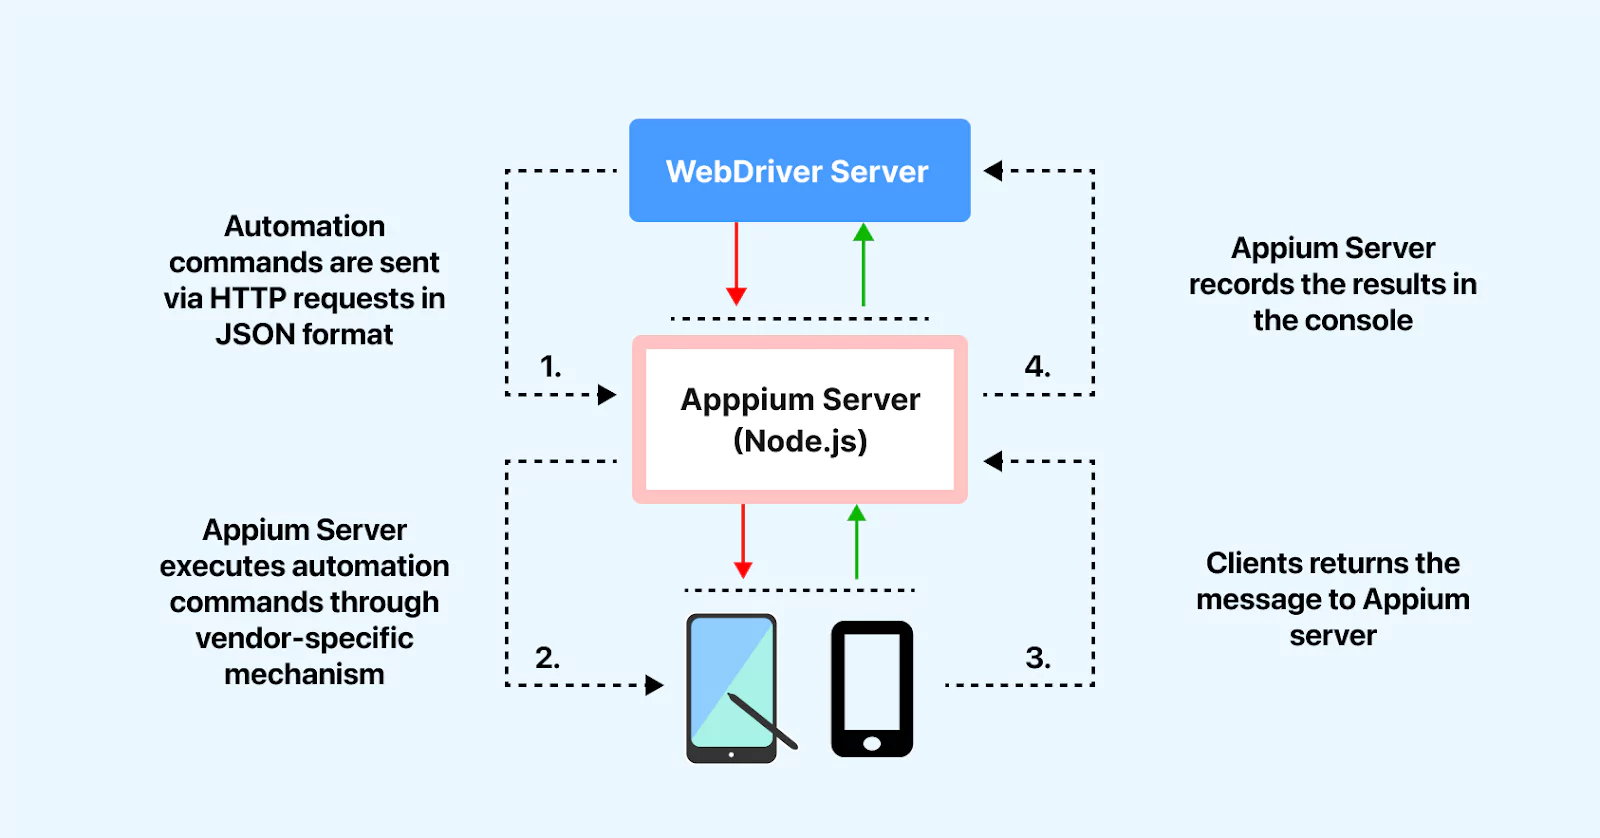
Each driver wraps the automation tool that Apple or Google already ships. The driver layer is where the platform difference lives, and it is the only part of the stack that changes per platform.
| Layer | Android | iOS |
|---|---|---|
| Driver | UiAutomator2 | XCUITest |
| On device agent | UiAutomator2 server APK | WebDriverAgent |
| Underlying framework | Android UiAutomator | Apple XCTest |
| Transport to device | adb port forwarding | USB tunnel on a local port |
| Host requirement | Any OS with Android SDK | macOS with Xcode |
| First session cost | Seconds to install the agent | Longer, WebDriverAgent compiles |
That last row explains a symptom most teams hit early. The first time I saw it I assumed the handset was faulty, but WebDriverAgent was simply compiling and signing before any command could run.
A deeper component walkthrough lives in our guide to Appium architecture.
What Changed Between Appium 1, Appium 2, and Appium 3?
Appium 1 bundled every driver in the core. Appium 2 split drivers and plugins into installable packages. Appium 3 requires Node 20.19, drops deprecated endpoints, and ships Inspector as a plugin.
Most Appium content still on the web describes version 1, and that is the single biggest source of broken setups. The table below shows what actually differs across the three releases.
| Area | Appium 1 | Appium 2 | Appium 3 |
|---|---|---|---|
| Drivers | Bundled in core | Installed via CLI | Installed via CLI |
| Protocol | JSON Wire and W3C | W3C only | W3C only |
| Node.js | 8 and above | 14 and above | 20.19 and above |
| Server base path | /wd/hub | Root, /wd/hub optional | Root |
| Capabilities | Flat keys | Vendor prefixed | Vendor prefixed |
| Gestures | TouchAction | W3C Actions | W3C Actions |
| Plugins | Not supported | Introduced | Inspector ships as one |
| Deprecated endpoints | Present | Supported | Removed or driver owned |
| Session discovery | /sessions | /sessions | /appium/sessions behind a flag |
| Server framework | Express 4 | Express 4 | Express 5 |
Three of those rows break old scripts silently rather than loudly. Unprefixed capabilities are rejected, TouchAction imports fail to resolve, and a URL ending in wd/hub returns a 404 on Appium 3.
A full breakdown of the newest release is in our guide to Appium 3 features. For upgrading an existing suite, follow the Appium 2 migration guide first, then apply the Node and endpoint changes above.

Note: Appium 3.7.0 shipped in August 2026. Release notes for every version live on the Appium releases page on GitHub.
How Do You Install and Configure Appium?
Install Appium 3 with npm install -g appium, add a platform driver using appium driver install uiautomator2 or xcuitest, then confirm the setup with appium driver doctor before running tests.
Prerequisites are light. You need the Node.js runtime at version 20.19 or newer, npm 10 or newer, and the platform SDK for the operating system you automate.
Install the Appium Server
Install the server globally from npm:
npm install -g appium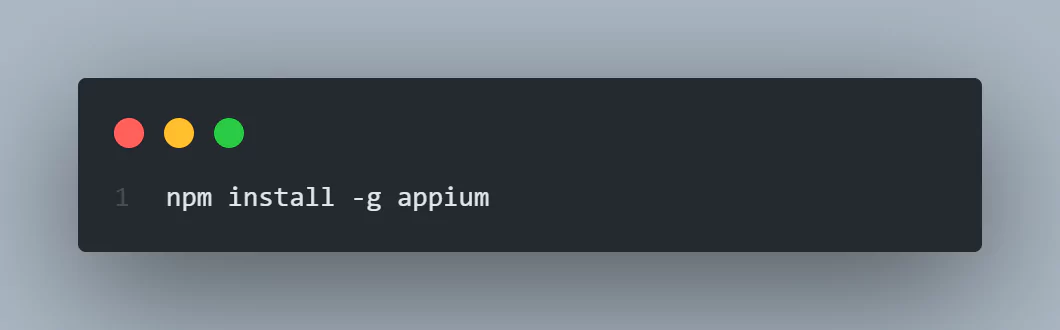
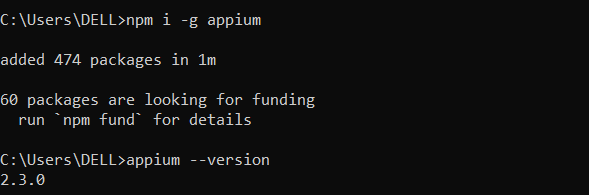
Confirm the version before going further:
appium --versionExpected output: a version string such as 3.7.0. A command not found response usually means npm installed to a directory outside your PATH.
Note: Appium Desktop is no longer part of this workflow. That project was archived in 2023, is incompatible with Appium 2 and later, and carries an unpatched remote code execution advisory.
Install a Platform Driver
Since Appium 2, drivers ship separately from the server. A fresh install automates nothing until you add at least one driver.
# See what is available for your platform
appium driver list

# Android
appium driver install uiautomator2

# iOS, macOS hosts only
appium driver install xcuitest

# Confirm what is installed
appium driver list --installed

# Update a driver in place
appium driver update uiautomator2
Verify the Toolchain
Each driver ships its own environment check. Run it before writing a test, because it catches missing SDK paths and signing problems that otherwise surface as confusing session errors.
appium driver doctor uiautomator2This replaces the standalone appium-doctor package, which is no longer maintained. The background on what those checks cover is in our guide to Appium Doctor.
Install Plugins
Plugins extend the server without forking it. Appium 3 ships Inspector as a plugin, so this is how most teams now get element inspection.
appium plugin list
appium plugin install inspector
appium plugin list --installed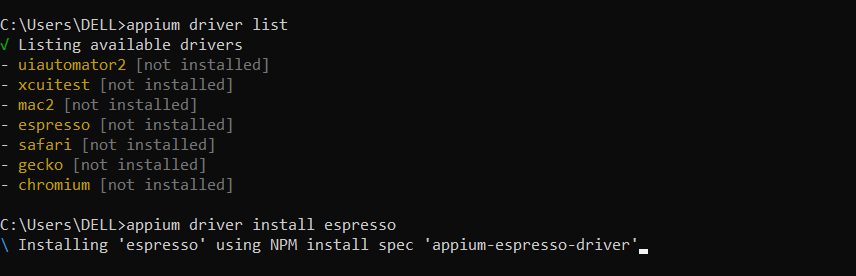
Platform specific setup steps are covered in our walkthrough on how to install Appium.
Run iOS + Android tests written by your AI agent.

How Do You Use Appium Inspector to Find Elements?
Appium Inspector renders the live element tree of a running app, so you can read the exact attributes a locator needs and see why a selector matched nothing before editing the test.
Three ways to run it exist today, and they behave identically once a session starts:
- As the Appium 3 server plugin, installed with appium plugin install inspector.
- As a desktop app from the Appium Inspector releases page for macOS, Linux, and Windows.
- As a hosted web app, which needs no local install but requires a reachable server.
Point it at your server host and port, paste the same capabilities your test will use, then start a session. The app installs on the target device and the element tree loads.
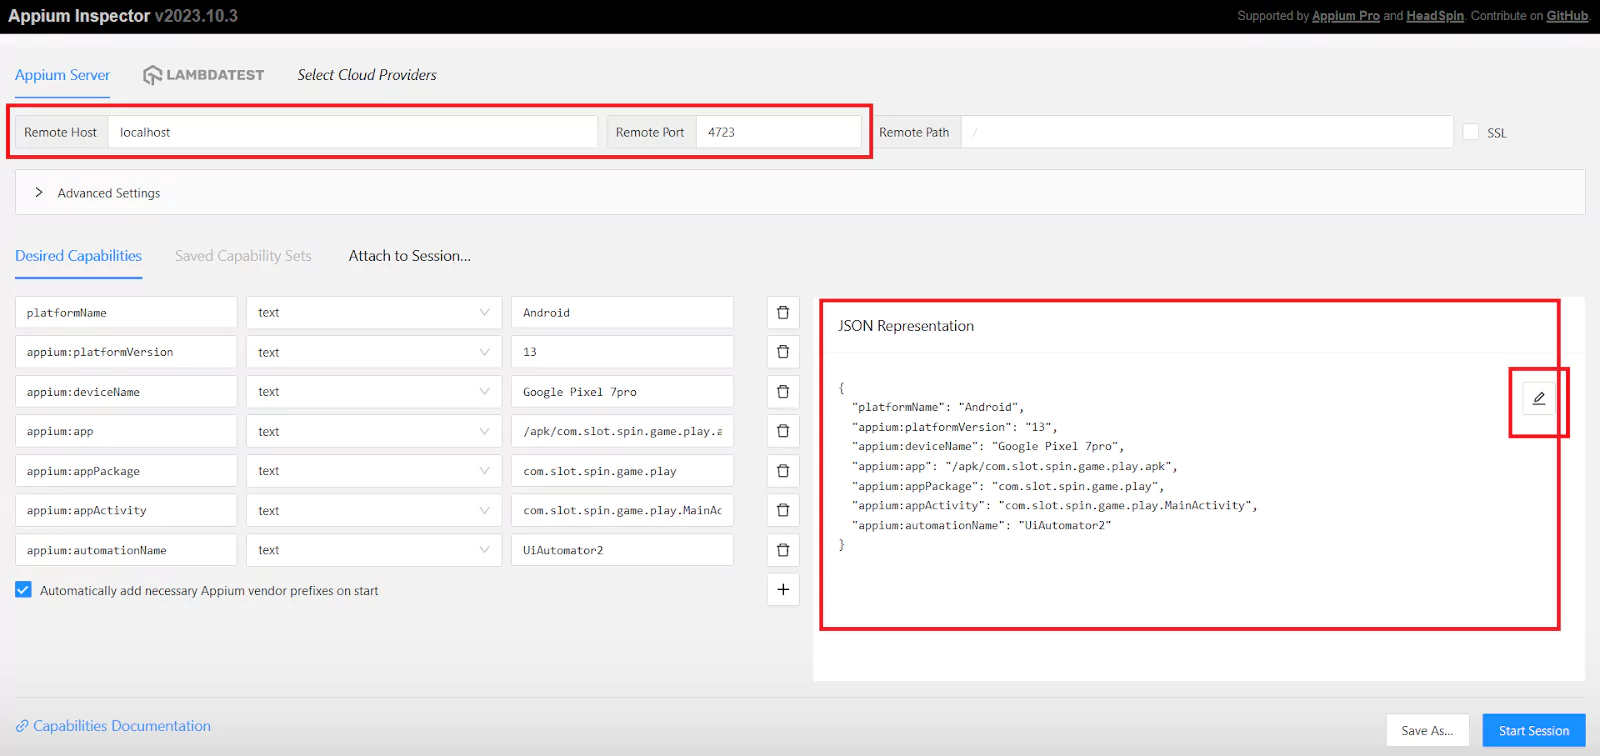
Inspector offers both an accessibility identifier and a generated XPath for the same node. I copy the identifier every time, because the XPath breaks on the next layout change.
More detail on the workflow is in our guide to Appium Inspector for apps.
How Do You Write Your First Appium Test?
Writing an Appium test takes four steps: install the language client, define W3C capabilities in a driver options object, point the client at the running server, then locate elements and assert.
The example below automates an Android app in Python. Before starting, make sure Python 3.10 or newer is installed and a device or emulator is connected.
Step 1: Install the Client Library
pip install Appium-Python-Client
Step 2: Connect a Device
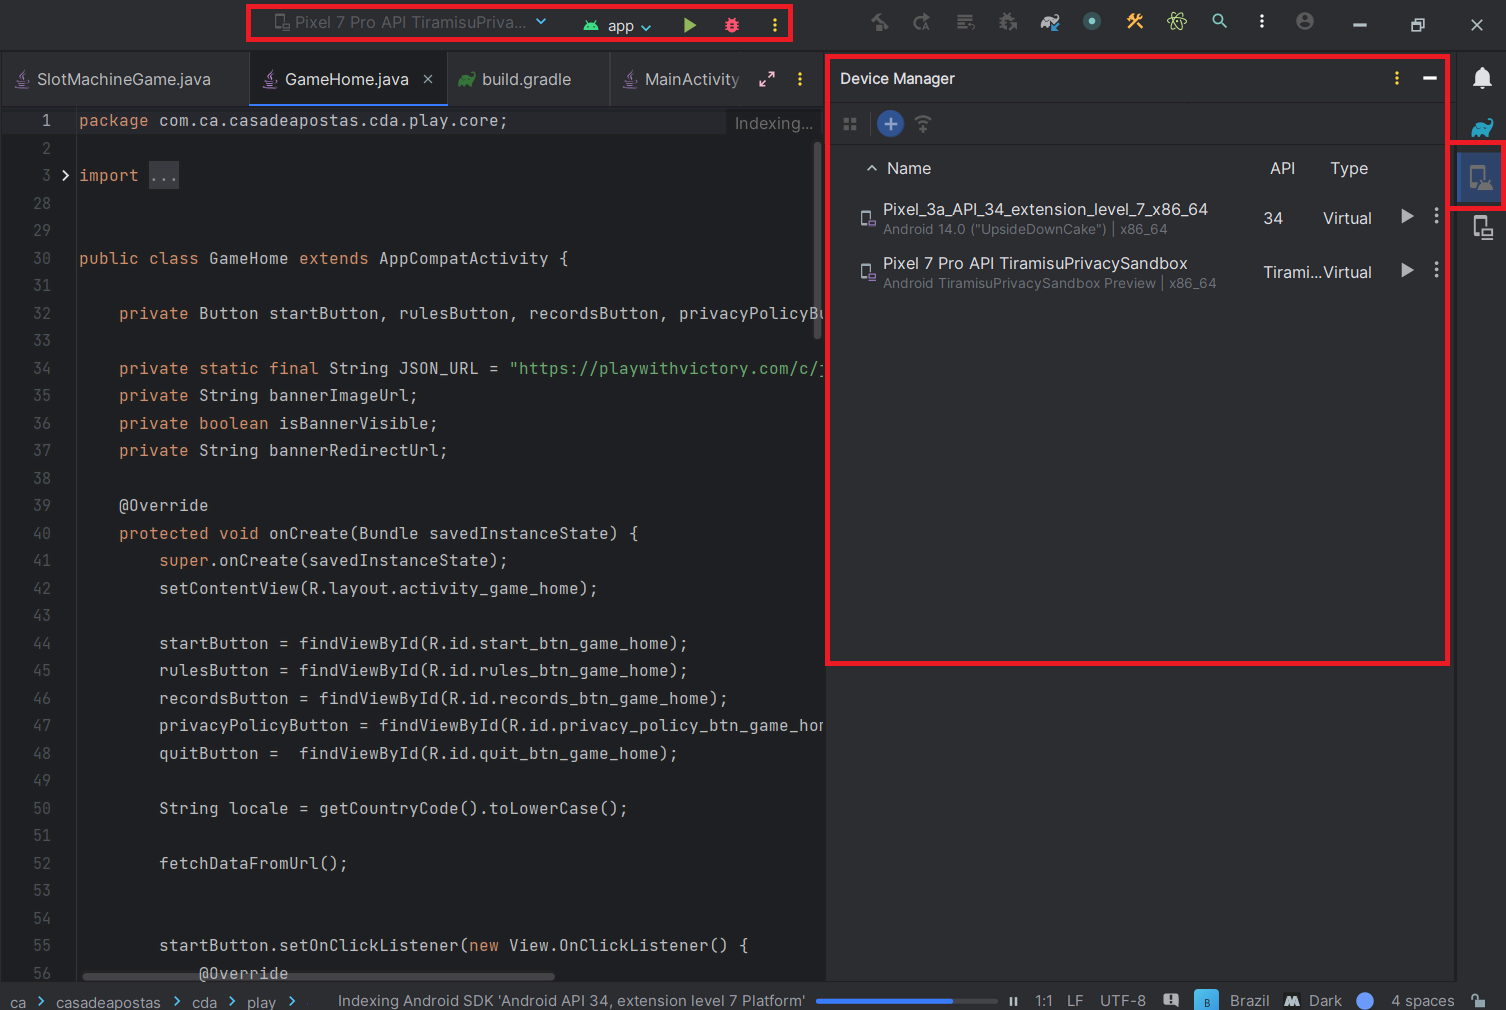
For a physical handset, enable USB debugging under developer options, then confirm the device is visible:
adb devicesEmulators need no cable. Launch one from the device manager in Android Studio instead.
Step 3: Start the Server
appium --port 4723Expected output: a line reading that the Appium REST http interface listener started on 127.0.0.1:4723. Leave this terminal open while tests run.
Step 4: Write the Test
Capabilities are key value pairs that tell the server which driver, device, and binary to use. Every non standard key needs the appium vendor prefix from version 2 onward.
from appium import webdriver
from appium.options.android import UiAutomator2Options
from appium.webdriver.common.appiumby import AppiumBy
from selenium.webdriver.support.ui import WebDriverWait
from selenium.webdriver.support import expected_conditions as EC

capabilities = {
    "platformName": "Android",
    "appium:platformVersion": "14",
    "appium:deviceName": "Pixel 8",
    "appium:app": "/apk/com.slot.spin.game.play.apk",
    "appium:appPackage": "com.slot.spin.game.play",
    "appium:appActivity": ".MainActivity",
    "appium:automationName": "UiAutomator2",
}

options = UiAutomator2Options().load_capabilities(capabilities)

# Appium 2 and 3 serve the W3C endpoint at the root. A trailing
# /wd/hub returns 404 on these versions.
driver = webdriver.Remote("http://127.0.0.1:4723", options=options)

try:
    # An explicit wait returns the moment the element is ready,
    # so the test stays fast on quick devices and stable on slow ones.
    spin_button = WebDriverWait(driver, 20).until(
        EC.element_to_be_clickable(
            (AppiumBy.ID, "com.slot.spin.game.play:id/playBtn")
        )
    )
    spin_button.click()

    result = WebDriverWait(driver, 20).until(
        EC.presence_of_element_located(
            (AppiumBy.ID, "com.slot.spin.game.play:id/resultText")
        )
    )
    print("Spin result:", result.text)
finally:
    driver.quit()
Expected output: the app launches on the device, the spin button is tapped, and the terminal prints a line beginning with Spin result followed by the on screen value.

Java teams use the same capability keys through a typed options object. The client differs, the protocol underneath does not.
UiAutomator2Options options = new UiAutomator2Options()
        .setPlatformVersion("14")
        .setDeviceName("Pixel 8")
        .setApp("/apk/com.slot.spin.game.play.apk")
        .setAppPackage("com.slot.spin.game.play")
        .setAppActivity(".MainActivity");

AndroidDriver driver = new AndroidDriver(
        new URL("http://127.0.0.1:4723"), options);

WebDriverWait wait = new WebDriverWait(driver, Duration.ofSeconds(20));
wait.until(ExpectedConditions.elementToBeClickable(
        AppiumBy.id("com.slot.spin.game.play:id/playBtn"))).click();

driver.quit();
Building capability sets by hand gets tedious across a device matrix. Our capabilities generator produces valid W3C blocks for either client.
Some teams now describe these steps in plain English instead of hand-coding each locator and assertion. TestMu AI's KaneAI is a GenAI-native testing agent that authors and evolves tests from those prompts, and its smart element detection re-anchors a step when the UI shifts, so maintenance becomes reviewing a heal rather than rewriting the test. Generated tests export to Appium, so the client and runner shown here stay in place.
Note: Ready to run this suite against physical hardware? Start free on 10,000+ real devices.
Which Locator Strategy Should You Use in Appium?
Prefer accessibility id in Appium because it maps to content-desc on Android and the accessibility identifier on iOS. Fall back to resource id, then class chain, and avoid XPath in hot paths.
Locator choice is the single largest cause of flaky mobile suites, and nearly every unstable suite I have inherited had XPath at its core. Those queries force the driver to serialise the whole element tree.
| Priority | Strategy | Works on | Why |
|---|---|---|---|
| 1 | Accessibility ID | Both | One locator for both platforms, fastest lookup |
| 2 | ID or resource id | Android | Direct index lookup, no tree walk |
| 3 | iOS class chain | iOS | Native XCUITest query, far faster than XPath |
| 4 | Android UiAutomator | Android | Runs on device, supports scrolling into view |
| 5 | XPath | Both | Last resort, brittle and slow on large trees |
Getting to priority one is a development task, not a QA task. Someone has to set content-desc on Android views and accessibilityIdentifier on iOS views, ideally to the same string.
When that groundwork exists, one locator serves both platforms:
# Same locator, both platforms, no branching
driver.find_element(AppiumBy.ACCESSIBILITY_ID, "checkout_button")

# Android only, still fast
driver.find_element(AppiumBy.ID, "com.shop.app:id/checkout")

# iOS class chain, prefer over XPath
driver.find_element(
    AppiumBy.IOS_CLASS_CHAIN,
    '**/XCUIElementTypeButton[`label == "Checkout"`]'
)
A common failure looks like a locator problem but is not. If an element is present in Inspector yet invisible to the test, check whether the app switched into a webview context.
Our guide to locators in Appium holds a wider catalogue of selectors and the syntax each one expects.
How Do You Handle Waits in Appium?
Use WebDriverWait with expected conditions instead of fixed sleeps. An explicit wait returns as soon as the element is ready, so tests stay fast on quick devices and stable on slow ones.
Fixed sleeps fail in both directions. Too short and the suite breaks on a cold device. Too long and every run pays the worst case, which compounds across hundreds of steps.
| Wait type | Scope | Use it when |
|---|---|---|
| Implicit wait | Every find call in the session | Rarely, as a low safety net only |
| Explicit wait | One condition at one point | Default choice for element readiness |
| Fluent wait | One condition, custom polling | Slow renders needing tuned intervals |
| Fixed sleep | Blocks the whole thread | Almost never, debugging aside |
Mixing implicit and explicit waits is the trap. I lost most of an afternoon to a five second wait that blocked for thirty, because a leftover implicit wait was compounding with it.
# Pick one strategy. If you use explicit waits, leave
# the implicit wait at zero.
driver.implicitly_wait(0)

wait = WebDriverWait(driver, 20)

# Present in the tree, may still be off screen
wait.until(EC.presence_of_element_located(
    (AppiumBy.ACCESSIBILITY_ID, "cart_badge")))

# Rendered and tappable, the condition most steps want
wait.until(EC.element_to_be_clickable(
    (AppiumBy.ACCESSIBILITY_ID, "checkout_button"))).click()

# Gone, useful after dismissing a loader
wait.until(EC.invisibility_of_element_located(
    (AppiumBy.ACCESSIBILITY_ID, "loading_spinner")))
Animations cause a subtle version of this. An element can be clickable while still sliding into place, so the tap lands on the wrong coordinates and the step fails intermittently.
Waiting on a post animation condition, such as a settled label, is more reliable than waiting on the element itself. Gesture level timing is covered in Appium gestures.
How Do You Run Appium Tests on Real Devices at Scale?
Point the same test at a device cloud instead of localhost. Only the remote URL and a few vendor prefixed capabilities change, so one suite fans out across many real Android and iOS handsets.
A local setup proves the test works. It does not prove the app works across the device and OS spread your users actually run, and maintaining that hardware is a full time job.
TestMu AI is an AI native test orchestration and execution platform whose real device cloud runs Appium mobile testing suites on 10,000+ Android and iOS handsets.
Your test logic stays untouched. Everything below the assertions is the same suite you wrote above, now pointed somewhere else.
- Real device grid: run against shipped hardware, not emulators, on demand.
- Parallel execution: fan one suite across many device and OS combinations at once.
- Device logs and video: every session records logs and a replay for triage.
- Network simulation: reproduce throttled and offline conditions that break real users.
- Geolocation testing: validate location gated flows without physically travelling.
Setup steps and capability reference live in the getting started with Appium testing documentation.
Only two things change in the script. The remote URL points at the cloud hub, and every vendor setting moves into an lt:options block beside the standard capabilities.
from appium import webdriver
from appium.options.android import UiAutomator2Options

username = "YOUR_USERNAME"
access_key = "YOUR_ACCESS_KEY"

capabilities = {
    "platformName": "Android",
    "appium:platformVersion": "14",
    "appium:deviceName": "Pixel 8",
    "appium:app": "lt://APP_ID",
    "appium:automationName": "UiAutomator2",
    # Cloud vendor settings live in lt:options, not the appium namespace
    "lt:options": {
        "username": username,
        "accessKey": access_key,
        "build": "Slot Machine Regression",
        "name": "Spin flow, Pixel 8",
        "isRealMobile": True,
        "network": True,
        "video": True,
        "deviceLog": True,
    },
}

options = UiAutomator2Options().load_capabilities(capabilities)

remote_url = f"https://{username}:{access_key}@mobile-hub.lambdatest.com/wd/hub"
driver = webdriver.Remote(remote_url, options=options)

# The rest of the test is identical to the local version.
One difference is worth planning for. The app capability takes an lt:// identifier returned by the upload API, not a local file path.
That means a build upload step belongs in the pipeline before test execution starts.
Fanning the same suite across devices is where the time is recovered. Our guide to Appium Parallel Testing covers session limits and result aggregation.
How Do You Fix Common Appium Errors?
Most Appium errors trace to environment drift rather than test logic. Match the message to its cause below, then rerun the driver doctor check before editing any locators or waits.
The table maps each message practitioners actually see to the cause behind it.
| Error | Usual cause | Fix |
|---|---|---|
| 404 on session creation | URL still ends in wd/hub | Point the client at the server root |
| Invalid or unknown capability | Missing appium vendor prefix | Prefix every non standard key |
| No driver found for automationName | Driver never installed | Run appium driver install for the platform |
| Device not found by adb | Emulator booted from a stale snapshot | Cold boot it from the AVD manager |
| WebDriverAgent fails to build | Signing or provisioning mismatch | Set a development team, unlock the keychain |
| xcodebuild exited with code 65 | Device symbols not downloaded | Open Xcode devices window, let it finish |
| Element not found, visible in Inspector | Session sitting in the wrong context | Switch to the webview context first |
| Session ends mid run | newCommandTimeout elapsed | Raise the timeout or remove long sleeps |
| TouchAction import fails | Class removed in current clients | Rewrite the gesture using W3C Actions |
Two of those rows deserve emphasis because they mimic real bugs. A session that dies mid run looks like an app crash, and a context mismatch looks like a missing element.
Now I rerun the driver doctor check before reading a single stack trace. Toolchain drift after an Xcode or Android SDK upgrade explains more failures than any change your team made to the test cases.
Server logs are the other underused signal. Running the server with the debug log level prints the exact capability payload it received, which settles most argument mismatches in seconds.
When Should You Not Use Appium?
Skip Appium when you need frame accurate gaming input, deep OS level control, or sub second unit feedback. Espresso and XCUITest run in process and give faster, more stable results there.
The cost of the cross platform abstraction is real. Every command crosses HTTP and a driver boundary, which adds latency and one more layer that can fail independently of your app.
| Framework | Platforms | Runs | Best for |
|---|---|---|---|
| Appium | Android, iOS, Windows | Out of process | One suite across both platforms |
| Espresso | Android only | In process | Fast Android feedback inside CI |
| XCUITest | iOS only | In process | Native iOS suites owned by developers |
| Detox | Android, iOS | Grey box | React Native apps needing auto sync |
| Maestro | Android, iOS | Out of process | Quick YAML flows over deep assertions |
Four constraints show up often enough to plan around:
- iOS automation requires a macOS host, which constrains CI runner choice.
- Flutter apps render to a canvas, so standard drivers see no element tree.
- Reporting is minimal, so test reports come from your runner.
- Every iOS CI job pays the WebDriverAgent build again, which inflates pipeline time.
A pragmatic split works well in practice. Developers keep fast in process tests per platform, and QA owns one Appium suite covering the cross platform journeys that matter to release decisions.
Full evaluations of each option are in our roundup of Appium alternatives.
Author

Sai Krishna
Blogs: 13

Sai Krishna is Director of Engineering at TestMu AI (formerly LambdaTest), where he leads agentic AI for quality engineering, building AI agents that autonomously drive mobile and conversational test automation. His current focus is Agent Testing and Model Context Protocol (MCP) support for mobile. He is a core contributor and member of the Appium open-source project and the creator of AppiumTestDistribution and appium-device-farm. With over 14 years of experience including more than 9 years at Thoughtworks as a Principal Consultant, he holds a BSc in Electronics and speaks regularly at TestMu and Appium Conf on Appium, mobile automation, and agentic AI in testing.
Reviewer

Srinivasan Sekar
Reviewer
Srinivasan Sekar is Director of Engineering at TestMu AI (formerly LambdaTest), where he leads engineering and open-source initiatives behind the Selenium and Appium automation grid and owns TestMu AI's MCP Server. A committer to Appium and a contributor to Selenium, WebdriverIO, Taiko, and AppiumTestDistribution, he brings over 15 years of experience in quality engineering and open-source technologies. He is the author of the Apress book 'The MCP Standard: A Developer's Guide to Building Universal AI Tools with the Model Context Protocol,' a Certified Kubernetes and Cloud Native Associate, and an international conference speaker. Before TestMu AI he spent over eight years at Thoughtworks as a Principal Consultant and Quality Architect. Srinivasan holds a B.Tech in Information Technology from Anna University.


Appium Testing FAQs
Did you find this page helpful?
More Related Blogs
TestMu AI forEnterprise
Get access to solutions built on Enterprise
grade security, privacy, & compliance
- Advanced access controls
- Advanced data retention rules
- Advanced Local Testing
- Premium Support options
- Early access to beta features
- Private Slack Channel
- Unlimited Manual Accessibility DevTools Tests