

Power Your Software Testing with AI Agents and Cloud
The Native AI-Agentic Cloud Platform to Supercharge Quality Engineering. Test Intelligently and Ship Faster.


- TestMu AI (Formerly LambdaTest)
- /
- Blog
- /
- How to Click on a Button in Selenium [With Examples]
How to Click on a Button in Selenium: A Complete Guide
Learn how to click on a button in Selenium with working Java, Python, and JavaScript examples covering left-click, right-click, double-click, drag-and-drop, JavascriptExecutor fallback, and explicit waits.
Last Updated on:
If you want to automate clicks in Selenium, this guide shows you exactly how.
From simple button clicks to advanced actions like right-click, double-click, drag-and-drop, and handling click failures, you’ll learn how to interact with any element reliably. It also covers when click() fails, how to fix common errors, and when to use Actions or JavascriptExecutor for better control.
Key Takeaways
To click on a button in Selenium, use the WebElement.click() method for standard elements like buttons and checkboxes, or use the Actions class for advanced mouse interactions like right-clicks and double-clicks. Always pair these clicks with explicit waits to prevent timing-related test failures.
- WebElement.click(): Trigger standard elements such as buttons, links, checkboxes, and radio buttons once they are located using this primary method.
- Actions class: Enable complex, chained interactions such as right-clicks, double-clicks, mouse hovers, drag-and-drop operations, and offset-based clicks to handle advanced mouse actions.
- WebDriverWait: Combine this with elementToBeClickable to ensure the target element is fully ready for interaction before Selenium attempts a click, which prevents flaky tests.
- JavascriptExecutor: Scroll elements into view or bypass overlapping overlays to force a click, but use this fallback option sparingly to avoid hiding real UI bugs.
- ID and CSS selectors: Prefer these locator choices for reliable element targeting when clicking elements, and use XPath only when those preferred selectors are unavailable.
- Common click errors: Resolve ElementClickInterceptedException, StaleElementReferenceException, and ElementNotInteractableException, which are typically caused by timing issues, DOM updates, or overlapping elements rather than framework defects.
- Cross-browser validation: Test interactions on multiple platforms because click behaviors can vary across different browsers and environments, ensuring consistent automation results.
What is the Selenium Click Button Method?
Selenium mirrors how a real user interacts with a webpage: a left-click activates buttons or opens links, a right-click opens a context menu, and chained actions cover hover, drag, and offset clicks. All of this automation testing behaviour funnels through the same primitive, the click() method.
The Selenium framework exposes the click() method on every WebElement returned by Selenium WebDriver, so testers can perform mouse-based operations across browsers. The Selenium click button method can be used for multiple purposes, such as handling radio buttons and handling checkboxes, or simply clicking any button, link, drag-and-drop target, or click-and-hold control.
In the next section, we will be checking out the practical implementation of the Selenium click button method for basic operation, and advanced operations and will also check out how to use the click() method with different Selenium locators.

Basic Operations Using Selenium Click Button Method
All examples below run on the TestMu AI cloud Selenium Grid using Selenium 4 on Chrome on Windows 10. The same code works locally if you swap the RemoteWebDriver grid URL for a local ChromeDriver instance.
LambdaTest Now Called TestMu AI — the same trusted platform with a new name and powerful AI capabilities.
TestMu AI is an AI-native test execution platform that lets developers and testers run automation testing on a real device cloud of 10,000+ real devices and 3000+ browser-OS combinations.
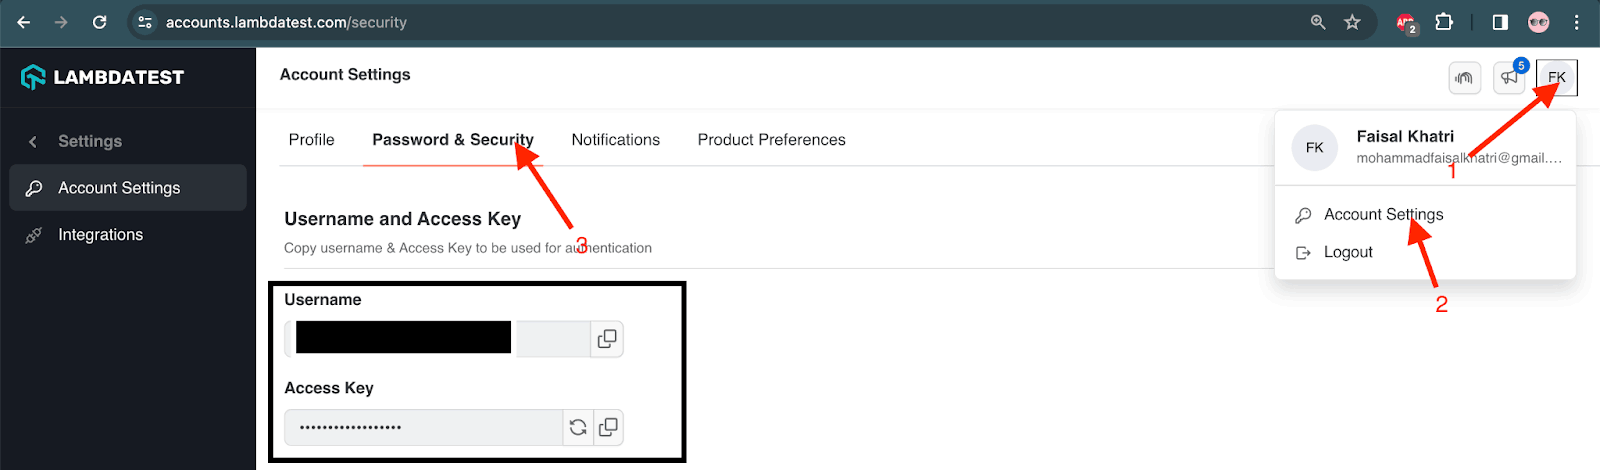
To run tests on the TestMu AI cloud, we will need a TestMu AI Username and Access Key. These values are on the Profile > Account Settings > Password & Security.
Next, we will need the TestMu AI automation capabilities to set the browser, browser version, platform, build and test name, etc. The TestMu AI Automation Capabilities Generator can be used to get the auto-generated code of the capabilities by manually setting all the values using the UI provided on the website.
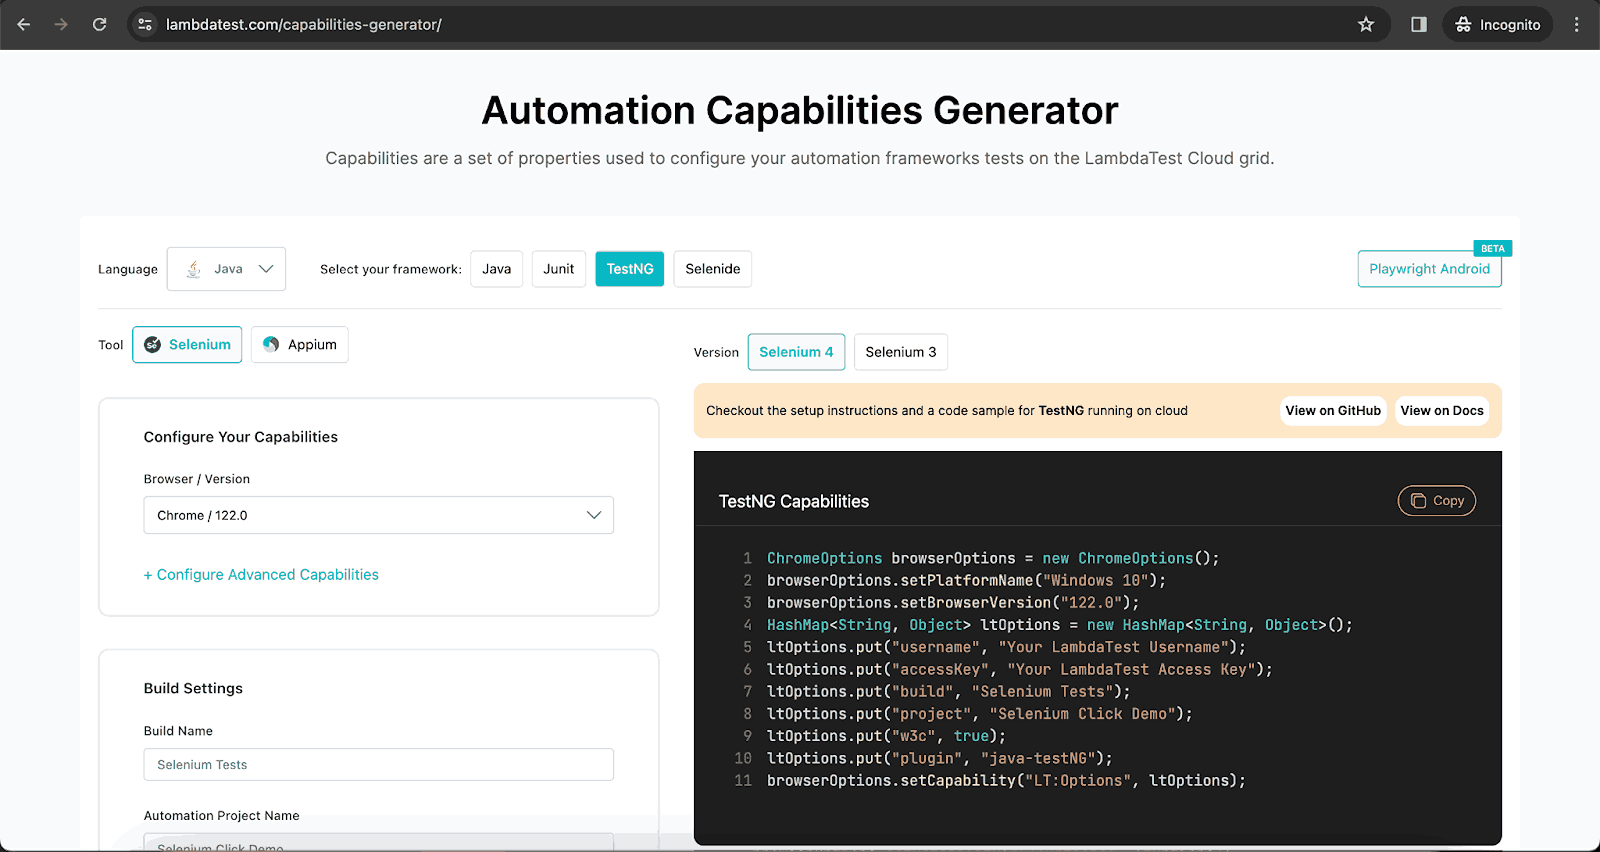
Finally, the code generated on the right-hand side of the window will be used in the test scripts.
The setup() method created inside the ClickDemoTests class will allow instantiating the instance of WebDriver using the RemoteWebDriver class.
setup() method:
@BeforeTest
    public void setup() {
        String userName = System.getenv("LT_USERNAME") == null ? "LT_USERNAME" : System.getenv("LT_USERNAME");
        String accessKey = System.getenv("LT_ACCESS_KEY") == null ? "LT_ACCESS_KEY" : System.getenv("LT_ACCESS_KEY");
        String gridUrl = "@hub.lambdatest.com/wd/hub";
        try {
            this.driver = new RemoteWebDriver(new URL("http://" + userName + ":" + accessKey + gridUrl), getChromeOptions());
        } catch (final MalformedURLException e) {
            System.out.println("Could not start the remote session on TestMu AI cloud grid");
        }
    }
All the TestMu AI capabilities will be set using the getChromeOptions() method.
getChromeOptions() method:
public ChromeOptions getChromeOptions() {
        final var browserOptions = new ChromeOptions();
        browserOptions.setPlatformName("Windows 10");
        browserOptions.setBrowserVersion("122.0");
        final HashMap<String, Object> ltOptions = new HashMap<String, Object>();
        ltOptions.put("project", "Selenium Click Demo");
        ltOptions.put("build", "Selenium Tests");
        ltOptions.put("name", "Selenium Click method tests");
        ltOptions.put("w3c", true);
        ltOptions.put("plugin", "java-testNG");

        browserOptions.setCapability("LT:Options", ltOptions);

        return browserOptions;

    }
With the setup in place, the next sections demonstrate every click operation in turn, starting with the basic mouse click and moving up to chained Actions for hover, drag-and-drop, and offset-based clicks.
Performing Mouse-Click/Left-Click in Selenium
The most basic operation using a Selenium click button method is a left-click or a mouse click. The following test scenario will click on the button and post a message.
Test Scenario 1
- Navigate to the Simple Form Demo page.
- Enter text in the Enter Message field.
- Click on the Get Checked Value button.
- Verify that the entered text is displayed correctly below Your Message.
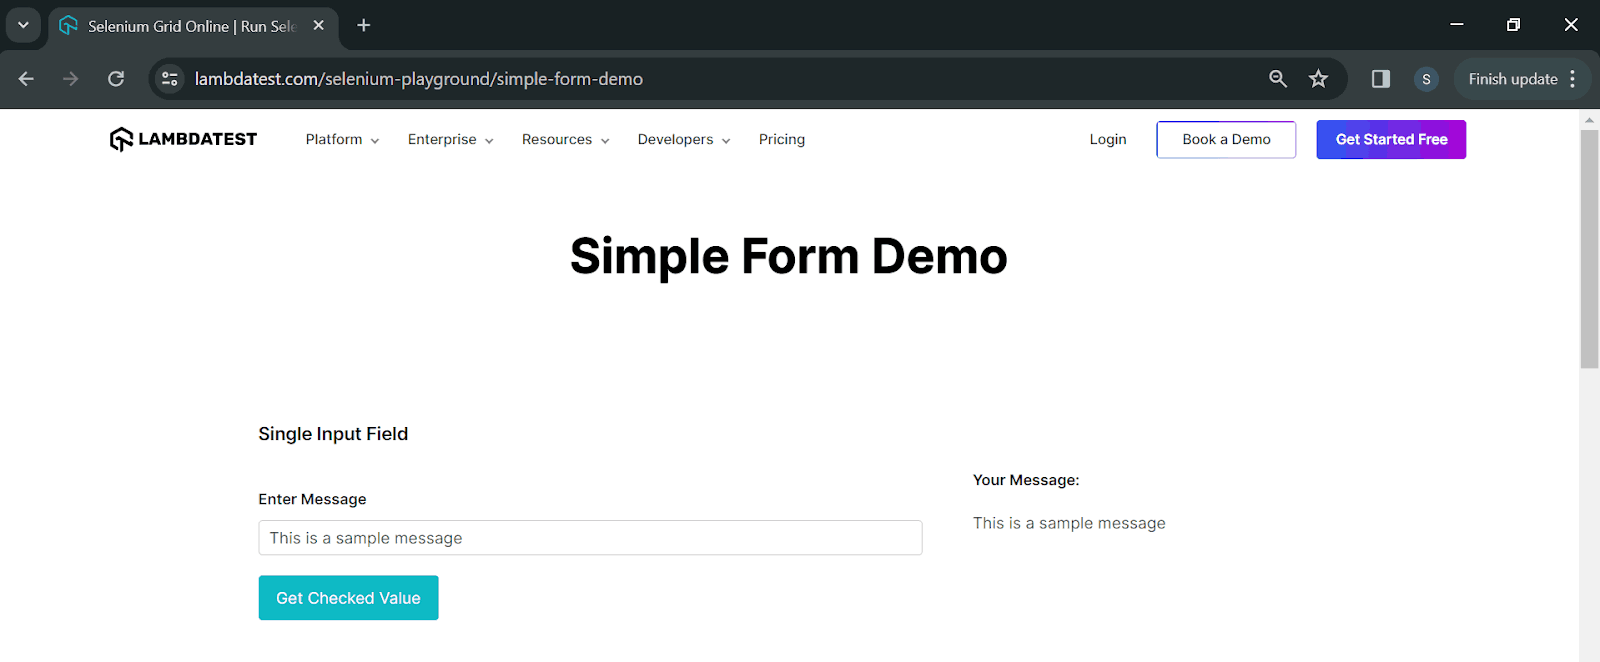
The following code will test the respective scenario.
@Test
    public void simpleFormDemoTest() {
        driver.get("https://www.testmuai.com/selenium-playground/simple-form-demo/");
        final WebElement messageField = driver.findElement(By.id("user-message"));
        messageField.sendKeys("This is a sample message");
        final WebElement getCheckedValueBtn = driver.findElement(By.cssSelector("#showInput > button"));
        getCheckedValueBtn.click();
        String resultText = driver.findElement(By.id("message")).getText();
        assertEquals(resultText, "This is a sample message");
    }
Code Walkthrough:
The test navigates to the Simple Form Demo page and locates the Enter Message textbox by its user-message ID. It types "This is a sample message", locates the Get Checked Value button via a CSS Selector, and calls click(). The message rendered below "Your Message" is then asserted with TestNG's assertEquals().
Test Execution:
The following is the screenshot of the test executed on the TestMu AI cloud grid.
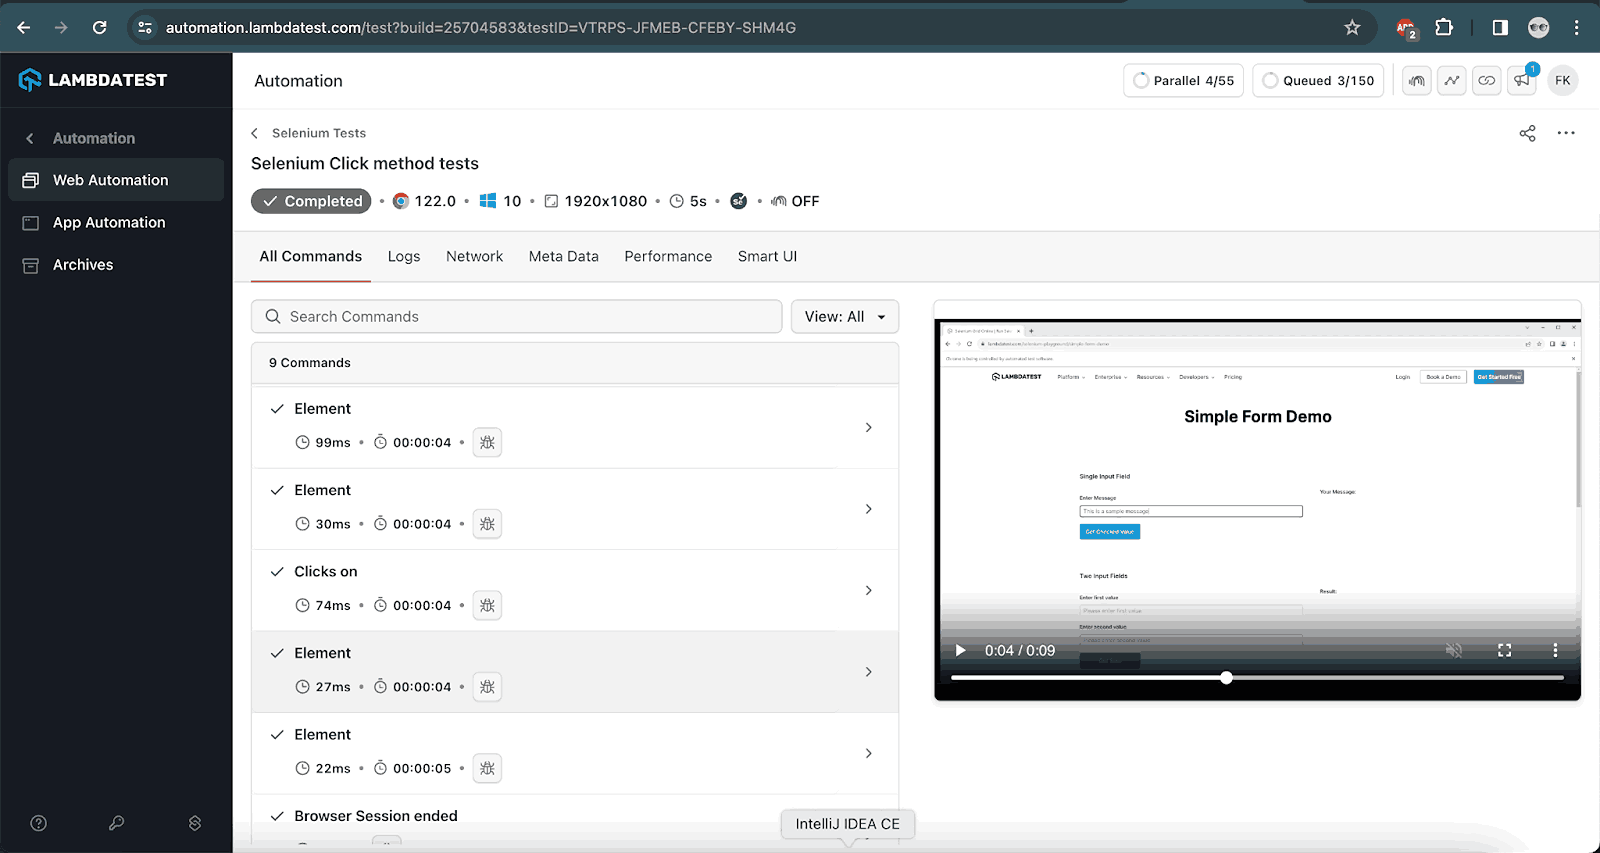
Selenium click button method can also be used to enable/disable checkboxes. The following test scenarios demonstrate how the Selenium click button method works with checkboxes.
Test Scenario 2
- Navigate to the Checkbox Demo page.
- In the Single Checkbox Demo section, click on the checkbox.
- Verify that the message “Checked” is displayed below the checkbox when the checkbox is ticked successfully.
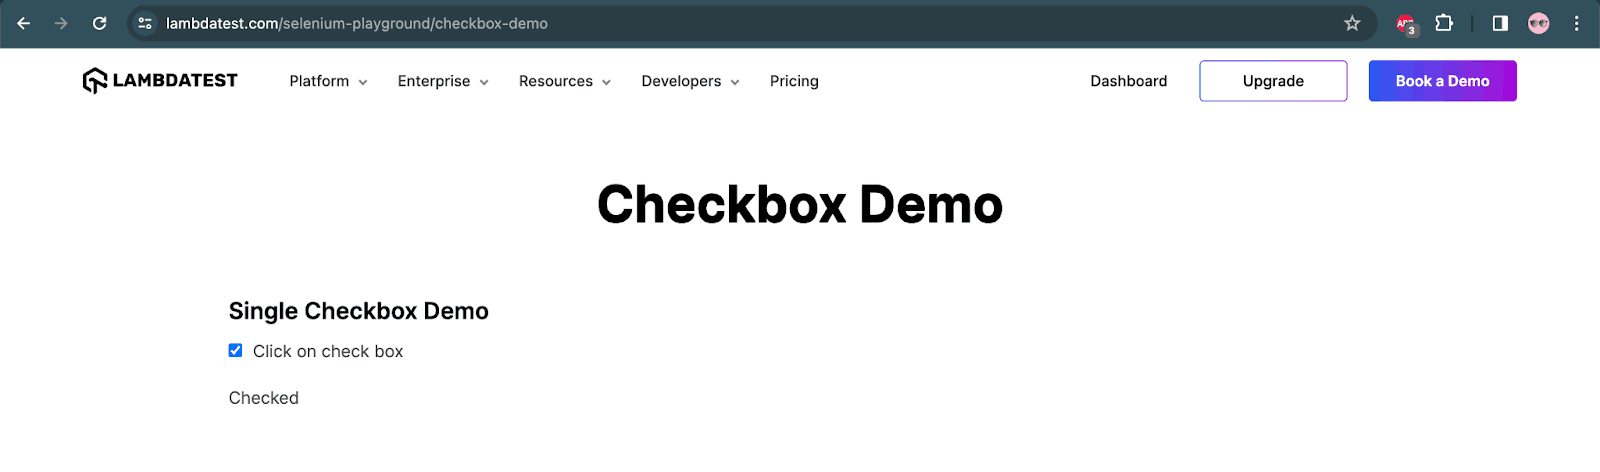
The following code will help execute the test scenario.
@Test
    public void checkboxDemoTest() {
        this.driver.get("https://www.testmuai.com/selenium-playground/checkbox-demo/");
        final WebElement checkboxOne = this.driver.findElement(By.id("isAgeSelected"));
        checkboxOne.click();
        assertTrue(checkboxOne.isSelected());
        final String selectedResult = this.driver.findElement(By.id("txtAge")).getText();
        assertEquals(selectedResult, "Checked");
    }
Code Walkthrough:
The driver.get() method will open the Checkbox Demo page as its URL is provided in the method parameter. Next, the checkbox will be located. It will be clicked using the Selenium click button method. To check that the checkbox was ticked successfully, we have used two ways, the first one is using the isSelected() method that returns a boolean value true or false based on the WebElement selection. So, here, as we expect that the checkbox should be ticked, we are asserting it using the assertTrue() method of TestNG to check that the isSelected() method returns true, meaning the checkbox is ticked.
The other way to assert is using the text “Checked”, which is displayed below the checkbox after it is ticked.
Test Execution:
The following screenshot displays the test execution performed on the TestMu AI cloud grid.
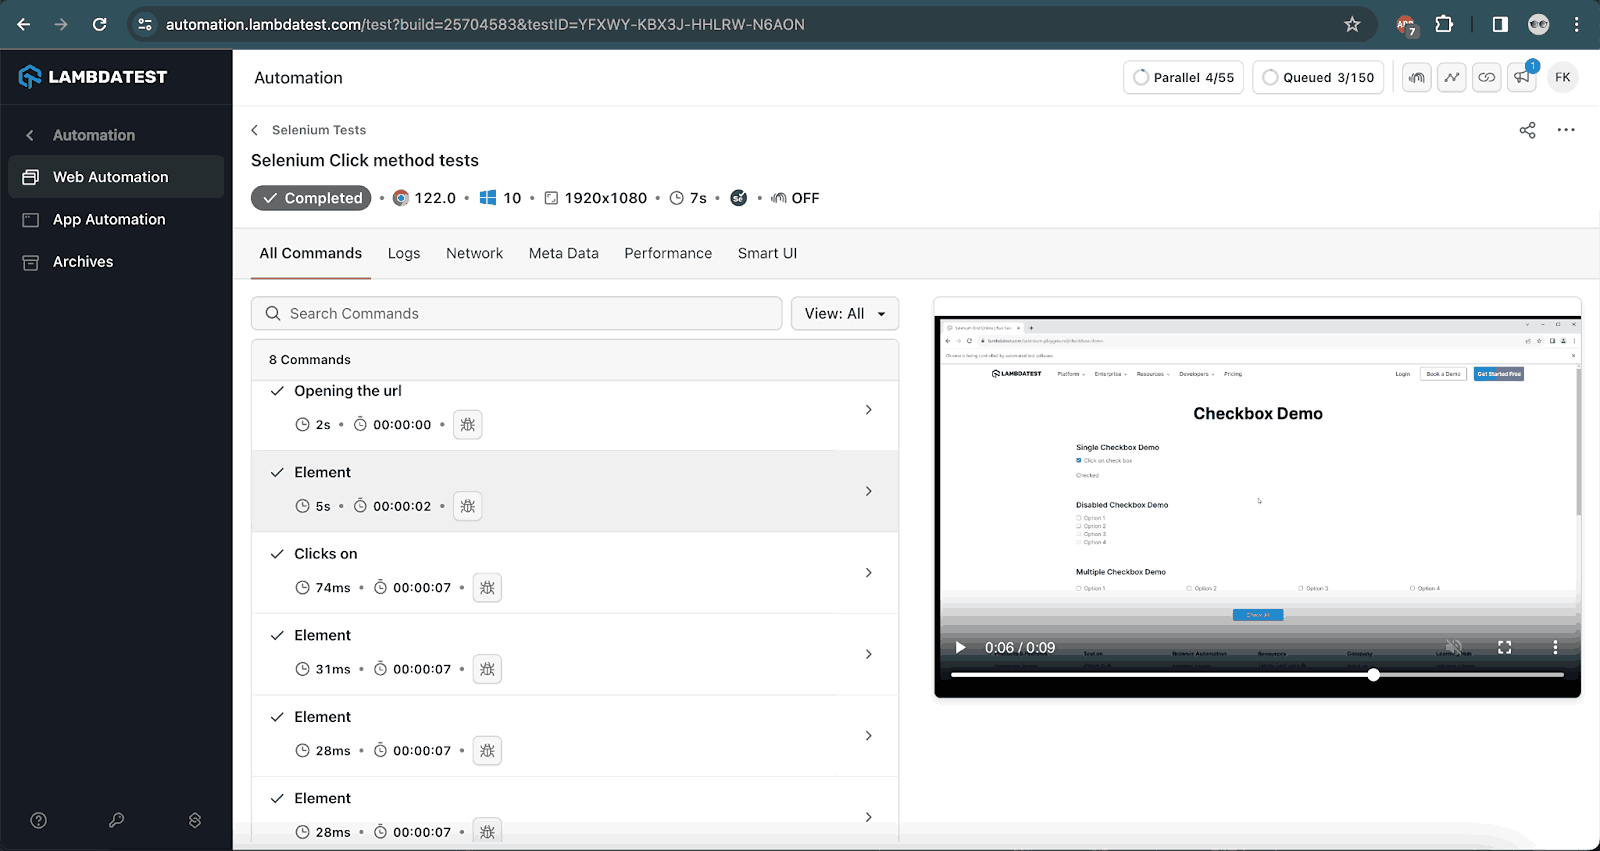
Selenium click button method can also be used to select/deselect radio buttons. The following test scenario demonstrates the working of the click() method on radio buttons.
Test Scenario 3
- Navigate to the Radio button Demo page.
- In the Click on button to get the selected value section, tick the Male radio button and click on the Get value button.
- Verify the message “Radio button ‘Male’ is checked” is displayed below the Get value button.
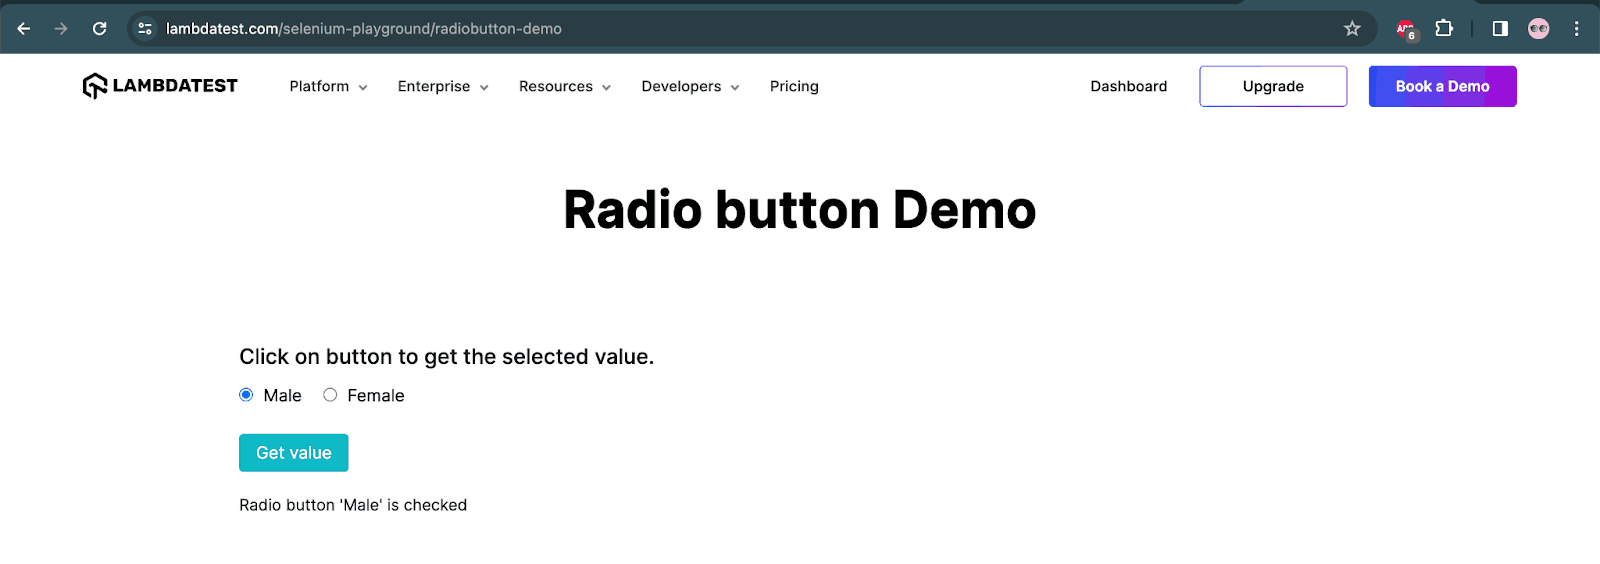
The following code will click on the radio button.
@Test
    public void radioButtonDemoTest() {
        driver.get("https://www.testmuai.com/selenium-playground/radiobutton-demo/");
        final WebElement maleRadioBtn = driver.findElement(By.cssSelector("[name="optradio"][value="Male"]"));
        maleRadioBtn.click();
        final WebElement getValueBtn = driver.findElement(By.id("buttoncheck"));
        getValueBtn.click();
        String resultText = driver.findElement(By.cssSelector("p.text-black.radiobutton")).getText();
        assertEquals(resultText, "Radio button 'Male' is checked");
    }
Code Walkthrough:
The code will first navigate to the Radio button Demo page and search for the Male radio button. It will perform a click on the Male radio button using the Selenium click() method. To check that the correct radio button is selected, the Get value button will be clicked, which will show the message “Radio button ‘Male’ is checked”. This text will be asserted using the assertEquals() method of TestNG.
Test Execution:
The following screenshot shows the test execution performed on the TestMu AI cloud grid.
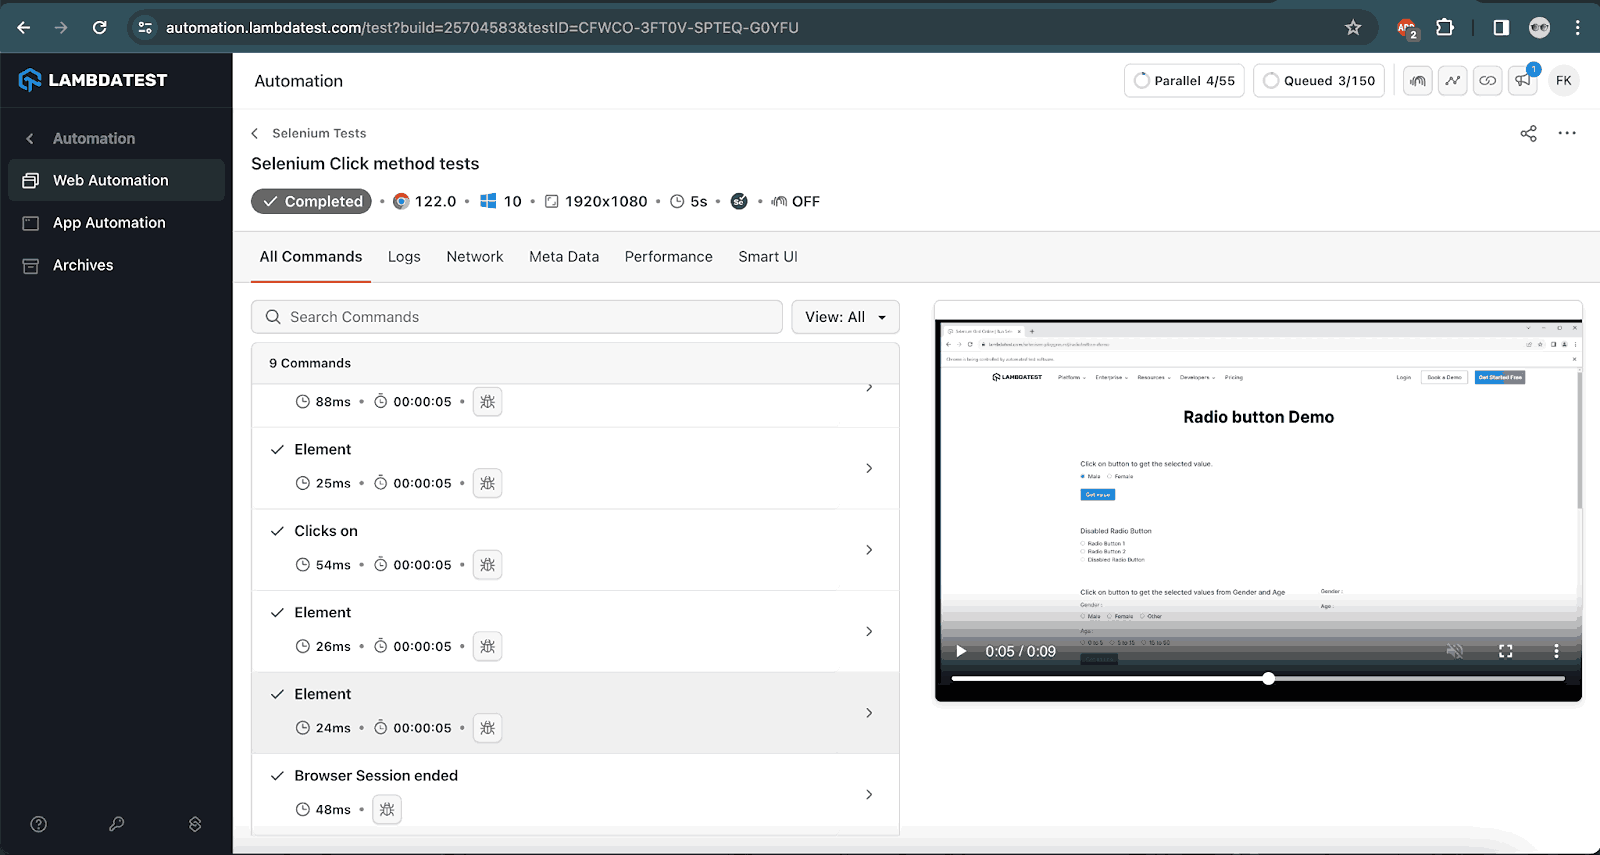
Performing Right-Click in Selenium
Based on the functionality and the features of the application under test. There are sometimes scenarios that need automating the right-clicking on the WebElement and selecting the option from the right-click menu bar. This right-click might be required on a button, textbox, image, URL, etc.
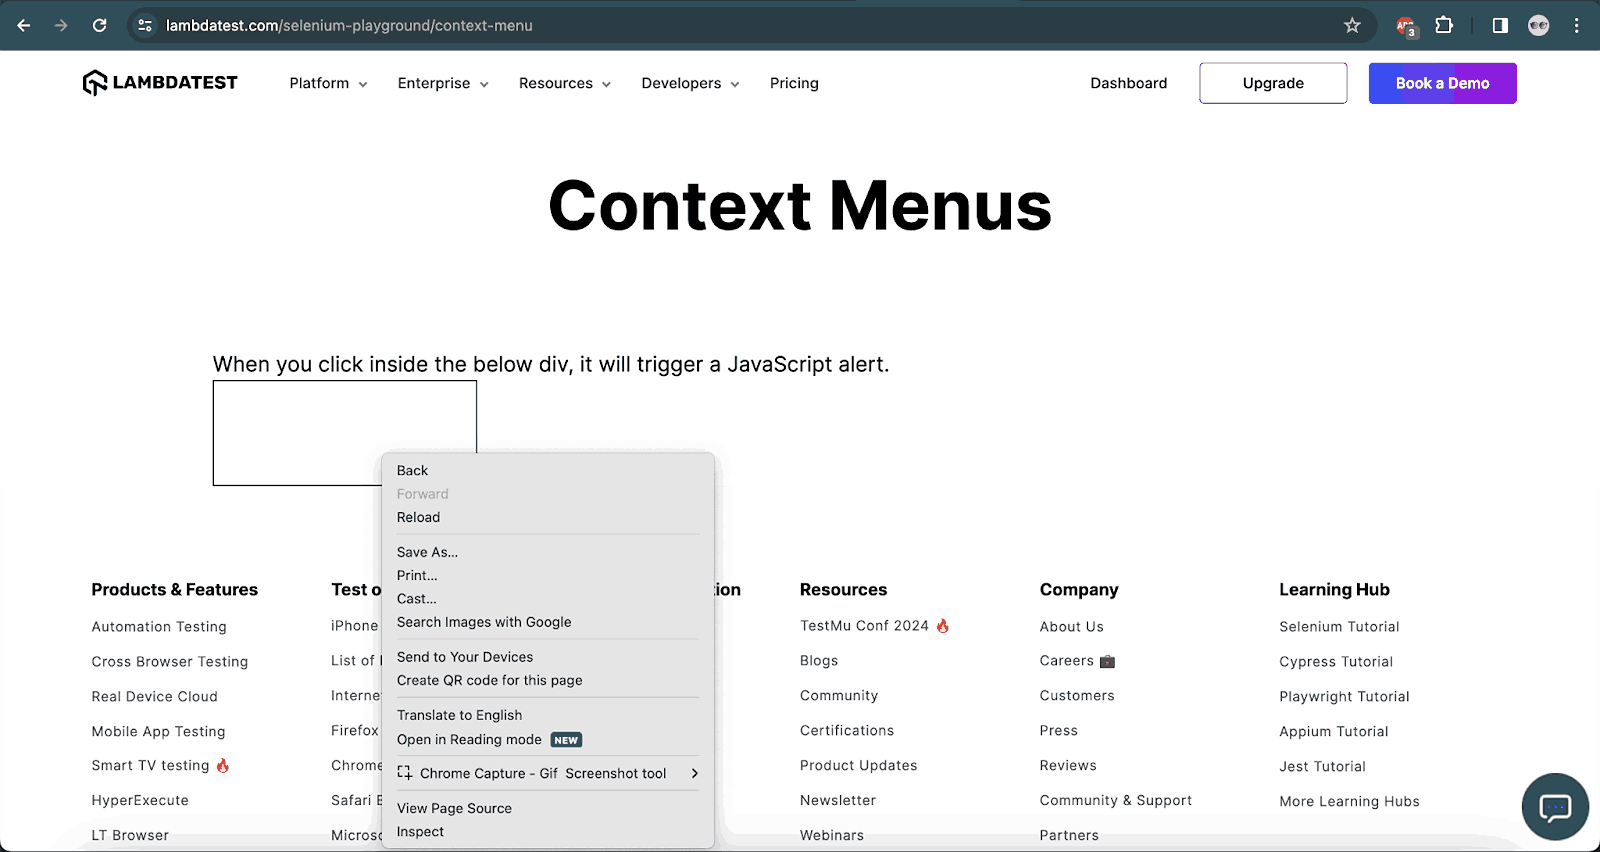
In this demo on the Selenium click button method, we will check out how to perform a right click using the Actions class in Selenium. However, the Actions class might be ineffective in selecting and clicking the different menu options after right-clicking.
Test Scenario
- Navigate to the Context Menus page.
- Right-click on the text box displayed on the page.
- Check for the JavaScript alert message “You selected a context menu”.
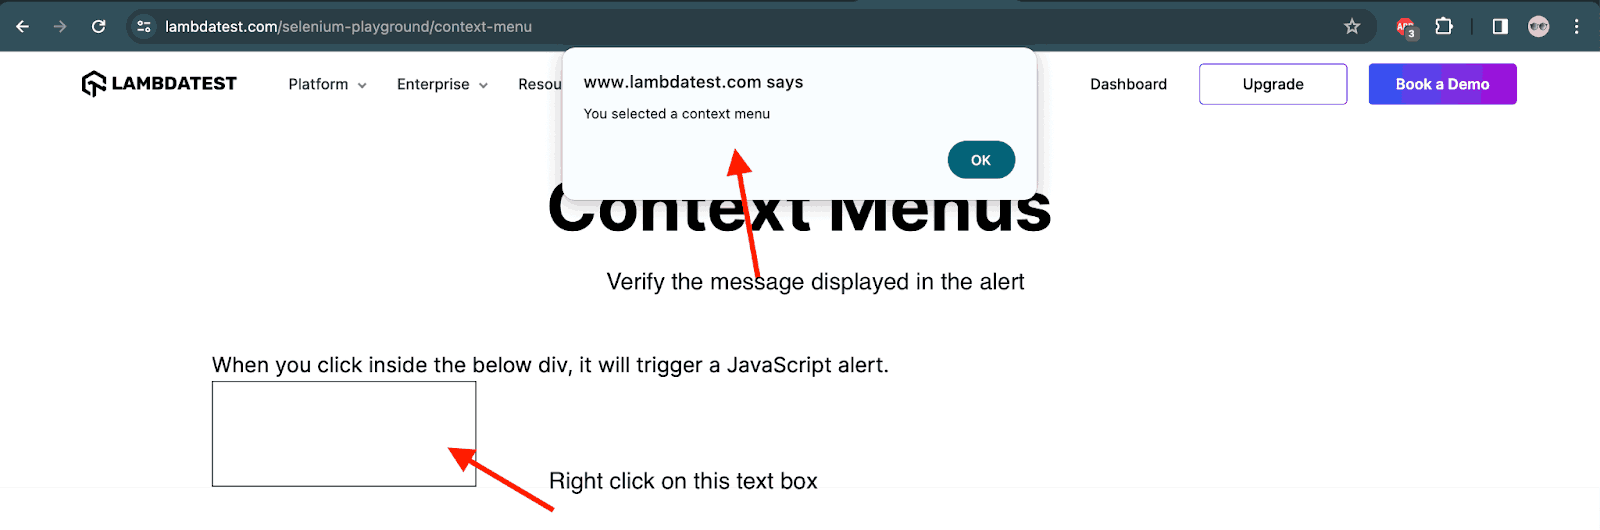
The following code will execute the test and perform the right click using Selenium.
@Test
    public void testRightClick() {

        driver.get("https://www.testmuai.com/selenium-playground/context-menu/");
        final WebElement rightClickArea = driver.findElement(By.id("hot-spot"));

        Actions actions = new Actions(driver);
        actions.contextClick(rightClickArea).build().perform();

        String alertText = driver.switchTo().alert().getText();
        assertEquals(alertText, "You selected a context menu");
    }
Code Walkthrough:
The first line of code will navigate to the context menu page on the TestMu AI Selenium Playground website. The right-click will be performed using the contextClick() method of the Actions class in Selenium.
Note that we have used the build() and perform() methods after using the contextClick() method, these methods are necessary to perform the action using the Actions class. Next, the text of the alert message is fetched, and finally, the assertion is performed using the assertEquals() method.
It should be noted that if we need to select the options from the right-click menu, there is no support from Selenium for the native menu bar, however, the options can be selected if it is not a native right-click menu bar.
In the case of right-click menu options that are not native, the WebElements of the menu options can be located, and accordingly, the click can be performed on those options.
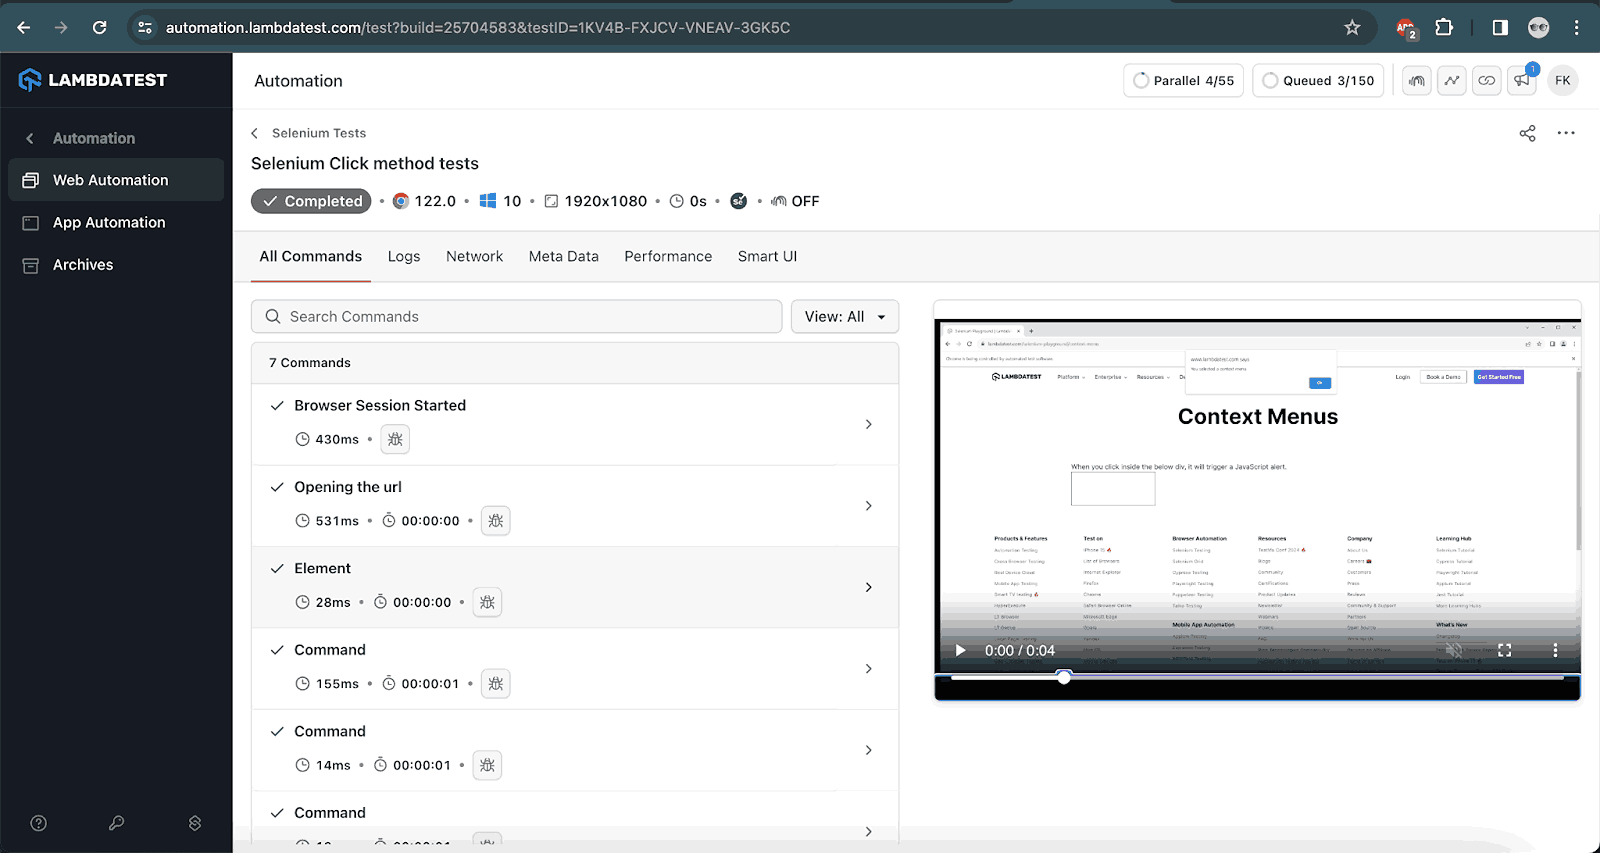
Test Execution:
The following screenshot provides the result of the test execution performed on the TestMu AI cloud grid.
Performing Mouse Hover in Selenium
Mouse hover is a vital part of any cross browser testing checklist. Many times, we want to check whether the styling applied over a WebElement is supported in a consistent manner when accessed from different browsers or not? We can use a mouse hover to verify a prompt message over a button.
There are two different ways to mouse hover in Selenium. We can use the moveToElement() method in the Actions class in Selenium, or we can use the JavaScriptExecutor and scroll into view.
Performing Mouse Hover Using Actions Class
In the following test scenario, we will use the Actions class in Selenium to demonstrate the working of mouse hover.
Test Scenario
- Navigate to the Mouse Hover page.
- Hover the mouse over the Hover Me green button.
- Check that the background color of the button changes to white.
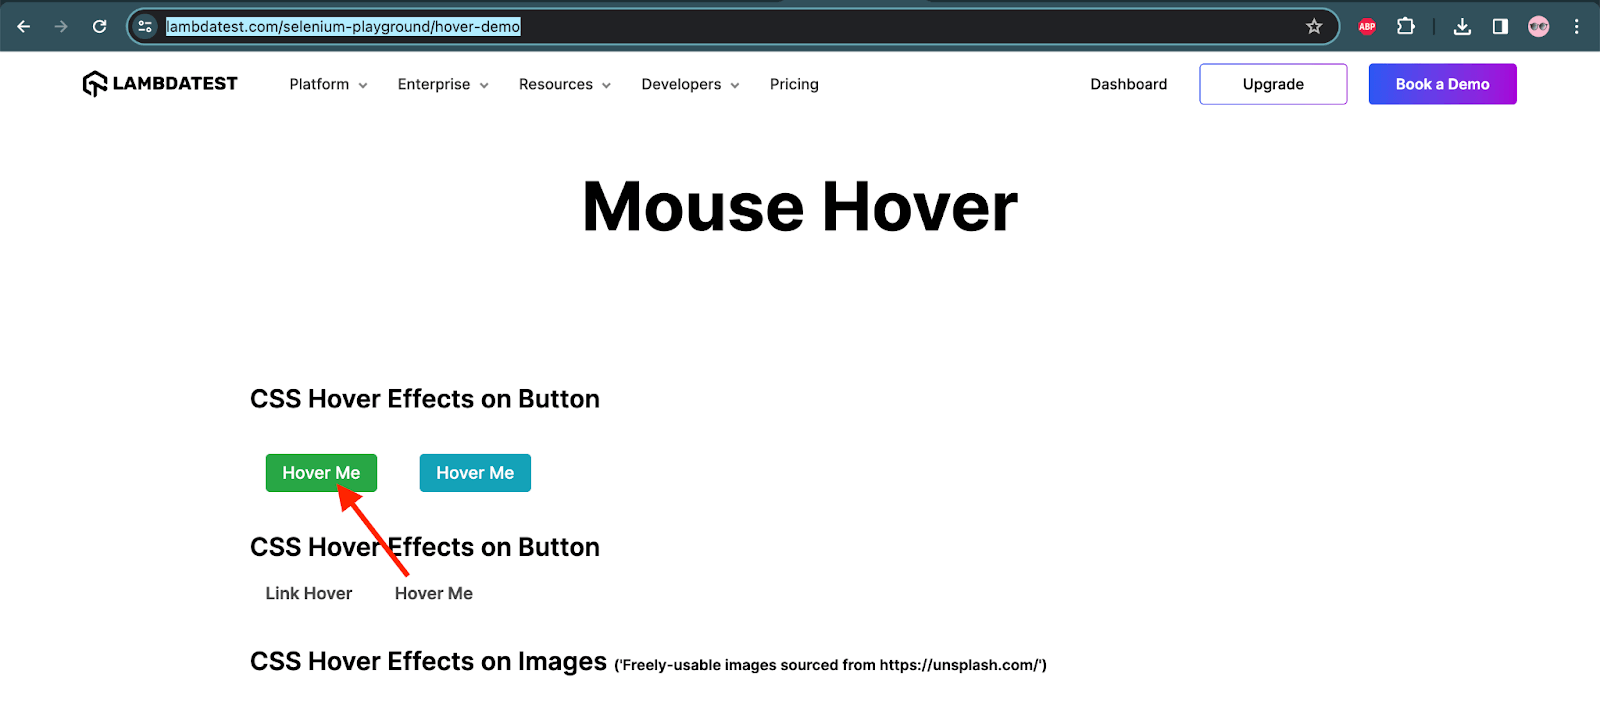
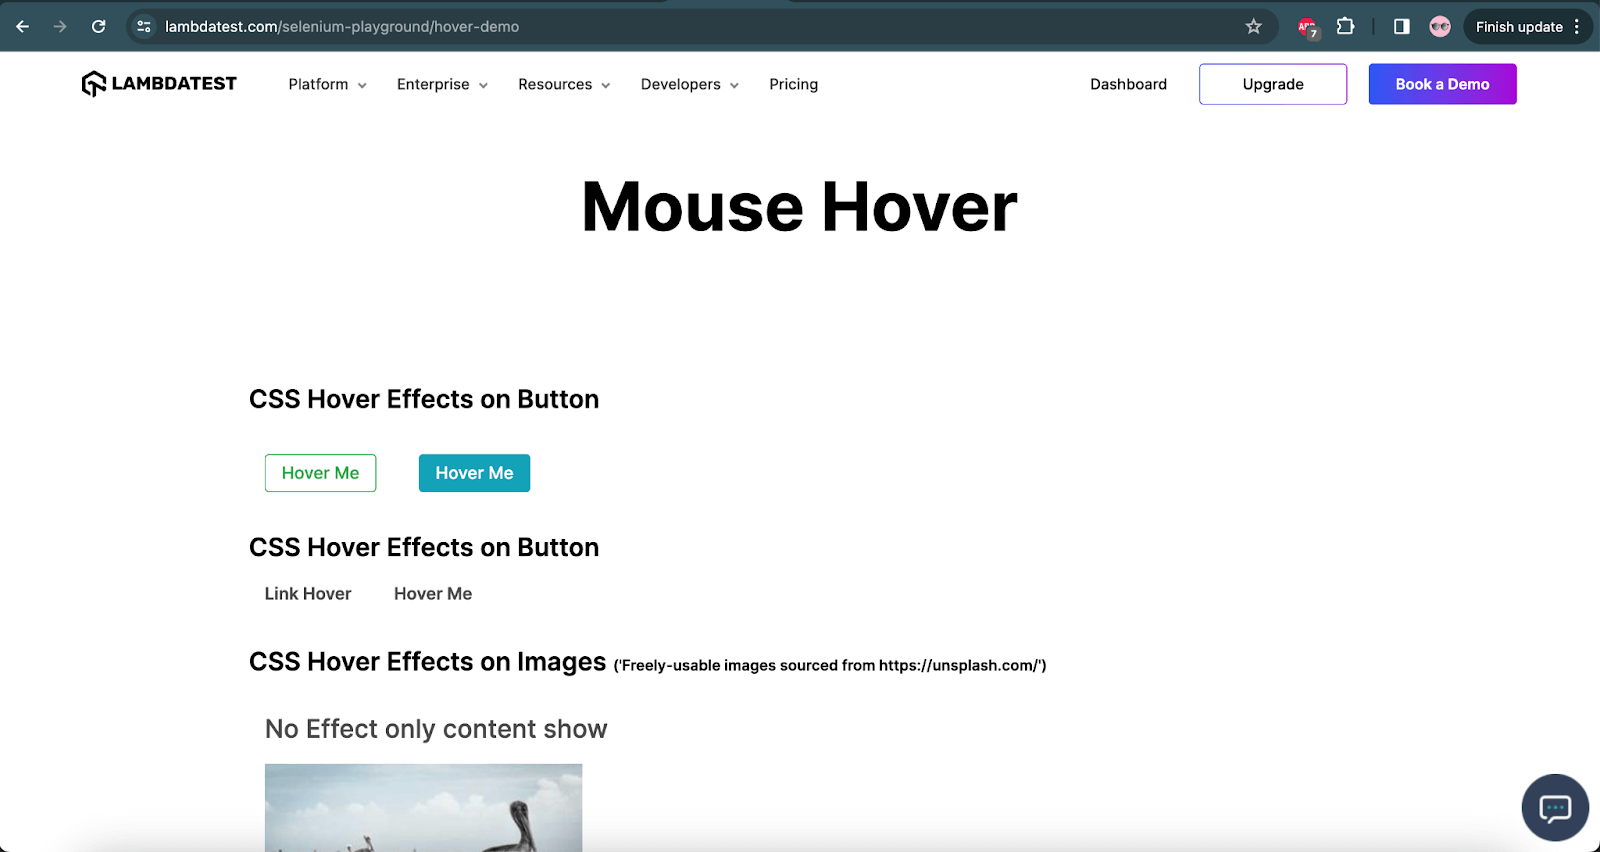
The following code will help in performing the mouse hover action.
@Test
    public void testMouseHover() {

        driver.get("https://www.testmuai.com/selenium-playground/hover-demo/");
        WebElement hoverMeGreenBtn = driver.findElement(By.className("bg-green-100"));
        String bgColorBase = hoverMeGreenBtn.getCssValue("background-color");
        assertEquals(bgColorBase, "rgba(40, 167, 69, 1)");

        Actions actions = new Actions(driver);
        actions.moveToElement(hoverMeGreenBtn).build().perform();
        String bgColorNew = hoverMeGreenBtn.getCssValue("background-color");
        assertEquals(bgColorNew, "rgba(255, 255, 255, 1)");
    }
Code Walkthrough:
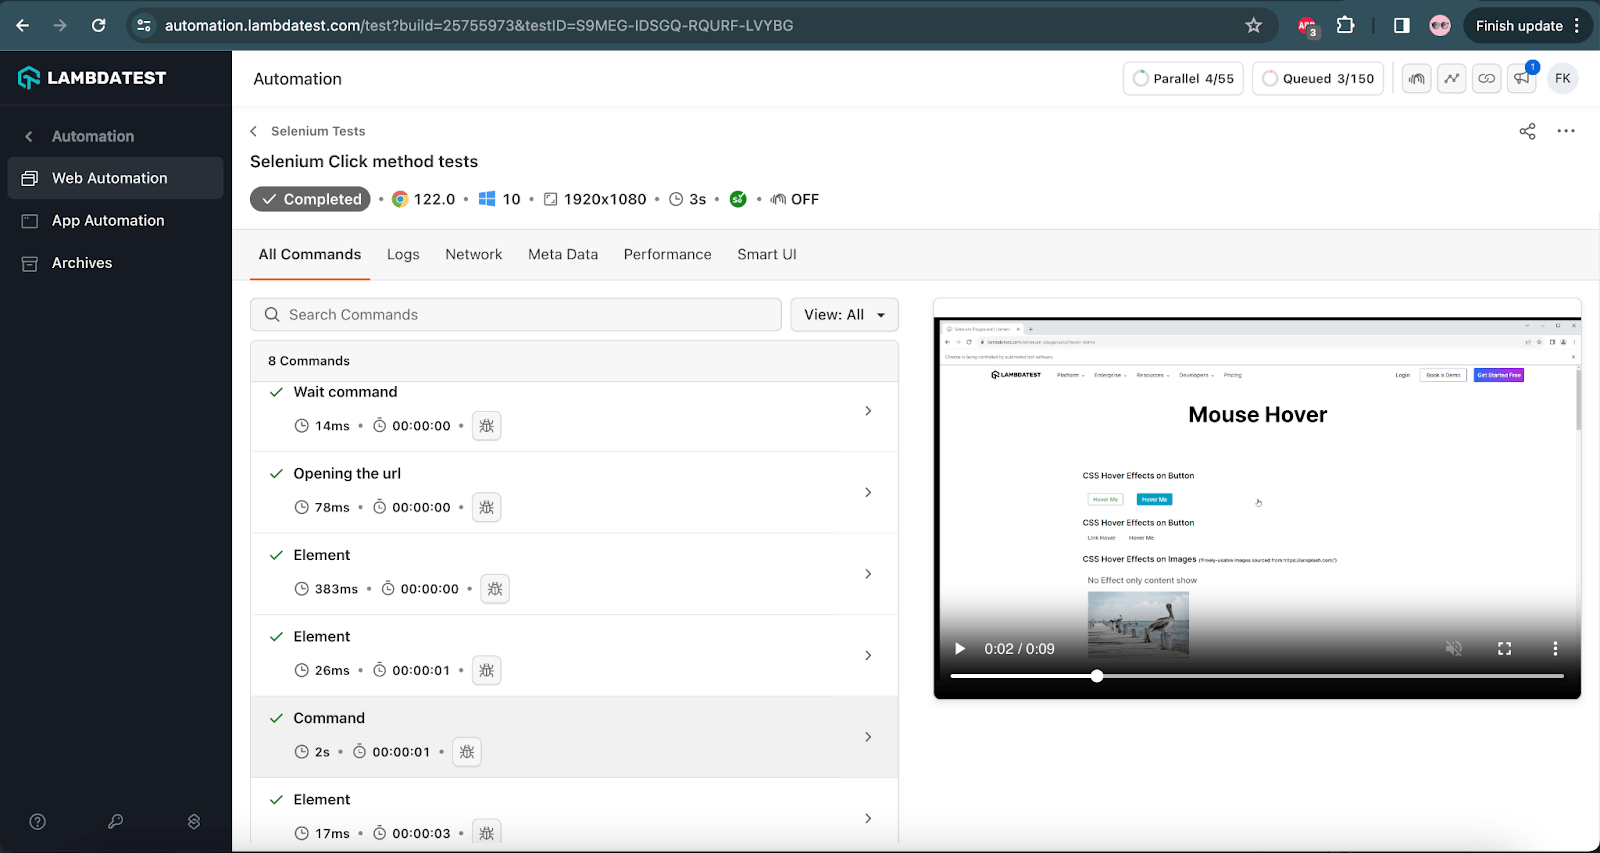
The code will first navigate to the Mouse Hover page on the TestMu AI Selenium Playground website. Next, it will search and locate the green button and capture its background color value using the getCssValue() method of Selenium. The property background-color will return the background color in RGBA format. The background color of the button should be rgba(40, 167, 69, 1).
The Actions class will be instantiated next. Using the moveToElement() method, the mouse hover operation will be performed on the green button. Once the mouse hover is performed, the background color of the button should change to white, which is rgba(255, 255, 255, 1). This color will be asserted to ensure the mouse hover operation was performed successfully.
Test Execution:
The following screenshot shows the details of the test execution on the TestMu AI cloud platform.
Performing Mouse Hover (Scroll Action) Using JavaScriptExecutor
While testing, we may face scenarios where the WebElements are not visible, and we have to scroll down the page to interact with the element. In such cases, the JavaScriptExecutor interface in Selenium can help us perform the required scroll action. In the following demo, we will check out how to perform scrolling to the WebElement on the web page.
Test Scenario
- Navigate to the Mouse Hover page.
- Scroll down to the image that has the caption Zoom In.
- Check the text above the image is displayed as Zoom In.
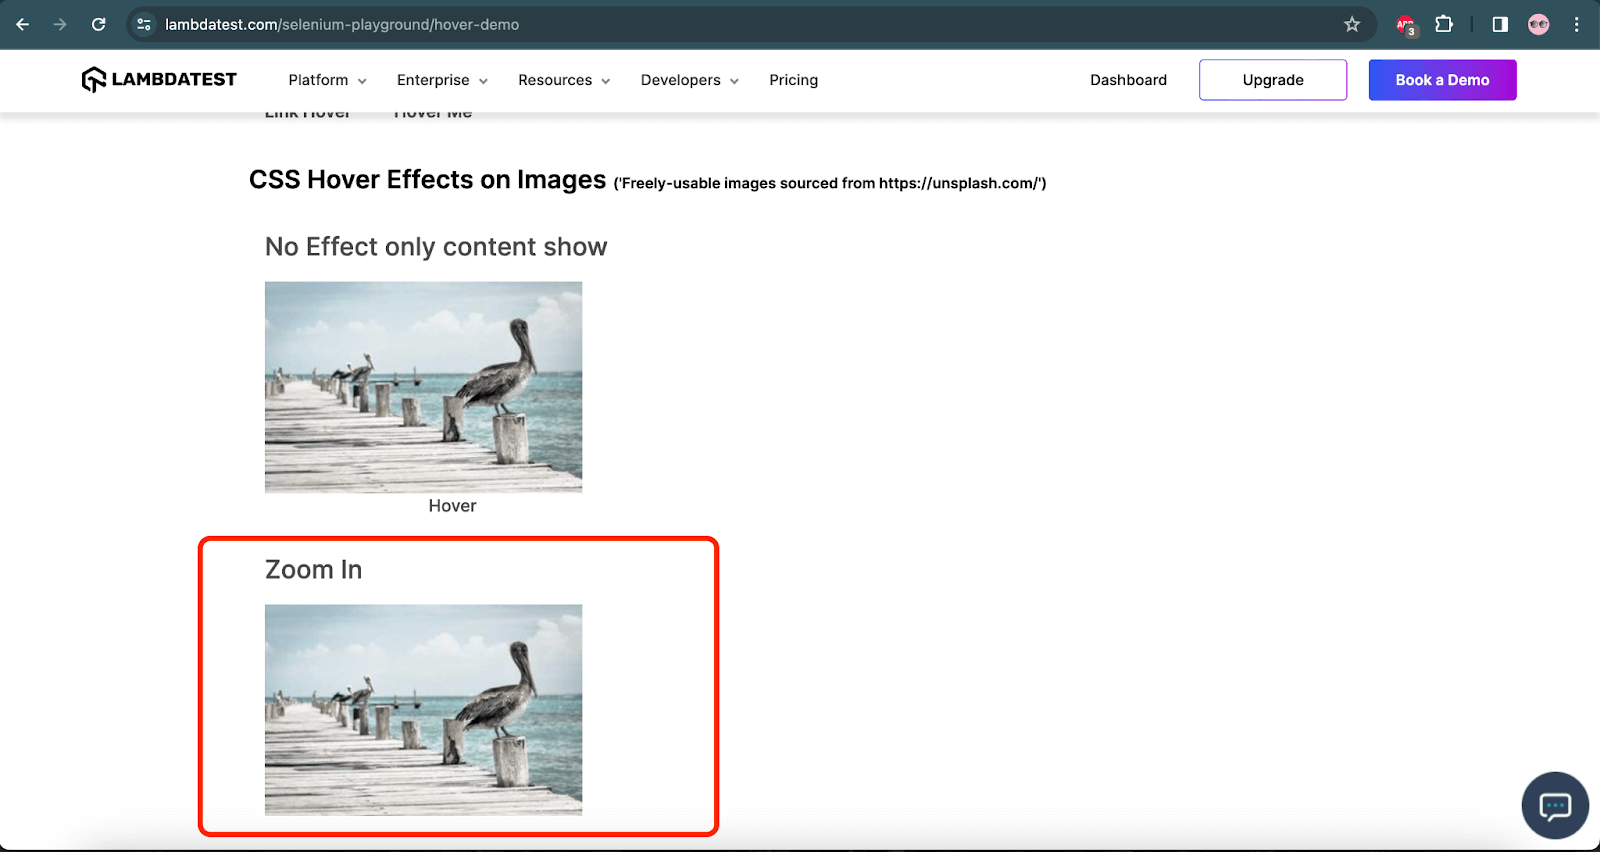
The following code will help us perform the scroll action using JavaScriptExecutor in Selenium.
@Test
    public void testScrollUsingJSExecutor ()  {
        driver.get("https://www.testmuai.com/selenium-playground/hover-demo/");
        WebElement zoomInImage = driver.findElement(By.cssSelector(".s__column2 .image-card img"));
        JavascriptExecutor js = (JavascriptExecutor) driver;
        js.executeScript("arguments[0].scrollIntoView();", zoomInImage);
        String imageText = driver.findElement(By.cssSelector(".p-15 h2:nth-child(8)")).getText();
        assertEquals(imageText, "Zoom In");

    }
Code Walkthrough:
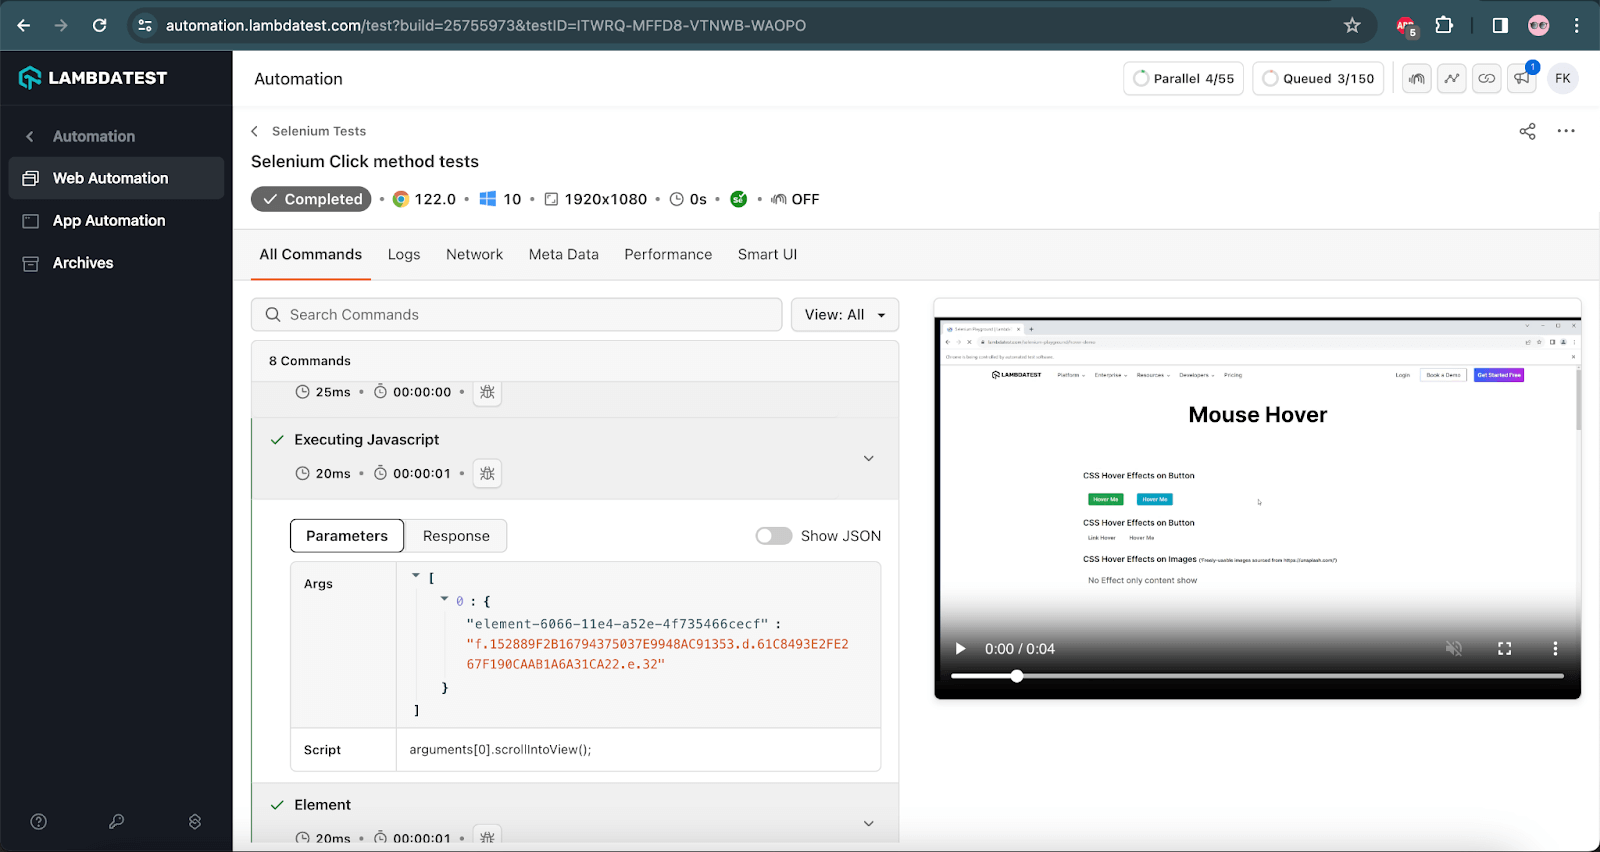
The code above will first navigate to the Mouse Hover page on the TestMu AI Selenium Playground website. Next, it will search and locate the Zoom In image on the webpage using the scrollIntoView() method of JavascriptExecutor.
After the image is located, the text "Zoom In" above the image is located and asserted.
Test Execution:
The following screenshot from the TestMu AI cloud grid shows that the tests were executed successfully.

Performing Click With (X, Y) Coordinates in Selenium
We can use movebyOffset() to perform a click anywhere on the page by feeding (x,y) coordinates to the WebDriver. You can even generate a click on blank portions of your webpage as long as you are aware of the (X, Y) coordinates.
Test Scenario
- Navigate to the Simple Form Demo page.
- Enter the numeric values in the Enter first value and Enter second value fields.
- Find the location coordinates of the Get Sum button.
- Click on the Get Sum button using the coordinates.
- Check that the result displayed for adding the two values is correctly displayed.
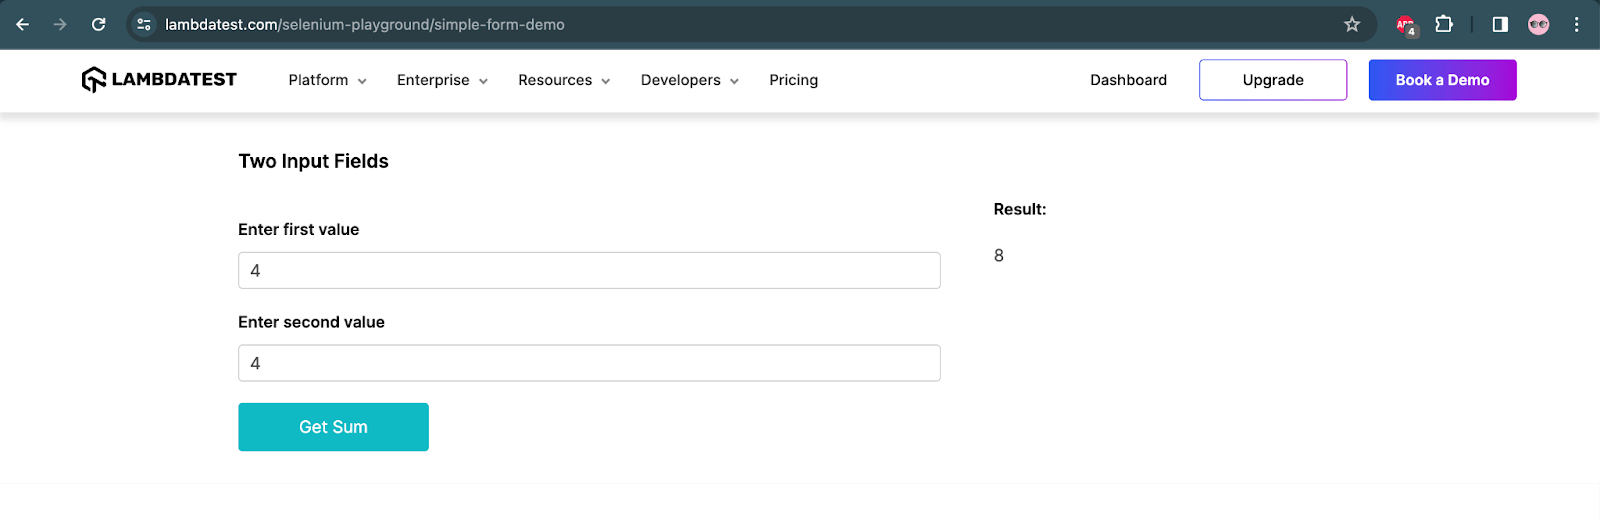
The following code will perform the click operation using the coordinates
@Test
    public void testClickUsingCoOrdinates () {
        driver.get("https://www.testmuai.com/selenium-playground/simple-form-demo/");
        WebElement firstValueField = driver.findElement(By.id("sum1"));
        firstValueField.sendKeys("5");

        WebElement secondValueField = driver.findElement(By.id("sum2"));
        secondValueField.sendKeys("8");

        WebElement getSumBtn = driver.findElement(By.cssSelector("#gettotal > button"));

        Actions actions = new Actions(driver);
        actions.moveToElement(getSumBtn,10,10).click().build().perform();
        String resultText = driver.findElement(By.id("addmessage")).getText();

        assertEquals(resultText, "13");

    }
Code Walkthrough:
The code will navigate to the Simple Form Demo page on the TestMu AI Selenium Playground website. It will locate the Enter first value and Enter second value fields. Now, enter the values 5 and 8 in the respective fields.
Next, it will locate the Get Sum button. Finally, using the moveToElement() method of the Actions class with the offset values for x and y coordinates, it will click on the Get Sum button to get the result. The offset values (10,10) will be taken into consideration after the focus is moved to the Get Sum button.
The result values, i.e. 13, are checked using the assertEquals() method of TestNG, which marks the completion of the test.
Note: These (X, Y) coordinates will differ from one screen resolution and size to another.
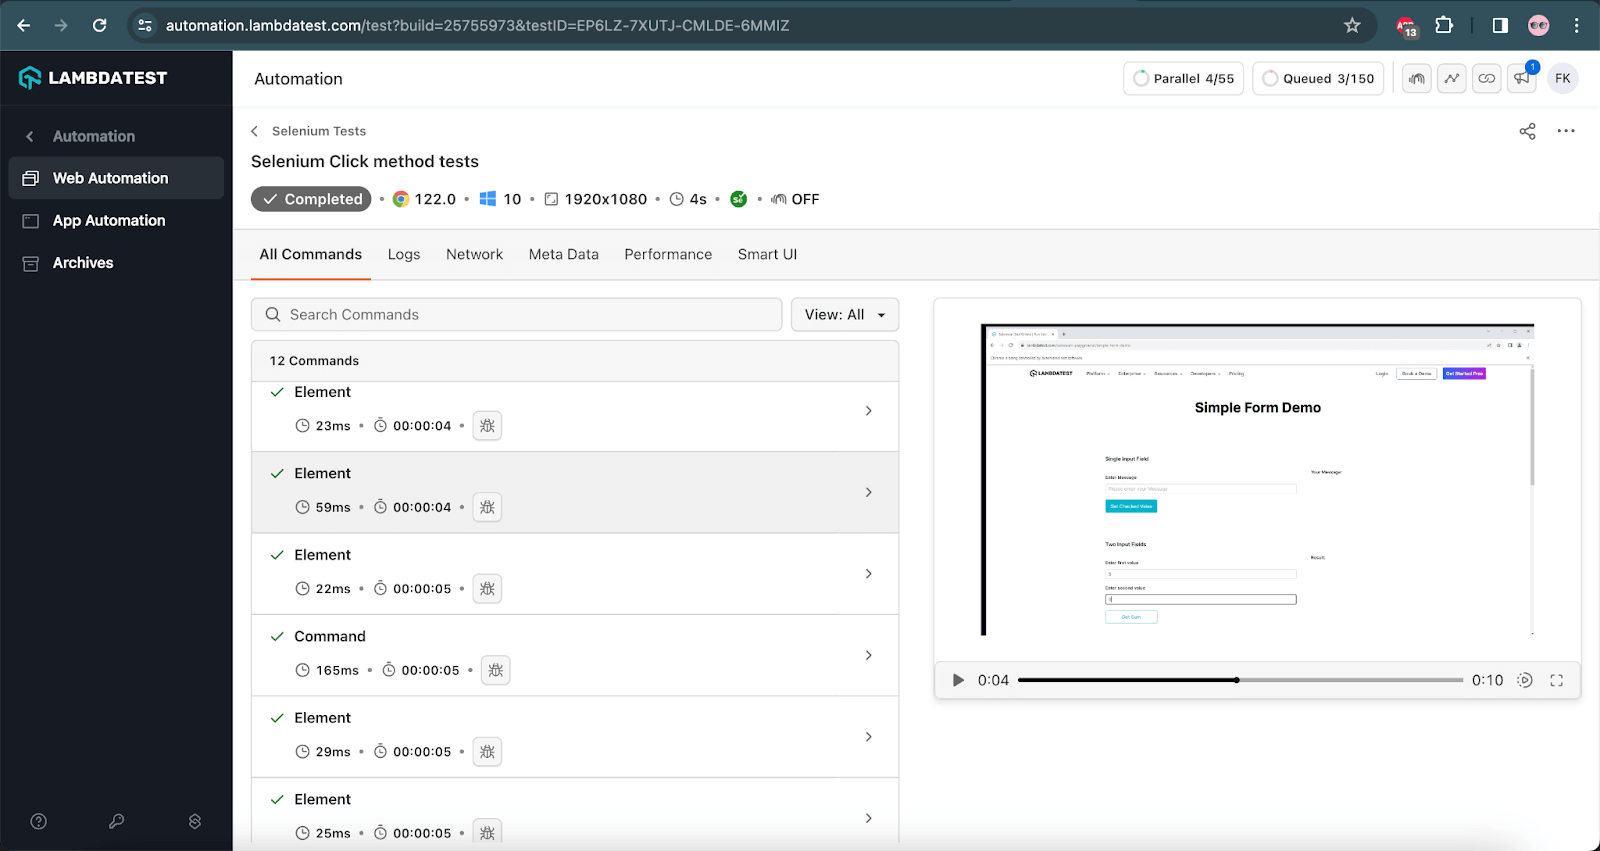
Test Execution:
The following screenshot shows the successful test execution on the TestMu AI cloud grid.
Performing Double-Click in Selenium
Double-click is an absolute must for Selenium automation testing, be it for performance or automated browser testing. Here is an example of how you can perform a double-click using Selenium.
Test Scenario
- Navigate to the Checkbox Demo page.
- Double-click on the checkbox that is shown in the Single Checkbox Demo section.
- Check that the checkbox remains unticked after the double click is performed.
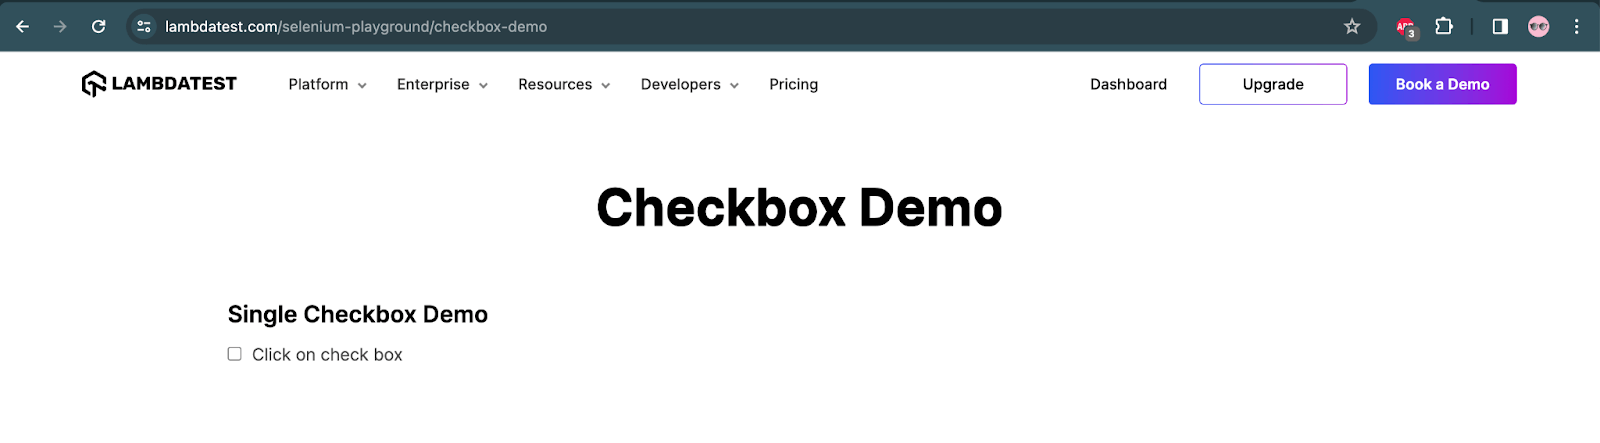
The following code will be used to perform a double click.
@Test
    public void testDoubleClick()  {
        this.driver.get("https://www.testmuai.com/selenium-playground/checkbox-demo/");
        final WebElement checkboxOne = this.driver.findElement(By.id("isAgeSelected"));

        Actions actions = new Actions(driver);
        actions.doubleClick(checkboxOne).build().perform();

        assertTrue(!checkboxOne.isSelected());
    }
Code Walkthrough:
The code will first open the Checkbox Demo page. It will search for the Checkbox on the page. Next, using the doubleClick() method from the Actions class of Selenium, a double-click will be performed on the checkbox.
Finally, an assertion will be made to check that the checkbox is not selected. Note the ! character in the assertion statement works as a NOT and reverses the condition. So, it can be read as “checkbox one is not selected”.
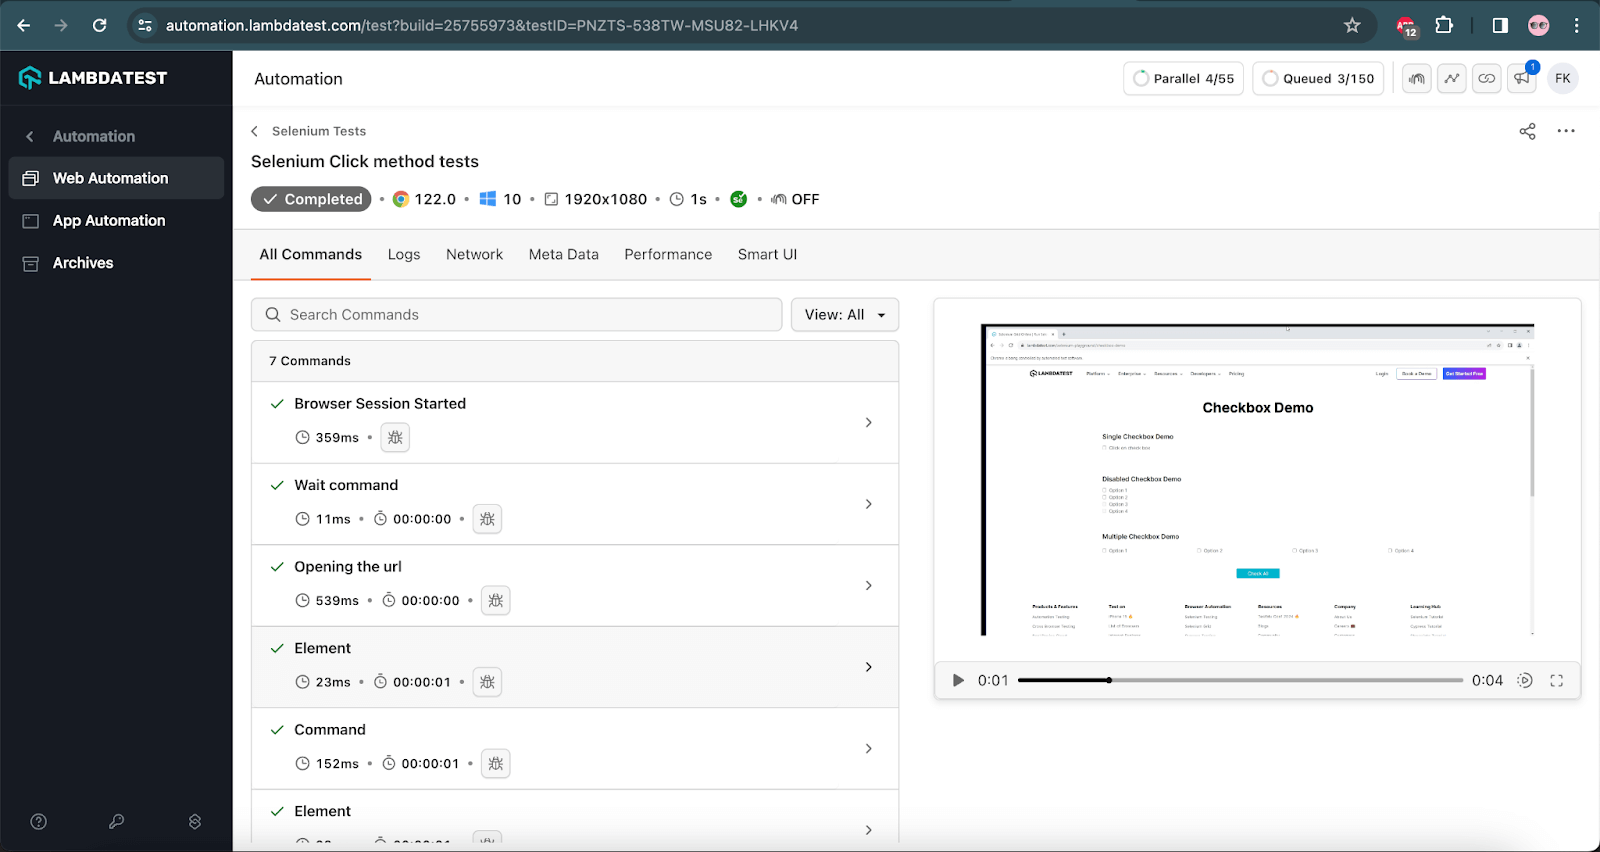
Test Execution:
The following screenshot shows the successful test execution performed on the TestMu AI cloud grid.
To learn more about the DoubleClick() Action class in Selenium, follow this dedicated blog on double click in Selenium.
Performing Click and Hold in Selenium
When performing automation testing with Selenium, we may come across a requirement where we would need to highlight a text or image by clicking and holding the mouse. Let us take a scenario to automate this interaction.
Test Scenario
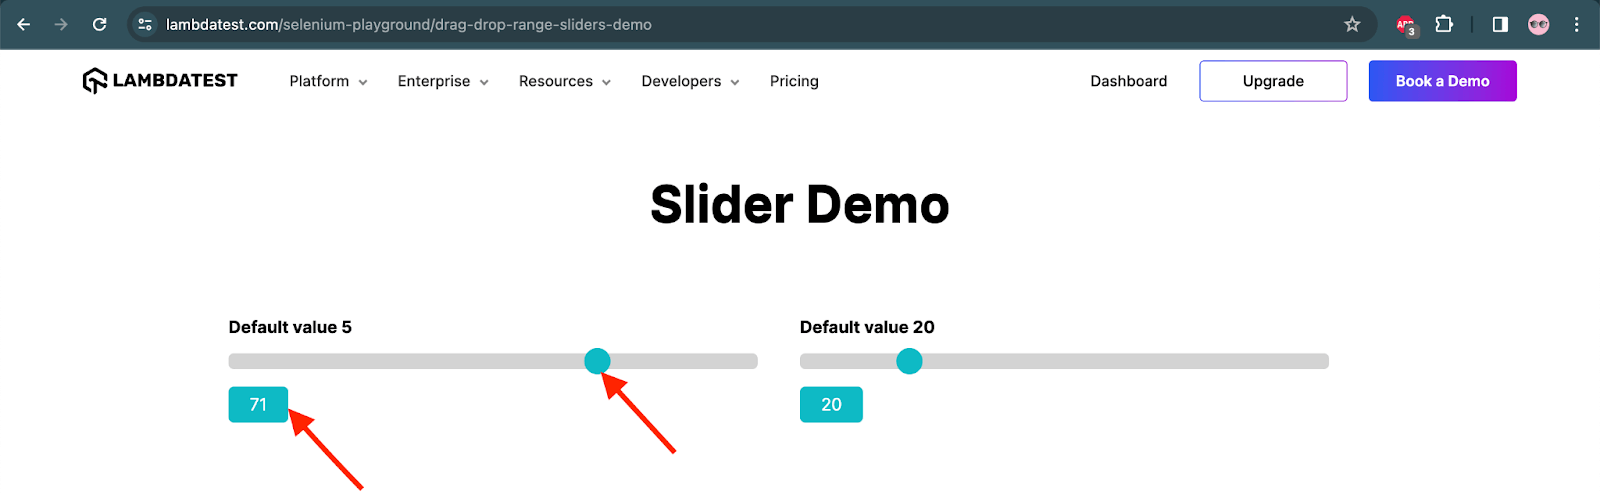
- Navigate to the Slider Demo page.
- Drag the slider one to 71 percent.
- Check that the value 71 is displayed once the slider is dragged.
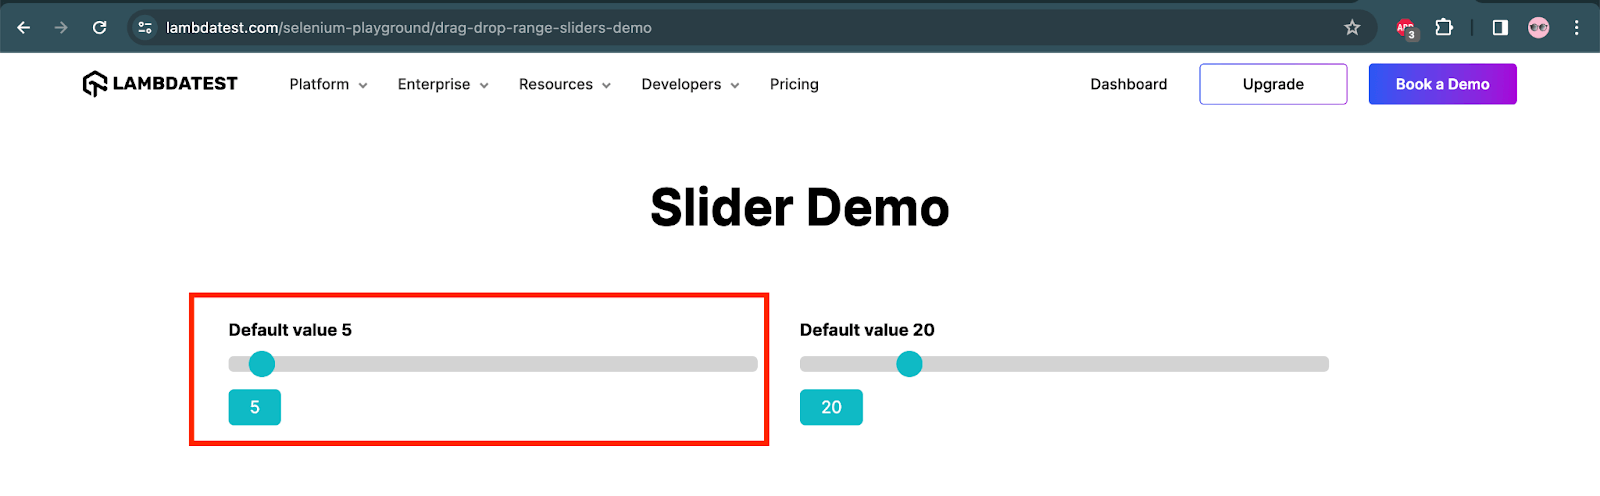
The following code will help move the slider using the clickAndHold() method in Selenium.
@Test
    public void testClickAndHold () {
        driver.get("https://www.testmuai.com/selenium-playground/drag-drop-range-sliders-demo/");
        WebElement sliderOne = driver.findElement(By.cssSelector("#slider1 input.sp__range"));

        Actions actions = new Actions(driver);
        actions.moveToElement(sliderOne).clickAndHold().moveByOffset(100,283).build().perform();

        String outputRange = driver.findElement(By.id("range")).getText();
        assertEquals(outputRange,"71");
    }
Code Walkthrough:
The code will first navigate to the Slider Demo page on the TestMu AI Selenium Playground website. Next, the slider will be located.
After instantiating the Actions class in Selenium, chain actions will be performed by moving the focus to the slider, clicking and holding the mouse button, and moving the offset to (100,283). This will drag the slider to 71%.
The slider’s width is 500 pixels, so from the center to the end, it is 250 pixels, hence, if I take 100, it means from the slider’s center, it is 100 pixels toward the end. Therefore, it will move to 71% when I apply the offset of 100.
This offset value is provided in the X and Y coordinates; 100 is the X coordinate value, and 283 is the Y coordinate value.
Similarly, if we need to move the slider between 1-50%, we need to provide the values in negative, for example, if we put the X coordinate as -250, it will move it to 0%.
After the slider range is set, the output range field will be located, and an assertion will be performed to check the value 71 is displayed in it.
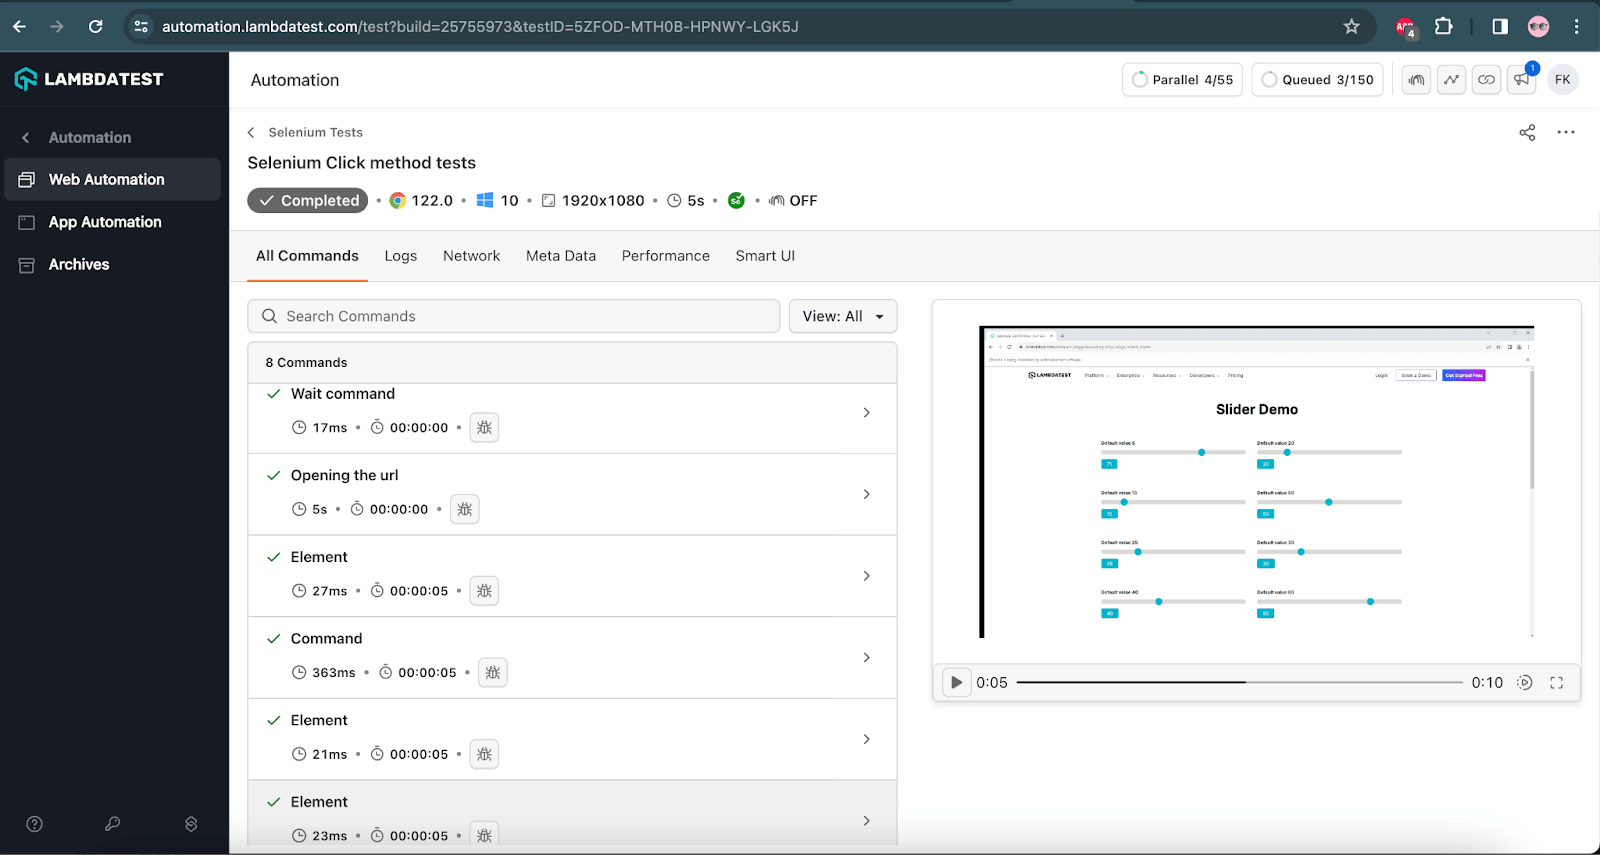
Test Execution:
The following screenshot from the TestMu AI cloud grid shows the successful execution of the test.
Performing Drag and Drop in Selenium
Somewhat similar but slightly different from click and hold is the requirement for drag and drop. Here, the place to drop after dragging is prominent in the UI, so you know where to place an element.
The following test scenario will demonstrate how the drag-and-drop action works using Selenium.
Test Scenario
- Navigate to the Drag and Drop Demo page.
- In the Drag and Drop (Demo 1), drag the Draggable 1 item and drop it in the Drop here area.
- Check that the Dropped Items List shows the value Draggable 1 after the draggable item is dropped successfully in the Drop here area.
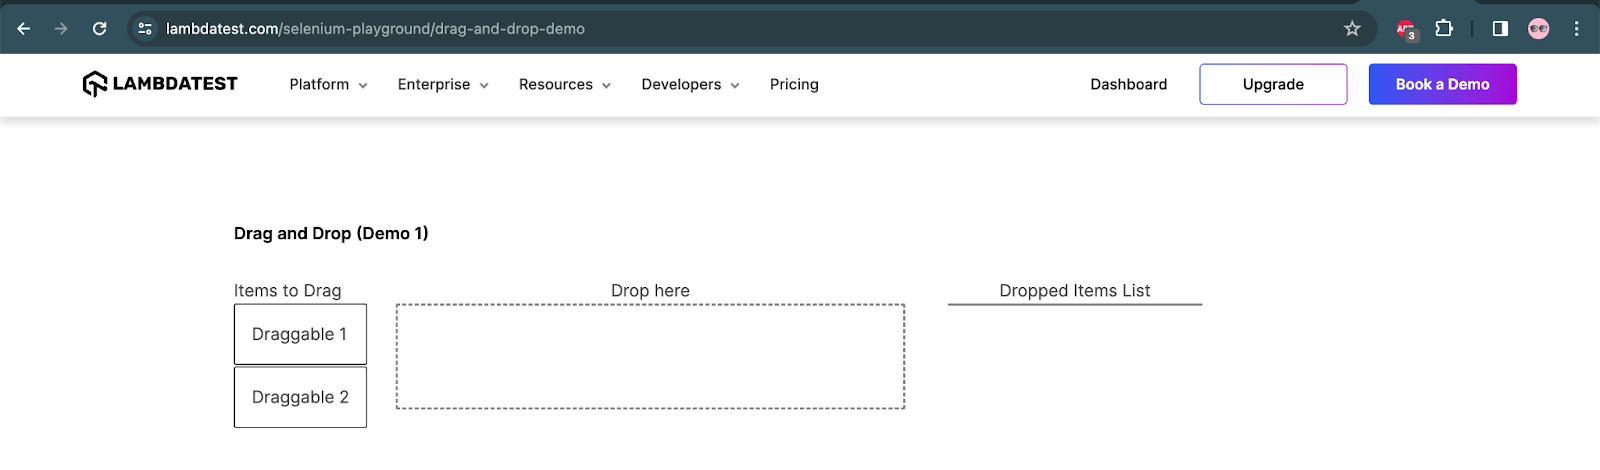
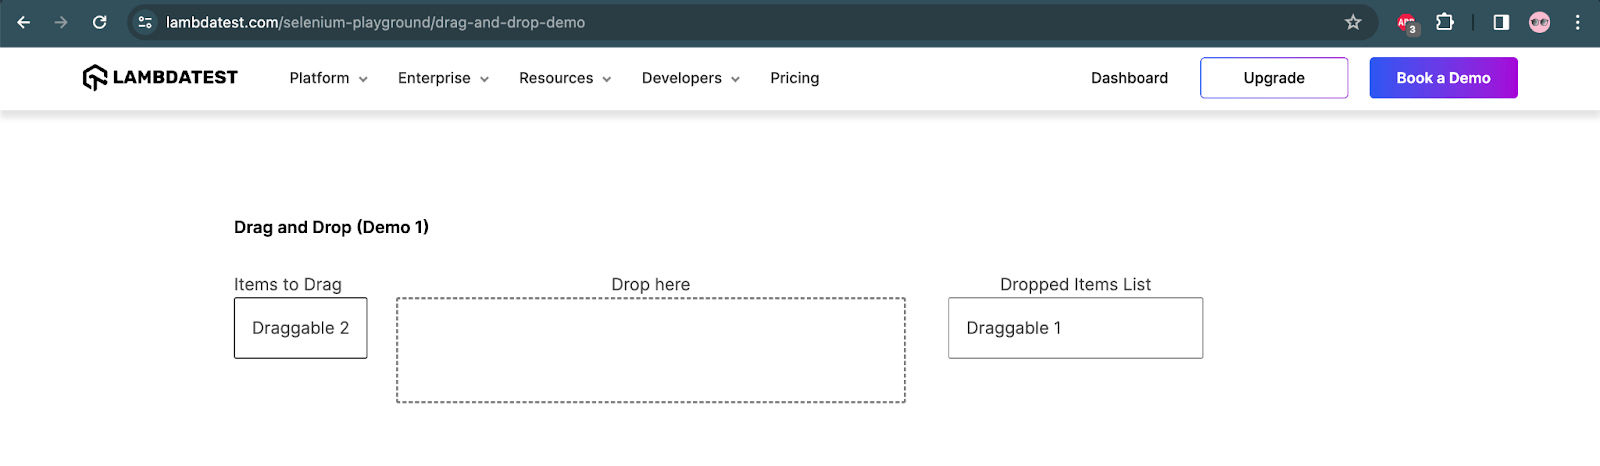
The following code will perform the drag-and-drop action.
@Test
    public void testDragAndDrop() {
        driver.get("https://www.testmuai.com/selenium-playground/drag-and-drop-demo/");
        WebElement draggableOne = driver.findElement(By.cssSelector("#todrag > span"));
        WebElement dropHere = driver.findElement(By.id("mydropzone"));

        Actions actions = new Actions(driver);
        actions.dragAndDrop(draggableOne, dropHere).build().perform();

        WebElement droppedList = driver.findElement(By.cssSelector("#droppedlist > span"));
        assertEquals(droppedList.getText(), "Draggable 1");

    }
Code Walkthrough:
The code will first navigate to the Drag and Drop Demo page on the TestMu AI Selenium Playground website. Next, it will locate the Draggable 1 and the Drop here boxes, respectively.
The drag and drop actions will be performed using the dragAndDrop() method of the Actions class. We need to pass on the draggable WebElement, which would be the source element, and the droppable WebElement, which would be the target in the parameter of the dragAndDrop() method, respectively.
Finally, the assertions will be performed to check that the draggable item was dropped successfully in the drop box.
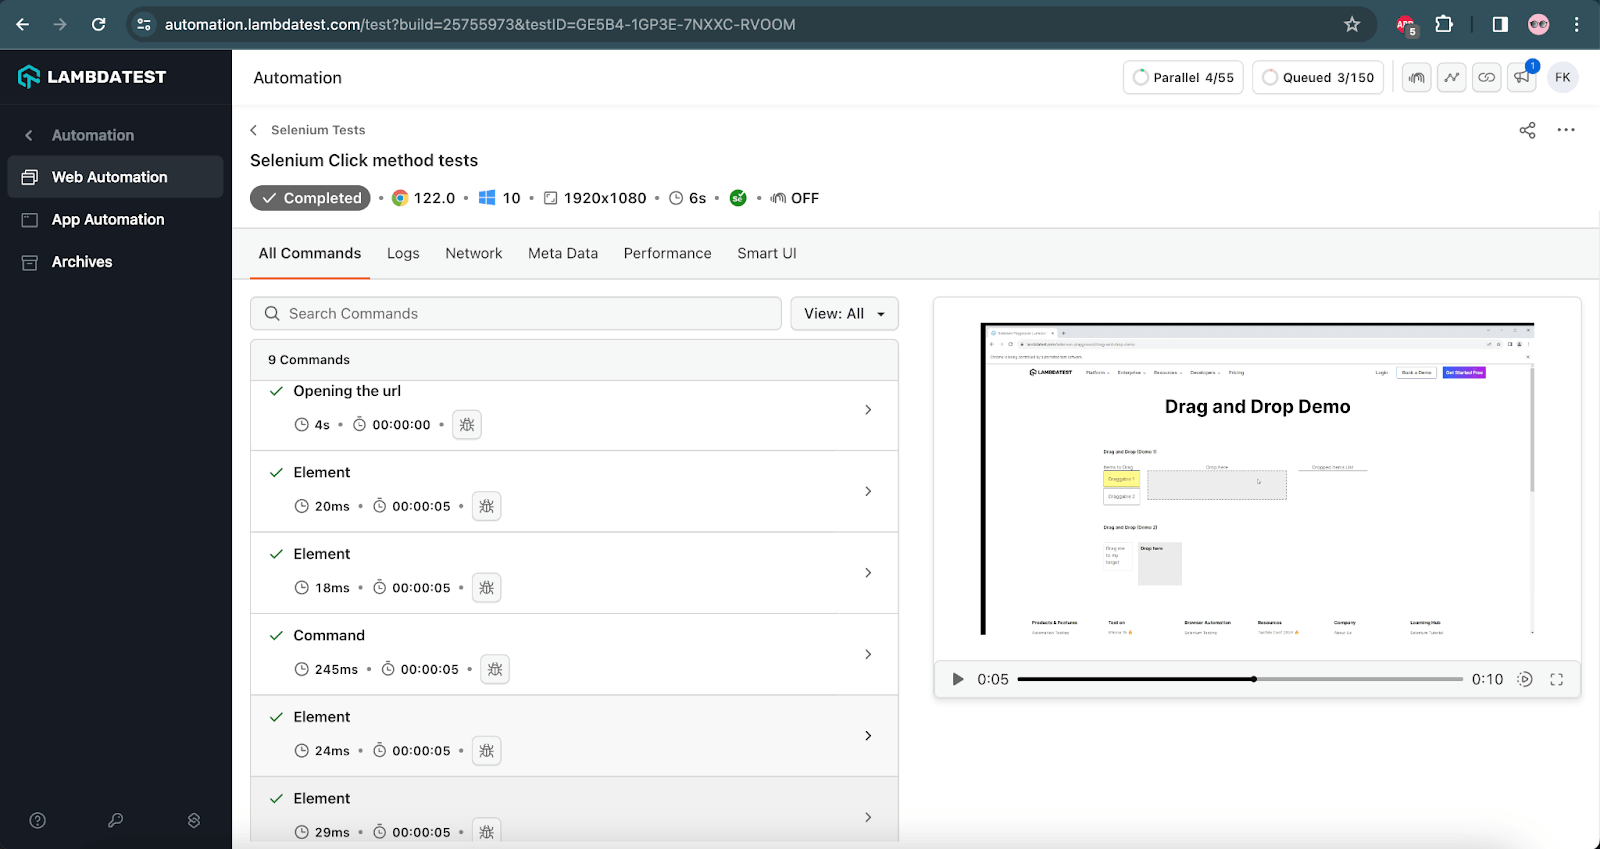
Test Execution:
The following screenshot shows that the test was executed successfully on the TestMu AI cloud grid.
Performing Click on Random Links in Selenium
Here is a cool tip using which you can click on every hyperlink on a webpage.
Test Scenario
- Navigate to the TestMu AI Selenium Playground website.
- Print all the demo page links in the console.
- Click on each demo page link one by one.
- Print the page header in the console.
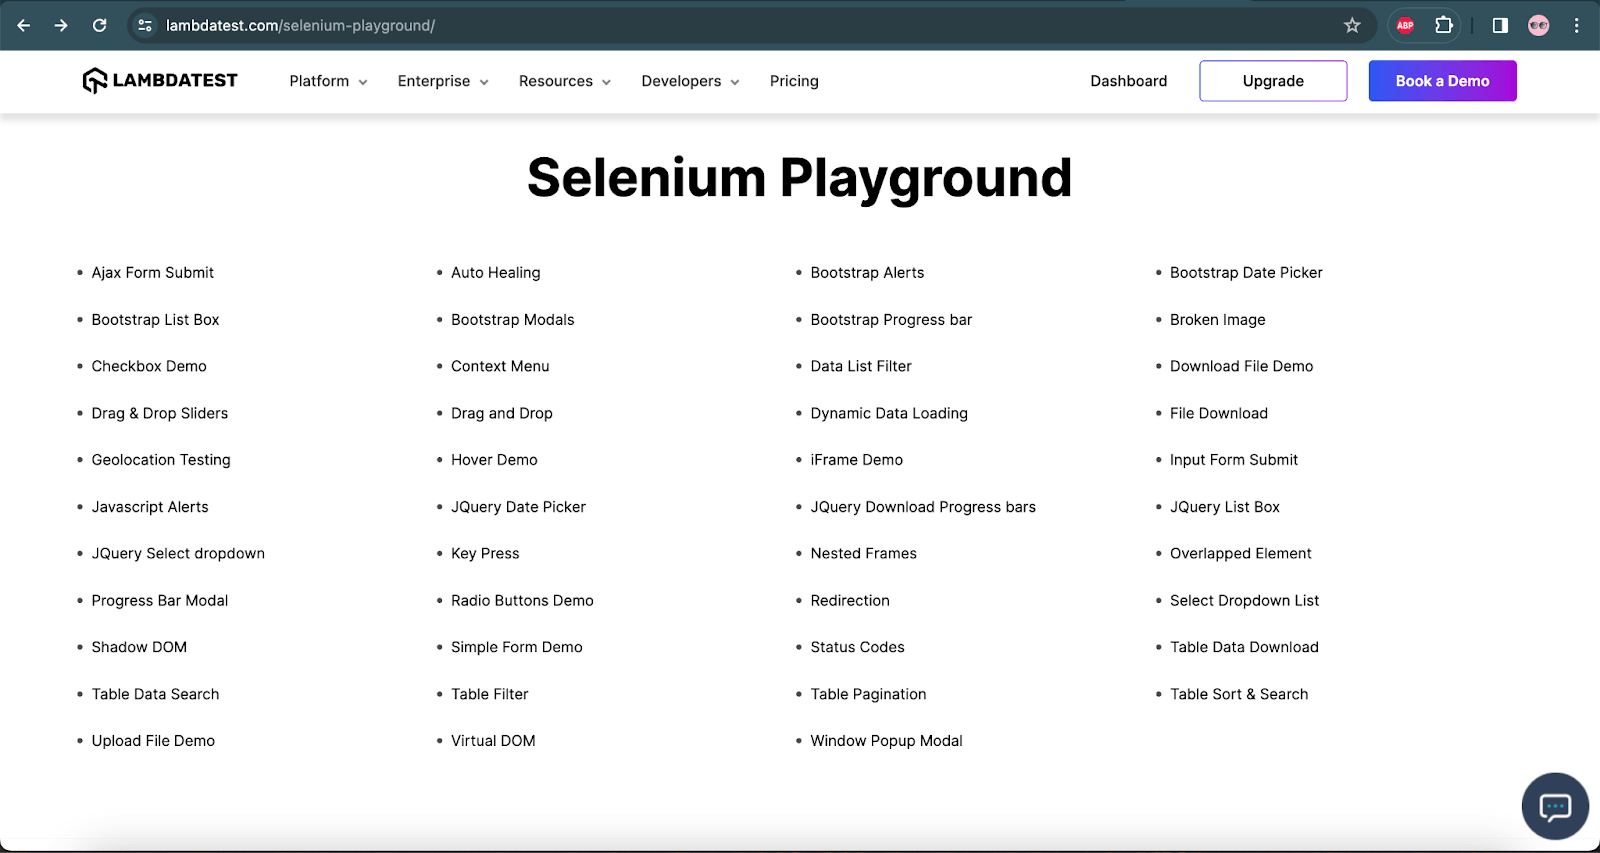
The following test script will generate the list of hyperlinks on the TestMu AI Selenium Playground website. Once all the links are located, a click will be performed on the demo page links. After the link is clicked, the page header will be located and printed in the console. This ensures the link was clicked and the page was navigated successfully.
@Test
    public void testPageLinks() {
        this.driver.get("https://www.testmuai.com/selenium-playground/");

        final WebDriverWait wait = new WebDriverWait(this.driver, Duration.ofSeconds(20));

        List<WebElement> demoPageLinks = this.driver.findElements(By.cssSelector(".container__selenium ul li a"));

        for (int i = 0; i < demoPageLinks.size(); i++) {

            String pageLinkName = demoPageLinks.get(i).getText();
            System.out.println(pageLinkName);

            if (!(pageLinkName.equals("Nested Frames"))) {

                final WebElement link = wait.until(ExpectedConditions.elementToBeClickable(demoPageLinks.get(i)));
                link.click();

                final WebElement pageHeader = wait.until(ExpectedConditions.presenceOfElementLocated(By.tagName("h1")));
                final String pageHeaderText = pageHeader.getText();

                System.out.println("Visited: " + pageHeaderText);

                this.driver.navigate().back();
                demoPageLinks = this.driver.findElements(By.cssSelector(".container__selenium ul li a"));
            }
        }
    }
The link with the name Nested Frames will not be clicked as this page has no page header. Hence, it will break the test since we are locating and searching for the page header with tagName(“h1”) in the test.
After the click is performed and the page header is printed, the website’s homepage with all the links will be called back using the driver.navigate.back() statement. The demoPageLinks variable is referenced again to ensure we don’t get the StaleElementReference exception.
The following is the screenshot of the test executed using IntelliJ IDE:
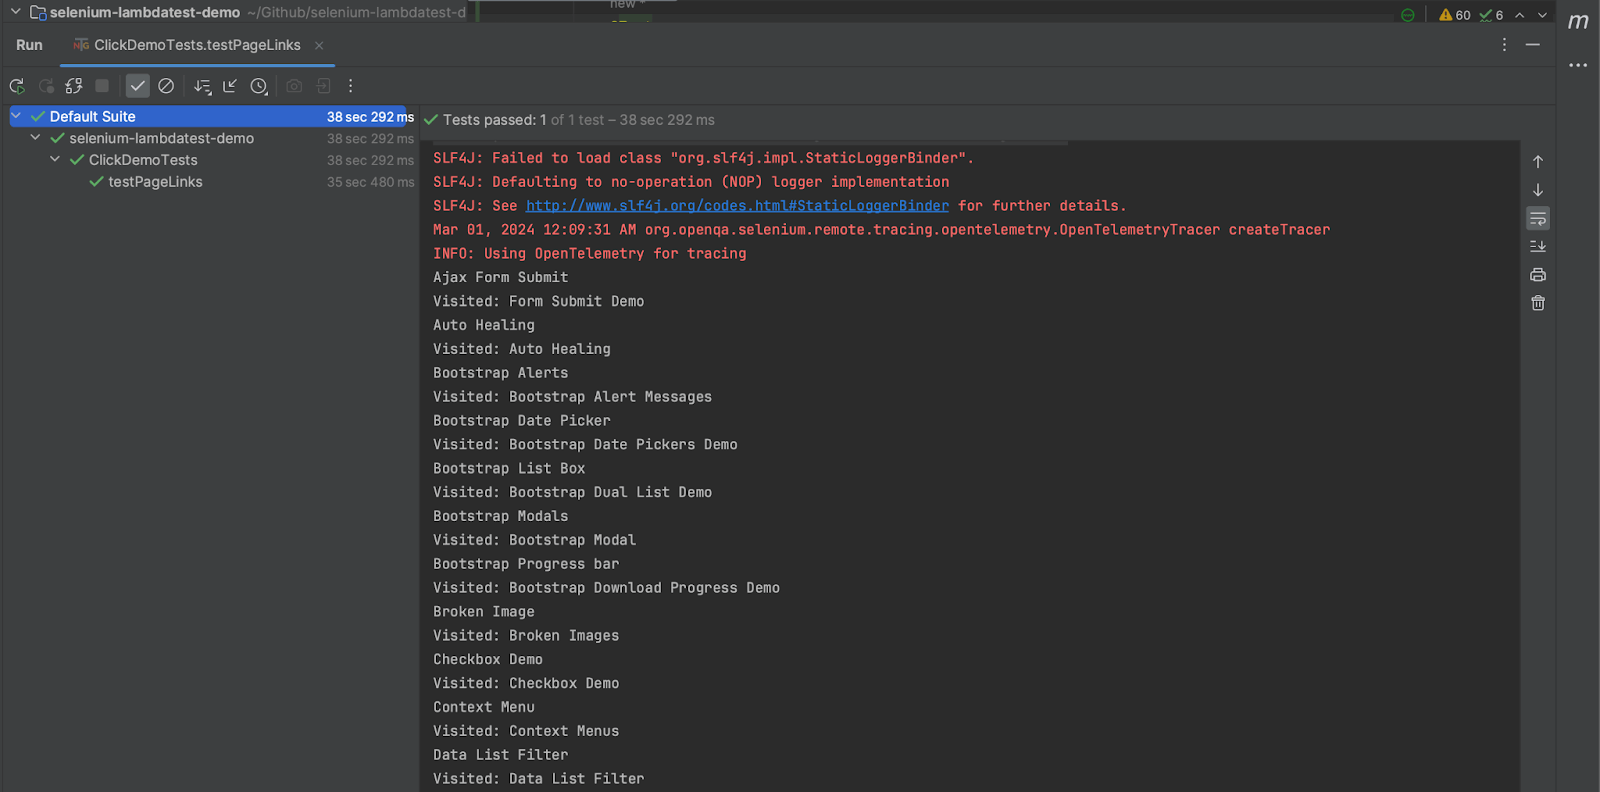
The script accumulated 43 hyperlinks and visited them sequentially. Adapt the loop to seed your own smoke-test suite or to validate that no link returns a 404.
Performing Click Using JavascriptExecutor
When a regular click() throws ElementClickInterceptedException because a sticky header, modal, or animation is sitting on top of the target, a JavaScript click is the standard fallback. Selenium's official docs note that the WebDriver click runs through the element's center and returns an interception error if anything obscures it. JavascriptExecutor bypasses this layer and dispatches a native DOM click on the element directly.
Test Scenario
- Navigate to the Simple Form Demo page.
- Locate the Get Checked Value button.
- Click it via JavascriptExecutor instead of WebElement.click().
@Test
    public void testJavascriptExecutorClick() {
        driver.get("https://www.testmuai.com/selenium-playground/simple-form-demo/");
        driver.findElement(By.id("user-message")).sendKeys("JS click test");
        WebElement getCheckedValueBtn = driver.findElement(By.cssSelector("#showInput > button"));

        JavascriptExecutor js = (JavascriptExecutor) driver;
        js.executeScript("arguments[0].click();", getCheckedValueBtn);

        String resultText = driver.findElement(By.id("message")).getText();
        assertEquals(resultText, "JS click test");
    }
When to use it: only as a fallback. A JS click skips Selenium's interactability checks (visibility, enabled state, viewport scroll), so it can succeed where a real user could not. That is fine for unblocking automation flake but hides genuine UI defects, so wrap it in a comment explaining why a normal click failed.
Click With Explicit Wait
If the test clicks a button that the page has not finished rendering, Selenium throws NoSuchElementException or ElementNotInteractableException. The fix is an explicit WebDriverWait with ExpectedConditions.elementToBeClickable, which polls the DOM until the element exists, is visible, and is enabled.
@Test
    public void testClickWithExplicitWait() {
        driver.get("https://www.testmuai.com/selenium-playground/simple-form-demo/");
        WebDriverWait wait = new WebDriverWait(driver, Duration.ofSeconds(15));

        WebElement messageField = wait.until(
            ExpectedConditions.presenceOfElementLocated(By.id("user-message"))
        );
        messageField.sendKeys("Wait demo");

        WebElement getCheckedValueBtn = wait.until(
            ExpectedConditions.elementToBeClickable(By.cssSelector("#showInput > button"))
        );
        getCheckedValueBtn.click();

        WebElement output = wait.until(
            ExpectedConditions.visibilityOfElementLocated(By.id("message"))
        );
        assertEquals(output.getText(), "Wait demo");
    }
Why explicit over implicit: implicit waits apply globally and can mask slow elements. Explicit waits are scoped to one expectation, fail loudly when the condition is not met within the timeout, and produce diagnosable error messages instead of silent flake.
Locators and Selenium Click Button Method
Selenium locators allow you to locate a WebElement on a web page. There are eight classic types plus the newer Selenium 4 relative locators. Here is how to use each one to perform a click.
ID
Wherever an ID locator in Selenium is specified in the HTML code for any WebElement, we can leverage that in our Selenium automation testing scripts to locate that particular element. The ID of a WebElement would always be unique, which makes it a very powerful way to locate WebElements automatically. To automate clicks using an ID locator we would need to specify the code as below.
driver.findElement(By.id("idLocator")).click();
Name
Similarly, we can find the name of a WebElement by inspecting the HTML and using it to locate the WebElement. To use the click() method with the Name locator in Selenium, we need to address it in a similar way.
driver.findElement(By.name("submit")).click();
ClassName
Inspect a WebElement, find its class name, and locate it using the Selenium automation scripts. The following statement can help click the WebElement using the ClassName locator in Selenium.
driver.findElement(By.className("mycheckbox")).click();
TagName
Whenever there is a WebElement with a unique HTML tag, we can use the TagName locator in Selenium. There can be many types of unique HTML tags, such as:
- Hyperlink:
<a> - Image:
<img> - Header:
<h1>
So, for example, if we have a unique hyperlink TagName using the anchor tag, we can incorporate Selenium click button interaction using the code below.
driver.findElement(By.tagName("a")).click();
LinkText
If there is a hyperlink with a unique HTML tag then we can make use of the LinkText locator. Here, we specify the text over which a hyperlink is triggered on a web page through a click.
driver.findElement(By.linkText("Selenium Playground")).click();
Partial LinkText
The text for a hyperlink can even partially be specified and located using the Partial LinkText locator. For example, if we wish to locate a WebElement with a hyperlink that says Amazon then we can do so using the below command.
driver.findElement(By.partialLinkText("zon")).click();
You can find more information here on how to use LinkText and Partial LinkText in Selenium.
CSS Selector
A more cross-browser compatible locator than XPath is a CSS Selector, as popular browsers such as Google Chrome and Mozilla Firefox are designed to optimize the execution time for a CSS Selector.
driver.findElement(By.cssSelector("#app > section > form > div > div > input:nth-child(3)")).click();
XPath
XPath is a locator used to locate the WebElement based on the tag, attribute, text, etc. We can use XPath for HTML and XML docs.
driver.findElement(By.xpath("//*[@id="app"]/section/form/div/div/input[1]")).click();

Note: Automate your button clicks with Selenium across 10,000+ real devices on TestMu AI cloud. Try TestMu AI free
Common Selenium Click Errors and How to Fix Them
Most "the click did not work" tickets in a Selenium suite trace back to a small set of exceptions. Here is each one, why it shows up, and the fix that actually works in production code.
1. ElementClickInterceptedException
As per Selenium's documentation, the WebDriver click runs through the element's center; if anything obscures that point, the driver returns this error. Fix in this order: (1) scroll the element into view with scrollIntoView(); (2) dismiss the overlay (cookie banner, sticky header, modal); (3) fall back to the JavascriptExecutor click shown above. See handling ElementClickInterceptedException in Selenium Java for a full code walkthrough.
((JavascriptExecutor) driver).executeScript("arguments[0].scrollIntoView(true);", element);
try {
    element.click();
} catch (ElementClickInterceptedException e) {
    ((JavascriptExecutor) driver).executeScript("arguments[0].click();", element);
}
2. ElementNotInteractableException
The element is in the DOM but not yet keyboard or pointer interactable, often because a CSS animation has not finished or the element is hidden behind display:none. Wrap the click in WebDriverWait + ExpectedConditions.elementToBeClickable instead of using Thread.sleep(). See the "Element is not clickable at point" exception guide for the diagnostic flow.
3. StaleElementReferenceException
A re-render replaced the DOM node after you stored the WebElement reference, so the next click() targets a node that no longer exists. Re-locate the element inside a retry loop or use refreshed() from ExpectedConditions. The stale element guide documents the retry pattern.
4. NoSuchElementException at click time
The locator did not match anything when findElement ran. Verify the locator in the browser's DevTools console (document.querySelector(...) or $x("...")), then add an explicit wait so the test does not race ahead of the render. The catalog at 49 common Selenium exceptions covers the rest.
Run the same scenarios across browsers and OS combinations on TestMu AI's real device cloud to confirm a fix is not browser-specific. The getting started with Selenium on TestMu guide walks through the grid setup.

Conclusion
Start with the right tool for the click you need: plain click() for buttons, links, checkboxes, and radio buttons; the Actions class for right-click, double-click, hover, drag-and-drop, and offset clicks; and JavascriptExecutor as the fallback when an overlay intercepts the click. Wrap every click in an explicit WebDriverWait + elementToBeClickable and the most common flake disappears.
Next step: take any one scenario from this article, paste it into your existing TestNG class, point your Selenium automation grid URL at hub.lambdatest.com/wd/hub with the LT:Options block from the setup section, and run it on a real Chrome on Windows 10. The getting started with TestMu automation doc has the copy-pasteable capabilities and the build URL pattern, so the result of your first run is a shareable build dashboard, not a console log.
Note: This article was researched and drafted with AI assistance, then reviewed, fact-checked, and published by Faisal Khatri, Community Contributor at TestMu AI, whose listed expertise includes Selenium, Automation Testing, and TestNG. Every code sample, locator, and external reference was verified against Selenium's official documentation and re-run on the TestMu AI cloud grid before publishing. Read our editorial process and AI use policy for details.
Author

Faisal Khatri
Blogs: 40


Mohammad Faisal Khatri is a Software Testing Professional with 17+ years of experience in manual exploratory and automation testing. He currently works as a Senior Testing Specialist at Kafaat Business Solutions and has previously worked with Thoughtworks, HCL Technologies, and CrossAsyst Infotech. He is skilled in tools like Selenium WebDriver, Rest Assured, SuperTest, Playwright, WebDriverIO, Appium, Postman, Docker, Jenkins, GitHub Actions, TestNG, and MySQL. Faisal has led QA teams of 5+ members, managing delivery across onshore and offshore models. He holds a B.Com degree and is ISTQB Foundation Level certified. A passionate content creator, he has authored 100+ blogs on Medium, 40+ on TestMu AI, and built a community of 25K+ followers on LinkedIn. His GitHub repository “Awesome Learning” has earned 1K+ stars.
Reviewer

Navin Chandra
Reviewer
Navin Chandra is a Member of Technical Staff at TestMu AI (formerly LambdaTest), building the open-source automation that powers its Selenium and Appium cloud grid. A committer to both Selenium and Appium, he implemented WebDriver BiDi support in Selenium for real-time browser events and bidirectional control and is developing Apple's iOS RemoteXPC protocol in Appium to enable low-level wireless communication with iOS system services. He contributes to Selenium across multiple language bindings as a member of the Selenium GitHub organization. He has served as a Google Summer of Code mentee and mentor at openSUSE and an LFX mentee at CNCF's KubeArmor, and is a SUSE Certified Deployment Specialist. Navin holds a B.Tech in Computer Science.


Selenium Click Button FAQs
Did you find this page helpful?
More Related Blogs
TestMu AI forEnterprise
Get access to solutions built on Enterprise
grade security, privacy, & compliance
- Advanced access controls
- Advanced data retention rules
- Advanced Local Testing
- Premium Support options
- Early access to beta features
- Private Slack Channel
- Unlimited Manual Accessibility DevTools Tests