

Power Your Software Testing with AI Agents and Cloud
The Native AI-Agentic Cloud Platform to Supercharge Quality Engineering. Test Intelligently and Ship Faster.


- TestMu AI (Formerly LambdaTest)
- /
- Blog
- /
- How To Use WebDriverWait In Selenium C#
How To Use WebDriverWait In Selenium C#
Learn how to effectively use WebDriverWait Selenium test automation with this tutorial. Improve your C# test automation skills now with WebDriverWait Selenium!
Last Updated on:
Selenium C# scripts avoid two brittle alternatives, a hardcoded Thread.Sleep and a page-wide implicit wait, by using WebDriverWait to pause a WebDriver script only until a specific condition such as ElementIsVisible or ElementToBeSelected comes true, the same approach the demo uses to wait out a jQuery download progress bar before clicking the Close button it reveals.
In this Selenium C# tutorial, I will show you how you can use the WebDriverWait in Selenium C# to increase the reliability of your test. If you are preparing for an interview you can learn more through Selenium interview questions.
What are Selenium Waits?
Before we dig deeper, let’s understand the waits in Selenium and why we use them. Selenium WebDriver doesn’t keep track of the DOM’s live, active state. Its default page load method waits for the document.readyState to become “complete”. This can happen before all the elements on the page are loaded and can cause the tests to throw NoSuchElementException. You can refer to this blog on the most common Selenium exceptions to learn more about it.
Consider a test where you try to click on a button that has not yet loaded or is not yet enabled (though visible) on the page. If Selenium WebDriver attempts to click on a button that is not available in the DOM, it will throw a NoSuchElementException. You might also witness the Element Is Not Clickable at Point exception if the element is visible in the DOM but not clickable at a particular point.
This will cause all further steps to fail, although the application works as expected when clicking the button at the correct time. To prevent this, we use waits. With waits, we can tell our tests to wait a certain amount or for specific conditions before moving on to the next steps.

Austin Siewert
Co-Founder, Steadfast Systems
Discovered @TestMu AI yesterday. Best browser testing tool I've found for my use case. Great pricing model for the limited testing I do 👏
2M+ Devs and QAs rely on TestMu AI
Deliver immersive digital experiences with Next-Generation Mobile Apps and Cross Browser Testing Cloud

Types of Waits in Selenium C#
There are several ways to wait for a web element to appear on a web page. I will go through each one and then expand more on the explicit waits, which are the focus of this blog.
Thread.Sleep()
System.Threading.Thread.Sleep(milliseconds) is not a Selenium WebDriver method but a built-in one in .Net. What it does is it suspends the current thread for the number of milliseconds passed as a parameter.
However, this is not recommended when working with automated web UI testing, because it is very rigid – the specified time has to pass before moving to the next step, regardless of whether the element you are waiting for was loaded faster.
For example, if your web element takes 3 seconds to load, and the Sleep parameter is set to 5 seconds, the test will wait 5 seconds before moving to the next step:
Thread.Sleep(5000);
driver.FindElement(By.Id("slowButton")).Click();
It might not sound like a big deal, but if you have hundreds of tests and many of them use Thread.Sleep(), which can add a lot of unnecessary wait time to the test execution. If the test takes around 5 seconds, adding up the Sleep time of another 5 seconds, that means doubling the time it takes to run the test!
Also, if the time it takes for the button to load exceeds those 5 seconds, you will still get a NoSuchElementException.
Implicit Wait
Then, we have the Selenium implicit wait:
driver.Manage().Timeouts().ImplicitWait = TimeSpan.FromSeconds(20);
The implicit wait in Selenium is dynamic – it waits until an element is visible on the page or until the given timespan has elapsed. If the element has not been found before the given time duration, an ElementNotVisibleException or NoSuchElementException will be thrown.
The Selenium implicit wait applies to all the web elements in the test script and is a much-preferred method to Thread.Sleep().
Explicit Wait
However, if you want even more flexibility, you should go for the explicit wait. The WebDriverWait in Selenium C# is part of the OpenQA.Selenium.Support.UI package.
WebDriverWait in Selenium C# allows Selenium not only to wait for an element to be visible on the web page but also until specific conditions are met.
WebDriverWait wait = new WebDriverWait(driver, TimeSpan.FromSeconds(20));
wait.PollingInterval = TimeSpan.FromMilliseconds(200);          wait.Until(ExpectedConditions.ElementIsVisible(By.Id("my-element']"))).Click();
This is how WebDriverWait in Selenium C# works:
- The condition is checked. If the condition is true, the next lines of code are executed.
- If the condition is false, a thread sleep is called at a polling interval. The default value of this polling interval is 250 ms, but a different value can be specified:
wait.PollingInterval = TimeSpan.FromMilliseconds(200);
Expected Conditions with Explicit Wait
Here are some examples of Expected Conditions in Selenium I have used the most in my tests (your tests might have different needs, but these are just to illustrate how explicit waits can be useful):
- ElementExists: waits for the element to exist in the DOM of the page, even if it’s not visible.
- ElementIsVisible: waits for the element to be visible on the page. There are cases when the element can exist in the DOM but is not yet displayed on the page, so we cannot interact with it.
- ElementToBeClickable: wait for an element to become clickable – can be useful when a button is quickly loaded on the page but cannot be clicked right away because it is disabled or cannot be clicked until a different action is performed.
- AlertIsPresent: waits for the presence of an alert – alerts are usually triggered by another action, and it can take some time to display them. If you interact with an element on the alert (like dismiss/confirm the alert or try to confirm its text) too soon, you can get a NoAlertPresentException.
- InvisibilityOfElementLocated: waits for an element to not be visible on the page. For instance, you want to check that after inserting invalid data in an input field, the warning message is no longer displayed when the correct data is entered.
- TextToBePresentInElement: waits for a given text to be displayed inside a certain web element.
- ElementToBeSelected: waits for an element to be selected – can be used for checkboxes that are automatically selected through other actions.

Note: Run your C# automation scripts across 3000+ environments. Try TestMu AI Now!
Is Fluent Wait Different From WebDriverWait in Selenium C#?
Selenium's C# bindings do not ship a separate FluentWait class the way Selenium's Java bindings do. The WebDriverWait class this tutorial uses extends the DefaultWait class and already exposes the PollingInterval and IgnoreExceptionTypes members a fluent wait needs, per Selenium's WebDriverWait class documentation.
The DefaultWait class lets a test set a custom polling interval and a list of exceptions to ignore while it keeps checking, for example NoSuchElementException, until the timeout expires. WebDriverWait already applies this pattern, with a default polling interval of 250 milliseconds unless a different value is set.
Instantiate DefaultWait directly only when a wait needs to ignore a specific exception type during polling. For every other case, including the ElementToBeClickable check used later in this tutorial, WebDriverWait covers the same behavior without the extra setup. Read Explicit and Fluent Wait in Selenium C# for the full DefaultWait syntax and a working demonstration.
Demonstration: How to use WebDriverWait in Selenium C#
In this section, we will go over an example of using WebDriverWait in Selenium C# to handle the dynamic nature of web pages. The WebDriverWait class is a useful tool for waiting for specific conditions to be met before executing the next step in your automation script. This helps to make your scripts more flexible and robust, allowing for a better automation solution.
Test Scenario
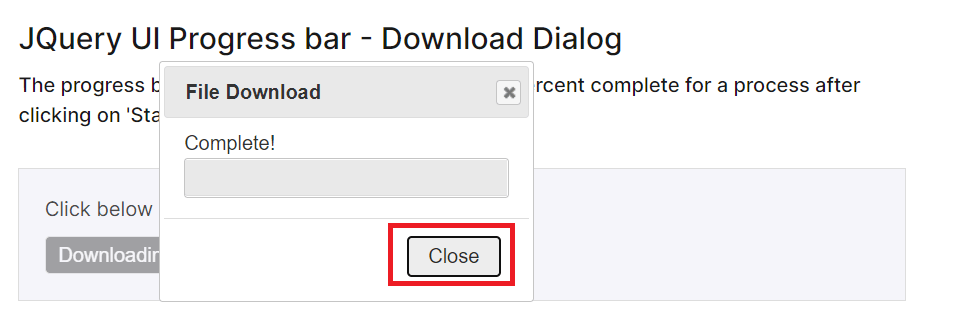
- Navigate to the JQuery Download Progress Bar page.
- Click the Start Download button.
- Click the Close button when it’s available:

Implementation
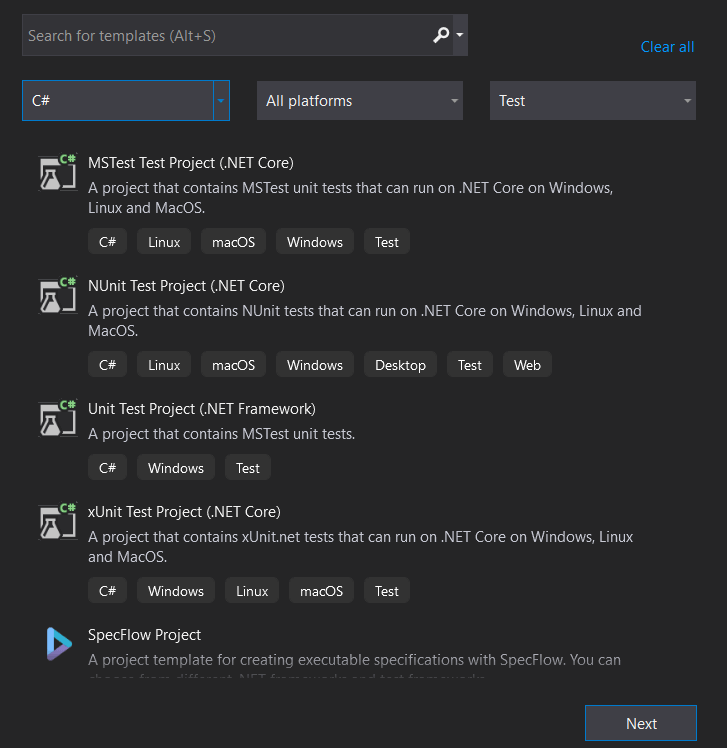
If this is your first test, you will need to create a new project. In this WebDriverWait in Selenium C# tutorial, I’ll be using the MSTest framework, which is Microsoft’s tool for running tests in .NET applications. If you prefer to work with NUnit, you can check out the Selenium NUnit tutorial.
To learn more about MSTest, NUnit, and other popular unit testing frameworks like xUnit, you can go through this blog on NUnit vs xUnit vs MSTest.
Finally, we will be executing the test on the TestMu AI cloud grid. Cloud testing platforms like TestMu AI allow you to perform cross browser testing at scale over an online device farm of 3000+ browsers and browser versions.

Subscribe to TestMu AI YouTube Channel and stay updated with detailed tutorials around Selenium testing, Cypress testing, and more.

- To create a new test project in Visual Studio, select the MSTest Test Project type:
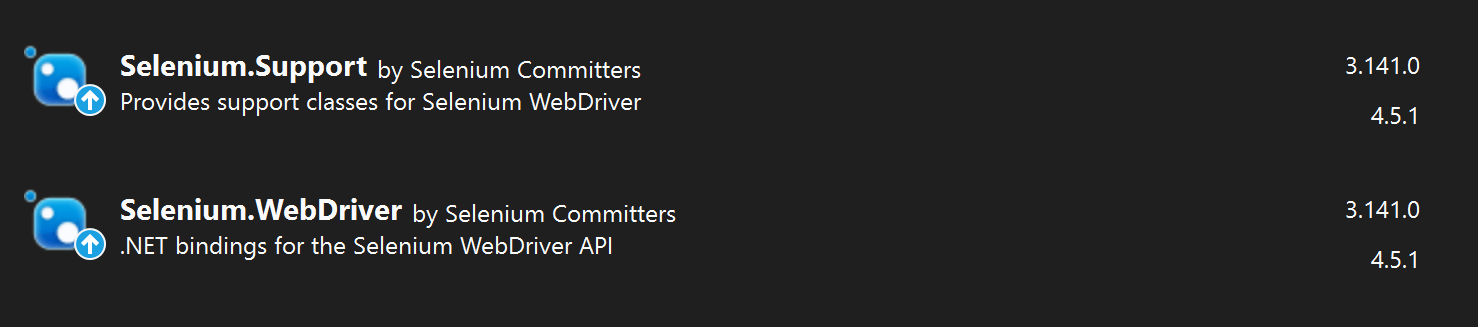
- Install the following NuGet packages from the Package Manager:
- Selenium.WebDriver: For this WebDriverWait in Selenium C# tutorial, I am using version 3.141.0.
- Selenium.Support: It should be the same version as the Selenium.WebDriver package; this is the package that contains the Selenium WebDriverWait.
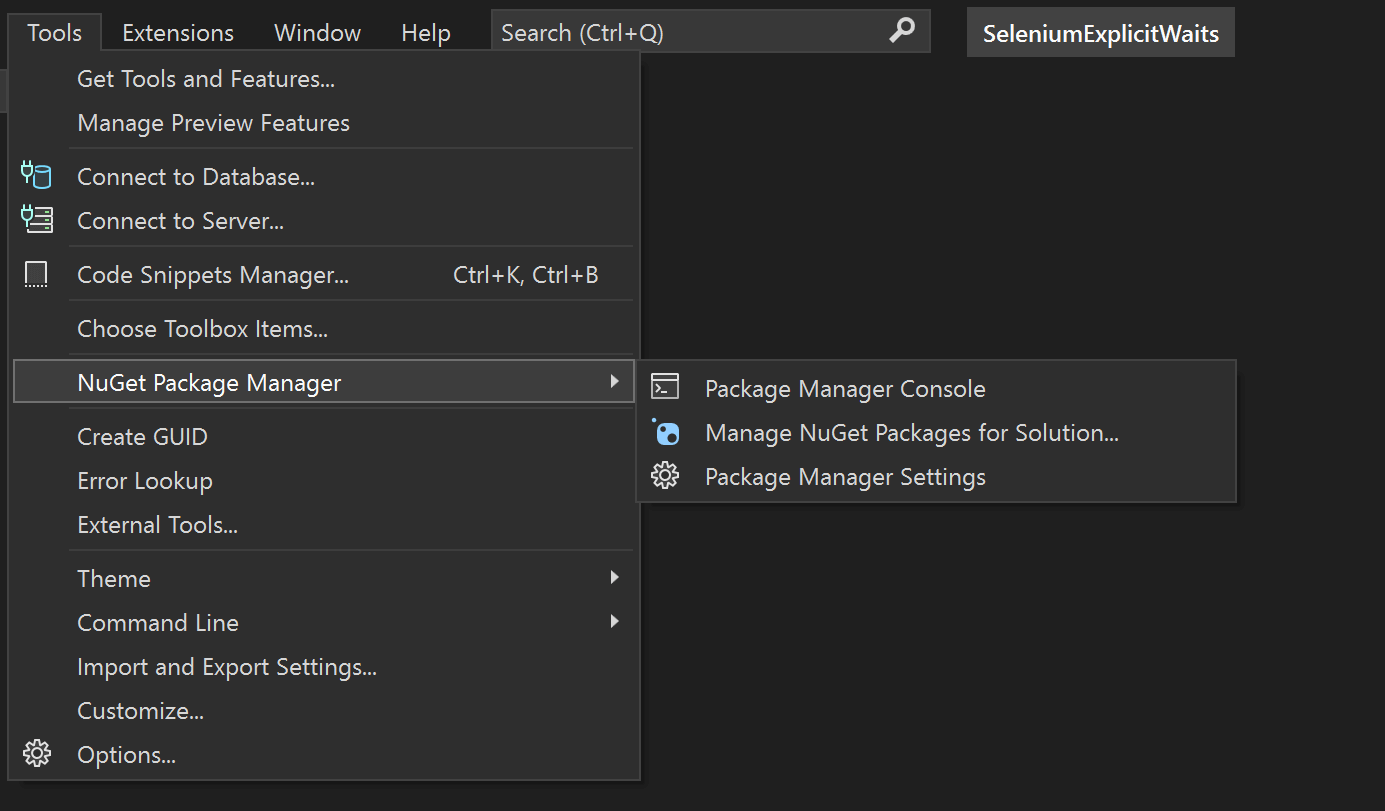
- Install the NuGet packages from the UI, from the Tools menu → NuGet Package Manager → Manage NuGet Packages for Solution… and search for them in the list:
- Before running the tests, please set the environment variables LT_USERNAME & LT_ACCESS_KEY from the terminal. The account details are available on your TestMu AI Profile page.
- Create a new class containing the following code:

For macOS:
export LT_USERNAME=LT_USERNAME
export LT_ACCESS_KEY=LT_ACCESS_KEY
For Linux:
export LT_USERNAME=LT_USERNAME
export LT_ACCESS_KEY=LT_ACCESS_KEY
For Windows:
set LT_USERNAME=LT_USERNAME
set LT_ACCESS_KEY=LT_ACCESS_KEY
using Microsoft.VisualStudio.TestTools.UnitTesting;
using OpenQA.Selenium;
using OpenQA.Selenium.Remote;
using System;
using OpenQA.Selenium.Support.UI;


namespace SeleniumExplicitWaits
{
    [TestClass]
    public class SeleniumWebDriverWaits
    {
        private static IWebDriver driver;
        public static string gridURL = "@hub.lambdatest.com/wd/hub";
        public static string LT_USERNAME = Environment.GetEnvironmentVariable("LT_USERNAME");
        public static string LT_ACCESS_KEY = Environment.GetEnvironmentVariable("LT_ACCESS_KEY");


        [TestInitialize]
        public void SetUp()
        {
            var desiredCapabilities = new DesiredCapabilities();
            desiredCapabilities.SetCapability("browserName", "Chrome");
            desiredCapabilities.SetCapability("platform", "Windows 11");
            desiredCapabilities.SetCapability("version", "101.0");
            desiredCapabilities.SetCapability("screenResolution", "1280x800");
            desiredCapabilities.SetCapability("user", LT_USERNAME);
            desiredCapabilities.SetCapability("accessKey", LT_ACCESS_KEY);
            desiredCapabilities.SetCapability("build", "Selenium C-Sharp");
            desiredCapabilities.SetCapability("name", "Selenium Test");
            driver = new RemoteWebDriver(new Uri($"https://{LT_USERNAME}:{LT_ACCESS_KEY}{gridURL}"), desiredCapabilities, TimeSpan.FromSeconds(600));


        }


        [TestMethod]
        public void DownloadFile()
        {
            driver.Navigate().GoToUrl("https://www.testmuai.com/selenium-playground/jquery-download-progress-bar-demo/");
            driver.FindElement(By.Id("downloadButton")).Click();
            WebDriverWait wait = new WebDriverWait(driver, TimeSpan.FromSeconds(20));
            wait.PollingInterval = TimeSpan.FromMilliseconds(200);
            wait.Until(ExpectedConditions.ElementToBeClickable(By.XPath("//button[contains(text(),'Close') and @class='ui-button ui-corner-all ui-widget']"))).Click();


        }

        [TestCleanup]
        public void Cleanup()
        {
            driver.Quit();
        }
    }
}

Code Walkthrough
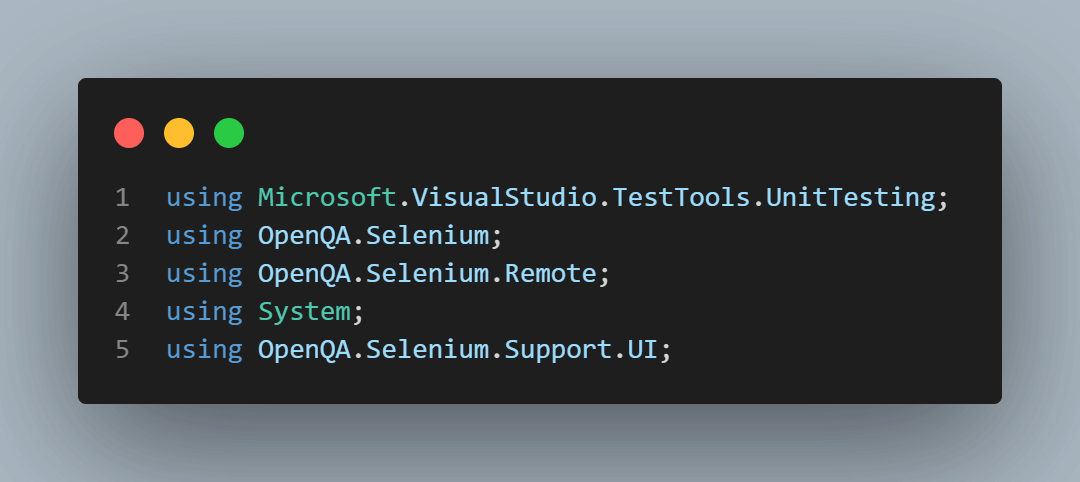
The using statements in any C# class contain the packages that will be used:
The [TestClass] attribute from MSTest marks the class as a test class:
![TestClass] attribute from MSTest](https://assets.testmuai.com/resources/uploads/2023/02/TestClass2520attribute2520from2520MSTest.png "TestClass] attribute from MSTest")
In the next part, I’m declaring all the variables that will be used in the methods:
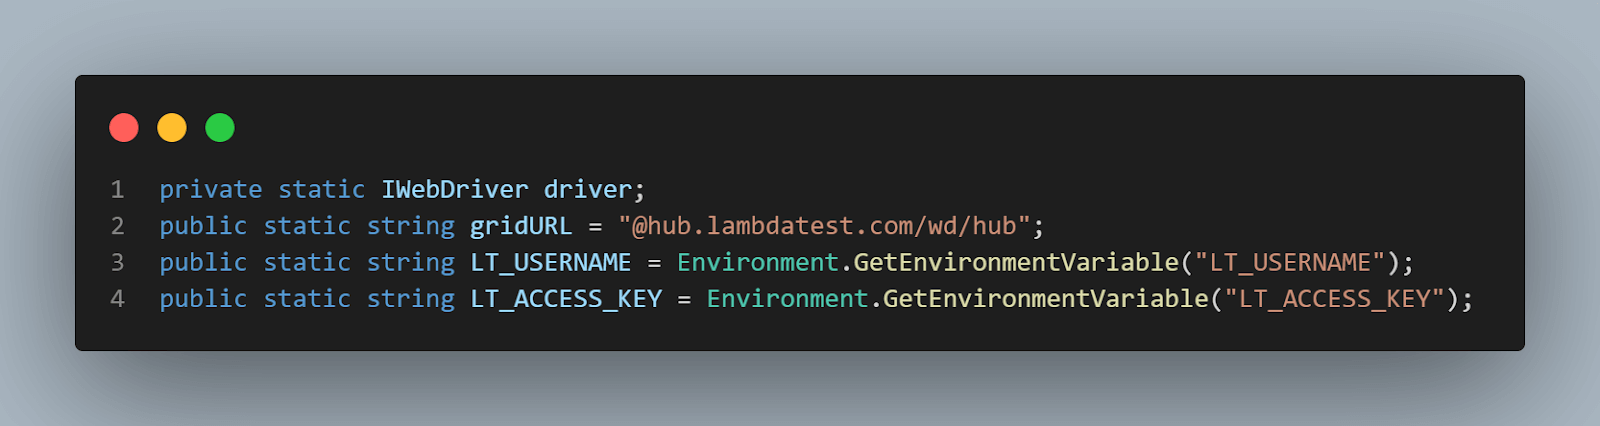
The driver is a new instance of the IWebDriver interface. Through it, we control the browser.
The next lines of code are related to my TestMu AI Account because I want my tests to run on cloud Selenium Grid. This way, I can specify configurations where my tests will run, which can be different from my local configuration.
This brings us to the next part:
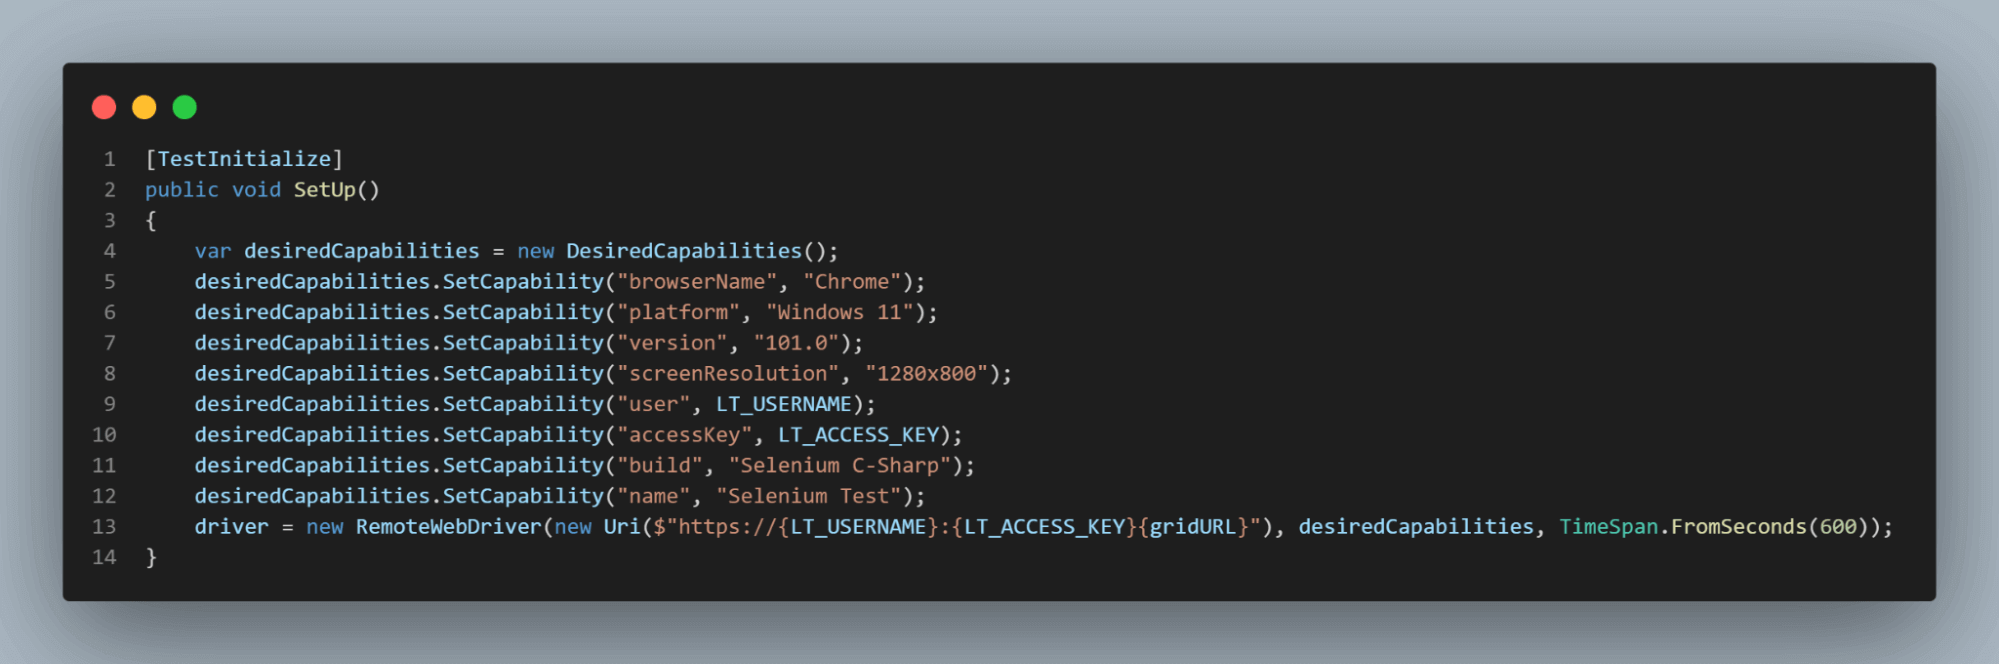
This method is triggered before each test case. It will create a new browser instance with specific capabilities.
The next method is the actual test:
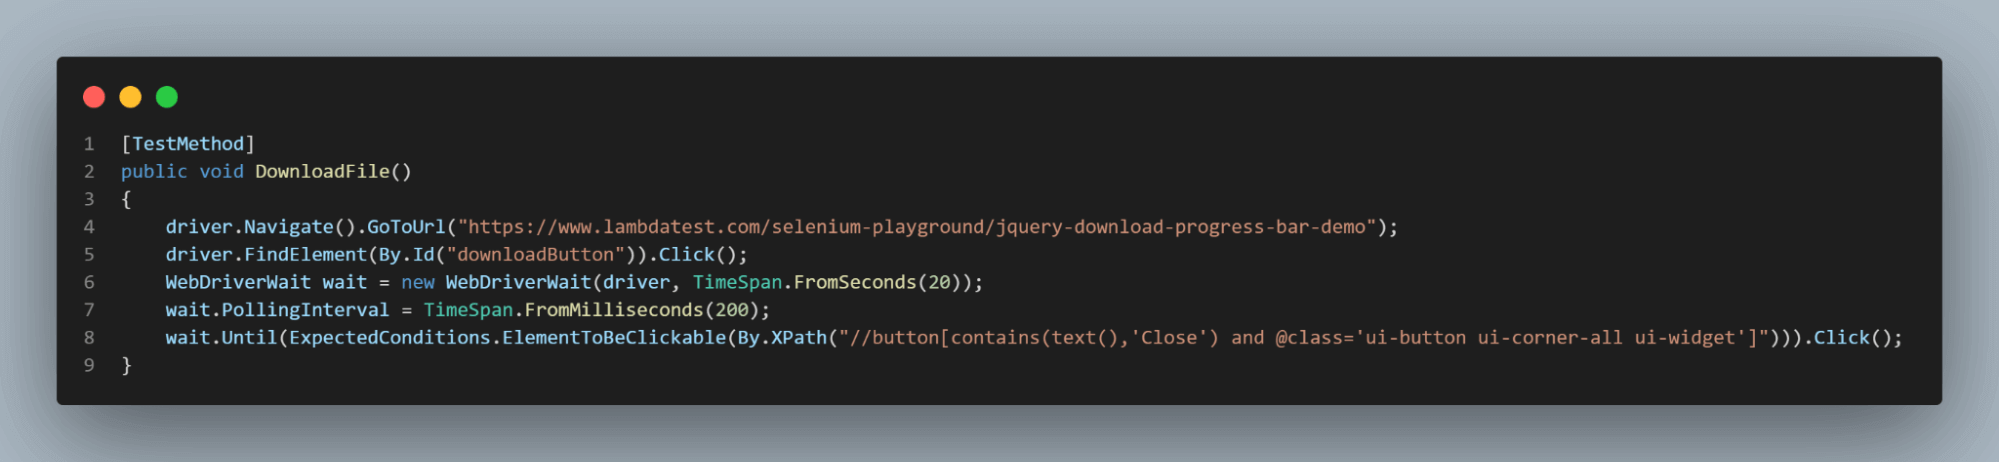
The [TestMethod] attribute informs that the method is a test method. The Navigate().GoToUrl() is the Selenium C# method to go to a specific URL.
Then, the FindElement() in Selenium is the method that allows us to identify web elements on the web page based on locators, such as
- ID
- Name
- Class Name
- XPath
- CSSSelector
- Link text or partial link text
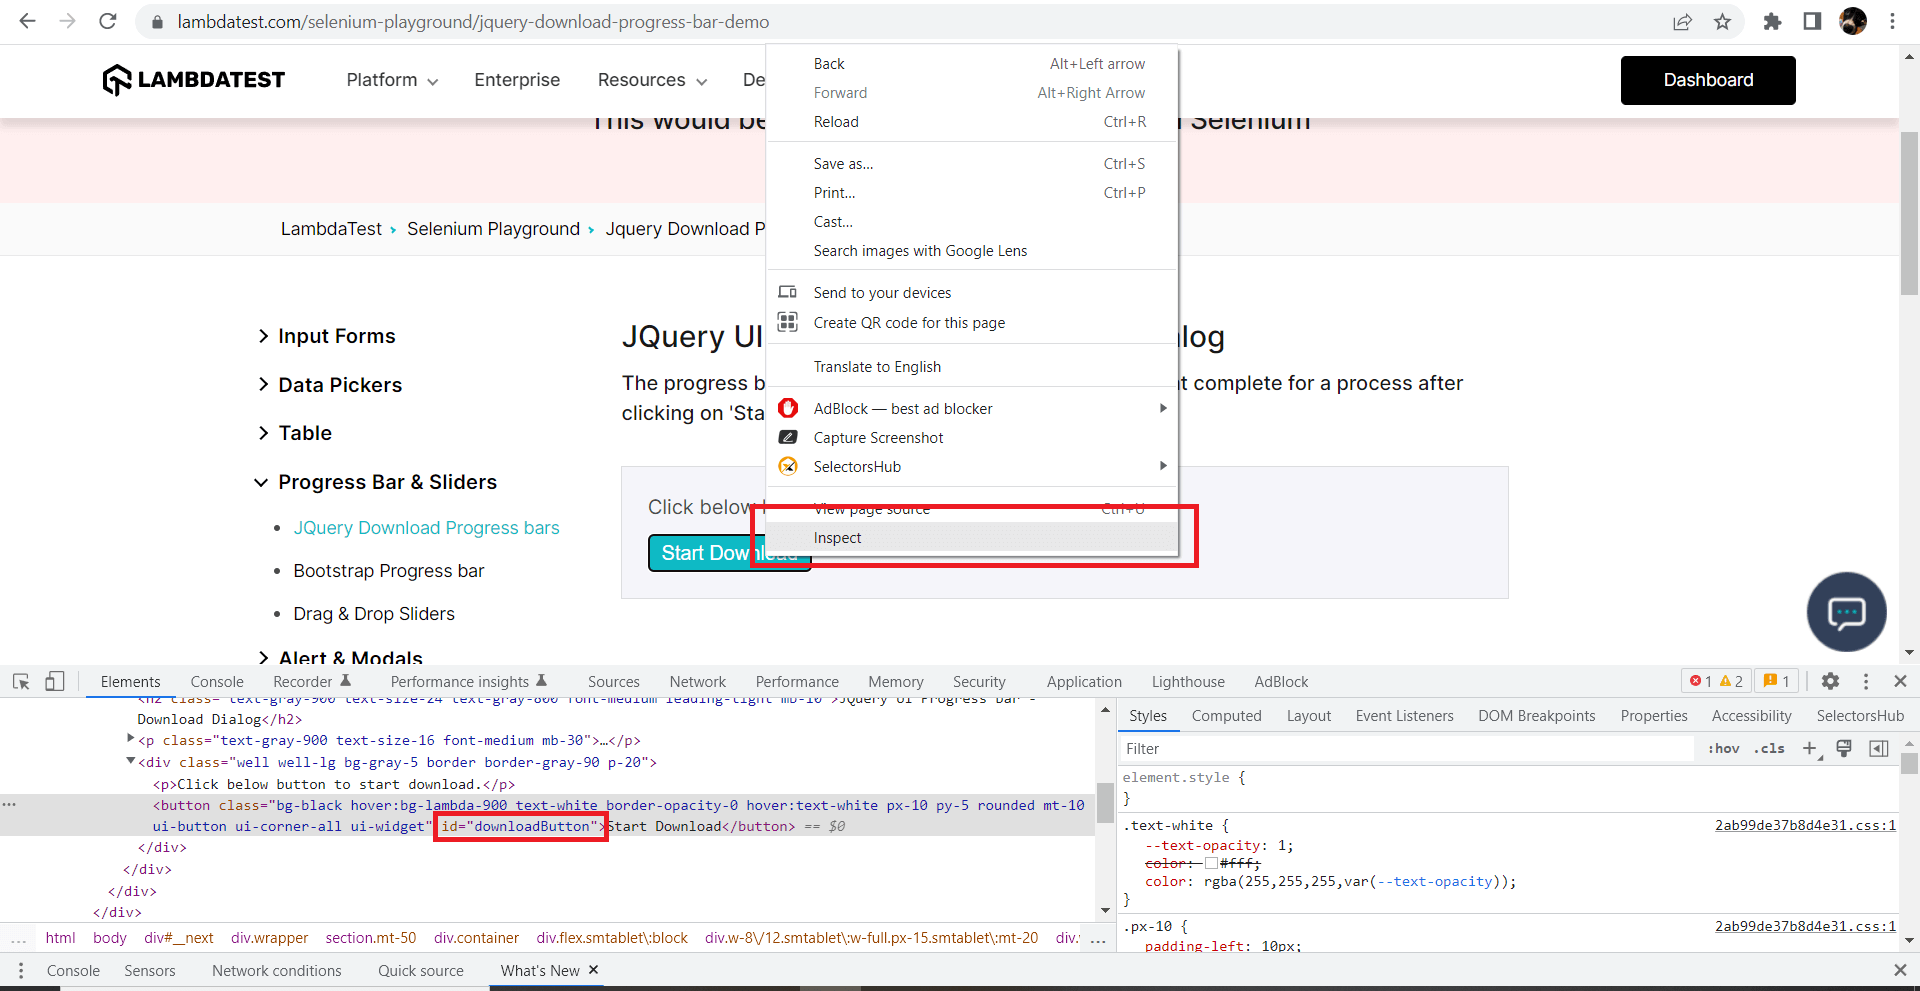
For the first element I’m interacting with, I’m using the ID locator in Selenium. It’s usually recommended because it should be unique. To retrieve this information from the browser, right-click the element and select Inspect. This will open up (if it’s not already open) the Developer Tools, where you can see the details of the element:
Next, I’m using the actual explicit wait:

I created a new variable of type WebDriverWait, giving it a time span of 20 seconds – this is the maximum amount of type I am instructing Selenium to wait for my condition to be met.
Next, I am using a polling interval of 200 milliseconds – this is completely optional, but I wanted to show you how it can be used. Selenium will retry to find the web element every 200 milliseconds.
Finally, I specified the condition I wanted to wait for, which was for the button to become clickable. The button doesn’t have an Id, so I am using an XPath with a combination of 2 attributes: text and class name. I can see this in Developer Tools as well:
<button type="button" class="ui-button ui-corner-all ui-widget">Close</button>
The last method is the cleanup, marked by the attribute [TestCleanup], which will run after every test. It simply closes the browser using the Selenium Quit() method.
[TestCleanup]
        public void Cleanup()
        {
            driver.Quit();
        }
Execution
The test will be visible in Visual Studio’s test explorer, and you can run it from there. If you choose to run it locally, you will see the browser open up and perform all the steps. If you are using cloud Selenium Grid, like me, you will see the test result when it finishes running:
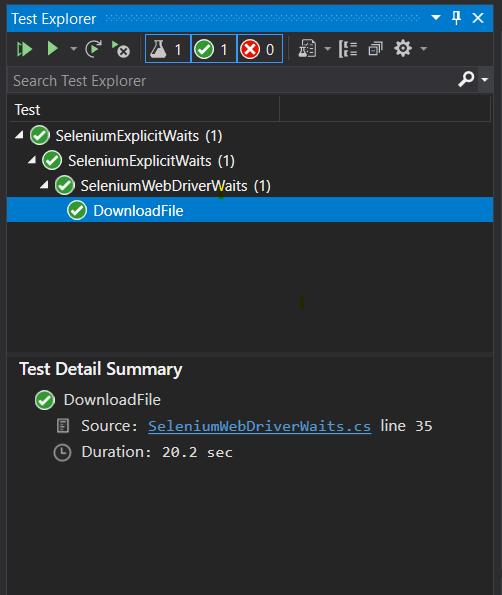
And you will see the results online:

You can also see all the retries performed before the element was found:
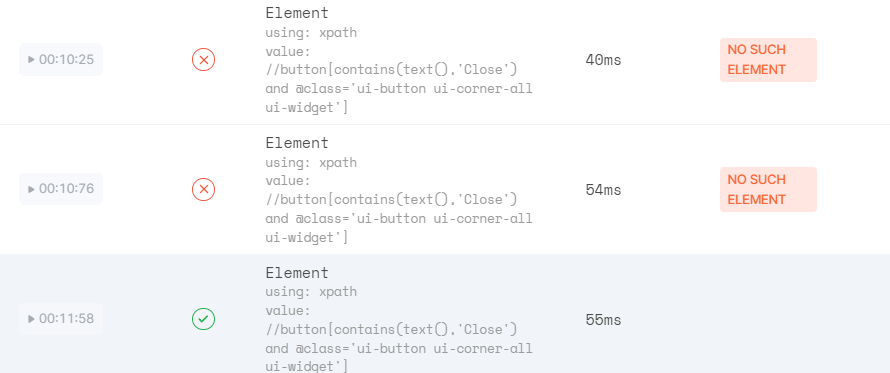
However, my test was successful because after waiting less than the given time, the element was found and clickable.
Demonstrate your expertise and knowledge in using Selenium for C# automation testing with this Selenium C# 101 certification. This will enhance your technical skills and establish your credibility as a tester.
Austin Siewert
Co-Founder, Steadfast Systems
Discovered @TestMu AI yesterday. Best browser testing tool I've found for my use case. Great pricing model for the limited testing I do 👏
2M+ Devs and QAs rely on TestMu AI
Deliver immersive digital experiences with Next-Generation Mobile Apps and Cross Browser Testing Cloud
Conclusion
Having the option to wait for web elements to be loaded or meet a certain condition can be very important in automated UI testing.
In this blog on WebDriverWait in Selenium C#, I covered how to create explicit waits using WebDriverWait in Selenium C# to create more stable tests and why they can be preferred to implicit waits. I also showed how you can run the tests on the cloud, so you don’t have to use your local settings and configuration, and how to see the results on the TestMu AI cloud Selenium Grid.
Author
Reviewer

Himanshu Sheth
Reviewer

Himanshu Sheth is the Director of Marketing (Technical Content) at TestMu AI, with over 8 years of hands-on experience in Selenium, Cypress, and other test automation frameworks. He has authored more than 130 technical blogs for TestMu AI, covering software testing, automation strategy, and CI/CD. At TestMu AI, he leads the technical content efforts across blogs, YouTube, and social media, while closely collaborating with contributors to enhance content quality and product feedback loops. He has done his graduation with a B.E. in Computer Engineering from Mumbai University. Before TestMu AI, Himanshu led engineering teams in embedded software domains at companies like Samsung Research, Motorola, and NXP Semiconductors. He is a core member of DZone and has been a speaker at several unconferences focused on technical writing and software quality.


WebDriverWait in Selenium C# FAQs
Did you find this page helpful?
More Related Blogs
TestMu AI forEnterprise
Get access to solutions built on Enterprise
grade security, privacy, & compliance
- Advanced access controls
- Advanced data retention rules
- Advanced Local Testing
- Premium Support options
- Early access to beta features
- Private Slack Channel
- Unlimited Manual Accessibility DevTools Tests