

Power Your Software Testing with AI Agents and Cloud
The Native AI-Agentic Cloud Platform to Supercharge Quality Engineering. Test Intelligently and Ship Faster.


- TestMu AI (Formerly LambdaTest)
- /
- Blog
- /
- How To Write Test Cases in Java
How To Write Test Cases in Java
Learn how to write test cases in Java Using Selenium WebDriver and TestNG.
Last Updated on:
A test case in Java is a TestNG method that locates a WebElement by ID or XPath, performs an action such as a click or sendKeys, and asserts the result with assertTrue or assertEquals. A base class handling ChromeDriver setup and teardown keeps each method focused on one scenario, and Selenium 4's relative locators, such as above() and below(), cut down brittle XPath. This guide covers locating WebElements, writing and running a test case locally and on a cloud grid, AI-assisted test authoring, and best practices for maintainable Java test cases.
Key Takeaways
- A Java test case is a TestNG method that locates a WebElement, performs an action such as a click or sendKeys, and asserts the result with a method like assertTrue or assertEquals.
- A BaseTest class with @BeforeMethod and @AfterMethod annotations creates and quits the WebDriver instance so every test case in Java starts from a clean browser session.
- Selenium 4's relative locators, such as above(), below(), toLeftOf(), and toRightOf(), cut down the need for brittle XPath expressions when locating WebElements.
- The Arrange-Act-Assert structure splits a Java test case into environment setup, the interaction steps, and the verification, keeping each test focused on one assertion.
- Running the same TestNG suite on a cloud grid instead of a local browser lets a Java test case cover multiple browser and OS combinations without added local infrastructure.
- AI coding assistants can scaffold a TestNG method's boilerplate from a plain-language scenario, and self-healing locator tools replace a broken selector at runtime instead of failing the test.
What Is a Test Case in Java?
Java is one of the most used programming languages for automation testing. Writing a test case in Java means building an entire automation project that follows and implements OOP concepts. This makes the project and test case more robust, and the whole code is categorized into many classes and methods, making it more maintainable and easy to use.
Automated test cases help to test the feature quickly in case of regression and help save a lot of manual effort. These test cases execute some flow on the webpage and then use asserts to verify if the output matches the desired output.
For example, For the Two Input Fields section on the TestMu AI Selenium Playground page, a few of the test cases would look like the below:
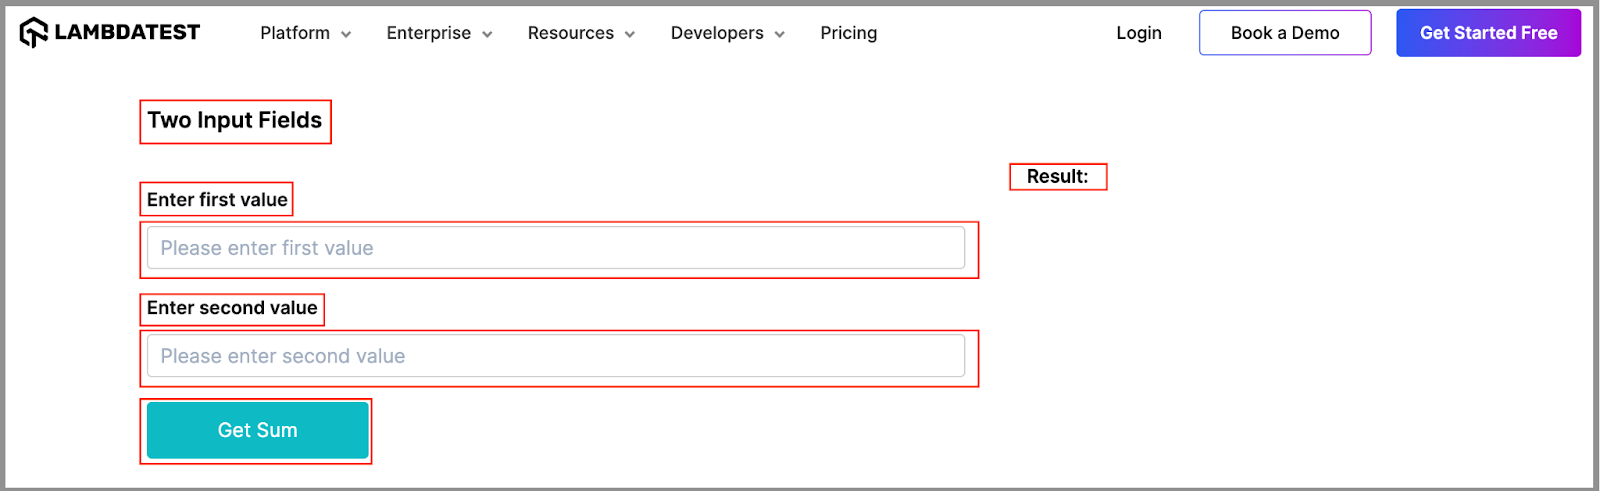
- Verify all the labels, text input boxes, and buttons are present on the page.
- Verify that the sum is displayed correctly under Result when entering both numbers.
- Verify that the error message is displayed under Result if one or both numbers are not entered.
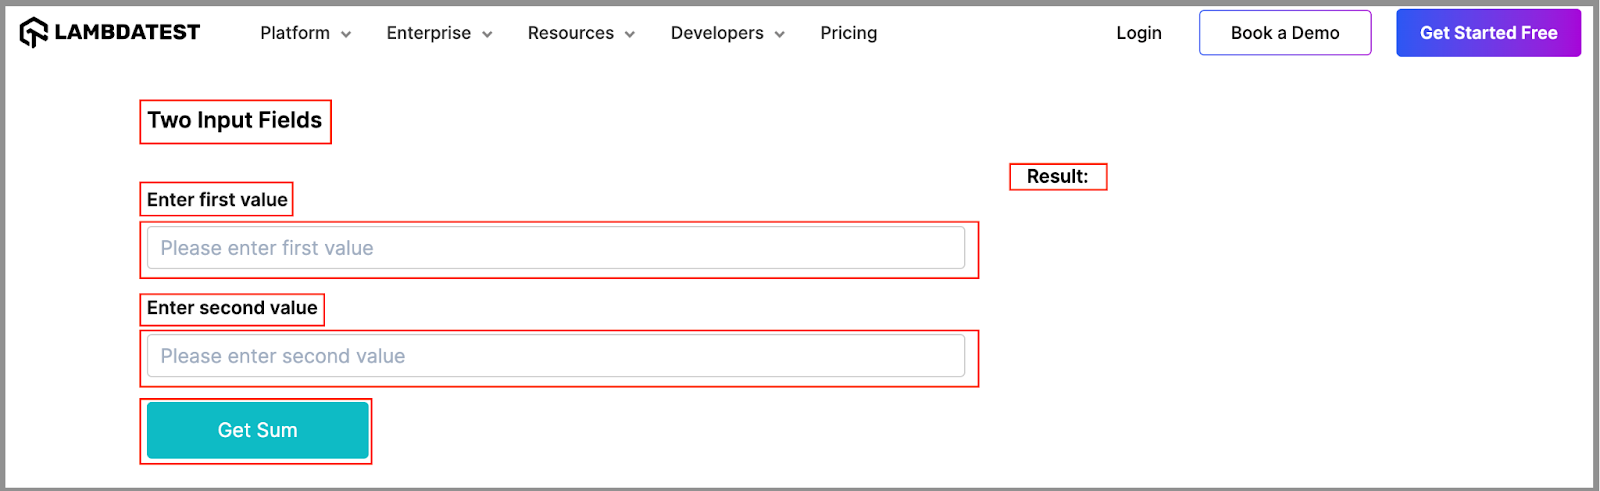
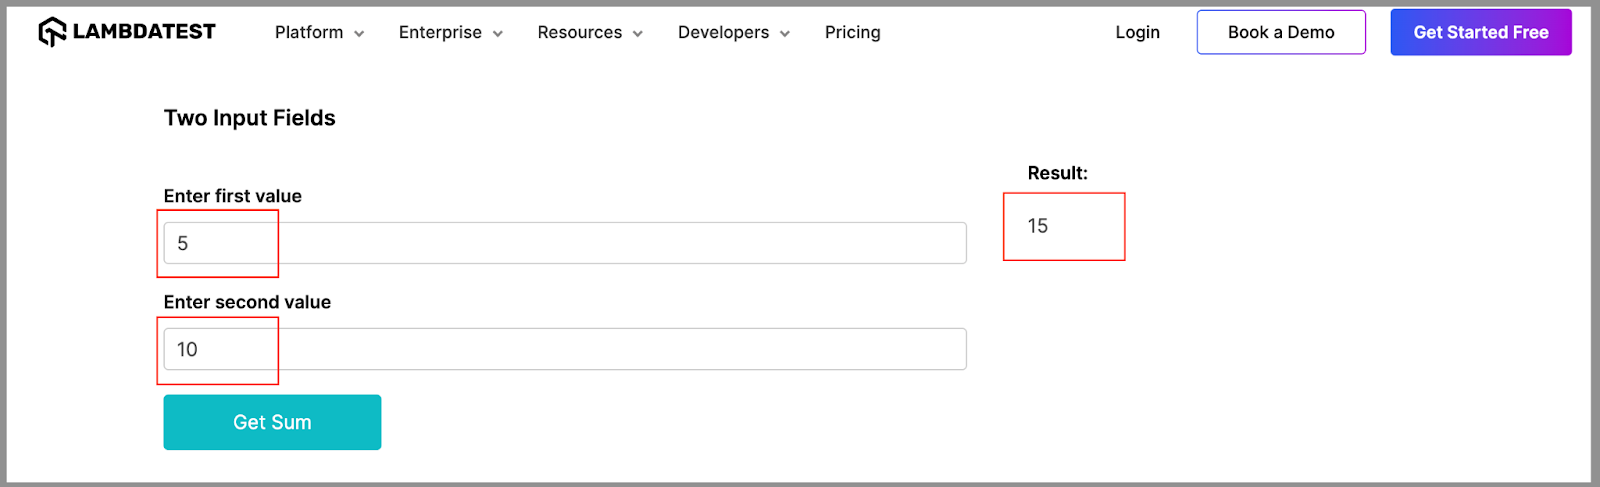
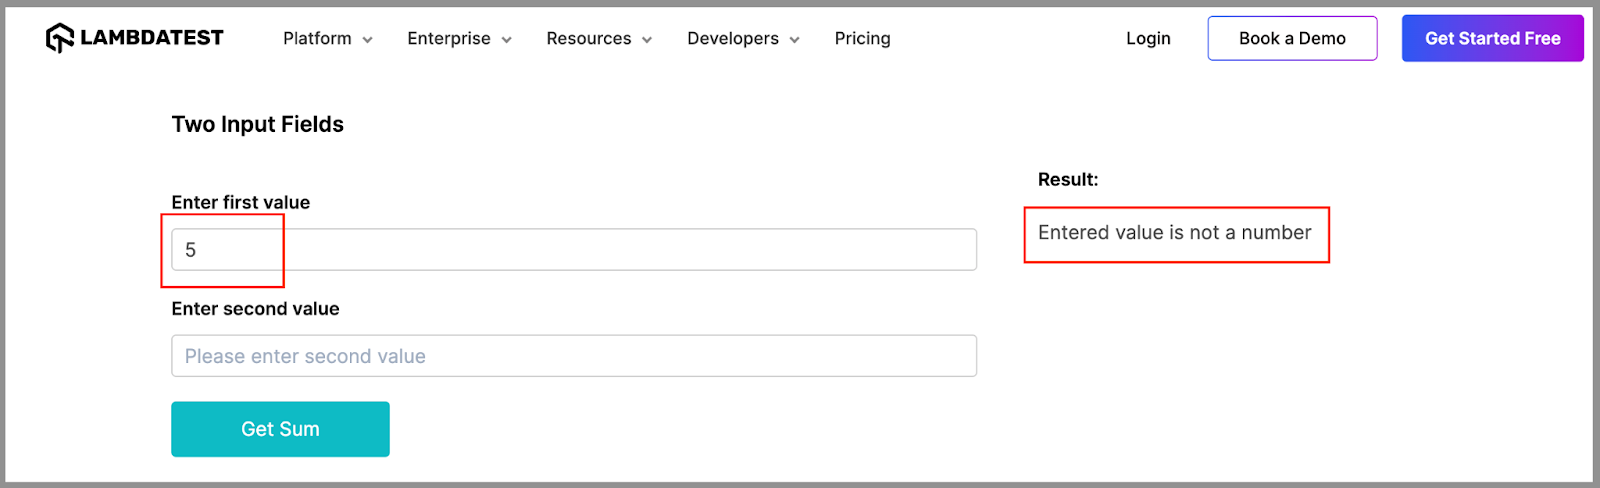
While writing test cases in Java, several things need to be considered, like the test flow, the test scope, naming, assertions, test data, grouping, locating WebElements, etc. When used accurately, all these make a good test case that is easy to understand and maintain in the future as more changes come.
However, the initial action to start with the test flow is to locate a WebElement for which you must write an effective test case in Java.

Note: Run your test cases across 3000+ browsers and OS combinations. Try TestMu AI Today!
Locating WebElements in Java
Another thing to learn about writing test cases in Java is locating the WebElements. This is required as the test case flow will interact with these WebElements to perform actions like entering data, clicking a button, retrieving data, etc., to get the results. There are multiple ways to find the WebElement locators in Selenium, such as ID, Name, CSS, XPath, linkText, etc.

Before demonstrating how to write test cases in Java, let’s learn how different WebElements used in the test flow can be located using their locator strategies. We will use XPath or ID locators to locate all the WebElements for this test case.
You can use one of the most common methods to find elements, i.e., findElement() in Selenium.
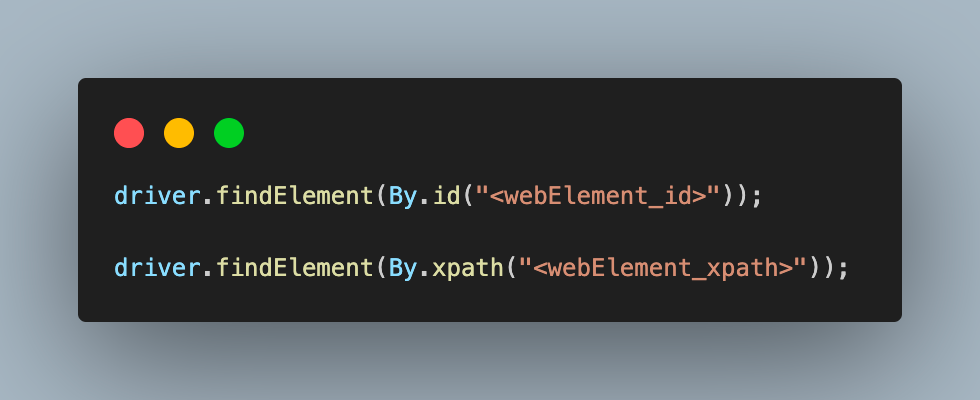
- To locate the Two Input Fields label from the TestMu AI Selenium Playground page using XPath, you can use the following XPath expression:
driver.findElement(By.xpath("//*[contains(text(),'Two')]"));
driver.findElement(By.xpath("//*[contains(text(),'first value')]"));
driver.findElement(By.xpath("//*[contains(text(),'Sum')]"));
driver.findElement(By.id("sum1"));
driver.findElement(By.id("sum2"));
driver.findElement(By.id("user-message"));
driver.findElement(By.id("addmessage"));
You can also refer to this Selenium locator guide to learn how to locate WebElements when writing test cases in Java.
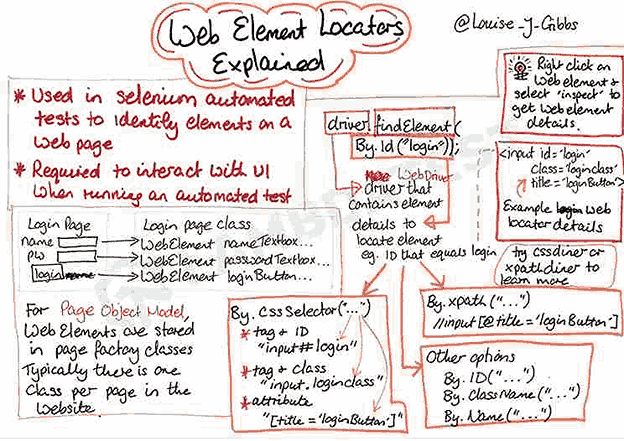
By Louise J Gibbs
How To Write a Test Case in Java?
Before writing an effective test case in Java, you must set up the project with all the required libraries and tools. We will use Eclipse IDE to demonstrate the setup for a Maven project. Additionally, we will add TestNG as the testing framework to handle test execution and implement setup and teardown methods.
In this demonstration, we will initially write 3 test cases to cover all the test cases in Java mentioned and implement all the best practices as applicable.
Test Scenario 1:
- Navigate to the Two Input Fields section on the Selenium Playgrounds (Simple Form Demo)
- Assert all the WebElement of this section for visibility
- Identify the locator for the Two Input Fields label.
- Identify the locator for the first and second value labels.
- Identify the locator for the first and second value input boxes.
- Identify the locator for the Get Sum button.
- Result label.
Test Scenario 2 :
- Navigate to the Two Input Fields section on the Selenium Playgrounds (Simple Form Demo) page.
- Enter valid values in both input boxes.
- Click on the Get Sum button.
- Assert the sum is correct and displayed under the Result label.
Test Scenario 3 :
- Navigate to the Two Input Fields section on the Selenium Playgrounds (Simple Form Demo) page.
- Enter the value in any one of the input boxes.
- Click on the Get Sum button.
- The assert error message is displayed under the Result label.
Let’s start installing the necessary libraries as we have the test flow in place and are ready to use the tools and libraries.
Project Setup:
As mentioned, we will use Eclipse IDE to write the test case in Java. However, you can use any IDE to write the test cases. You just need to create a new Maven project.
- Launch Eclipse IDE and open the New Project wizard by clicking File > New > Project.
- Under Wizards, expand Maven, select Maven Project, and click Next.
- Click on Create a simple project checkbox and click on Next.
- On this New Maven Project wizard, enter the Group Id and Artifact Id and click on Finish to create your project. Here, Group Id is the unique name that helps identify one project group from another, and Artifact Id is the unique name given to the project we will create.
Once the project is created, the project structure will include a pom.xml file in the root folder. Here, we will add the dependencies needed to write and execute automation test cases in Java. We will add its dependency since we will use TestNG as the testing framework. Additionally, we will add the Selenium dependency, as the test case we will write involves web automation.
You can fetch the latest TestNG and Selenium dependencies from the Maven Repository.
The updated pom.xml would look like the one below.
<project xmlns="http://maven.apache.org/POM/4.0.0"
 xmlns:xsi="http://www.w3.org/2001/XMLSchema-instance"
 xsi:schemaLocation="http://maven.apache.org/POM/4.0.0 https://maven.apache.org/xsd/maven-4.0.0.xsd">
 <modelVersion>4.0.0</modelVersion>
 <groupId>demo.lambdaTest</groupId>
 <artifactId>JavaTestCase</artifactId>
 <version>0.0.1-SNAPSHOT</version>
 <dependencies>
   <dependency>
     <groupId>org.testng</groupId>
     <artifactId>testng</artifactId>
     <version>7.10.1</version>
     <scope>test</scope>
   </dependency>
   <dependency>
     <groupId>org.seleniumhq.selenium</groupId>
     <artifactId>selenium-java</artifactId>
     <version>4.21.0</version>
   </dependency>
 </dependencies>
</project>
The next step is to add the test class files where we will write the test case in Java. Add 2 Java class files under src/test/java package.
- BaseTest.java: This file will have the setup() and tearDown() methods to create and remove the WebDriver instances for test cases.
- TwoInputFieldTests.java: This file will be the test class file where all the test cases discussed above will be written.
The completed BaseTest.java would look like the one below.
package LocalGrid;


import org.openqa.selenium.WebDriver;
import org.openqa.selenium.chrome.ChromeDriver;
import org.testng.annotations.*;


public class BaseTest {
   public static WebDriver driver;

   @BeforeMethod
   public void setup()
   {
       driver = new ChromeDriver();

       System.out.println("Navigating to Two Input Field section");
       driver.get("https://www.lambdatest.com/selenium-playground/simple-form-demo/");
   }

   @AfterMethod
   public void tearDown()
   {
       driver.quit();
   }
}
Code Walkthrough:
Below is the complete code walkthrough to understand the code written in the above BaseTest.java file.
- In this class, create a WebDriver instance, which will be used to interact with the browser, then create the first method as setup() and annotate it with the @BeforeMethod. @BeforeMethod is a TestNG annotation. This annotation helps invoke this method before executing each test method, i.e., each test case. This will help create a new WebDriver instance for each test case in Java and navigate to the website.
- Initialize the driver variable with the ChromeDriver() class. This will execute all the test cases in Java on the Chrome browser.
- Use the get() method of Selenium WebDriver to navigate to the test webpage on TestMu AI Playground.
- Add the next method, tearDown(), and annotate it with @AfterMethod annotation to execute it after each test case in Java is executed. @AfterMethod is called the quit() method, which quits the driver instance and closes the open browser windows.
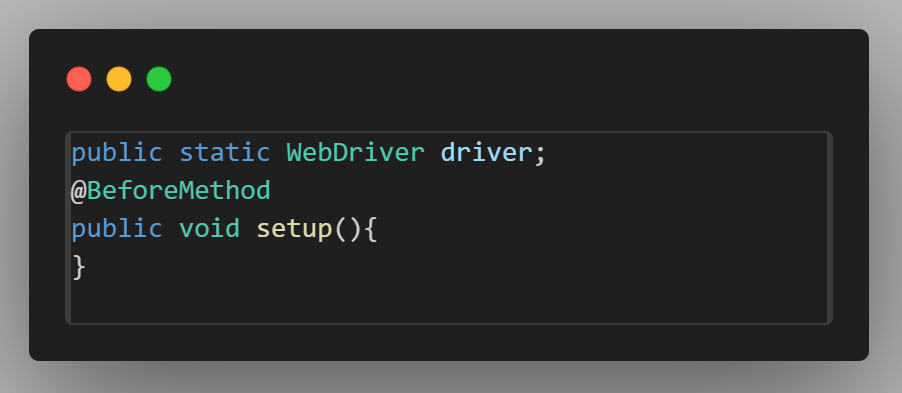
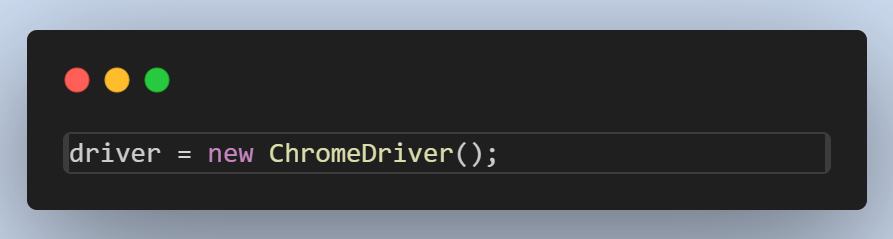

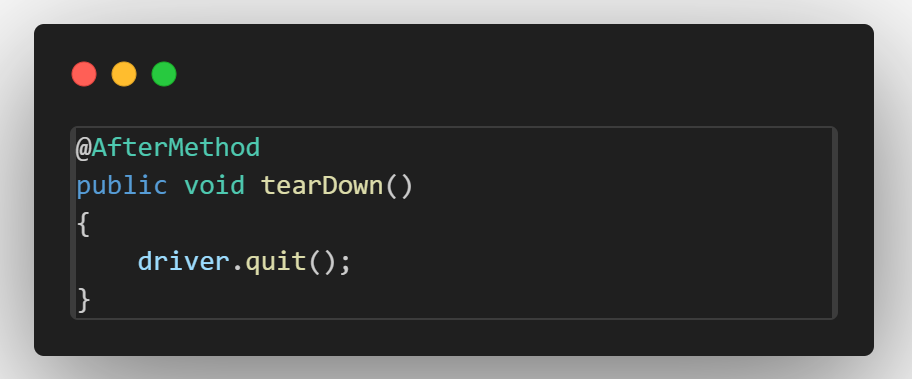
With this, the BaseTest file is created, and we are ready to create a test file to run the test case in Java.
Create a file called TwoInputFieldTests.java. This file will contain all the code for the test scenarios discussed earlier.
package LocalGrid;


import org.openqa.selenium.By;
import org.testng.Assert;
import org.testng.annotations.Test;


public class TwoInputFieldTests extends BaseTest
{


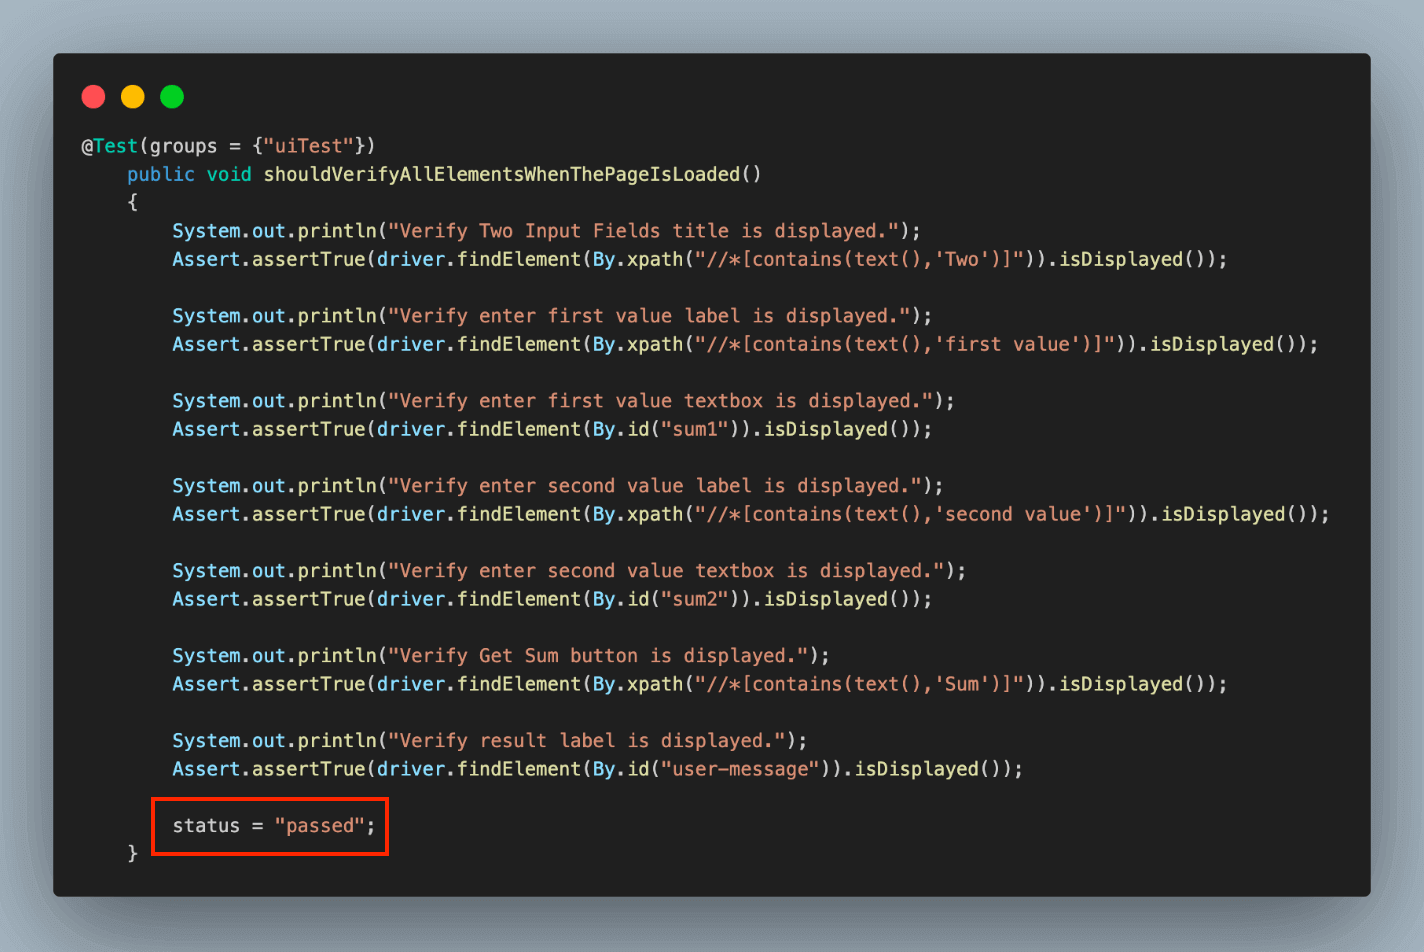
   @Test(groups = {"uiTest"})
   public void shouldVerifyAllElementsWhenThePageIsLoaded()
   {
       System.out.println("Verify Two Input Fields title is displayed.");
       Assert.assertTrue(driver.findElement(By.xpath("//*[contains(text(),'Two')]")).isDisplayed());

       System.out.println("Verify enter first value label is displayed.");
       Assert.assertTrue(driver.findElement(By.xpath("//*[contains(text(),'first value')]")).isDisplayed());

       System.out.println("Verify enter first value textbox is displayed.");
       Assert.assertTrue(driver.findElement(By.id("sum1")).isDisplayed());

       System.out.println("Verify enter second value label is displayed.");
       Assert.assertTrue(driver.findElement(By.xpath("//*[contains(text(),'second value')]")).isDisplayed());

       System.out.println("Verify enter second value textbox is displayed.");
       Assert.assertTrue(driver.findElement(By.id("sum2")).isDisplayed());

       System.out.println("Verify Get Sum button is displayed.");
       Assert.assertTrue(driver.findElement(By.xpath("//*[contains(text(),'Sum')]")).isDisplayed());

       System.out.println("Verify result label is displayed.");
       Assert.assertTrue(driver.findElement(By.id("user-message")).isDisplayed());
   }

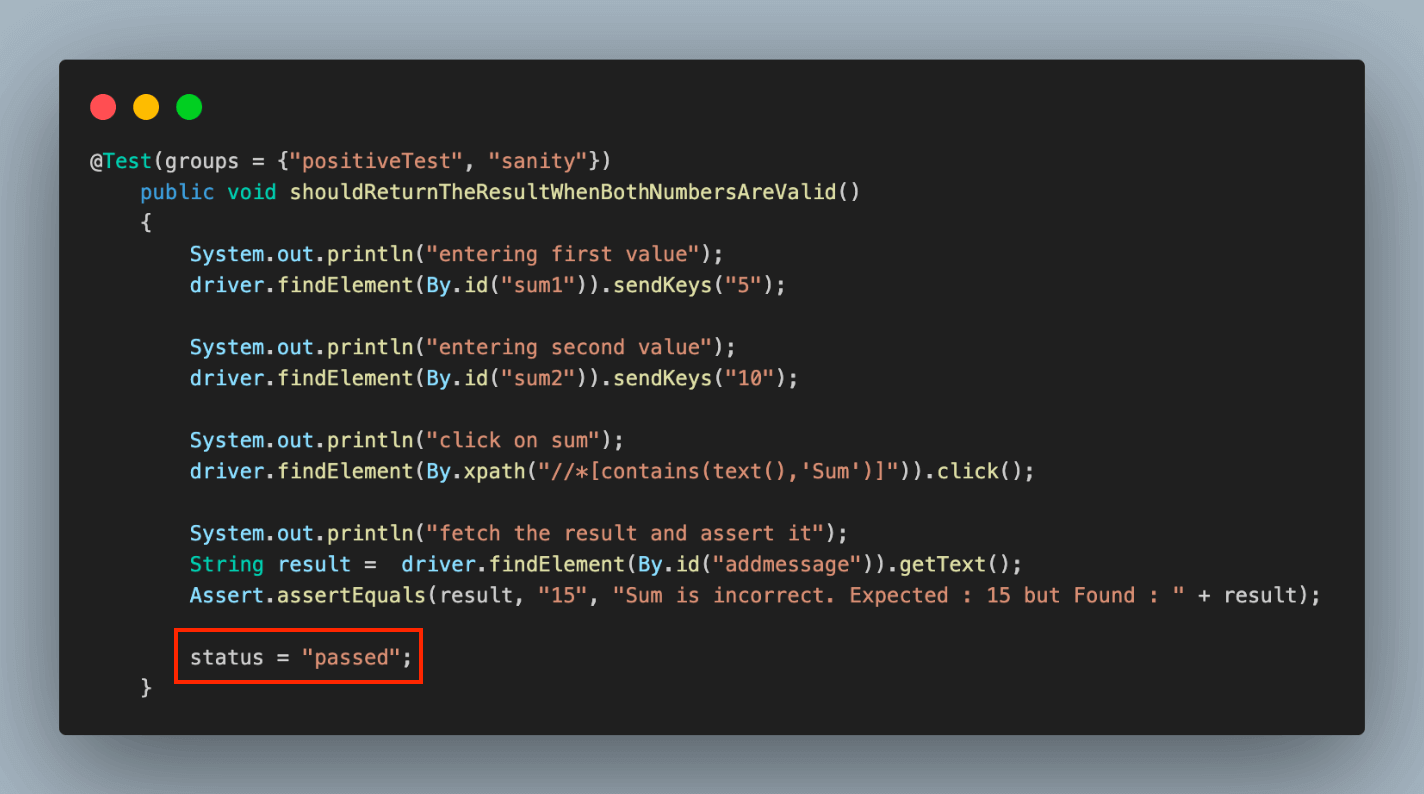
   @Test(groups = {"positiveTest", "sanity"})
   public void shouldReturnTheResultWhenBothNumbersAreValid()
   {
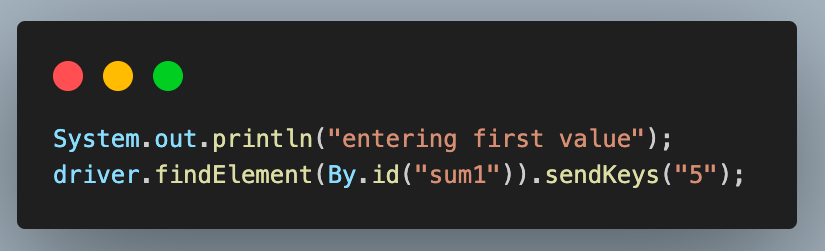
       System.out.println("entering first value");
       driver.findElement(By.id("sum1")).sendKeys("5");

       System.out.println("entering second value");
       driver.findElement(By.id("sum2")).sendKeys("10");

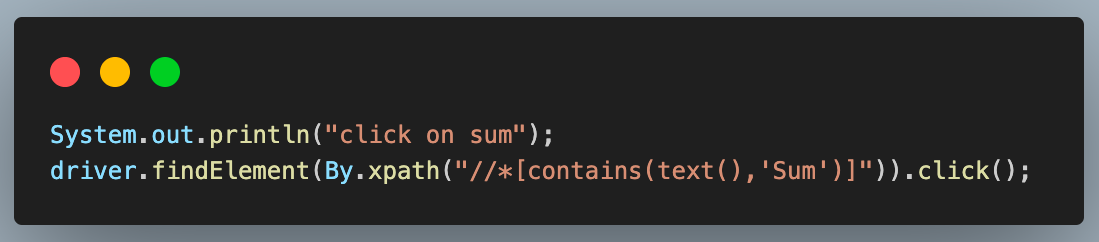
       System.out.println("click on sum");
       driver.findElement(By.xpath("//*[contains(text(),'Sum')]")).click();

       System.out.println("fetch the result and assert it");
       String result =  driver.findElement(By.id("addmessage")).getText();
       Assert.assertEquals(result, "15", "Sum is incorrect. Expected : 15 but Found : " + result);
   }

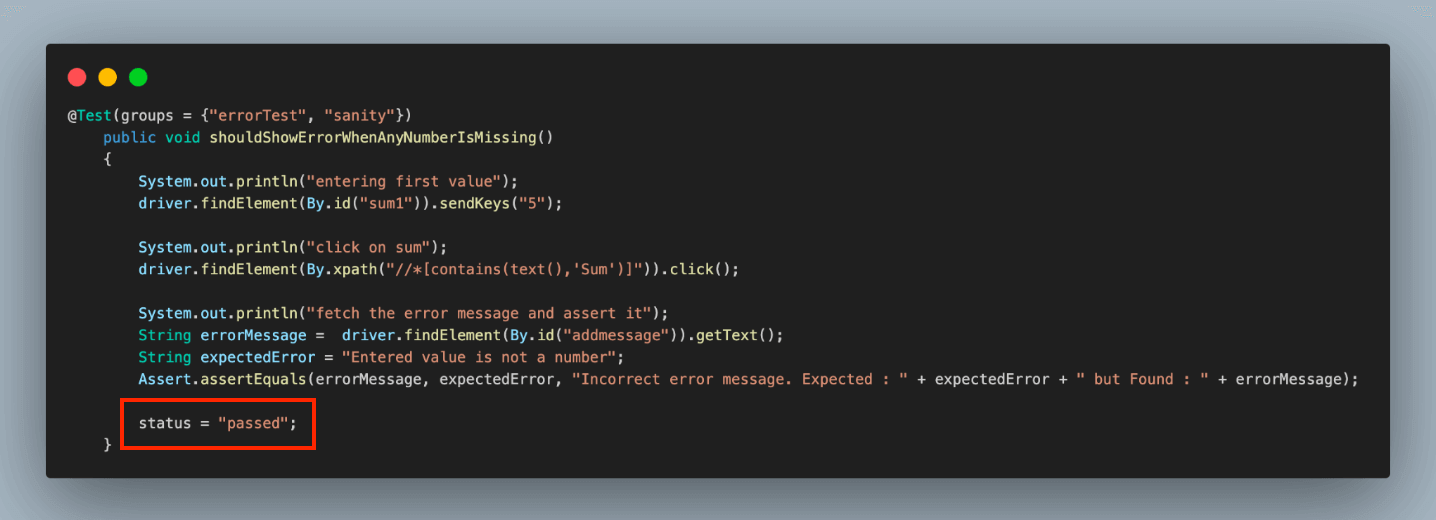
   @Test(groups = {"errorTest", "sanity"})
   public void shouldShowErrorWhenAnyNumberIsMissing()
   {
       System.out.println("entering first value");
       driver.findElement(By.id("sum1")).sendKeys("5");

       System.out.println("click on sum");
       driver.findElement(By.xpath("//*[contains(text(),'Sum')]")).click();

       System.out.println("fetch the error message and assert it");
       String errorMessage =  driver.findElement(By.id("addmessage")).getText();
       String expectedError = "Entered value is not a number";
       Assert.assertEquals(errorMessage, expectedError, "Incorrect error message. Expected : " + expectedError + " but Found : " + errorMessage);
   }
}
Code Walkthrough:
Below is the complete code walkthrough to understand the code written in the above TwoInputFieldTests.java file.
- Add a new class file as TwoInputFieldTests.java and extend BaseTest. This helps to inherit and access the driver variable and methods of the base class in all the test cases and prevents redundant code.
- Add the first test case as shouldVerifyAllElementsWhenThePageIsLoaded() and annotate it with the @Test annotation. This annotation helps to identify a method as a test case and execute it as a TestNG case. We have used the groups attribute of @Test annotation here to mark this test as part of the uiTests group so that it gets executed whenever these group cases are triggered.
- In this test case, we verify if all the Two Input Fields section elements are displayed when the web page is loaded.
- For this, we use the isDisplayed() method of WebElement to check whether the element is displayed. This returns a boolean true value if the element is displayed and false if not.
- To assert the same, we use the assertTrue() method of the Assert class. It passes if the passed value is true, meaning the element is displayed.
- Write a similar assert statement using the isDisplayed() method for all the web elements to verify the entire UI of this section.
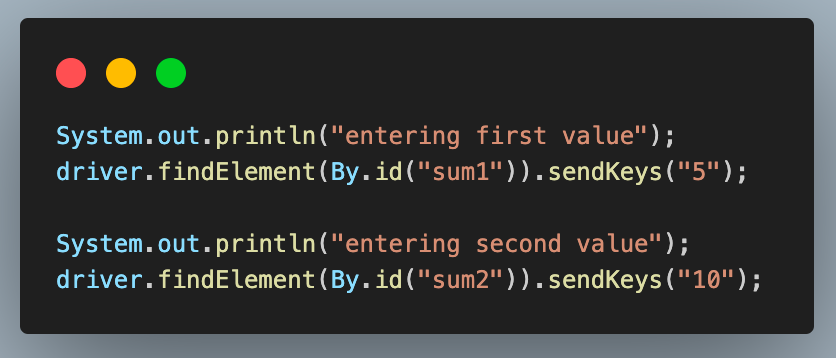
- Add the second test case as shouldReturnTheResultWhenBothNumbersAreValid(). Similar to the previous case, annotate it with the @Test annotation and add it to positiveTest and sanity groups. We have added 2 group names here, unlike 1 in the previous case. This means that this test case in Java will get executed as part of both these groups.
- Enter the first and second values using the sendKeys() method. This method of Selenium WebDriver is used to enter data in any input text box field while working with web automation.
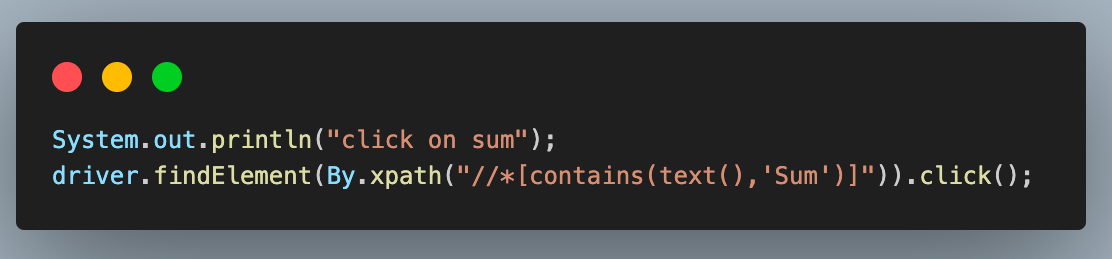
- After entering the values, click the Get Sum button to get the result. For this, another method of WebDriver, click() is used.
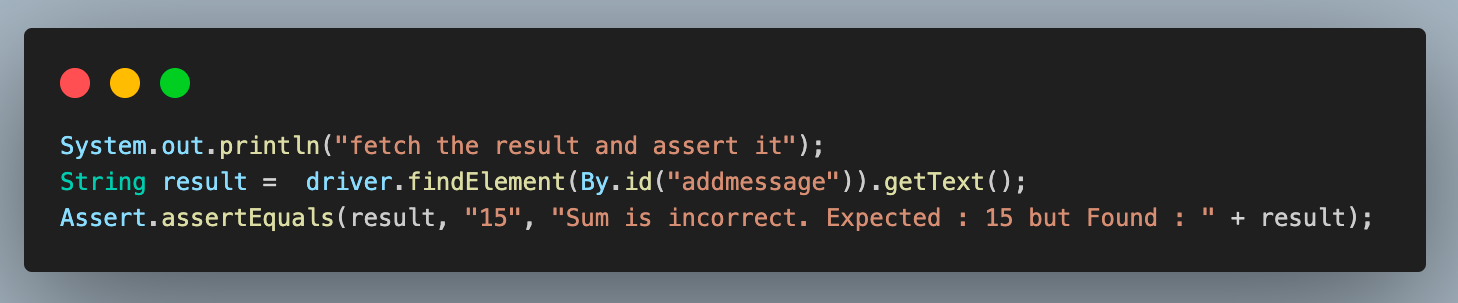
- Finally, we fetch the result using the getText() method and store it in a variable. This method retrieves any text value from the web page using Selenium web automation. Assert’s assertEquals() method compares this value with the expected result.
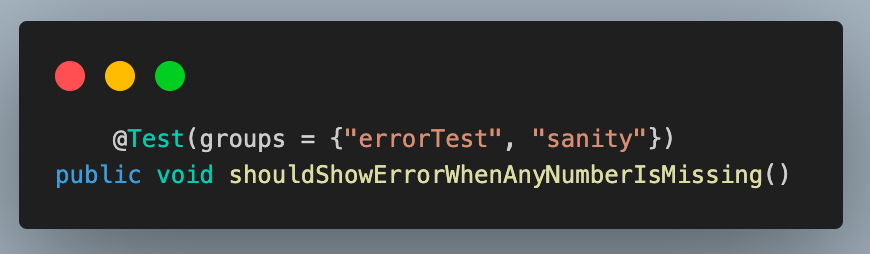
- Add the last test case and name it as shouldShowErrorWhenAnyNumberIsMissing(). Like the previous cases, annotate it with @Test and add it to the negativeTest and sanity groups.
- Enter any one value using the sendKeys() method. Here, we are entering the first value field.
- Click on the Get Sum button.
- Fetch the error message using the getText() method and assert it to be the same as the expected error message using the assertEquals() method.


Assertions are crucial in the automation testing process, ensuring the software functions as expected. To learn assertTrue(), follow this guide on assertTrue() in Java and gain valuable insights.

This method is used to compare two values as part of an assertion. Learn how to use asserts in TestNG correctly to help you verify and validate your actual and expected results.

Test Execution And Results
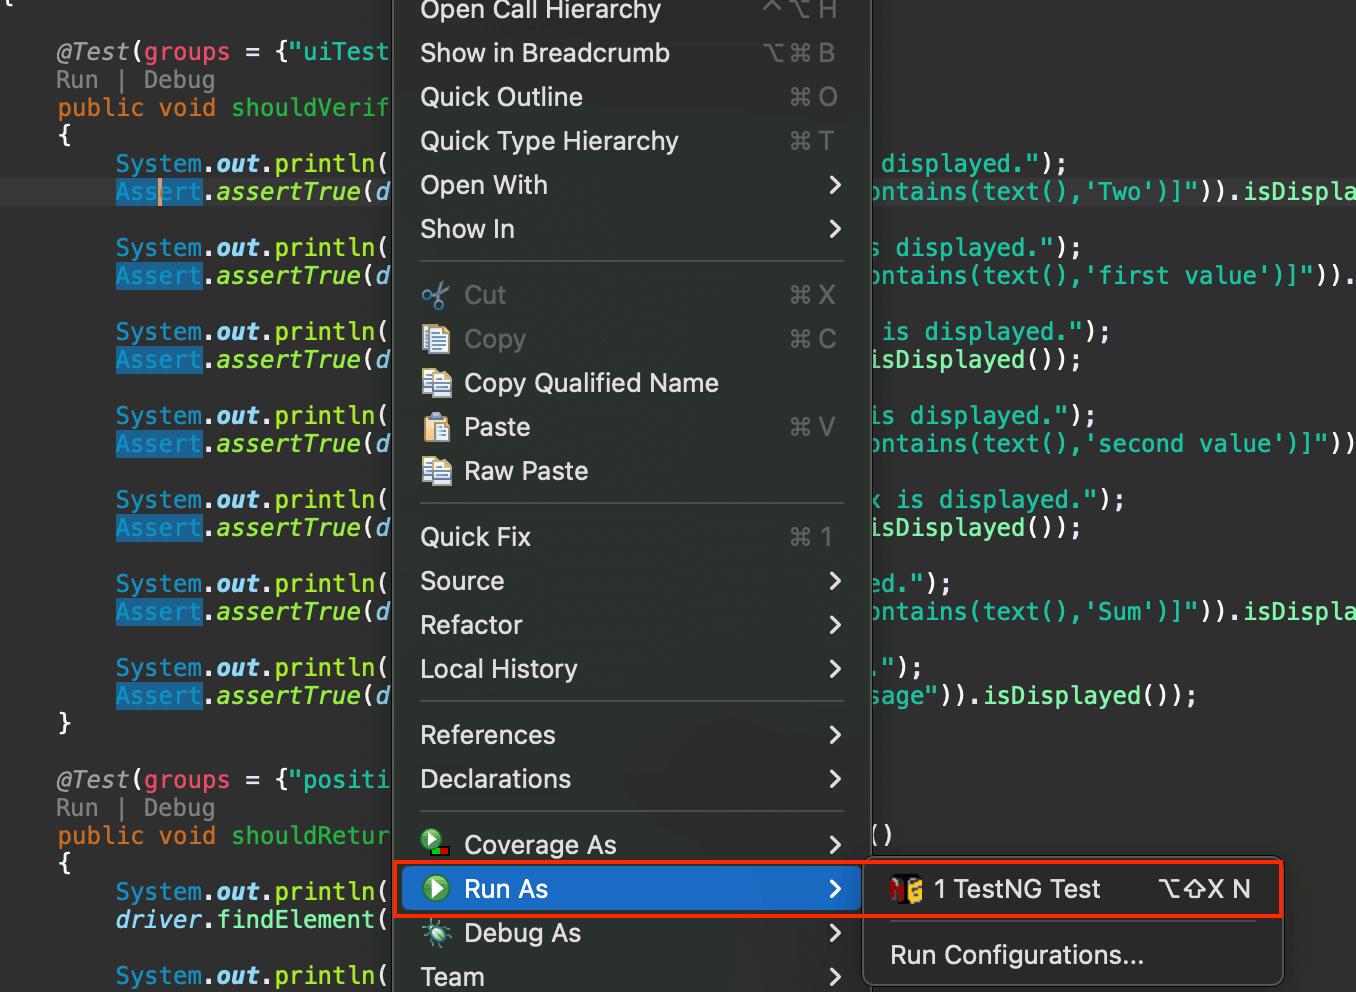
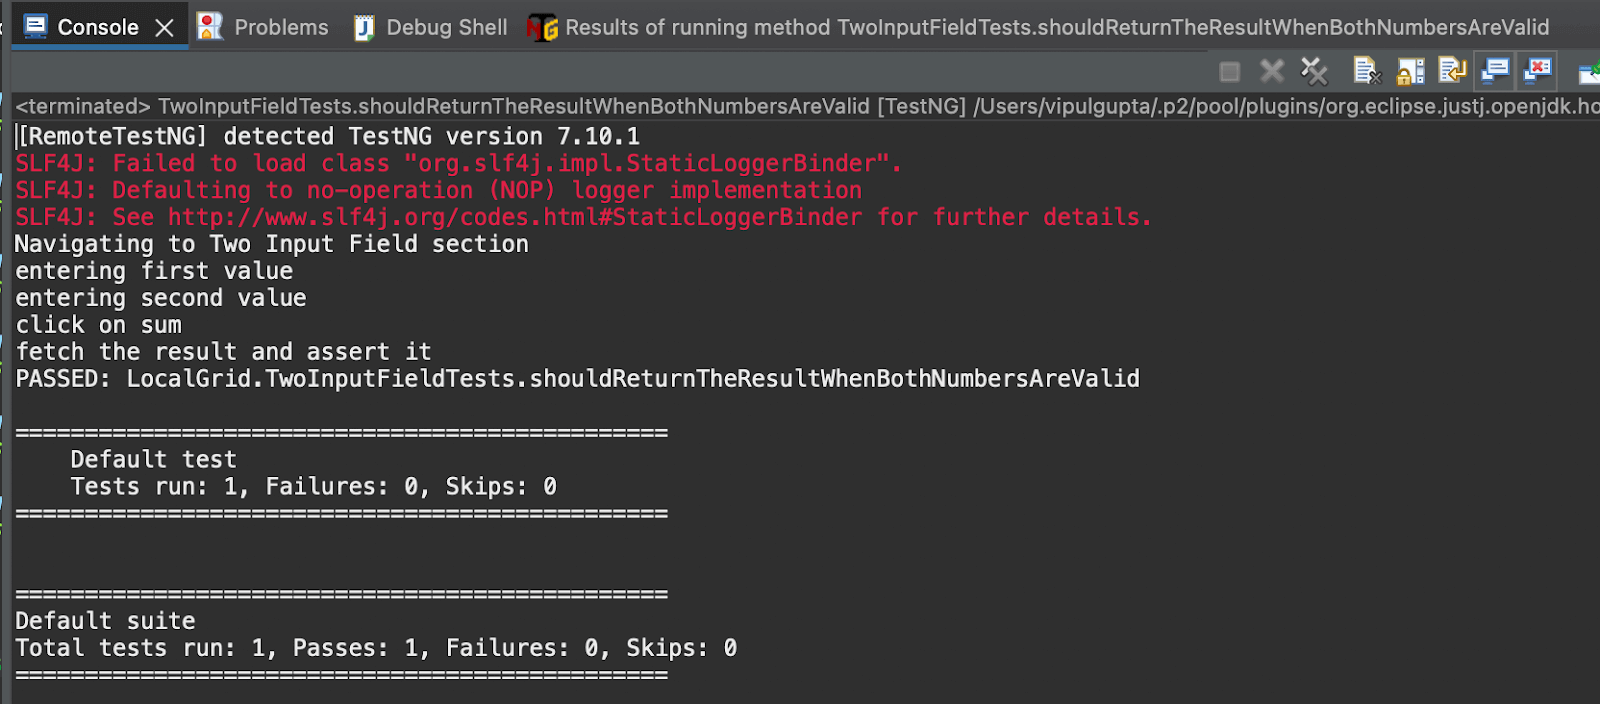
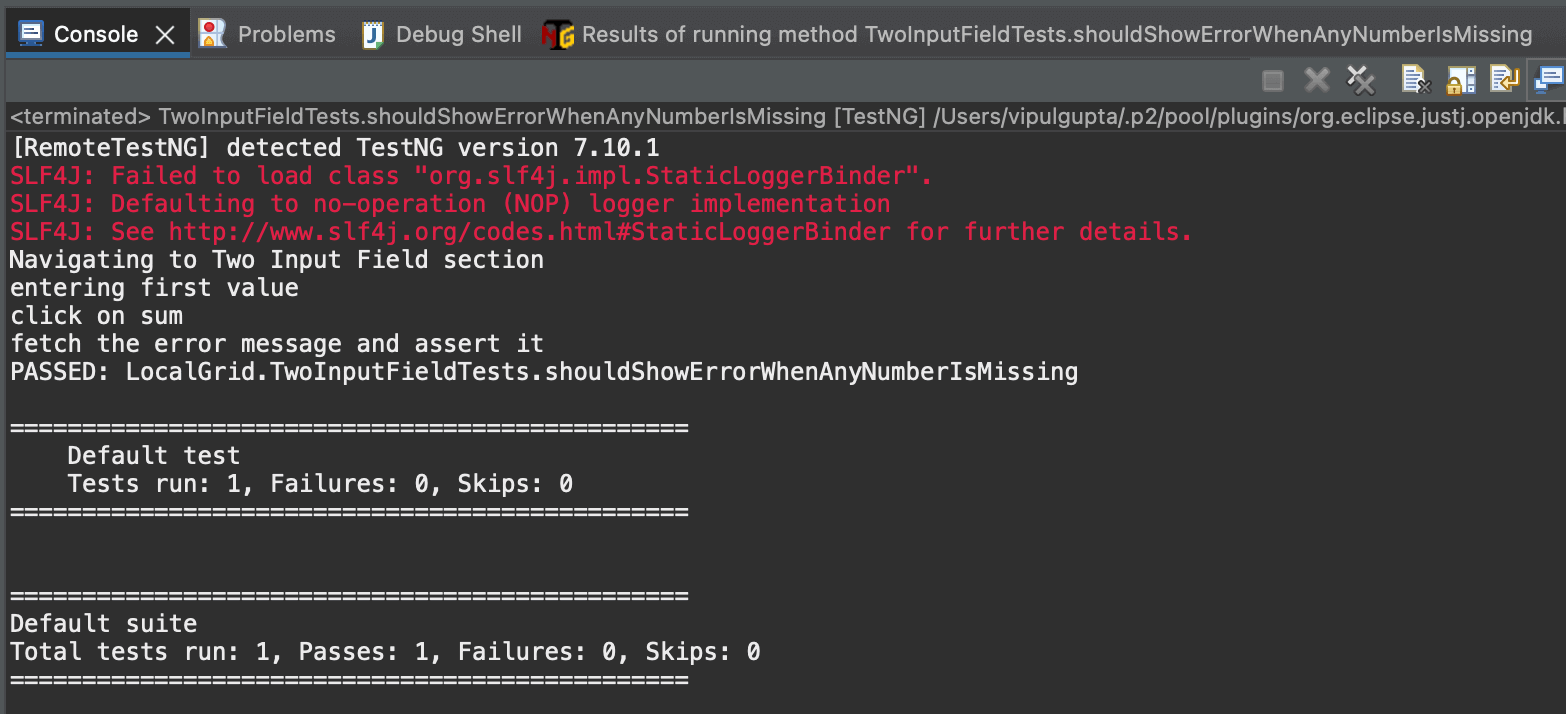
Right-click > Select Run As > TestNG, Test to execute the tests individually.
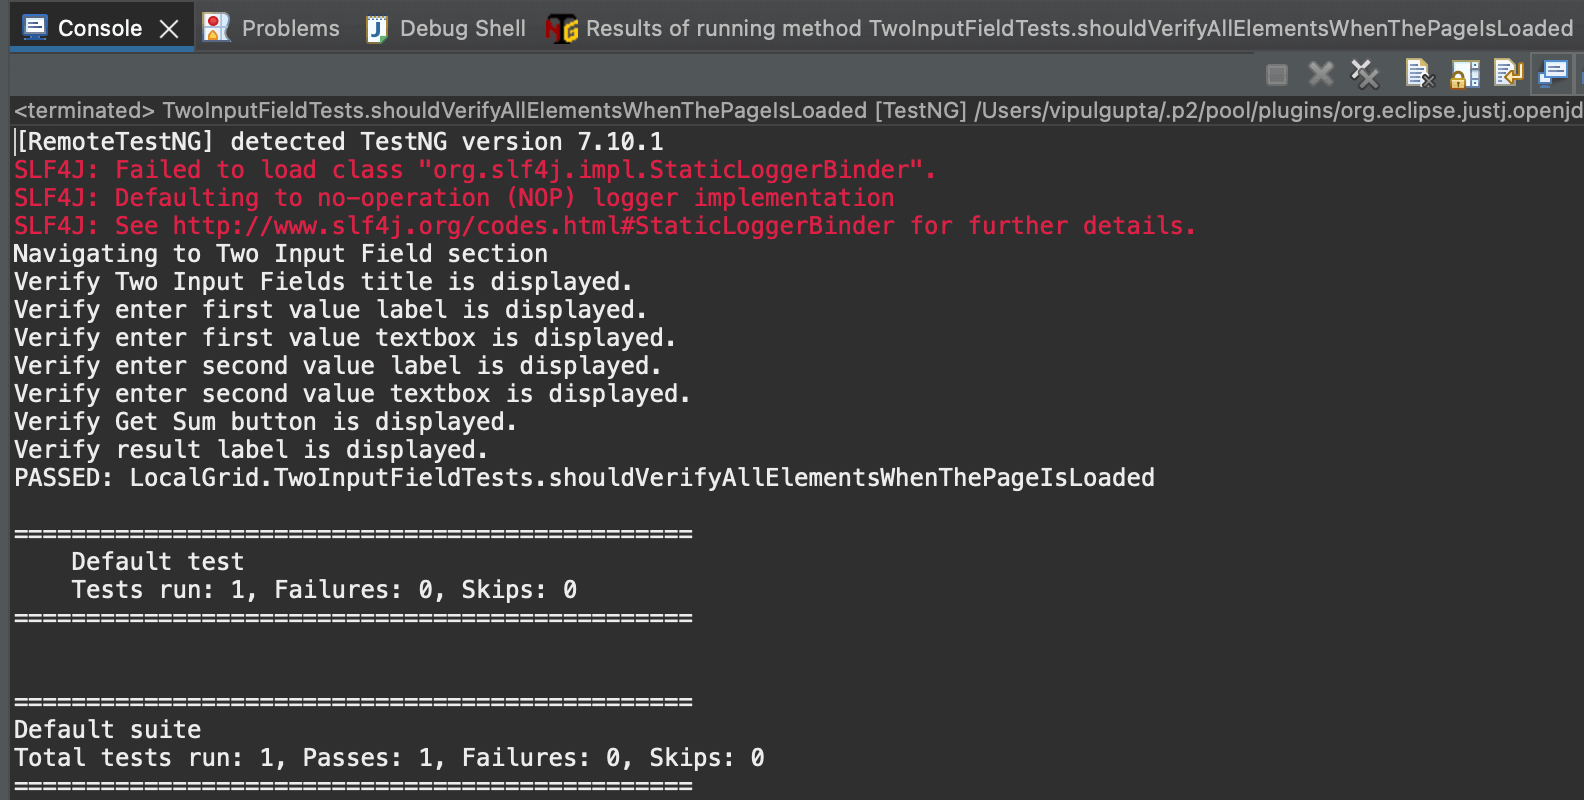
Result:
shouldVerifyAllElementsWhenThePageIsLoaded()
Result:
shouldReturnTheResultWhenBothNumbersAreValid()
Result:shouldShowErrorWhenAnyNumberIsMissing()
Running tests locally is manageable when working with up to three or four browsers and one operating system. However, this limitation makes it difficult for testers to conduct tests on more than four browsers and multiple operating systems. To address this, testers can use a cloud-based platform where they do not have to worry about maintaining test infrastructure and can conduct comprehensive cross-browser and cross-platform testing seamlessly. One such platform is TestMu AI.
It is an AI-powered test execution platform that lets you run manual and automated cross-browser testing at scale, with over 3000+ real devices, browsers, and OS combinations.
This platform provides the speed and resources to make test executions faster and more reliable. It facilitates parallel execution, allowing multiple tests to run simultaneously for large automation suites. This cloud grid platform also offers enhanced logging, maintenance, and debugging resources.

Now, let’s move the local test script to the TestMu AI platform with a few modifications to leverage all the features this cloud grid offers.
How To Write a Test Case in Java for Cloud Execution?
Having understood the flow of writing and executing the first test case in Java using Selenium and TestNG, let us move ahead and learn how we can do the same on a cloud grid platform.
To use the TestMu AI cloud grid to run the Selenium automation test cases, we need to make some changes to the code to use Selenium RemoteWebDriver, which will help connect to the TestMu AI cloud grid and execute the cases over there.
Most of these changes involve configuring the WebDriver settings in BaseTest.java. The modified BaseTest.java with the cloud grid integration will look similar to the example below.
package CLoudGRid;


import java.net.*;
import java.util.HashMap;


import org.openqa.selenium.remote.RemoteWebDriver;
import org.openqa.selenium.chrome.ChromeOptions;
import org.testng.annotations.*;


public class BaseTest {
   public RemoteWebDriver driver = null;


   String username = System.getenv("LT_USERNAME") == null ? "<lambdatest_username>" : System.getenv("LT_USERNAME");
   String accessKey = System.getenv("LT_ACCESS_KEY") == null ? "<lambdatest_accesskey>" : System.getenv("LT_ACCESS_KEY");

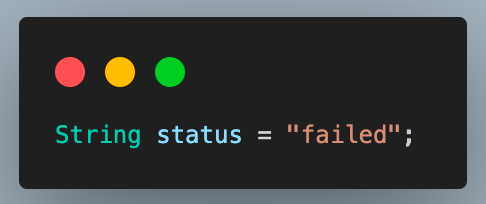
   String status = "failed";


   @BeforeMethod
   public void setup() {
       try {
           ChromeOptions chromeOptions = new ChromeOptions();
           chromeOptions.setPlatformName("Windows 10");
           chromeOptions.setBrowserVersion("125");


           HashMap<String, Object> ltOptions = new HashMap<String, Object>();
           ltOptions.put("build", "Test case in Java");
           ltOptions.put("name", "Test case in Java");
           ltOptions.put("w3c", true);
           chromeOptions.setCapability("LT:Options", ltOptions);


           driver = new RemoteWebDriver(
                   new URL("https://" + username + ":" + accessKey + "@hub.lambdatest.com/wd/hub"), chromeOptions);


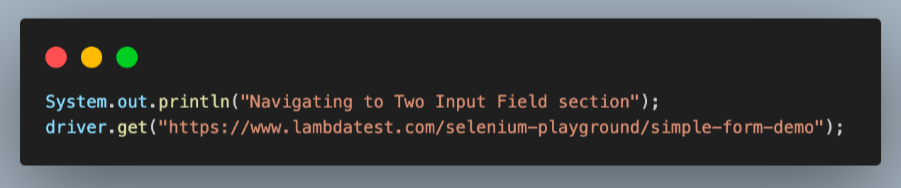
           System.out.println("Navigating to Two Input Field section");
           driver.get("https://www.lambdatest.com/selenium-playground/simple-form-demo/");


       } catch (MalformedURLException e) {
           e.printStackTrace();
       }
   }


   @AfterMethod
   public void tearDown() {
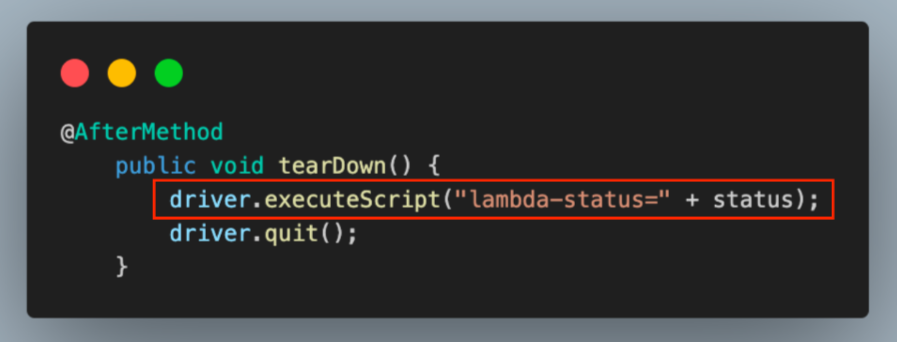
       driver.executeScript("lambda-status=" + status);
       driver.quit();
   }
}
Code Walkthrough:
Below is the complete code walkthrough to understand the code written in the above BaseTest.java file.
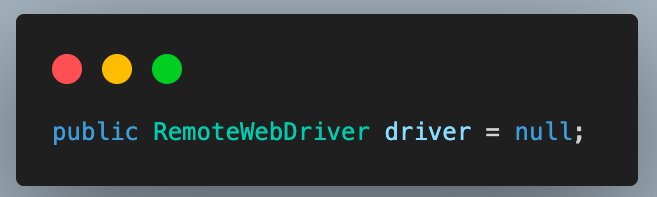
- Start by creating required class objects and variables with public access to access them in the test classes. For this, first, create an object of RemoteWebDriver and initialize it to null.
- Next, add the username and access key for your TestMu AI account to connect to the cloud grid for test execution. You can find these in the Password & Security section tab.
- You can also configure these as environment variables and directly fetch them in code instead of defining them in plain text.

For Windows:
set LT_USERNAME=LT_USERNAME
set LT_ACCESS_KEY=LT_ACCESS_KEY
For macOS and Linux:
export LT_USERNAME=LT_USERNAME
export LT_ACCESS_KEY=LT_ACCESS_KEY
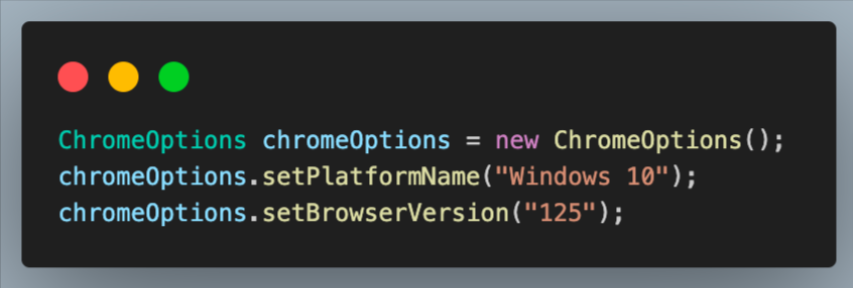
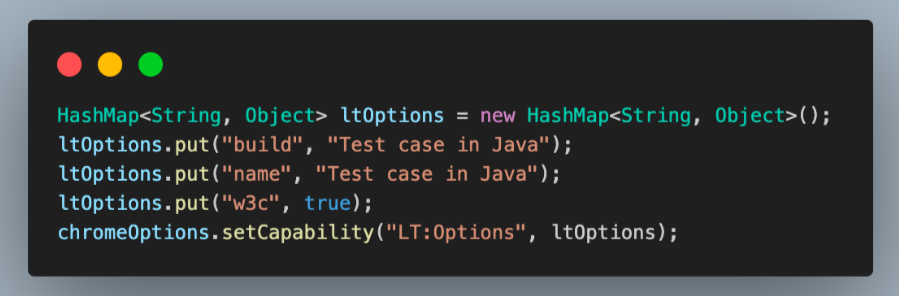
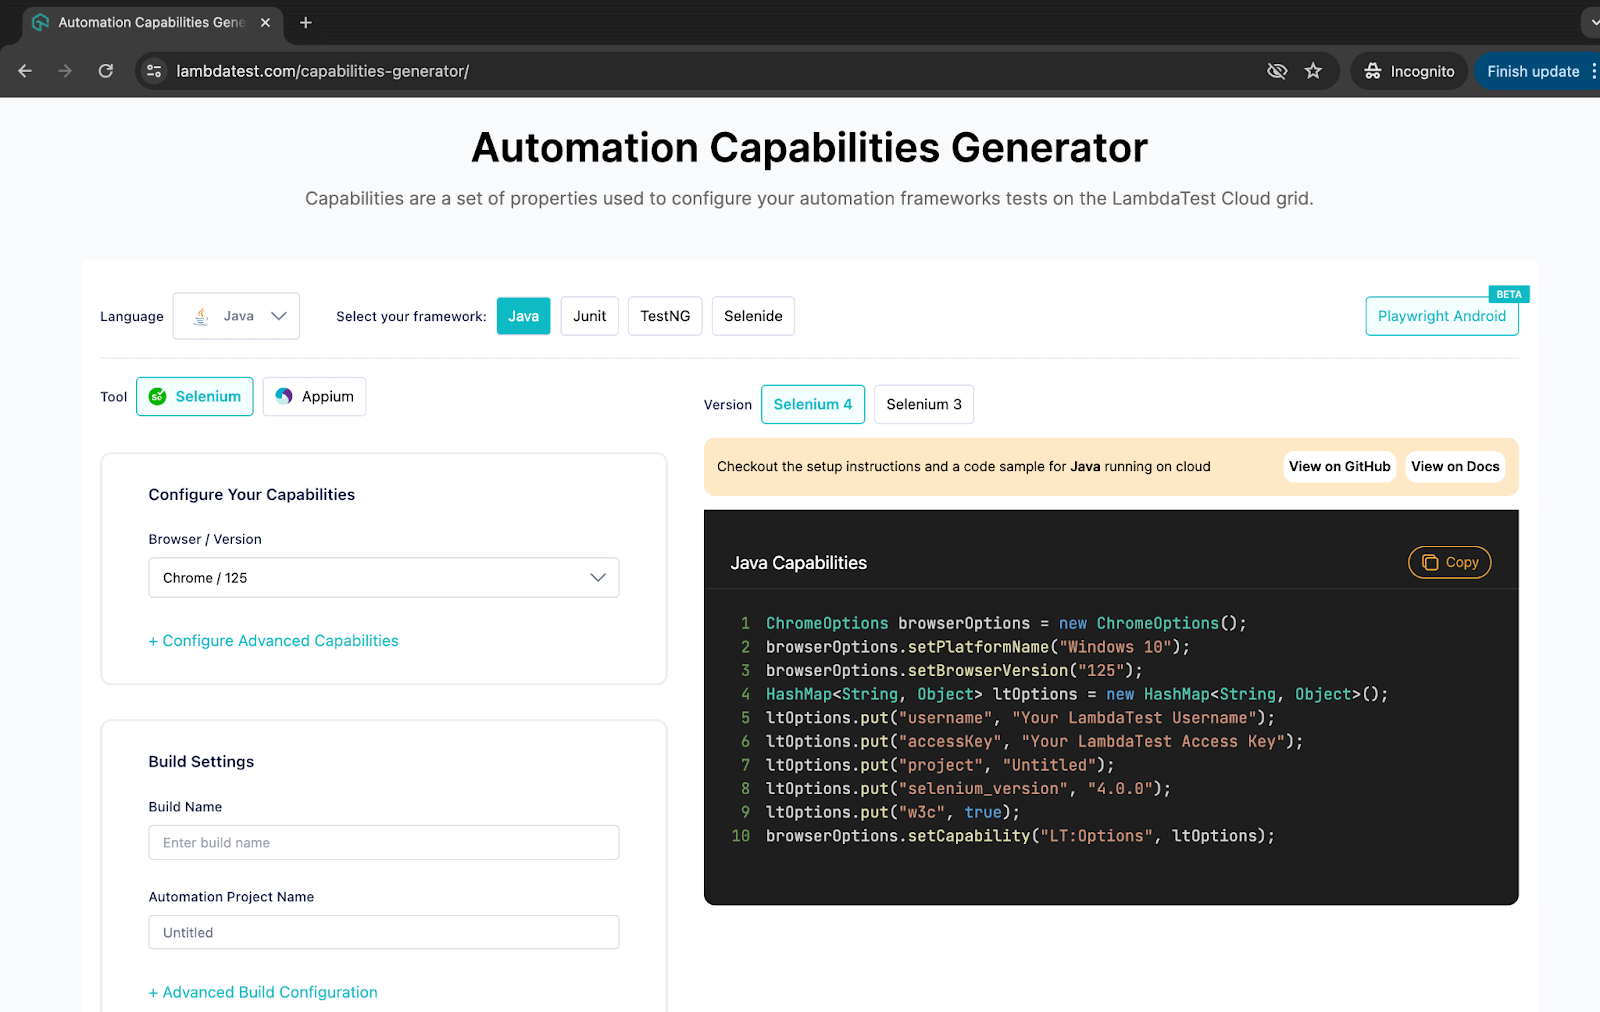
You can fetch the required browser capabilities from the TestMu AI platform by navigating to the Automation Capabilities Generator. This helps by offering ready-to-use code for setting up browser capabilities that can be used in execution.

Results:
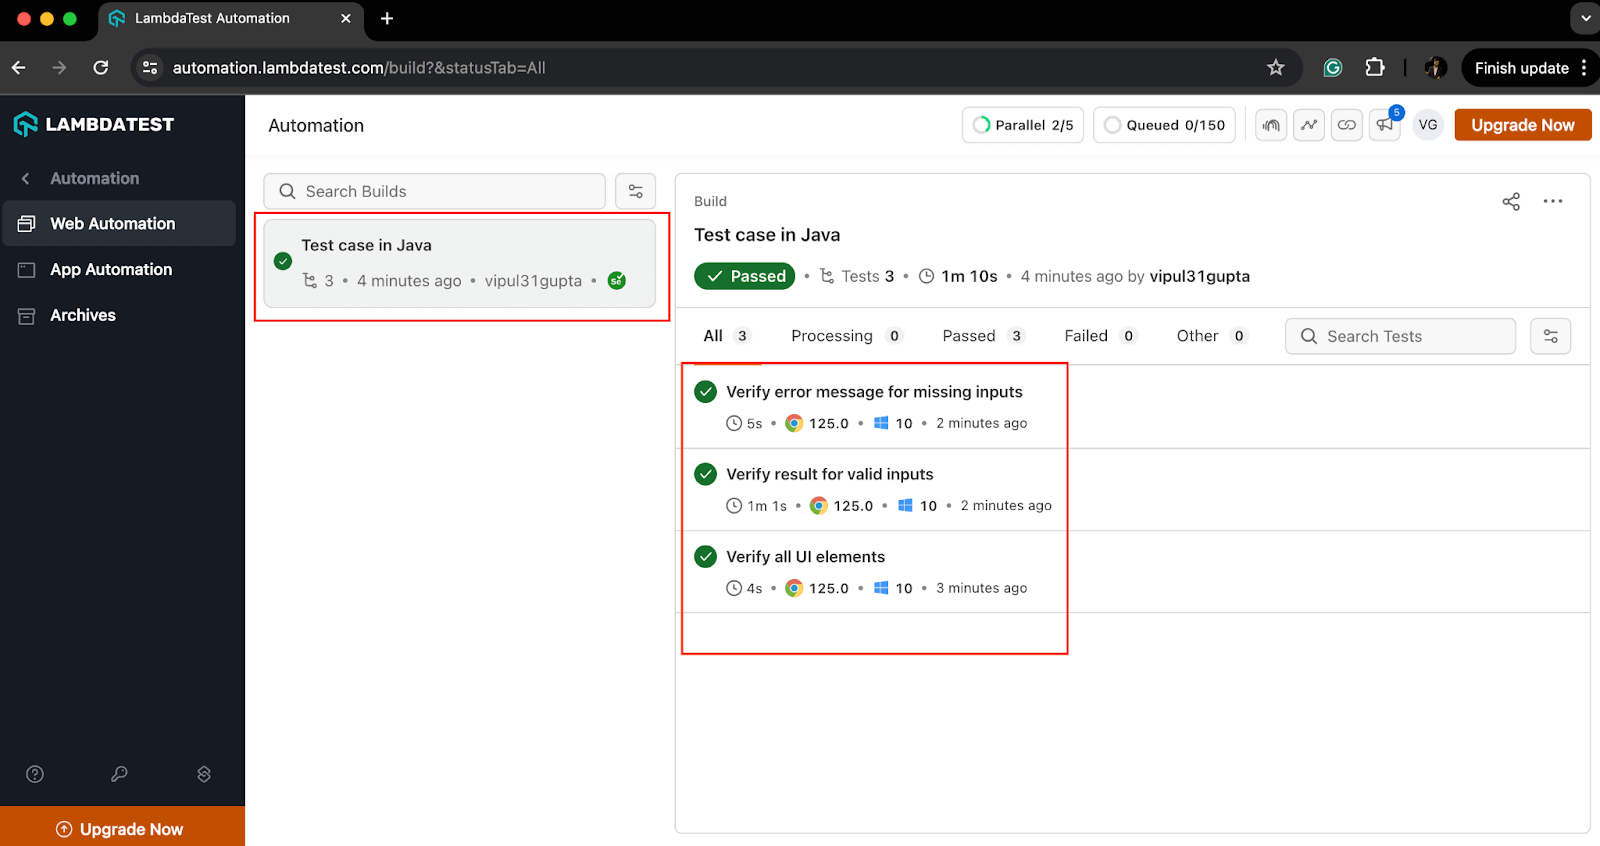
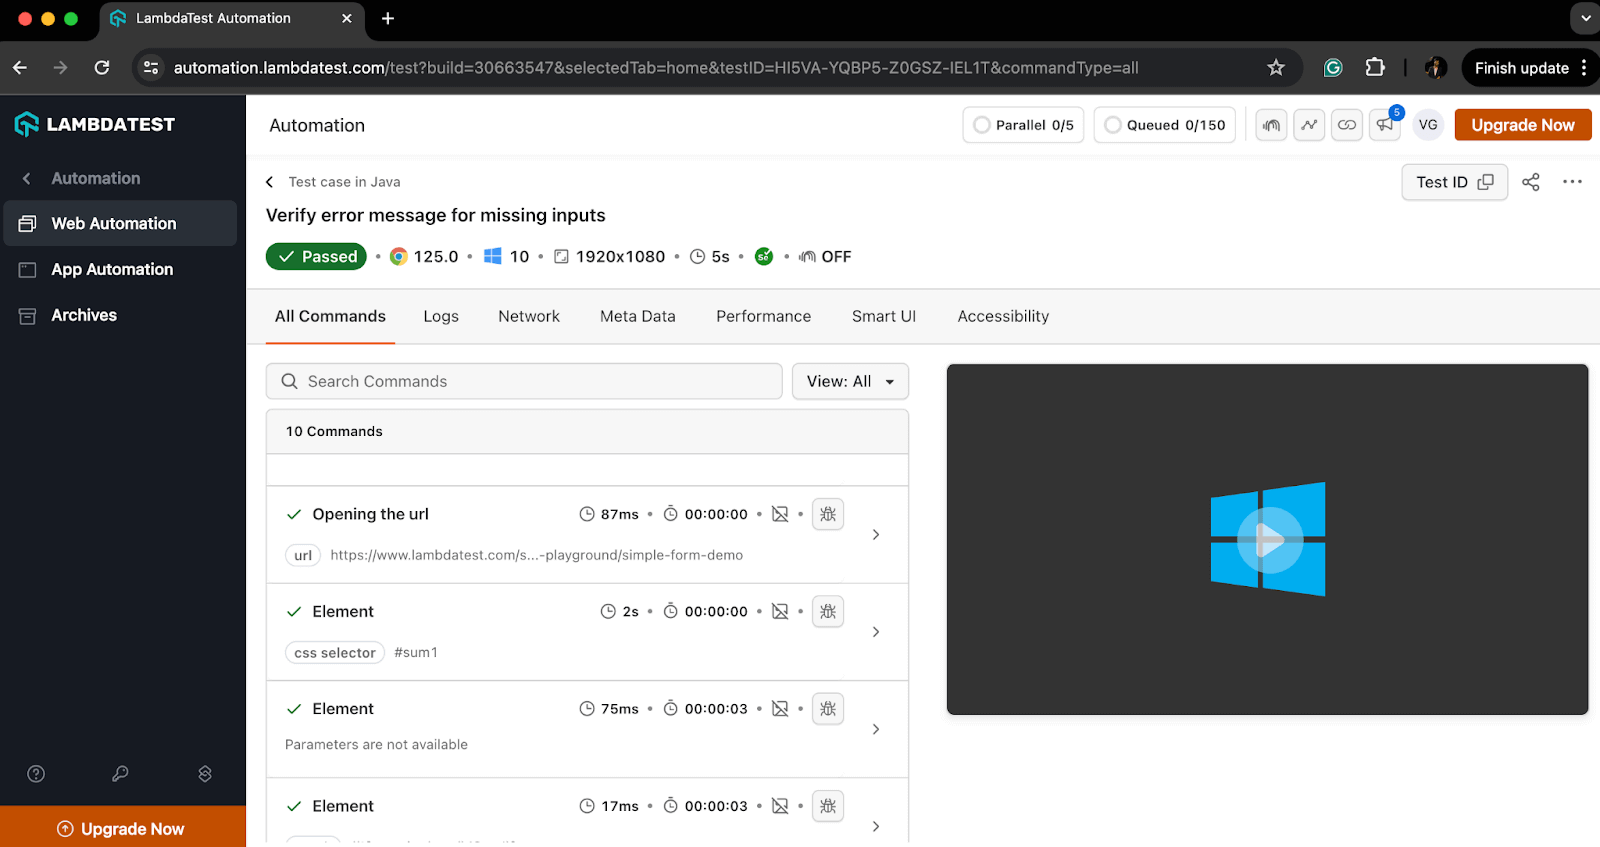
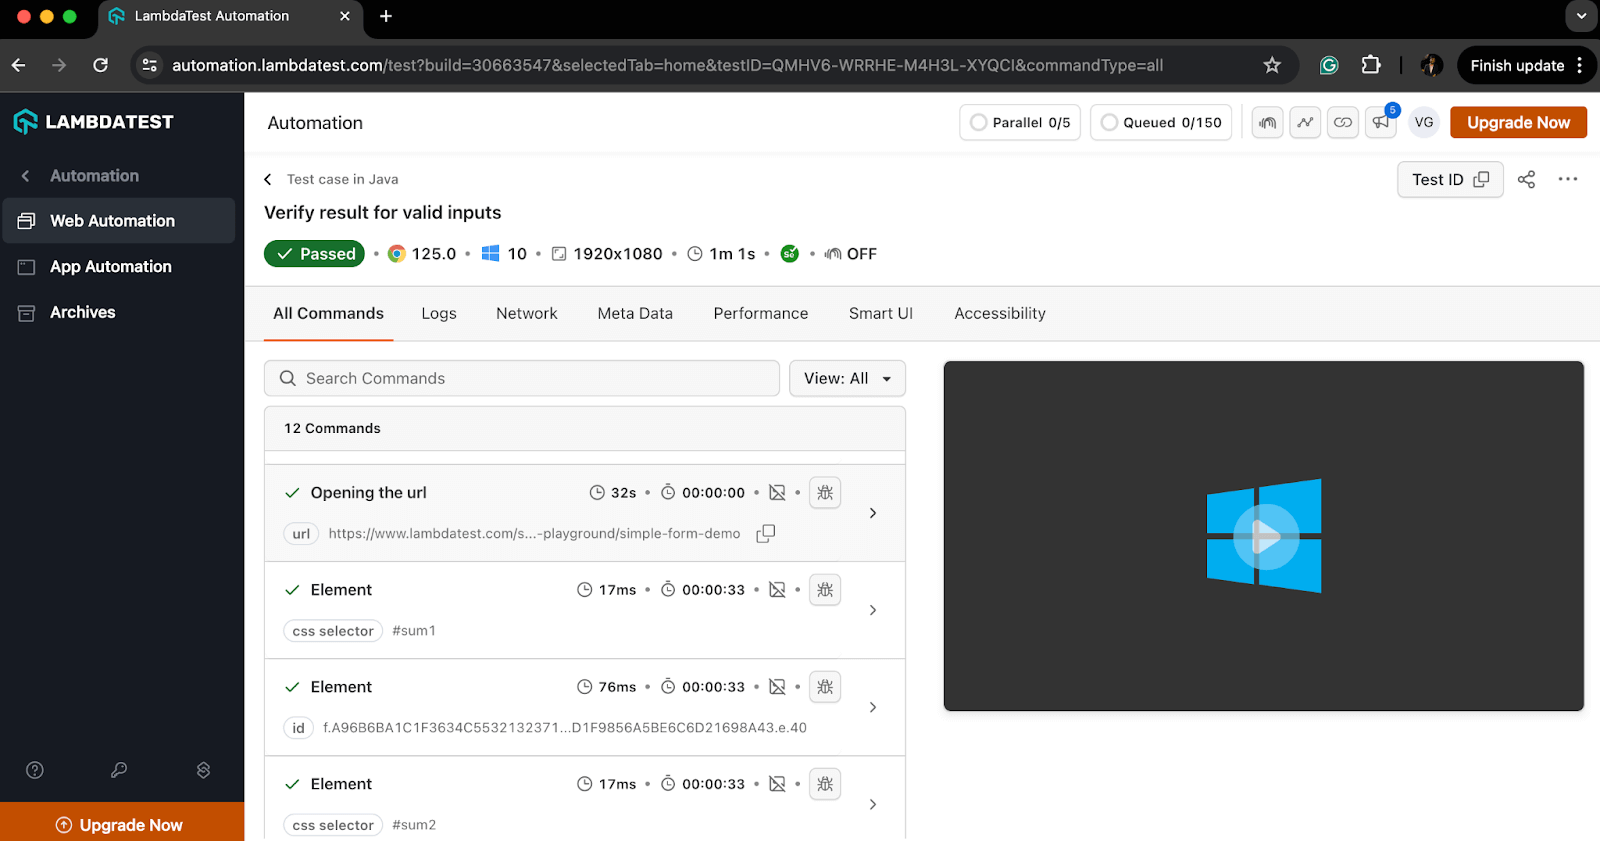
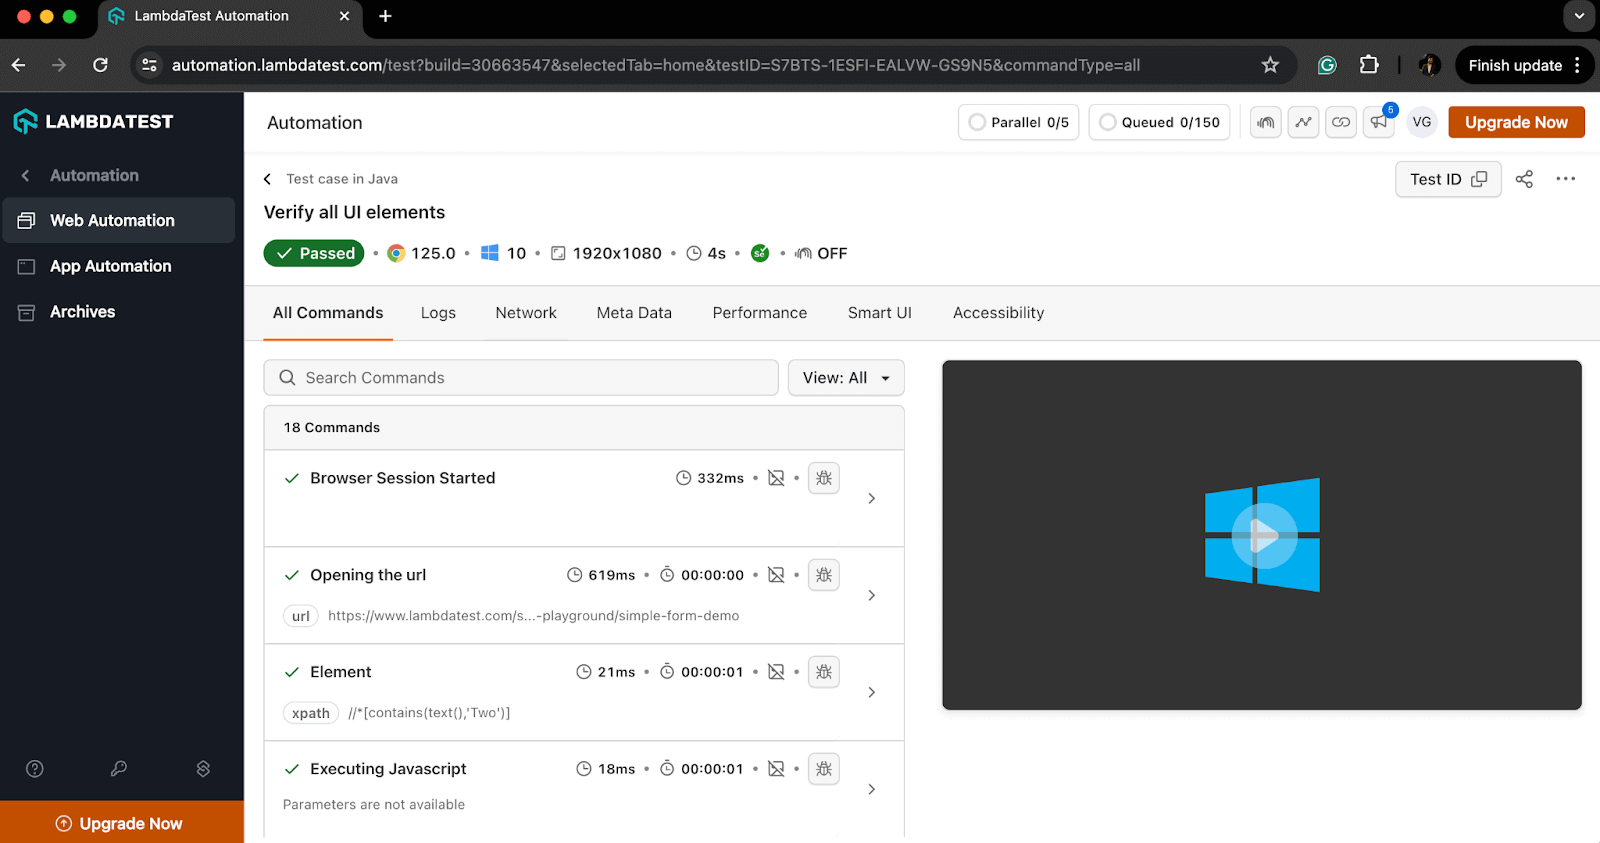
We can execute the test cases similarly to how we did for local execution. The console output in the IDE will remain unchanged, but the primary focus will shift to monitoring the execution results on the TestMu AI dashboard.
The execution results are on the TestMu AI Dashboard under the Automation > Web Automation tab.
This cloud grid platform supports automation using various automation testing tools like Selenium, Cypress, Playwright, and more. To learn how to conduct automation testing on a Desktop browser, watch the video tutorial below and get detailed insights.

To get access to more tutorial videos, subscribe to the TestMu AI YouTube Channel and stay ahead with your automation testing journey.
Best Practices for Writing Test Cases in Java
All the test executions we’ve learned above are written following best practices. Adhering to these practices helps avoid repeating the same or similar mistakes and ensures a smooth test flow in your automation projects.
Some of the best practices are given below.
- Understanding the Requirements
- Maintainable and Reusable Code
- Clear and Descriptive Test Case Names
- Arrange-Act-Assert Structure
- Arrange: Define and set up the test environment and test data on which we want to execute the test.
- Act: Write the execution steps which interact with the feature using the above data.
- Assert: Write proper assertions which verify the actual and expected results
- One Test Case, One Assertion
- Using Setup and Teardown Methods
- Using Mock Data and Stubs for Error Cases
- Covering Edge and Boundary Value Cases
- Using Tags, Groups, and Categories
The first and foremost requirement of writing a good test case is understanding the changes and features clearly. The tester needs to know what is expected from the code based on the input. We can refer to the product requirement documentation or the acceptance cases to know the expected behavior.
The test cases should be readable and follow clean coding principles. This helps to keep test cases maintainable and allows quick refactoring in case of requirement changes without much hassle.
The names should be clear and meaningful so that anyone who sees the code or test case can understand what a particular test is supposed to do. The name should be descriptive enough to describe the purpose of the test case. One of the naming conventions one can follow is should[ExpectedResult]When[Condition]. For example, shouldReturnTheResultWhenBothNumbersAreValid or shouldShowErrorWhenAnyNumberIsMissing.
Try to follow the AAA structure for your test cases for effective test management by splitting it into three parts.
Use specific and meaningful assertions for each test case, which helps to verify the required details. One test should not be used to verify multiple flows and should not have a dependency on any other test case. For example, valid results for valid input and error responses for invalid input should be two separate test cases. You can use assertions like assertEquals(), assertTrue(), assertFalse(), assertNotNull(), etc., to assert to-the-point data and provide meaningful messages to better understand the failures.
Use @Before and @After annotations of JUnit or TestNG, depending on your framework, to write setup and teardown methods. These methods help to prevent duplicity by making the common code, like driver setup, browser launch, driver termination, etc, reusable across all the test cases.
Mock data or stubs means to simulate a function behavior in the software to return some particular result as desired by the tester to test some particular test cases. We can use mocking frameworks like Mockito or write a stub function to mock dependencies and verify test cases for external dependency failures.
Write test cases to cover all the edge cases or unusual scenarios due to software or hardware downtimes. You can use mocking for such types of test cases. Also, testing for boundary values by passing various test data helps verify if the code and software function properly for limiting cases.
Use tags, groups, or categories to group the related test cases together that serve some common purpose, flow, or requirement in general. For instance, you can group all test cases for login flow, positive and negative cases, etc.
How Do AI Coding Assistants Help Write Java Test Cases Now?
AI coding assistants now help write Java test cases by scaffolding TestNG methods and healing broken locators automatically. GitHub Copilot and JetBrains AI Assistant draft the @Test method skeleton inside the IDE, cutting the setup() and tearDown() boilerplate this guide writes by hand, while a self-healing tool patches a locator before the test fails.
- Test skeleton generation: given a comment describing the scenario, such as verifying the sum under Result, an assistant drafts the @Test method signature and the assertEquals() call, leaving the developer to fill in the exact locator.
- IDE-assisted locator suggestions: an AI assistant integrated into an IDE such as IntelliJ IDEA can read the page DOM and propose an XPath or CSS Selector when the ID attribute is missing, alongside Selenium 4 relative locators.
- Self-healing locators: tools such as Healenium wrap the WebDriver calls and replace a broken ID or XPath with the closest matching element at runtime, so a DOM change does not fail every test case in Java using the old locator.
- Automated failure triage: AI-based test analytics group repeated TestNG stack traces across a run, flagging a failure as an assertion bug versus environment flakiness before a developer opens the console log.
Conclusion
With this, we have concluded this blog on how to write a test case in Java. In this blog, we learned how a good test case can be written with a basic understanding of Java language and test case fundamentals like flow, assertions, and WeElement locators. We learned the working examples on local and cloud grids and understood how following the best practices makes the test case robust and reliable. Now, it’s time for you to go ahead and try writing your first test case in Java.
Happy learning!!
Best Practices for Writing Test Cases in Java
Conclusion
Author

Vipul Gupta
Blogs: 25


Vipul Gupta is a Sr. Lead SDET at Zupee with over 9 years of experience in functional and automation testing. He has built 10+ automation projects from scratch covering web, API, and mobile applications. Vipul is skilled in Selenium, Appium, Rest Assured, Playwright, Java, Python, Pytest, BDD, TDD, Maven, Jenkins, TestNG, and JUnit. He has successfully led end-to-end QA efforts, including setting up teams from scratch and managing a 15-member QA team to ensure manual and automation testing run in parallel from day one. Vipul graduated in B.Tech CSE from CGC College of Engineering and is followed by 3,000+ QA and SDET professionals on LinkedIn, reflecting his strong influence in the testing community.


Java Test Cases FAQs
Did you find this page helpful?
More Related Blogs
TestMu AI forEnterprise
Get access to solutions built on Enterprise
grade security, privacy, & compliance
- Advanced access controls
- Advanced data retention rules
- Advanced Local Testing
- Premium Support options
- Early access to beta features
- Private Slack Channel
- Unlimited Manual Accessibility DevTools Tests