
Run Web Automation Tests at Scale with Agentic AI
Generate tests with AI agents or automate test suites with Selenium, Playwright and other frameworks. Run tests in parallel on TestMu AI scalable cloud grid.

- TestMu AI (Formerly LambdaTest)
- /
- Blog
- /
- assertTrue() in Java: JUnit Guide With Tested Examples
assertTrue() in Java: JUnit Guide With Tested Examples
assertTrue() method is used for performing assertions in automated tests. This JUnit tutorial demonstrates using the assertTrue() in Java to perform assertions and check specific conditions.
Last Updated on:
assertTrue() lives in the org.junit.jupiter.api.Assertions class and fails a test the instant its condition is false. The current JUnit release, 6.1.3, documents six overloads: a boolean or a BooleanSupplier, each with no message, a String message, or a Supplier<String> message. It works for checking a checkbox state, a page title, or whether returned data contains a search term.
Consider an example of an end-to-end testing journey of an eCommerce application where the product checkout from cart tests depends on the add product to cart tests. If the add product to cart tests fail, subsequent tests should not be executed as they will fail.
The test execution halts when the condition (part of the assertion) is unmet. Hence, when Selenium automation testing with TestNG is performed, assertions can help us understand the expected behavior of the application and allow us to check the quality of the software under test.
JUnit 5 is one of the popular testing frameworks used by many test automation projects to execute and run automation tests and perform assertions. It is a very good library with different functions to perform automation testing seamlessly.
In this JUnit tutorial, we will demonstrate performing assertions and check specific conditions. using the assertTrue() in Java.
TL;DR
- assertTrue() is in org.junit.jupiter.api.Assertions and fails the test as soon as its condition is false.
- JUnit 6.1.3 documents six overloads: a boolean or BooleanSupplier condition, with no message, a String, or a Supplier<String> message.
- Add a failure message so a red build explains what broke without reading the test code.
- A 2026 re-run of this guide's checkbox test found its positional CSS selectors matched nothing; heading-anchored XPath fixed it.
- Use assertEquals when you compare two values, so the failure shows both the expected and actual value.
What are Assertions in test automation?
Assertions are the core concept of functional testing. In automated testing, it forms an integral part of the test and is used to derive the outcome of the test execution. The test passes if the test result confirms the assertion; otherwise, it will fail.
It brings many benefits to test automation, like providing accurate test results, speeding up the test process by performing the required checks automatically, and confirming the expected behavior of the software under test. It also helps you catch the bugs and errors in the software easily, thus aiding you in getting faster feedback on the builds.
Assertions are Boolean expressions confirming where the specified condition works and are considered passed per the application's behavior. If the outcome condition is true, the test will pass; if the outcome is false, the test will fail.
Consider an example of a Login web page, where the test is to check the login functions properly. Here, we make an assertion condition that if the Logout button is displayed successfully after Login, the test is marked as passed. If the Logout button is not displayed after Login, the assertion will fail, marking the test as a failure.
Assertions come in two types, hard and soft, as covered in assertions in automated testing.
- Hard Assertion
- Soft Assertion
Hard Assertion
Hard assertions ensure that the test execution is stopped when the asserting condition is not met. The next steps or tests, if any, will only proceed if the asserting condition is evaluated to be true.
This helps in the automated pipeline as it turns red in case of test failures, and test execution is halted until the necessary fixes are made to the build.
Soft Assertion
With Soft assertions, the test execution is not stopped if the asserting condition is not met. Even after the assertion fails, the test execution will continue until it reaches the test's end. After the tests are executed, all the respective failures will be displayed in the logs.
Soft assertions should be used when the tests are not dependent on each other and passing one test condition does not impact the upcoming tests.
Having learned about the two types of assertions, Let us quickly move towards learning the assertTrue() in Java for performing assertions in the automated tests.
To learn more about Hard Assert and Soft Assert, watch this complete video and get detail insights on how to use each of the assertions method.


What is the assertTrue() in Java?
The assertTrue() method is in the org.junit.jupiter.api.Assertions class, used by JUnit 5 and JUnit 6. The class is a collection of static utility methods for asserting test conditions.

It verifies the supplied condition and checks if it is True. Following are the two overloaded assertTrue() methods provided by JUnit 5:
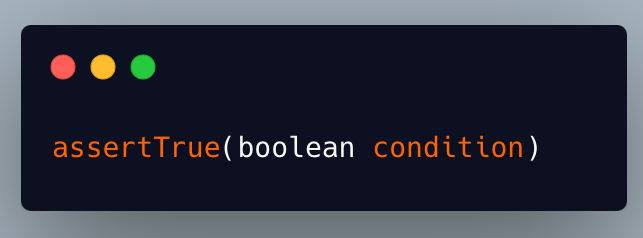
assertTrue(boolean condition)
In this method, the Boolean condition is supplied as a parameter. If the condition is true, the test passes or is marked as a failure.
Syntax
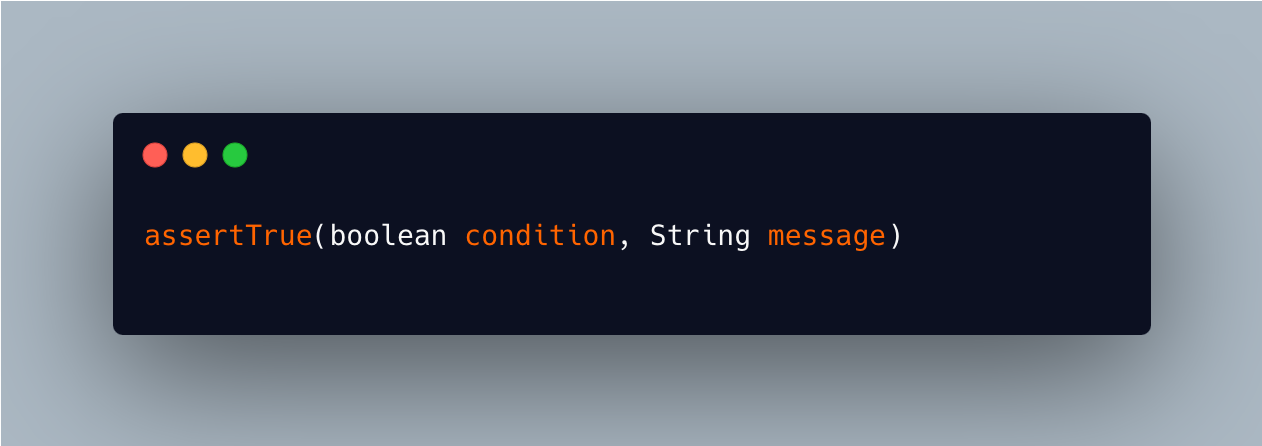
assertTrue(boolean condition, String message)
In this method, the Boolean condition is supplied as the first parameter, and the second parameter is the message text displayed in case the condition fails.
Syntax
In the next section, let's learn how to use these methods in the test.
All assertTrue() Overloads
According to the JUnit Assertions API for version 6.1.3, these are all the forms:
| Signature | Use it when |
|---|---|
| assertTrue(boolean condition) | The condition is already computed and a default message is enough |
| assertTrue(boolean condition, String message) | You want a fixed failure message |
| assertTrue(boolean condition, Supplier<String> messageSupplier) | Building the message is expensive, so it runs only on failure |
| assertTrue(BooleanSupplier condition) | The condition should be evaluated lazily inside the assertion |
| assertTrue(BooleanSupplier condition, String message) | A lazy condition with a fixed message |
| assertTrue(BooleanSupplier condition, Supplier<String> messageSupplier) | A lazy condition and a lazy message |
How to use the assertTrue() method in the test?
The two most common forms are shown below.
The first is using the Assertions class and then calling the assertTrue() in Java.
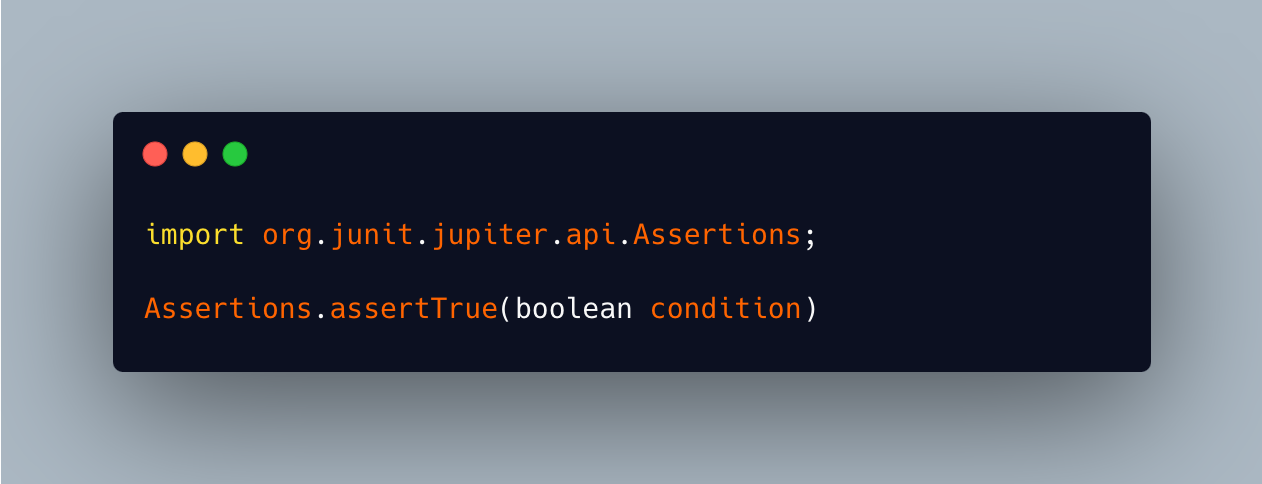
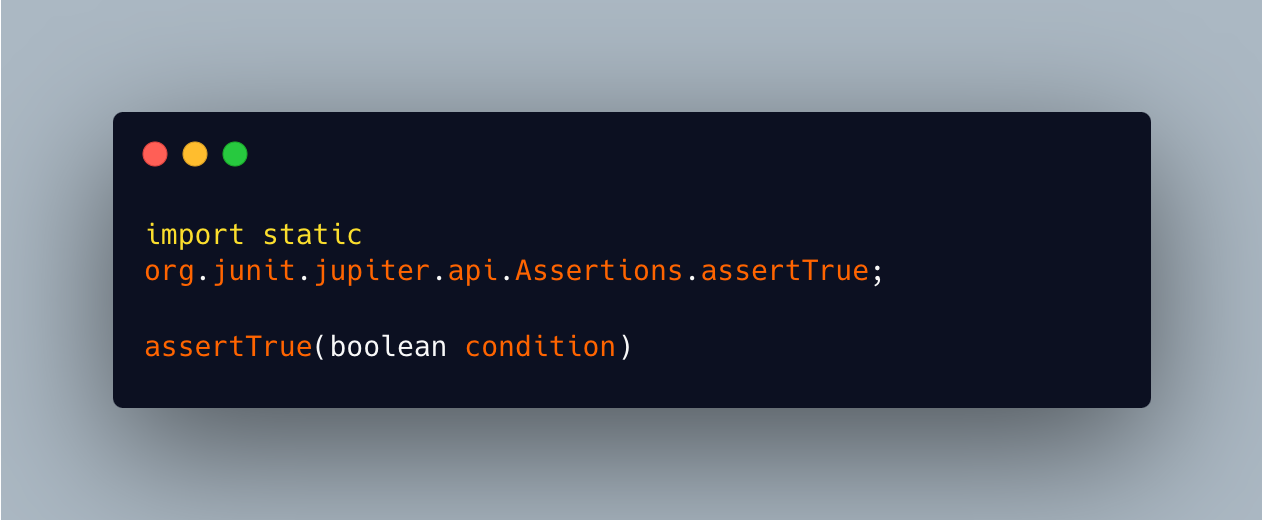
The second way is to directly import the static assertTrue() method in the test.
Setting up the project
Now look at the test scenarios and check the actual working of the assertTrue() in Java. We will use the following tech stack to demonstrate and run the tests on the TestMu AI cloud grid.
TestMu AI is an AI-powered test orchestration and execution platform that lets you perform Selenium Java testing at scale on an online browser farm of 3000+ real web browsers and operating systems. You even run your automated test suites with Selenium in parallel and achieve faster software release cycles.

Subscribe to the TestMu AI YouTube Channel and stay updated with the latest tutorials around automated testing, Selenium testing, Selenium with Java, and more.
| Programming Language/ Tools/Framework | Version |
|---|---|
| Java | 17 |
| Selenium WebDriver | 4.12.1 |
| JUnit 5 | 5.10.0 |
| Maven | 3.9.4 |
First, let's create a Maven project and add the dependencies for Selenium WebDriver and JUnit 5 in the pom.xml file to set up the project.
<project xmlns:xsi="http://www.w3.org/2001/XMLSchema-instance" xmlns="http://maven.apache.org/POM/4.0.0"
         xsi:schemaLocation="http://maven.apache.org/POM/4.0.0 http://maven.apache.org/xsd/maven-4.0.0.xsd">
    <modelVersion>4.0.0</modelVersion>

    <groupId>io.github.mfaisalkhatri</groupId>
    <artifactId>junit-examples</artifactId>
    <version>1.0-SNAPSHOT</version>
    <packaging>jar</packaging>

    <name>junit-examples</name>
    <url>http://maven.apache.org</url>

    <properties>
        <project.build.sourceEncoding>UTF-8</project.build.sourceEncoding>
        <maven.compiler.source>17</maven.compiler.source>
        <maven.compiler.target>17</maven.compiler.target>
        <junit.version>6.1.3</junit.version>
        <selenium.version>4.49.0</selenium.version>
        <junit.platform.launcher.version>6.1.3</junit.platform.launcher.version>
<maven-surefire-plugin.version>3.6.0</maven-surefire-plugin.version>
    </properties>

    <dependencies>
        <!-- https://mvnrepository.com/artifact/org.junit.jupiter/junit-jupiter -->
        <dependency>
            <groupId>org.junit.jupiter</groupId>
            <artifactId>junit-jupiter</artifactId>
            <version>${junit.version}</version>
            <scope>test</scope>
        </dependency>
        <!-- https://mvnrepository.com/artifact/org.seleniumhq.selenium/selenium-java -->
        <dependency>
            <groupId>org.seleniumhq.selenium</groupId>
            <artifactId>selenium-java</artifactId>
            <version>${selenium.version}</version>
        </dependency>
        <!-- https://mvnrepository.com/artifact/org.junit.platform/junit-platform-launcher -->
        <dependency>
            <groupId>org.junit.platform</groupId>
            <artifactId>junit-platform-launcher</artifactId>
            <version>${junit.platform.launcher.version}</version>
            <scope>test</scope>
        </dependency>
    </dependencies>

    <build>
        <plugins>
            <plugin>
                <groupId>org.apache.maven.plugins</groupId>
                <artifactId>maven-surefire-plugin</artifactId>
                <version>${maven-surefire-plugin.version}</version>
                <configuration>
                    <includes>**/*Test*.java</includes>
                </configuration>
            </plugin>
        </plugins>
    </build>
</project>
The project setup is complete, with the dependencies updated in the pom.xml, and we can now proceed to write the automated tests.
Test Scenarios
We will cover the following test scenarios as a part of the automation test to demo the working of the assertTrue() in Java.
Test Scenario 1
- Open the TestMu AI's Selenium Playground website.
- Navigate to the Checkbox Demo screen.
- In the Disabled Checkbox Demo section, tick Option 1.
- Using assertTrue(), verify that the Option 1 checkbox is ticked successfully.
- Next, using assertTrue(), verify that the Option 3 checkbox is disabled.
TestMu AI's Selenium Playground
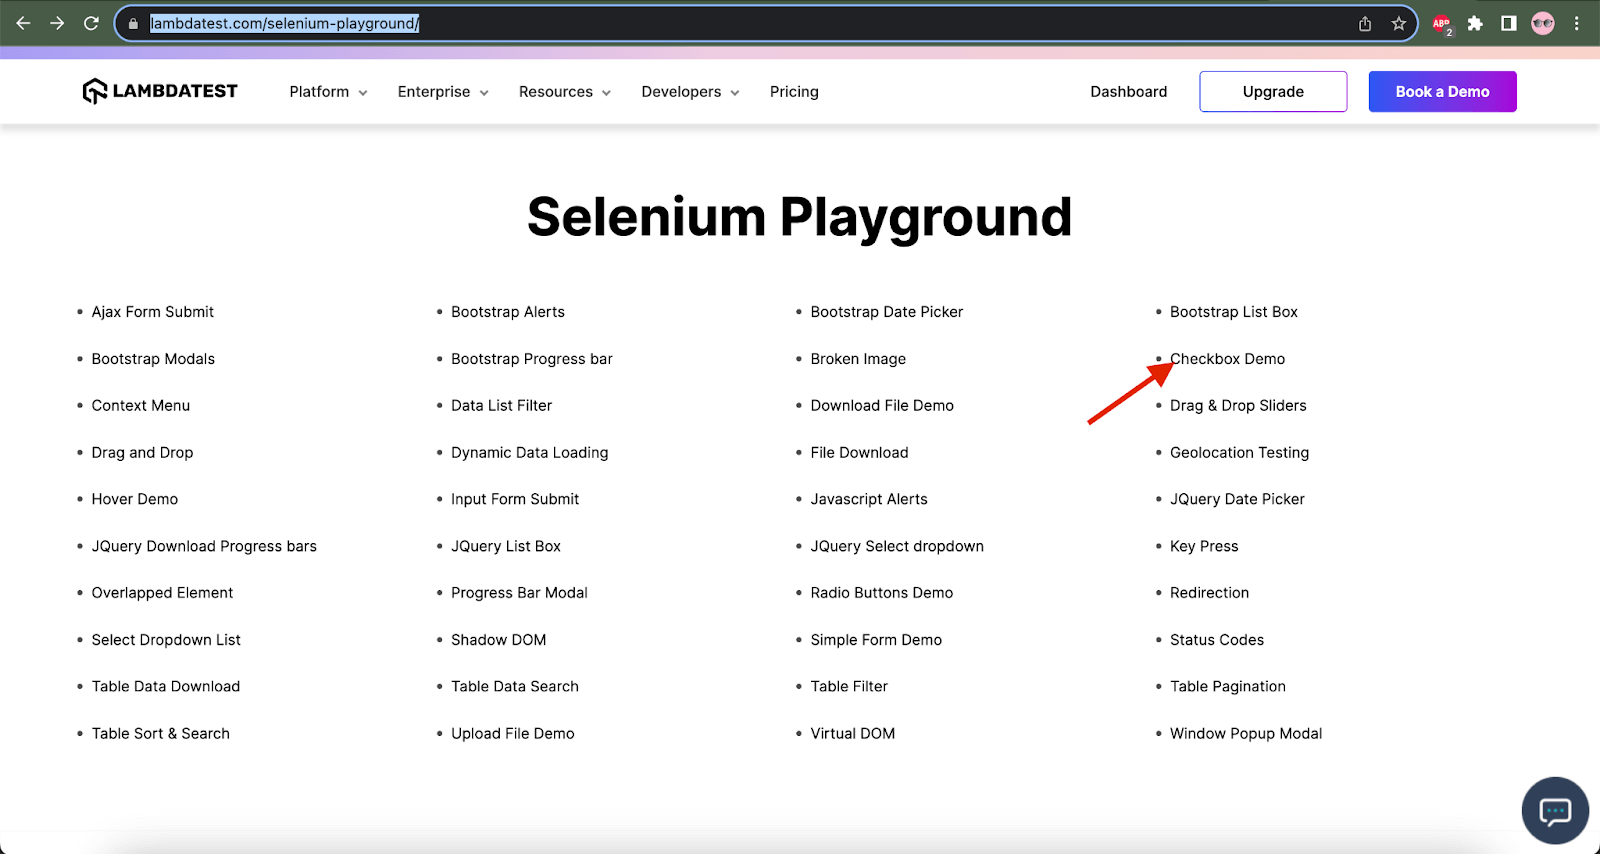
Checkbox Demo Screen
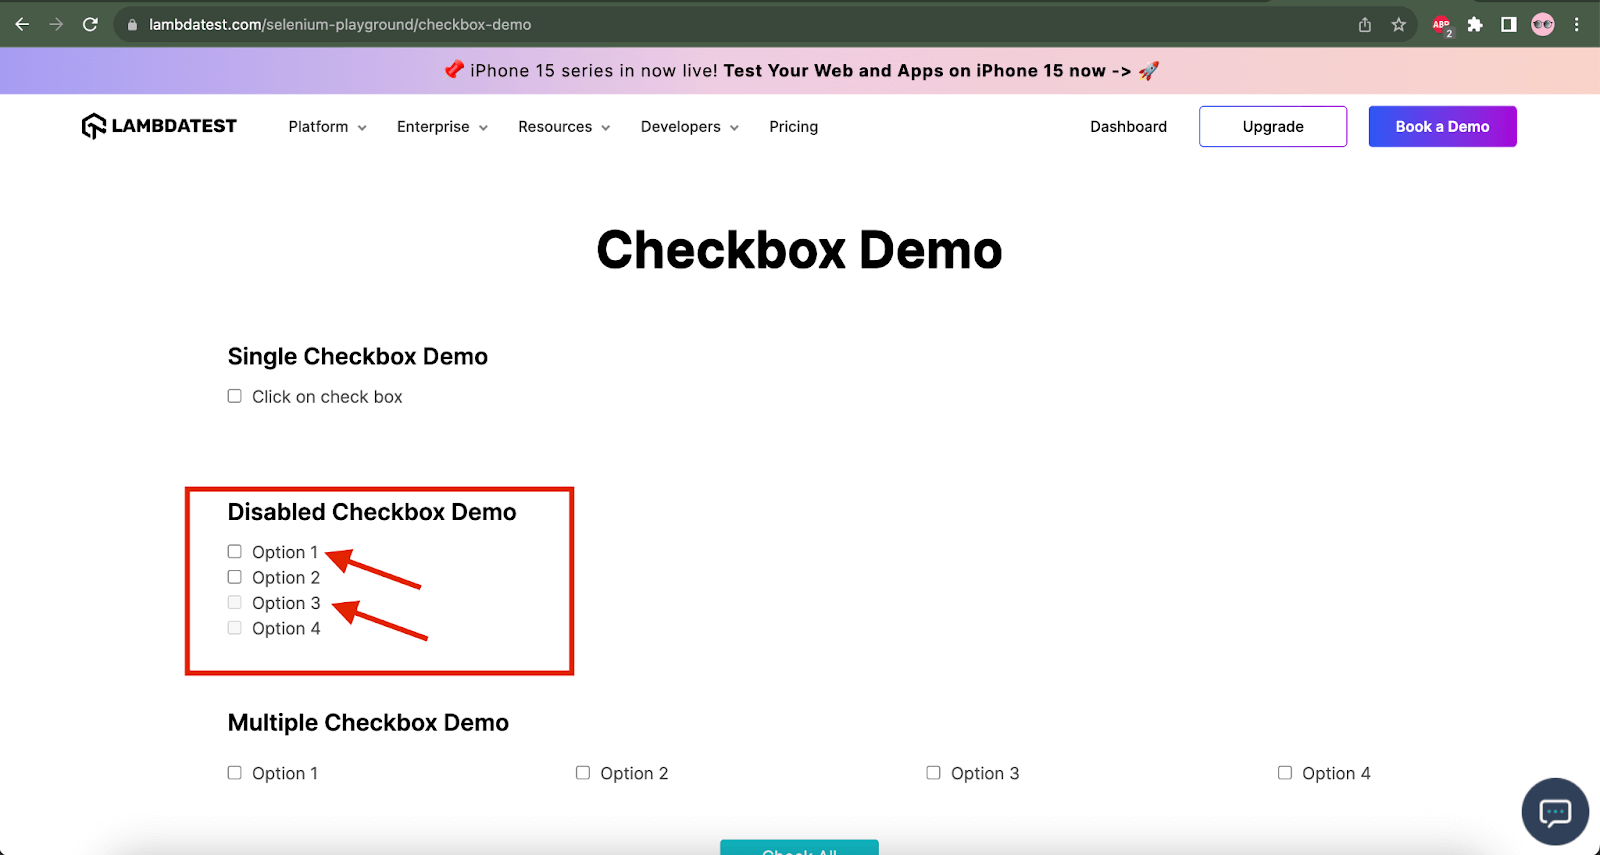
Test Scenario 2
- Open the TestMu AI's Selenium Playground website.
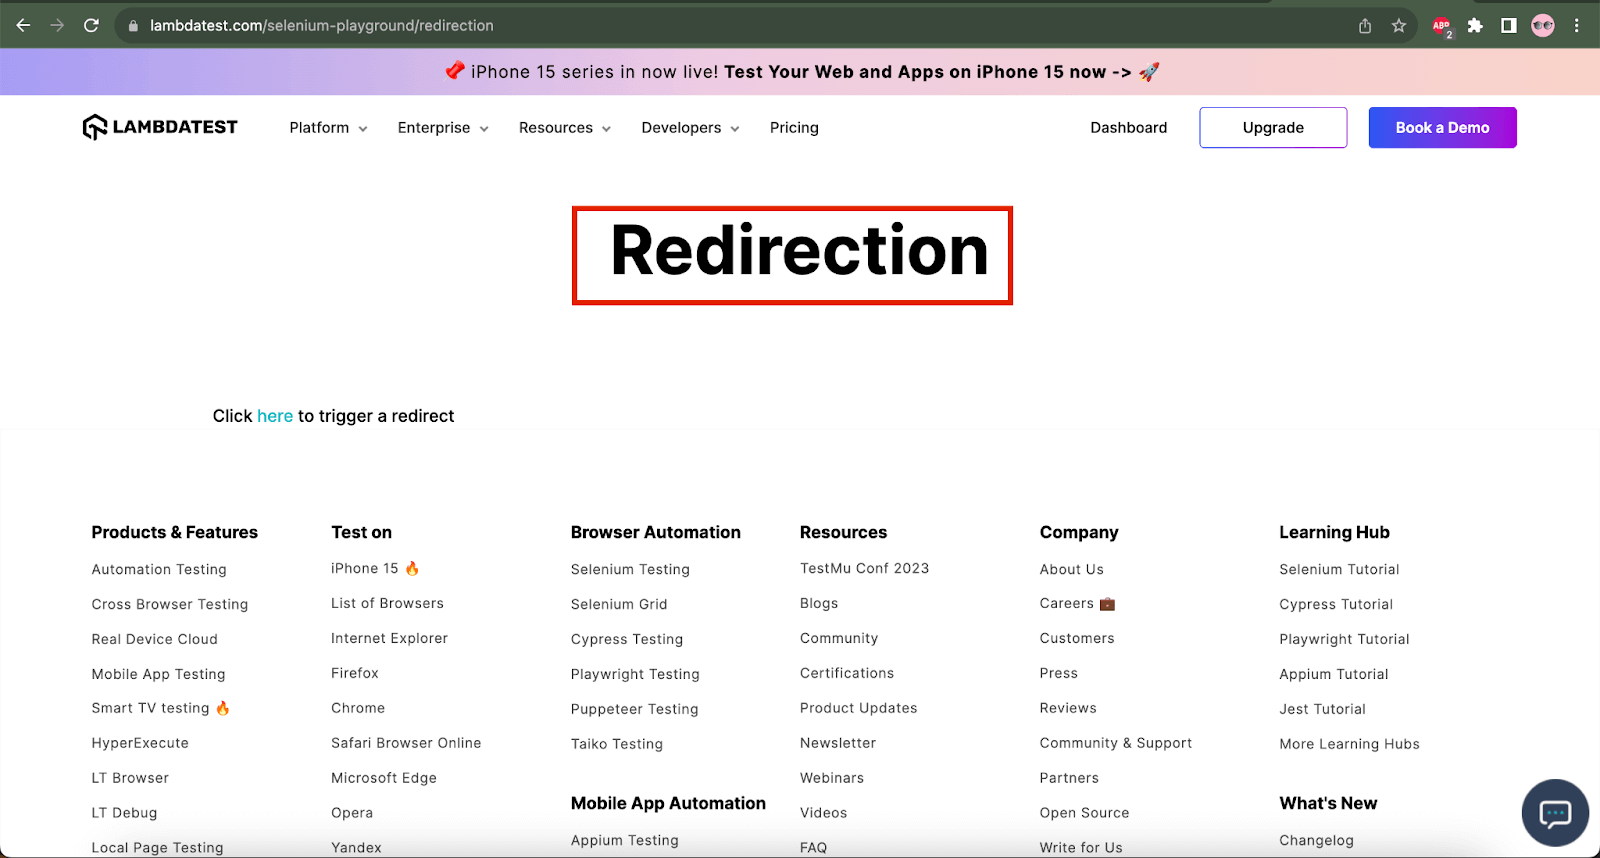
- Navigate to the Redirection page.
- Using assertTrue(), verify that the page header is displayed on successfully loading the Redirection Page.
TestMu AI's Selenium Playground
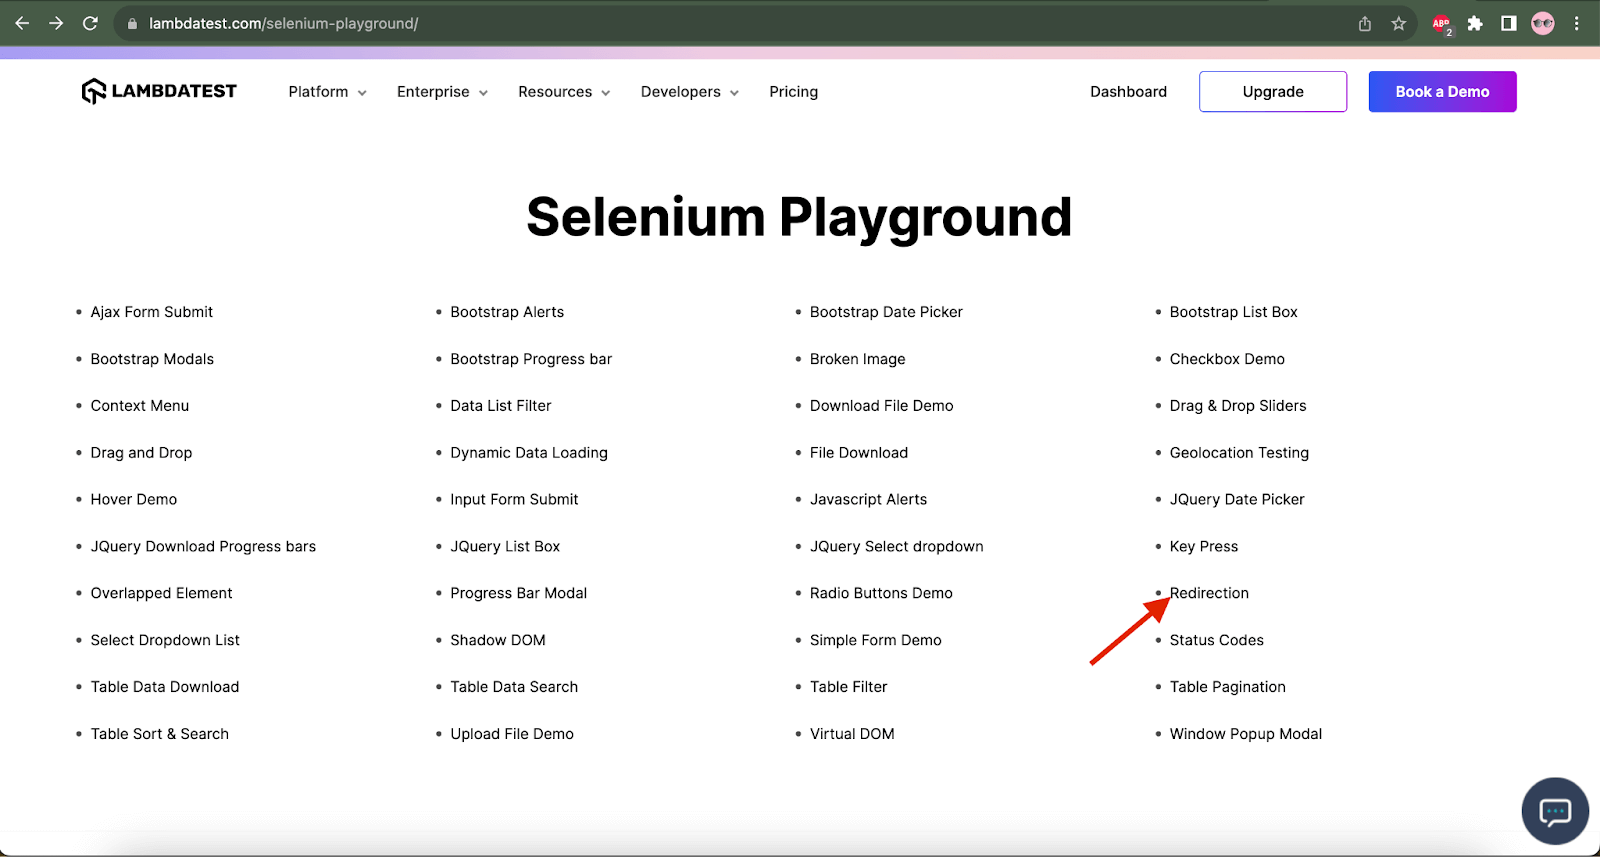
Redirection Page
Test Scenario 3
- Open the TestMu AI's Selenium Playground website.
- Navigate to the Data List Filter page.
- Search for a record by entering the Attendee name.
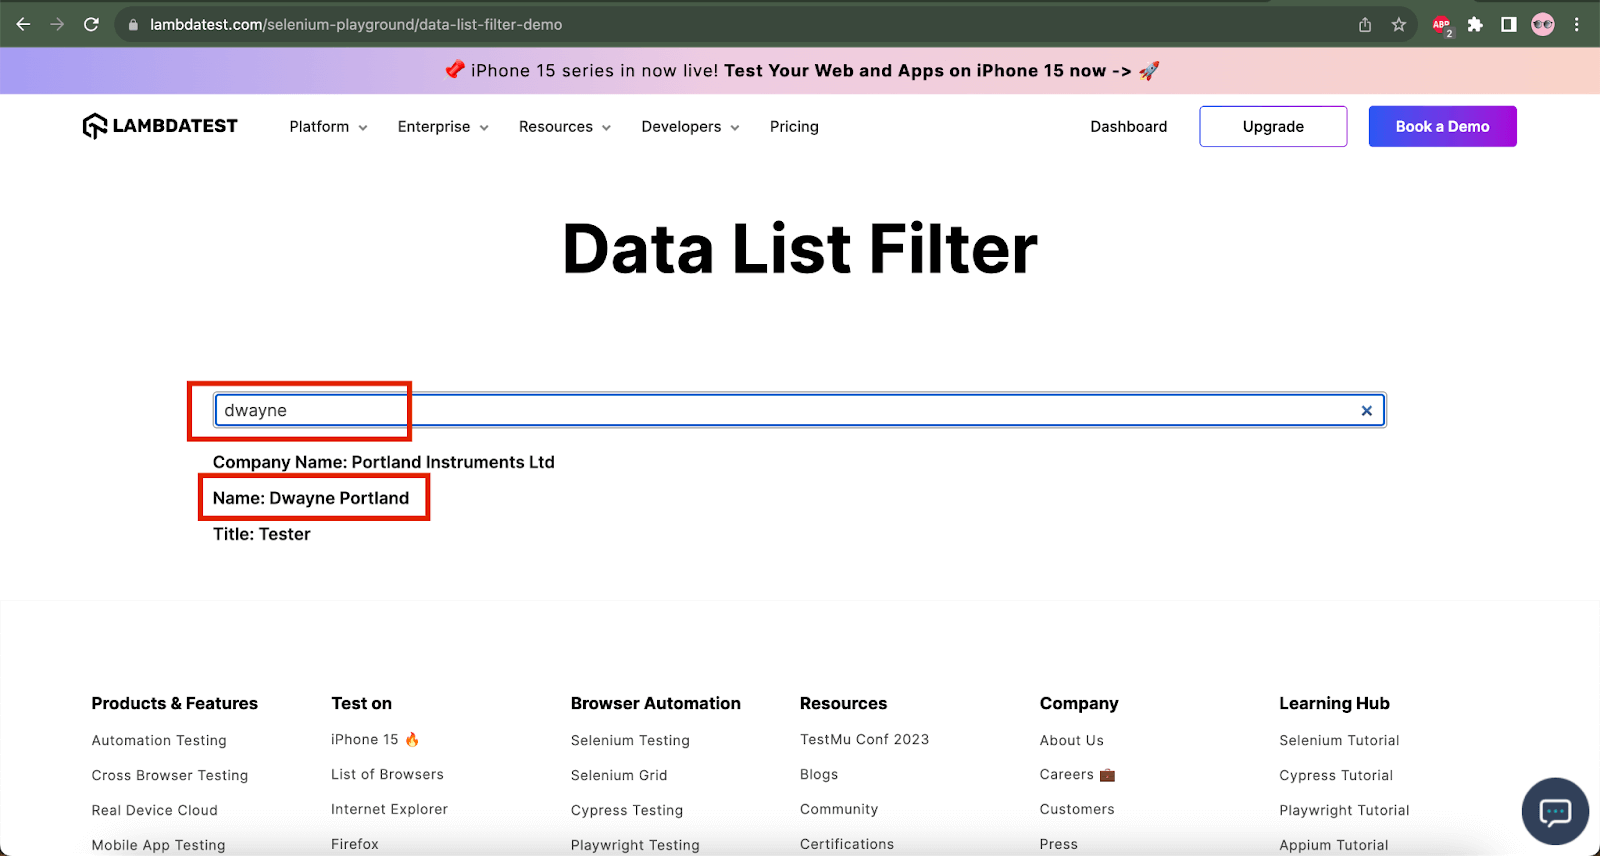
- Using assertTrue(), verify that the data retrieved contains the Attendee name entered in the search box.
TestMu AI's Selenium Playground
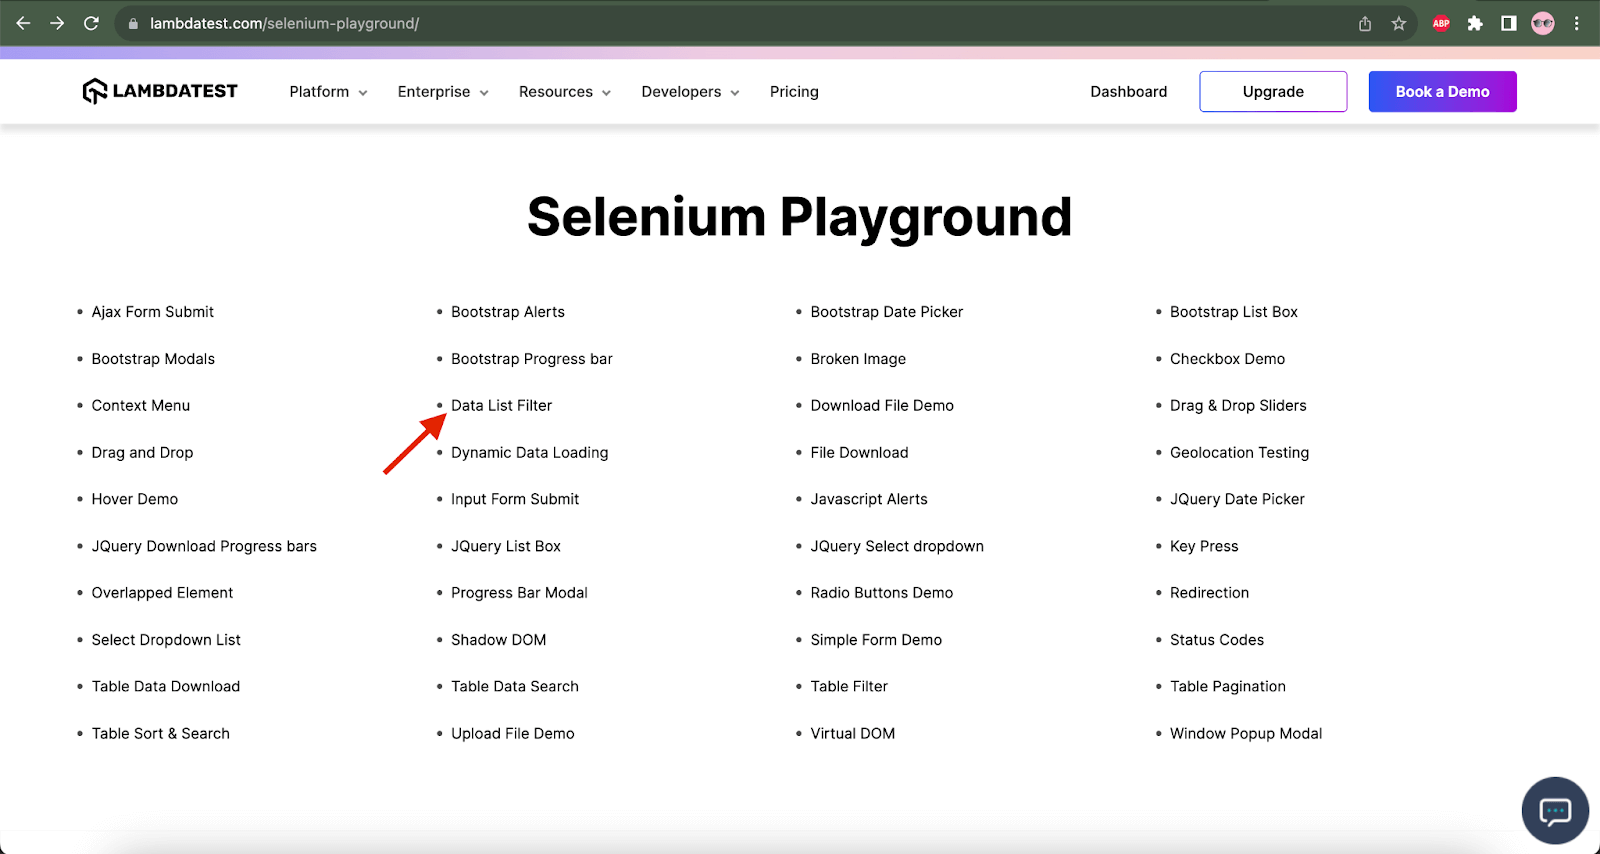
Data List Filter Screen

We will run the tests on the Chrome browser on the Windows 11 platform using the TestMu AI Cloud grid.

Note: Automate your Java automated tests with Selenium. Try TestMu AI Today!
Implementation [Test Scenario 1]
In test scenario 1, we must open TestMu AI's Selenium Playground website and navigate to the Checkbox Demo screen. We need to tick the Option 1 checkbox in the Disabled Checkbox Demo section and use the assertTrue() in Java to verify that it is ticked successfully. We will also check that the Option 3 checkbox is disabled using the assertTrue() method.
The following automated test method named checkboxDemoTest() is written in the SeleniumPlaygroundTests class that will help us achieve the automation of the test scenario:
Filename: SeleniumPlaygroundTests.java
@Test
    public void checkboxDemoTest() {
        createDriver(Browsers.REMOTE_CHROME);
        final String website = "https://www.testmuai.com/selenium-playground/";
        getDriver().get(website);

        final HomePage homePage = new HomePage();
        homePage.navigateToLink("Checkbox Demo");

        final var checkboxDemoPage = new CheckboxDemoPage();
        assertTrue(checkboxDemoPage.checkIfCheckboxOneIsTicked(), "Check box one is not ticked");
        assertTrue(checkboxDemoPage.checkIfCheckboxThreeIsDisabled());
    }
@Test
   public void checkboxDemoTest() {
       createDriver(Browsers.REMOTE_CHROME);
       final String website = "https://www.testmuai.com/selenium-playground/";
       getDriver().get(website);

       final HomePage homePage = new HomePage();
       homePage.navigateToLink("Checkbox Demo");

       final var checkboxDemoPage = new CheckboxDemoPage();
       assertTrue(checkboxDemoPage.checkIfCheckboxOneIsTicked(), "Check box one is not ticked");
       assertTrue(checkboxDemoPage.checkIfCheckboxThreeIsDisabled());
   }
The first line of the method will create an instance of the Chrome browser in the TestMu AI Cloud grid. createDriver() method is a static method in the DriverManager class that will help us instantiate a new instance of WebDriver.
Filename: DriverManager.java

The browser's name passed in the createDriver() method parameter will get started. The REMOTE_CHROME browser name will call the setupChromeInRemote() method.
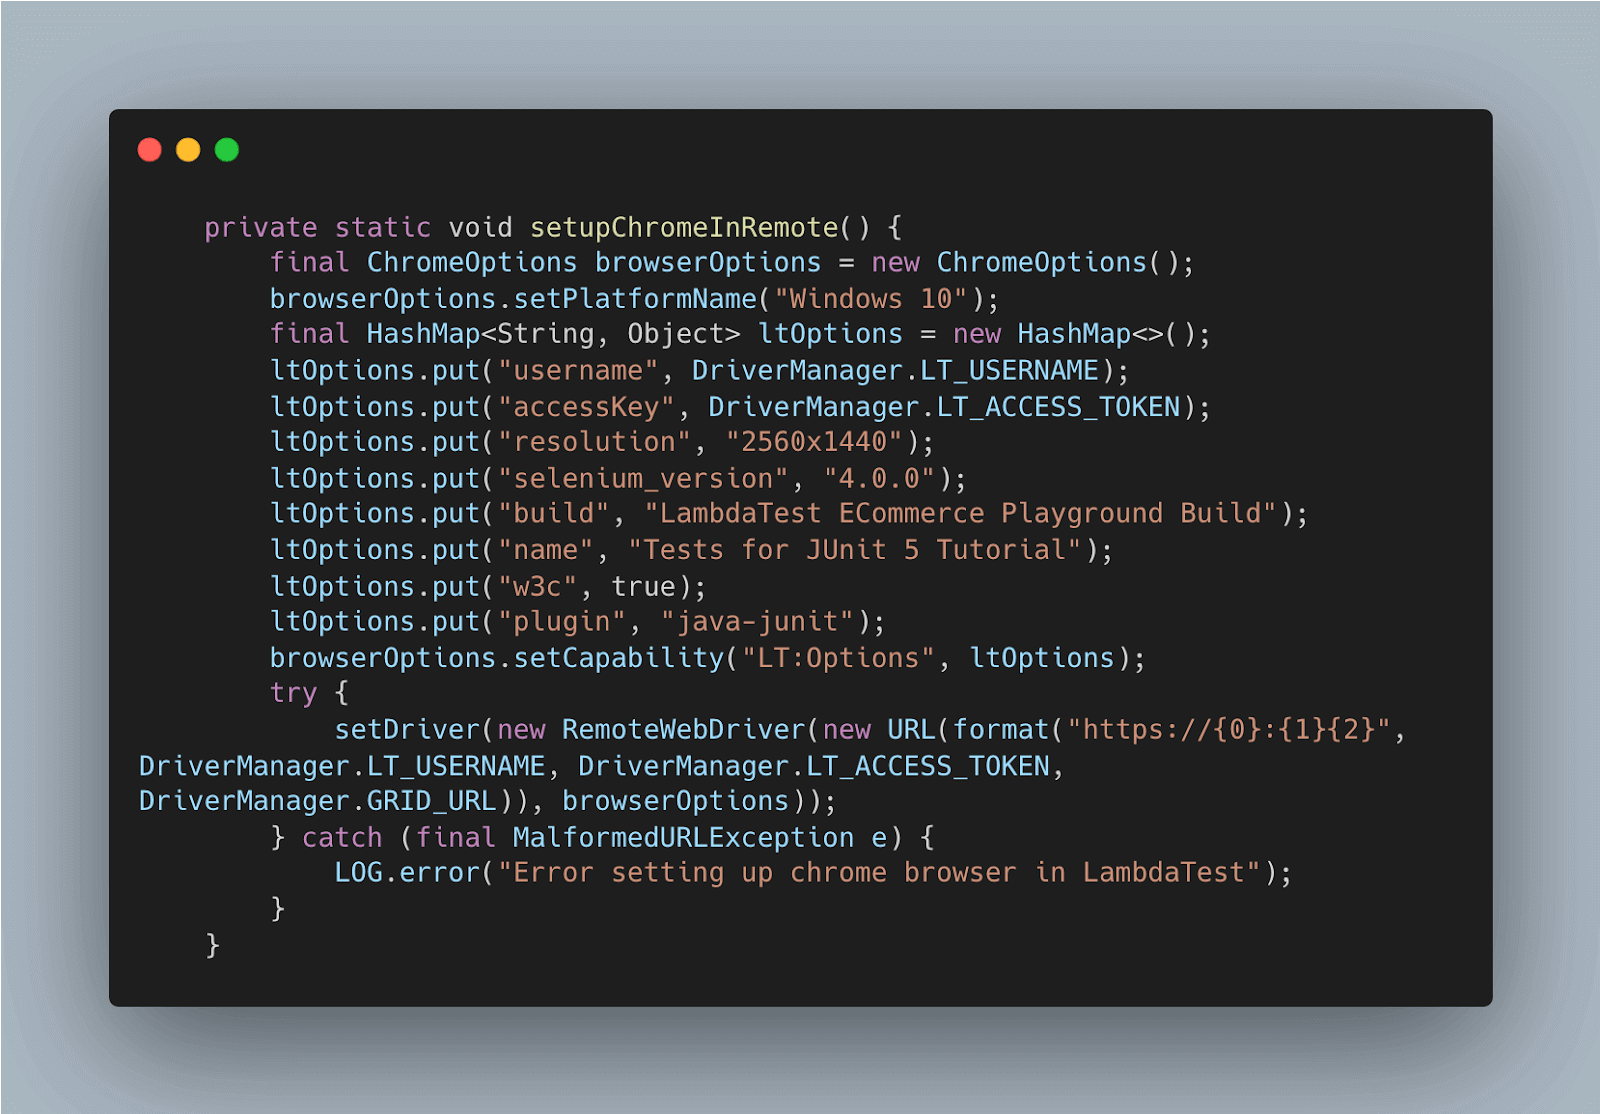
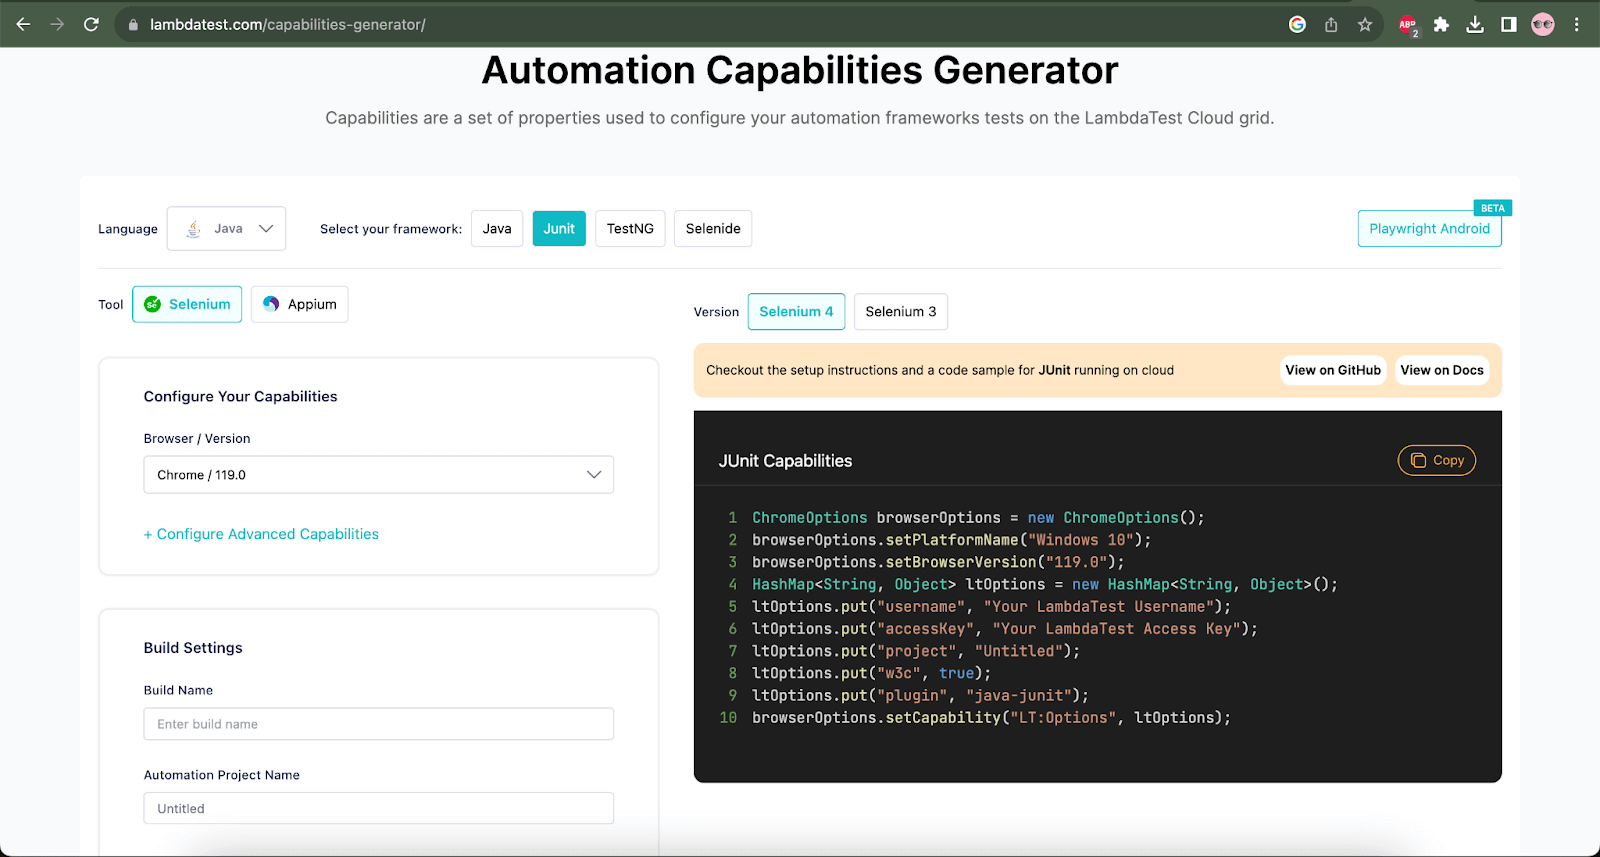
This method will set all the desired capabilities and the configuration required for running the tests on the TestMu AI Cloud grid. These capabilities can be directly copied using the TestMu AI Capabilities Generator.
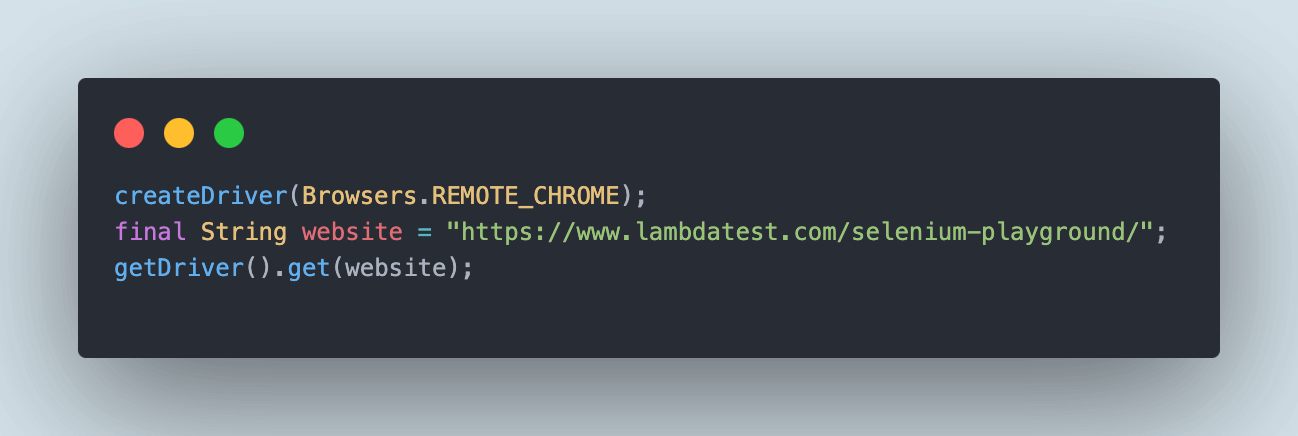
Once the driver session is created and the Chrome browser is started, the next line in the test will navigate the user to the TestMu AI Selenium Playground website.
On the website's Homepage, the Checkbox Demo link will be clicked to navigate the user to the Checkbox Demo page.
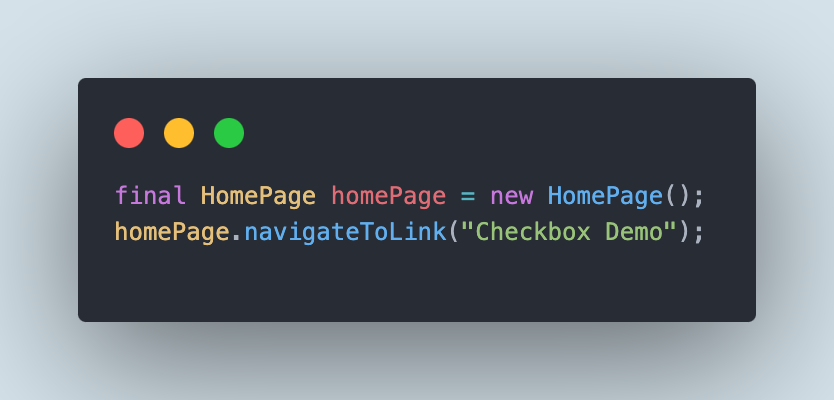
The Page Object Model is used in this project as it helps test readability, reduces code duplication, and acts as an interface for the web page under test. The HomePage class houses the page objects for the Home Page of TestMu AI's Selenium Playground website.
As the Homepage contains links to different website windows, a generic method has been created to search the links using the respective LinkText and then click on it to navigate to the required page.
Filename: HomePage.java
public class HomePage {

    public void navigateToLink (final String linkText) {
        getDriver ().findElement (By.linkText (linkText)).click ();
    }
}
The next step is to tick the Option 1 checkbox under the Disabled Checkbox Demo section and verify that it is ticked successfully using the assertTrue() in Java.
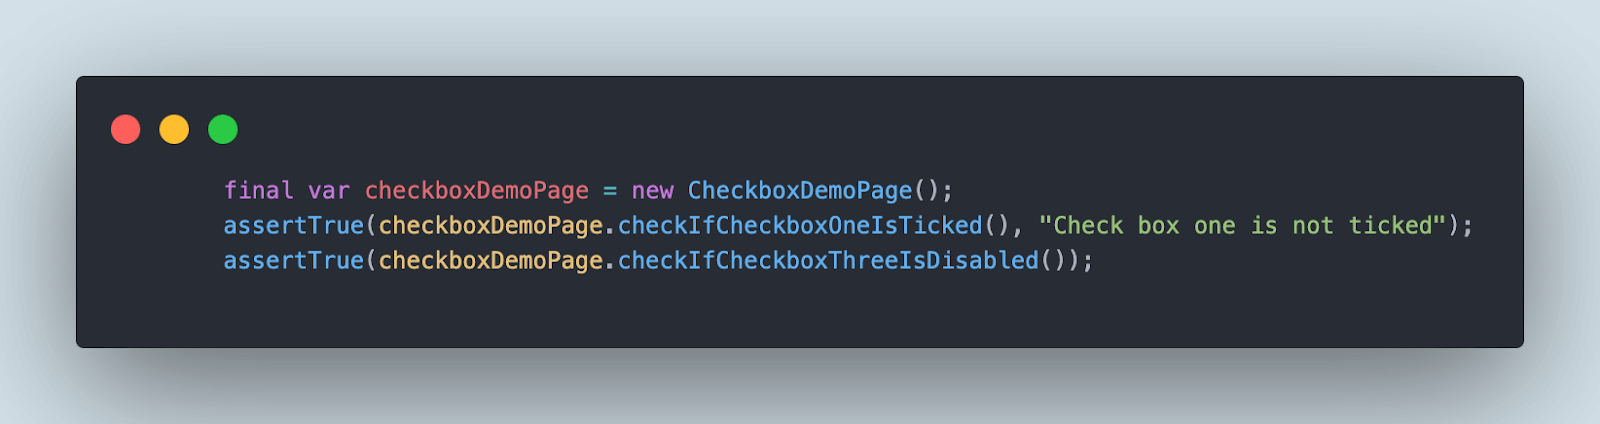
We will also provide a message in the assertTrue() method so that if the test fails, this text will be printed in the console for easy interpretation of the failure.
The page objects for the Checkbox page are updated in the CheckboxDemoPage class. The checkboxOne() method will return a WebElement for the Option 1 checkbox.
The checkboxes on this page have no IDs, and "Option 1" and "Option 3" each appear twice, in the Disabled Checkbox Demo and the Multiple Checkbox Demo sections. So the locator starts from the Disabled Checkbox Demo heading and takes the first label with the option text after it, using XPath. The checkboxThree() method uses the same pattern for Option 3.
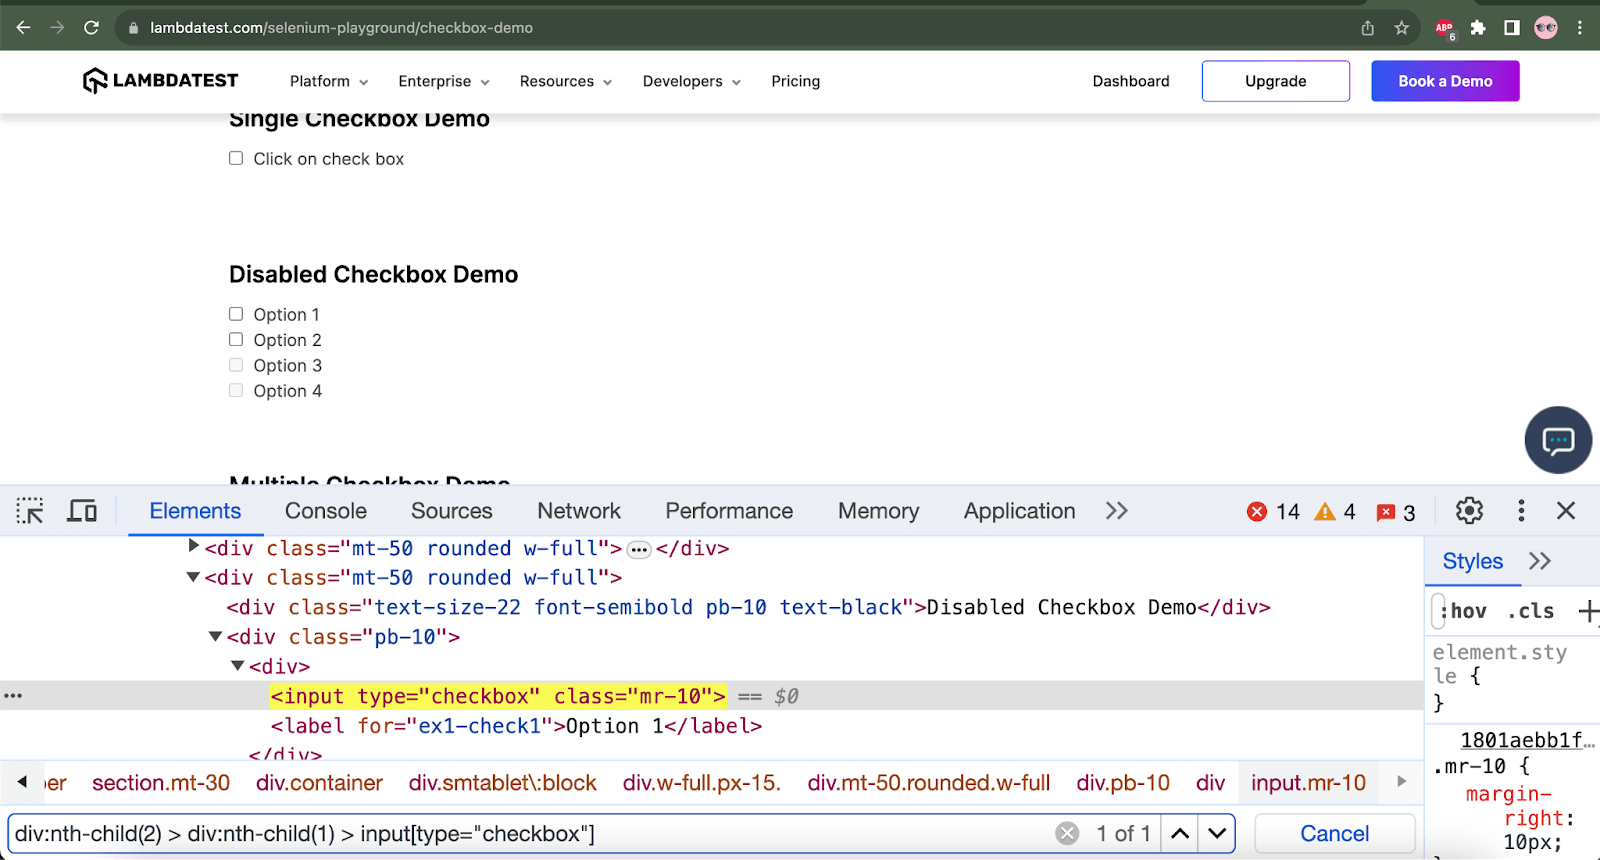
The checkIfCheckboxOneIsTicked() method will tick the Option 1 checkbox and return the boolean value stating if the checkbox is selected.
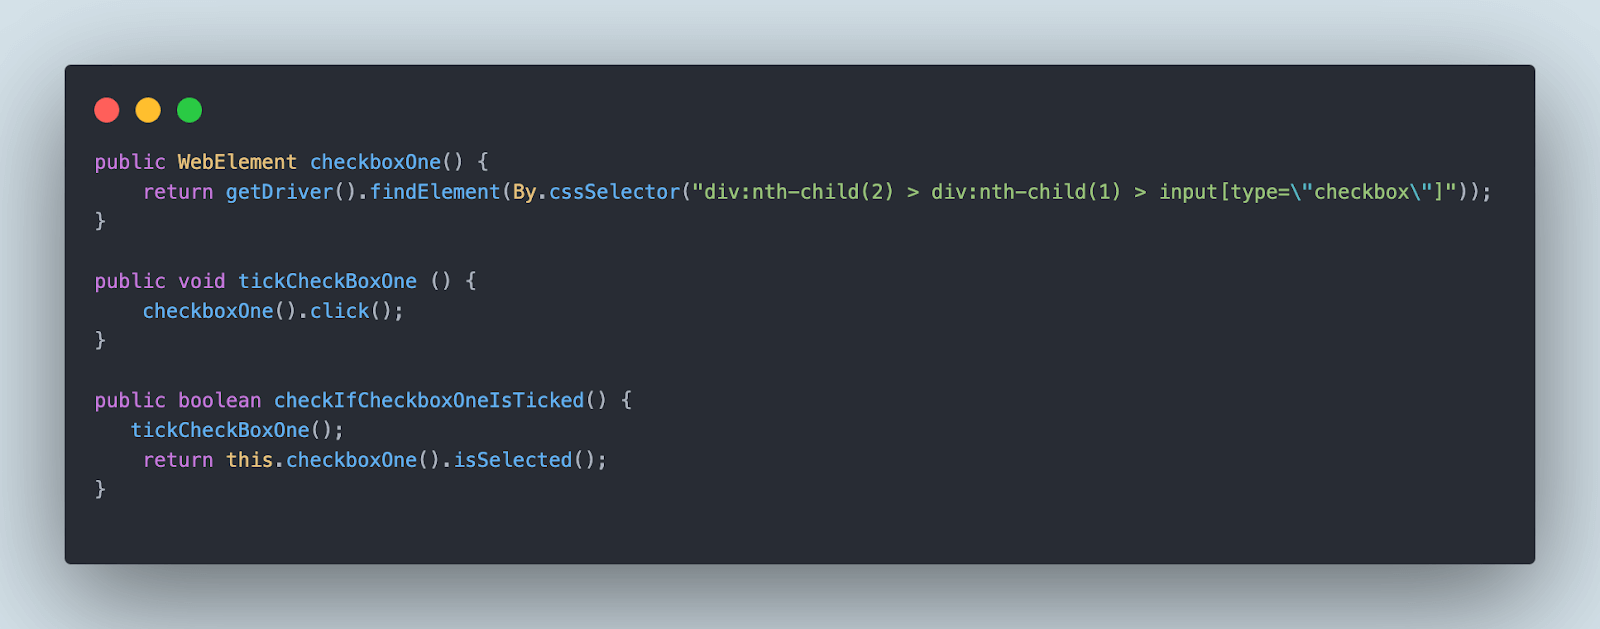
Filename: CheckboxDemoPage.java
public class CheckboxDemoPage {

    public WebElement checkboxOne() {
        return getDriver().findElement(By.xpath("//h2[normalize-space()='Disabled Checkbox Demo']/following::label[normalize-space()='Option 1'][1]/input"));
    }
    public WebElement checkboxThree() {
        return getDriver().findElement(By.xpath("//h2[normalize-space()='Disabled Checkbox Demo']/following::label[normalize-space()='Option 3'][1]/input"));
    }

    public void tickCheckBoxOne () {
        checkboxOne().click();
    }

    public boolean checkIfCheckboxOneIsTicked() {
       tickCheckBoxOne();
        return this.checkboxOne().isSelected();
    }

    public boolean checkIfCheckboxThreeIsDisabled() {
        return !this.checkboxThree().isEnabled();
    }
}
The next assertion performed using the assertTrue() in Java is to check that the Option 3 checkbox is disabled.
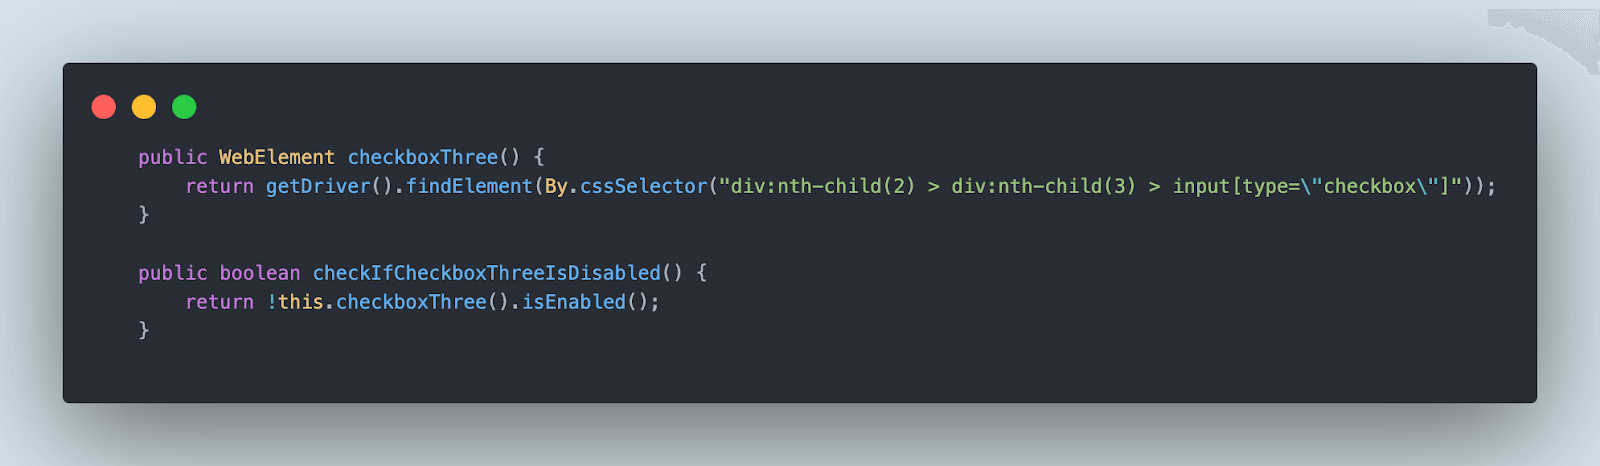
The checkIfCheckboxThreeIsDisabled() method from the CheckboxPage class is used to check the disabled state of the checkbox.
The point to note here is that we are using the "!" while returning the output of the boolean condition from the checkIfCheckboxThreeIsDisabled() method that uses the isEnabled() method. So, ideally, it will check that the checkbox is disabled and return the output as true, else it will return false.
Test Execution
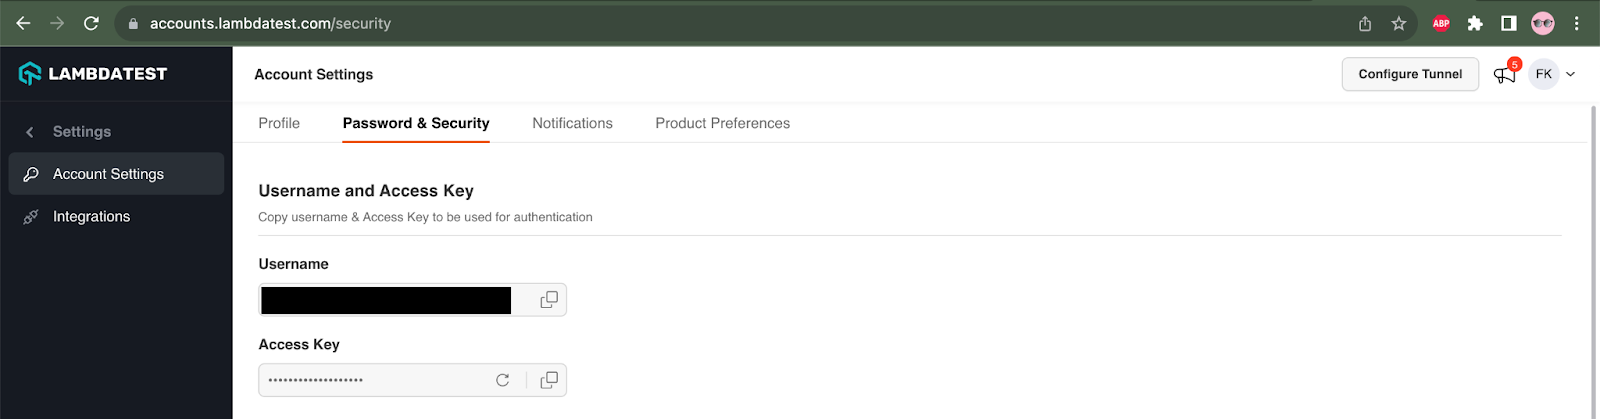
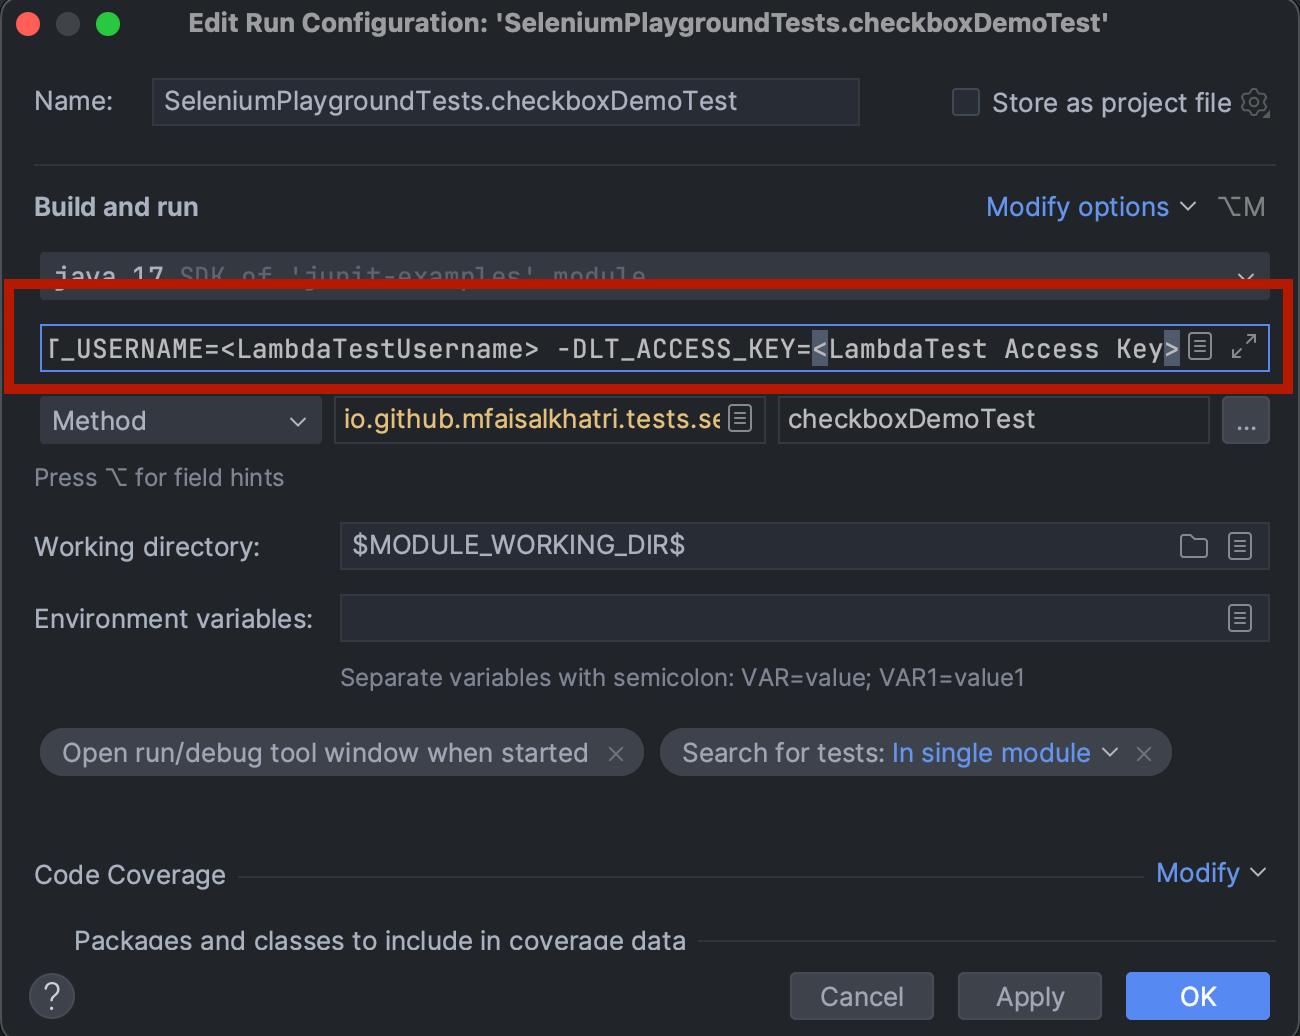
The TestMu AI Username and Access Key must be provided for authentication to run tests successfully on the TestMu AI Cloud grid. These values can be updated in the Run Configuration window, which can be opened using the Modify Run Configuration option by clicking the Green Play button beside the test method name.
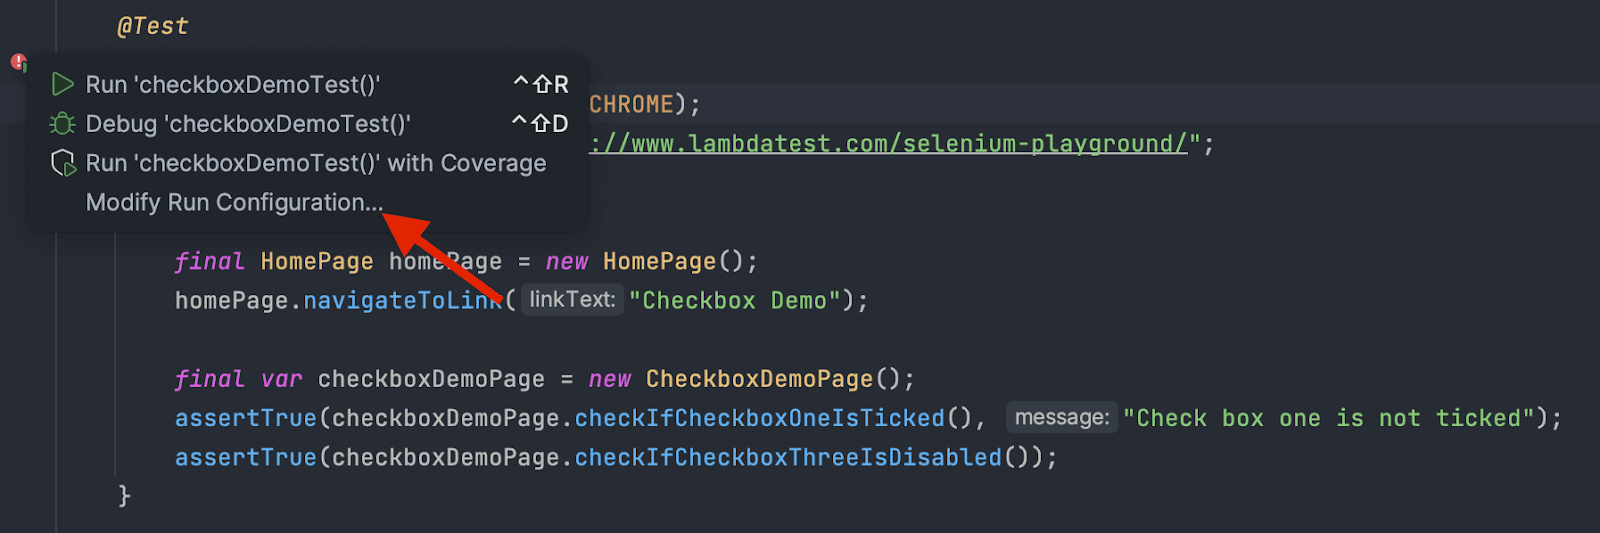
The TestMu AI Username and Access Key values can be copied from the Profile >> Account Settings >> Password and Security window.
In the Run Configuration window, update the values for the Username and Access Key as follows :
-DLT_USERNAME= < TestMu AI Username > -DLT_ACCESS_KEY=< TestMu AI_Access_Key >
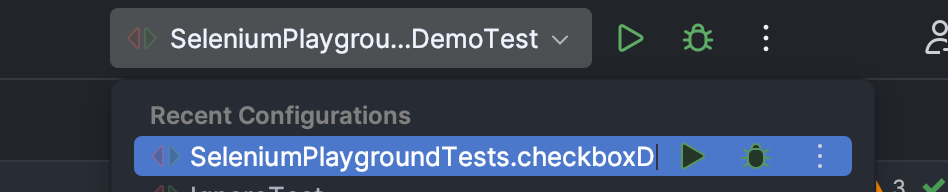
Once the credentials are successfully updated in the configuration window, the tests can be executed by selecting Run Configuration from the dropdown in the top menu bar and clicking on the green button.
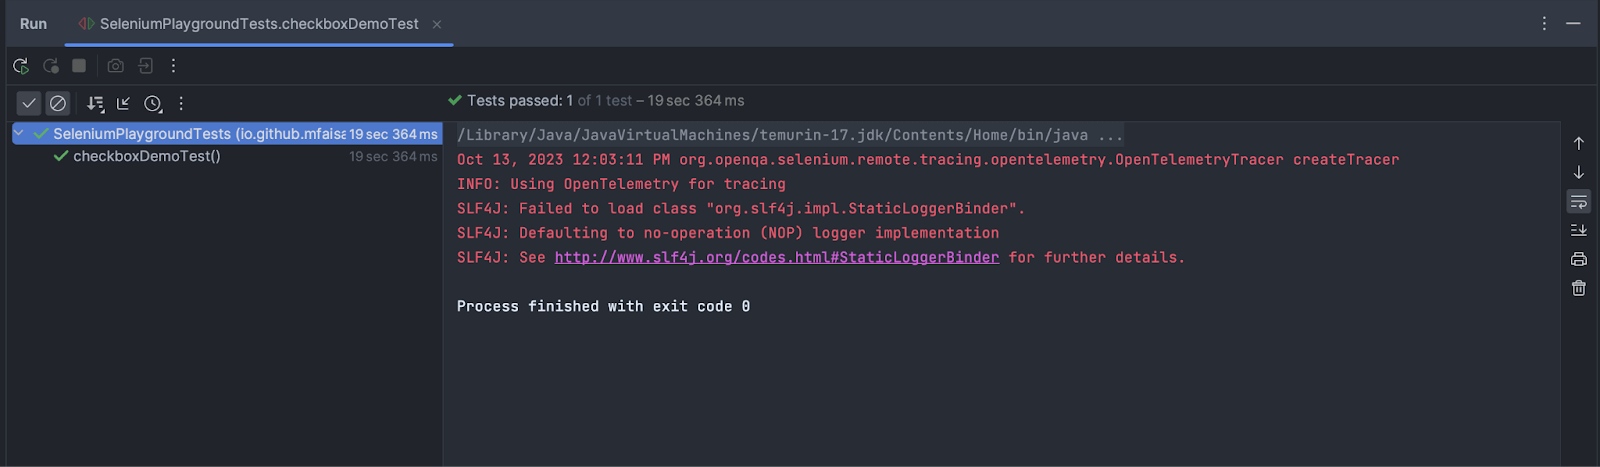
Screenshot of the test execution
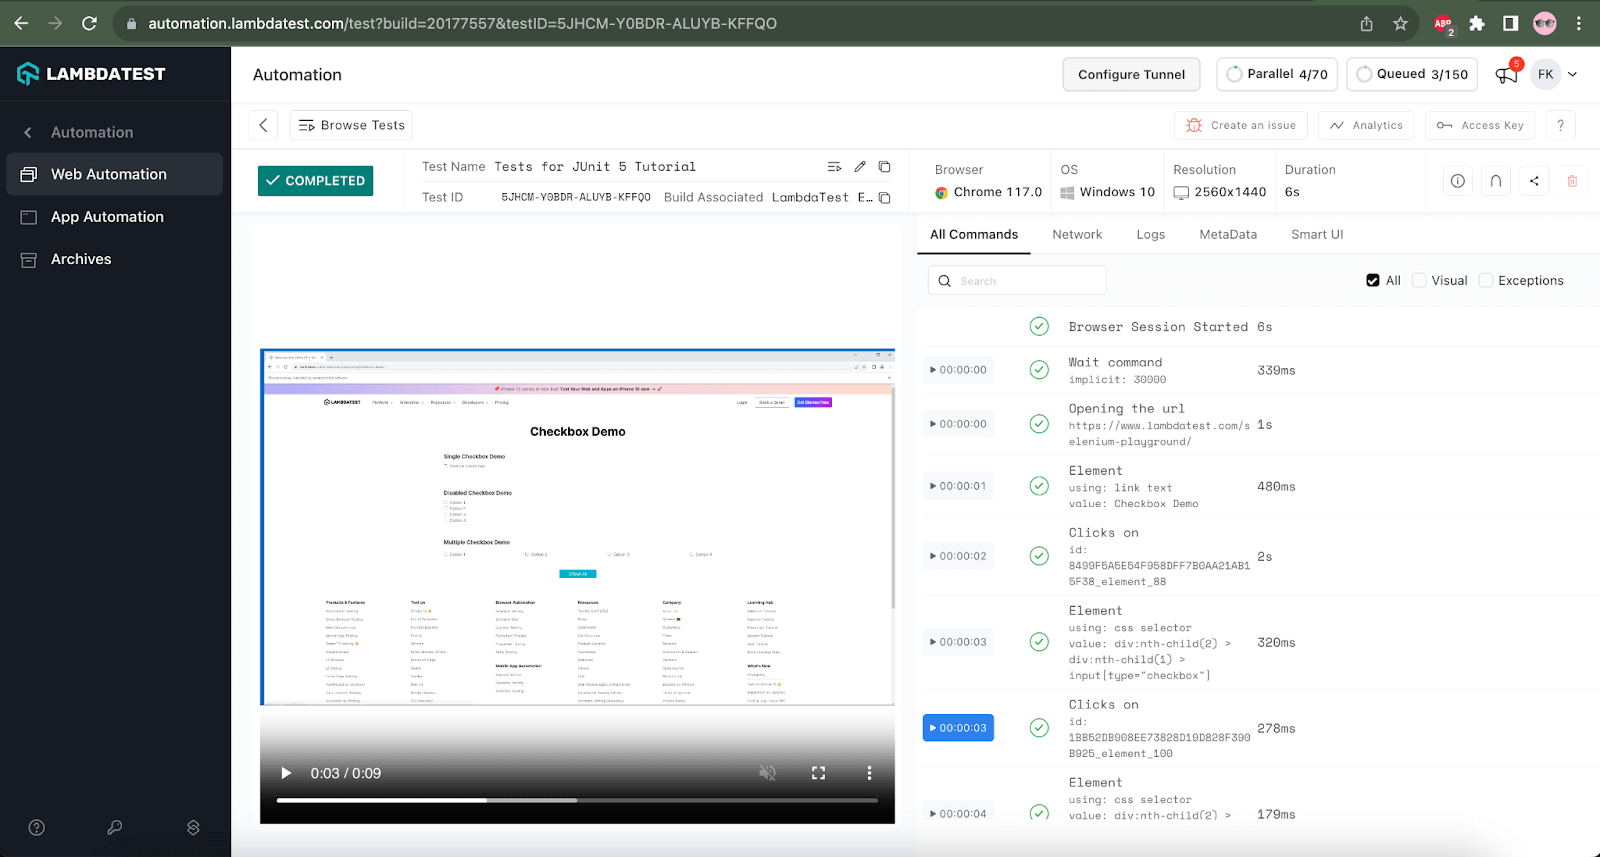
All the test details can be viewed on the TestMu AI dashboard, including platform name, browser name, resolution, test execution logs, time taken to execute the tests, etc.
Implementation [Test Scenario 2]
In test scenario 2, we will navigate to the Redirection page on TestMu AI's Selenium Playground website and verify that the page title is displayed using the assertTrue() in Java.
The steps for test scenario 2 will be automated using the redirectionPageTest() method created inside the SeleniumPlaygroundTests.java class.
Filename: SeleniumPlaygroundTests.java
@Test
    public void redirectionPageTest() {
        createDriver(Browsers.REMOTE_CHROME);
        final String website = "https://www.testmuai.com/selenium-playground/";
        getDriver().get(website);

        final HomePage homePage = new HomePage();
        homePage.navigateToLink("Redirection");

        final var redirectionPage = new RedirectionPage();
        assertTrue(redirectionPage.isPageTitleDisplayed());
    }
@Test
   public void redirectionPageTest() {
       createDriver(Browsers.REMOTE_CHROME);
       final String website = "https://www.testmuai.com/selenium-playground/";
       getDriver().get(website);

       final HomePage homePage = new HomePage();
       homePage.navigateToLink("Redirection");

       final var redirectionPage = new RedirectionPage();
       assertTrue(redirectionPage.isPageTitleDisplayed());
   }
The initial 3 lines in the test are the same as we discussed in the test scenario 1 implementation. We will not discuss the configuration and setup for creating a WebDriver session and launching the Chrome browser.
Once the website is loaded on the browser, the Redirection page is navigated, and further interaction is taken to check that the title is displayed on the page.
public class RedirectionPage {

    public boolean isPageTitleDisplayed() {
        return getDriver().findElement(By.tagName("h1")).isDisplayed();
    }
}
The RedirectionPage class is created to update all the page objects related to the Redirection page. The isPageTitleDisplayed() method returns a boolean value using the Selenium WebDriver's isDisplayed() method.
First, the Page title will be located, and then, using the isDisplayed() method, the verification will be done to check that it is displayed on the page. The assertTrue() method is finally used in the test to check the result of the boolean condition returned by the isPageTitleDisplayed() method.
Test Execution
The steps followed while executing Test Scenario 1 for setting the TestMu AI Username and AccessKey to execute the tests on the TestMu AI Cloud grid. The same steps need to be followed while executing this test.
As we have already set the TestMu AI Username and AccessKey in the Configuration window, we can re-use the same window and just change the test method name to run this test.
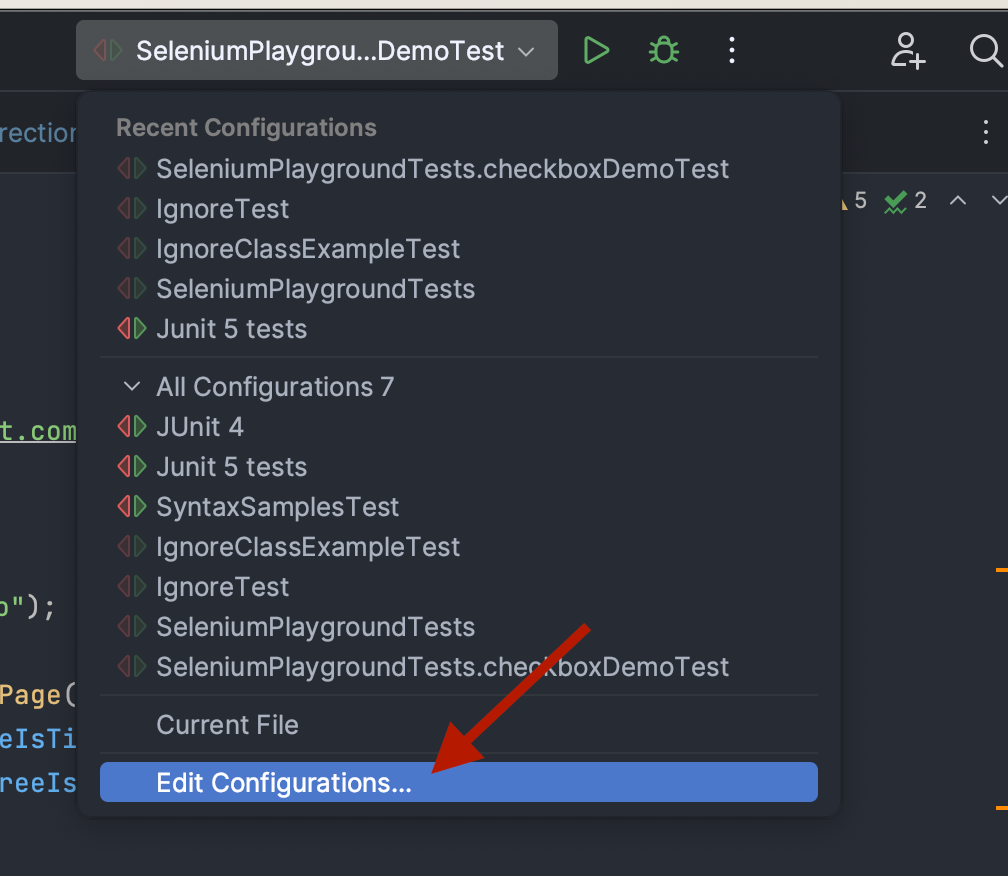
Click the Run/Debug Configuration dropdown and select the Edit Configuration option.
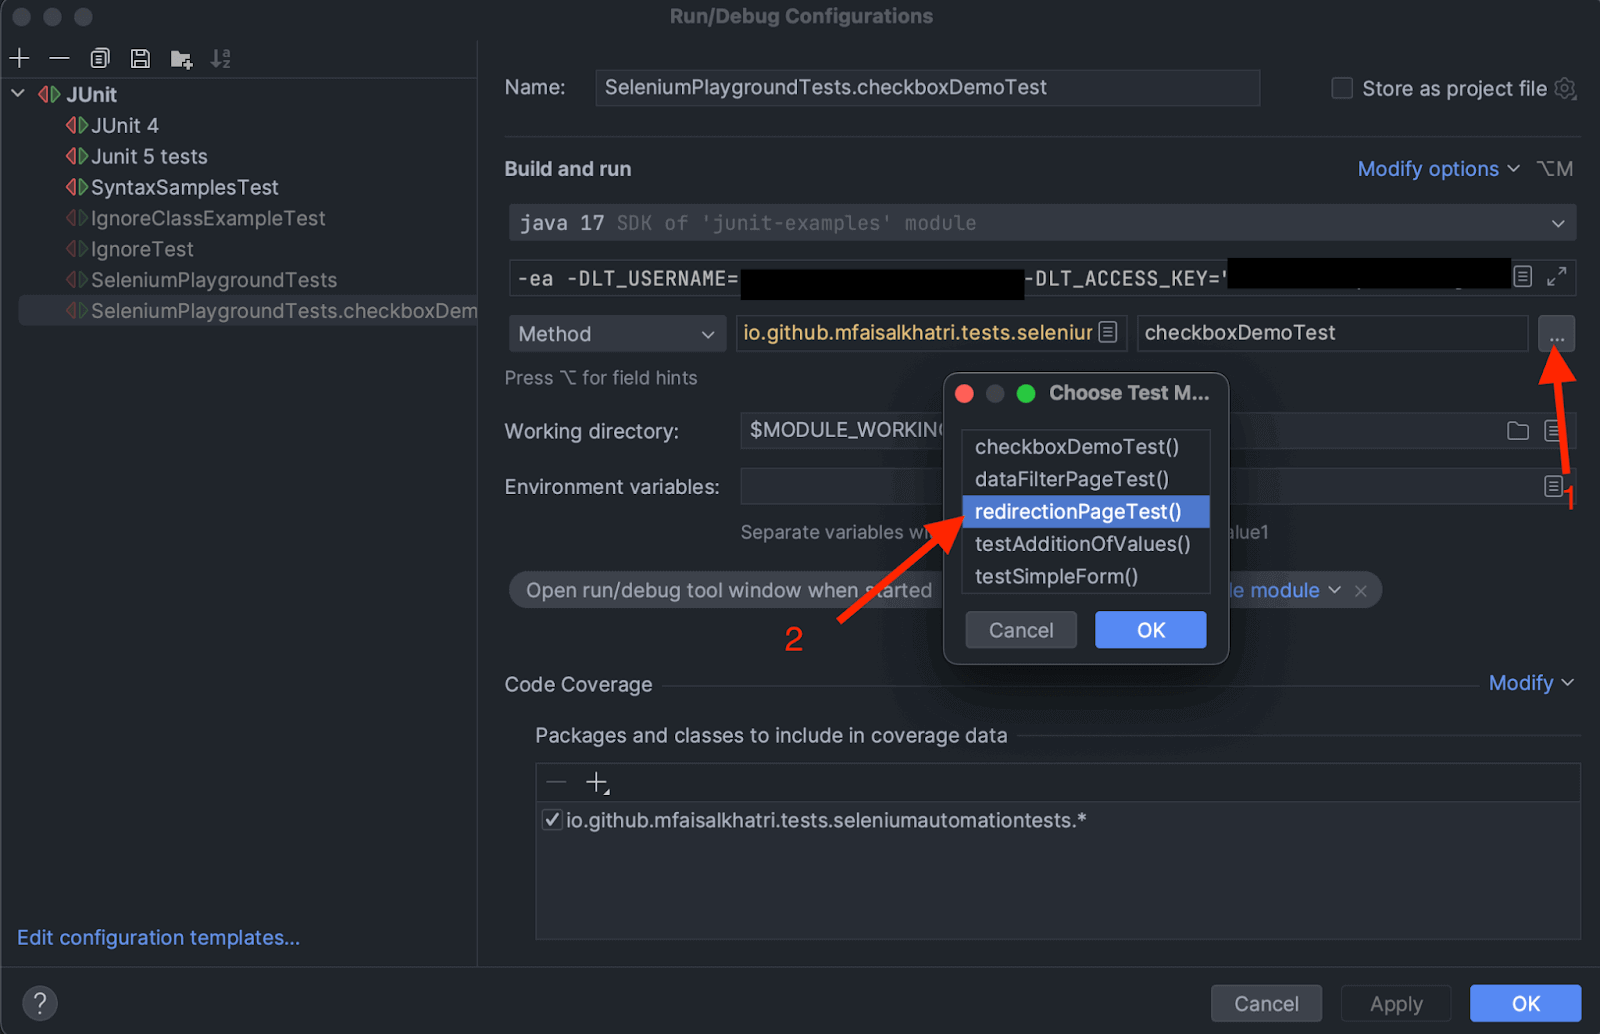
Select the redirectionPageTest() method name in the configuration window by clicking on the three dots next to the Method name field. Leave the other settings/configurations as they are and click "Apply" and then the "OK" button to close the configuration window.
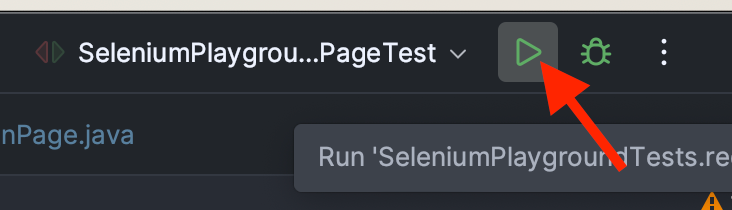
The tests can now be executed by clicking on the green button next to the Run/Debug configuration field.
Screenshot of the test execution
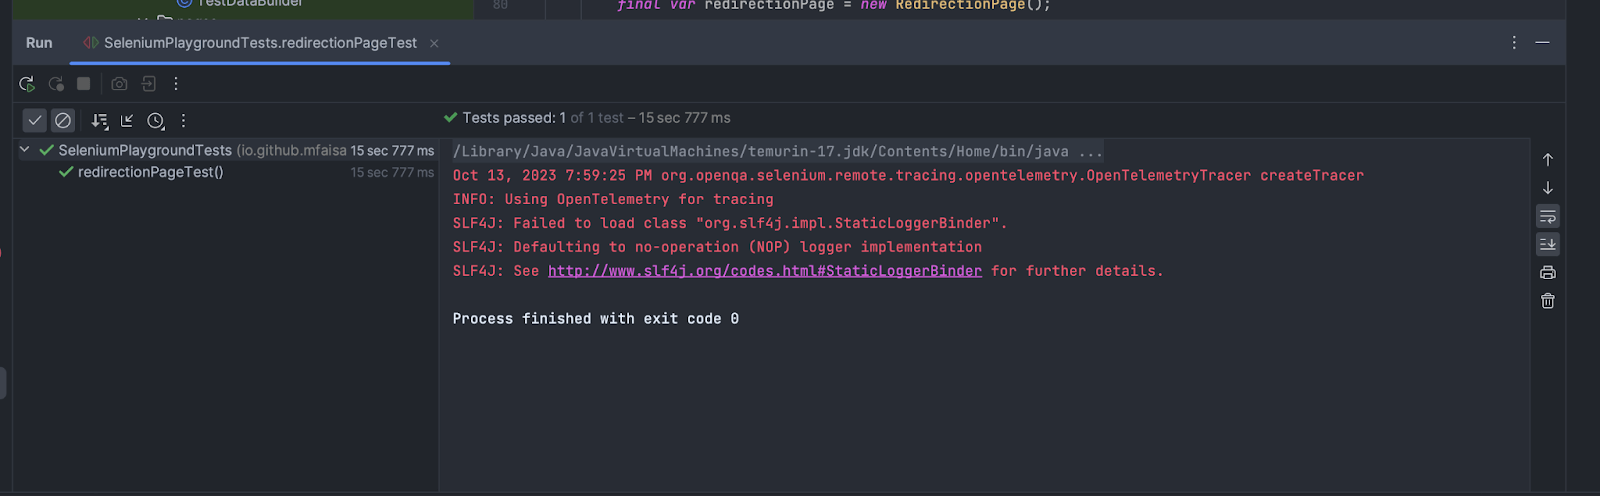
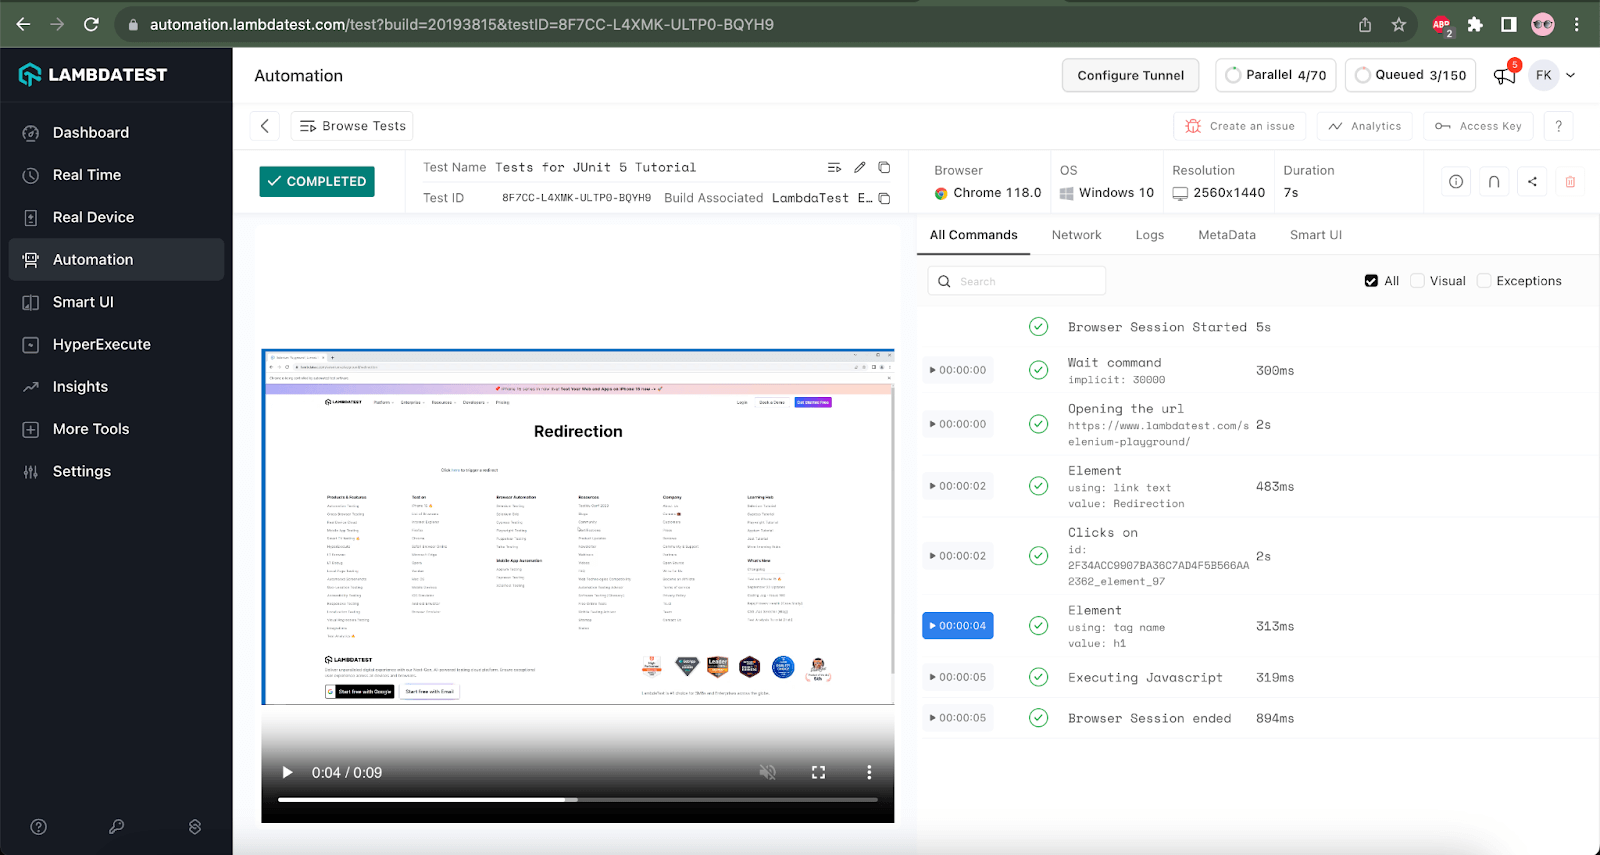
The test execution can be checked in the TestMu AI Build details windows after logging in to the TestMu AI website. This window provides granular details of the test execution that help know the test analytics and execution status.
Implementation [Test Scenario 3]
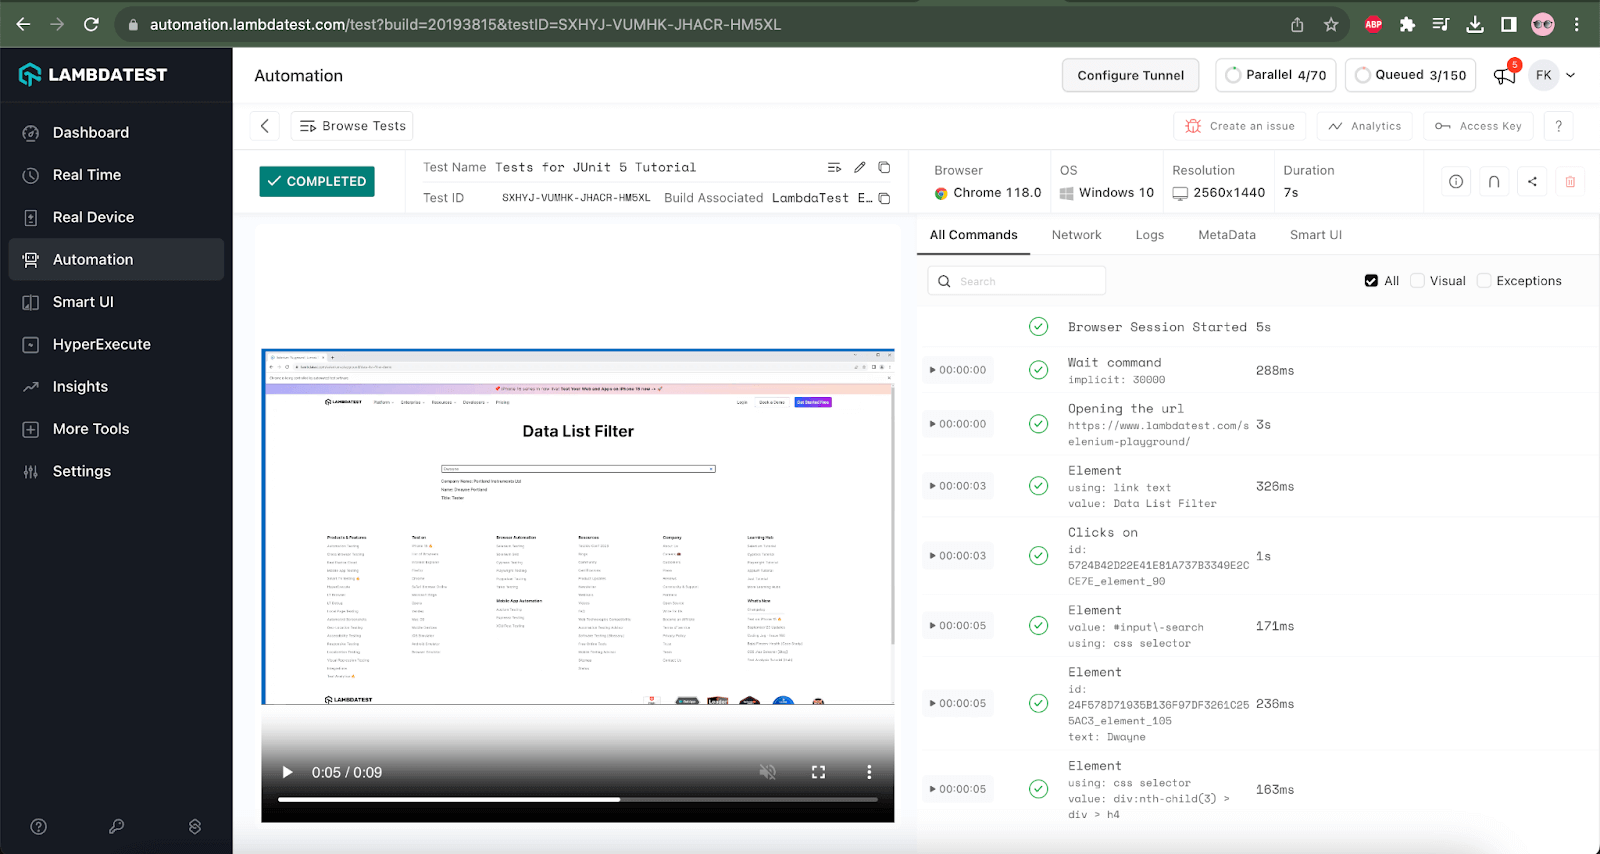
In test scenario 3, we will navigate to the Data Filter List page on TestMu AI's Selenium playground website to search for an attendee record by entering a name. Once the records are retrieved based on the filter according to the name provided, the record will be verified using the assertTrue() method by checking if the Attendee name in the record contains the name searched for.
The steps for test scenario 3 will be automated using the dataFilterPageTest() method that is updated inside the SeleniumPlaygroundTests.java class.
Filename: SeleniumPlaygroundTests.java
@Test
    public void dataFilterPageTest() {
        createDriver(Browsers.REMOTE_CHROME);
        final String website = "https://www.testmuai.com/selenium-playground/";
        getDriver().get(website);

        final HomePage homePage = new HomePage();
        homePage.navigateToLink("Data List Filter");

        final var dataListFilterPage = new DataListFilterPage();
        final String attendeeName = "Dwayne";
        dataListFilterPage.searchAttendees(attendeeName);
        assertTrue(dataListFilterPage.getAttendeeName().contains(attendeeName));
    }
@Test
   public void dataFilterPageTest() {
       createDriver(Browsers.REMOTE_CHROME);
       final String website = "https://www.testmuai.com/selenium-playground/";
       getDriver().get(website);

       final HomePage homePage = new HomePage();
       homePage.navigateToLink("Data List Filter");

       final var dataListFilterPage = new DataListFilterPage();
       final String attendeeName = "Dwayne";
       dataListFilterPage.searchAttendees(attendeeName);
       assertTrue(dataListFilterPage.getAttendeeName().contains(attendeeName));
   }
In this test, we will first open the Chrome browser in the TestMu AI Cloud grid and navigate to the Data List Filter Page on TestMu AI's Selenium Playground website. Next, it will search for the data with the attendee name "Dwayne". Once the data is loaded on the page, the assertTrue() method will check the condition that the attendee name in the results contains the text - "Dwayne". The test will be marked as pass if the text is found in the Attendee's name in the data results.
Test Execution
The test for scenario 3 can be easily run by just changing the method name from the Run Configuration window, as shown in the screenshot below.
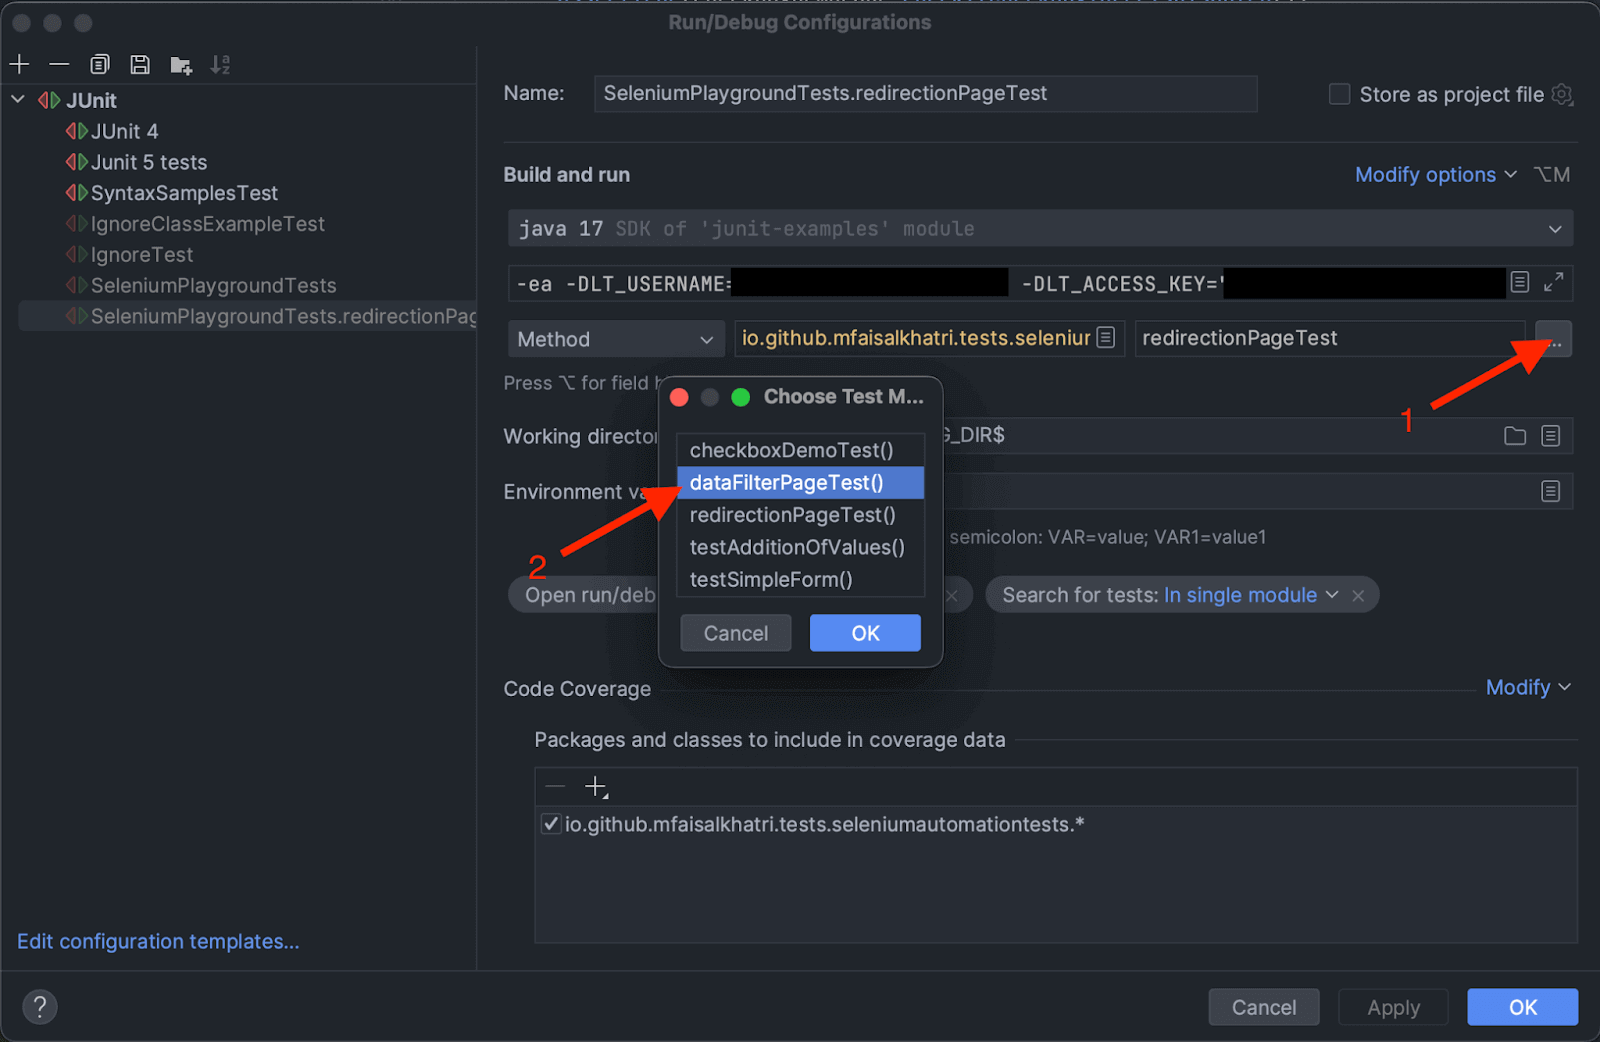
Once the method is selected, click the Apply button and then the OK button to close the config window. To run the test, click the Green Play button on the toolbar on the top,

Screenshot of the test execution
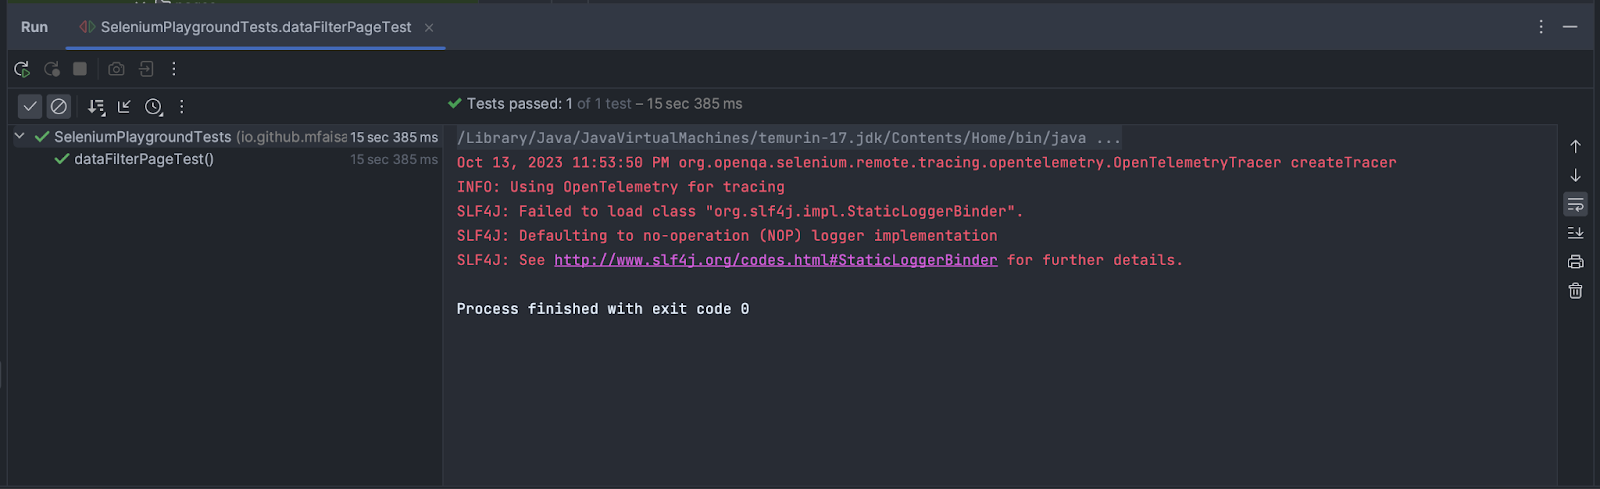
Re-Running These Tests in 2026
Page structures change, so on September 30, 2026, I replayed the three scenarios against the live Selenium Playground in Chrome 154 on the TestMu AI cloud, using the same links, locators, and conditions as the tests:
| Scenario | Locator or step | Result |
|---|---|---|
| 1. Checkbox Demo | Original CSS selectors div:nth-child(2) > div:nth-child(1) > input[type="checkbox"] and the nth-child(3) version | Matched 0 elements, so Selenium would throw NoSuchElementException before any assertTrue() ran |
| 1. Checkbox Demo | Heading-anchored XPath now used in the code above | Each matched exactly 1 element; Option 1 was ticked and Option 3 was disabled, so both assertTrue() checks passed |
| 2. Redirection | Link text "Redirection", then the h1 element | Page loaded and the "Redirection" heading was displayed: pass |
| 3. Data List Filter | Typing "Dwayne" into #input-search | Only "Dwayne Portland" stayed visible, so the contains() check passed |
The failure in scenario 1 is the common case for assertTrue() tests: the assertion logic was still right, but the locator feeding it broke when the page layout changed. Positional selectors such as nth-child break first, so anchor locators to visible text or stable attributes.
How Do AI Agents Generate assertTrue() Checks in 2026?
In 2026, browser-driven agents read a page, decide what condition proves the step worked, and write the assertTrue() line for you, though the boolean logic still needs a human check.
- Browser-driven agents - browser-use and the Playwright MCP server open a page, read an element's checked or displayed state from the accessibility tree, and generate the matching assertTrue(condition) call.
- IDE-native suggestions - GitHub Copilot and Cursor read the page object method above the cursor and suggest an assertTrue() line that matches its return type as you type the test.
- Terminal-driven repair - Claude Code runs the JUnit suite, reads a failing assertTrue() stack trace, rewrites the locator in the page object class, and reruns the test until the check passes.
- Real limitation - an agent can wrap a trivial or unrelated condition in assertTrue() just to make a red build turn green, so the boolean it asserts still needs a person to confirm it tests the right thing.
Read the generated condition before you trust it. An assertTrue() call that compiles and passes is not proof the check tests the behavior you actually care about.
Conclusion
Without assertions, an automated test is incomplete. Assertions help us to derive the results of the automated tests. This can help in providing faster feedback on the software builds.
assertTrue() in Java is used to perform assertions in automated tests. We can verify a boolean condition using this method. This web automation method can ideally be used to check if a particular web element, like a checkbox or a radio button is enabled. It can also help in checking if a particular text is displayed. Further, it can be used for checking boolean conditions like text on a web page containing a particular string or text.
I hope this helps you in writing better assertions for the automated tests.
Happy Testing!
Testing from the terminal? Kane CLI by TestMu AI lets SDETs and developers plan, write, run and debug tests from the command line.
Author

Faisal Khatri
Blogs: 37


Mohammad Faisal Khatri is a Software Testing Professional with 17+ years of experience in manual exploratory and automation testing. He currently works as a Senior Testing Specialist at Kafaat Business Solutions and has previously worked with Thoughtworks, HCL Technologies, and CrossAsyst Infotech. He is skilled in tools like Selenium WebDriver, Rest Assured, SuperTest, Playwright, WebDriverIO, Appium, Postman, Docker, Jenkins, GitHub Actions, TestNG, and MySQL. Faisal has led QA teams of 5+ members, managing delivery across onshore and offshore models. He holds a B.Com degree and is ISTQB Foundation Level certified. A passionate content creator, he has authored 100+ blogs on Medium, 40+ on TestMu AI, and built a community of 25K+ followers on LinkedIn. His GitHub repository “Awesome Learning” has earned 1K+ stars.
Reviewer

Srinivasan Sekar
Reviewer
Srinivasan Sekar is Director of Engineering at TestMu AI, where he leads engineering and open-source initiatives behind the Selenium and Appium automation grid and owns TestMu AI's MCP Server. A committer to Appium and a contributor to Selenium, WebdriverIO, Taiko, and AppiumTestDistribution, he brings over 15 years of experience in quality engineering and open-source technologies. He is the author of the Apress book 'The MCP Standard: A Developer's Guide to Building Universal AI Tools with the Model Context Protocol,' a Certified Kubernetes and Cloud Native Associate, and an international conference speaker. Before TestMu AI he spent over eight years at Thoughtworks as a Principal Consultant and Quality Architect. Srinivasan holds a B.Tech in Information Technology from Anna University.


assertTrue() in Java FAQs
Did you find this page helpful?
More Related Blogs

TestMu AI forEnterprise
Get access to solutions built on Enterprise
grade security, privacy, & compliance
- Advanced access controls
- Advanced data retention rules
- Advanced Local Testing
- Premium Support options
- Early access to beta features
- Private Slack Channel
- Unlimited Manual Accessibility DevTools Tests