

Power Your Software Testing with AI Agents and Cloud
The Native AI-Agentic Cloud Platform to Supercharge Quality Engineering. Test Intelligently and Ship Faster.


- TestMu AI (Formerly LambdaTest)
- /
- Blog
- /
- Jenkins Declarative Pipeline [With Examples]: Detailed Guide
Jenkins Pipeline is an automation solution that lets you create simple or complex (template) pipelines via the DSL used in each pipeline. Jenkins provides two ways of developing a pipeline- Scripted and Declarative. Traditionally, Jenkins jobs were created using Jenkins UI called FreeStyle jobs. In Jenkins 2.0, Jenkins introduced a new way to create jobs using the technique called pipeline as code. In pipeline as code technique, jobs are created using a script file that contains the steps to be executed by the job. In Jenkins, that scripted file is called Jenkinsfile. In this Jenkins tutorial, we will deep dive into Jenkins Declarative Pipeline with the help of Jenkins declarative pipeline examples. If you are preparing for an interview you can learn more through Jenkins Interview Questions.
Let’s get started with the basics.
What is Jenkinsfile?
A Jenkinsfile is a text file used in the Jenkins automation server to define and describe the entire build and deployment process for a software project. It is written in a domain-specific language called Groovy and serves as a blueprint for Jenkins to automate tasks such as building, testing, and deploying software applications.
Jenkinsfiles are typically stored within the version control repository of a project, allowing developers to manage and version the build and deployment pipeline alongside their code. This approach provides transparency and reproducibility in the software development and continuous integration/continuous deployment (CI/CD) processes.
Jenkinsfile can be written in two aspects – Scripted pipeline syntax & Declarative pipeline syntax
What is Jenkins Scripted Pipeline?
Jenkins pipelines are traditionally written as scripted pipelines. Ideally, the scripted pipeline is stored in Jenkins webUI as a Jenkins file. The end-to-end scripted pipeline script is written in Groovy.
- It requires knowledge of Groovy programming as a prerequisite.
- Jenkinsfile starts with the word node.
- Can contain standard programming constructs like if-else block, try-catch block, etc.
Sample Scripted Pipeline
node {
    stage('Stage 1') {
        echo 'hello'
    }
}

What is Jenkins Declarative Pipeline?
The Declarative Pipeline subsystem in Jenkins Pipeline provides a simplified, opinionated syntax on top of the Pipeline subsystems.
- Jenkins declarative pipeline needs to use the predefined constructs to create pipelines. Hence, it is not flexible as a scripted pipeline.
- Jenkinsfile starts with the word pipeline.
Jenkins declarative pipeline should be the preferred way to create a Jenkins job as they offer a rich set of features, come with less learning curve & no prerequisite to learn a programming language like Groovy just for the sake of writing pipeline code.
We can also validate the syntax of the Declarative pipeline code before running the job. It helps to avoid a lot of runtime issues with the build script.
Our First Declarative Pipeline
pipeline {
    agent any
    stages {
        stage('Welcome Step') {
            steps {
                echo 'Welcome to LambdaTest'
            }
        }
    }
}
We recommend VS Code IDE for writing Jenkins pipeline scripts, especially when creating Jenkins Declarative pipeline examples.
Running Your First Declarative Pipeline
Now that you are well-acquainted with the Jenkins pipeline’s basics, it’s time to dive deeper. In this section, we will learn how to run a Jenkins declarative pipeline. You can refer to our Jenkins Pipeline Tutorial for more.
Let us run our Jenkins declarative pipeline step by step.
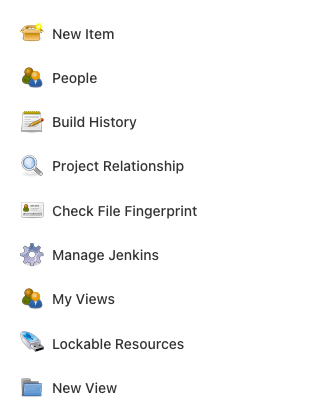
Step 1: Open Jenkins home page (http://localhost:8080 in local) & click on New Item from the left side menu.
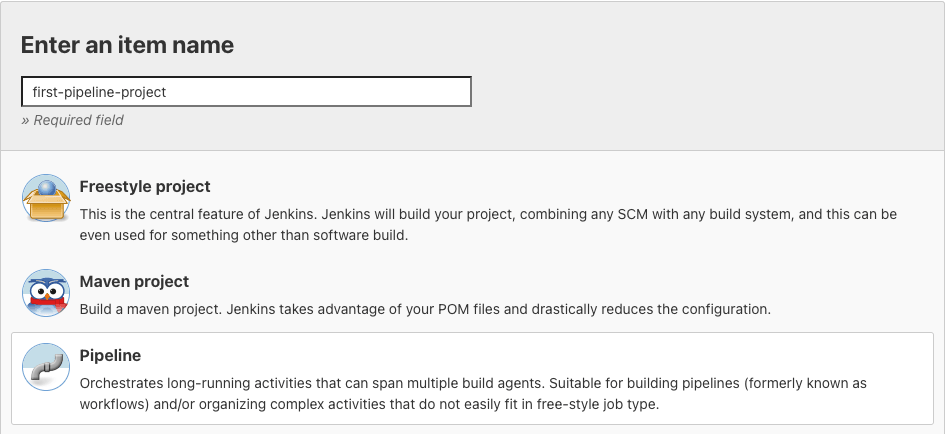
Step 2: Enter Jenkins job name & choose the style as Pipeline & click OK.
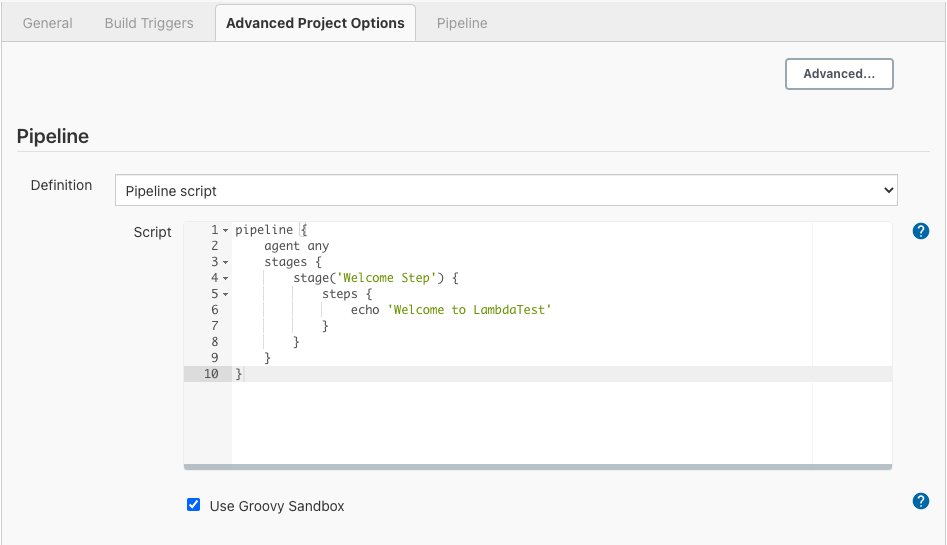
Step 3: Scroll down to the Pipeline section & copy-paste your first Declarative style Pipeline code from below to the script textbox.
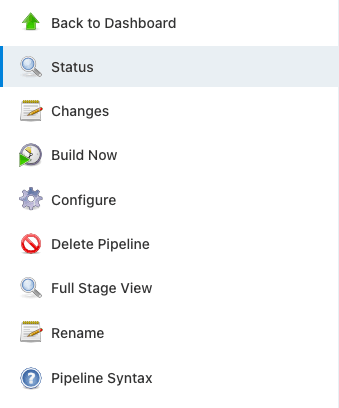
Step 4: Click on the Save button & Click on Build Now from the left side menu.
We can see the build running stage by stage in Stage View.
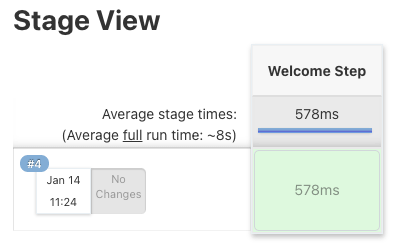
Step 5: To check logs from Build Job, click on any stage & click on the check logs button. Or you can use the Console Output from the left side menu to see the logs for the build.
Console Output
Jenkins Declarative Pipeline Syntax
In this section, we will look at the most commonly used Jenkins declarative pipeline examples or syntax. Typically, declarative pipelines contain one or more declarative steps or directives, as explained below.
pipeline
Entire Declarative pipeline script should be written inside the pipeline block. It’s a mandatory block.
pipeline {
}
agent
Specify where the Jenkins build job should run. agent can be at pipeline level or stage level. It’s mandatory to define an agent.
Possible values-
- any – Run Job or Stage on any available agent.
pipeline {
     agent any
}
pipeline {
     agent none
}
E.g All linux nodes can be labeled as linux-machine
pipeline {
       agent {
           label 'linux-machine'
       }
}
A sample can be found here at GitHub.
stages
stages block constitutes different executable stage blocks. At least one stage block is mandatory inside stages block.
pipeline {
       agent {
           label 'linux-machine'
       }
     stages {
     }
}
stage
stage block contains the actual execution steps. Stage block has to be defined within stages block. It’s mandatory to have at least one stage block inside the stage block. Also its mandatory to name each stage block & this name will be shown in the Stage View after we run the job.
In below example, the stage is named as “build step”
pipeline {
       agent {
           label 'linux-machine'
       }
     stages {
         stage('build step') {
         }
     }
}
A sample can be found here at GitHub.
steps
steps block contains the actual build step. It’s mandatory to have at least one step block inside a stage block.
Depending on the Agent’s operating system (where Jenkins job runs), we can use shell, bat, etc., inside the steps command.
pipeline {
     agent any
     stages {
         stage('build step') {
              steps {
                 echo "Build stage is running"
              }
         }
     }
}
Scripted Pipeline in Jenkins job
Sample can be found here at GitHub.
parameters
The parameters directive provides a way for Jenkins job to interact with Jenkins CI/CD users during the running of the build job.
parameter can be of the following types – string, text, booleanParam, choice & password
string – Accepts a value of String type from Jenkins user.
E.g.string(name: ‘NAME’, description: ‘Please tell me your name?’)
text – Accepts multi line value from Jenkins user E.g.text(name: ‘DESC’, description: ‘Describe about the job details’)
booleanParam – Accepts a true/false value from Jenkins user E.g.booleanParam(name: ‘SKIP_TEST’, description: ‘Want to skip running Test cases?’)
choice – Jenkins user can choose one among the choices of value provided E.g.choice(name: ‘BRANCH’, choices: [‘Master’, ‘Dev’], description: ‘Choose the branch’)
password – Accepts a secret like password from Jenkins user E.g.password(name: ‘SONAR_SERVER_PWD’, description: ‘Enter SONAR password’)
Let’s look at a sample on how to use parameters directive-
pipeline {
    agent any
    parameters {
        string(name: 'NAME', description: 'Please tell me your name?')

        text(name: 'DESC', description: 'Describe about the job details')

        booleanParam(name: 'SKIP_TEST', description: 'Want to skip running Test cases?')

        choice(name: 'BRANCH', choices: ['Master', 'Dev'], description: 'Choose branch')

        password(name: 'SONAR_SERVER_PWD', description: 'Enter SONAR password')
    }
    stages {
        stage('Printing Parameters') {
            steps {
                echo "Hello ${params.NAME}"

                echo "Job Details: ${params.DESC}"

                echo "Skip Running Test case ?: ${params.SKIP_TEST}"

                echo "Branch Choice: ${params.BRANCH}"

                echo "SONAR Password: ${params.SONAR_SERVER_PWD}"
            }
        }
    }
}
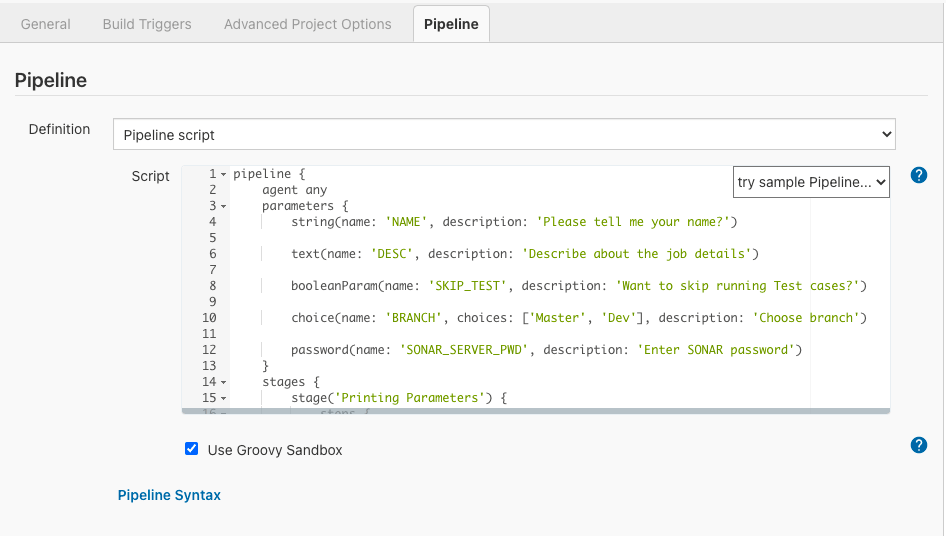
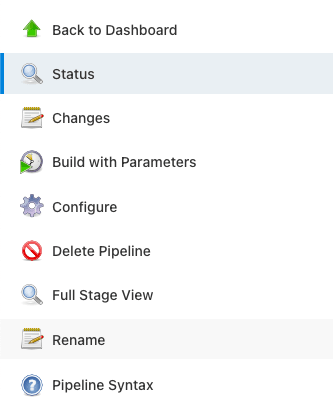
If a parameters directive is used in the pipeline, Jenkins CI/CD can sense that it needs to accept the user’s input while running the job. Hence Jenkins will change the Build now link in the left side menu to Build with parameters link.
When we click on the Build with Parameters link, Jenkins CI/CD will let us pass values for the parameters we configured in the declarative pipeline.
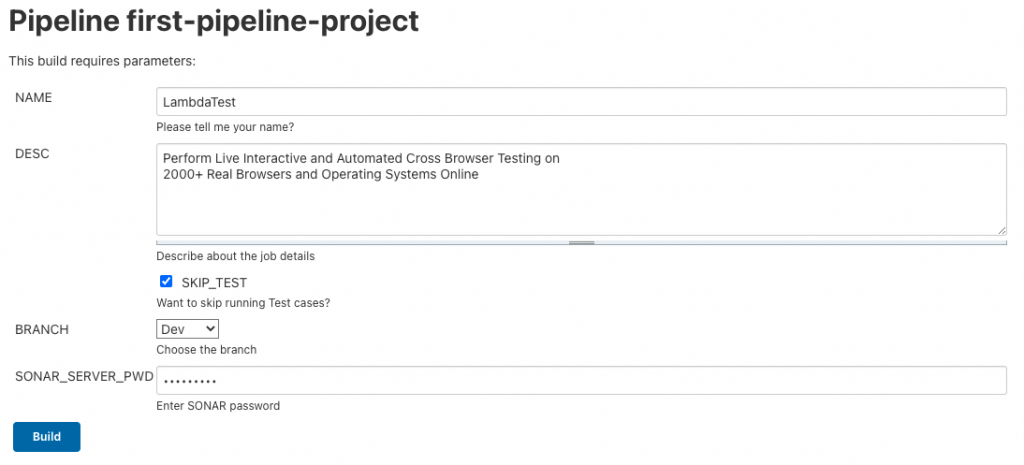
Once we enter each parameter’s values, we can hit the build button to run the job.
script
script block helps us run Groovy code inside the Jenkins declarative pipeline.
pipeline {
    agent any
    parameters {
        string(name: 'NAME', description: 'Please tell me your name')
        choice(name: 'GENDER', choices: ['Male', 'Female'], description: 'Choose Gender')
    }
    stages {
        stage('Printing name') {
            steps {
                script {
                    def name = "${params.NAME}"
                    def gender = "${params.GENDER}"
                    if(gender == "Male") {
                        echo "Mr. $name"
                    } else {
                        echo "Mrs. $name"
                    }
                }
            }
        }
   }
}
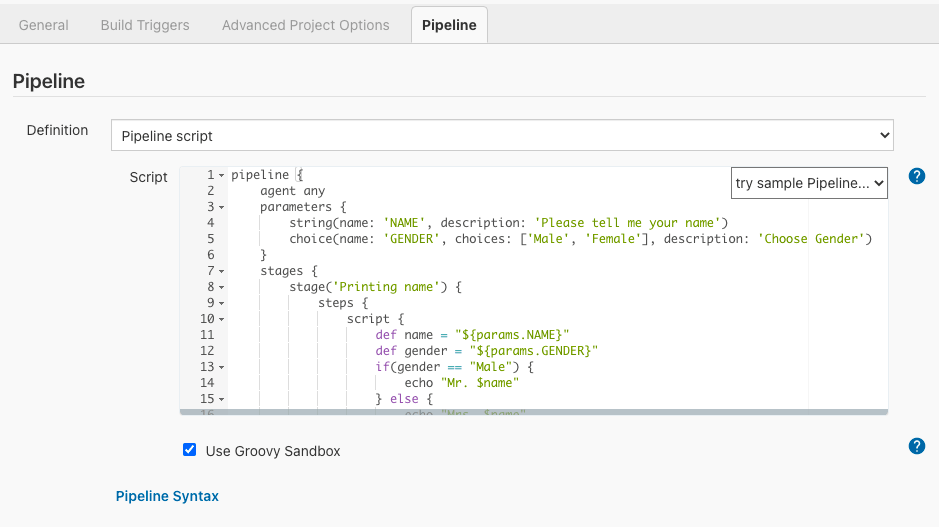
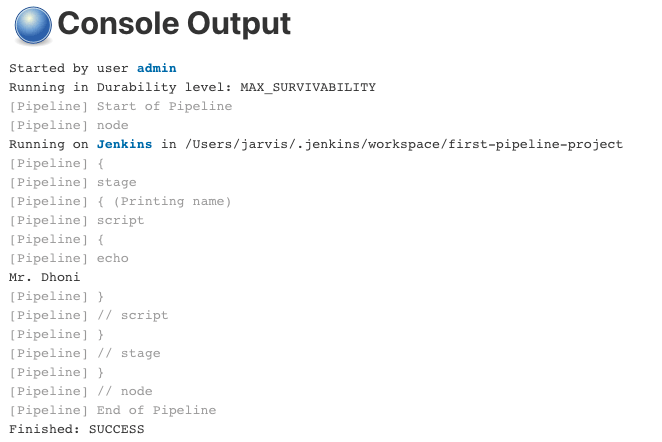
script block is wrapped inside the steps block. In the above example, we are printing the name passed as parameter suffixed with Mr. or Mrs. based on the Gender chosen.
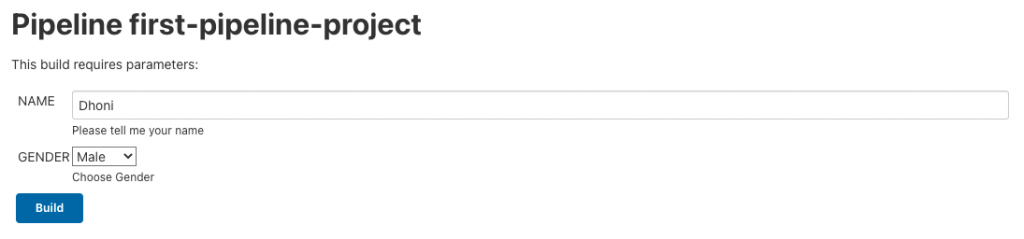
We used build with parameters to pass params at the time of running the job.
environment
Key value pairs which helps passing values to job during job runtime from outside of Jenkinsfile. It’s one way of externalizing configuration.
Example- Usually, Jenkins jobs will run in a separate server. We may not be sure where the installation path of JAVA or JMeter is that server. Hence these are ideal candidates to be configured in Environment variables & passed during job run.
Method 1 : Configure Environment Variable in Jenkins CI/CD portal
Step 1: Open Jenkins Server URL (http://localhost:8080)
Step 2: Click on Manage Jenkins from the left sidebar menu.
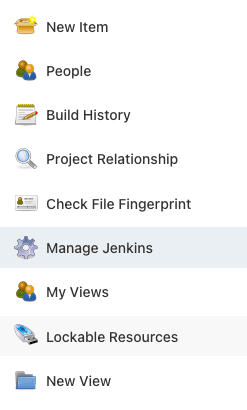
Step 3: Click on Configure System under System Configuration.
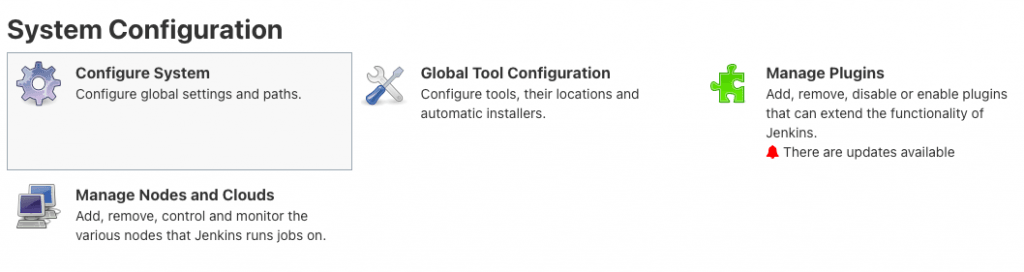
Step 4: Scroll down to the Global Properties section. This is where we will add our Environment variables.
Step 5: Click on the Add button under Environment Variables & enter the Key & value.
We have added the Java installation path under the variable name JAVA_INSTALLATION_PATH
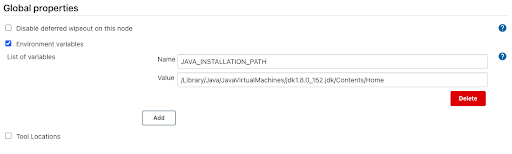
Step 6: Click on Save Button.
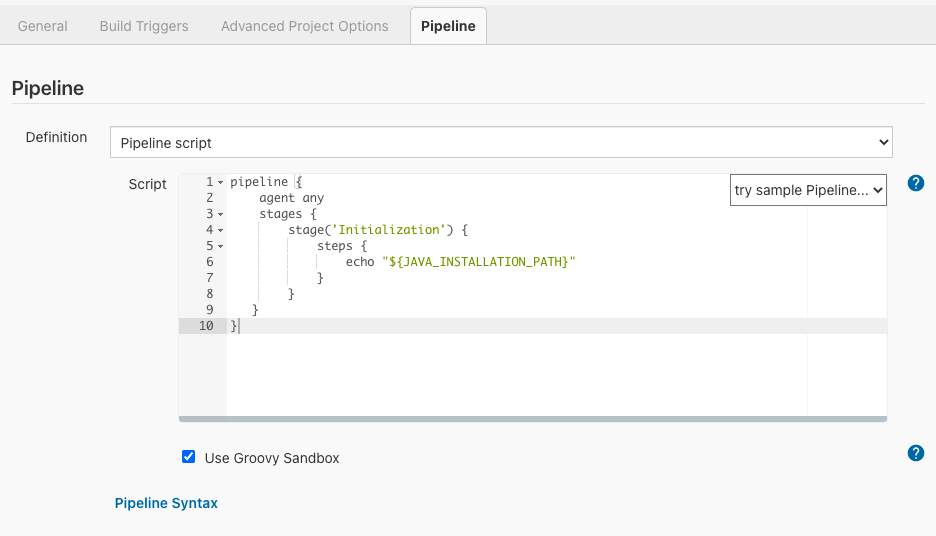
Refer Environment variable in JenkinsfileWe can refer to the Environment variables in declarative pipeline using the ${} syntax
pipeline {
    agent any
    stages {
        stage('Initialization') {
            steps {
                echo "${JAVA_INSTALLATION_PATH}"
            }
        }
   }
}
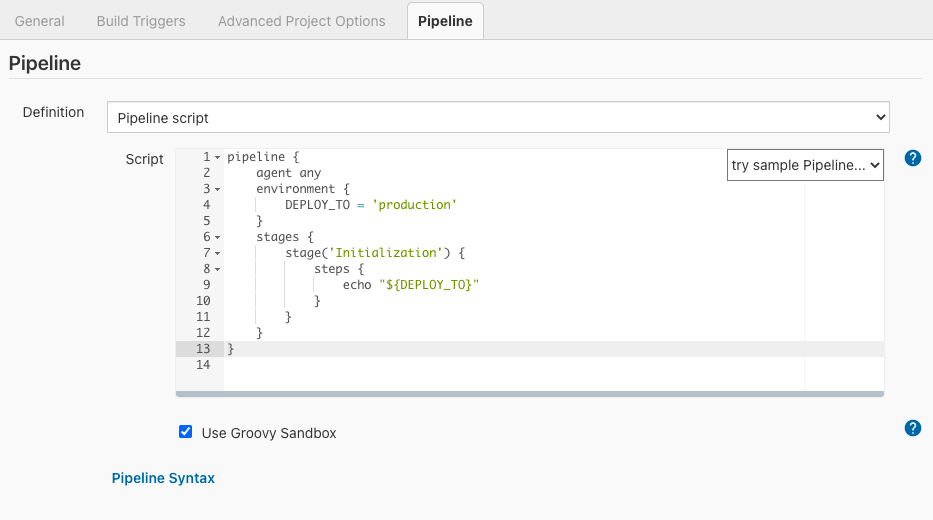
Method 2 : Creating & Referring Environment Variable in Jenkinsfile
We can create key value pairs of environment variables under environment block. It’s an optional block under pipeline.
pipeline {
    agent any
    environment {
        DEPLOY_TO = 'production'
    }
    stages {
        stage('Initialization') {
            steps {
                echo "${DEPLOY_TO}"
            }
        }
    }
	}
Method 3 : Initialize Environment variables using sh scripts in Jenkinsfile
Let’s say we need the timestamp when the job gets run for logging purposes. We can create an Environment variable which can hold the timestamp. But how to initialize it ?
We can use the shell script to fetch the current timestamp and assign it to the Environment variable.
Example-
The following command will print date & time in shell
>  date '+%A %W %Y %X'
Tuesday 03 2021 22:03:31
Lets see how to use the above command to initialize the Environment variable in Jenkinsfile.
pipeline {
    agent any
    stages {
        stage('Initialization') {
            environment {
                   JOB_TIME = sh (returnStdout: true, script: "date '+%A %W %Y %X'").trim()
            }
            steps {
                sh 'echo $JOB_TIME'
            }
        }
    }
}
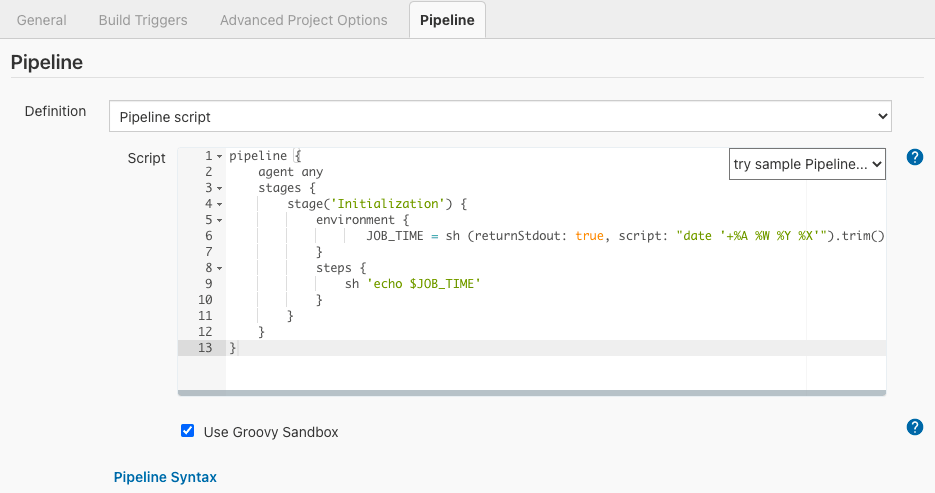
returnStdout: true makes sh step returning the output of the command so you can assign it to a variable.
Sample can be found here at GitHub.

Load credentials via environment block
credentials() is a special method that can be used inside the environment block. This method helps loading the credentials defined at Jenkins configuration.
Lets see it with an example. First lets configure credential in Jenkins CI/CD-
Creating Credential in Jenkins portal
Step 1: Open Jenkins Server URL (http://localhost:8080)
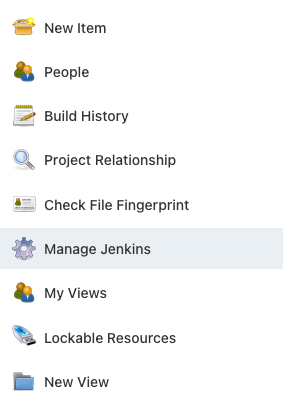
Step 2: Click on Manage Jenkins from the left sidebar menu.
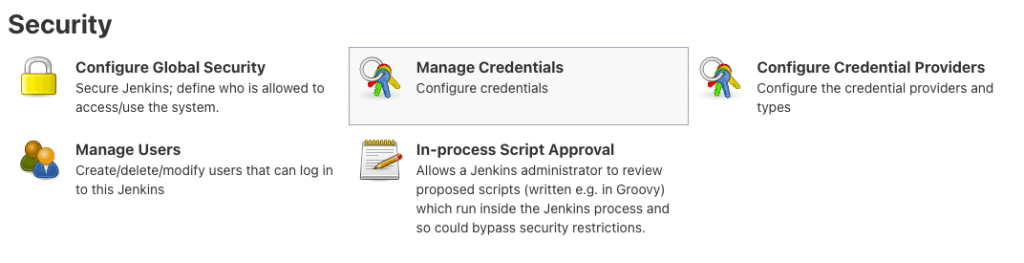
Step 3: Click on Manage Credentials under Security.
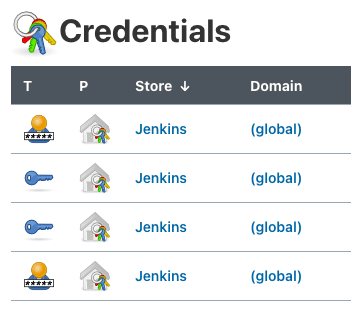
Step 4: Click on the Global hyperlink.
Step 5: Click on Add Credentials from the left side menu.
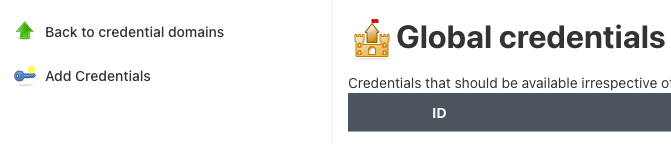
For demonstration, let me use the following values
- Kind – Username with password
- Scope – Global
- Username – admin
- Password – root123
- ID – MY_SECRET
- Description – Secret to access server files
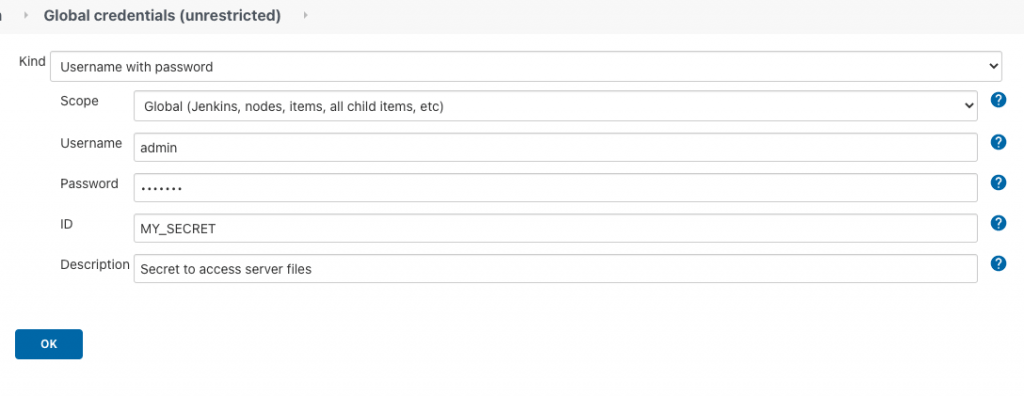
Step 6: Click the OK button. Now our credentials are configured.
Referring credential in Jenkinsfile
We can use the special method called credentials() to load credentials we configured. We need to use the ID we used while configuring credentials to load a particular credential.
Example- credentials(‘MY_SECRET’)
To refer to the username, append the word _USR to the variable we assigned credentials() output & append the word _PSW to get the password.
Example- Lets load the credential at MY_CRED variable using the credentials(‘MY_SECRET’) method. We need to append _USR ($MY_CRED_USR) & _PSW ($MY_CRED_PSW) to MY_CRED variable to get the username & password.
pipeline {
    agent any
  environment {
   	MY_CRED = credentials('MY_SECRET')
    }
    stages {
        stage('Load Credentials') {
            steps {
                echo "Username is $MY_CRED_USR"
                echo "Password is $MY_CRED_PSW"
            }
        }
    }
}
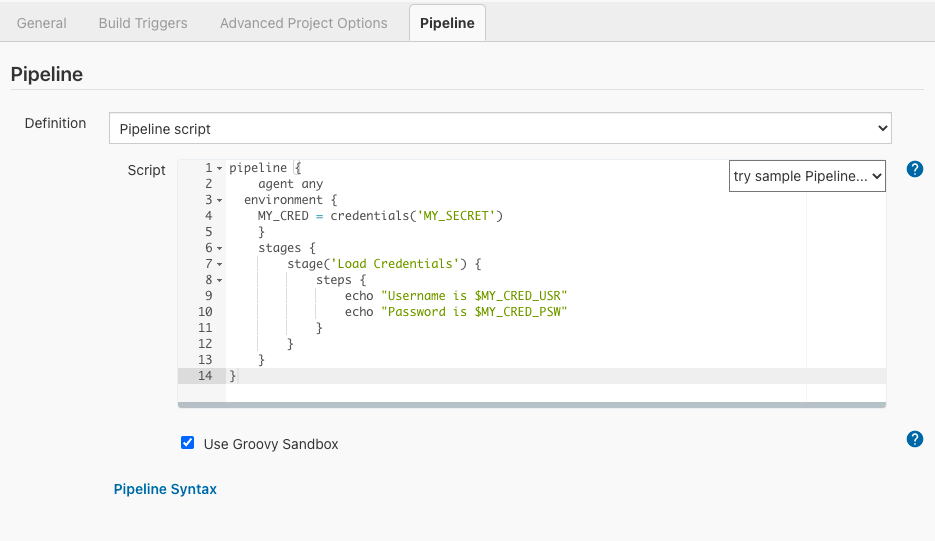
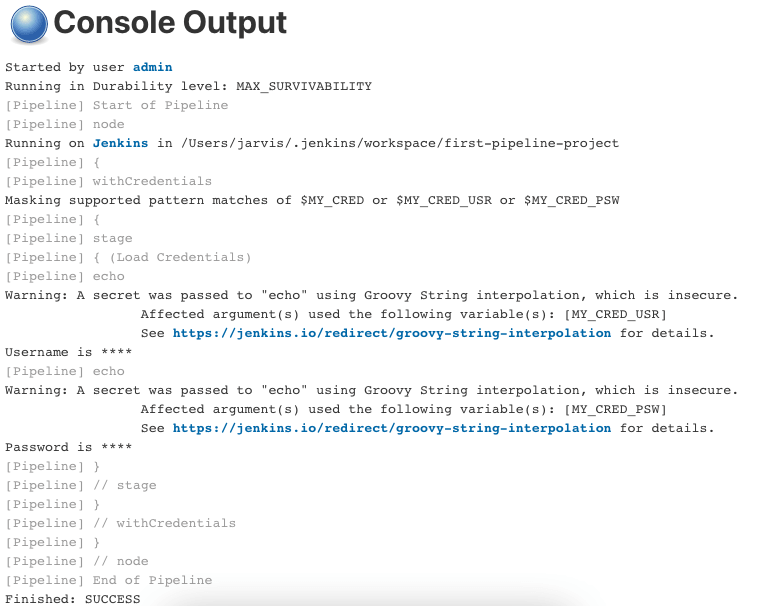
Interestingly, Jenkins print username & password as **** to avoid accidental leakage of credentials.
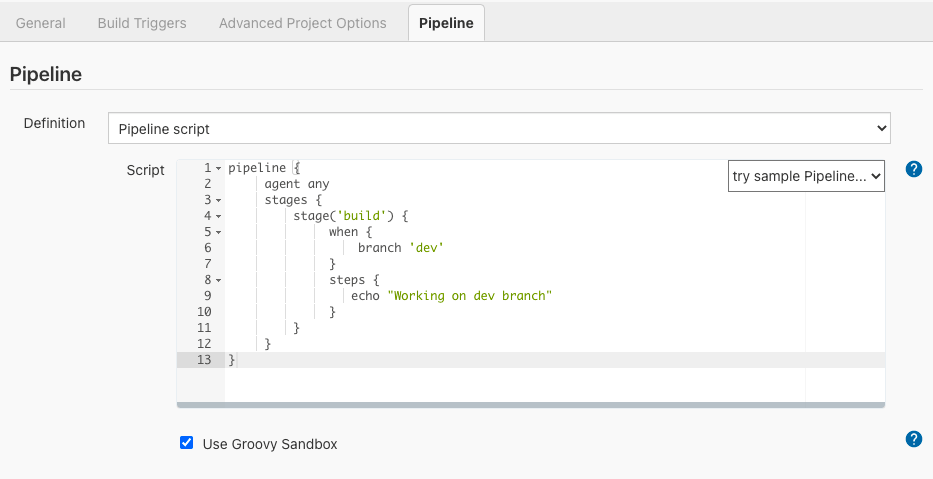
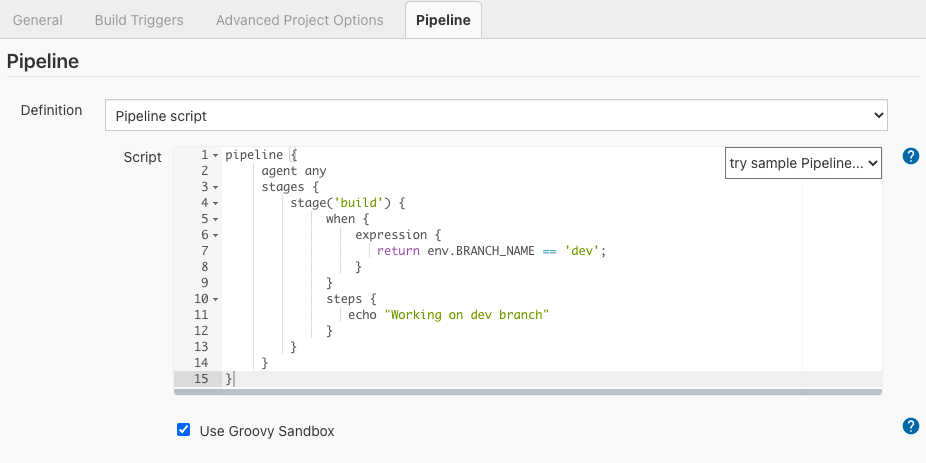
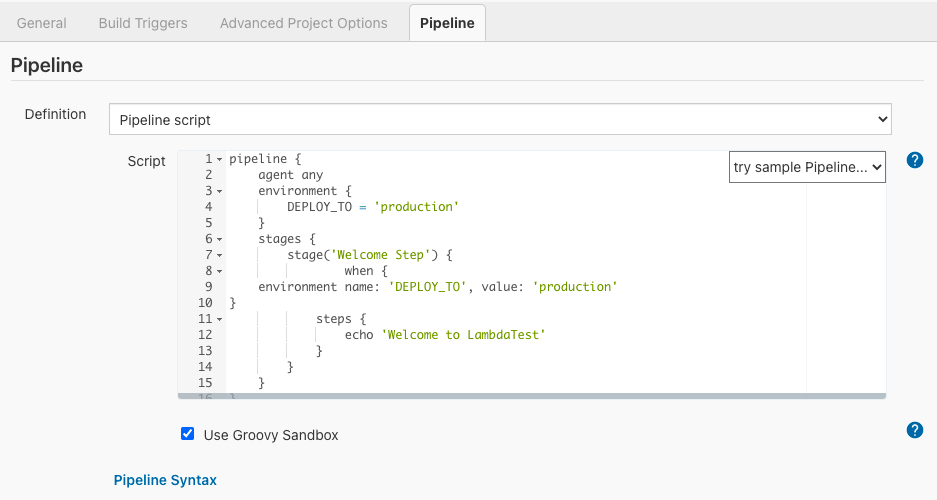
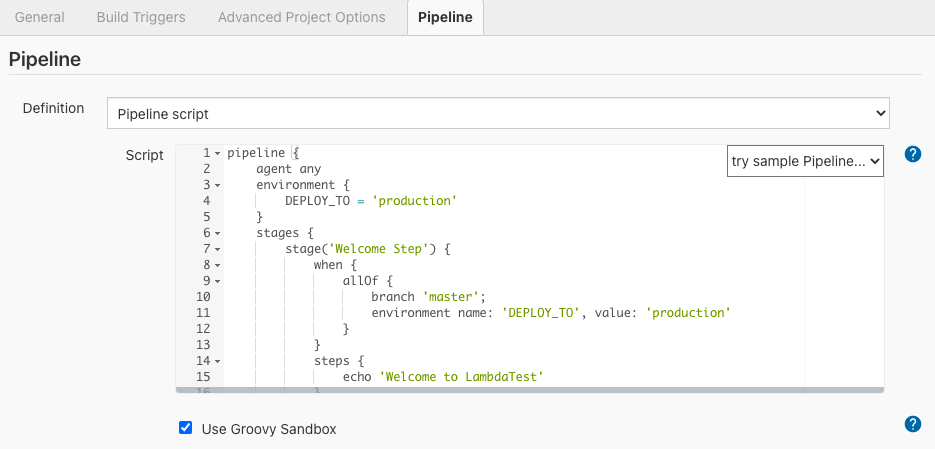
when
Acts like if condition to decide whether to run the particular stage or not . Its an optional block.
- when block
pipeline {
     agent any
     stages {
         stage('build') {
              when {
                  branch 'dev'
              }
              steps {
                 echo "Working on dev branch"
              }
         }
     }
}
pipeline {
     agent any
     stages {
         stage('build') {
              when {
                  expression {
                     return env.BRANCH_NAME == 'dev';
                  }
              }
              steps {
                 echo "Working on dev branch"
              }
         }
     }
}
pipeline {
    agent any
    environment {
        DEPLOY_TO = 'production'
    }
    stages {
        stage('Welcome Step') {
            	when {
    environment name: 'DEPLOY_TO', value: 'production'
}
            steps {
                echo 'Welcome to LambdaTest'
            }
        }
    }
}
pipeline {
    agent any
    environment {
        DEPLOY_TO = 'production'
    }
    stages {
        stage('Welcome Step') {
            when {
                allOf {
                    branch 'master';
                    environment name: 'DEPLOY_TO', value: 'production'
                }
            }
            steps {
                echo 'Welcome to LambdaTest'
            }
        }
    }
}
pipeline {
    agent any
    environment {
        DEPLOY_TO = 'production'
    }
    stages {
        stage('Welcome Step') {
            when {
                anyOf {
                    branch 'master';
                    branch 'staging'
                }
            }
            steps {
                echo 'Welcome to LambdaTest'
            }
        }
    }
}
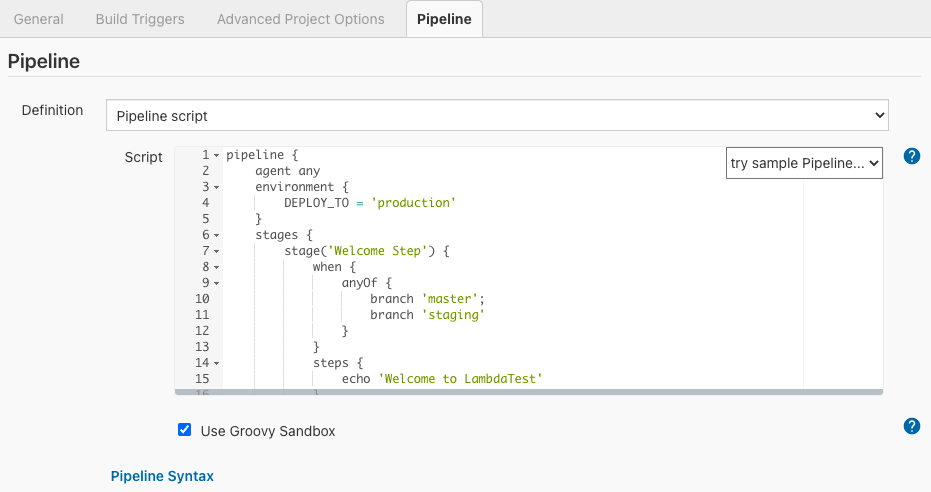
Sample can be found here at GitHub.
tools
This block lets us add pre configured tools like Maven or Java to our job’s PATH. It’s an optional block.
To use any tool, they have to be pre-configured under the Global Tools Configuration section. For this example, let’s see how to configure Maven. You can also refer to our Jenkins Maven integration tutorial for more information.
Step 1: Open Jenkins Server URL (http://localhost:8080)
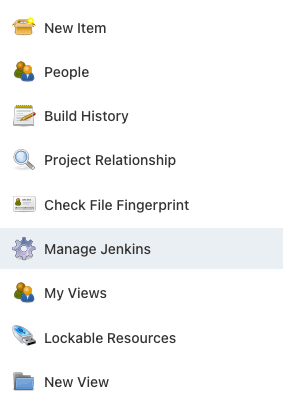
Step 2: Click on Manage Jenkins from the left sidebar menu.
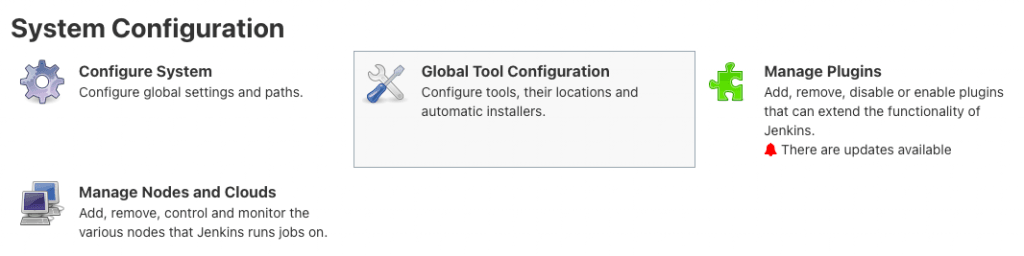
Step 3: Click on Global Tools Configuration under System Configuration.
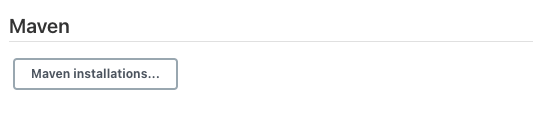
Step 4: Scroll down to the Maven section & click on Maven Installations.
Step 5: Click on the Add Maven button. Enter the following values in the configuration.
- Name – Maven 3.5.0
- MAVEN_HOME – Enter the maven installation path in local
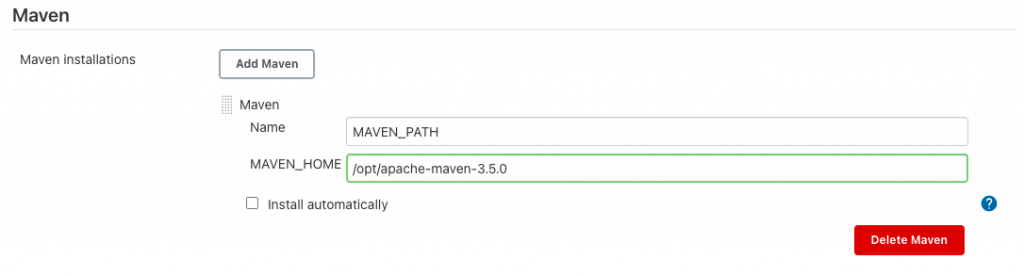
Alternatively we can download Maven from Internet instead of pointing to the local installation path by enabling the Install Automatically checkbox.
Step 6: Click on Add Installer button & choose Install from Apache.
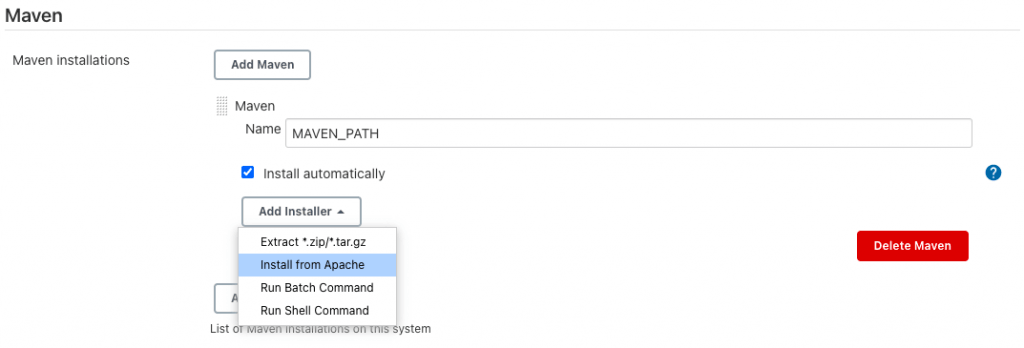
Step 7: Choose the Maven version to download. We have chosen the Maven version 3.6.3.
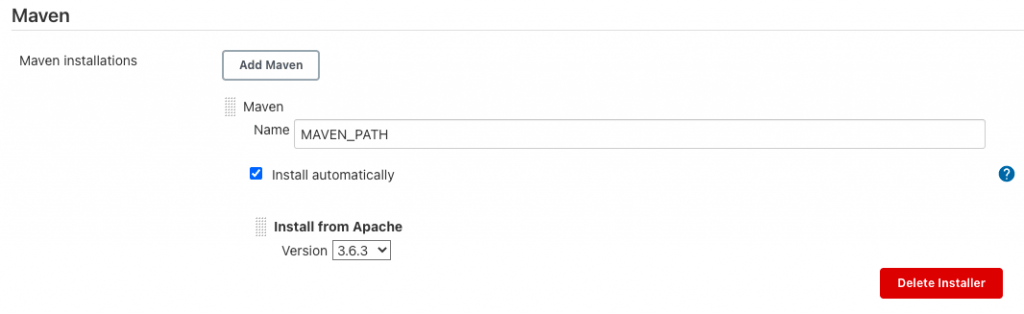
Step 8: Click on the Save button.
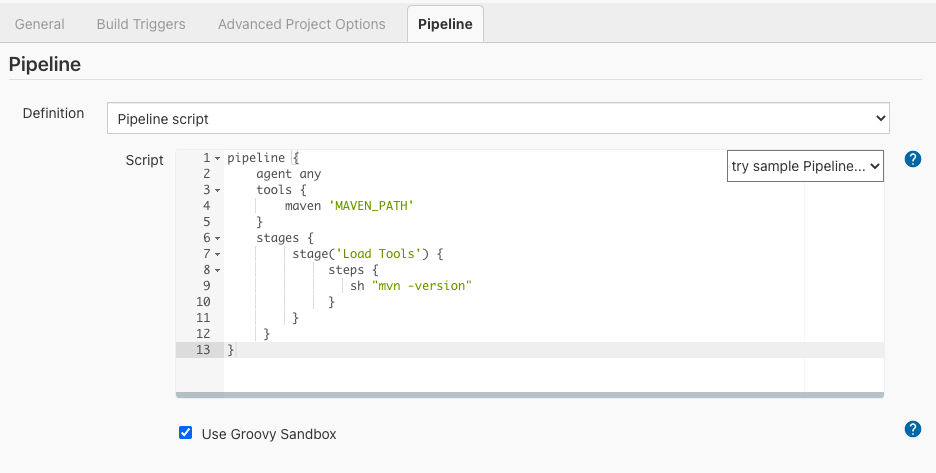
Refer to Maven tool in Pipeline in tools block with the name we used while configuring in Global Tools Configuration (MAVEN_PATH in this example).
pipeline {
    agent any
    tools {
        maven 'MAVEN_PATH'
    }
    stages {
         stage('Load Tools') {
              steps {
                 sh "mvn -version"
              }
         }
     }
}
Sample can be found here at GitHub.
Console Output-
Run the job & we should see the mvn -version command response in console output-
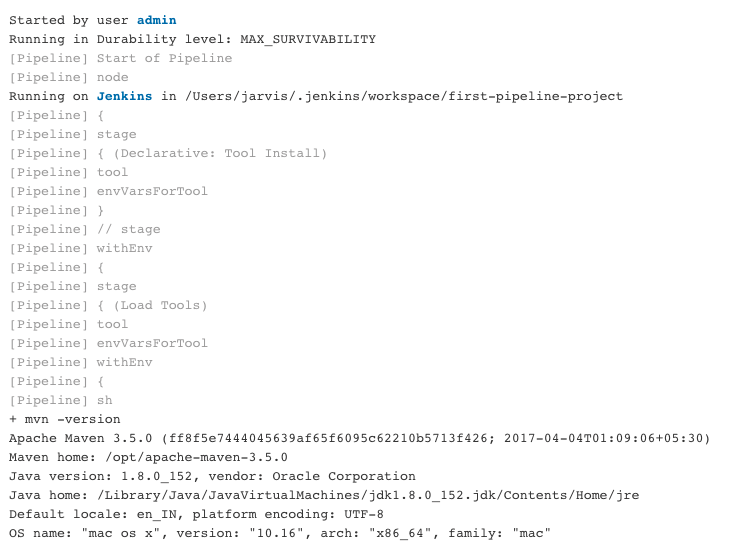
Similarly we can also configure & use tools like Java, Gradle, Git etc from tools block in pipeline code.
parallel
parallel blocks allow us to run multiple stage blocks concurrently. It’s ideal to parallelize stages which can run independently. We can define agents for each stage within a parallel block, so each stage will run on its own agent.
Example- When we want to run a piece of script in windows agent & another script in linux agent as part of the build, we can make them run concurrently using parallel blocks.
pipeline {
    agent any
    stages {
           stage('Parallel Stage') {
              parallel {
                stage('windows script') {
                    agent {
                        label "windows"
                    }
                    steps {
                        	echo "Running in windows agent"
		bat 'echo %PATH%'
                    }
                }
                stage('linux script') {
                    agent {
                        label "linux"
                    }
                    steps {
                       sh "Running in Linux agent"
                    }
                }
             }
        }
    }
}
Sample can be found here at GitHub.
post
post block contains additional actions to be performed on completion of the pipeline execution. It can contain one or many of the following conditional blocks – always, changed, aborted, failure, success, unstable etc.
post block conditions
always – run this post block irrespective of the pipeline execution statuschanged – run this post block only if the pipeline’s execution status is different from the previous build run. E.g., the build failed at an earlier run & ran successfully this time.aborted – if the build is aborted in the middle of the run. Usually due to manual stopping of the build runfailure – if the build status is failuresuccess – if the build ran successfullyunstable – build is successful but not healthy. E.g. On a particular build run, test cases ran successfully, but test coverage % is less than expected, then the build can be marked as unstable
Example-
pipeline {
     agent any
     stages {
         stage('build step') {
              steps {
                 echo "Build stage is running"
              }
         }
     }
     post {
         always {
             echo "You can always see me"
         }
         success {
              echo "I am running because the job ran successfully"
         }
         unstable {
              echo "Gear up ! The build is unstable. Try fix it"
         }
         failure {
             echo "OMG ! The build failed"
         }
     }
}
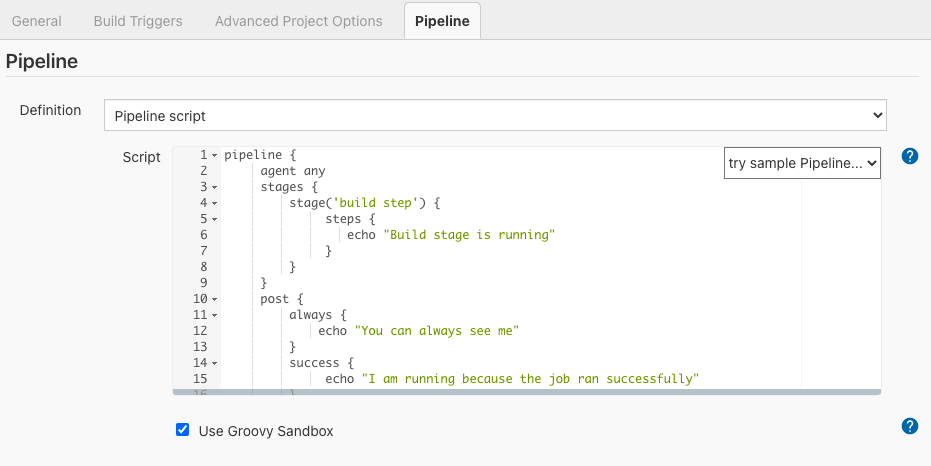
Sample can be found here at GitHub.
Marking build as Unstable
There are scenarios where we don’t want to mark build as failure but want to mark build as unstable.
Example- When test case coverage doesn’t cross the threshold we expect, we can mark the build as UNSTABLE.
pipeline {
    agent any
    tools {
        maven 'MAVEN_PATH'
        jdk 'jdk8'
    }
    stages {
        stage("Tools initialization") {
            steps {
                sh "mvn --version"
                sh "java -version"
            }
        }
        stage("Checkout Code") {
            steps {
                git branch: 'master',
                url: "https://github.com/iamvickyav/spring-boot-data-H2-embedded.git"
            }
        }
        stage("Building Application") {
            steps {
               sh "mvn clean package"
            }
        }
        stage("Code coverage") {
           steps {
               jacoco(
                    execPattern: '**/target/**.exec',
                    classPattern: '**/target/classes',
                    sourcePattern: '**/src',
                    inclusionPattern: 'com/iamvickyav/**',
                    changeBuildStatus: true,
                    minimumInstructionCoverage: '30',
                    maximumInstructionCoverage: '80')
               }
           }
        }
 }
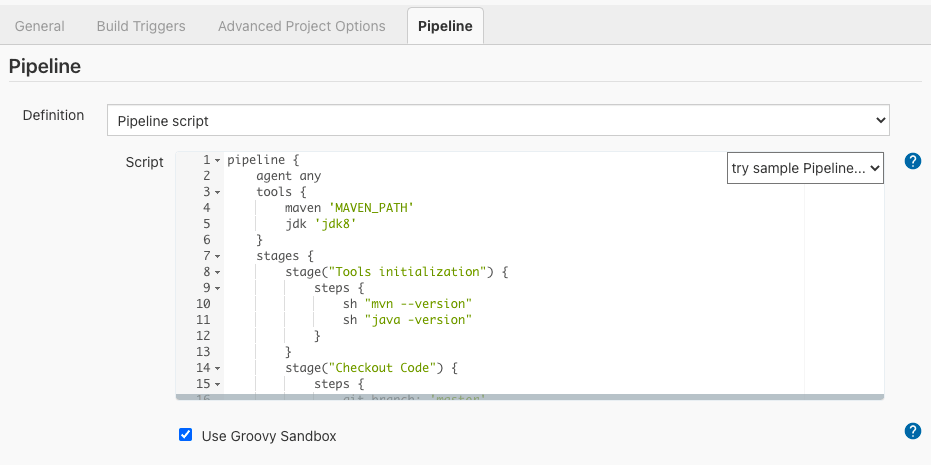
Sample can be found here at GitHub.
jacoco() is a special method which helps us configure Jacoco reports including the minimum & maximum coverage threshold. In the above example, min coverage (minimumInstructionCoverage) check is set as 30 & max coverage (maximumInstructionCoverage) check is set as 80.
So if the code coverage is-
Less than 30 – Build will be marked as Failure.Between 30 & 80 – Build will be marked as Unstable.Above 80 – Build will be marked as Success.
What Does the Options Block Do in a Jenkins Declarative Pipeline?
The options block sets pipeline-wide behavior instead of a single stage: build retention, timeouts, retries, and concurrent-run limits. It sits inside the pipeline block next to agent and stages, and it is optional.
Some of the most commonly used options directives are:
- buildDiscarder: keeps only a set number of past builds and their console logs, so old runs do not fill up server storage.
- disableConcurrentBuilds: stops a second run of the same pipeline from starting while one is already in progress.
- timeout: fails the whole pipeline run once it runs longer than the time limit set here.
- retry: reruns the entire pipeline a set number of times if it fails.
- skipDefaultCheckout: turns off the automatic source checkout on the agent, useful when a stage needs a different workspace setup.
- timestamps: adds a timestamp to every line of console output, so a build log shows how long each step took.
pipeline {
    agent any
    options {
        buildDiscarder(logRotator(numToKeepStr: '10'))
        timeout(time: 1, unit: 'HOURS')
        disableConcurrentBuilds()
    }
    stages {
        stage('Example') {
            steps {
                echo 'Hello World'
            }
        }
    }
}
The full list of options directives is in Jenkins' own Pipeline syntax reference.
triggers
Instead of triggering the build manually, we can configure build to run in certain time intervals using the triggers block. We can use the special method called cron() within triggers block to configure the build schedule.
Understanding cron
Cron configuration contains 5 fields representing minute (0-59), hour (0-23), day of the month (1-31), month (1-12), day of the week (0-7)
Example-
Every 15 minutes – H/15 * * * * Every 15 minutes but only between Monday & Friday – H/15 * * * 1-5
pipeline {
    agent any
    triggers {
        cron('H/15 * * * *')
    }
    stages {
        stage('Example') {
            steps {
                echo 'Hello World'
            }
        }
    }
}
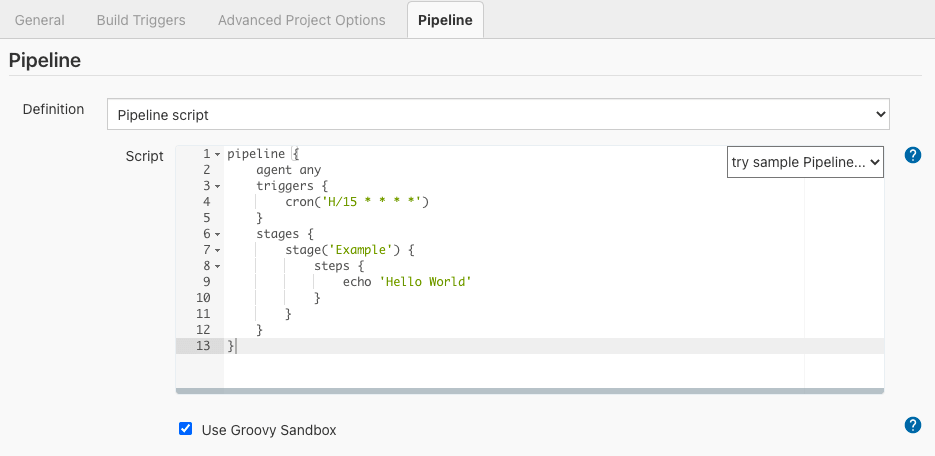
Sample can be found here at GitHub.

Conclusion
In this blog, we have done an in-depth dive into Jenkins Declarative pipeline examples and their usage. Instead of configuring build steps using UI in a remote Jenkins portal, we would always recommend you to prefer creating Jenkinsfile with Declarative pipeline syntax. Jenkinsfile, since part of the application’s source code, will provide more control over CI/CD steps to developers. The same Jenkinsfile can also call the CLI of TestMu AI's HyperExecute in a test stage to split a suite across parallel virtual machines. That’s the best way to make the most of Jenkins CI/CD and all the features it has to offer!
Happy building & testing!
Author

Praveen Mishra
Blogs: 23


Praveen Mishra is a community contributor with 7 years of experience in B2B SaaS, specializing in testing automation and data-driven testing strategies. He holds a Bachelor's degree in Computer Applications (Computer Science) and has written 25+ technical articles on automation testing, CI/CD, cross-browser testing, and related topics. Praveen is followed by over 10,000 professionals from the QA community, including QA engineers, tech leaders, AI enthusiasts, and DevOps professionals, on LinkedIn.


Did you find this page helpful?
More Related Blogs
TestMu AI forEnterprise
Get access to solutions built on Enterprise
grade security, privacy, & compliance
- Advanced access controls
- Advanced data retention rules
- Advanced Local Testing
- Premium Support options
- Early access to beta features
- Private Slack Channel
- Unlimited Manual Accessibility DevTools Tests