

Power Your Software Testing with AI Agents and Cloud
The Native AI-Agentic Cloud Platform to Supercharge Quality Engineering. Test Intelligently and Ship Faster.


- TestMu AI (Formerly LambdaTest)
- /
- Blog
- /
- How To Set Jenkins Pipeline Environment Variables?
On This Page
- What are Jenkins Pipeline Environment Variables?
- Viewing Jenkins Environment Variables List
- Reading Jenkins Environment Variables
- Setting Jenkins Environment Variables
- Capturing bat Command Output in the Environment Variable
- AI Agents and Jenkins Variables
- Jenkins Set Environment Variables Using TestMu AI Plugin
Jenkins pipeline environment variables are set globally through the Jenkins UI, locally inside a declarative or scripted pipeline, from a properties file with the Pipeline Utility Steps plugin, or injected at build startup with the EnvInject plugin. You can then view them on an HTML page served by the Jenkins controller or via a shell command in a groovy script.
So, let’s get started!
What are Jenkins Pipeline Environment Variables?
While writing the script for a Jenkins pipeline, some dynamic values are to be injected and used. These are especially useful to avoid hardcoding every value into the pipeline. For this dynamic integration, Jenkins set environment variables.
A Jenkins environment variable, accessible via the ‘env’ variable, is a global value utilized in Jenkins pipelines and throughout Jenkinsfiles. It’s important to note that any value stored as an environment variable within ‘env’ is of string data type.
The Jenkins pipeline environment variables facilitate the benefits like :
- Injection of sensitive data at runtime to avoid the hardcoding into the pipeline.
- Addition of job parameters available only at runtime, but not at design time.
- Boolean values set in environment variables help certain toggle stages in a pipeline via a parameter that describes a specific subset of tests you want to run.
- Providing IDs of credentials defined in Jenkins.

In the Jenkins pipeline, there are a lot of helpful environment variables that can be accessed and maintained during build execution; some of the most useful ones are :
- env: env is used to access the Jenkins pipeline environment variables in groovy code as env.VARNAME or simply as VARNAME. The env prefix also accesses the environment variables provided in the Jenkins pipeline.
- currentBuild: As the name suggests, it addresses the currently running build of the Jenkins pipeline.
- params: All the parameters provided for a successful build from a read-only map with various typed variables. These can be accessed via params.
- docker: This is to provide convenient access to Docker – related functions in a Groovy script of Jenkins pipeline.
To ease building the pipeline, Jenkins has provided us with a Jenkins environment variables list. This list contains some of the most used variables. Let’s start by browsing through the list of environment variables.
Viewing Jenkins Environment Variables List
Jenkins exposes the crucial characteristics of components using environment variables. Thus, a set of these variables are already defined by Jenkins. This includes information about the job and the specific build that is running. Some of the most commonly used variables are :
http://localhost:8082/job/envvars/ | ||
The Jenkins environment variables list can be viewed using two different ways.
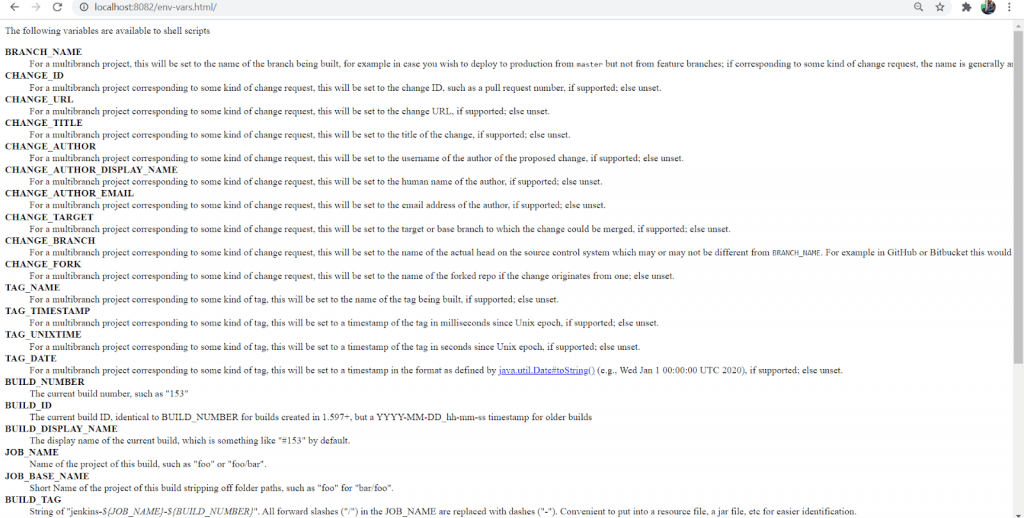
1. Via env-vars.html :
The environment variables can be viewed on an HTML page. You have to open the page on your Jenkins controller server. The steps to view the jenkins environment variables list are :
- At the address bar of chrome, type
${YOUR_JENKINS_HOST}/env-vars.html. - The ${YOUR_JENKINS_HOST} itself is an environment variable defining the Jenkins host address/Jenkins URL(that would be
http://localhost:8080/). - And env-vars.html is the HTML file consisting of the list of all Jenkins environment variables.
- The page looks like this :
2. Via Windows batch script/shell command :
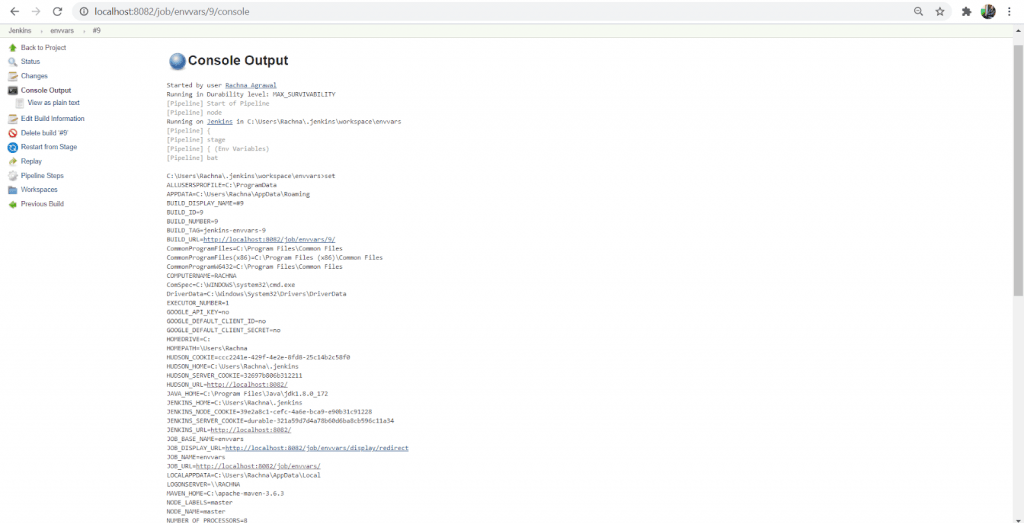
You can also list all the environment variables by writing the shell command in the groovy script of the Jenkins pipeline. The steps to do the same are :
- Create a new pipeline in Jenkins, named ‘envvars’.
- In the Pipeline Script, type the following groovy script.
pipeline{
    agent any

    stages{
        stage("Env Variables"){
            steps{
                bat ‘set’
            }
        }
    }
}
Reading Jenkins Environment Variables
In this section, we will see how you can read your Jenkins environment variables list. Let’s take it one step at a time-
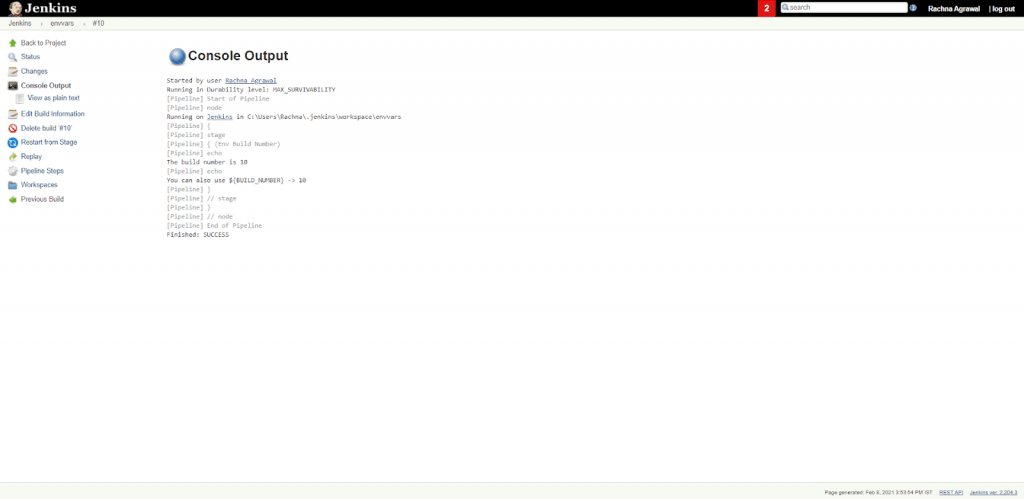
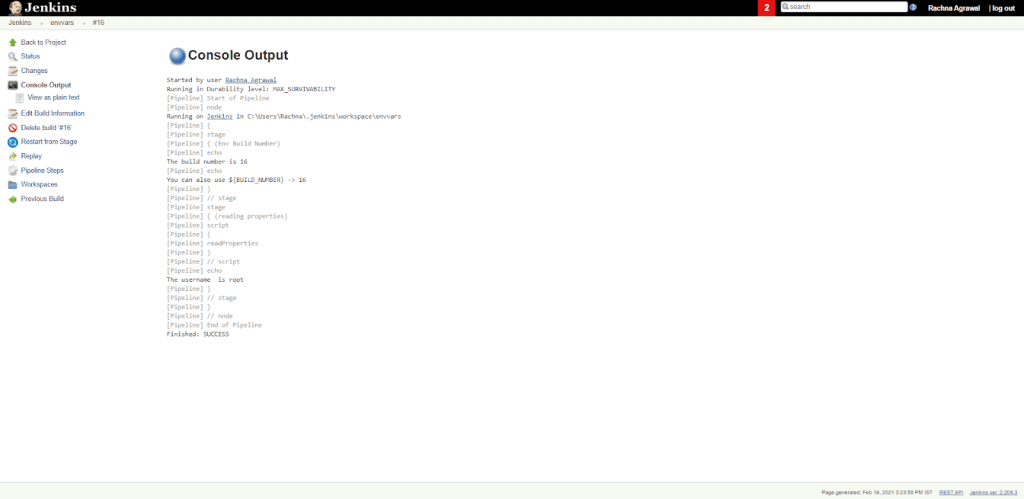
- To access the Jenkins environment variables in a pipeline, you can use the env object, eg. env.BUILD_NUMBER will give the current build number of a pipeline. The reference to Jenkins pipeline environment variables is made by surrounding it by ${} in the following way: ${env.BUILD_NUMBER}
- You can also use the short version, which is BUILD_NUMBER. But this variant is quite confusing for some users. The script to read the build number via environment variables is :
pipeline{
    agent any

    stages{
        stage("Env Build Number"){
            steps{
                echo "The build number is ${env.BUILD_NUMBER}"
                echo "You can also use \${BUILD_NUMBER} -> ${BUILD_NUMBER}"
            }
        }
    }
}
Setting Jenkins Environment Variables
Jenkins environment variables are set both globally as well as locally. Global environment variables can be set via the UI of Jenkins, and local environment variables are set according to the pipeline, being declarative or scripted. The Jenkins pipeline environment variables can also be read from a properties file. For this, we use the Pipeline Utility Steps plugin. You can also inject the variables during the build startup via the EnvInject plugin.
Thus, different ways to set Jenkins environment variables are :
1. Creating Global Environment Variables
Global environment variables are the variables that can be used in any and every Pipeline or Job built on Jenkins. The global variables are set via the Jenkins console and via the groovy script of a pipeline. The ways to set these global environment variables are:
- Using Jenkins Console :
- Log in to the Jenkins Server first.
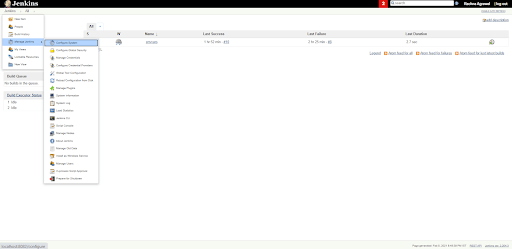
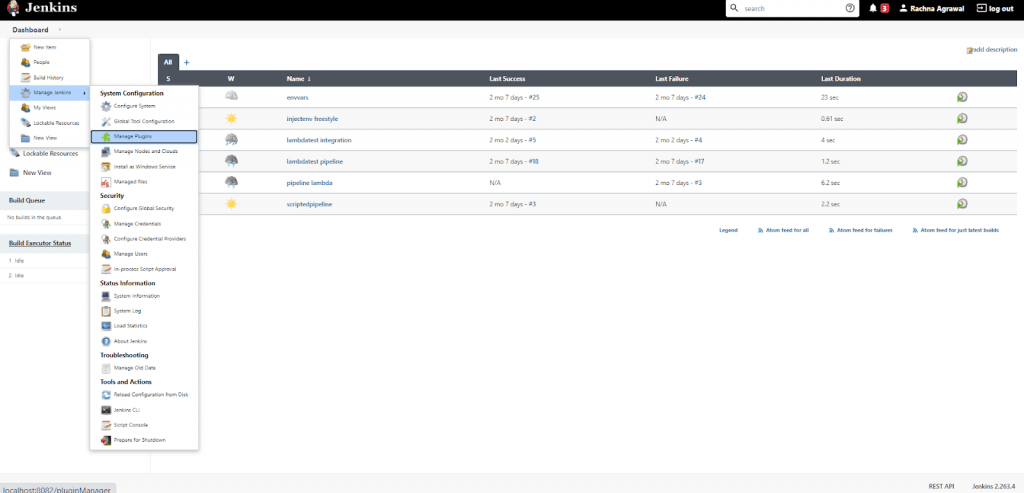
- On the upper left side, you will find a dropdown menu on the right of Jenkins; Select the dropdown menu.
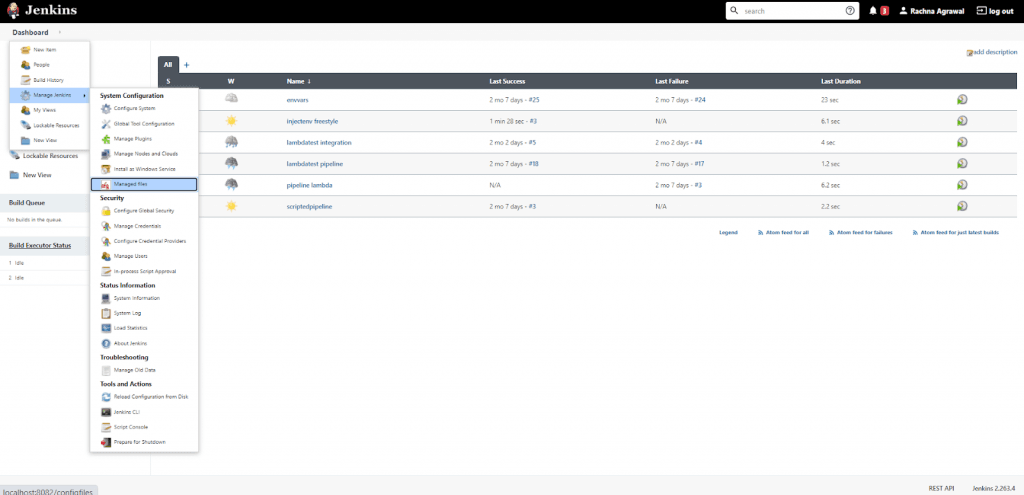
- In the dropdown menu, you will find an option for Manage Jenkins. Please click on it.
- In the Manage Jenkins window, click on the Configure System. Here, you can configure global properties, commands, and a lot more.
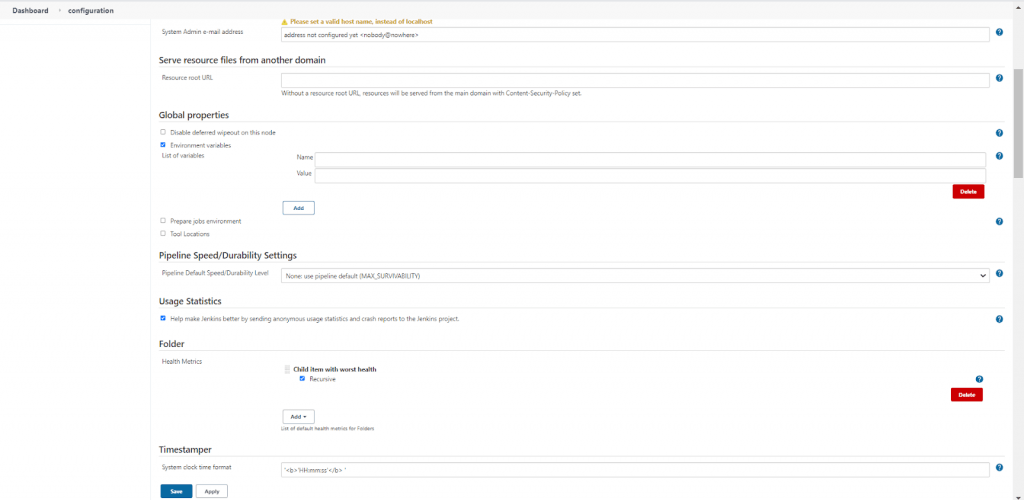
- Find the Global properties section.
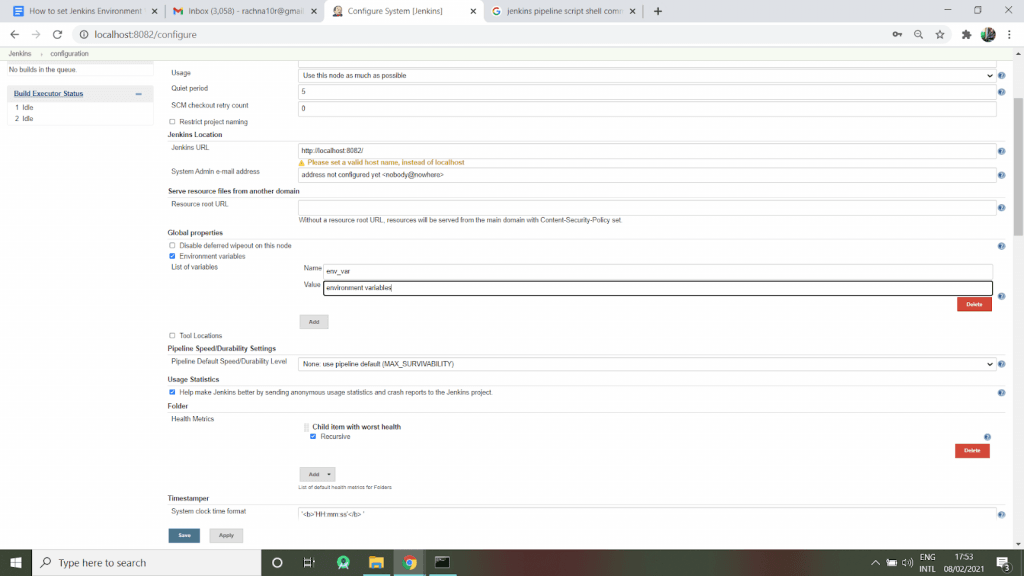
- In the Global properties section, tick the box of environment variables.
- As you will tick the box, the button to add the Jenkins environment variables list appears.
- Click on Add. Two fields appear- Name and Value.
- You can provide multiple environment variables by clicking on the add button.
- This can be viewed as :
- Using Java Code in Groovy Script :
- You can create Jenkins environment variables by using Java code in the Groovy script. This code is to be written in the pipeline script section when a new pipeline is created.
- The required code is :
import hudson.EnvVars;
import hudson.slaves.EnvironmentVariablesNodeProperty;
import hudson.slaves.NodeProperty;
import hudson.slaves.NodePropertyDescriptor;
import hudson.util.DescribableList;
import jenkins.model.Jenkins;
public createGlobalEnvironmentVariables(String key, String value){

       Jenkins instance = Jenkins.getInstance();

       DescribableList<NodeProperty<?>, NodePropertyDescriptor> globalNodeProperties = instance.getGlobalNodeProperties();
       List<EnvironmentVariablesNodeProperty> envVarsNodePropertyList = globalNodeProperties.getAll(EnvironmentVariablesNodeProperty.class);

       EnvironmentVariablesNodeProperty newEnvVarsNodeProperty = null;
       EnvVars envVars = null;

       if ( envVarsNodePropertyList == null || envVarsNodePropertyList.size() == 0 ) {
           newEnvVarsNodeProperty = new hudson.slaves.EnvironmentVariablesNodeProperty();
           globalNodeProperties.add(newEnvVarsNodeProperty);
           envVars = newEnvVarsNodeProperty.getEnvVars();
       } else {
           envVars = envVarsNodePropertyList.get(0).getEnvVars();
       }
       envVars.put(key, value)
       instance.save()
}
createGlobalEnvironmentVariables('Var1','Dummy')
In java, createGlobalEnvironmentVariables() method is used to create new global environment variables. Here, the environment variable named, “Var1” is created having the value “Dummy”.
- Using Jenkins File :
- You can populate the environment variable using a Jenkins file.
- There might be a file in your code repository where some configuration properties for your app are saved, Or the file would be available on fileshare somewhere.
- There is a plugin in Jenkins that can be used to read these properties from a file. This is the Pipeline Utility Steps plugin.
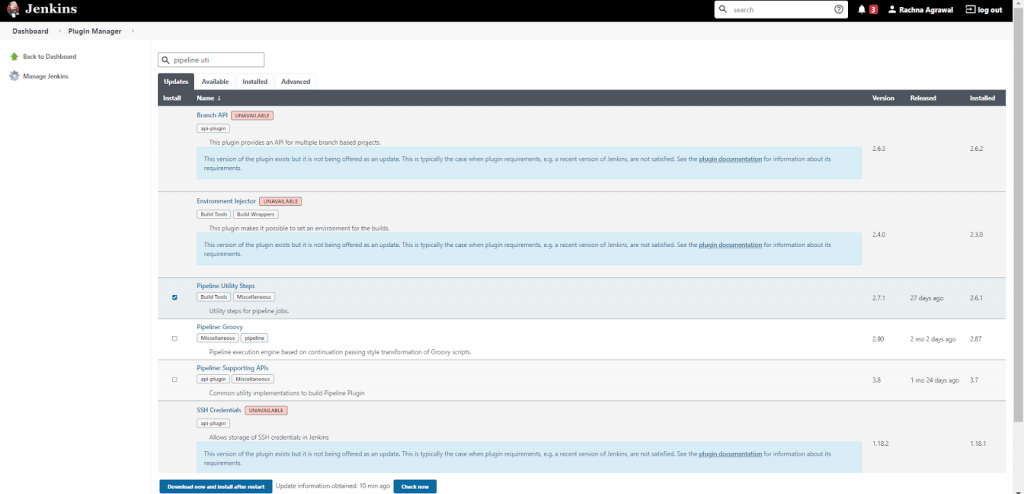
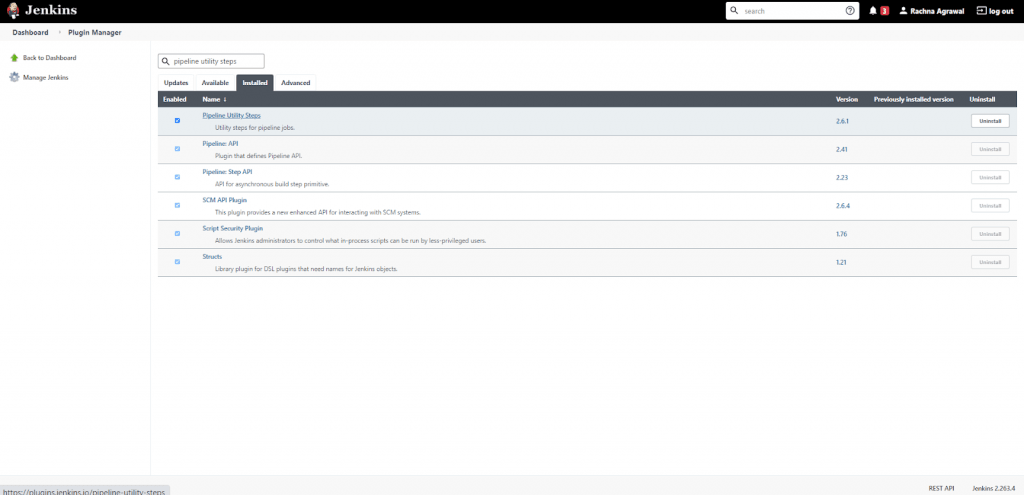
- So, firstly install the Pipeline Utility Steps plugin. This provides the readProperties step, which makes it easy to read properties from a file.
- Click on Manage Jenkins on the left column.
- Select Manage Plugins and go to the Available Tab.
- In the filter box, type pipeline utility steps.
- You will find the plugin listed, select the checkbox in front of Pipeline Utility Steps and click on the install button.
- After successful installation, you will find the required plugin under the Installed tab.
- Also, define Java .properties file with some key and value pairs. The properties file is used to store the username, password, access tokens etc., which cannot be hardcoded due to privacy. As shown below :
Username = root
Access_Token = ***************
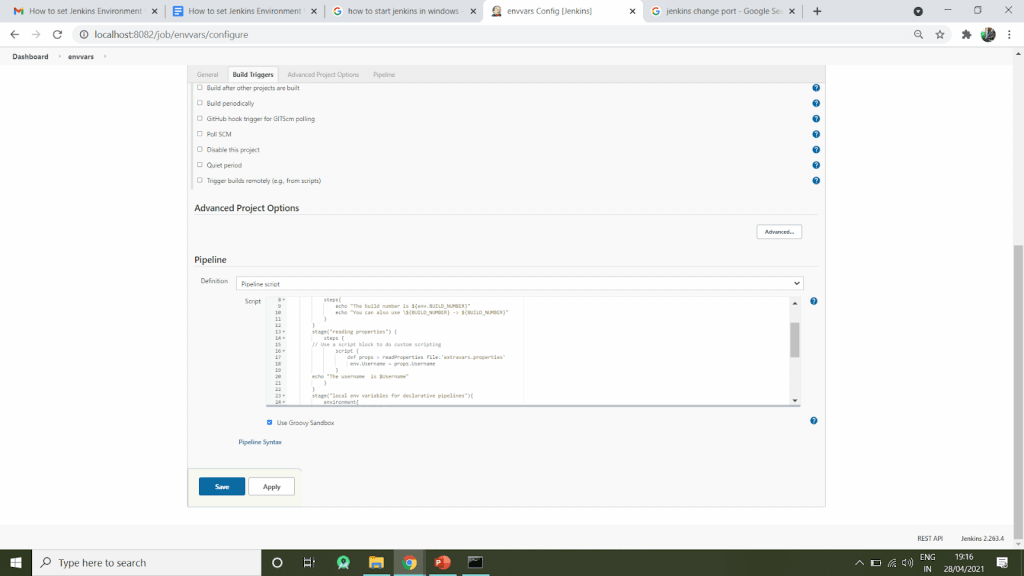
stage(“reading properties from properties file”) {
    steps {
        // Use a script block to do custom scripting
        script {
            def props = readProperties file: 'extravars.properties'
            env.Username = props.Username
        }
        echo "The username  is $Username"
    }
}
2. Creating Local Environment Variables
The local environment variables are the variables explicitly defined for a particular job in Jenkins. These are defined according to the pipeline and its type. There are declarative pipelines as well as scripted pipelines. The Jenkins declarative Pipelines break down the stages into individual stages that can contain multiple steps; Scripted pipelines, on the other hand, use groovy code and references within the stages without any extra efforts. Because of this difference, the code for creating local environment variables is different for the two types of pipelines.
- Using Declarative Pipeline:
- The Jenkins declarative pipeline uses an environment directive to define local environment variables. The environment directive looks like:
environment {
       DISABLE_AUTH = 'true'
   }
pipeline {
   agent any
   environment {
       DISABLE_AUTH = 'true'                               //can be used in whole pipeline
   }
   stages {
       stage(“Build”) {
           steps {
               echo env.DISABLE_AUTH
           }
       }
   }
}
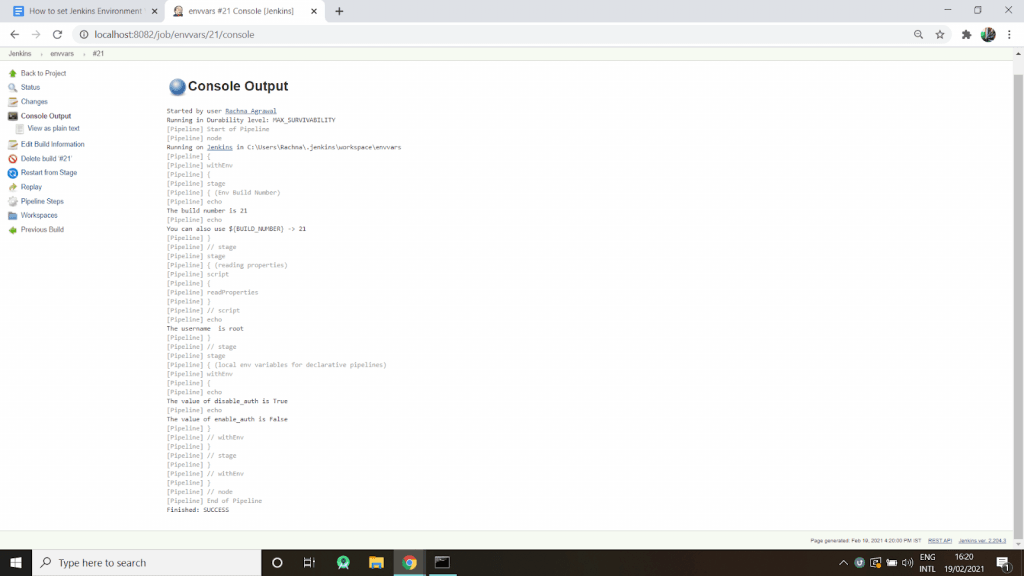
pipeline {
   agent any
   environment {
       DISABLE_AUTH = 'true'
   }
   stages {
       stage(“Build”) {
           environment {
                   ENABLE_AUTH = ‘false’                                 //can be used in this stage only
              }
           steps {
               echo env.DISABLE_AUTH
               echo env.ENABLE_AUTH
           }
       }
   }
}
- Using Scripted Pipeline:
- Create nodes for the scripted pipeline.
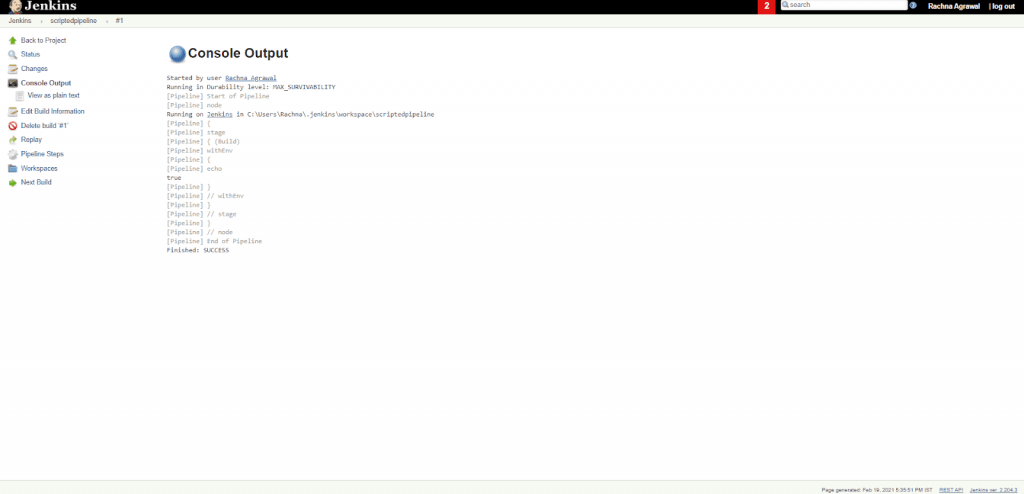
- In the scripted pipelines, use withEnv to define local Jenkins environment variables. The withEnv([“env=value]) block can also be used to override any environment variable.
- The simple code to declare local environment variables is :
node{
   stage('Build') {
       withEnv(["DISABLE_AUTH=true"]) {
         echo env.DISABLE_AUTH   }
   }
 }

Austin Siewert
Co-Founder, Steadfast Systems
Discovered @TestMu AI yesterday. Best browser testing tool I've found for my use case. Great pricing model for the limited testing I do 👏
2M+ Devs and QAs rely on TestMu AI
Deliver immersive digital experiences with Next-Generation Mobile Apps and Cross Browser Testing Cloud

3. Injecting Environment Variables in Freestyle Projects
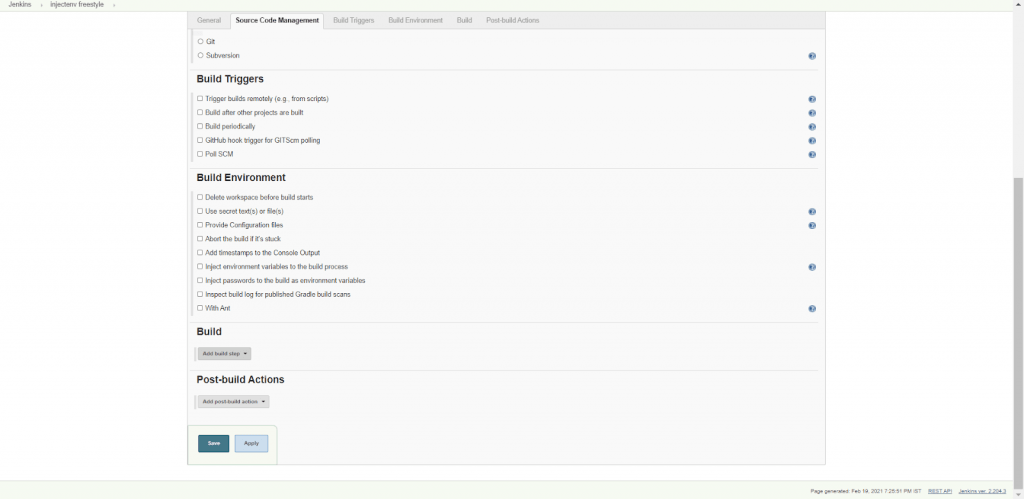
Injecting Jenkins environment variables can be done with the help of a plugin. This plugin is the EnvInject plugin. You can install the EnvInject plugin and inject the environment variables during the build startup. This makes it possible to set up a custom environment for all Jenkins jobs. This plugin is used massively in the freestyle projects of Jenkins. The steps that demonstrate the usage of the EnvInject plugin are:
- Log in to the Jenkins server with your credentials.
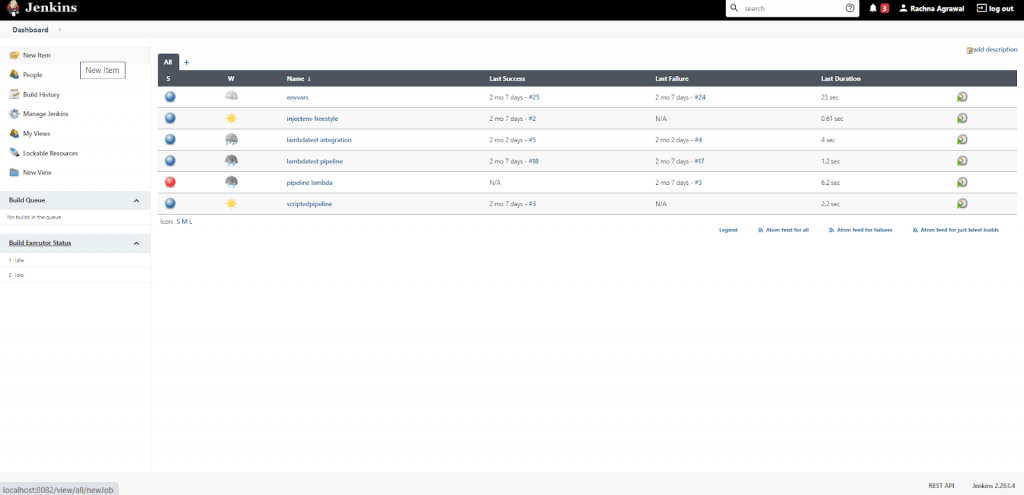
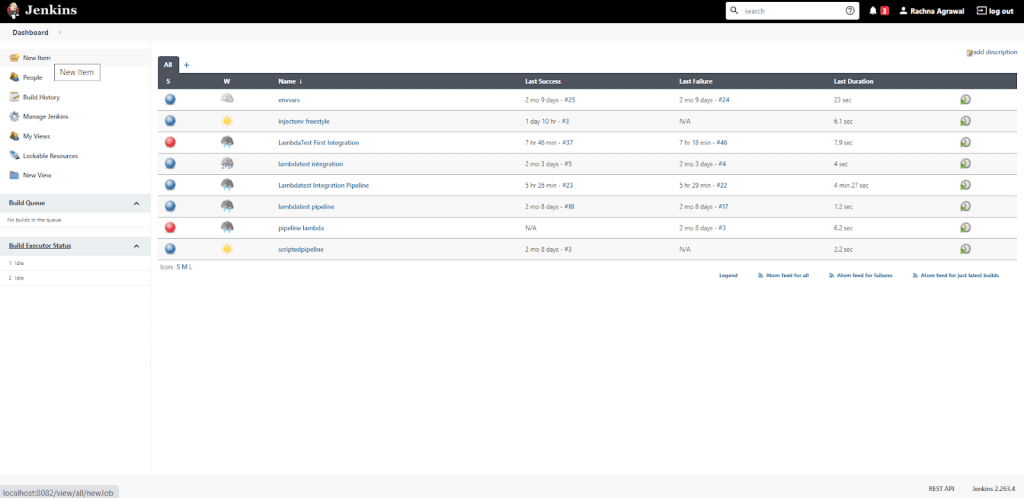
- On the leftmost side, you will find the New Item option. Click on that, and a new window appears.
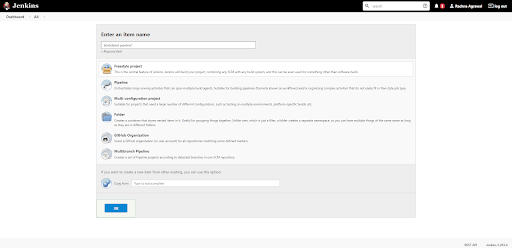
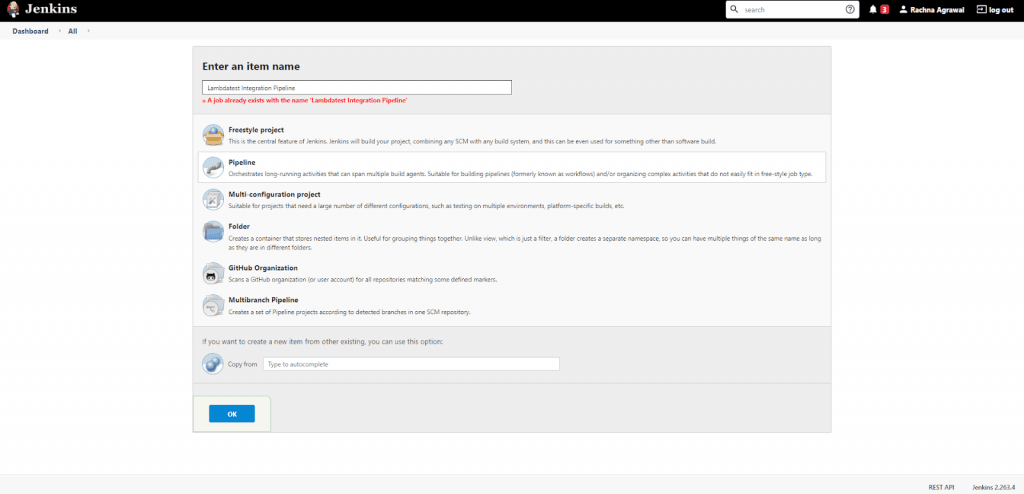
- Enter the Item name and select the Item type from the types available like freestyle project, pipeline, multibranch pipeline, folder etc.
- You can provide the name of an existing job if you want this job to be its replica, or you can leave it blank and then click on OK.
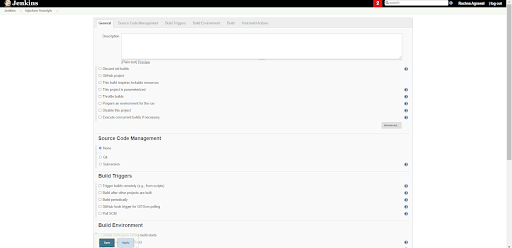
- Your freestyle project is created.
- Click on configure to alter the project and to inject Jenkins environment variables.
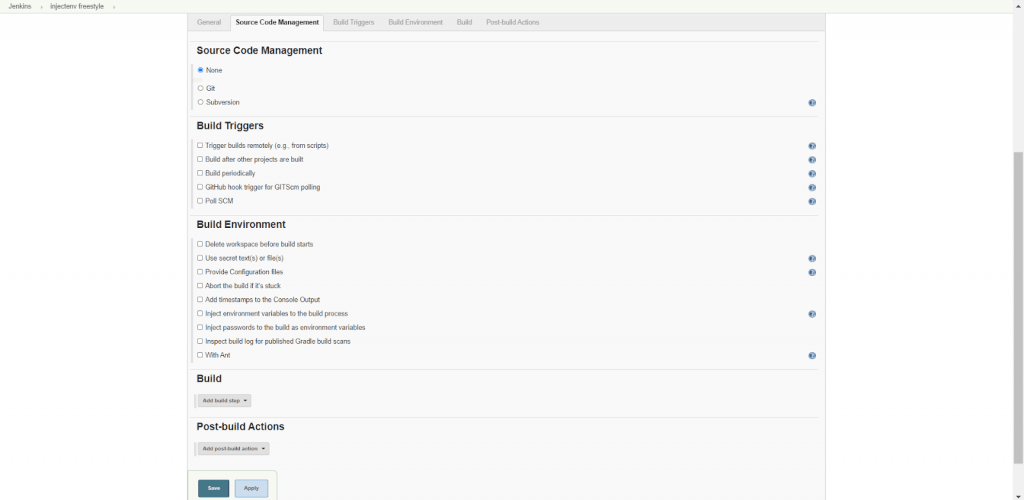
- In the Source Code Management section, select the None option as we are not fetching code from any code repository. You can choose Git if you want to fetch the code from a Git repository.
- You can also select checkboxes in the Build Triggers and Build Environment section to do the necessary settings required.
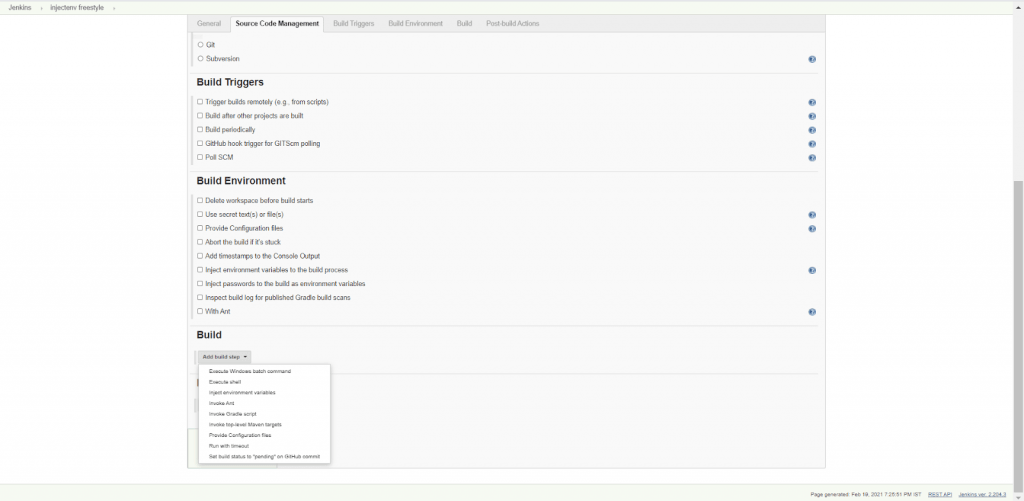
- In the Build section, click on the drop-down Add Build Steps. (This provides the steps taken before a successful build happens.)
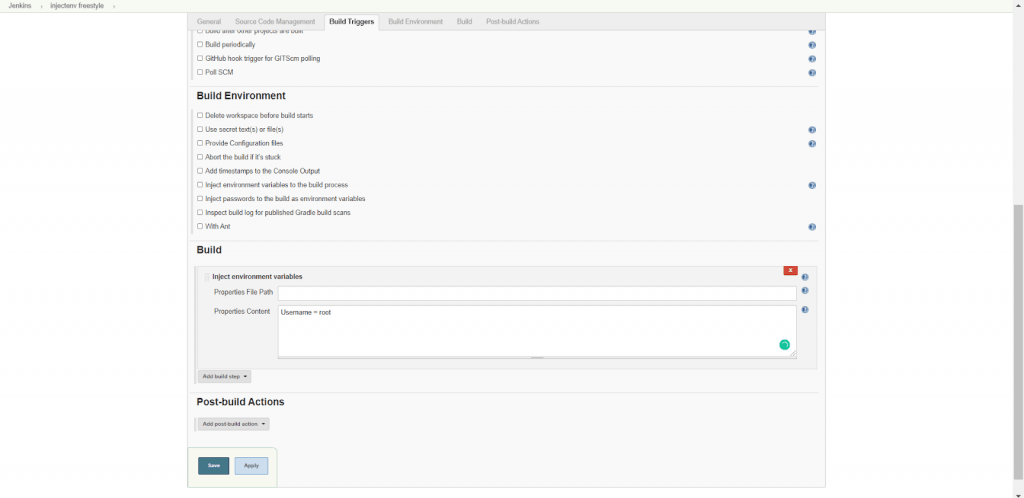
- Select Inject environment variables from the drop-down. A dialog box will be added to the build section.
- In this box, specify the Properties File Path if you have the environment variables defined in a properties file separately.
- You can also add environment variables in the Properties Content directly without specifying the file path. Here, ‘Username’ is the environment variable with ‘root’ as its value.
- You can also select an option from the drop-down, Post-build Actions to be performed after the successful build.
- Click Save and Apply. Your freestyle project is configured successfully.
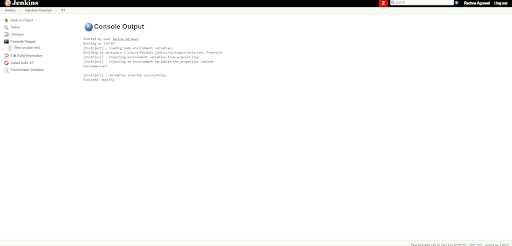
- The output shows that the given environment variable is injected successfully.
Capturing bat Command Output in the Environment Variable
You can capture the output of a shell command or batch command as a Jenkins environment variable and use it in later stages of the pipeline. For that you need to use the exact given syntax – bat(script: ‘cmd’, returnStdout:true). This is to force the bat command to return the output to be captured and stored in an environment variable. The steps to store the output into a Jenkins environment variable are:
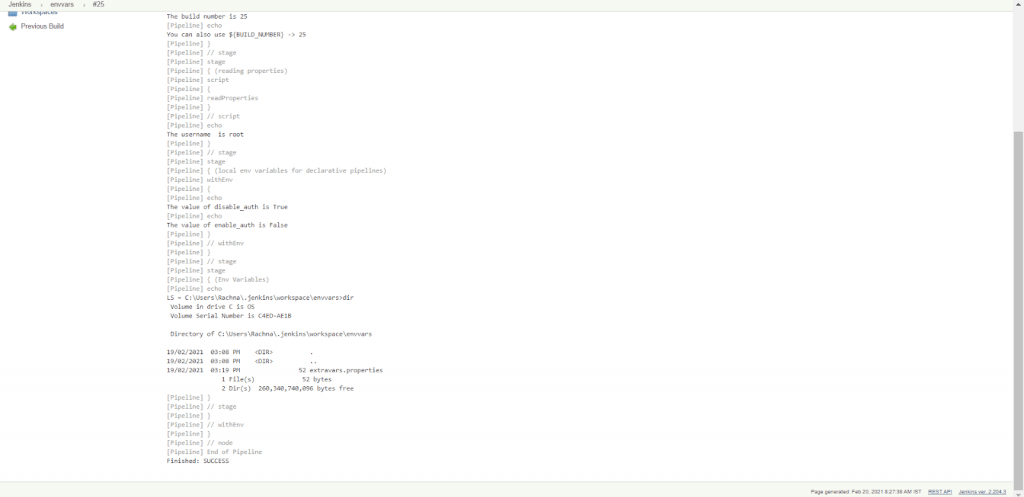
- Here, we have taken the dir command, and we will capture its output in an environment variable named LS.
- We have used a script block to save the output in LS, and then we have accessed the same variable and displayed the saved content.
- The groovy script that works for the same is :
pipeline {
    agent any

    stages {
        stage("capturing output in Environment Variables") {
            steps {
                script {
                    env.LS = bat(script:'dir', returnStdout: true).trim()
                   // if you access environment variable in the batch command
                    echo $LS
                }
            }
        }
    }

How Do AI Coding Agents Manage Jenkins Environment Variables In 2026?
AI coding agents can read a Jenkinsfile, draft the environment block, and flag env vars nobody uses, but none of them can create or rotate a credential inside the Jenkins credential store on their own.
- GitHub Copilot: suggests new environment entries and variable names inline as you edit a Jenkinsfile, working from the surrounding groovy code instead of a generic snippet.
- Claude Code: runs as a terminal agent that opens the actual Jenkinsfile, traces every place env.VARNAME is read across stages, and rewrites a withEnv block on request.
- Cursor: cross-checks a properties file against the pipeline script in agent mode and flags variables that are declared but never consumed by any stage.
- Playwright MCP server: drives a real browser against the Jenkins env-vars.html page so an agent can confirm a variable is actually exposed at runtime, not just declared in code.
- browser-use: automates the same Manage Jenkins to Configure System to Global properties walk for teams that still set global variables through the console.
The limit holds across all five tools: an agent can read, draft, and verify a variable, but adding, rotating, or deleting a Jenkins credential still needs a human with access to Manage Jenkins.
Jenkins Set Environment Variables Using TestMu AI Plugin
As the installation of a plugin is facilitated, new environment variables are added to the jenkins environment variables list. Here, we will install the TestMu AI Jenkins plugin and view the environment variables added by this plugin.
TestMu AI Jenkins plugin helps in pacing up your automated cross browser testing cycles. This easily automates your Selenium test scripts by connecting the Jenkins instance to the TestMu AI Selenium Grid. TestMu AI offers you an expansive library of 3000+ browser and browser versions so as to achieve higher test coverage while performing automation testing using the Selenium suite. You can view the steps to install the TestMu AI Jenkins plugin by clicking here. Some new environment variables added due to the TestMu AI Jenkins plugin are:
[ { "operatingSystem":"win10", "browserName":"Chrome", "browserVersion": "78.0", "resolution": "1024x768" }, { "operatingSystem":"win8", "browserName": "Firefox", "browserVersion": "67.0", "resolution": "1024x768" } ] | ||
When set in the Jenkins pipeline, these environment variables provide the required information for the TestMu AI integration with Jenkins. The groovy script to set these environment variables in a pipeline is :
pipeline{
    agent any
    environment{
          LT_USERNAME='racha10r@gmail.com'
          LT_ACCESS_KEY='iHnnmi0atXDjDKIqckdBH0gU72Uf8zJb76EyNlXjzvGPzvr54'
          LT_TUNNEL=true
        }
    stages{
        stage('printing the environment variables'){
            steps{
                echo env.LT_USERNAME
                echo env.LT_ACCESS_KEY
                echo env.LT_TUNNEL
            }
        }
    }
}
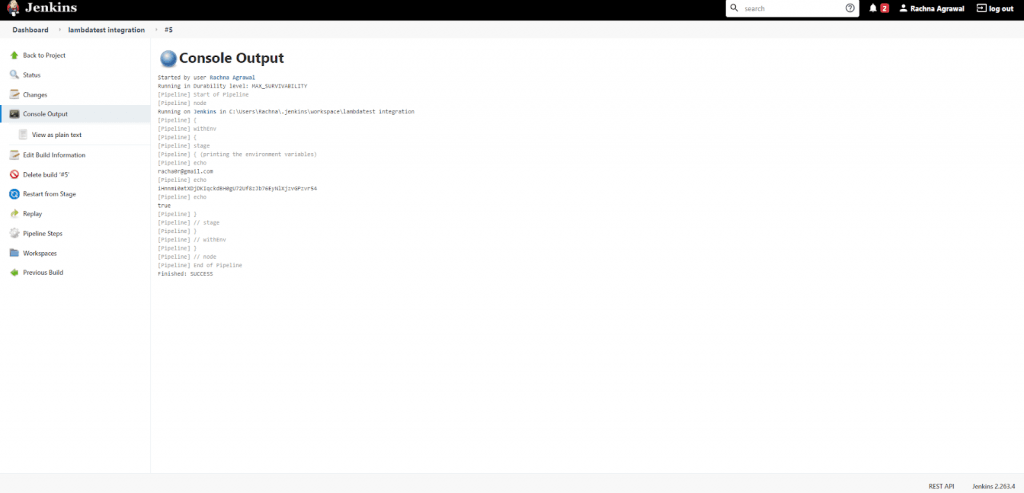
This is a simple groovy script to just set and print the environment variables in the build's console output. The Console Output looks like this:
Using Jenkins Pipeline Environment Variables with TestMu AI Jenkins Plugin
Before we jump off to learn about the practical usage of Jenkins environment variables, let us understand the pre-requisites for the plugin.
Pre-requisites:
- A Git repository containing Selenium Test: This is a sample project with some Nightwatch tests scripts; We will run these tests script from Jenkins on the TestMu AI Selenium Grid Cloud. The URL to the repository is: https://github.com/TestMu AI/nightwatch-selenium-sample.git
- A Jenkins pipeline: A new pipeline will be created on Jenkins to run the Nightwatch tests on the TestMu AI Selenium Grid. To achieve this, this project is integrated into TestMu AI.
- Credentials of TestMu AI Account: The credentials to your TestMu AI profile will be needed. You can easily find the Username and Access Key on the profile section of your TestMu AI Account. (After logging in, click on the rightmost avatar, a dropdown menu will appear and then click on the profile section. You will find the username and Access token there.)
Steps to achieve Integration through Environment Variables
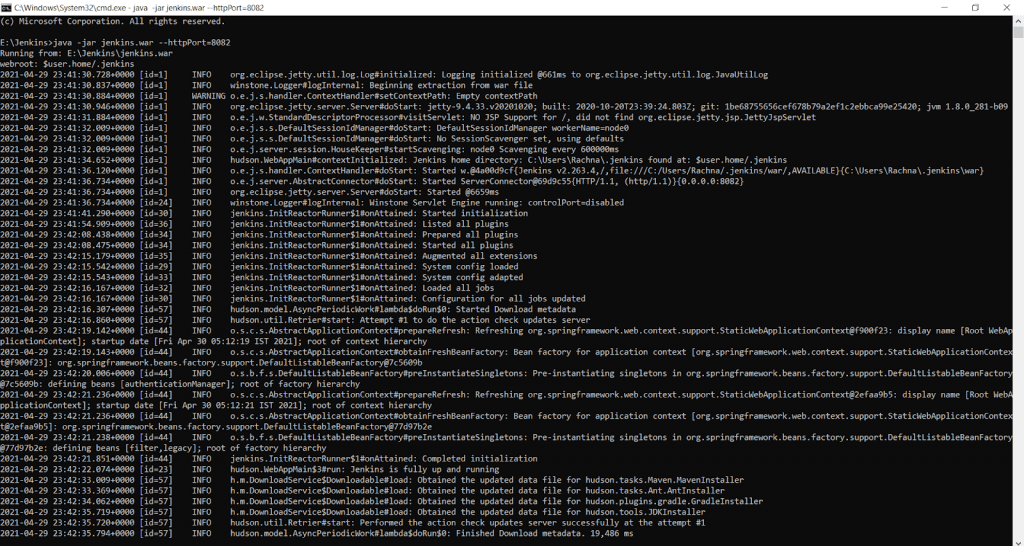
- Start the Jenkins Server by traversing to the location of Jenkins folder in CMD(Command Line Prompt) and typing the command “java -jar jenkins.war”. (You can also change the port on which Jenkins is running by adding --httpPort = <port number> attribute to the previous command.)
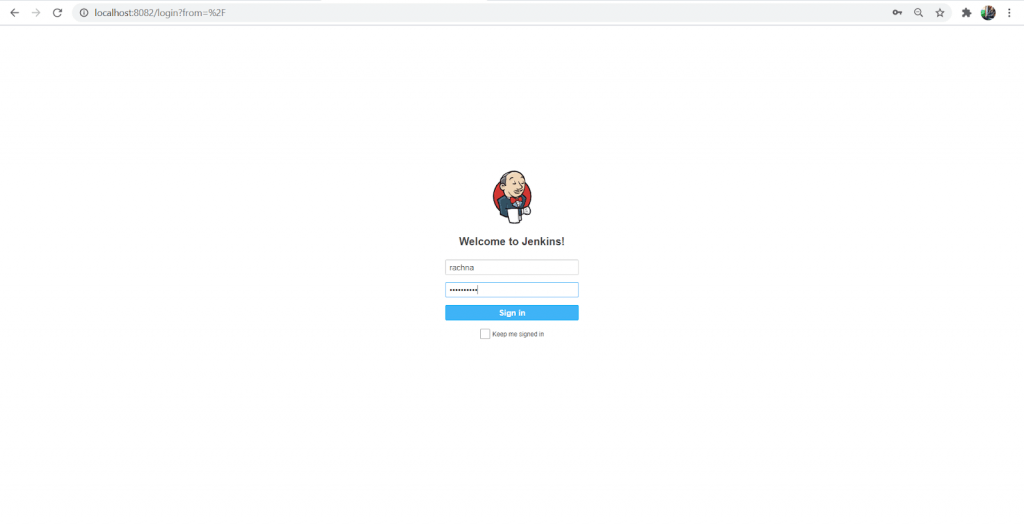
- As the Jenkins server is up and running, go to
http://localhost:8082/and Login to the Jenkins Server. - The Jenkins Dashboard appears; On the Topmost left side, select the New Item Icon. You will be directed to a new configuration page.
- Enter the Name of the pipeline (in this case, it’s “LambdaTest Integration Pipeline”), and select Pipeline from the given options. Click on OK. A new Jenkins pipeline is created.
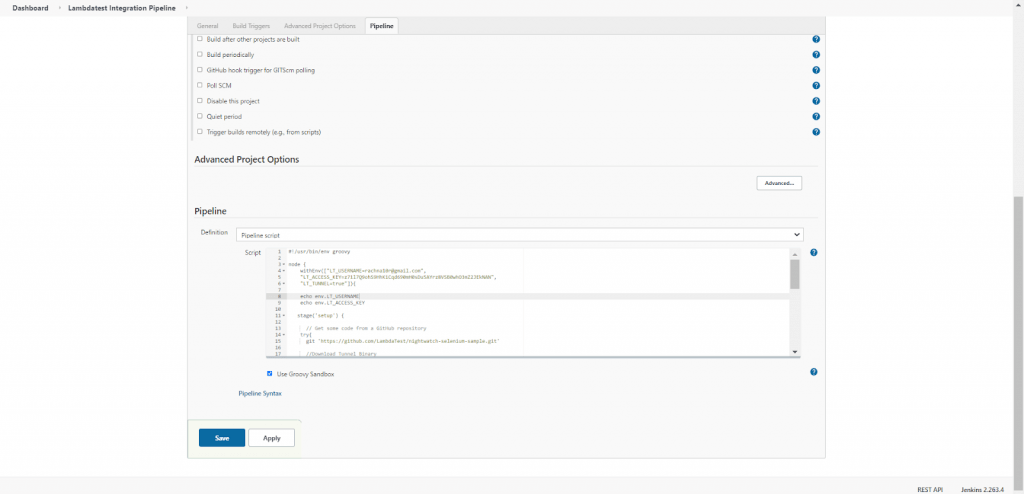
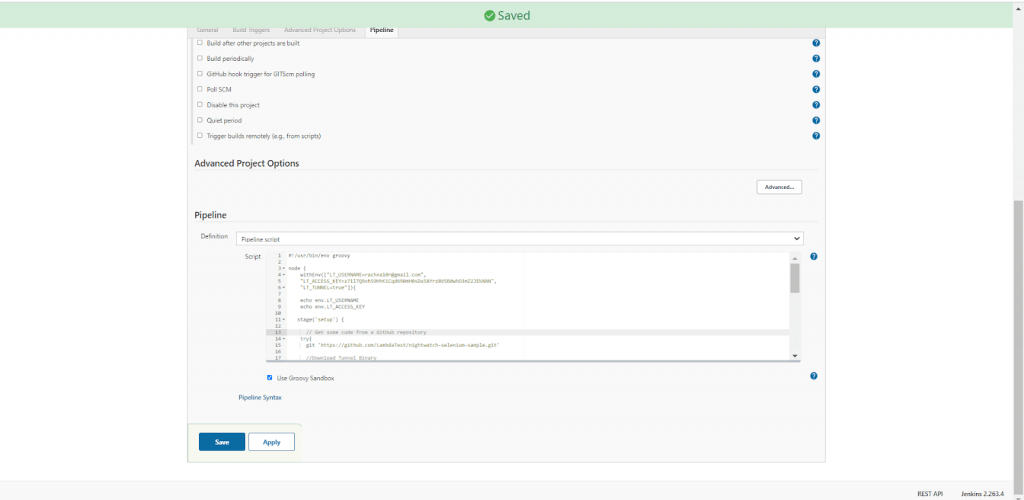
- You will be directed to the configuration page for the Jenkins pipeline, Select Tab Pipeline and add the below Groovy Script in order to create three pipeline stages:
- Providing the Environment by TestMu AI Environment Variables: By the withEnv construct you will set the environment with variables, LT_USERNAME, LT_ACCESS_KEY, LT_TUNNEL. These variables will then be used in our whole pipeline.
- Setup Stage: In the setup stage, you will clone the git repository and download the binary file(LT_Windows.zip) required to create an ssh connection through a Tunnel. You will then unzip the zip file and Activate the tunnel by command “LT --user ${LT_USERNAME} --key ${LT_ACCESS_KEY}”.
- Build Stage: After the activation of Tunnel, you will install the required dependencies by commands, npm install and npm install nightwatch.
- Test Stage: In the test stage, we will run the tests with the help of Nightwatch. Here the command used is a batch command : bat 'node_modules/.bin/nightwatch -e chrome tests'. Through this command we are also providing the environment in which the Tests should be run(the environments can be chrome, ie, edge, firefox etc.. TestMu AI eases the process of testing in various environments by providing us to choose the environment as per the need.)
- The Groovy Script for the Pipeline to create stages is :
#!/usr/bin/env groovy

node {
	// Sets the environment variables from LambdaTest for testing
    withEnv(["LT_USERNAME=rachna10r@gmail.com",
    "LT_ACCESS_KEY=z71l7Q9ohS9HhKiCqd690mH0sDu5AYrz8VSB0whO3mZ2JEkNAN",
    "LT_TUNNEL=true"]){

	// Just printing the above set environment variables
    echo env.LT_USERNAME
    echo env.LT_ACCESS_KEY

   stage('setup') {

      // Get some code from a GitHub repository
    try{
      git 'https://github.com/LambdaTest/nightwatch-selenium-sample.git'

      //Download Tunnel Binary
     bat 'wget "https://downloads.lambdatest.com/tunnel/v3/windows/64bit/LT_Windows.zip"'

     //Required if unzip is not installed
      bat 'unzip -o LT_Windows.zip'

      //Starting Tunnel Process
     'LT --user ${LT_USERNAME} --key ${LT_ACCESS_KEY}'
         }
    catch (err){
      echo err
        }
   }
   stage('build') {
      // Installing Dependencies
      bat 'npm install'
      bat 'npm install nightwatch'
    }

   stage('test') {
          try{
		// Running the nightwatch tests with environment set as Chrome
          bat 'node_modules/.bin/nightwatch -e chrome tests'
          }
          catch (err){
          echo err
          }
   }
   stage('end') {
	// Printing the success message
     echo "Success"
     }
 }
}
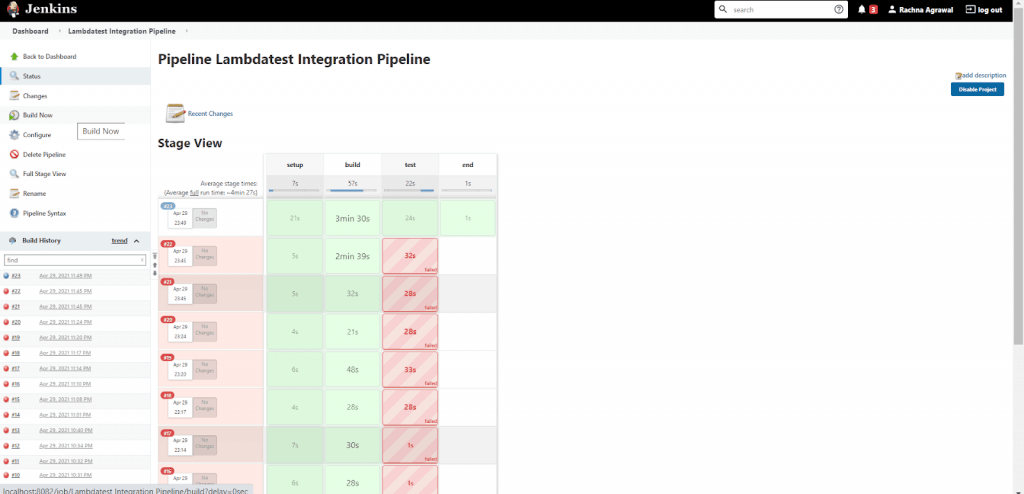
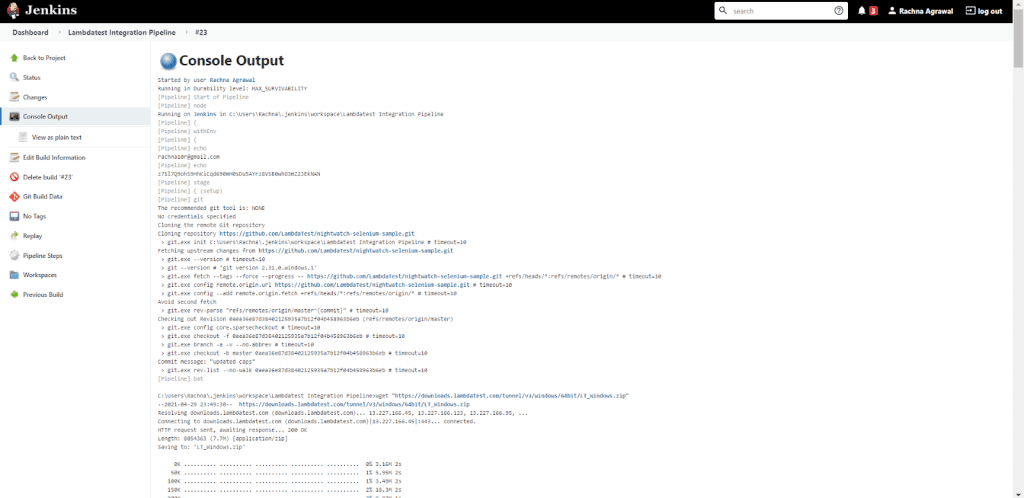
Checking the Test Cases on the TestMu AI Automation Dashboard
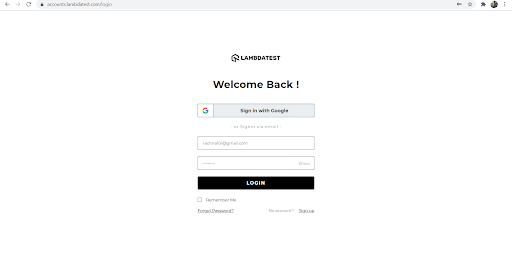
- Log in to your TestMu AI account by visiting URL:
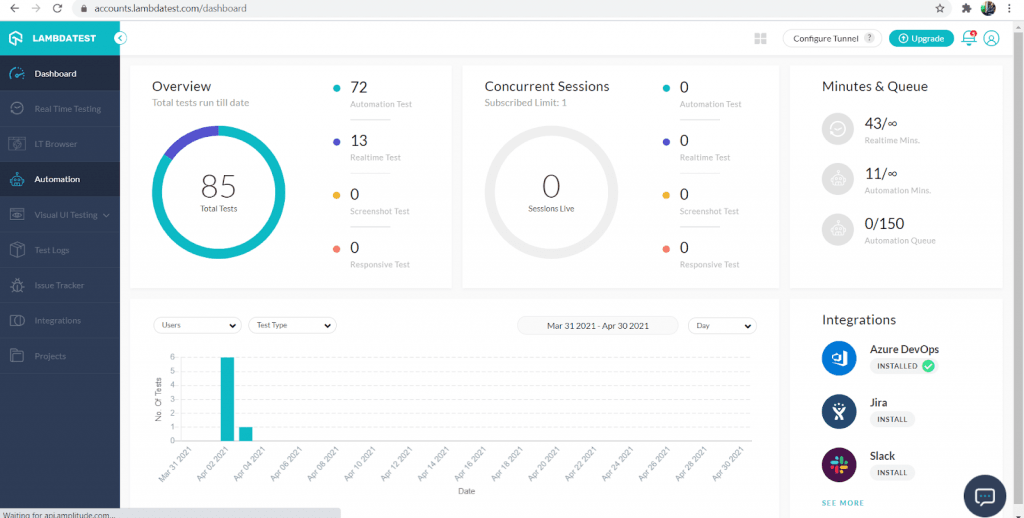
https://accounts.lambdatest.com/login - You will be directed to the TestMu AI Dashboard; On the Left Menu, click on the Automation option.
- The TestMu AI Automation Dashboard appears. Select Automation Logs Tab on it.
- You will find the Test run from Jenkins with proper configurations. TestMu AI eases the process of testing by providing a video log, screenshot etc. You can view the video log and see how the test is passed and weigh the intricacies of the Nightwatch test run through TestMu AI - Jenkins Integration.
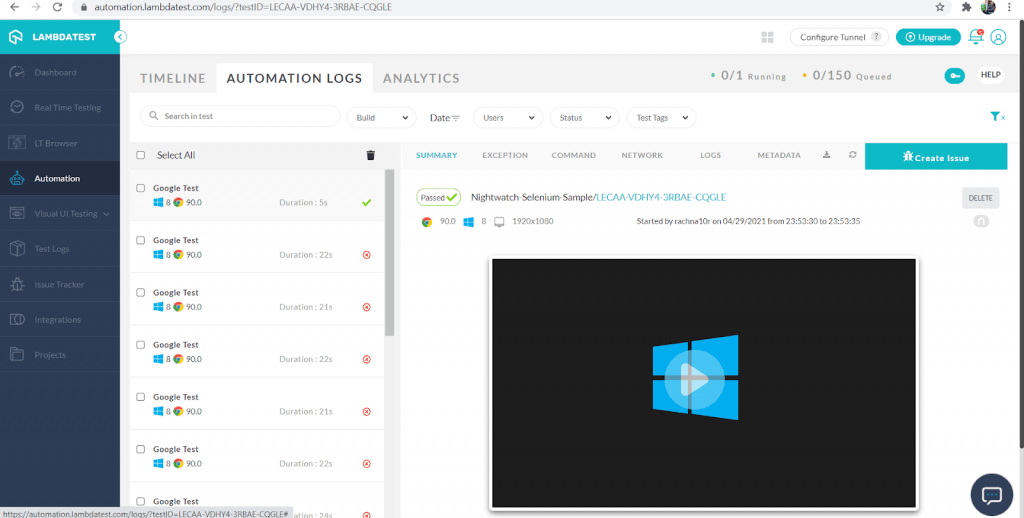
Thus, this way, you can use the TestMu AI Integration with Jenkins for easeful testing. You can also create a freestyle project where after installation of the TestMu AI plugin, the environment variables, TestMu AI credentials etc., can be set manually through a user-friendly UI.
Wrapping Up!
Jenkins has a lot of potential in it. With the integration of various plugins and configuration of different platforms like TestMu AI integration with Jenkins; It provides different environments to create a build and facilitates various applications of continuous integration and continuous deployment.
However, setting up the environment variables is a crucial step in every use case provided by Jenkins. These variables maintain a lot of information required for a successful setup. These are accessed and injected in freestyle projects and pipelines to fulfil essential requirements of the build process and the test process. With Jenkins, we aim to create a robust product or software with excellent test resistance and performance. Thus, ensure that the required Jenkins environment variables are set and can be accessed wherever and whenever necessary.
Also, don't forget to leave your comments, and if you have any query or question, shoot up to the TestMu AI community and get it resolved.
Till then, Happy Testing!
Author

Praveen Mishra
Blogs: 23


Praveen Mishra is a community contributor with 7 years of experience in B2B SaaS, specializing in testing automation and data-driven testing strategies. He holds a Bachelor's degree in Computer Applications (Computer Science) and has written 25+ technical articles on automation testing, CI/CD, cross-browser testing, and related topics. Praveen is followed by over 10,000 professionals from the QA community, including QA engineers, tech leaders, AI enthusiasts, and DevOps professionals, on LinkedIn.


Did you find this page helpful?
More Related Blogs
TestMu AI forEnterprise
Get access to solutions built on Enterprise
grade security, privacy, & compliance
- Advanced access controls
- Advanced data retention rules
- Advanced Local Testing
- Premium Support options
- Early access to beta features
- Private Slack Channel
- Unlimited Manual Accessibility DevTools Tests