
Next-Gen App & Browser Testing Cloud
Trusted by 2 Mn+ QAs & Devs to accelerate their release cycles

On This Page
- What is Selenium?
- What is WebDriver?
- What are the components of Selenium?
- Selenium WebDriver architecture
- Benefits of Selenium WebDriver
- Limitations of Selenium WebDriver
- Selenium WebDriver: Installation and set up
- How to setup Eclipse for Selenium WebDriver
- Running test automation script using Selenium WebDriver
- Automated browser testing using cloud Selenium Grid
- What’s new in Selenium WebDriver 4?
Complete Selenium WebDriver Tutorial: Guide to Selenium Test Automation
An end-to-end Selenium WebDriver tutorial to deep dive in the basics of Selenium WebDriver, its architecture, and automation testing with Selenium WebDriver.

Ria Dayal
February 22, 2026
This article is a part of our Learning Hub. For more in-depth resources, check out our hub on Selenium Tutorial.
When it comes to web automation testing, there are a number of frameworks like Selenium, Cypress, PlayWright, Puppeteer, etc., that make it to the ‘preferred list’ of frameworks. The choice of test automation framework depends on a range of parameters like type, complexity, scale, along with the framework expertise available within the team. However, it’s no surprise that Selenium is still the most preferred framework among developers and QAs.
For starters, Selenium WebDriver is the core of the Selenium automation framework. In this Selenium WebDriver tutorial, I deep dive into the integral aspects of Selenium WebDriver along with touching upon the Selenium WebDriver architecture.
Here’s this complete Selenium WebDriver Tutorial series that will help you learn everything you need to know while performing Selenium automation testing with real-time use cases and examples.
By the end of this Selenium WebDriver tutorial, you will be in a better position to know what is selenium grid, know how to run Selenium WebDriver tests on local Selenium Grid and cloud Selenium Grid.
Overview
Selenium is an open-source automation framework used for web browser testing. It supports multiple programming languages such as Java, Python, C#, JavaScript, Ruby, and PHP, and enables cross-browser and cross-platform test execution.
What Is Selenium WebDriver?
Selenium WebDriver is the core component of the Selenium framework that acts as a bridge between test scripts and browsers. It is a remote control interface that allows programs to interact with browsers, manipulate DOM elements, and control user agent behavior.
What Are the Components of Selenium?
The Selenium framework consists of three main components that serve different testing needs:
- Selenium IDE: A browser plugin that supports record-and-playback testing without requiring programming knowledge.
- Selenium WebDriver: The core automation engine used for browser-based test execution with multi-language support.
- Selenium Grid: Enables parallel test execution across multiple browsers and operating systems simultaneously.
What Is Selenium WebDriver Architecture?
Selenium WebDriver architecture differs between Selenium 3 and Selenium 4:
- Selenium 3: Uses the JSON Wire Protocol over HTTP to communicate between test scripts and browser drivers. Commands are encoded and decoded as HTTP requests, which can lead to slower execution.
- Selenium 4: Replaces the JSON Wire Protocol with the W3C WebDriver Protocol for direct communication. This eliminates encoding and decoding overhead, resulting in faster, more stable, and less flaky tests.
What's New in Selenium 4?
Selenium 4 introduces several major enhancements over previous versions:
- W3C Standardization: WebDriver communicates directly with browsers, eliminating JSON Wire Protocol overhead.
- Enhanced Selenium Grid: Simplified setup using a single JAR file, improved GUI, Docker support, and Kubernetes deployment capabilities.
- Relative Locators: Locate elements relative to others using above(), below(), toLeftOf(), toRightOf(), and near().
- Better Tab and Window Management: New APIs allow creating and switching between windows or tabs without instantiating new WebDriver objects.
- Chrome DevTools Protocol Integration: Enables debugging, network simulation, and geolocation emulation for advanced testing scenarios.
What is Selenium?
Selenium, an open-source tool, enables seamless automation of web browsers, empowering testers to write test scripts effortlessly in a multitude of programming languages, including Ruby, Java, NodeJS, PHP, Perl, Python, C#, and many more.
During my QA career, I had the fortune to try out and use a number of test automation frameworks. So far, none of the frameworks come close to the Selenium automation framework in terms of framework features, supported languages, CI/CD integrations, and more. Nevertheless, as per a survey, Selenium automation testing is still the most preferred mode for realizing web automation testing.

One of the major advantages of Selenium WebDriver over other test automation frameworks, is it’s support for all popular programming languages like Python, Java, JavaScript, C#, PHP, and Ruby. Therefore, referring to individual Selenium language tutorials like the Selenium Python tutorial can be a good starting point to make the most out of Selenium and Python for web automation testing.
What is WebDriver?
WebDriver is one of the components of the whole Selenium framework that helps in overall browser based test automation. WebDriver is the remote control interface component that allows programs to interact and instruct browsers, manipulate DOM elements in a web document, and control the behavior of the User Agent. WebDriver’s is language neutral protocols, i.e. protocols that is not dependent on any one language, is leveraged by Selenium framework to automate testing steps. So in nutshell WebDriver is the bridge between the Selenium framework and the end browser over which the test is being executed.
Today Selenium and Webdriver are usually spoken together and are even used interchangeably to identify the same framework, Selenium WebDriver. However that has not been the case always. In the beginning Selenium and WebDriver were separate open source projects, however in 2008 both teams came together to create a joint project which in turn helped eliminate inherent issues of then Selenium RC version.
Shown below is the evolution of the Selenium automation framework:

By Sathwik Prabhu
Apart from Selenium WebDriver, Selenium IDE and Selenium Grid are other key components of the Selenium framework. Selenium 4 is the latest Selenium version at the time of writing this blog. If you are curious about Selenium 4, you can further deep-dive into our blog on what is new in Selenium 4.
Also, you can follow the TestMu AI YouTube Channel and stay updated with the latest tutorials around Selenium testing, Cypress testing, CI/CD, and more.
Features of Selenium automation framework
Now that we have covered the basics about what is Selenium, lets me walk you through some of the major features of the Selenium automation framework in this section of the Selenium WebDriver tutorial:
- Selenium supports popular programming languages like Java, Python, C#, JavaScript, Ruby, PHP, and Perl; through the use of specific browser drivers.
- Selenium is also a platform-agnostic test automation framework. For example, running Selenium tests on macOS is very much similar to running Selenium tests on Windows OS.
- Selenium tests can be executed across multiple browsers (e.g., Firefox, Chrome, IE, Safari, etc.) and multiple operating systems (e.g., Windows 10, macOS, etc.). Running Selenium tests in IE is still relevant even in 2021 🙂
- Parallel testing in Selenium using the Selenium Grid helps achieve improved browser and test coverage. This eventually helps in expediting the time to market.
- Selenium integration with test automation frameworks supported by Python, Java, JavaScript, etc., helps make the most out of Selenium and the corresponding test automation framework. For example, the TestNG framework for Selenium helps achieve the best out of Selenium and TestNG frameworks.
- Selenium and Continuous Integration lets QA engineers run Selenium automation tests as a part of the CI/CD pipeline. For example, Selenium Continuous Integration with Jenkins helps run Selenium automation tests as a part of Jenkins pipelines.
- Selenium integration with reporting platforms like Extent, Allure, etc., helps generate and manage test reports. In addition, reporting tools in Selenium provide information about the overall behavior of tests, which helps improve the quality of tests.
- Running Selenium tests in Docker containers cuts down the test execution time and minimizes the differences that might arise among different test environments (e.g., staging, production, etc.)
Now that you already know what is Selenium, let’s deep dive into various components of Selenium in the next section of this Selenium WebDriver tutorial.

What are the components of Selenium?
As already stated, Selenium is a framework (i.e., it is not a single software but a suite composed of different components).
Selenium is composed of the following components:
- Selenium IDE
- Selenium WebDriver
- Selenium Grid
It’s important to understand these main components in depth before getting started with a hands-on in this Selenium WebDriver tutorial.
Selenium IDE
Selenium IDE is basically a Record/Run tool that is available as a browser plugin for Mozilla Firefox and Google Chrome. You need not have any programming language experience to work with the IDE.
It follows a record-and-playback approach wherein you can record your test steps and export the tests in the preferred Selenium-supported programming language. These exported tests can then be used with Selenium WebDriver.
Selenium IDE in Selenium 4 is more than a playback & recording tool, the features of which can be leveraged to make the most out of Selenium automation testing.
Also read our comprehensive Selenium IDE Tutorial
Selenium WebDriver
Selenium WebDriver is an enhanced version of Selenium RC and overcomes the limitations faced in Selenium RC. It controls the browser by direct communication. It has a faster execution time as compared to IDE and RC.
Selenium RC and WebDriver were merged into one single unit known as Selenium WebDriver 2.0. Over time it has been enhanced for more features and functionalities. In Selenium 3, the JSON Wire protocol was the primary mode of communication between the test code and web browser.
With Selenium 4, JSON Wire protocol is replaced with W3C protocol, which means that encoding and decoding of test requests are no longer required in WebDriver W3C protocol. Therefore, as QA engineers, we can expect less flaky tests with W3C WebDriver Protocol in Selenium 4.
Selenium Grid
Selenium Grid enables the users to perform parallel test execution. It is used along with Selenium RC to run parallel tests across different browsers and machines.
Users can run simultaneous tests in multiple environments, thereby saving a lot of time and expediting the time to market.
Selenium Grid is based on the Hub-Node concept. Until Selenium 3, the Hub and Node jars had to be started separately. With Selenium 4, all the necessary dependencies are available in a single Jar file. Therefore, to use the Selenium Grid on Selenium 4, you need not start the Hub and Node separately.
That’s not all. Selenium Grid on Selenium 4 supports different operating modes like Standalone Mode, Hub & Node Mode, and Fully-Distributed Mode.
Also read – Selenium Grid set up tutorial
Selenium WebDriver architecture

By Sathwik Prabhu
In this Selenium WebDriver tutorial so far, we have covered the basics of Selenium and its components. Now, let’s try to understand Selenium WebDriver in a detailed manner.
As mentioned earlier, Selenium WebDriver is an enhanced version of Selenium RC. It is a web framework that helps us in executing cross browser tests. It also allows us to choose a programming language to create the test scripts.
Selenium WebDriver architecture in Selenium 3
The Selenium WebDriver architecture in Selenium 3 constitutes of four major components:
- Selenium Client Libraries/ Language Bindings
- JSON Wire Protocol
- Browser Drivers
- Real Browsers
Selenium Client Libraries
In order to support multiple languages, Selenium developers have built the language bindings. For example, if you are writing your tests in Java, you can use the Java bindings. Client libraries can be downloaded from the official Selenium website.
JSON Wire Protocol
JSON is an abbreviated form of JavaScript Object Notation. It transfers the data between client and server. It provides support for data structures like objects and arrays, hence doing data reading and writing easier.
It acts as a REST(Representational State Transfer) API to transfer information between the HTTP servers.

Selenium WebDriver Architecture in Selenium 3
Selenium WebDriver Architecture in Selenium 3
Browser Drivers
In order to develop a secure connection with the browser, Selenium uses Drivers. Each browser has its own driver that hides the internal logic of the browser’s functionality.
In addition, each automation language has a corresponding browser driver. The following series of actions are performed when a Selenium automation test is triggered:
- Every Selenium command generates a corresponding HTTP request, which is sent to the browser driver.
- This request is routed through the HTTP Server.
- The HTTP Server now drives the instruction execution on the browser.
- The browser sends back the status to the HTTP Server, which forwards it to the automation script.
Some of the browser drivers are ChromeDriver, GeckoDriver, MicrosoftEdge driver, etc.
Browsers
Browsers are the end-point of our test execution. Selenium supports all major browsers like Firefox, Chrome, Safari, Edge, etc.
Selenium WebDriver architecture in Selenium 4
One of the major differences between Selenium 3 and Selenium 4 is that Selenium WebDriver in Selenium 4 is W3C Compliant. As seen in the WebDriver architecture in Selenium 3, encoding and decoding of API requests had to be done due to the involvement of the JSON Wire protocol.

Selenium WebDriver Architecture in Selenium 4
Selenium WebDriver Architecture in Selenium 4
With W3C WebDriver in Selenium 4, the tests can directly communicate with the web browser. Since the Selenium WebDriver and web browsers are on the same page (as far as W3C protocol is concerned), you can expect less flakiness and more consistency as far as Selenium automation testing is concerned.
Austin Siewert
CEO, Vercel
Discovered @TestMu AI yesterday. Best browser testing tool I've found for my use case. Great pricing model for the limited testing I do 👏
2M+ Devs and QAs rely on TestMu AI
Deliver immersive digital experiences with Next-Generation Mobile Apps and Cross Browser Testing Cloud
This certification is ideal for testing professionals who want to acquire advanced, hands-on knowledge in Selenium automation testing.
Here’s a short glimpse of the Selenium Advanced certification from TestMu AI:
Benefits of Selenium WebDriver
Now that we know about the entire architecture of Selenium WebDriver, let’s take a quick look at its advantages in this part of the Selenium WebDriver tutorial.
Here are the major advantages of Selenium WebDriver:
- It supports multiple operating systems like Windows, Mac, Linux, etc.
- It supports multiple programming languages like Java, Python, JavaScript, PHP, C#, etc.
- It is compatible with all modern browsers like Chrome, Firefox, Opera, Safari, and Microsoft Edge. It is also compatible with the near-retiring Internet Explorer (IE) browser.
- It provides faster completion of test scripts as compared to other tools.
Limitations of Selenium WebDriver
The advantages of Selenium WebDriver outnumber its shortcomings. However, as a QA engineer, it is important to make an informed choice before choosing the best-suited framework for the project.
Here are some of the potential shortcomings of Selenium WebDriver:
- It does not support the automation of Windows-based applications.
- It does not have any in-built reporting mechanism.
- There is no test tool integration for test management in Selenium.
- Out of the box, Selenium WebDriver does not support parallel testing, which makes it very challenging to run larger and complex test suites. If you wish to perform parallel testing with Selenium, then you need to use the Selenium Grid.
However, you can eliminate the above-mentioned drawbacks by adopting cloud Selenium Grid for test automation where Selenium tests can securely run at scale, that too at a rapid pace! Cross browser testing platforms like TestMu AI provide a secure, scalable, and reliable online Selenium Grid that lets you run Selenium tests in parallel on 2,000+ browser and platform configurations.
In the latter sections of this Selenium WebDriver tutorial, we will deep dive into how to run Selenium tests in parallel on TestMu AI cloud Selenium Grid.
Selenium WebDriver: Installation and set up
In this section of the Selenium WebDriver tutorial, we look at setting up Selenium WebDriver for the Windows Operating System with Java as the programming language.
For demonstration, I have used the Eclipse IDE. However, you can choose to use the IDE of your choice. Now we are about to get our hands dirty with some code 🙂
Starting with the prerequisites:
- Install Java
- Install Eclipse IDE
- Install Selenium WebDriver
Install Java
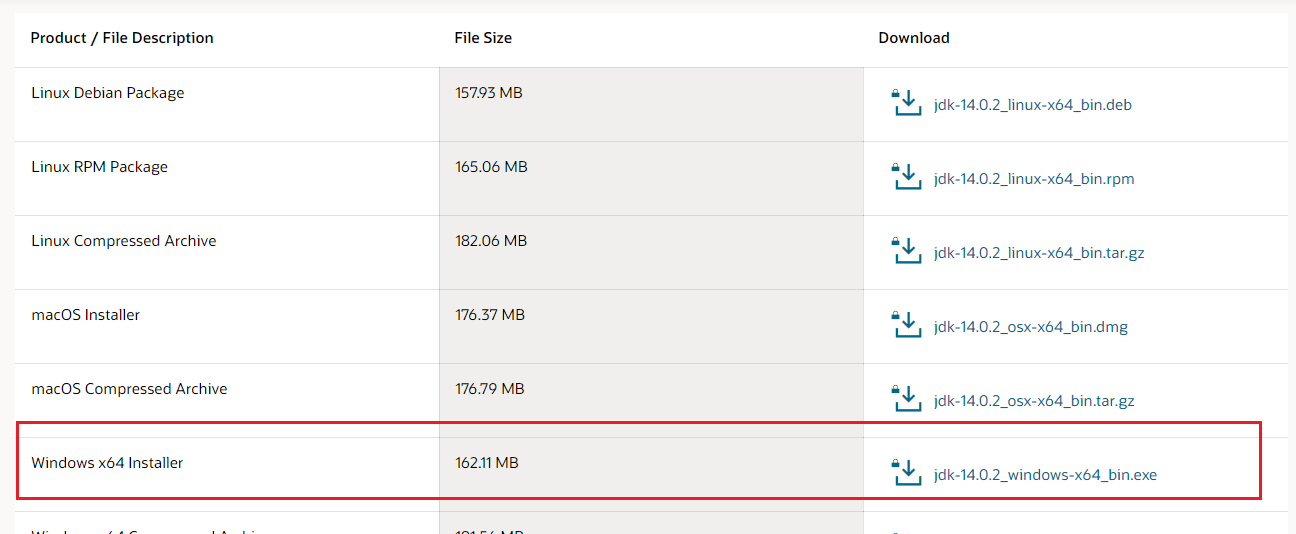
Step 1: Go to the official Java Downloads website and download the JDK for Windows x64 Installer.
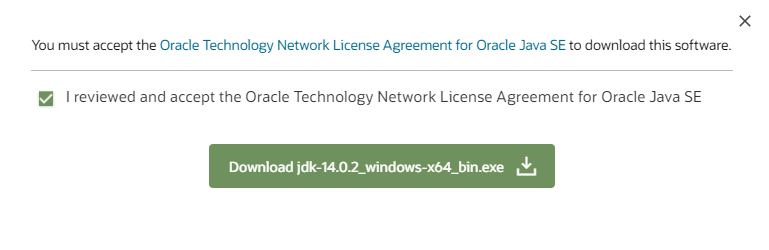
Step 2: Accept the license agreement in the pop-up next and click on Download.
Step 3: Once the download is done, navigate to the Downloads folder and double click the executable so that Java is installed in your system.
Set Up Environment Variables
Step 1: Open your PC settings and select ‘Advanced system settings’ from the System dialog window.

Step 2: Click on the Environment Variables button on the next window.

Step 3: Now, under the System variables, double-click on Path.
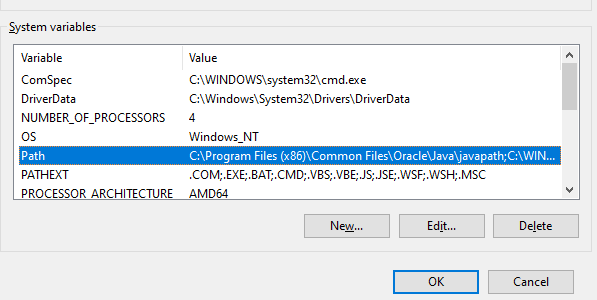
Step 4: Add the complete path of the Java installation directory as per your system location and click OK.
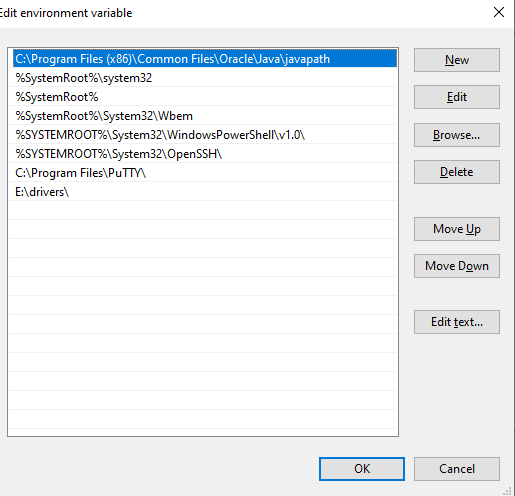
Step 5: That’s it. You can now see the topmost path in the screenshot is the Java path in my system.
To verify that the Java is installed and variables are set correctly, open Command Prompt and type: java -version. You will see the Java version installed in your system.
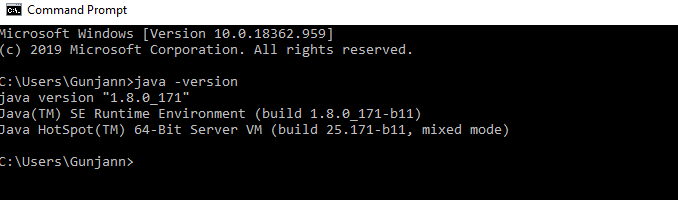
And there you go, your first prerequisite is fulfilled. The next step is installing Eclipse.
Install Eclipse
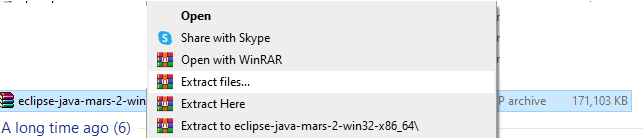
Step 1: Download Eclipse IDE for Java Developers from the official Eclipse website. I would suggest downloading the last stable release. Select the download based on your system architecture. I am using eclipse Mars, but you can choose any of the latest versions.
Step 2: Once the download is complete, extract the zip file at a location at your convenience.
Step 3: Now open the extracted folder and double click on eclipse.exe.
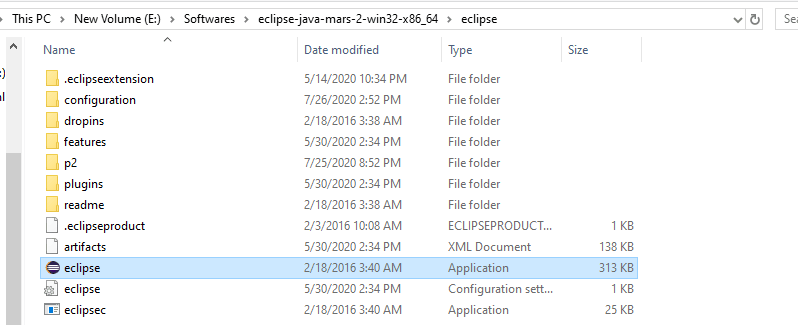
The Eclipse will open up, and there you are done with your second prerequisite of this Selenium WebDriver tutorial.
Install Selenium WebDriver
The last step in this Selenium WebDriver tutorial is to install the Selenium Standalone Server, which is shown in the steps below:
Step 1: Download Selenium Client & WebDriver Language Bindings from the Selenium website. You can download the client libraries corresponding to your language preference. We will be working with Java Client Bindings in this blog.

Step 2: Once the file is downloaded, extract it to a folder of your choice from where you can use it later.
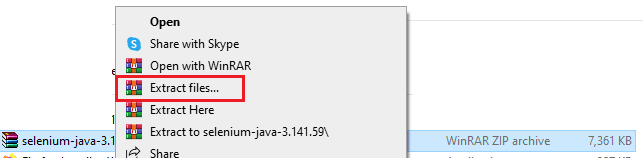
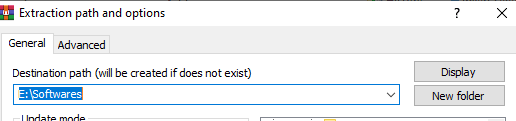
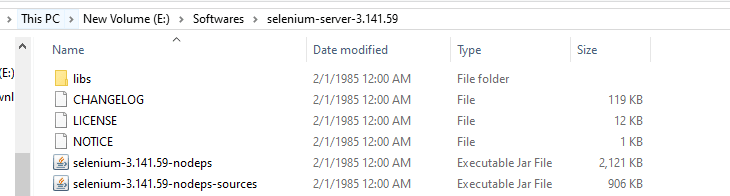
Step 3: You can now see the corresponding extracted file at the selected destination folder.

Step 4: On opening the folder, you will be able to see the jar files, a libs folder(which contains some more jar files), and a CHANGELOG file.
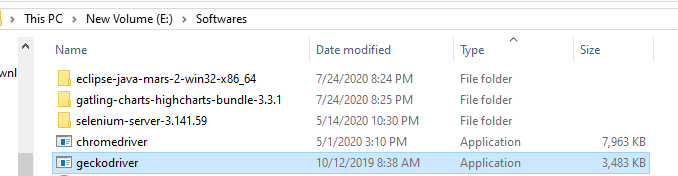
Step 5: Next, you need to download the browser drivers that will help you instantiate the browser. Below are the links to download the drivers for some major browsers:
There is a difference between WebDriver and Remote WebDriver since there is no necessity to download browser drivers when running Selenium tests on a cloud Selenium Grid.
Step 6: Next, simply extract the downloaded driver and store it at a location where you can use it.
Now we are done with setting up the prerequisites, let’s look at how to configure Eclipse with the Selenium Libraries that we have just installed.

How to setup Eclipse for Selenium WebDriver
The following steps in this Selenium WebDriver tutorial will guide you in configuring and installing the Eclipse IDE:
Step 1: Launch eclipse.exe that was saved in the steps to install Eclipse.
Step 2: Select your workspace manually, or let the default location be there and click on OK.

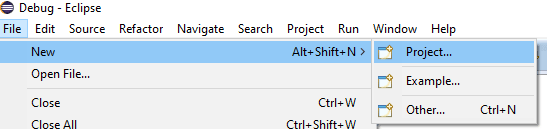
Step 3: Create a New Project by navigating to File > New > Java Project.
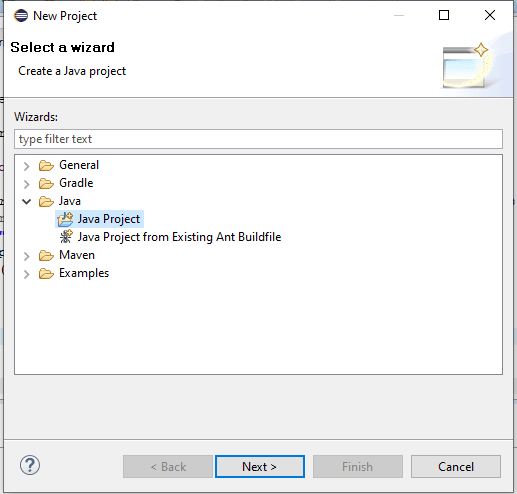
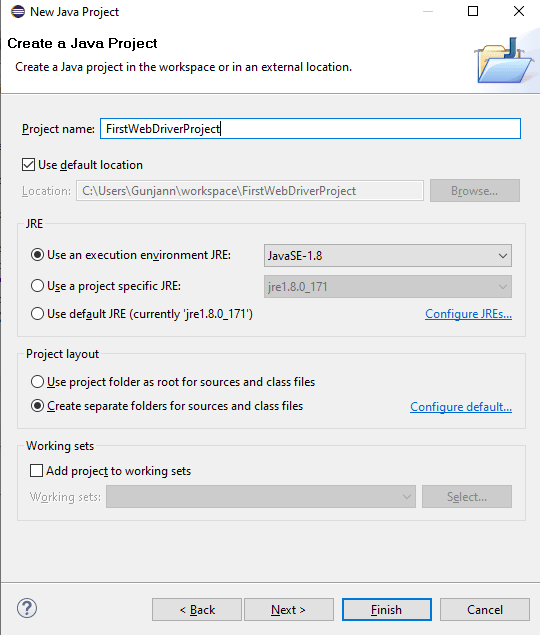
Step 4: Click on Next and give a name to the Project. Click on Finish.
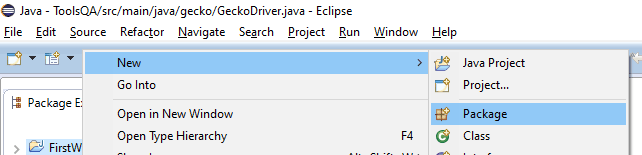
Step 5: Now that your project is created, Right-click on the project and select New > Package.
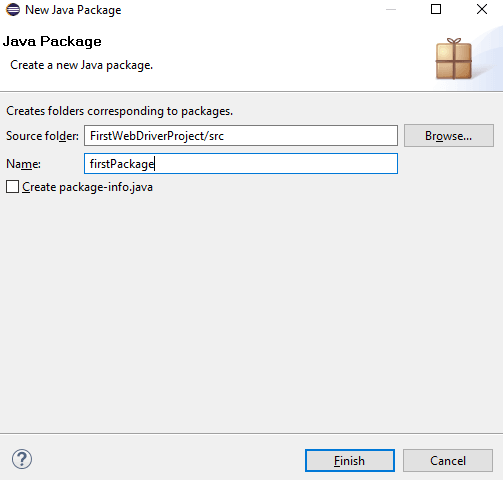
Step 6: Enter the package name in the New Java Package dialog box and click on Finish.
Step 7: You need to create a class under the package now. To do so, right-click on the package name, go to New > Class.

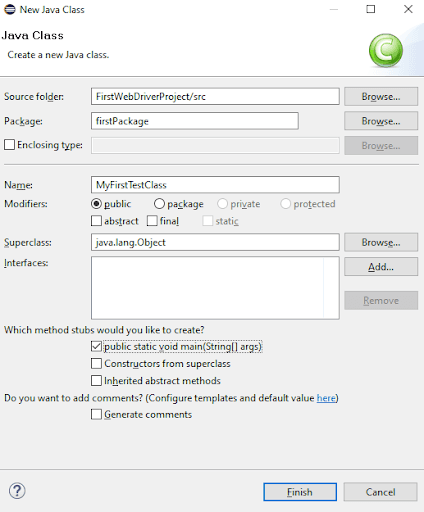
Step 8: In the New Java Class dialog box, enter a name for your class, select a method stub viz, public static void main(String[] args) and click on Finish.
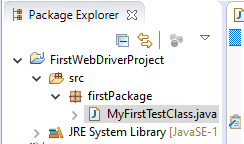
Your Explorer would look like below:
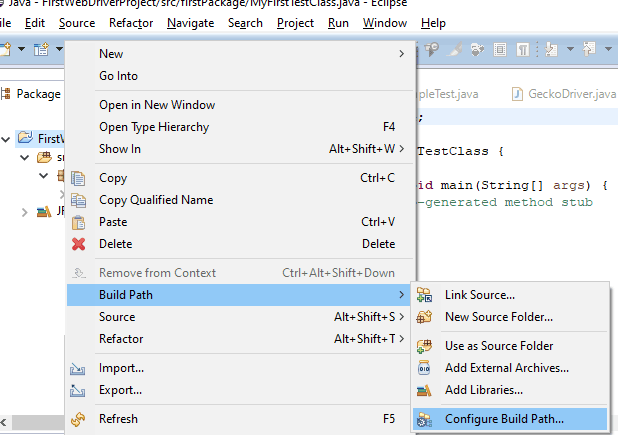
Step 9: Now that we have created an outline for our test project, we need to import the libraries we installed for the Selenium WebDriver tutorial in the section above.
To start with, right-click on the project and go to Build Path > Configure Build Path.
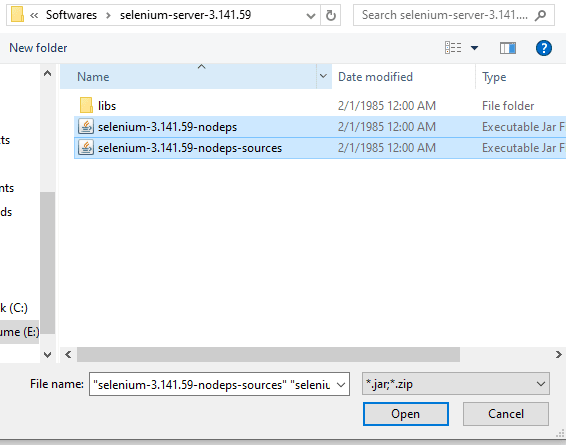
Step 10: Click on Add External JARs and navigate to the location where your downloaded JARs were saved.

Step 11: Select the two jars installed in the Selenium Client folder and the jars under the libs folder.
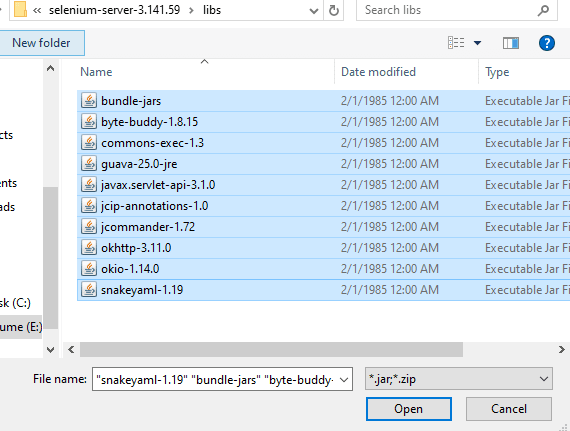
Step 12: Once added, you will see the jar files under the Libraries:
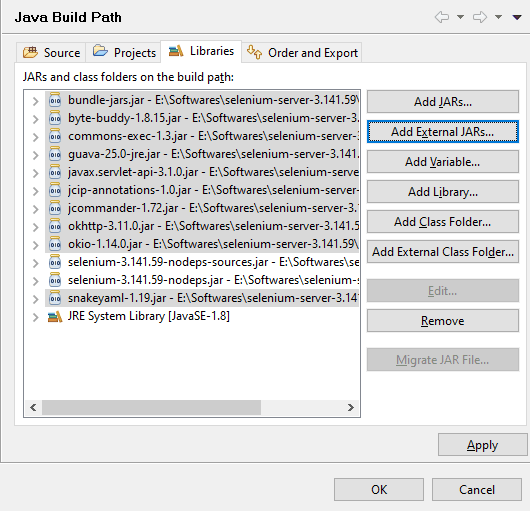
Step 13: Click on Apply and then OK. You can now see the Referenced Libraries populated in the package explorer.
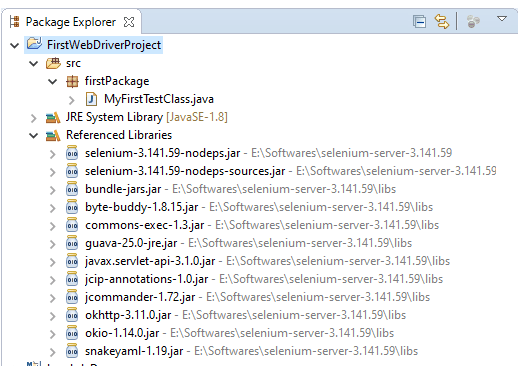
We have now configured Selenium WebDriver in our Eclipse Project and are good to write our first test script.
Watch this video to learn about collecting performance metrics in Selenium 4 using the Chrome DevTools Protocol on the TestMu AI platform.
Running test automation script using Selenium WebDriver
Now that I have touched upon Selenium Webdriver and its architecture, let’s write our first automation script using Selenium Webdriver in this section of the Selenium WebDriver tutorial.
Problem Statement
To demonstrate the usage of Selenium WebDriver, I will perform the following use case:
- Launch Chrome browser.
- Open TestMu AI sign up page.
- Click on the Sign In button.
- Close the web browser.
Implementation
package LambdaTest;
import io.github.bonigarcia.wdm.WebDriverManager;
import org.openqa.selenium.By;
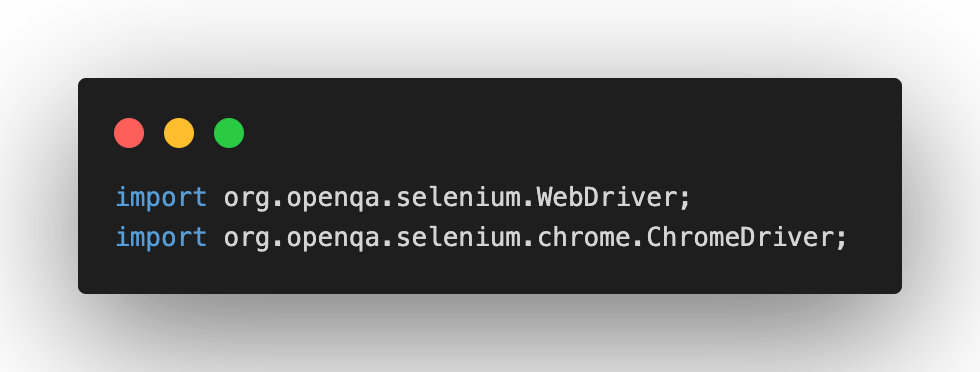
import org.openqa.selenium.WebDriver;
import org.openqa.selenium.WebElement;
import org.openqa.selenium.chrome.ChromeDriver;
import org.testng.annotations.AfterTest;
import org.testng.annotations.BeforeTest;
import org.testng.annotations.Listeners;
import org.testng.annotations.Test;
@Listeners({util.Listener.class})
class FirstTestScriptUsingWebDriver {
public static WebDriver driver = null;
@BeforeTest
public void setUp() throws Exception {
WebDriverManager.chromedriver().setup();
driver=new ChromeDriver();
}
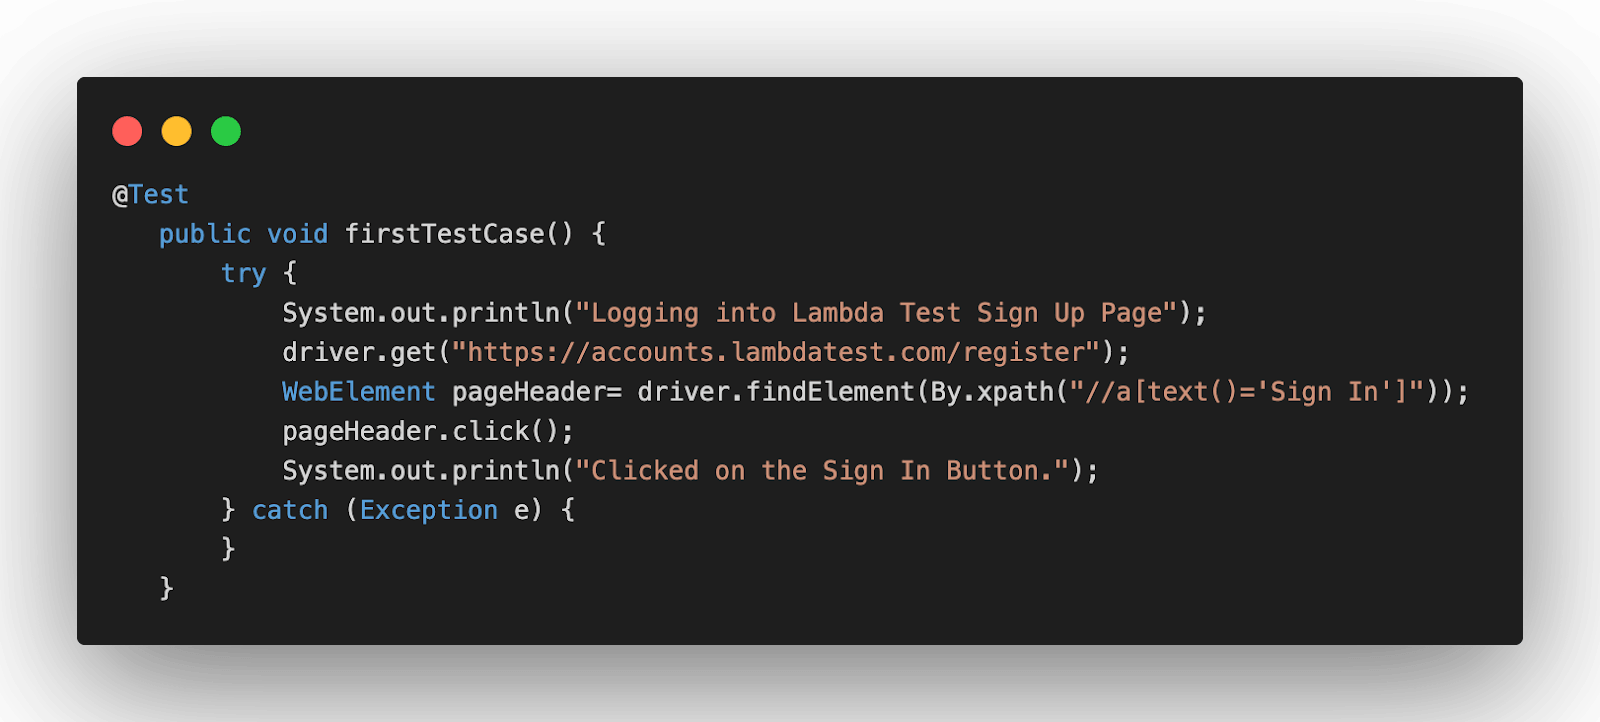
@Test
public void firstTestCase() {
try {
System.out.println("Logging into Lambda Test Sign Up Page");
driver.get("https://accounts.lambdatest.com/register");
WebElement pageHeader= driver.findElement(By.xpath("//a[text()='Sign In']"));
pageHeader.click();
System.out.println("Clicked on the Sign In Button.");
} catch (Exception e) {
}
}
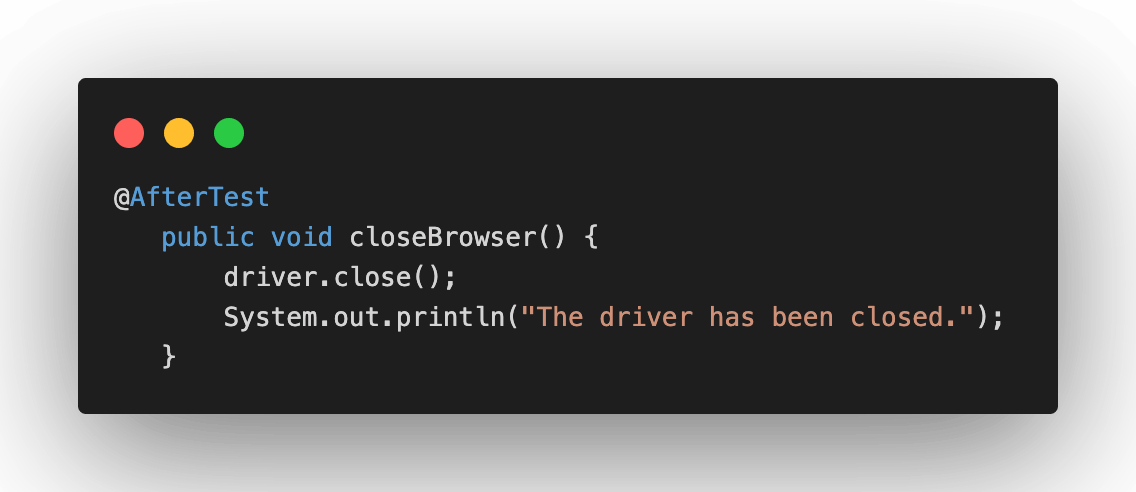
@AfterTest
public void closeBrowser() {
driver.close();
System.out.println("The driver has been closed.");
}
}
You will need the below pom.xml for importing the necessary dependencies.
<?xml version="1.0" encoding="UTF-8"?>
<project xmlns="http://maven.apache.org/POM/4.0.0"
       xmlns:xsi="http://www.w3.org/2001/XMLSchema-instance"
       xsi:schemaLocation="http://maven.apache.org/POM/4.0.0 http://maven.apache.org/xsd/maven-4.0.0.xsd">
  <modelVersion>4.0.0</modelVersion>

  <groupId>org.example</groupId>
  <artifactId>LambdaTest</artifactId>
  <version>1.0-SNAPSHOT</version>
  <dependencies>
      <dependency>
          <groupId>org.seleniumhq.selenium</groupId>
          <artifactId>selenium-api</artifactId>
          <version>4.0.0-alpha-7</version>
      </dependency>
      <dependency>
          <groupId>org.seleniumhq.selenium</groupId>
          <artifactId>selenium-remote-driver</artifactId>
          <version>4.0.0-alpha-7</version>
      </dependency>
      <dependency>
          <groupId>org.seleniumhq.selenium</groupId>
          <artifactId>selenium-chrome-driver</artifactId>
          <version>4.0.0-alpha-7</version>
      </dependency>
      <dependency>
          <groupId>org.testng</groupId>
          <artifactId>testng</artifactId>
          <version>6.14.3</version>
      </dependency>
      <dependency>
          <groupId>io.github.bonigarcia</groupId>
          <artifactId>webdrivermanager</artifactId>
          <version>4.4.3</version>
      </dependency>
  </dependencies>

  <properties>
      <maven.compiler.source>8</maven.compiler.source>
      <maven.compiler.target>8</maven.compiler.target>
  </properties>
</project>
And the below testng.xml file will be needed for running the test case.
<?xml version="1.0" encoding="UTF-8"?>
<!DOCTYPE suite SYSTEM "http://testng.org/testng-1.0.dtd">
<suite  name="FirstTestScriptUsingWebDriverSuite">
   <test name="FirstTestScriptUsingWebDriver" >
       <classes>
           <class name="LambdaTest.FirstTestScriptUsingWebDriver" >
           </class>
       </classes>
   </test>
</suite>
Code Walkthrough
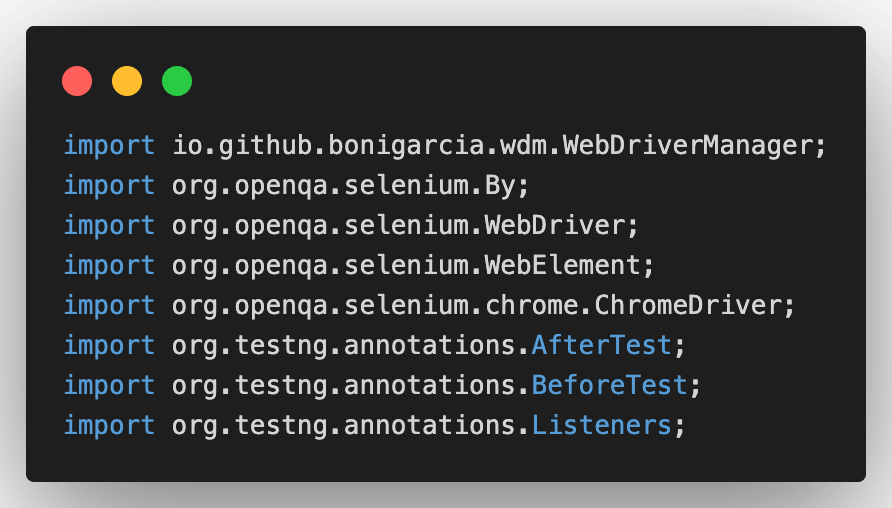
Import Dependencies: Here, we have imported all the necessary classes for using WebDriver, ChromeDriver, and the related annotations in TestNG.
@BeforeTest: Typically, for running any Selenium test script, you will need a browser driver, and to use it, you need to set the browser driver executable path explicitly. After that, you need to instantiate the driver instance and proceed with the test case.
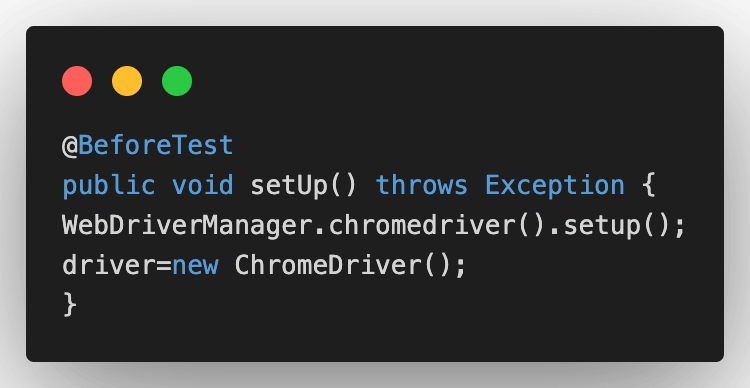
However, managing the browser driver can become cumbersome over time as their versions keep changing, and you need to keep updating the drivers. Hence, to overcome the same, I have used the WebDriverManagerClass.
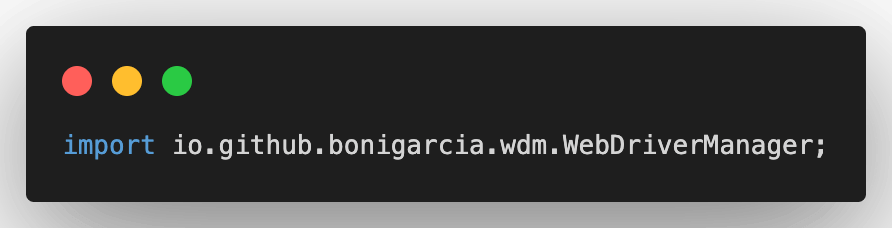
Here, WebDriverManager.chromedriver.setup() checks for the latest version of the specified web driver binary. If the binaries are not present, it will download them and later instantiate the Selenium WebDriver instance with the ChromeDriver. Isn’t it easy? 🙂
The below two classes will help you in using WebDriver and ChromeDriver.
@Test(firstTestCase): In the test case, I opened the TestMu AI sign up page in the Chrome browser using the driver.get() statement. The findElement method in Selenium is used for locating the SignIn WebElement.
Here, I have used XPath in Selenium for locating the ‘Sign In’ button. To investigate the XPath of any element, you can simply right-click on it and click on Inspect. You will be able to spot the locator in the Elements tab. The click method in Selenium is used for clicking on the Sign In button.
@AfterTest: In the AfterTest method, close the browser using the driver.close() method.
Read – Parallel Test Execution in Selenium using TestNG
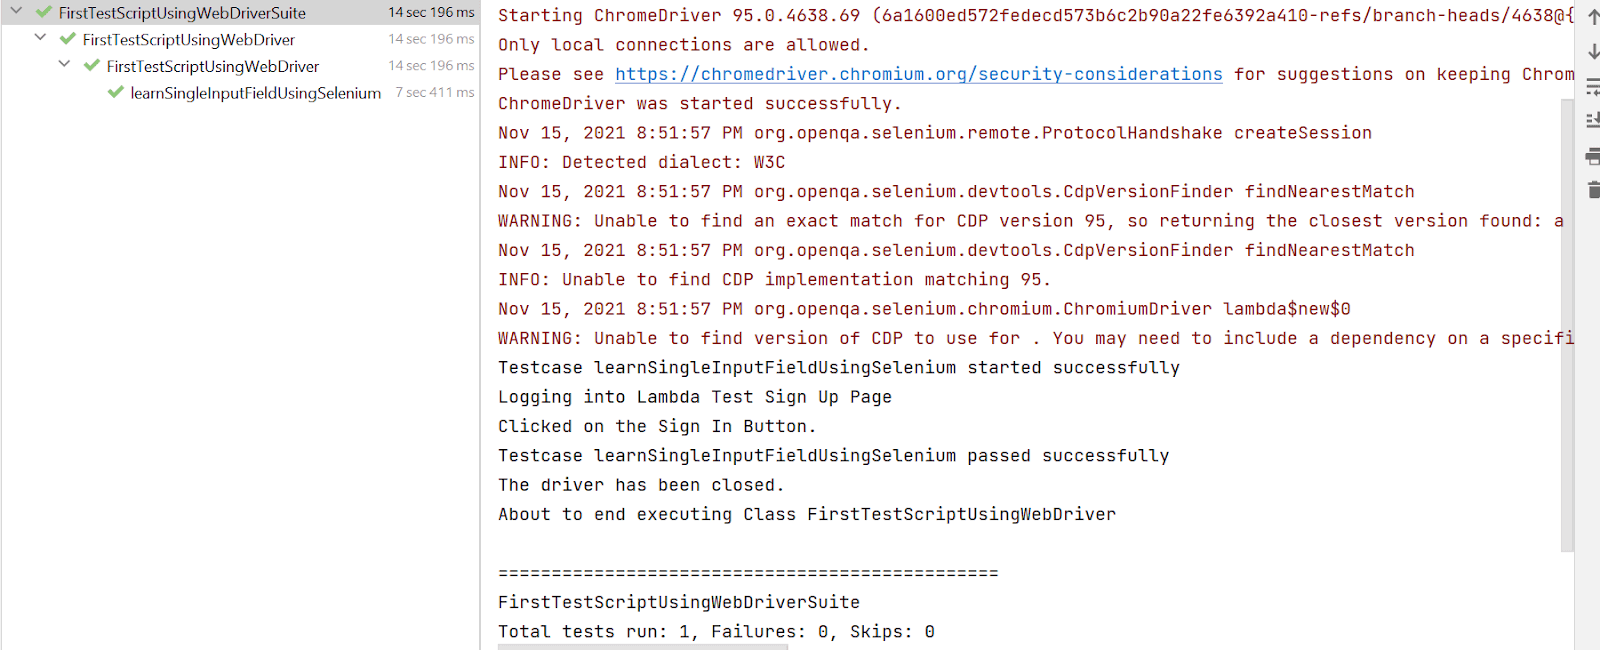
Test Execution
You will see the below output once you run the testng.xml file.
Automated browser testing using cloud Selenium Grid
So far, in this Selenium WebDriver tutorial, I used the local Selenium WebDriver to run a particular test case. Now, as the number of test cases increases, running them parallel with a higher number of threads on a single VM would start giving automation failures.
However, a realistic scenario is where a single test case (or multiple test cases) has to be run across different browser and OS combinations. This is where the Selenium Grid comes into the picture. Selenium Grid eases our setup-related woes, along with helping us run tests at scale on a local (or cloud) grid setup.
Selenium Grid makes parallel execution possible by sending commands to remote Web Browser instances from a hub server.
Selenium testing tools like TestMu AI offer a cloud Selenium Grid that lets you run parallel tests across 3000+ different browsers and operating systems. All you need to do is instantiate the remote Selenium WebDriver instead of the local Selenium WebDriver.
With TestMu AI, you don’t have to worry about downloading and configuring hundreds of browsers on your machine as they are readily available on the online Selenium Grid. Instead, all you need to do is register on TestMu AI for free and claim your 100 free automation testing minutes.
Now that I have covered the basics of cloud Selenium Grid, let’s implement the same example using TestMu AI Selenium Grid.
Problem Statement
In the below example, I am running the same test case on Chrome (latest) + Windows 10 combination.
- Launch Chrome browser on Windows 10
- Open TestMu AI sign up page.
- Click on the Sign In button.
- Close the web browser.
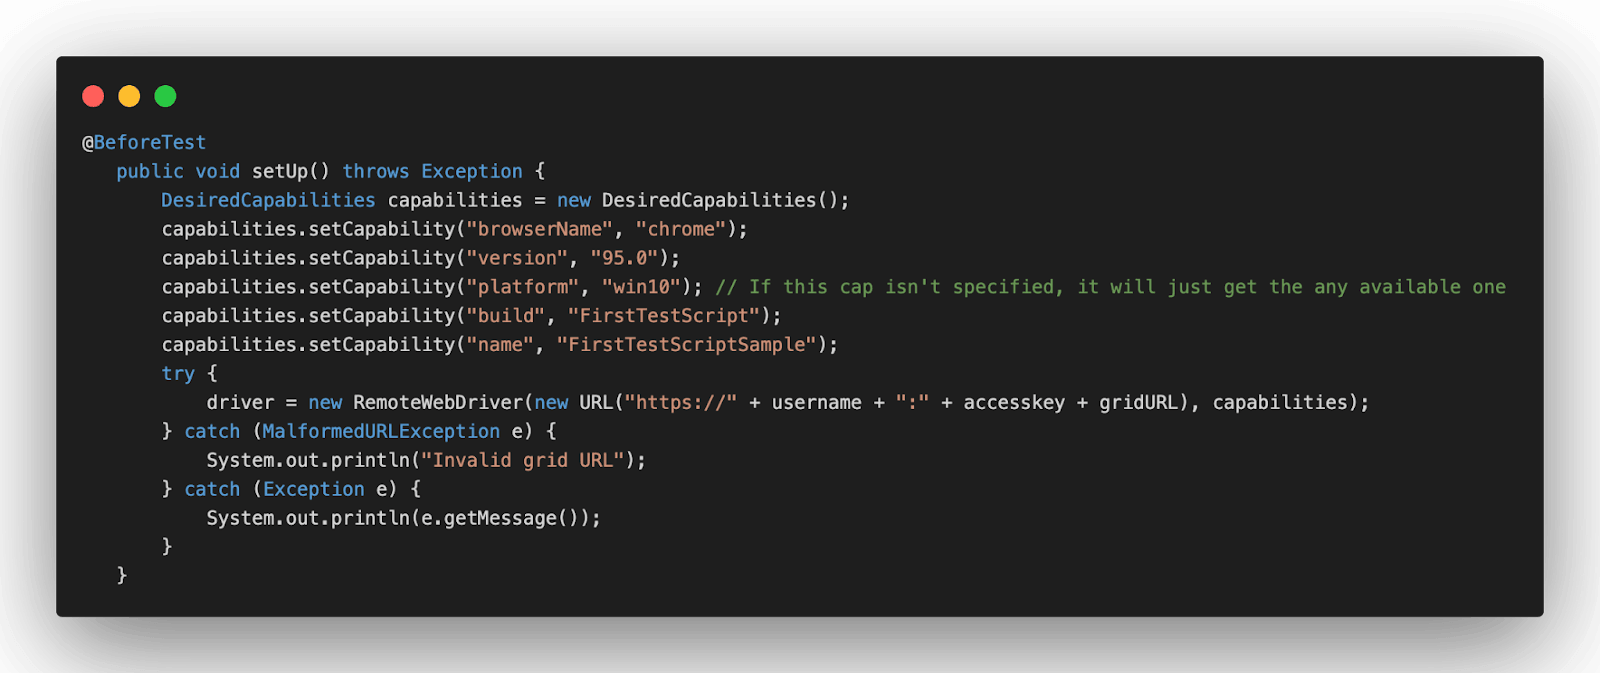
Implementation
package LambdaTest;

import org.openqa.selenium.By;
import org.openqa.selenium.WebElement;
import org.openqa.selenium.remote.DesiredCapabilities;
import org.openqa.selenium.remote.RemoteWebDriver;
import org.testng.annotations.AfterTest;
import org.testng.annotations.BeforeTest;
import org.testng.annotations.Listeners;
import org.testng.annotations.Test;

import java.net.MalformedURLException;
import java.net.URL;

@Listeners({util.Listener.class})
class FirstTestScriptUsingSeleniumGrid {

  public String username = "YOUR USERNAME";
  public String accesskey = "YOUR ACCESSKEY";
  public static RemoteWebDriver driver = null;
  public String gridURL = "@hub.lambdatest.com/wd/hub";

  @BeforeTest
  public void setUp() throws Exception {
      DesiredCapabilities capabilities = new DesiredCapabilities();
      capabilities.setCapability("browserName", "chrome");
      capabilities.setCapability("version", "94.0");
      capabilities.setCapability("platform", "win10"); // If this cap isn't specified, it will just get the any available one
      capabilities.setCapability("build", "FirstTestScript");
      capabilities.setCapability("name", "FirstTestScriptSample");
      try {
          driver = new RemoteWebDriver(new URL("https://" + username + ":" + accesskey + gridURL), capabilities);
      } catch (MalformedURLException e) {
          System.out.println("Invalid grid URL");
      } catch (Exception e) {
          System.out.println(e.getMessage());
      }
  }

  @Test
  public void firstTestCase() {
      try {
          System.out.println("Logging into Lambda Test Sign Up Page");
          driver.get("https://accounts.lambdatest.com/register");
          WebElement pageHeader= driver.findElement(By.xpath("//a[text()='Sign In']"));
          pageHeader.click();
          System.out.println("Clicked on the Sign In Button.");
      } catch (Exception e) {

      }
   }

  @AfterTest
  public void closeBrowser() {
      driver.close();
      System.out.println("The driver has been closed.");
  }
}
Code Walkthrough
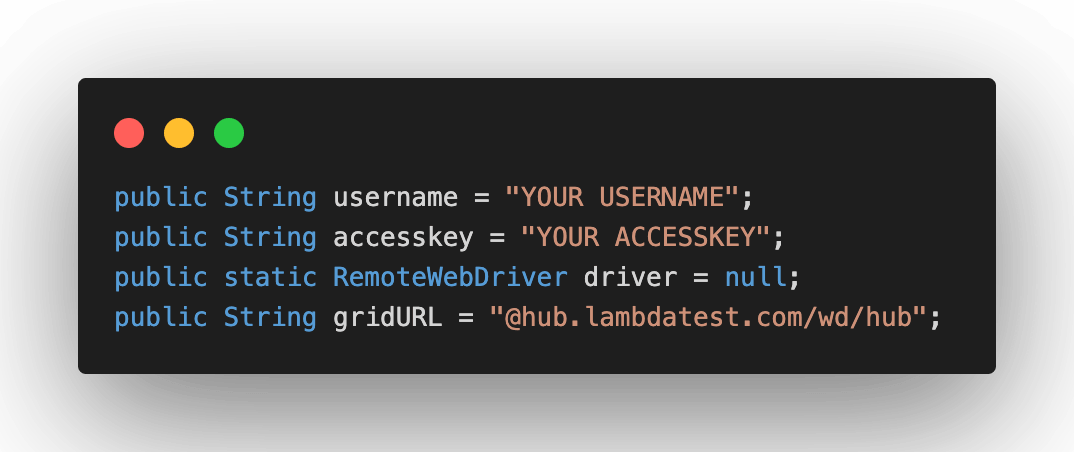
Global Variables: As tests have to be run on TestMu AI cloud Selenium Grid, we would be using the below-shown variables.
Here, you can populate the values for your corresponding username and access key, which can be collected by logging into your LamdaTest Profile Section. However, the gridURL will remain the same.
@BeforeTest(Setup Method): In Selenium, the RemoteWebDriver class implements the WebDriver interface to execute test scripts through the RemoteWebDriver server on a remote machine.
The below-imported class will help you in using the RemoteWebDriver class.
Here, I have used the TestMu AI Desired Capabilities Generator and have set the necessary capabilities of browser name, version, platform, etc.
The implementation under @Test and @AfterTest annotations remain unchanged since only the end-point of execution have changed from Selenium Grid’s load to cloud Selenium Grid.
Execution
Log on to TestMu AI Automation Dashboard to check the status of the test execution on TestMu AI.

What’s new in Selenium WebDriver 4?
So far, in this Selenium WebDriver tutorial, I have covered the essentials of Selenium WebDriver and its architecture in Selenium 3 and Selenium 4. However, as a QA engineer, the innumerable features offered by Selenium 4 fascinate me a lot!
🚨 Release 🚨
— Selenium (@SeleniumHQ) October 13, 2021
🎉🎉 Selenium 4.0 is here! 🎉🎉
Read all about in our blog post:https://t.co/E8ntH7OdaB
We hope you enjoy Selenium 4, and we can’t wait to see what you do with it!#selenium4
Apart from the renewed Selenium WebDriver architecture, here are some of the other major enhancements in Selenium 4:
W3C Standardization
A significant change in Selenium 4 is the complete W3C compliance of the WebDriver APIs. This eliminates the need for encoding and decoding the API requests by the JSON wire protocol responsible for communication between browsers and test scripts.
The implementation of this standardization means the WebDriver will now interact directly with the target browser.
Enhanced Selenium Grid
The earlier versions of Selenium Grid were complex to set up and maintain. However, the new Selenium Grid is easy to set up as there is no need to maintain Hub and Node separately.
The Grid even has an improved GUI, and the support for Docker helps the developers (and testers) to use it on Virtual Machines(VMs). The Grid can also be deployed now on Kubernetes. Running Selenium tests in Docker is now a cakewalk with the Selenium Grid setup on Selenium 4!
Relative Locators in Selenium 4
Relative locators (or Friendly locators) help locate WebElements relative to a particular WebElement. For example, the required element could be near to, left of, right of, above, or below a specified element.
Relative locators in Selenium 4 can help save a lot of time when locating tricky WebElements. Above, Below, To Right Of, To Left Of, and Near are some of the relative locators that can be leveraged to reduce the lines of code when it comes to locating WebElements.
Better Browser and Tab Management
Selenium 4 provides a new API newWindow that lets you create a new window (or tab) and switch to it without creating a new WebDriver object.
Opening a new Window in Selenium 4
driver.get("https://www.google.com/");
// Opens a new window and switches to new window
driver.switchTo().newWindow(WindowType.WINDOW);
// Opens LambdaTest homepage in the newly opened window
driver.navigate().to("https://www.lambdatest.com/");
Opening a new Tab in Selenium 4
driver.get("https://www.google.com/");
// Opens a new window and switches to new window
driver.switchTo().newWindow(WindowType.TAB);
// Opens LambdaTest homepage in the newly opened tab
driver.navigate().to("https://www.lambdatest.com/");
Deprecation Of Desired Capabilities
In Selenium 4, Desired Capabilities are getting replaced with Options, and we need to create an Options object to use the Driver class.
The below-mentioned Options objects will be used in Selenium 4 for defining the browser-specific capabilities.
- Chrome – ChromeOptions
- Firefox – FirefoxOptions
- Safari – SafariOptions
- Internet Explorer (IE) – InternetExplorerOptions
- Microsoft Edge – EdgeOptions
Chrome DevTools Protocol (CDP)
Chrome DevTools Protocol is the new addition in Selenium 4. The new feature provides Chrome and Microsoft Edge’s debugging protocol for debugging, simulating poor network conditions, and emulating geolocation for automation testing.
Geolocation testing with Selenium helps in mocking browser’s geolocation for the purpose of web browser testing. This feature in Selenium 4 can be leveraged to test the website’s functionalities by mocking different geographical locations.

Conclusion
In this Selenium WebDriver tutorial, I deep-dived into the basics of Selenium WebDriver, its components, and Selenium WebDriver architecture. I also implemented test scenarios using WebDriver as well as cloud Selenium Grid. In the end, we also glanced upon the new and improved features which Selenium 4 offers. I believe you are now all geared up to start on your Selenium automation journey.
Happy testing! 🙂
Frequently asked questions
Did you find this page helpful?
More Related Hubs
TestMu AI forEnterprise
Get access to solutions built on Enterprise
grade security, privacy, & compliance
- Advanced access controls
- Advanced data retention rules
- Advanced Local Testing
- Premium Support options
- Early access to beta features
- Private Slack Channel
- Unlimited Manual Accessibility DevTools Tests