

Power Your Software Testing with AI Agents and Cloud
The Native AI-Agentic Cloud Platform to Supercharge Quality Engineering. Test Intelligently and Ship Faster.


- TestMu AI (Formerly LambdaTest)
- /
- Blog
- /
- TestCafe Cross Browser Testing: A Complete Guide to Scaling with TestMu AI
TestCafe Cross Browser Testing: A Complete Guide to Scaling with TestMu AI
Run TestCafe tests across real browsers: local vs cloud limits, Safari on Windows, TestCafe vs Playwright and Cypress, and cloud grid setup with TestMu AI.
Last Updated on:
On This Page
- Importance Of End-To-End Testing
- Introduction To TestCafe
- Why Choose TestCafe?
- TestCafe vs. Playwright & Cypress: Cross-Browser Capabilities Compared
- Getting Started With TestCafe
- Running Your First Automation Test With TestCafe
- Local vs. Cloud Cross-Browser Testing In TestCafe: The Physical Limitations
- How TestMu AI & TestCafe Integrate For Better Browser Coverage?
- Troubleshooting Common TestCafe Cross-Browser Compatibility Issues
- Wrapping Up!
TestCafe is one of the few automation frameworks that can drive the real Safari your users actually run — not an approximation of it. That single fact shapes most of what follows, because the browser you cannot install is usually the browser your bugs live in.
This guide covers TestCafe cross browser testing end to end: what TestCafe is and why teams pick it, how its browser support compares to Playwright and Cypress, how to write and run your first test, where local execution hits a hard physical ceiling (Safari on Windows being the obvious one), how to scale past that ceiling on a cloud grid with the testcafe-browser-provider-lambdatest plugin, and how to fix the cross-browser quirks that trip teams up along the way.
Much of the material here grew out of a webinar we hosted with DevExpress, the team behind TestCafe, featuring Paul Usher, their Technical Evangelist. You can watch the full session further down the page. If you want to jump straight to running scripts, see how to test TestCafe on TestMu AI’s online cloud.
Overview
To scale cross-browser testing, run the open-source TestCafe framework on TestMu AI to execute automated tests across real browsers and operating systems. TestCafe provides driverless browser automation, while TestMu AI offers a cloud-based Selenium Grid for parallel test execution and real-time monitoring.
Why Choose TestCafe?
- Driverless automation: TestCafe runs directly on browsers using a URL-rewriting proxy, eliminating the need for external WebDrivers or browser plugins during web automation.
- Real Safari testing: TestCafe drives the actual Safari browser on macOS hardware or cloud grids, unlike other frameworks that rely on patched WebKit builds.
- JavaScript and TypeScript support: TestCafe supports JavaScript and TypeScript out of the box, enabling quick setup, concurrent test execution, and advanced multi-window or cross-origin testing scenarios.
How TestMu AI and TestCafe Integrate
- Cloud-based Selenium Grid: TestMu AI provides access to a cloud-based Selenium Grid, allowing you to run TestCafe tests across various browser, version, and operating system combinations.
- NPM plugin integration: TestMu AI integrates with TestCafe via an npm plugin and environment variables, allowing you to define test capabilities using a Capabilities Generator.
Parallel Testing on TestMu AI Cloud
- Parallel test execution: Parallel testing on TestMu AI allows you to run multiple TestCafe tests simultaneously across different browser-OS setups using command-line browser aliases to reduce test times.
- Real-time debugging dashboard: TestMu AI provides a dashboard where you can view live test sessions and video recordings to validate and debug concurrent test runs.
Let’s get started!
Importance Of End-To-End Testing
On principle, most developers often lean towards unit testing or test-driven development (TDD) to help ensure the quality of code. But when it comes to testing web applications, it is essential to consider a user’s viewpoint. We need to get into a user’s mindset and test our apps the way a user will interact with those apps. As simple as it sounds, this behavior can never be predicted to precision and thus calls for a more flexible testing approach.
Now your testing team can do this manually over and over, but it can get very monotonous, frustrating, and demoralizing for the entire team. And it gets even more challenging for the team when we start looking at multiple browser configurations, numerous systems, and regressions tests. The good news is that automated UI testing can help go a long way in simplifying this workload.
Introduction To TestCafe
Traditional software-based products required special WebDrivers or browser plugins. While it was easy to get a hold of these drivers or plugins, they often created additional problems due to browser limitations, browser versions, or product compatibilities. This is precisely what the DevExpress team wanted to change. They tried to introduce a brand-new approach to testing, a practice that would transcend these issues. This was how TestCafe saw the light of the day.
TestCafe is an open-source, cross-browser platform designed to automate web testing for small and large teams alike. The idea behind TestCafe was to resolve some of the most common challenges developers and testers were facing with testing tools like Selenium. Some of the challenges were-
- Hard to set up test environments.
- Hard to deal with waits.
- Compatibility issues.
- No inbuilt reporting features.
- Inaccuracy while dealing with handling dynamic web elements.
- Hard to handle iframes and pop-ups.
There was a lot of room for improvement in the world of test automation, and TestCafe was built to fill that gap. In the next sections, we will understand how TestCafe helped overcome these challenges.
Why Choose TestCafe?
Now that you know what TestCafe is all about, it is time to determine whether TestCafe is the right choice for you. There are several ways in which TestCafe changed the test automation game and made it easier for people to get acquainted with Selenium automation. Let us dive deeper into the best features of TestCafe-
1. Intuitive & Easy-to-Use-
TestCafe has a simple one-minute installation, with no extra hassles involved. It can be utilized by hardcore developers or testers and people who may only have limited knowledge of JavaScript, TypeScript, etc.
2. No Third-Party Installation Required-
It is easy-to-setup and does not require the use of cumbersome browser plugins or software for running TestCafe. There is simply no need to have Selenium set up in your system before you get started with automated web testing using TestCafe.
3. Latest JavaScript Syntax-
TestCafe is JavaScript-based, and it utilizes the latest available syntax of JavaScript and TypeScript. This makes it so much easier to get started with TestCafe without the steep learning curve.
4. Cross-Browser & Powerful-
TestCafe is compatible with a plethora of browsers and browser versions entirely out of the box, and no plugins are needed here. This includes mobile browsers and multiple platforms ranging from macOS, Windows to Linux as well. TestCafe is also capable of handling powerful technologies like waits.
5. Simple To Advanced Test Scenarios-
With TestCafe, you can perform a variety of test scenarios from multiple window testing to cross-origin testing. You can throw mock requests as well as do client-side injections. It provides full support for iframes, and you can also run concurrent tests.
6. Free & Open Source-
TestCafe is licensed under MIT, and it is completely free to use. Presently, it has over 8.7k stars on GitHub and clocks over 1 million downloads per month via npm.
TestCafe vs. Playwright & Cypress: Cross-Browser Capabilities Compared
All three frameworks claim cross-browser support, but they mean different things by it. The difference comes down to how each one drives the browser, and it decides whether you can test the browser your users actually have.
TestCafe is a hybrid. Since version 3.0, it uses native automation — driving Chromium-based browsers directly over the Chrome DevTools Protocol (CDP). For everything else, including Firefox, Safari, remote devices, and cloud browsers, it falls back to testcafe-hammerhead, a URL-rewriting proxy that intercepts requests and injects automation scripts into the page. The proxy is the important part: because it only needs a browser that can load a URL, it works with browsers no bundled binary can provide — real Safari included.
Playwright ships its own browsers. It bundles patched builds of Chromium, Firefox, and WebKit. Those builds are excellent and often ahead of the shipping releases — Playwright's WebKit is "derived from the latest WebKit main branch sources, often before these updates are incorporated into Apple Safari." But patched builds are the whole mechanism, which is why Playwright's own documentation is explicit that it "doesn't work with the branded version of Safari since it relies on patches." Testing Playwright's WebKit is testing Safari's engine, not Safari.
Cypress runs inside the browser. It supports Chrome-family browsers (including Edge and Electron) and Firefox, plus WebKit — which its docs label experimental, with known limitations including no cy.origin() support. Cypress does not drive Safari.
| Capability | TestCafe | Playwright | Cypress |
|---|---|---|---|
| How it drives the browser | CDP for Chromium (native automation); Hammerhead proxy for the rest | Patched Chromium, Firefox, and WebKit builds it ships itself | Executes in-browser, alongside your app |
| Real, branded Safari | Yes — on macOS hardware or a cloud grid | No — patched WebKit build only | No — experimental WebKit only |
| Branded Chrome / Edge | Yes | Yes, via channels | Yes |
| Internet Explorer 11 | No — dropped in TestCafe 3.0 | No | No |
| WebDriver required | No | No | No |
| Headless mode | Yes — :headless alias | Yes | Yes |
| Remote / mobile browsers | Yes — any browser that can open a URL | Emulated devices; real devices via a grid | Limited |
The honest summary: if your matrix is Chromium and Firefox, all three will serve you and Playwright's tooling is generally the fastest and richest of the set. TestCafe's edge appears the moment "cross browser" has to include the real Safari your customers use — its proxy architecture is what makes a cloud grid full of genuine macOS machines usable, rather than a bundled engine that merely resembles one.
One caveat worth stating plainly: TestCafe 3.0 discontinued official support for Internet Explorer 11, several months after Microsoft retired the browser. No amount of infrastructure changes that — if IE11 is still a hard requirement, none of these three frameworks covers it.
For a wider look at how these frameworks differ beyond browser reach, see our comparisons of Playwright vs Selenium vs Cypress and Cypress vs Playwright.
Getting Started With TestCafe
Before we run our first automation test with TestCafe, let us get to know it a little better. There are two significant components of TestCafe-
- TestCafe Engine- an open-source framework
- TestCafe Studio- a commercial IDE that allows easy-to-use video recording while serving as a powerful code editor.
In this blog, we will be focusing only on the TestCafe Engine. The only prerequisite for getting started with TestCafe is the pre-installation of node.js (a JavaScript runtime environment) and the npm (node package manager).
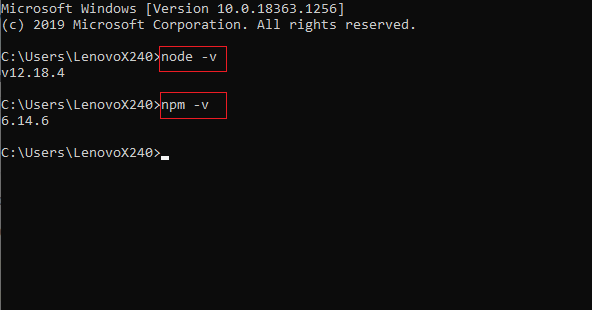
You can check whether you have these already installed in your system by running the commands node -v and npm -v. If your system is already equipped with node.js and npm (like mine), you will see an output like this (this is for Windows.)
Note: We recommend installing the LTS version, although TestCafe will run on both versions.
When it comes to installing TestCafe, you can do it globally or locally for your own projects.
Global installation is required to run TestCafe in the command line from any location. On the other hand, Local deployment should be preferred for continuous integration systems, Node.js applications, and other scenarios where the global installation is not required. TestCafe supports npx, yarn run & npm scripts.
For Global Installation-
You need to run the following command for installing TestCafe globally-
npm install -g testcafe
For Local Installation-
The following command installs TestCafe into your project directory and saves it on the dependencies list-
npm install --save-dev testcafe
We will be installing it globally since we want to execute the testcafe command from our custom application.
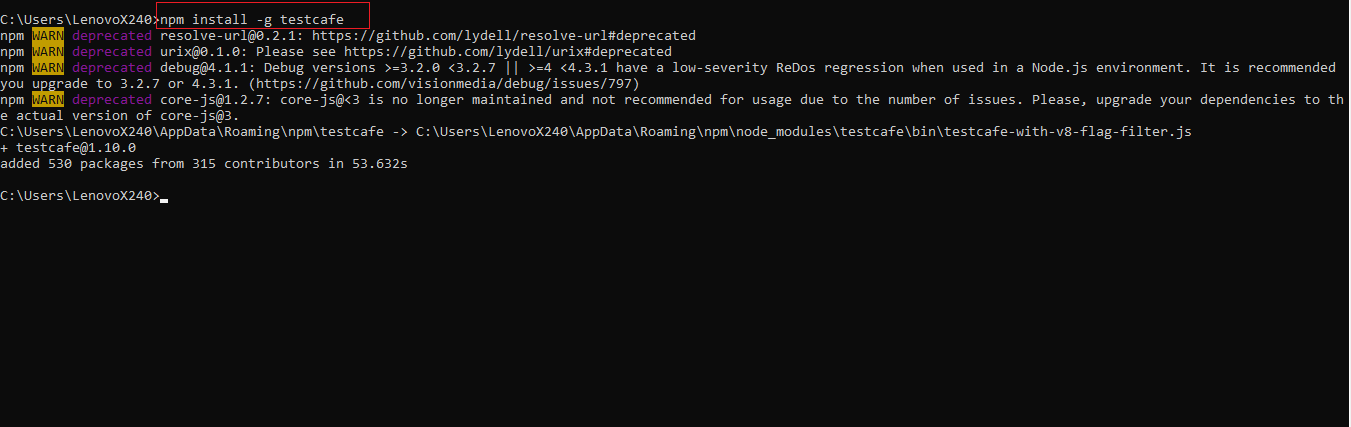
Now that TestCafe is successfully installed in your system, you can start using it directly from your command line by calling testcafe, stating your browser name and your code file-
testcafe <browser> tests/TestCafe will start running and you will see something like this on your screen-
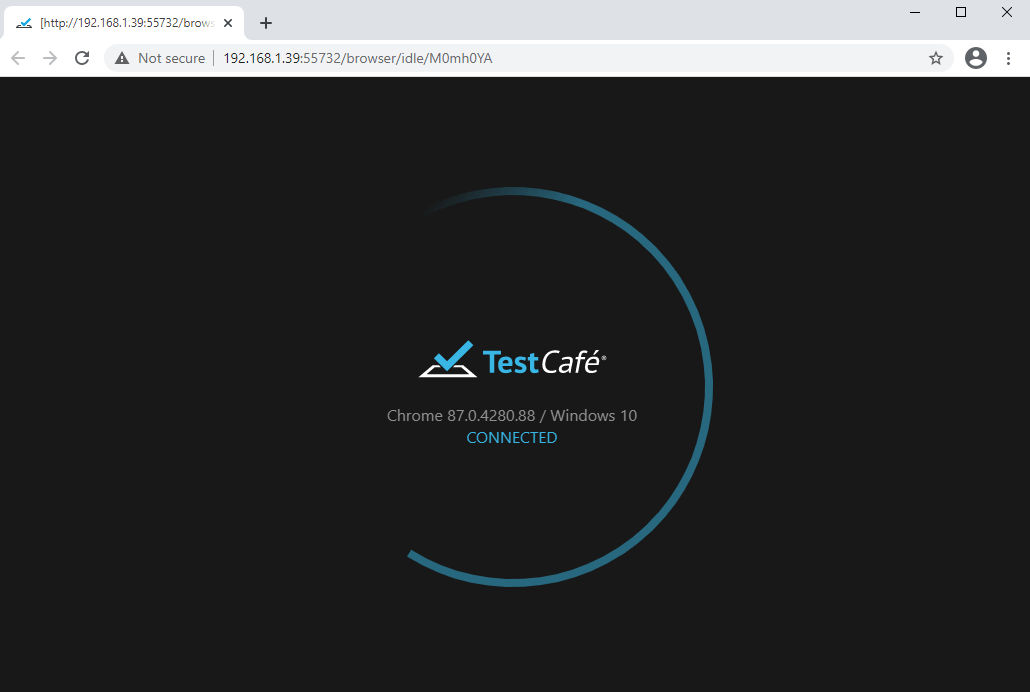
Note: If you are installing TestCafe on Mac Catalina or any version above, you will be prompted to allow screen recording within the security options. This is required if you want to use screenshots or video recording.
Hurrah, you are now ready to run your first automation test with TestCafe!
Running Your First Automation Test With TestCafe
It is time to run our first automation test with TestCafe. Note that TestCafe allows you to write tests using TypeScript or JavaScript. For this blog, we will be using Visual Studio Code to run through all the different aspects of TestCafe. To get started, we will run a simple example to make sure TestCafe is running perfectly. In the next sections, we will move on to a more typical scenario of someone testing a web application from scratch. We will also be refactoring the different elements and functionalities of TestCafe.
In TestCafe, all tests are organized into categories called fixtures. So when we create a new JavaScript or TypeScript file, we are going to place our fixtures inside there. Then we will be creating our test within that particular fixture.
Note: You can choose to have a single file and many fixtures inside it. As a best practice, we recommend creating one fixture per file.
Step 1: To create a test, create a new .js or .ts file. This file must have a special structure – tests must be organized into fixtures.
Step 2: Import the testcafe module.
import { Selector } from 'testcafe';
Step 3: Declare a fixture using the fixture function.
fixture Getting Started
Let us look at a basic example to ensure that TestCafe is working properly in your system. This is the page we are using for running the sample test.
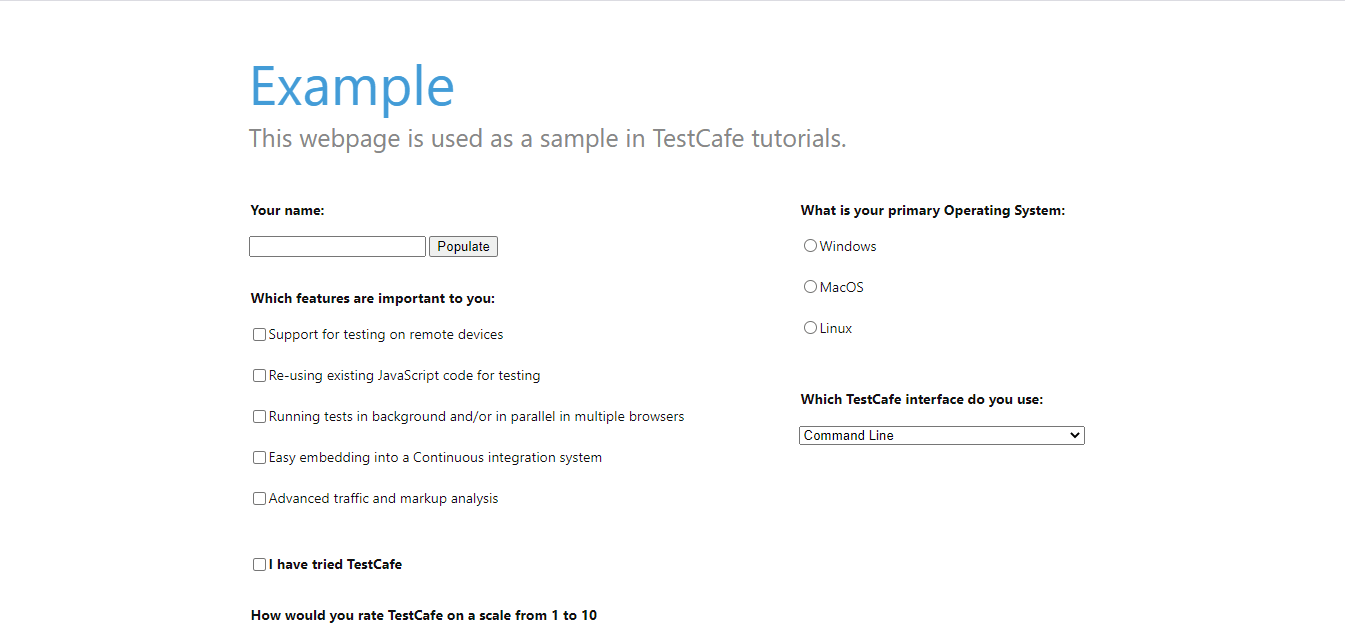
Here’s the sample test that you can run-
import { Selector } from “testcafe”;

fixture(“TestCafe Example”)
.page “http://devexpress.github.io/testcafe/example”;

test(“Fill out and submit form”, async t => {
    // Fill out the “Your name” field.

   await t.typeText(“#developer-name”, “John Doe”);

    // Select the first three checkboxes under the “Which features are
    // important to you” section.

await t
       	 .click(“#remote-testing”)
 	 .click(“#reusing-js-code”)
 	 .click(“#background-parallel-testing”);

    // Select the MacOS option in the “What is your primary Operating
    // System” section.
await t.click(“#macOS”)

// Select the JavaScript API option under the dropdown list in the
    // “Which TestCafe interface do you use” section.
   const preferredInterface = Selector(“#preferred-interface”);
   await t.click(preferredInterface) .click(preferredInterface.find(“option”).withText(“JavaScript API”));

    // Verify that the Submit button is enabled.
   Const submitButton = Selector(“#submit-button”);
   await t.expect(submitButton.hasAttribute(“disabled”)).notOk();

});
Code Breakdown-
To perform user actions, TestCafe provides several actions: click, hover, typeText, setFilesToUpload, etc. They can be called in a chain.
All test actions are implemented as async functions of the test controller object t. This object is used to access the test run API. To wait for actions to complete, use the await keyword when calling these actions or action chains.
TestCafe also allows you to observe the page state. For this purpose, it offers special kinds of functions that will execute your code on the client. For eg, Selector is used to get direct access to DOM elements. You call these functions as regular async functions, i.e., you can obtain their results and use parameters to pass data to them.
Output-
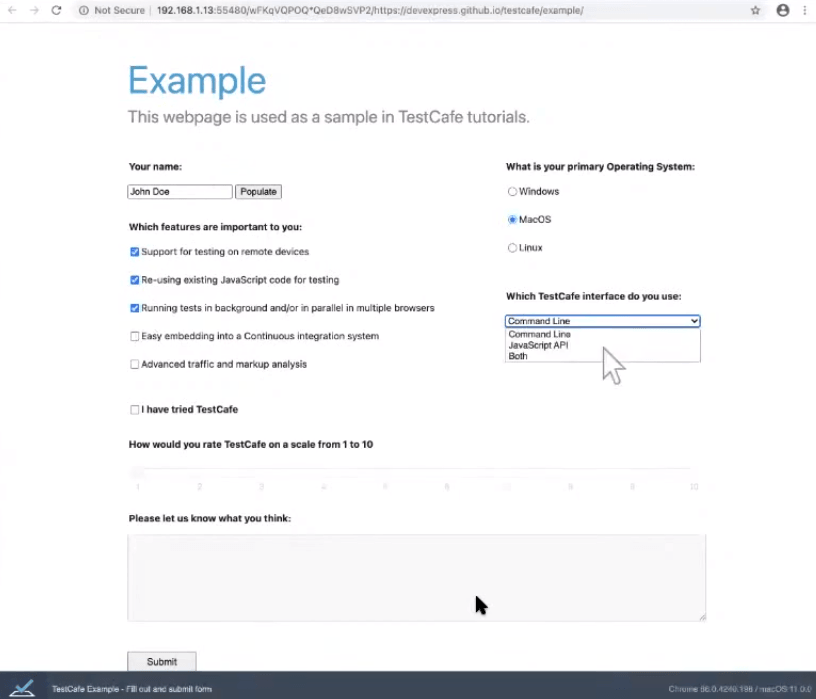
Once you run the test, you will see that TestCafe is loading that page and running that test (as you can see below). You will also be able to see the status of the test at the bottom of the page.
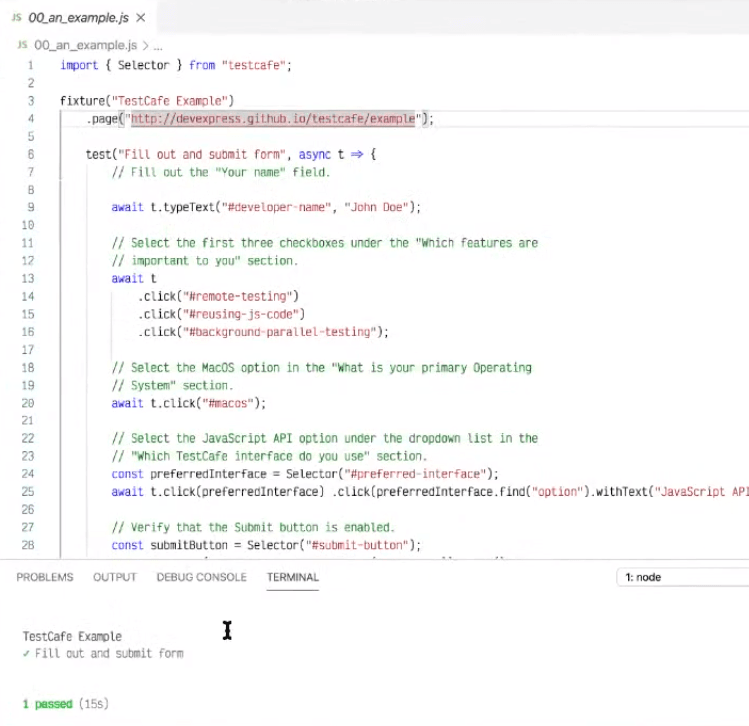
Once the test has run successfully, TestCafe will automatically return the result.
Congratulations, you have successfully run your first automated test on TestCafe!
Local vs. Cloud Cross-Browser Testing In TestCafe: The Physical Limitations
Everything so far has run on your own machine, and for Chrome and Firefox that is genuinely all you need. The ceiling you hit next is not a TestCafe limitation or a configuration mistake. It is physics, or more precisely, licensing.
The Safari-on-Windows problem
TestCafe supports Safari. Your Windows machine does not. Apple discontinued Safari for Windows over a decade ago, and no supported version of Safari runs on Windows or Linux today. So testcafe safari tests/ on a Windows box cannot work — not because TestCafe is missing a driver, but because the browser does not exist for that operating system.
This matters more than it sounds. Safari's engine ships on every iPhone and iPad, and on iOS every browser is required to use it. Skipping Safari does not mean skipping one browser; it means skipping the engine behind a large share of your mobile traffic. And Safari is where engine-specific bugs concentrate — date input handling, backdrop filters, scroll behavior, and IndexedDB quirks routinely surface there and nowhere else.
The local workaround is to buy Macs. Testing several Safari versions means several Macs, or macOS virtual machines — and Apple's licensing only permits running macOS on Apple hardware, so virtualization does not release you from buying the machines. Each one then needs OS updates, browser version pinning, and someone to maintain it. That is real infrastructure cost incurred entirely so that one browser is reachable.
Where local execution runs out of room
- Operating systems: one machine gives you one OS. Testing Windows and macOS from a single laptop is not possible without a second machine.
- Browser versions: browsers auto-update, and holding several versions side by side on one machine is fragile and constantly undone by the updater.
- Parallelization: TestCafe's
-cflag runs multiple instances concurrently, but they contend for the same CPU and RAM. Concurrency is capped by your hardware, and pushing past that point introduces the timing flakiness you were testing to prevent. - Real mobile browsers: emulation approximates a viewport. It does not reproduce a real device's engine build, memory limits, or touch behavior.
Local TestCafe vs. TestCafe on a cloud grid
| Metric | Local TestCafe execution | TestCafe + TestMu AI cloud grid |
|---|---|---|
| OS availability | Whatever your machine runs — one OS | Windows and macOS environments on demand |
| Safari access | Only on a Mac; impossible on Windows or Linux | Real Safari on real macOS, from any host OS |
| Browser versions | Usually one per browser; auto-updates fight you | Many versions available side by side |
| Parallelization limit | Bounded by local CPU and RAM | Bounded by your plan's concurrency, not your laptop |
| Execution speed for a full matrix | Serial across configurations — grows with the matrix | Configurations run concurrently |
| Mobile browsers | Emulation only | Real devices and browsers |
| Maintenance | You patch, update, and pin every machine | Provider maintains the environments |
| Debug artifacts | Local screenshots and video you wire up yourself | Video, logs, and screenshots captured per session |
This is precisely the gap a cloud grid closes, and it is the reason TestCafe's proxy architecture matters commercially rather than just architecturally. Because Hammerhead drives any browser that can open a URL, TestCafe treats a remote macOS machine exactly like a local one — the test code does not change, only the browser alias does. Providers in this space include TestMu AI, BrowserStack, and Sauce Labs; the setup below uses the official TestMu AI plugin.
How TestMu AI & TestCafe Integrate For Better Browser Coverage?
TestCafe offers a power-packed performance in terms of test automation. As you have already seen above, it packs in a plethora of functionalities that can actually be used to scale your test cases to a whole new level.
- How do you scale up your test cases?
- How do you improve your browser coverage?
- How do you implement continuous integration testing against multiple browser configurations and operating systems?
The answer is simple- employ a cloud-based solution, aka TestMu AI. It allows you to perform cross browser testing on 3000+ browsers and operating systems using a cloud Selenium Grid.

To make things easier for you, TestMu AI provides a plugin for easy integration of TestCafe and TestMu AI. In order to install the npm plugin for TestCafe integration, there are a set of prerequisites to fulfill.
Step 1: Make sure you have your TestCafe Credentials.
- For Linux/Mac:
$ export LT_USERNAME= {your lambdatest username}
$ export LT_ACCESS_KEY= {your lambdatest access_key}
$ set LT_USERNAME= {your lambdatest username}
$ set LT_ACCESS_KEY= {your lambdatest access_key}
Step 2: Use the below command for installing the npm plugin to integrate TestMu AI with TestCafe.
$ npm install testcafe-browser-provider-lambdatest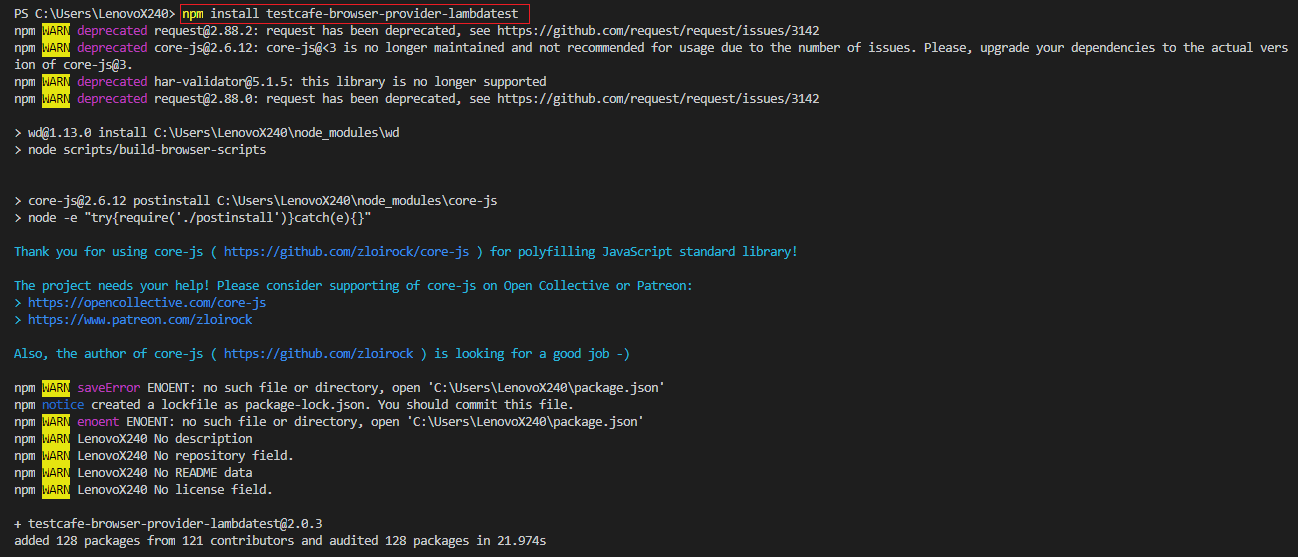
Step 3: Before using this plugin, save your TestMu AI username and access key to the environment variables LT_USERNAME and LT_ACCESS_KEY. You can use the following command to set these variables-
$ set LT_USERNAME=*insert your username*
$ set LT_ACCESS_KEY=*insert your accesskey*
You can find the username and access key in the Profile section (top right corner) of your TestMu AI account. If you haven’t registered yet, you can do it for free here.
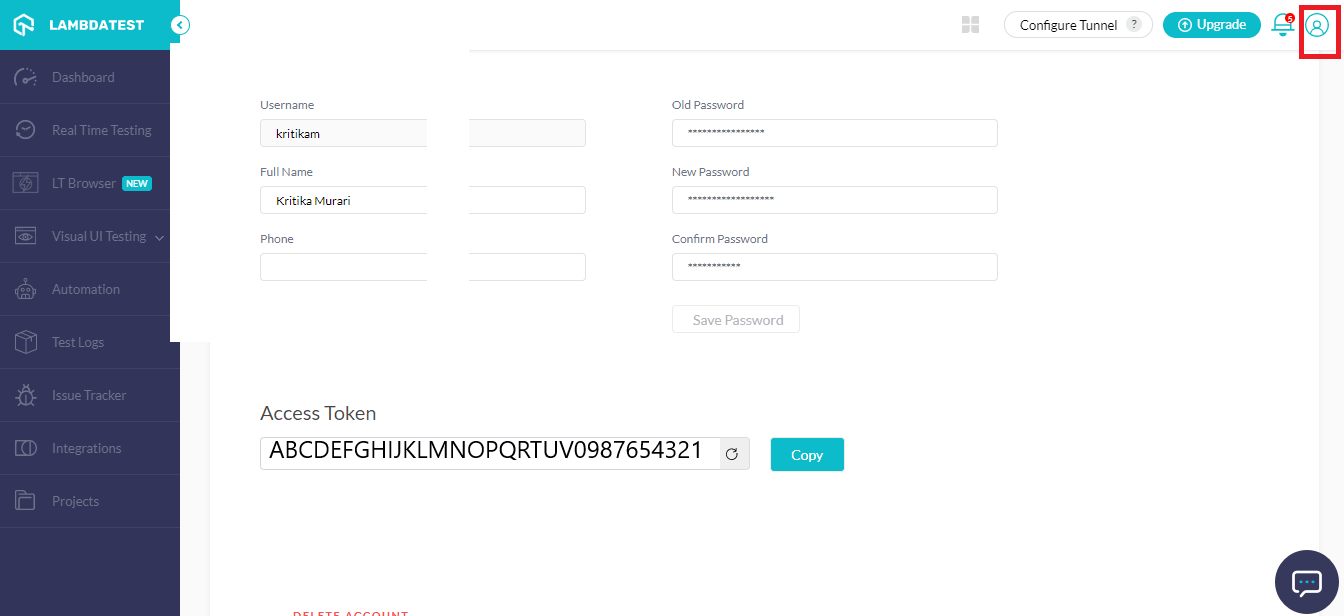
Step 4: In this step, we will connect with the TestMu AI platform.
- To acknowledge all available browsers aliases offered by TestMu AI Selenium Grid, type the below command:
$ testcafe -b lambdatest
$ testcafe "lambdatest:Chrome@86.0:MacOS Catalina" test.js
testCafe
    .createRunner()
    .src('path/to/test/file.js')
    .browsers('lambdatest:Chrome@86.0:MacOS Catalina')
    .run();
Based on your requirement, you can choose the command of your choice and run it on VS Code. Once you do that, you will notice that a tunnel has been established on the TestMu AI platform. This tunnel will allow you to run tests over a cloud Selenium Grid, providing an easy way to scale up your browser coverage.
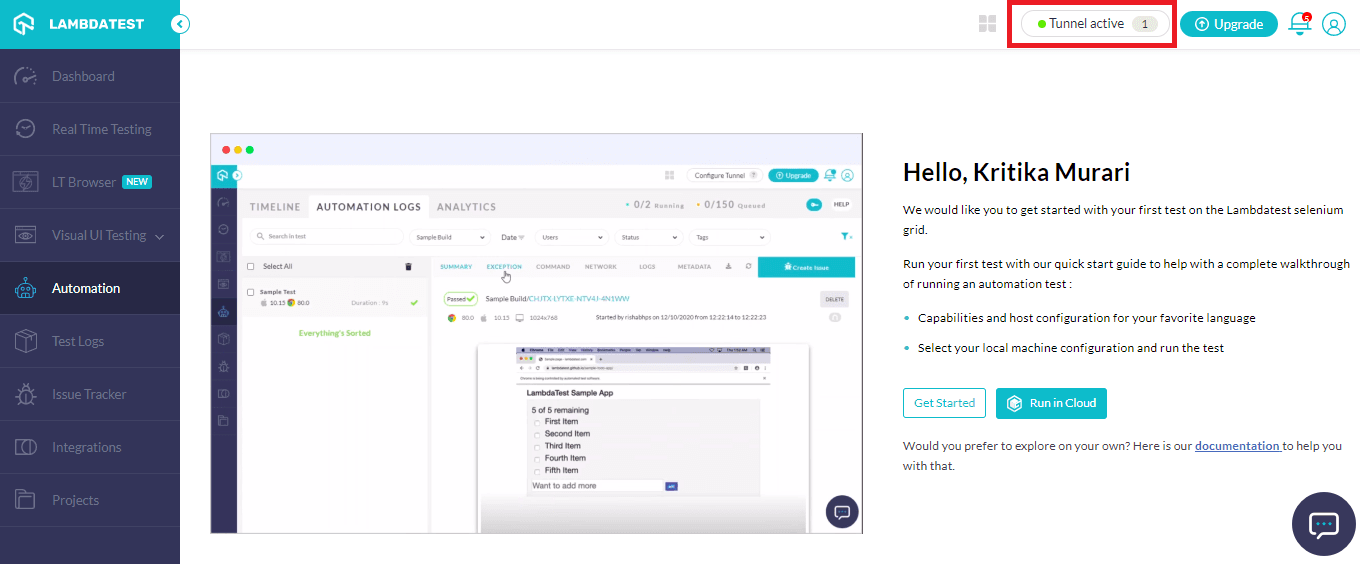
In case you wish to make some additional configurations to your automation test scripts, you can refer to our official npm plugin documentation.
Step 5: Create a test.js file to execute the test cases. Now let us run a test script to see how the integration works. This script implements a number of functionalities on https://devexpress.github.io/testcafe/example/ page and check how it goes.
import Page from './page-model';

fixture `A set of examples that illustrate how to use TestCafe API`
    .page `https://devexpress.github.io/testcafe/example/`;

// Page model
const page = new Page();

// Tests
test('Text typing basics', async t => {
    await t
        .typeText(page.nameInput, 'Peter') // Type name
        .typeText(page.nameInput, 'Paker', { replace: true }) // Replace with last name
        .typeText(page.nameInput, 'r', { caretPos: 2 }) // Correct last name
        .expect(page.nameInput.value).eql('Parker'); // Check result
});


test('Click an array of labels and then check their states', async t => {
    for (const feature of page.featureList) {
        await t
            .click(feature.label)
            .expect(feature.checkbox.checked).ok();
    }
});


test('Dealing with text using keyboard', async t => {
    await t
        .typeText(page.nameInput, 'Peter Parker') // Type name
        .click(page.nameInput, { caretPos: 5 }) // Move caret position
        .pressKey('backspace') // Erase a character
        .expect(page.nameInput.value).eql('Pete Parker') // Check result
        .pressKey('home right . delete delete delete') // Pick even shorter form for name
        .expect(page.nameInput.value).eql('P. Parker'); // Check result
});


test('Moving the slider', async t => {
    const initialOffset = await page.slider.handle.offsetLeft;

    await t
        .click(page.triedTestCafeCheckbox)
        .dragToElement(page.slider.handle, page.slider.tick.withText('9'))
        .expect(page.slider.handle.offsetLeft).gt(initialOffset);
});


test('Dealing with text using selection', async t => {
    await t
        .typeText(page.nameInput, 'Test Cafe')
        .selectText(page.nameInput, 7, 1)
        .pressKey('delete')
        .expect(page.nameInput.value).eql('Tfe'); // Check result
});


test('Handle native confirmation dialog', async t => {
    await t
        .setNativeDialogHandler(() => true)
        .click(page.populateButton);

    const dialogHistory = await t.getNativeDialogHistory();

    await t.expect(dialogHistory[0].text).eql('Reset information before proceeding?');

    await t
        .click(page.submitButton)
        .expect(page.results.innerText).contains('Peter Parker');
});


test('Pick option from select', async t => {
    await t
        .click(page.interfaceSelect)
        .click(page.interfaceSelectOption.withText('Both'))
        .expect(page.interfaceSelect.value).eql('Both');
});


test('Filling a form', async t => {
    // Fill some basic fields
    await t
        .typeText(page.nameInput, 'Bruce Wayne')
        .click(page.macOSRadioButton)
        .click(page.triedTestCafeCheckbox);

    // Let's leave a comment...
    await t
        .typeText(page.commentsTextArea, "It's...")
        .wait(500)
        .typeText(page.commentsTextArea, '
good');

    // I guess, I've changed my mind
    await t
        .wait(500)
        .selectTextAreaContent(page.commentsTextArea, 1, 0)
        .pressKey('delete')
        .typeText(page.commentsTextArea, 'awesome!!!');

    // Let's submit our form
    await t
        .wait(500)
        .click(page.submitButton)
        .expect(page.results.innerText).contains('Bruce Wayne');
});
To define your desired set of browser & operating system combinations, you can use TestMu AI Capabilities Generator to specify your desired configurations with the help of a config.JSON file (as shown below.)
{
“Chrome@86.0:Windows 10”: {
		“network”: true,
		“visual”: true,
		“resolution”: “1280x1024”,
		“build”: “My TestCafe Build Webinar”
},
“Chrome@85.0:Windows 10”: {
	“network”: true,
	“visual”: true,
	“resolution”: “1280x1024”,
	“build”: “My TestCafe Build Webinar”
},
“Chrome@86.0:MacOS Catalina”: {
	“network”: true,
	“visual”: true,
	“resolution”: “1280x1024”,
	“build”: “My TestCafe Build Webinar”
},
“Chrome@85.0:MacOS Catalina”: {
	“network”: true,
	“visual”: true,
	“resolution”: “1280x1024”,
	“build”: “My TestCafe Build Webinar”
}
}
You can even skip this step entirely and use a quick utility offered by TestMu AI. You can use the following command with TestCafe to create a combined list of all the available browsers (with all possible combinations available) in the form of a simple text file and choose your desired combination-
testcafe - b lambdatest >combination.txt
Output-
As soon as you run the script above, the test will be reflected on the TestMu AI platform as well. You can also find these sample tests at the TestMu AI TestCafe GitHub repository.
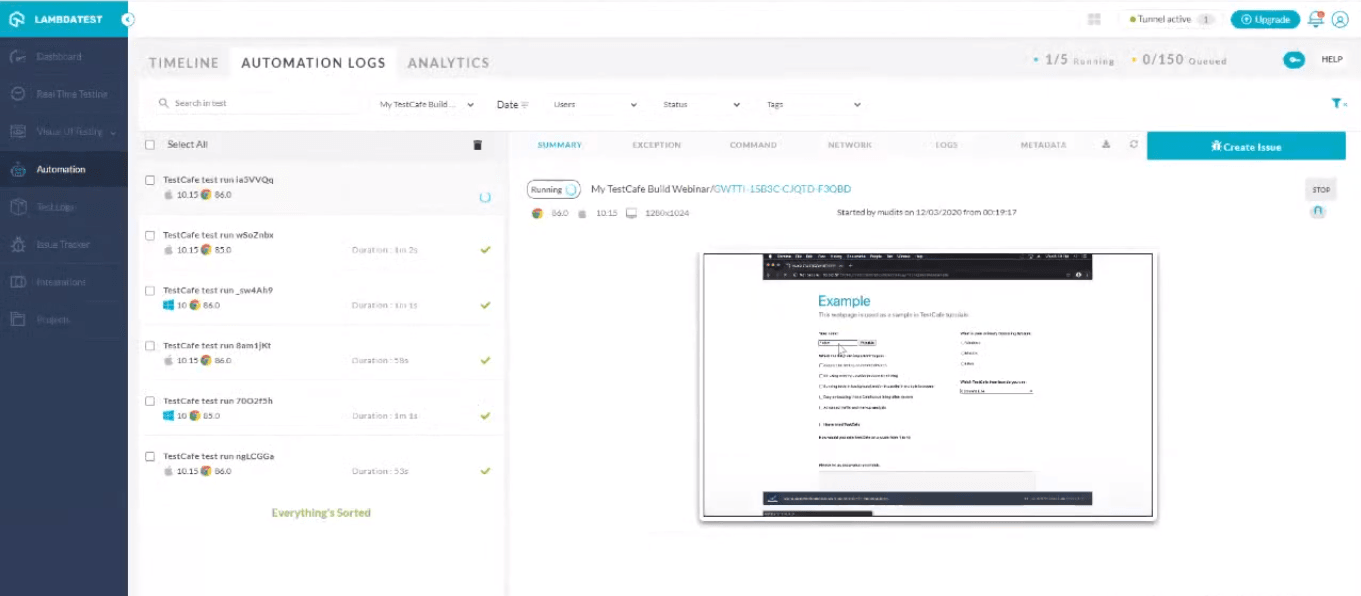
You can even check your test’s live execution by clicking on the video recording on the TestMu AI dashboard. The best part is that you can check your web app’s performance across a wide range of browser & operating systems.
Parallel Testing On TestMu AI Cloud
Additionally, you can also run multiple tests in parallel to save up your time and resources. This is another great feature offered by TestMu AI; it helps save up a lot of time and effort as you can simply run multiple test scripts or even the same test script on different browsers or operating systems at the same time.
You can use the following command for executing parallel tests:
$ testcafe "lambdatest:Chrome@86.0:MacOS Catalina","lambdatest:@86.0:MacOS Catalina" test.js

Troubleshooting Common TestCafe Cross-Browser Compatibility Issues
A suite that is green on Chrome and red on Safari is the normal experience of going cross-browser, and the failures follow a small number of recurring patterns. Before reaching for any fix, establish one thing: reproduce the failure on the exact browser and OS that failed, not an approximation. Debugging a Safari bug against a WebKit build or an emulated viewport is how teams lose days chasing a difference that was never in their app.
Timing failures that only appear on some engines
The most common cross-browser failure is not a rendering bug at all — it is a race condition that your fastest browser hides. TestCafe waits for selectors to resolve for 10,000 ms by default and for assertions for 3,000 ms. A slower engine, or a remote machine with network latency in the loop, can exceed those windows on a page Chrome renders instantly. Raise them at the run level rather than sprinkling waits through your tests:
testcafe "lambdatest:Safari:MacOS Catalina" tests/ --selector-timeout 30000 --assertion-timeout 10000If a test passes in isolation but fails in a suite, suspect cached page state rather than the browser. --disable-page-caching prohibits the browser from caching page content, which resolves the class of failures where a browser restores a previous page state between fixtures.
Resize and viewport actions on mobile browsers
Window-resize actions are the usual casualty when a desktop suite meets mobile. A real handset has a fixed viewport and no resizable window, so resize calls either no-op or error, and layout assertions written around a resize step fail for reasons unrelated to your CSS. Keep resize actions in desktop-only fixtures and assert responsive behavior on real mobile browsers at their native viewport instead of resizing your way to a breakpoint. Where a resize is genuinely needed, allow settling time before asserting — re-layout after a viewport change is not instantaneous, and it is slower on real devices than on your laptop.
SSL and certificate errors on older browsers
Because Hammerhead serves your application through its own proxy, anything strict about certificates will notice. Older browsers and stricter engines reject self-signed certificates that Chrome waves through, and pages served over HTTP while the test harness runs HTTPS trigger mixed-content blocks. Run the TestCafe proxy over HTTPS with the --ssl option, which takes Node.js HTTPS initialization options:
testcafe chrome tests/ --ssl pfx=/path/to/cert.pfx;rejectUnauthorized=trueIf third-party scripts throw errors that fail tests without affecting the behavior you are verifying, --skip-js-errors (or -e) ignores JavaScript errors during the run, and accepts filters so you can suppress a known offender without going blind to everything else.
Configuring concurrent and headless execution
Concurrency is where local runs turn flaky. The -c flag runs multiple instances of the same browser simultaneously, and headless mode is an alias suffix — combine them for CI:
# Three concurrent headless Chrome instances
testcafe 'chrome:headless' tests/ -c 3

# Multiple browsers in one run, comma-separated
testcafe chrome,firefox tests/

# Capture evidence when a cross-browser test fails
testcafe 'chrome:headless' tests/ --screenshots takeOnFails=true
Two cautions. Headless and headed browsers do not always render identically — fonts and scrollbars differ most often — so a headless-only failure is worth confirming headed before you change application code. And local concurrency is bounded by your CPU and RAM: raising -c beyond what the machine can serve manufactures exactly the timing flakiness you are trying to eliminate. On a cloud grid, concurrency is bounded by your plan rather than your hardware, which is why the same -c value behaves very differently in the two places.
For the wider methodology behind this, see our guides to cross browser testing and headless browser testing.
Wrapping Up!
TestCafe earns its place through what it does not require: no WebDriver, no browser plugins, no bundled engine standing in for the real thing. Its native automation drives Chromium over CDP, and the Hammerhead proxy handles everything else — which is what lets it point at real Safari on a real Mac while your test code stays identical.
That capability is only theoretical until the browsers are reachable. No one keeps every browser, version, and operating system on their desk, and Safari cannot be installed on the Windows machine most teams develop on at any price. You can buy and maintain the Macs, or you can change one browser alias and run the same suite against a cloud grid. While TestCafe provides the functionality, TestMu AI makes it reachable across browsers, versions, and operating systems — which is what turns cross browser coverage from an aspiration into a build step.
For further reading, see code coverage vs test coverage. Happy testing!

Author

Kritika Murari
Blogs: 32


Kritika Murari is a Community Contributor with experience in creating technical content around software testing, automation, and emerging technologies. A former Content Manager at TestMu AI, she has authored blogs, guides, and resources that simplify complex testing concepts for developers and QA professionals. Kritika actively contributes to the testing community through insightful content and knowledge-sharing.


Frequently asked questions
Did you find this page helpful?
More Related Blogs
TestMu AI forEnterprise
Get access to solutions built on Enterprise
grade security, privacy, & compliance
- Advanced access controls
- Advanced data retention rules
- Advanced Local Testing
- Premium Support options
- Early access to beta features
- Private Slack Channel
- Unlimited Manual Accessibility DevTools Tests