

Power Your Software Testing with AI Agents and Cloud
The Native AI-Agentic Cloud Platform to Supercharge Quality Engineering. Test Intelligently and Ship Faster.


- TestMu AI (Formerly LambdaTest)
- /
- Blog
- /
- Mouse Actions in Selenium: Examples Using the Actions Class
Mouse Actions in Selenium: Examples Using the Actions Class
Learn how to handle mouse actions in Selenium using the Actions class: click, double-click, right-click, hover, and drag-and-drop, with working Java code.
Last Updated on:
On This Page
Real users do more than click buttons. They hover over menus, right-click for context options, drag sliders, and double-click to select. To test those flows, your automation has to reproduce the same low-level pointer interactions on elements in the DOM.
That is what mouse actions in Selenium are for. The Actions class turns hovering, dragging, right-clicking, and scrolling into a few chainable method calls you trigger with perform().
The Actions class covers both keyboard and mouse actions. This blog focuses on mouse actions in Selenium, with working Java examples, a Python equivalent, and a look at combining them with keyboard keys.
Overview
To automate complex user interactions in Selenium, use the Actions class to chain low-level mouse inputs like hovering, dragging, and scrolling, and execute these scripts across browsers using the zero-infrastructure cross-browser cloud provided by TestMu AI.
- click(): Selenium's click() method performs a standard left-click on a specified web element to interact with buttons, links, checkboxes, and radio buttons.
- doubleClick(): Selenium's doubleClick() method simulates two quick left-clicks on a web element to select text or trigger specific double-click event handlers.
- contextClick(): Selenium's contextClick() method triggers a right-click on a web element to open the browser context menu and test custom right-click menus.
- clickAndHold(): Selenium's clickAndHold() method presses and holds the left mouse button down on an element without releasing it, which is useful for sliders.
- dragAndDrop(): Selenium's dragAndDrop() method clicks and holds a source element, moves it to a target location, and releases it to complete drag-and-drop actions.
- moveToElement(): Selenium's moveToElement() method moves the mouse pointer to the center of an element, simulating a hover effect to reveal tooltips or dropdown menus.
- moveByOffset(): Selenium's moveByOffset() method shifts the mouse cursor by specified X and Y pixel coordinates, which is useful for moving sliders to precise locations.
- release(): Selenium's release() method releases the currently held mouse button at the present cursor position to complete a drag or selection action.
- scrollToElement(): Selenium's scrollToElement() method scrolls the page until a specified element is in view, bringing off-screen elements into the viewport without JavaScript.
- TestMu AI: The TestMu AI platform provides a zero-infrastructure cross-browser cloud spanning 3,000+ browser/OS combinations to run Selenium scripts in parallel.
What Are Mouse Actions in Selenium?
Mouse actions in Selenium automate the low-level interactions a real user performs with a mouse, from simple single and double clicks to complex sequences like hovering, dragging and dropping, and clicking and holding.
The Actions class exposes a dedicated method for each of these operations.
The table below maps each method of the Actions class in Selenium to what it does and when to reach for it:
| Method | What It Does | When to Use |
|---|---|---|
| click() | Performs a single left-click on an element. | Buttons, links, checkboxes, and radio buttons. |
| doubleClick() | Performs two quick left-clicks on an element. | Selecting text or triggering double-click handlers. |
| contextClick() | Performs a right-click to open the context menu. | Testing custom right-click menus. |
| clickAndHold() | Presses and holds the left button without releasing (a.k.a. mouse down). | Sliders, drag operations, resizable elements. |
| release() | Releases the held mouse button (a.k.a. mouse up). | Completing a clickAndHold drag or selection. |
| dragAndDrop() | Drags a source element onto a target and releases it. | Drag-and-drop between two known elements. |
| moveToElement() | Moves the pointer to the center of an element (hover). | Revealing hover menus and tooltips. |
| moveByOffset() | Moves the pointer by X and Y pixel offsets. | Sliders and clicking at precise coordinates. |
| scrollToElement() | Scrolls the page until an element is in view. | Bringing off-screen elements into the viewport. |

Subscribe to the TestMu AI YouTube Channel for more such tutorials.
What Is the Difference Between the Actions Class and Action Interface?
Two similarly named types do the work behind every mouse action, and confusing them is a common interview trip-up. The Actions class (plural) is the builder you call methods on, while the Action interface (singular) is what those calls produce.
- Actions class (org.openqa.selenium.interactions.Actions): a builder that exposes methods such as click(), doubleClick(), contextClick(), moveToElement(), and dragAndDrop(). You chain these to compose a sequence of low-level interactions.
- Action interface (org.openqa.selenium.interactions.Action): the type returned by Actions.build(). It represents one assembled, ready-to-run interaction.
So what does the Action interface in Selenium support? Exactly one method: perform(), which executes the built sequence. The typical pattern is build-then-perform, where build() returns an Action object and perform() runs it:
Actions actions = new Actions(driver);

// build() returns an Action; perform() executes it
Action mouseAction = actions.moveToElement(menu).click(submenuItem).build();
mouseAction.perform();
When you chain methods and end with .build().perform() in a single line, the same two steps happen: Selenium assembles the Action, then runs it. For a deeper walkthrough of the builder API, see our guide on the Actions class in Selenium linked above.
How Do You Handle Mouse Actions in Selenium?
You handle mouse actions in Selenium by creating an Actions object with the WebDriver instance, chaining the methods you need, and calling perform() to execute them. Here is how to set that up.
Implementation:
Import the package org.openqa.selenium.interactions.Actions. Then, create an object of the Actions class and pass the Selenium WebDriver instance to the object.
WebDriver driver = new ChromeDriver();
Actions actions = new Actions(driver);
Use the object to access the methods for automating mouse-related operations in the Selenium script.
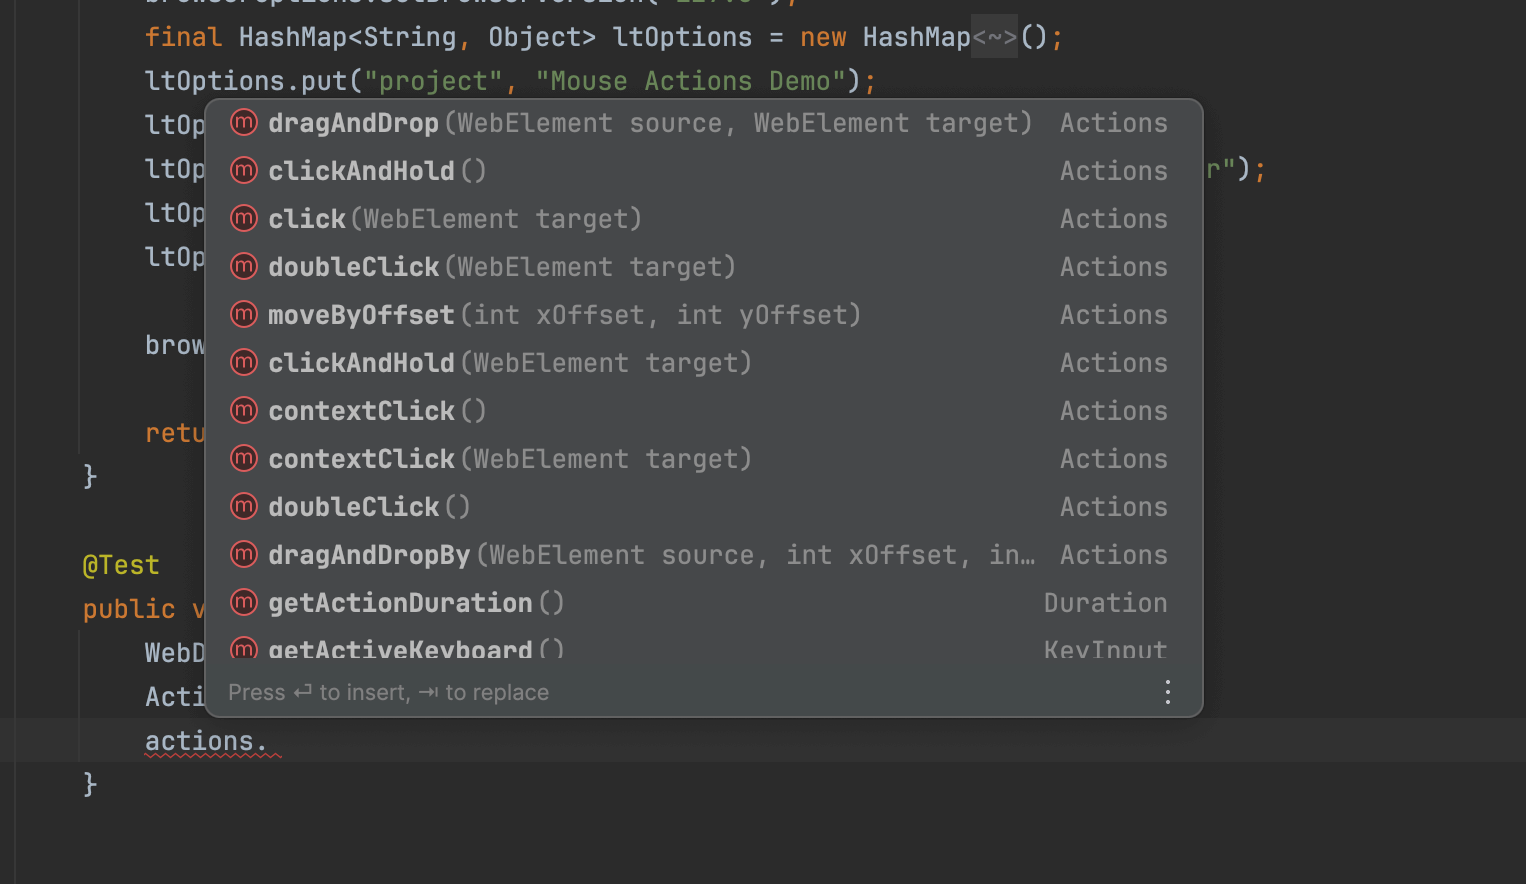
We will use the TestNG framework and Selenium 4. At the time of updating this blog, the latest stable version of Selenium WebDriver on the official Selenium downloads page was 4.44.0, so the examples use it.
<dependency>
    <groupId>org.seleniumhq.selenium</groupId>
    <artifactId>selenium-java</artifactId>
    <version>4.44.0</version>
</dependency>
The pom.xml file is used for downloading the requisite packages from the Maven repository. The respective tests are executed on cloud testing platforms like TestMu AI.
It is an AI-driven test execution platform that lets you run Selenium tests online on various browsers and operating systems. It helps ensure consistent behavior of mouse interactions across different environments, reducing the need for local infrastructure.

You get access to your Username and Access Key from your TestMu AI Account Settings > Password and Security.
Also, the automation capabilities can be generated using the TestMu AI Capabilities Generator. For the full setup walkthrough, follow the Java with Selenium documentation.
A new mouseactionsdemo package has been created inside the src/test folder that will have all the demo test scenarios for handling mouse actions in Selenium.
Here is the implementation of the methods under the @BeforeTest and @AfterTest annotations. The methods used for demonstrating mouse actions in Selenium should be included under the @Test annotation.
@BeforeTest
   public void setup() {
       final String userName = System.getenv("LT_USERNAME") == null ? "LT_USERNAME" : System.getenv("LT_USERNAME");
       final String accessKey = System.getenv("LT_ACCESS_KEY") == null ? "LT_ACCESS_KEY" : System.getenv("LT_ACCESS_KEY");
       final String gridUrl = "@hub.lambdatest.com/wd/hub";
       try {
           this.driver = new RemoteWebDriver(new URL("http://" + userName + ":" + accessKey + gridUrl), getChromeOptions());
       } catch (final MalformedURLException e) {
           System.out.println("Could not start the remote session on LambdaTest cloud grid");
       }
       this.driver.manage().timeouts().implicitlyWait(Duration.ofSeconds(20));
   }

   public ChromeOptions getChromeOptions() {
       final var browserOptions = new ChromeOptions();
       browserOptions.setPlatformName("Windows 10");
       browserOptions.setBrowserVersion("127.0");
       final HashMap<String, Object> ltOptions = new HashMap<String, Object>();
       ltOptions.put("project", "Mouse Actions Demo");
       ltOptions.put("build", "LambdaTest Selenium Playground");
       ltOptions.put("name", "Perform Mouse Actions using Selenium WebDriver");
       ltOptions.put("w3c", true);
       ltOptions.put("plugin", "java-testNG");

       browserOptions.setCapability("LT:Options", ltOptions);

       return browserOptions;

   }

   @AfterTest
   public void tearDown() {
       this.driver.quit();
   }
}

The setup() method that has the @BeforeTest annotation over it will set up the configuration for running the tests on the TestMu AI cloud grid. The getChromeOptions() method will pass on the required capabilities for running the tests on the Chrome browser.
Likewise, the tearDown() method that has the @AfterTest annotation will close the WebDriver session gracefully.
Now, let’s look at different types of mouse actions in Selenium.
Single Click Action in Selenium
Single click is one of the basic mouse actions in the latest version of Selenium that you will be required to perform during the Selenium test automation process.
Left mouse clicks are primarily used to perform click actions on buttons, checkboxes, radio buttons, etc. When we refer to a mouse click, it is always the ‘left click’ since the right click opens up the context menu.
For more details about mouse click action, refer to this blog on the Selenium click button method.
In this blog, we will use the TestMu AI eCommerce Playground website for our test scenarios.
Test Scenario:
- Navigate to the TestMu AI eCommerce Playground website.
- Locate the search box and type the text iPhone.
- Click on the search button to perform the search operation.
- Check if the product is listed in the search.
Implementation:
A new testMouseClickAction() method has been added in the class TestMouseActions that implements the above test scenario.
@Test
public void testMouseClickAction() {
   driver.get("https://ecommerce-playground.lambdatest.io/");
   WebElement searchBox = driver.findElement(By.name("search"));
   searchBox.sendKeys("iPhone");

   WebElement searchBtn = driver.findElement(By.cssSelector("button[type=submit]"));
   searchBtn.click();

   String pageHeader = driver.findElement(By.cssSelector("#entry_212456 h1")).getText();
   assertEquals(pageHeader, "Search - iPhone");

}
Code Walkthrough:
The test navigates the user to the home page of the TestMu AI eCommerce Playground website. It locates the search box using the name locator strategy of Selenium and types the word iPhone in it.
The search button will be located next using the CSS Selector locator strategy, and a click action will be performed on the button using the click() method.
The page header will be located at the end, and its text will be stored in the pageHeader variable in string format using the getText() method of Selenium. Finally, an assertion will be performed to check that the page header equals Search- iPhone.
Test Execution:
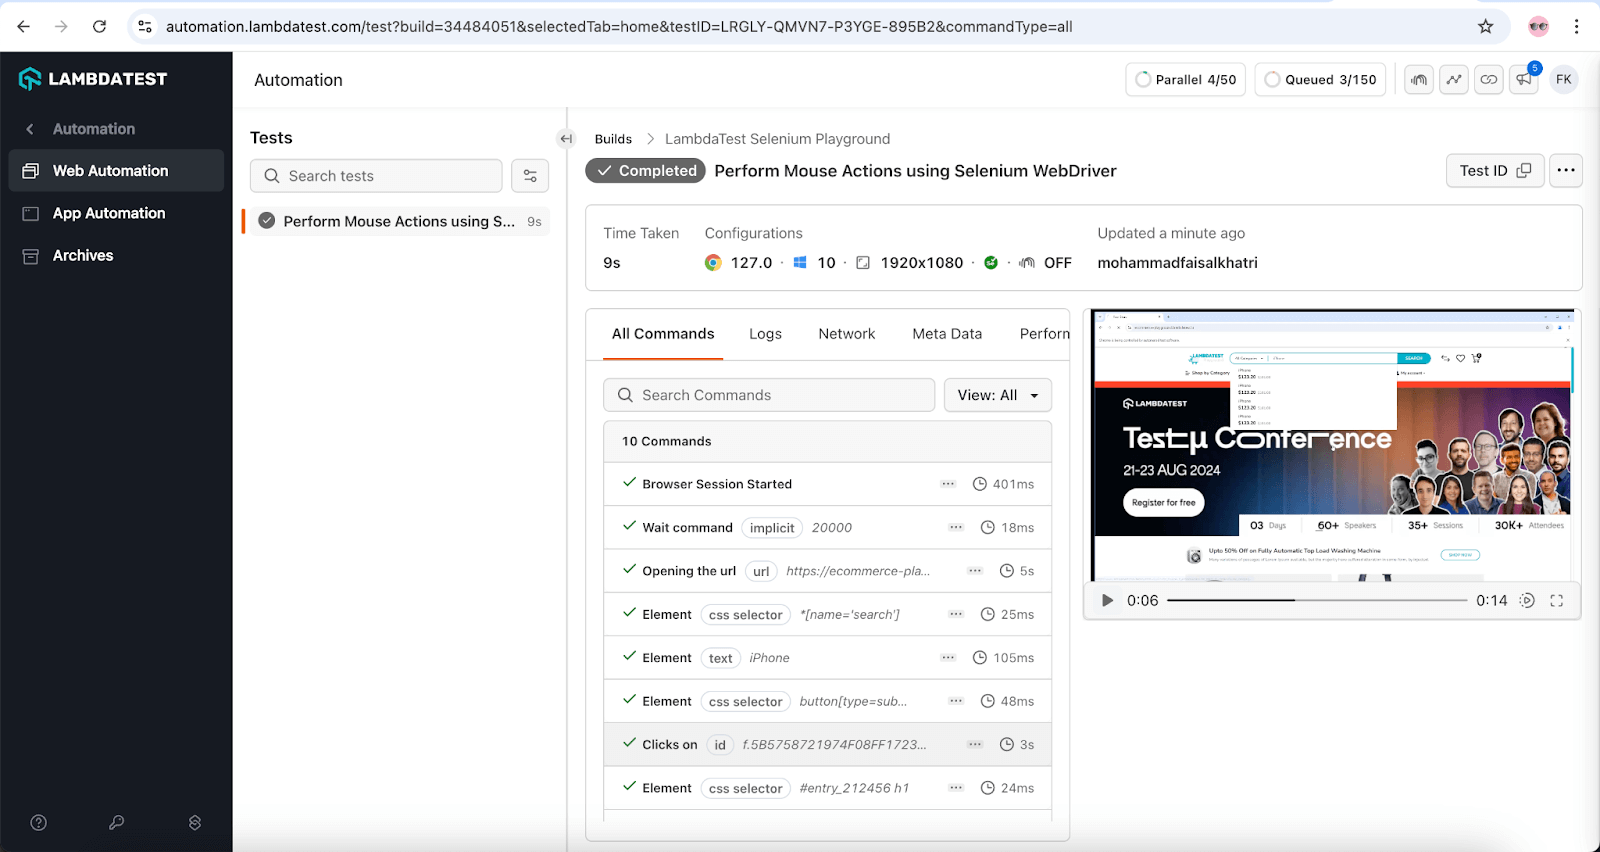
Here is the single-click test passing on the TestMu AI cloud dashboard:
Double Click Action in Selenium
Double click mouse action in Selenium is one of the prime actions used for Selenium test automation.
Test Scenario:
- Navigate to https://unixpapa.com/js/testmouse.html.
- Double-click on click here to test.
- Search for dblclick in the text area.
- Assert if the double-click operation is not successful.
Implementation:
A new testDoubleClickAction() method has been created in the existing TestMouseActions class to implement the test scenario.
@Test
public void testDoubleClickAction () {
   driver.get("https://unixpapa.com/js/testmouse.html");
   WebElement clickHereText = driver.findElement(By.linkText("click here to test"));
   Actions actions = new Actions(driver);
   actions.doubleClick(clickHereText).build().perform();

   WebElement textBox = driver.findElement(By.tagName("textarea"));
   String textBoxValue = textBox.getAttribute("value");

   assertTrue(textBoxValue.contains("dblclick"));
}
Code Walkthrough:
This test script locates the click here to test link after navigating to the website. Next, the Actions class by Selenium performs a double-click action on the link.
The text box that shows the click action information is located using the tagName locator strategy and the CSS attribute value.
The last statement of the code performs an assertion to check that the text box contains the text dblclick in it.
Test Execution:
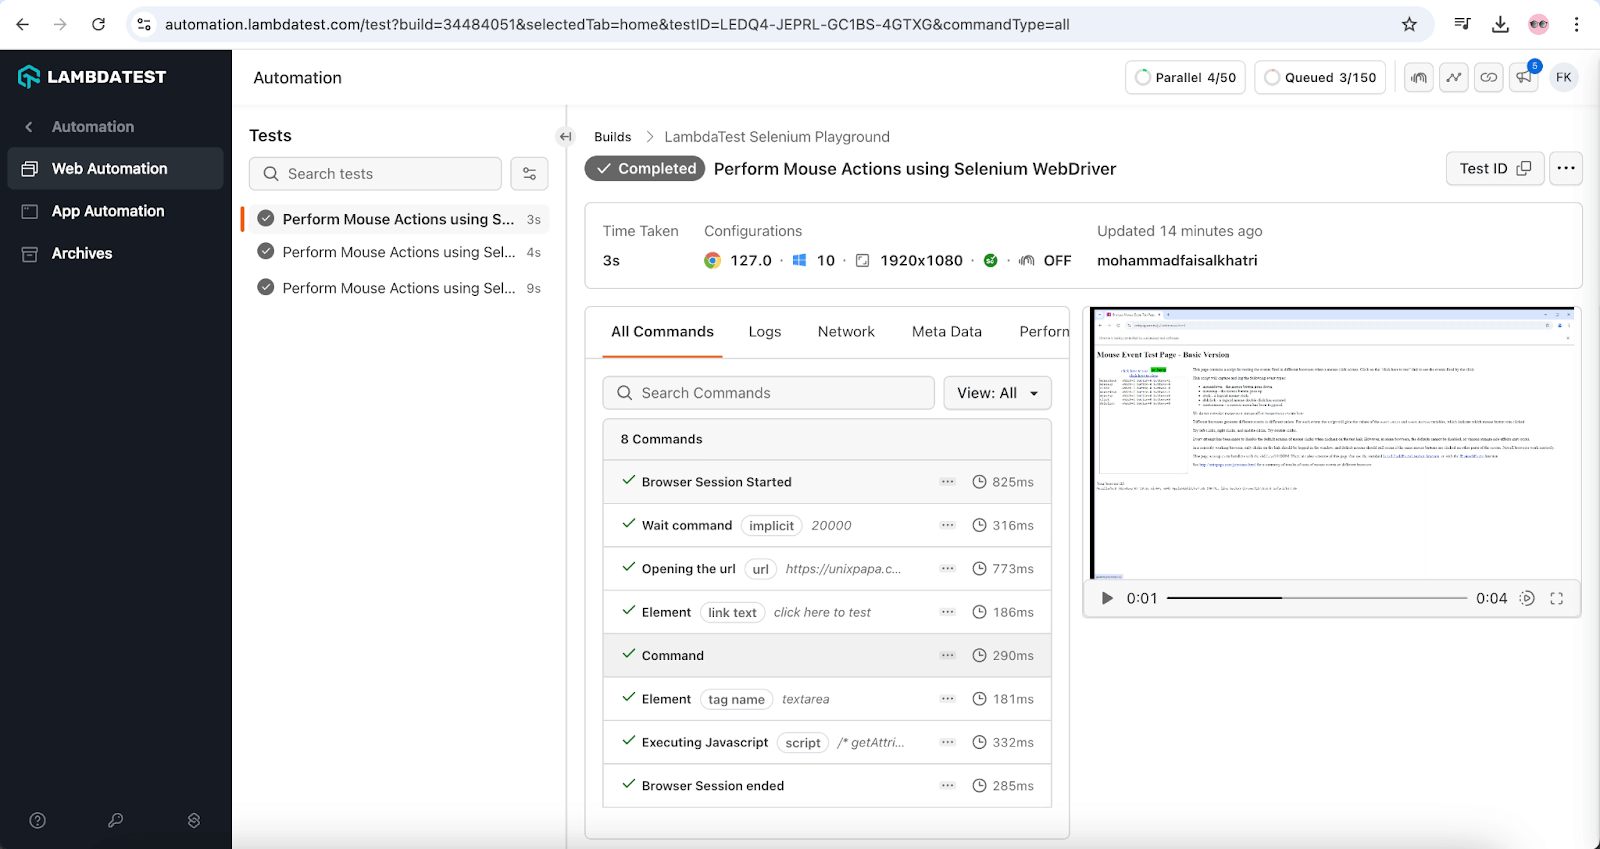
Below is the double-click test result captured on the TestMu AI cloud dashboard:
Context Click Action in Selenium
Context menu (or browser context menu) is the menu that is available when the user does a right-click operation on a web page (or WebElement). The items in the context menu depend on the WebElement on which right-click is performed.
Test Scenario:
- Navigate to the Context Menus page of the TestMu AI Selenium Playground website.
- Right-click on the box provided on the screen.
- Verify the alert text You selected a context menu displayed on the right click.
Implementation:
A new testContextClickAction() method is added to the existing TestMouseActions class to implement the test scenario.
@Test
public void testContextClickAction() {
       driver.get("https://www.testmuai.com/selenium-playground/context-menu/");
   WebElement contextClickBox = driver.findElement(By.id("hot-spot"));
   Actions actions = new Actions(driver);
   actions.contextClick(contextClickBox).build().perform();

   Alert alert = driver.switchTo().alert();

   String alertText = alert.getText();
   assertEquals(alertText, "You selected a context menu");
   alert.accept();
}
Code Walkthrough:
The above test script will locate the context click-box using the id locator hot-spot on the context menu page of the TestMu AI Selenium Playground website. Using the contextClick() method of the Actions class of Selenium WebDriver, the right-click action will be performed.
After the right click is performed, an alert message will be displayed, and the text of this message will be stored in the alertText variable in string format.
Finally, an assertion will be performed to check that the alert text equals You selected a context menu.
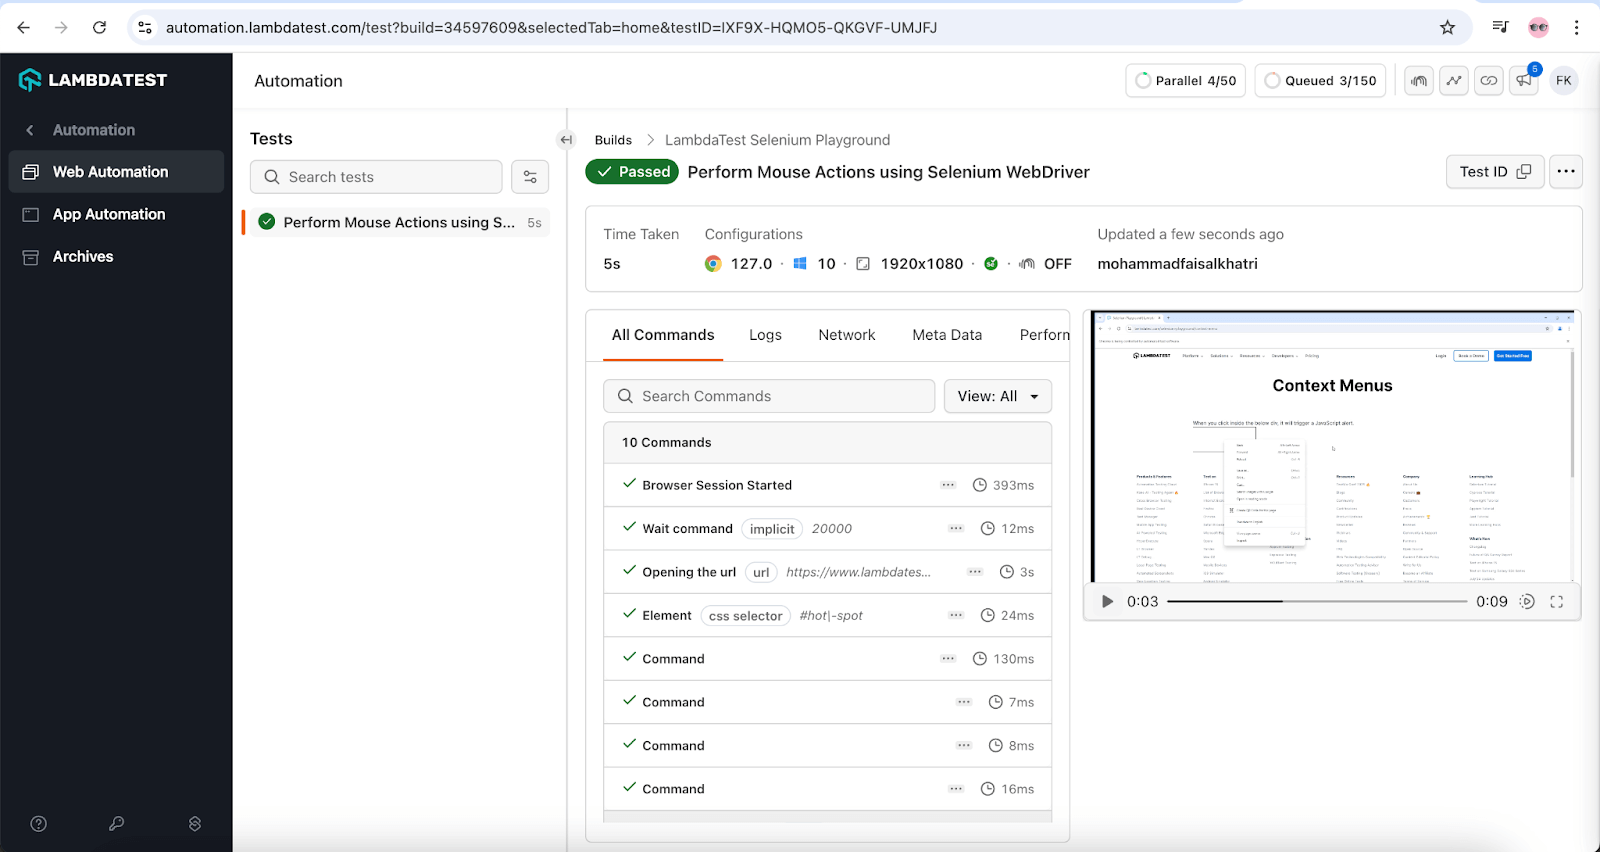
Test Execution:

Note: Automate mouse actions across 3,000+ real browser and OS combinations with TestMu AI. Try TestMu AI Now!
Advanced Use Cases: Mouse Actions in Selenium
In the above section, we discussed handling different types of mouse actions in Selenium, such as click, double-click, and context click. Now, let’s look at some more advanced use cases of mouse actions in Selenium.
Scroll Wheel Actions
Selenium 4 added native scroll-wheel support to the Actions class, so you no longer need a JavaScript executor to scroll.
The three methods are scrollToElement() to bring an element into view, scrollByAmount() to scroll by a pixel delta, and scrollFromOrigin() to scroll from a specific point on the page or element.
Test Scenario:
- Navigate to the TestMu AI Selenium Playground website.
- Scroll the Drag & Drop Sliders demo link into view using scrollToElement().
- Assert that the link is displayed in the viewport.
Implementation:
@Test
public void testScrollToElement() {
   driver.get("https://www.testmuai.com/selenium-playground/");
   WebElement sliderLink = driver.findElement(By.linkText("Drag & Drop Sliders"));

   Actions actions = new Actions(driver);
   actions.scrollToElement(sliderLink).build().perform();

   assertTrue(sliderLink.isDisplayed());
}
Code Walkthrough:
The test locates the Drag & Drop Sliders link on the Selenium Playground using the linkText locator strategy. The scrollToElement() method of the Actions class scrolls the page until that link is inside the viewport, and the assertion confirms the element is now displayed.
For pixel-level control, use scrollByAmount(deltaX, deltaY) to scroll a fixed distance, or scrollFromOrigin() to start the scroll from a given element or viewport coordinate, which is useful for scrolling inside a div or carousel rather than the whole page.
Automate Slider Movement
For automating test scenarios where a WebElement like slider is involved, we have to use the moveByOffset() method with the X and Y coordinates to move the slider.
The moveByOffset() method can also be used for clicking anywhere on the page where the offset is in the form of an X and Y coordinate pair.
Let’s consider the following test scenario for demonstrating the slider movement using moveByOffset() in Selenium.
Test Scenario:
- Navigate to the range sliders demo page of the TestMu AI Selenium Playground website.
- From the current default value of 5, drag and move the slider to value 20.
- Check that the output value is displayed correctly after the slider is moved.
Implementation:
For moving the slider horizontally, we have to perform the following set of mouse actions:
- Click and hold the slider element.
- Move the slider element by the specified offset using the moveByOffset() method.
- Release the mouse at the resultant X and Y position.
- Perform the set of actions.
The test scenario has been implemented by creating a new testSliderAction() in the existing TestMouseActions class.
@Test
public void testSliderAction() {
   driver.get("https://www.testmuai.com/selenium-playground/drag-drop-range-sliders-demo/");
   WebElement slider = driver.findElement(By.cssSelector("input[type='range'][value='5']"));
   Point point = slider.getLocation();
   int xcord = point.getX();
   int ycord = point.getY();
   System.out.println("x: " + xcord);
   System.out.println("y: " + ycord);

   Actions actions = new Actions(driver);
   actions.clickAndHold(slider).moveByOffset(-145,0).release().build().perform();
   String outputResult = driver.findElement(By.cssSelector("output#range")).getText();

   assertEquals(outputResult, "20");

}
Code Walkthrough:
The slider on the Slider Demo page is located using the CSS Selector locator strategy combining the type and value attributes. Now, as we need to drag the slider using the offset, we need the X and Y coordinates of the slider.
Hence, we will be retrieving the X and Y coordinates of the slider using the getX() and getY() methods of the point class. We can then use the Y coordinates to drag the slider using the moveByOffset() method from the Actions class.
When we execute the test, the X and Y coordinates are printed in the console as X: 60 and Y: 282.
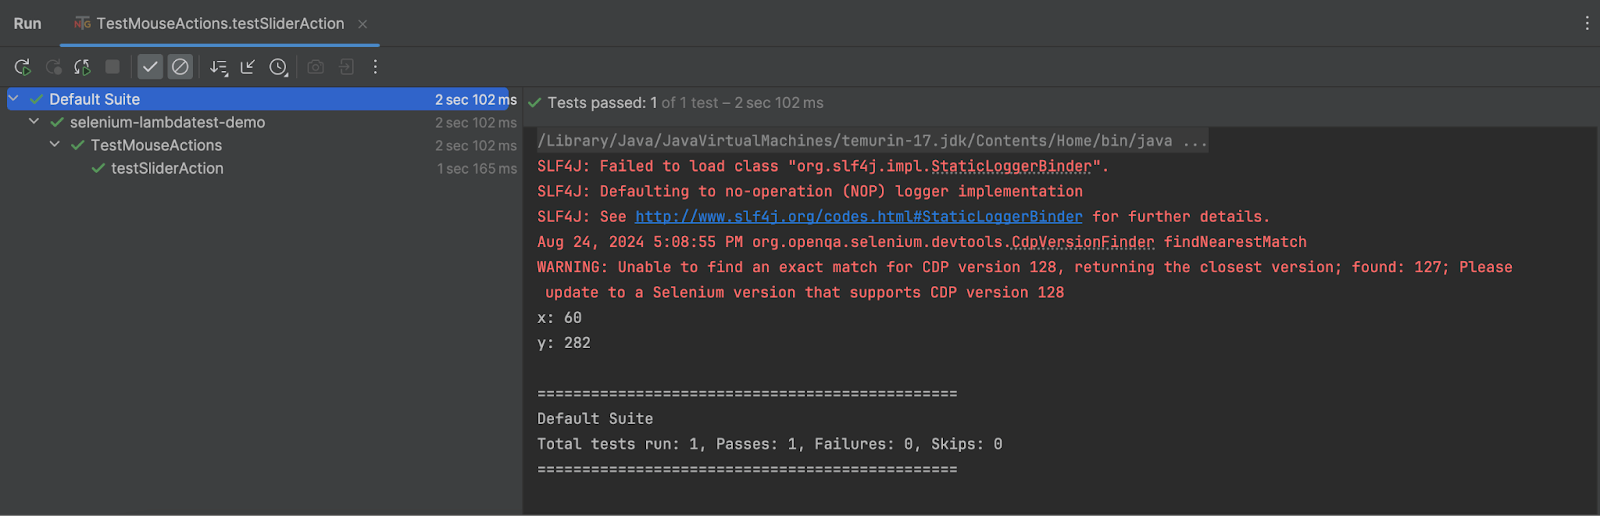
These coordinates are actually the points in the center of the slide.
So, in order to move the slide to 20, we need to provide a negative value of -145 in the offset X coordinate (value between 0 and -282 as point 282 is the center, i.e., 50).
Similarly, if we need to move the slider above 50, then we need to provide positive values between 0 to 282.
We will be chaining the actions, i.e., click and hold, moveByOffset() method, and then release the mouse to drag the slider. This chaining will be performed using the Actions class in Selenium.
After the slider is dragged successfully, an assertion will be performed to check that the slider was dragged successfully to 20 pixels.
Test Execution:
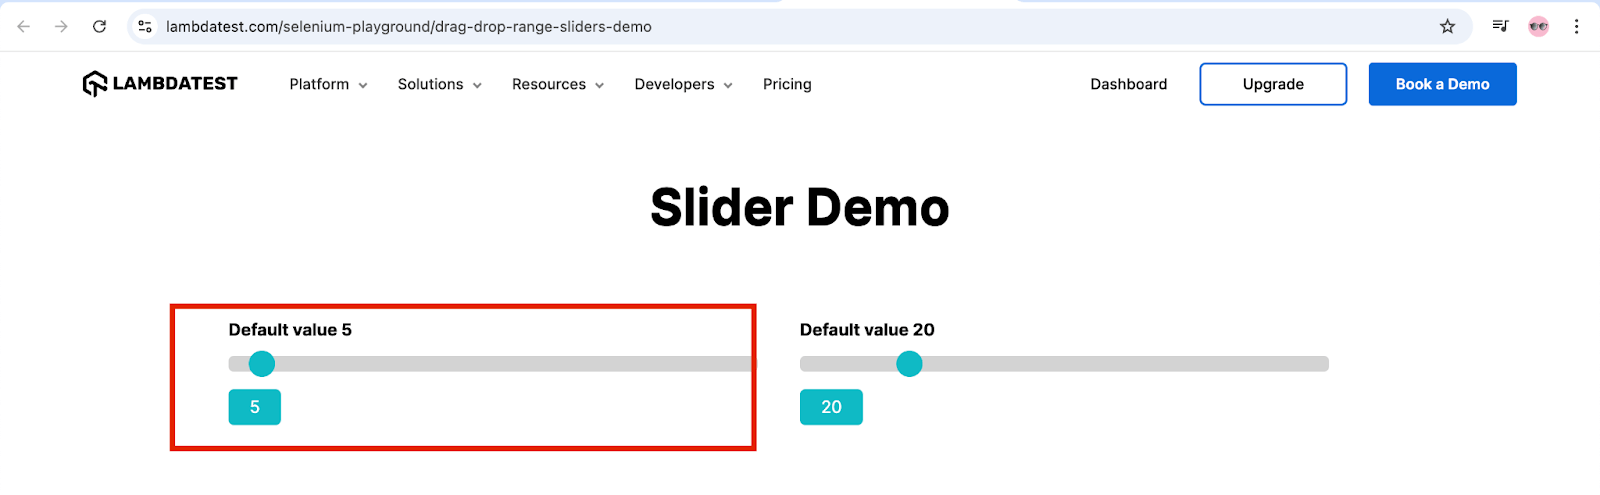
Shown below is the position of the slider element before the test is executed:
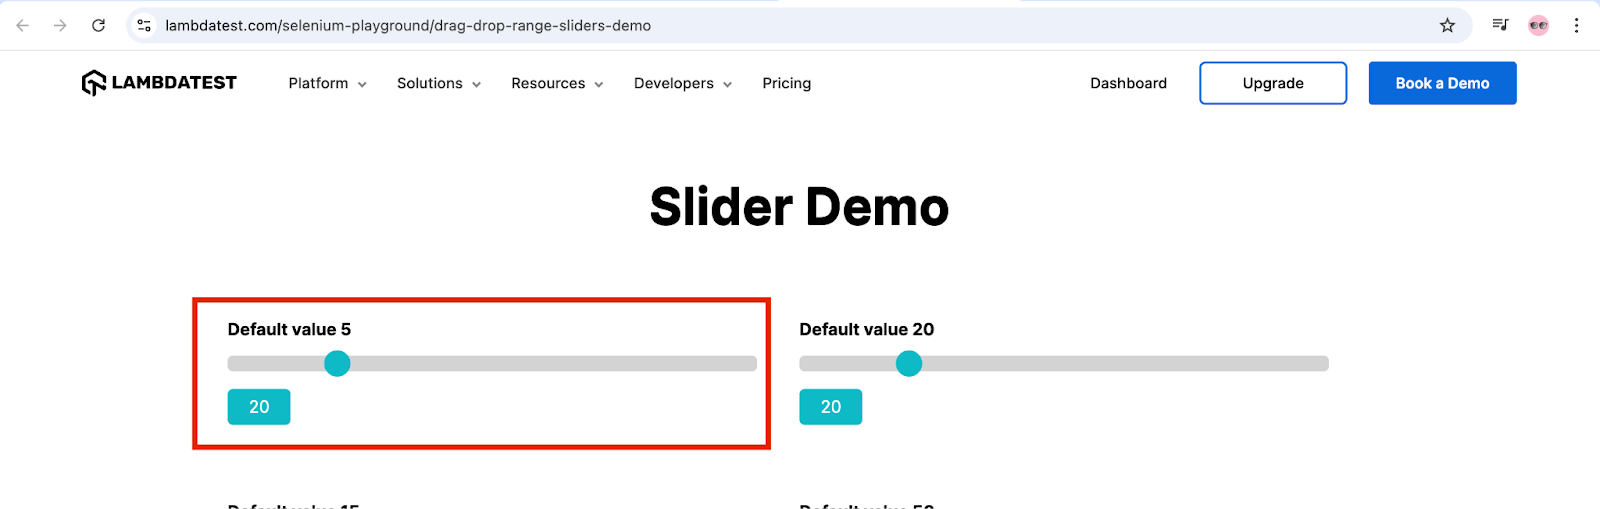
Here is a snapshot that indicates that the slider element has moved by an offset of (-145, 0). It is just before the release operation is performed, due to which the slider element is still in focus.
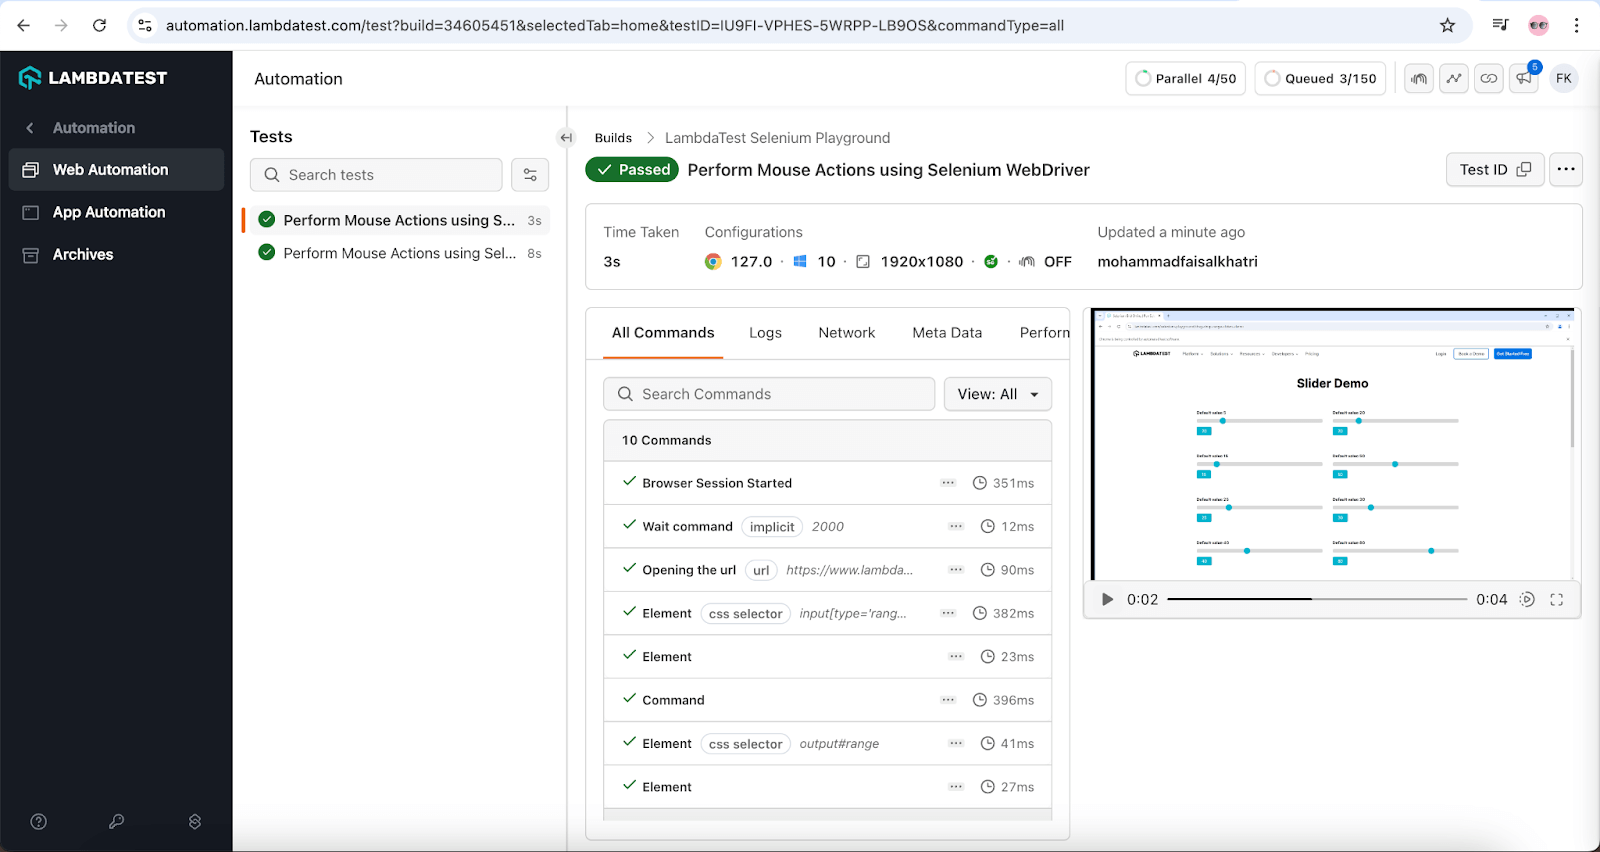
The test execution details with video and screenshots can be found on the TestMu AI Web Automation Dashboard page.
Drag and Drop Operation
There are scenarios in Selenium web automation where you will need to drag a WebElement and drop it at the target location.
Here the location where you need to drop the element is prominent in the UI so that the user has complete visibility about where the source element has to be dropped.
There are three methods that can be used to carry out a drag-and-drop operation using the Actions class in Selenium:
Let’s look at each of these approaches that demonstrate mouse actions in Selenium for the following test scenario:
- dragAndDrop() method
- clickAndHold() and moveToElement() methods
- dragAndDropBy() method
Test Scenario:
- Navigate to the Drag and Drop Demo page of the TestMu AI Selenium Playground website.
- Drag the Draggable 1 item and drop it to the Drop here box.
- Assert that the Dropped Items List shows the Draggable 1 under it.
dragAndDrop() Method
In this method, we will be using the dragAndDrop() method of the Actions class to drag and drop the WebElement. Let’s create a new testDragAndDrop() method in the existing test TestMouseActions class to implement the test scenario.
@Test
public void testDragDrop() {
   driver.get("https://www.testmuai.com/selenium-playground/drag-and-drop-demo/");

   WebElement draggable = driver.findElement(By.cssSelector("#todrag > span:nth-child(2)"));
   WebElement dropZone = driver.findElement(By.id("mydropzone"));

   Actions actions = new Actions(driver);
   actions.dragAndDrop(draggable,dropZone).build().perform();

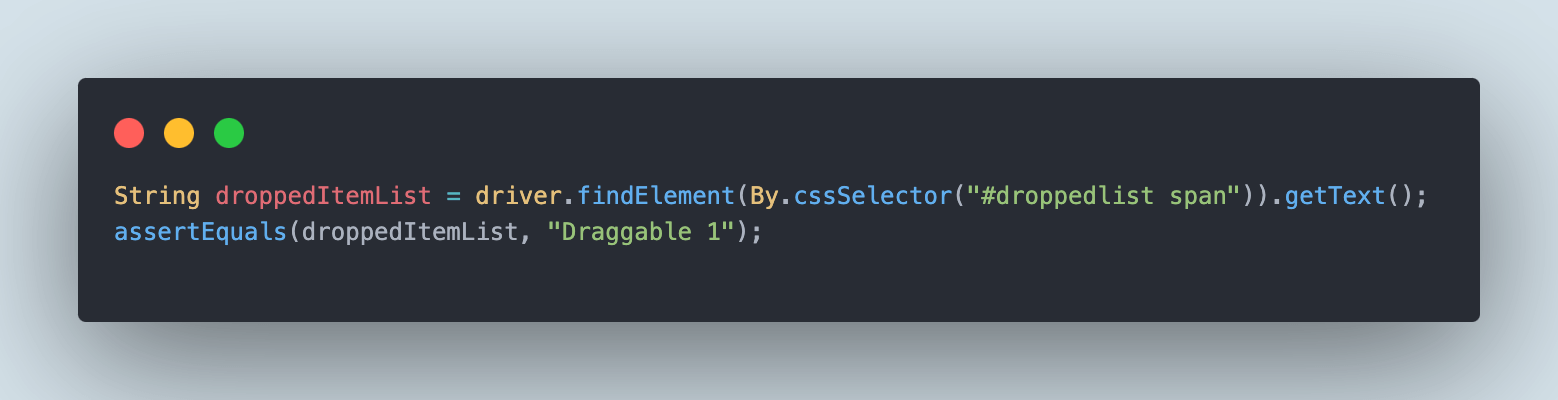
   String droppedItemList = driver.findElement(By.cssSelector("#droppedlist span")).getText();
   assertEquals(droppedItemList, "Draggable 1");
}
Code Walkthrough:
The draggable item will be located using the CSS Selector locator strategy #todrag > span:nth-child(2) as there are two draggable items on the screen. CSS Selectors make it easy to locate the WebElements using the nth-child selector.
Next, the drop zone is located using the ID locator strategy.
The dragAndDrop() method from the Actions class is used to perform the drag and drop action where we need to supply the draggable item as the source WebElement and drop zone as the target WebElement.
An assertion is finally performed to verify that the drag and drop actions were performed as required, where we check that the Dropped Item List has the value Draggable 1 in it.
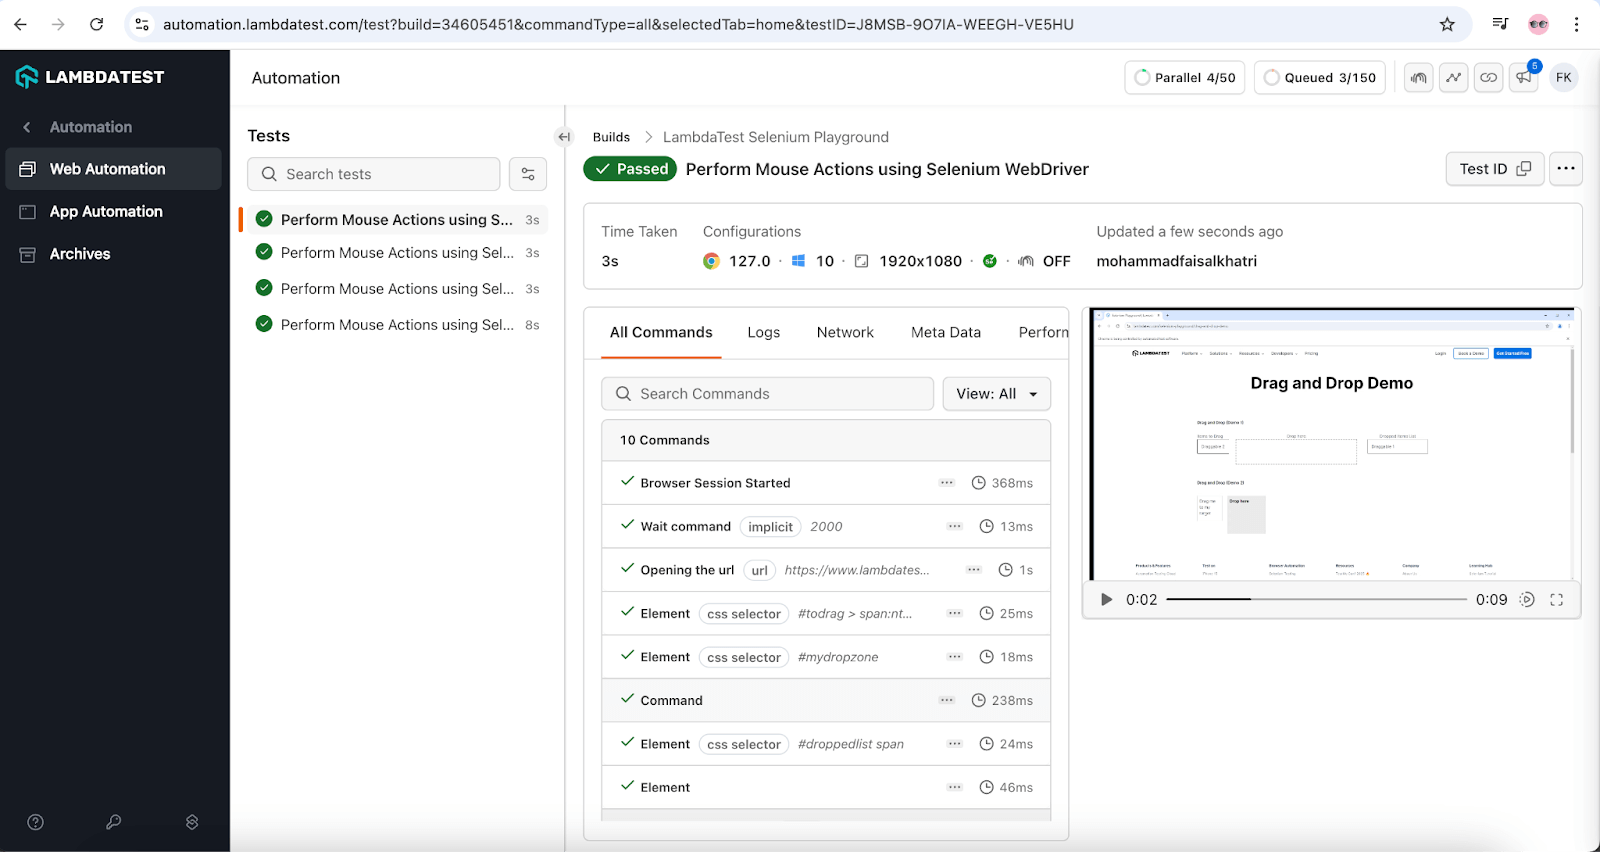
Test Execution:
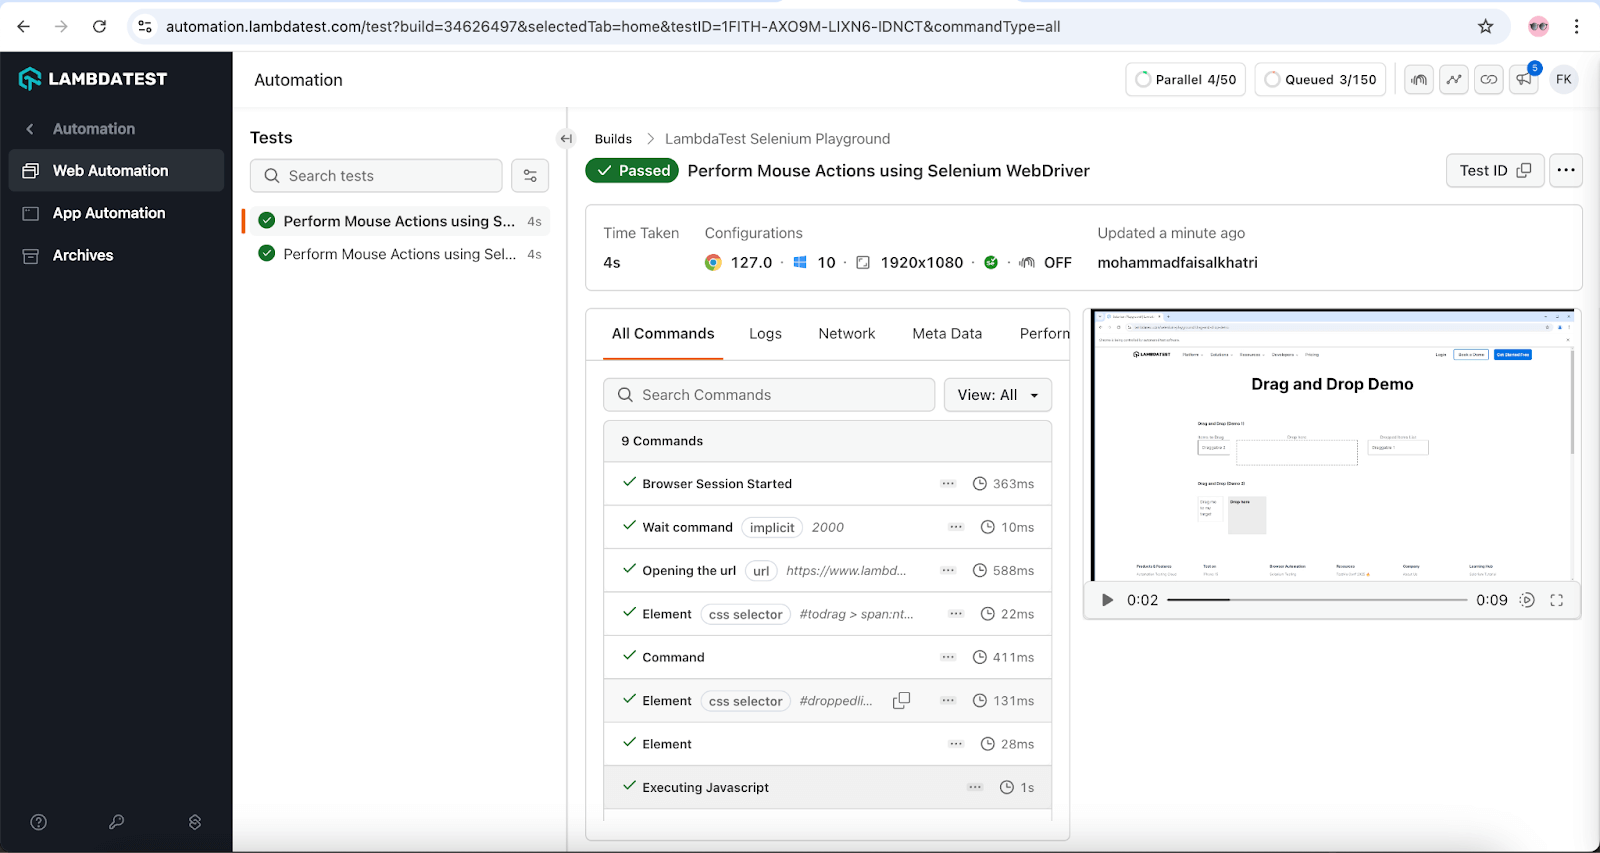
The following screenshot from TestMu AI Web Automation Dashboard shows the test execution details with a video of the test execution and different test steps.
clickAndHold() and moveToElement() Methods
Let’s create a new testDragDropApproachTwo() method for implementing this approach in the existing test TestMouseActions class.
@Test
public void testDragDropApproachTwo() {
   driver.get("https://www.testmuai.com/selenium-playground/drag-and-drop-demo/");

   WebElement draggable = driver.findElement(By.cssSelector("#todrag > span:nth-child(2)"));
   WebElement dropZone = driver.findElement(By.id("mydropzone"));

   Actions actions = new Actions(driver);
   actions.clickAndHold(draggable).moveToElement(dropZone).release().build().perform();

   String droppedItemList = driver.findElement(By.cssSelector("#droppedlist span")).getText();
   assertEquals(droppedItemList, "Draggable 1");

}
Code Walkthrough:
This script will navigate to the Drag and Drop Demo page and locate the draggable WebElement using the CSS Selector strategy. Next, it will locate the drop zone WebElement using the ID locator strategy.
The following lines of code will help in dragging and dropping of WebElements using clickAndHold() and moveToElement() methods.
Finally, it will perform the assertion to check that the Dropped Items List has the Droppable 1 WebElement in it.
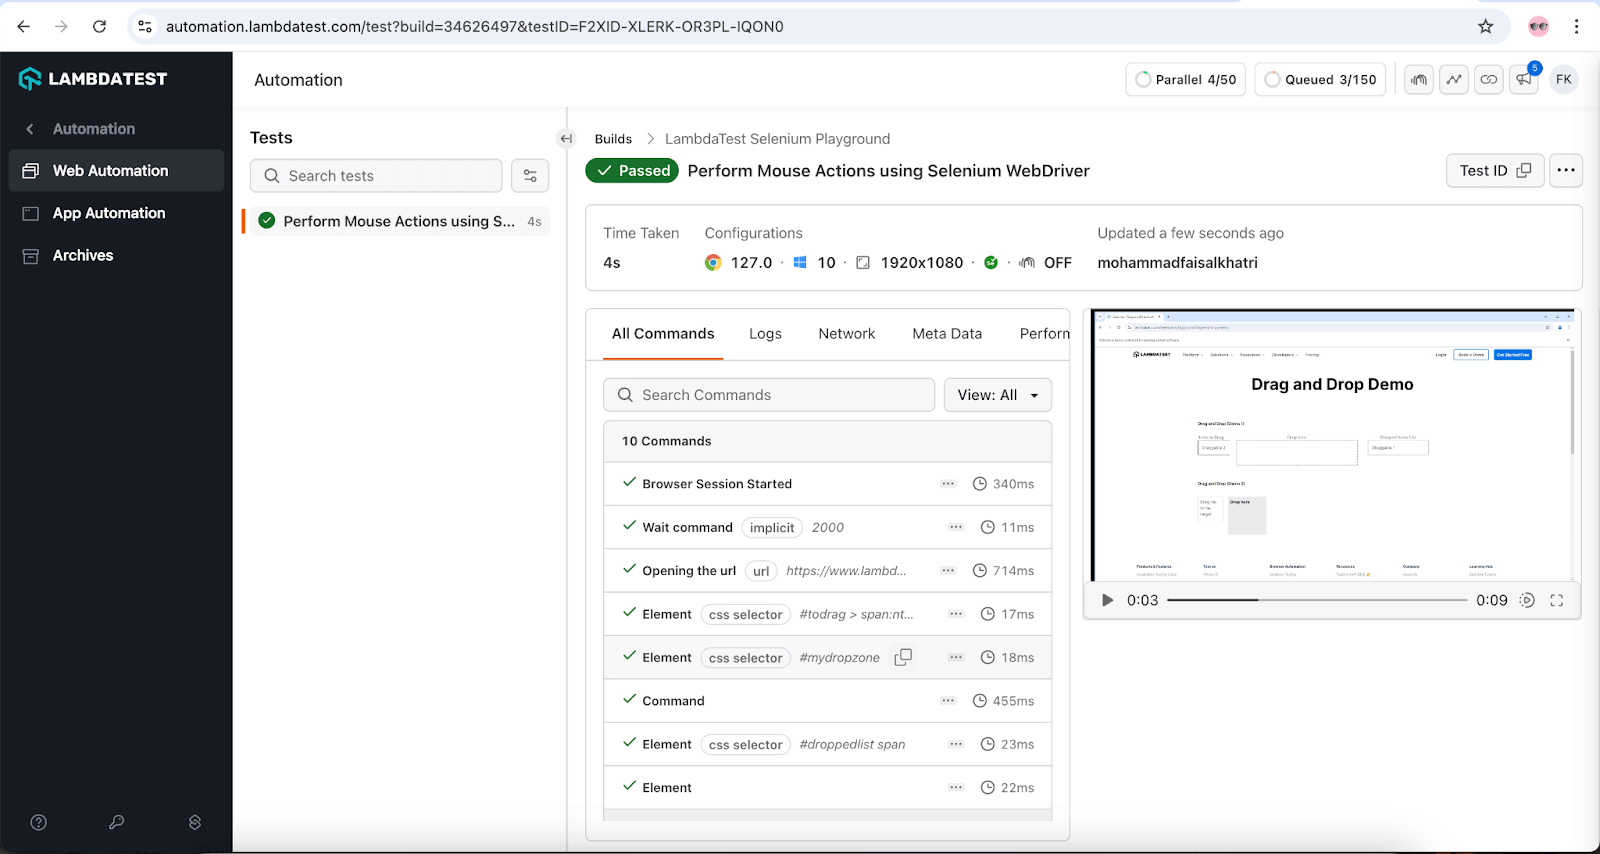
Test Execution:
The clickAndHold() and moveToElement() run, with steps and logs, is shown on the TestMu AI Web Automation Dashboard below.
dragAndDropBy() Method
Let’s create a new testDragDropApproachThree() method to implement the third approach and use the dragAndDropBy() method to implement the test scenario.
@Test
public void testDragDropApproachThree() {
   driver.get("https://www.testmuai.com/selenium-playground/drag-and-drop-demo/");

   WebElement draggable = driver.findElement(By.cssSelector("#todrag > span:nth-child(2)"));

   Actions actions = new Actions(driver);
   actions.dragAndDropBy(draggable, 477, 0).build().perform();

   String droppedItemList = driver.findElement(By.cssSelector("#droppedlist span")).getText();
   assertEquals(droppedItemList, "Draggable 1");

}
Code Walkthrough:
The script will navigate to the Drag and Drop Demo page, locating the draggable WebElement using the CSS Selector strategy. The drag and drop action will be performed using the dragAndDropBy() method of the Actions class.
This dragAndDropBy() method needs three parameters, i.e., source element, xOffset, and yOffset. The source element is draggable, which we located earlier. Now, to locate the X and Y offset, there is a quick tip that can be used.
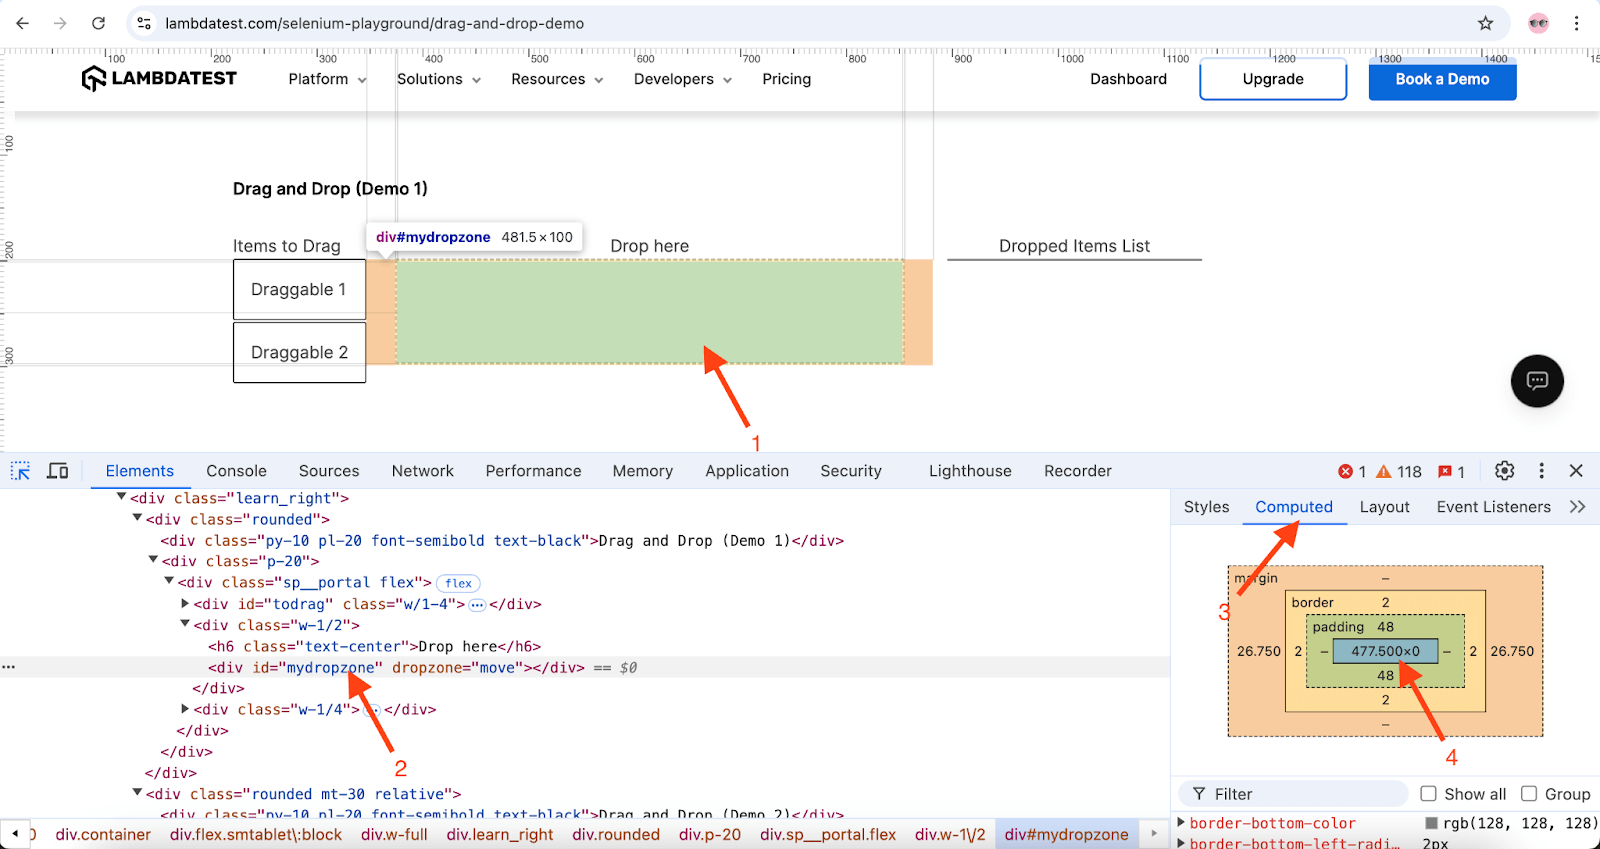
The X offset can be quickly located using the following steps:
- Locate the WebElement using the DevTools window in Chrome.
- On the right hand of the DevTools window, click on the Computed tab and check the center point of the WebElement. Currently, it shows 477.500 x 0.
We can use the X offset as 477 and Y offset as 0 for performing the drag and drop action. The following line of code will allow us to achieve the action we intend to perform.
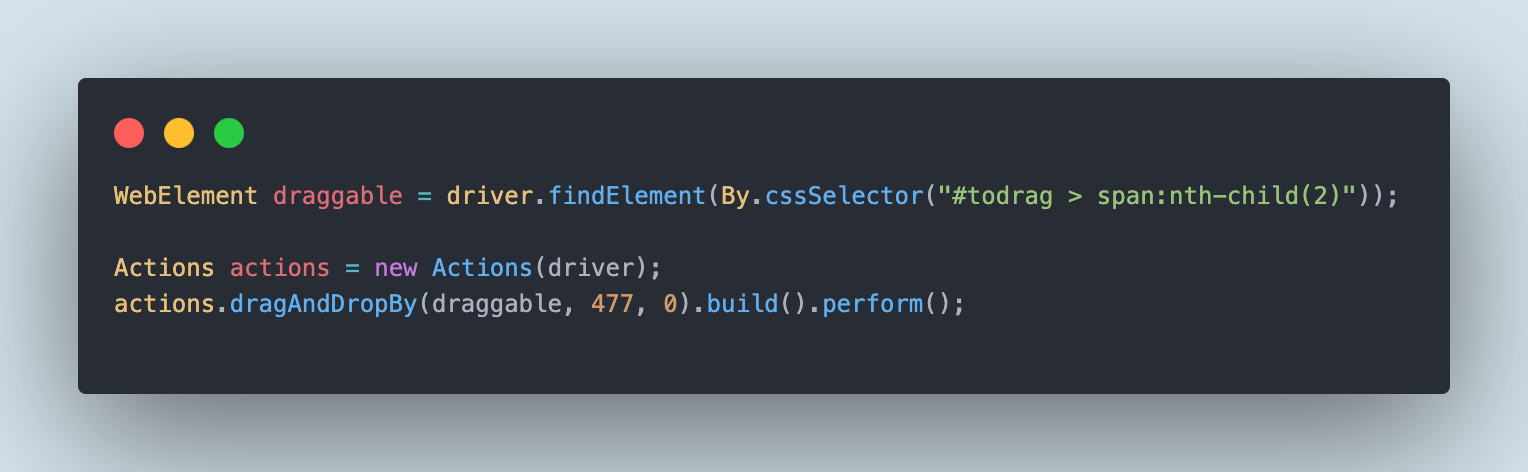
After the drag and drop action is complete, an assertion will be performed to check that the draggable item was moved to the correct drop zone.
Test Execution:
The following screenshots are of the test execution performed using IntelliJ IDE, showing that the drag-and-drop action was completed.
The test execution details can be found on the TestMu AI Web Automation Dashboard with video and other insights like logs, screenshots, test steps, etc.
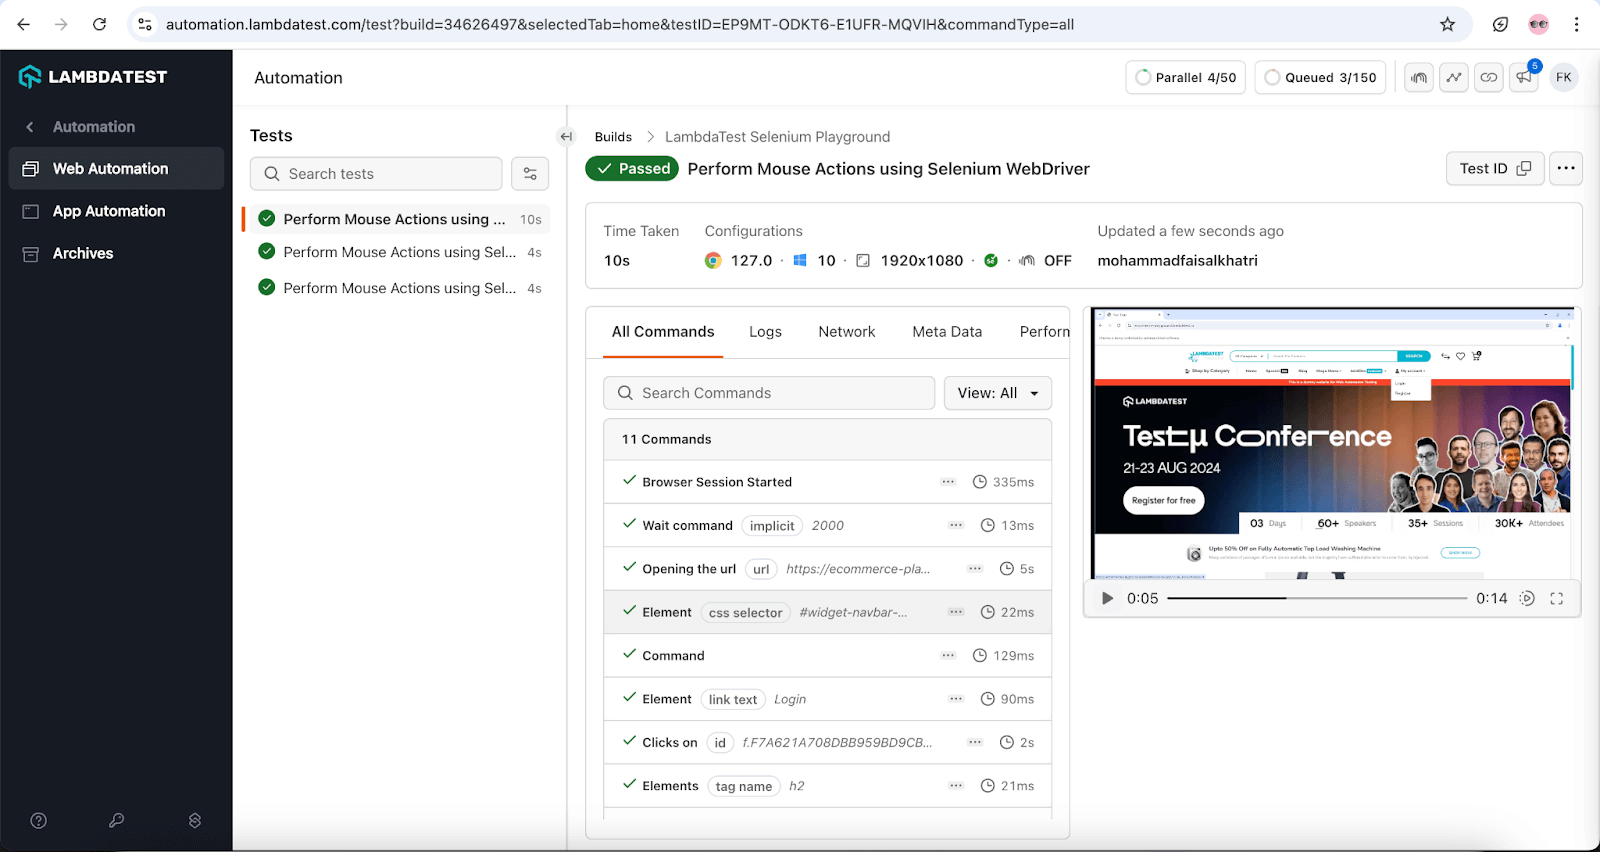
Click a Link in Hover Menu
Here are the steps to automate clicking on a link that is inside the hover menu:
- Use the moveToElement() method to move the pointer to the WebElement containing the link in the hover menu.
- Trigger perform() method to execute the prepared action, making the hover menu visible.
- Locate the hover menu using the findElement() method.
- Use moveToElement() method again to move the pointer to the body of the hover menu.
- Locate the required link in the hover menu using a suitable locator (e.g., linkText).
- Wait for a certain duration using ExpectedConditions.presenceOfElementLocated, then perform a click() method on the located link, ensuring it is present in the DOM before proceeding.
You can also check out this blog to learn about mouse hover in Selenium.
Test Scenario:
- Navigate to the TestMu AI eCommerce Playground website.
- Hover the mouse over the ‘My account” menu on the home page and click on Login.
- Assert that the Login page is loaded successfully by checking the Page header text - Returning Customer.
Implementation:
Let’s create a new testMouseHover() method in the TestMouseActions class for implementing this test scenario.
@Test
public void testMouseHover() {
   driver.get("https://ecommerce-playground.lambdatest.io/");
   WebElement myAccountLink = driver.findElement(By.cssSelector("#widget-navbar-217834 > ul > li:nth-child(6) > a"));
   Actions actions = new Actions(driver);
   actions.moveToElement(myAccountLink).build().perform();

   WebElement loginLink = driver.findElement(By.linkText("Login"));
   loginLink.click();

   List<WebElement> pageHeaders = driver.findElements(By.tagName("h2"));
   String loginHeader = pageHeaders.get(1).getText();
   assertEquals(loginHeader, "Returning Customer");

}
Code Walkthrough:
The script navigates to the TestMu AI eCommerce Playground website and locates the My account link using the CSS Selector strategy. The mouse hover action will be performed using the moveToElement() method of the Actions class in Selenium WebDriver.
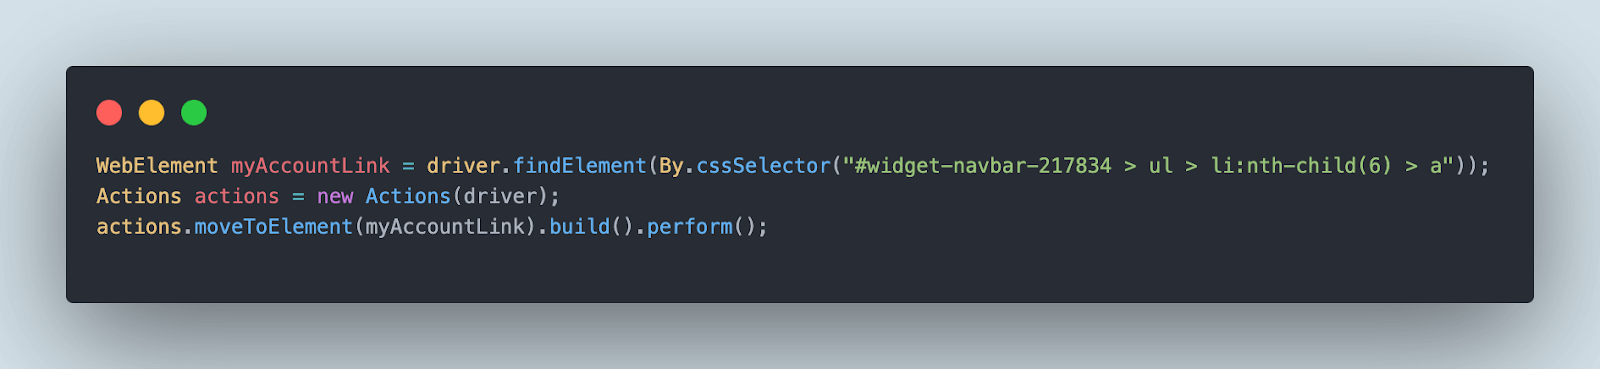
The moveToElement() method takes the target element as the parameter, which in our case is the My account link.
When the My account link is hovered over by mouse, the menu should open, and next the Login link will be located using the linkText locator strategy of Selenium WebDriver.
An assertion needs to be performed next to check that the Login page was navigated successfully after clicking on the Login link.
The page header text on the Login page is located using the tagName locator strategy. As there are multiple h2 tags on this page, we will be using the findElements() method of locator that will return a list of WebElements.
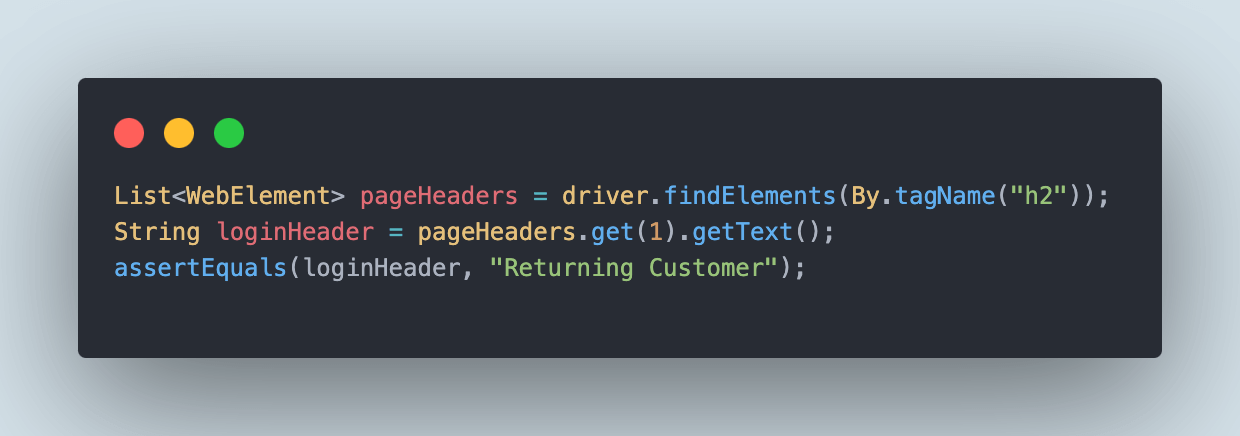
Finally, an assertion is done to check that the page header text equals the text Returning Customer.
Test Execution:
The mouse hover test run, including video and console logs, appears on the TestMu AI Web Automation Dashboard below.
Combining Mouse and Keyboard Actions
The Actions class also handles keyboard actions, so you can chain mouse and keyboard steps in one sequence. The two keyboard building blocks are keyDown() and keyUp() for modifier keys like Control or Shift, plus sendKeys() for typing.
A common need is holding a modifier key while clicking, for example Control-click to select multiple items, or typing into a field right after moving to it.
@Test
public void testMouseAndKeyboardActions() {
   driver.get("https://ecommerce-playground.lambdatest.io/");
   WebElement searchBox = driver.findElement(By.name("search"));

   Actions actions = new Actions(driver);
   actions.moveToElement(searchBox)
          .click()
          .keyDown(Keys.SHIFT)
          .sendKeys("iphone")
          .keyUp(Keys.SHIFT)
          .build().perform();
}
Code Walkthrough:
The chain moves the pointer to the search box and clicks it, then presses and holds Shift with keyDown(Keys.SHIFT). While Shift is held, sendKeys("iphone") types the text in uppercase, and keyUp(Keys.SHIFT) releases the key.
Always release every key you press with a matching keyUp(), since a held modifier leaks into the next action. The Keys enum is imported from org.openqa.selenium.Keys.
How Do You Perform Mouse Actions in Selenium Python?
The examples above use Java, but mouse actions work the same way in Selenium Python. Python uses the ActionChains class from selenium.webdriver.common.action_chains, which exposes the same set of operations: click(), double_click(), context_click(), move_to_element(), drag_and_drop(), and perform().
Here is the double-click and hover example rewritten in Python:
from selenium.webdriver.common.action_chains import ActionChains

actions = ActionChains(driver)

# Hover over an element to reveal a menu
actions.move_to_element(my_account_link).perform()

# Double-click an element
actions.double_click(click_here_text).perform()
Under the hood, Selenium 4 routes both the Java and Python APIs through the same W3C Actions protocol (the selenium.webdriver.common.actions package, including pointer input), so the behavior you verify in one language carries over to the other.
To run the Python version across the same browser matrix, point your Remote WebDriver at the TestMu AI cloud grid using the capabilities from the Automation Capabilities Generator shown earlier.
Why Are Your Mouse Actions Not Working in Selenium?
When a mouse action silently does nothing, the cause is usually one of a handful of recurring mistakes. Check these first before debugging deeper.
- You forgot perform(): chaining methods only builds the action. Without a final perform() (or build().perform()), nothing executes. This is the most common reason mouse actions appear to do nothing.
- The element is not in view: the Actions class acts on the element's on-screen position, so an off-screen element can fail. Call scrollToElement() first to bring it into the viewport.
- Stale element reference: if the DOM re-renders between locating the element and acting on it, the reference goes stale. Re-locate the element immediately before the action.
- Hover does not fire in headless mode: CSS hover menus often need a real rendering context. Run hover tests on actual browsers rather than headless when the menu fails to appear.
- A modifier key is still held: a keyDown() without a matching keyUp() leaks into later actions. Always release modifier keys in the same chain.
When a failure is environment-specific, the video, console logs, and step-by-step screenshots on the TestMu AI Web Automation Dashboard make it easy to see exactly where the pointer landed and which action ran.
Wrapping Up
Start by copying the Actions object setup into a single test, then add one interaction at a time: a click(), a doubleClick(), a contextClick(), and finally a dragAndDrop().
Remember the build-then-perform rule, where the Actions class composes the sequence and the Action interface runs it through perform().
Once your scenarios pass locally, run them across real browsers and operating systems on TestMu AI's Selenium automation cloud to catch interaction differences before they reach users, with video, logs, and screenshots captured on every run.
Grab the working code from the GitHub demo repository linked above and the setup steps from the cloud-grid documentation, then point your suite at the grid and watch the runs in the Web Automation Dashboard.
Author

Faisal Khatri
Blogs: 40


Mohammad Faisal Khatri is a Software Testing Professional with 17+ years of experience in manual exploratory and automation testing. He currently works as a Senior Testing Specialist at Kafaat Business Solutions and has previously worked with Thoughtworks, HCL Technologies, and CrossAsyst Infotech. He is skilled in tools like Selenium WebDriver, Rest Assured, SuperTest, Playwright, WebDriverIO, Appium, Postman, Docker, Jenkins, GitHub Actions, TestNG, and MySQL. Faisal has led QA teams of 5+ members, managing delivery across onshore and offshore models. He holds a B.Com degree and is ISTQB Foundation Level certified. A passionate content creator, he has authored 100+ blogs on Medium, 40+ on TestMu AI, and built a community of 25K+ followers on LinkedIn. His GitHub repository “Awesome Learning” has earned 1K+ stars.
Reviewer

Sri Harsha
Reviewer
Sri Harsha is Engineering Manager of the Open Source Program Office at TestMu AI (formerly LambdaTest), where he leads open-source engineering behind the Selenium and Appium automation grid and builds agentic AI systems for quality engineering. He is a member of the Selenium Technical Leadership Committee and a committer to WebdriverIO and Appium, and was recognized with the LambdaTest Delta Award 2023 for Best Contributor in open-source testing. He brings over 10 years of experience in software testing and automation, with earlier roles at EPAM Systems and ZenQ. Sri Harsha holds a B.Tech in Computer Science from Jawaharlal Nehru Technological University.


Mouse Actions in Selenium FAQs
Did you find this page helpful?
More Related Blogs
TestMu AI forEnterprise
Get access to solutions built on Enterprise
grade security, privacy, & compliance
- Advanced access controls
- Advanced data retention rules
- Advanced Local Testing
- Premium Support options
- Early access to beta features
- Private Slack Channel
- Unlimited Manual Accessibility DevTools Tests