Selenium With Java
Run your Java Selenium tests on the TestMu AI cloud grid. This guide covers setup, running a sample test, configuring capabilities, and testing locally hosted pages.
Prerequisites
Complete these steps before running Java Selenium tests.
- Create a TestMu AI account if you don't have one.
- Get your Username and Access Key from the TestMu AI Dashboard.
- Install the Java Development Kit (JDK) 11 or later.
- Download the latest Selenium Java Client and extract the ZIP file to your project directory.
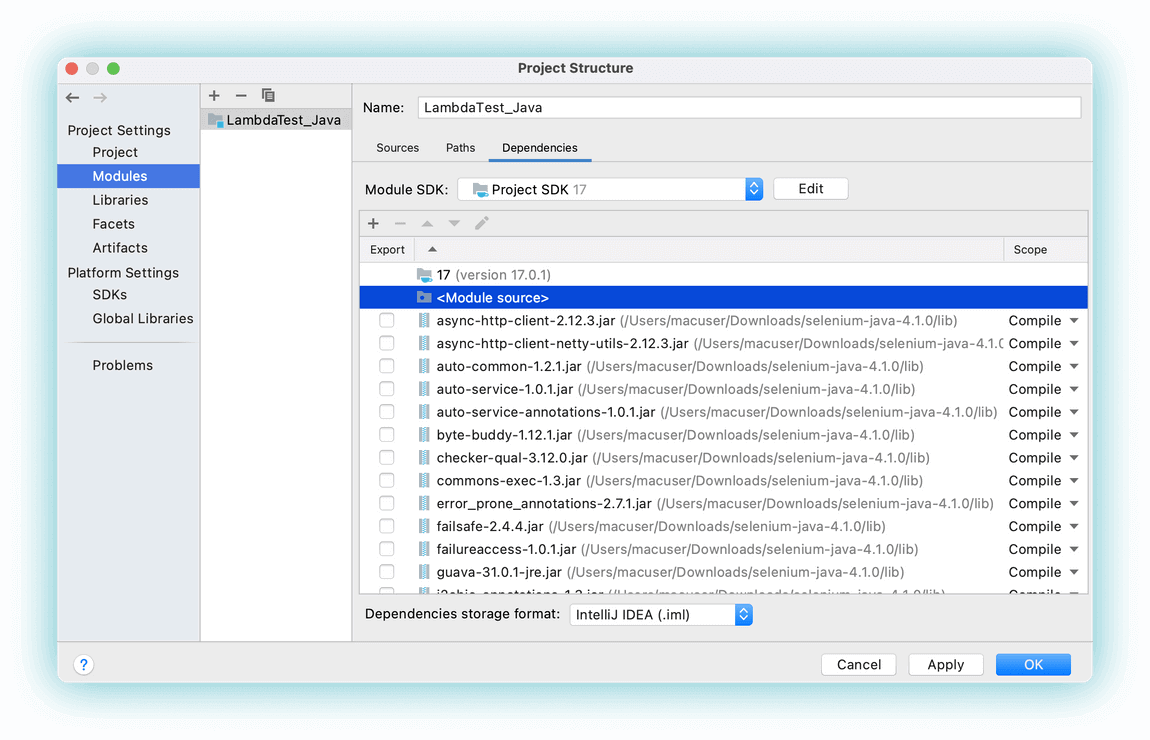
- Add the Selenium JARs to your project dependencies in your IDE.
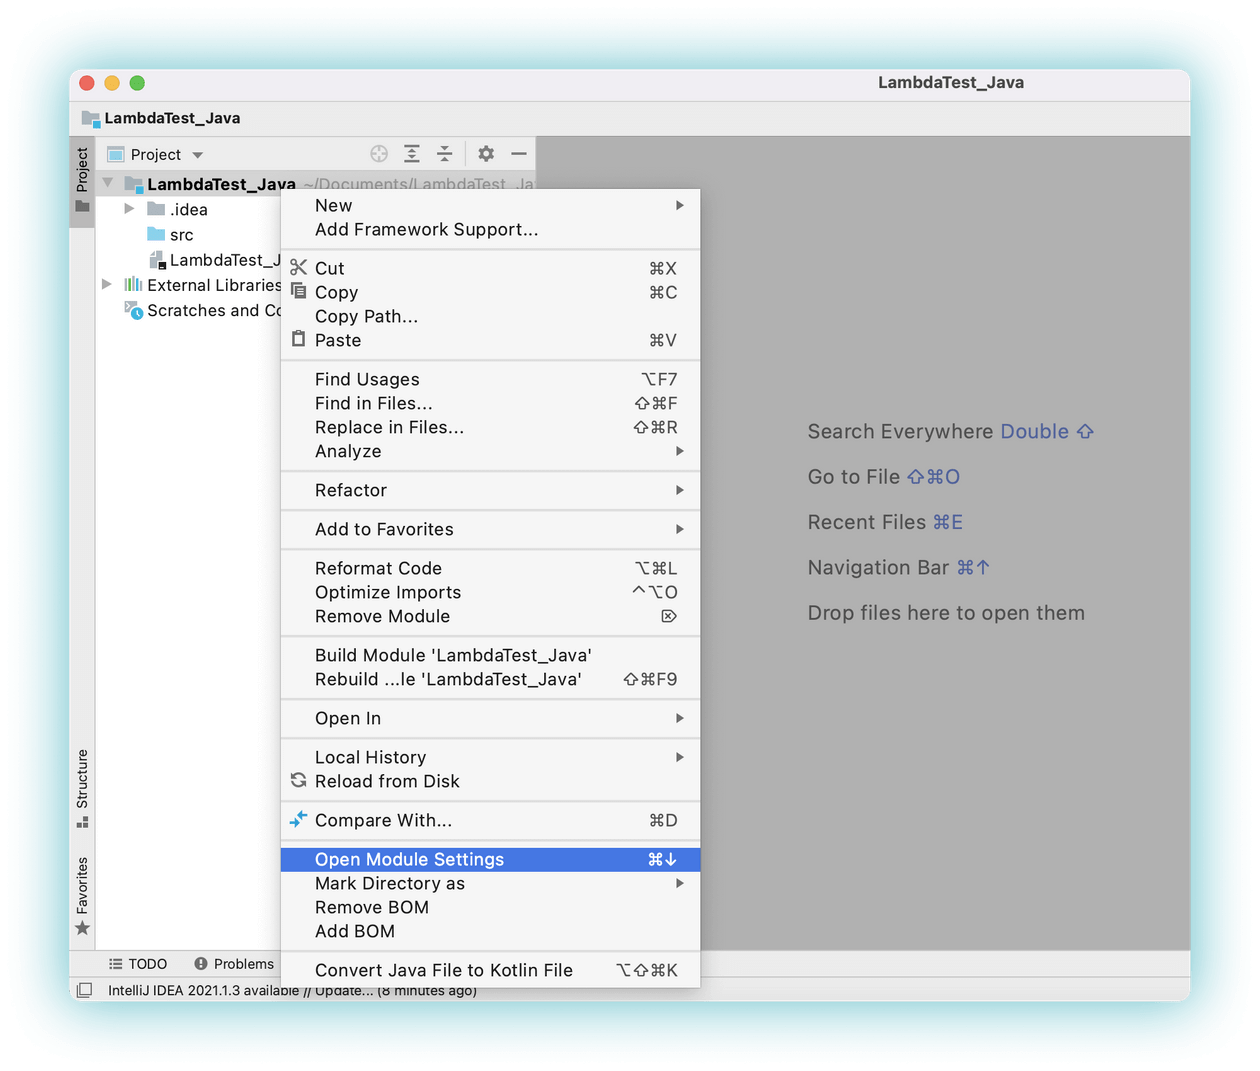
Navigate to Dependencies in module settings, click +, and add the downloaded Selenium JARs.
Step 1: Create the Test File
Create a new Java file and add the following sample test. It opens a to-do app, marks two items as done, adds a new item, and verifies it.
import java.net.MalformedURLException;
import java.net.URL;
import org.openqa.selenium.By;
import org.openqa.selenium.JavascriptExecutor;
import org.openqa.selenium.chrome.ChromeOptions;
import org.openqa.selenium.remote.RemoteWebDriver;
import java.util.HashMap;
public class JavaTodo {
    String username = "YOUR_LAMBDATEST_USERNAME";
    String accesskey = "YOUR_LAMBDATEST_ACCESS_KEY";
    static RemoteWebDriver driver = null;
    String gridURL = "@hub.lambdatest.com/wd/hub";
    boolean status = false;
    public static void main(String[] args) {
        new JavaTodo().test();
    }
    public void test() {
        setUp();
        try {
            driver.get("https://lambdatest.github.io/sample-todo-app/");

            driver.findElement(By.name("li1")).click();
            driver.findElement(By.name("li2")).click();

            driver.findElement(By.id("sampletodotext")).sendKeys("Yey, Let's add it to list");
            driver.findElement(By.id("addbutton")).click();

            String enteredText = driver.findElementByXPath("/html/body/div/div/div/ul/li[6]/span").getText();
            if (enteredText.equals("Yey, Let's add it to list")) {
                status = true;
            }
        } catch (Exception e) {
            System.out.println(e.getMessage());
        } finally {
            tearDown();
        }
    }
    private void setUp() {
        ChromeOptions browserOptions = new ChromeOptions();
        browserOptions.setPlatformName("Windows 10");
        browserOptions.setBrowserVersion("latest");

        HashMap<String, Object> ltOptions = new HashMap<String, Object>();
        ltOptions.put("build", "LambdaTestSampleApp");
        ltOptions.put("name", "LambdaTestJavaSample");
        ltOptions.put("w3c", true);
        browserOptions.setCapability("LT:Options", ltOptions);
        try {
            driver = new RemoteWebDriver(new URL("https://" + username + ":" + accesskey + gridURL), browserOptions);
        } catch (MalformedURLException e) {
            System.out.println("Invalid grid URL");
        } catch (Exception e) {
            System.out.println(e.getMessage());
        }
    }
    private void tearDown() {
        if (driver != null) {
            ((JavascriptExecutor) driver).executeScript("lambda-status=" + status);
            driver.quit();
        }
    }
}
Step 2: Set Your Credentials
Replace the placeholder values with your actual credentials from the TestMu AI Dashboard.
String username= "undefined";
String accesskey= "undefined";
Step 3: Configure Capabilities
Define the browser, version, and OS for your test run.
ChromeOptions browserOptions = new ChromeOptions();
        browserOptions.setPlatformName("Windows 10");
        browserOptions.setBrowserVersion("latest");

        HashMap<String, Object> ltOptions = new HashMap<String, Object>();
        ltOptions.put("build", "LambdaTestSampleApp");
        ltOptions.put("name", "LambdaTestJavaSample");
        ltOptions.put("w3c", true);
        browserOptions.setCapability("LT:Options", ltOptions);
Use the Capabilities Generator to auto-generate capabilities for any browser, version, and OS combination.
Step 4: Run the Test
Execute your Java test from your IDE or terminal.
From your IDE: Build and run the Java file directly.
From the terminal:
cd to/file/location
javac -classpath ".:/path/to/selenium/jarfile:" JavaTodo.java
java -classpath ".:/path/to/selenium/jarfile:" JavaTodo
Your test results appear on the TestMu AI Automation Dashboard.
