

Power Your Software Testing with AI Agents and Cloud
The Native AI-Agentic Cloud Platform to Supercharge Quality Engineering. Test Intelligently and Ship Faster.


- TestMu AI (Formerly LambdaTest)
- /
- Learning Hub
- /
- What Is Xcode? How to Use It to Build iOS Apps
What Is Xcode? How to Use It to Build iOS Apps
Xcode is an IDE developed by Apple for developing your applications for macOS, iOS, iPadOS, watchOS, tvOS, and visionOS with powerful, integrated tools.
Last Updated on:
On This Page
- What Is Xcode?
- What Is Xcode Used for?
- Key Features of Xcode
- What's New in Xcode 16
- Xcode vs. VS Code
- How to Install Xcode on Mac?
- How to Install Xcode With Command Line Tools?
- How to Install Xcode on Windows?
- How to Update Xcode?
- Update Without App Store
- Create & Export .ipa File
- Productivity Tips and Tricks for Xcode
- How to Uninstall Xcode?
Xcode is an integrated development environment for building apps across Apple devices like Macs, iPhones, iPads, Apple Watches, and Apple TVs. Recent releases, from Xcode 16 to the year-based Xcode 26, add on-device predictive code completion and Swift Assist, so you have everything you need to design, code, test, and optimize your apps for each Apple platform.
AI Overview
To build native iOS apps, use Apple's Xcode IDE to write, debug, and package your application, then verify its performance on physical devices using TestMu AI. Xcode provides the essential compilers and simulators, while TestMu AI ensures your app works flawlessly on genuine Apple hardware.
- Native Apple development: Xcode is Apple's integrated development environment that allows developers to design, code, test, and package native applications for iOS, macOS, watchOS, tvOS, and visionOS.
- Real-device testing: TestMu AI provides real-time testing on genuine Apple hardware to catch touch behaviors, sensor inputs, and OS-specific performance issues that virtual simulators miss.
- Cross-platform editing: VS Code is a lightweight, cross-platform code editor popular for web development, though it requires the native Xcode toolchain underneath to compile and sign iOS builds.
- Managing multiple versions: xcodes is an open-source command-line version manager that enables developers to list, download, and switch between multiple Xcode installations on a single Mac.
- Scripting updates: mas-cli is a command-line interface for the Mac App Store that allows developers to automate and script Xcode updates within continuous integration environments.
What Is Xcode?
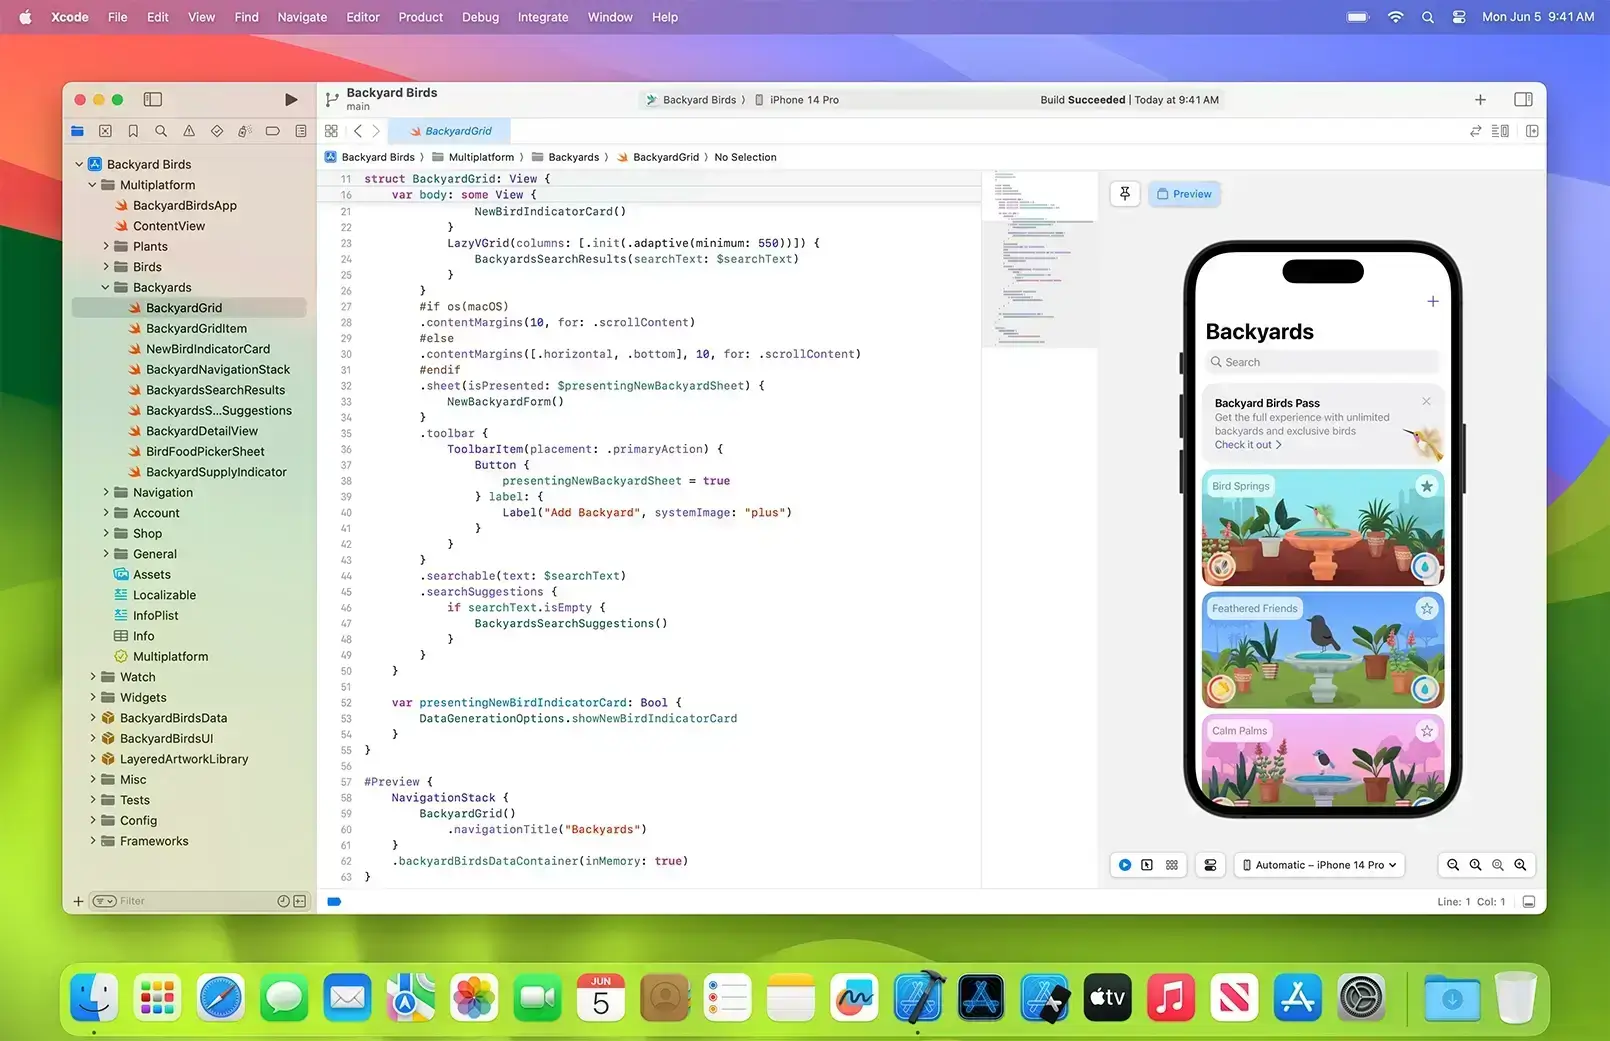
Xcode is an IDE developed by Apple for building apps across iOS, macOS, watchOS, tvOS, and visionOS. It simplifies your workflow by helping you move from writing code to performing iOS app testing and then releasing your app.
With features like a smart code editor that uses machine learning for code suggestions, a real-time preview for live UI updates, and an integrated debugger with conditional breakpoints, Xcode has everything you need.
It includes tools for code editing, UI design, version control, simulation, and profiling, all tailored for Swift, Objective-C, and other Apple languages.
What Is Xcode Used for?
Xcode is primarily used for:
- Developing Applications: Create apps for iPhone, iPad, Mac, Apple Watch, and Apple TV.
- Building User Interfaces: Use Interface Builder and SwiftUI to design app interfaces visually or programmatically.
- Writing and Editing Code: Support for Swift, Objective-C, C++, and other languages with features like syntax highlighting and code completion.
- Version Control: Manage source code with integrated Git support.
- Profiling and Performance Analysis: Analyze app performance using tools like Instruments.
- Testing and Debugging: Run unit tests, debug code, and use iOS simulators to test apps.
- Continuous Integration and Delivery: Automate builds, tests, and deployments with Xcode Cloud.
Key Features of Xcode
Let's look at some of the key features of Xcode:
- Integrated IDE and Code Editor: Xcode comes with a code editor with syntax highlighting, refactoring tools, and machine-learning-powered code completion for Swift and other Apple frameworks. It also includes Quick Help tooltips and jump-to-definition for faster development.
- Interface Builder and SwiftUI Previews: It includes Interface Builder for storyboard/XIB editing and supports SwiftUI with live previews, allowing you to design UI elements and connect them to code for real-time rendering on simulated devices.
- Simulators for All Apple Devices: Xcode offers simulators for iOS, iPadOS, watchOS, tvOS, and visionOS, enabling you to test apps on virtual devices without needing physical hardware.
- Debugging Tools: The LLDB debugger lets you set breakpoints, step through code, inspect variables, and check memory usage, helping you find and fix issues in your app.
- Performance and Profiling (Instruments): Instruments provides performance graphs for CPU, GPU, memory, and I/O, along with tools to trace app activity and optimize performance.
- Built-in Testing Tools/Frameworks: Xcode integrates iOS testing tools like XCTest and XCUITest for writing unit and UI tests, enabling you to test your code and measure its performance within the IDE.
- Version Control (Git) Integration: It includes Git for source control, allowing you to create repositories, commit changes, and manage code versions without leaving the IDE.
- Playgrounds and REPL: Xcode offers Playgrounds for interactive coding, where you can write and test Swift code and see results immediately, useful for learning or prototyping.
- SwiftUI Canvas and Previews: SwiftUI support in Xcode includes a live canvas that updates instantly, allowing you to view and interact with your app's UI across different devices or themes.
- Continuous Integration (Xcode Cloud): Xcode Cloud automates cloud-based builds, testing, deployments, and feedback collection, streamlining development and team collaboration.
What's New in Xcode 16: AI and Predictive Coding
Xcode 16 marked Apple's shift toward on-device AI inside the IDE, and later releases built on it. From version 26 onward, Apple aligned Xcode's version number with its year-based OS naming, so "Xcode 26" is the release that ships alongside the corresponding iOS and macOS versions rather than a jump of ten numbers.
- Predictive Code Completion: an on-device machine learning model trained for Swift and Apple SDKs suggests whole lines and function bodies as you type. Because the model runs locally, your code never leaves the machine.
- Swift Assist: a coding assistant that answers questions and generates Swift code from natural-language prompts, integrated directly into the editor so you stay in context.
- Faster builds and a redesigned debugging experience: improvements to the build system and the debugger surface issues sooner and cut iteration time.
These features assist authoring, but they do not remove the need to test on real hardware. On-device predictions and generated code still have to be verified against actual iOS devices before release.
Xcode vs. VS Code: How Do They Compare?
Xcode and Visual Studio Code (VS Code) solve different problems. Xcode is Apple's native, platform-specific IDE and is mandatory for compiling native iOS and macOS binaries and submitting to the App Store. VS Code is a lightweight, cross-platform code editor that runs on macOS, Windows, and Linux and is popular for web and cross-platform work, but it cannot produce a signed iOS build on its own.
| Aspect | Xcode | VS Code |
|---|---|---|
| OS support | macOS only | macOS, Windows, Linux |
| Primary languages | Swift, Objective-C, C, C++ | Language-agnostic via extensions (JavaScript, Python, and more) |
| Build native iOS/macOS apps | Yes, including signing and App Store submission | No native compiler; needs Xcode toolchain underneath |
| UI design tools | Interface Builder and SwiftUI previews built in | None built in |
| Best for | Native Apple app development | Web and cross-platform development, quick editing |
Neither is strictly "better." If you ship native iOS or macOS apps, Xcode is required. If you work across web or multiple platforms, VS Code is lighter and more flexible, and many developers use both.

Note: Test your Xcode-built apps on real iOS devices, not just the simulator. Try TestMu AI Now!
How to Install Xcode on Mac?
To install Xcode for Mac, you can follow these steps:
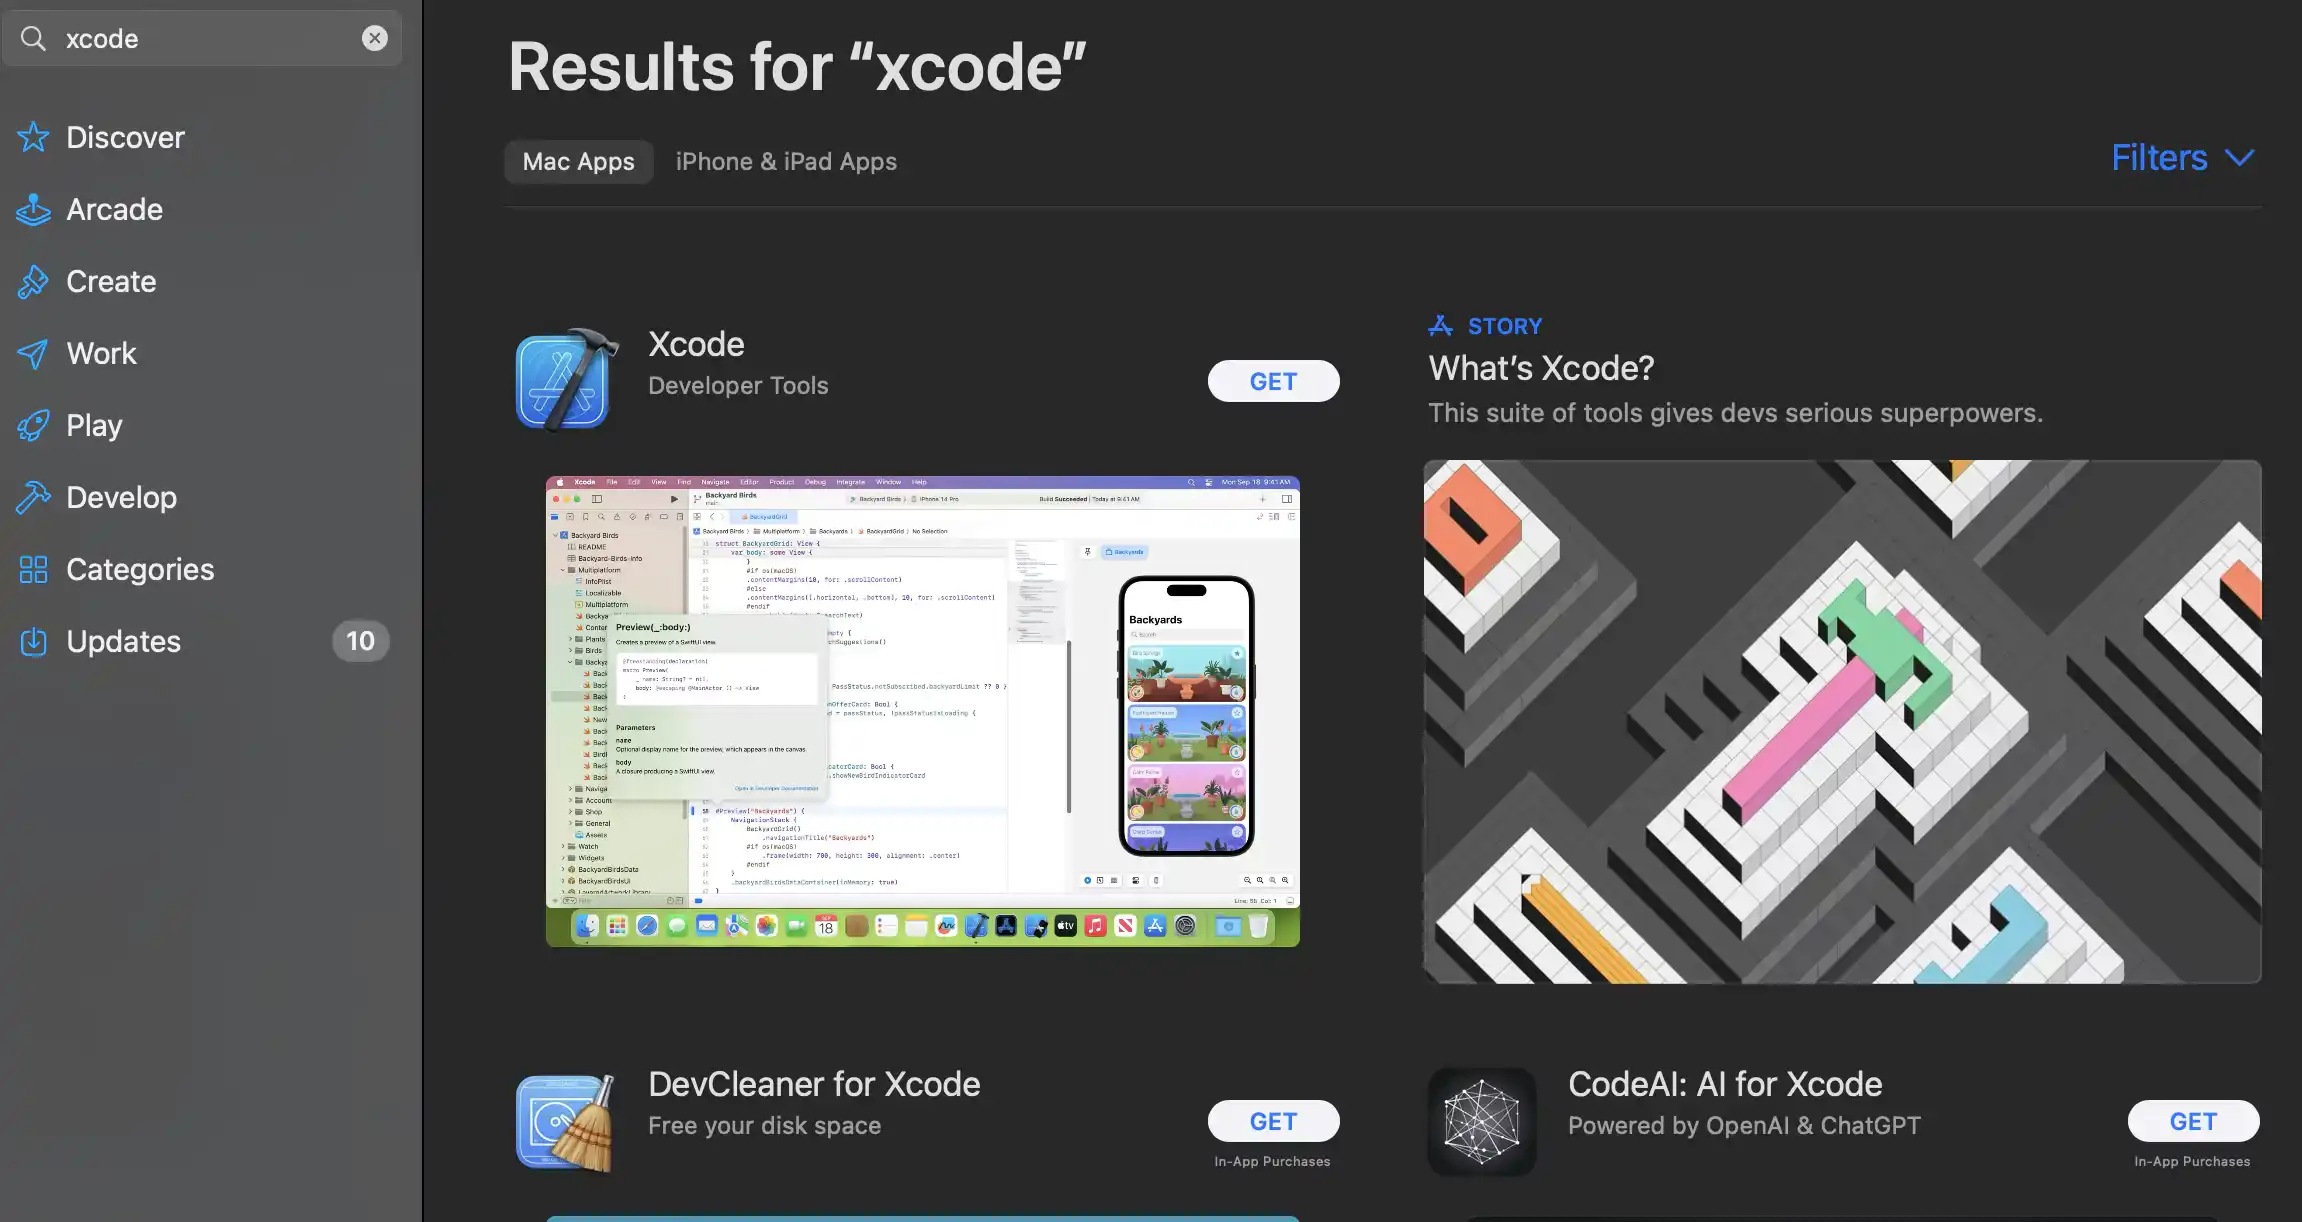
- Go to the Mac App Store. You can find it in your Applications folder or by searching for "App Store" in Spotlight (Cmd + Space, then type "App Store").
- In the Mac App Store, use the search bar in the top-right corner to search for "Xcode."
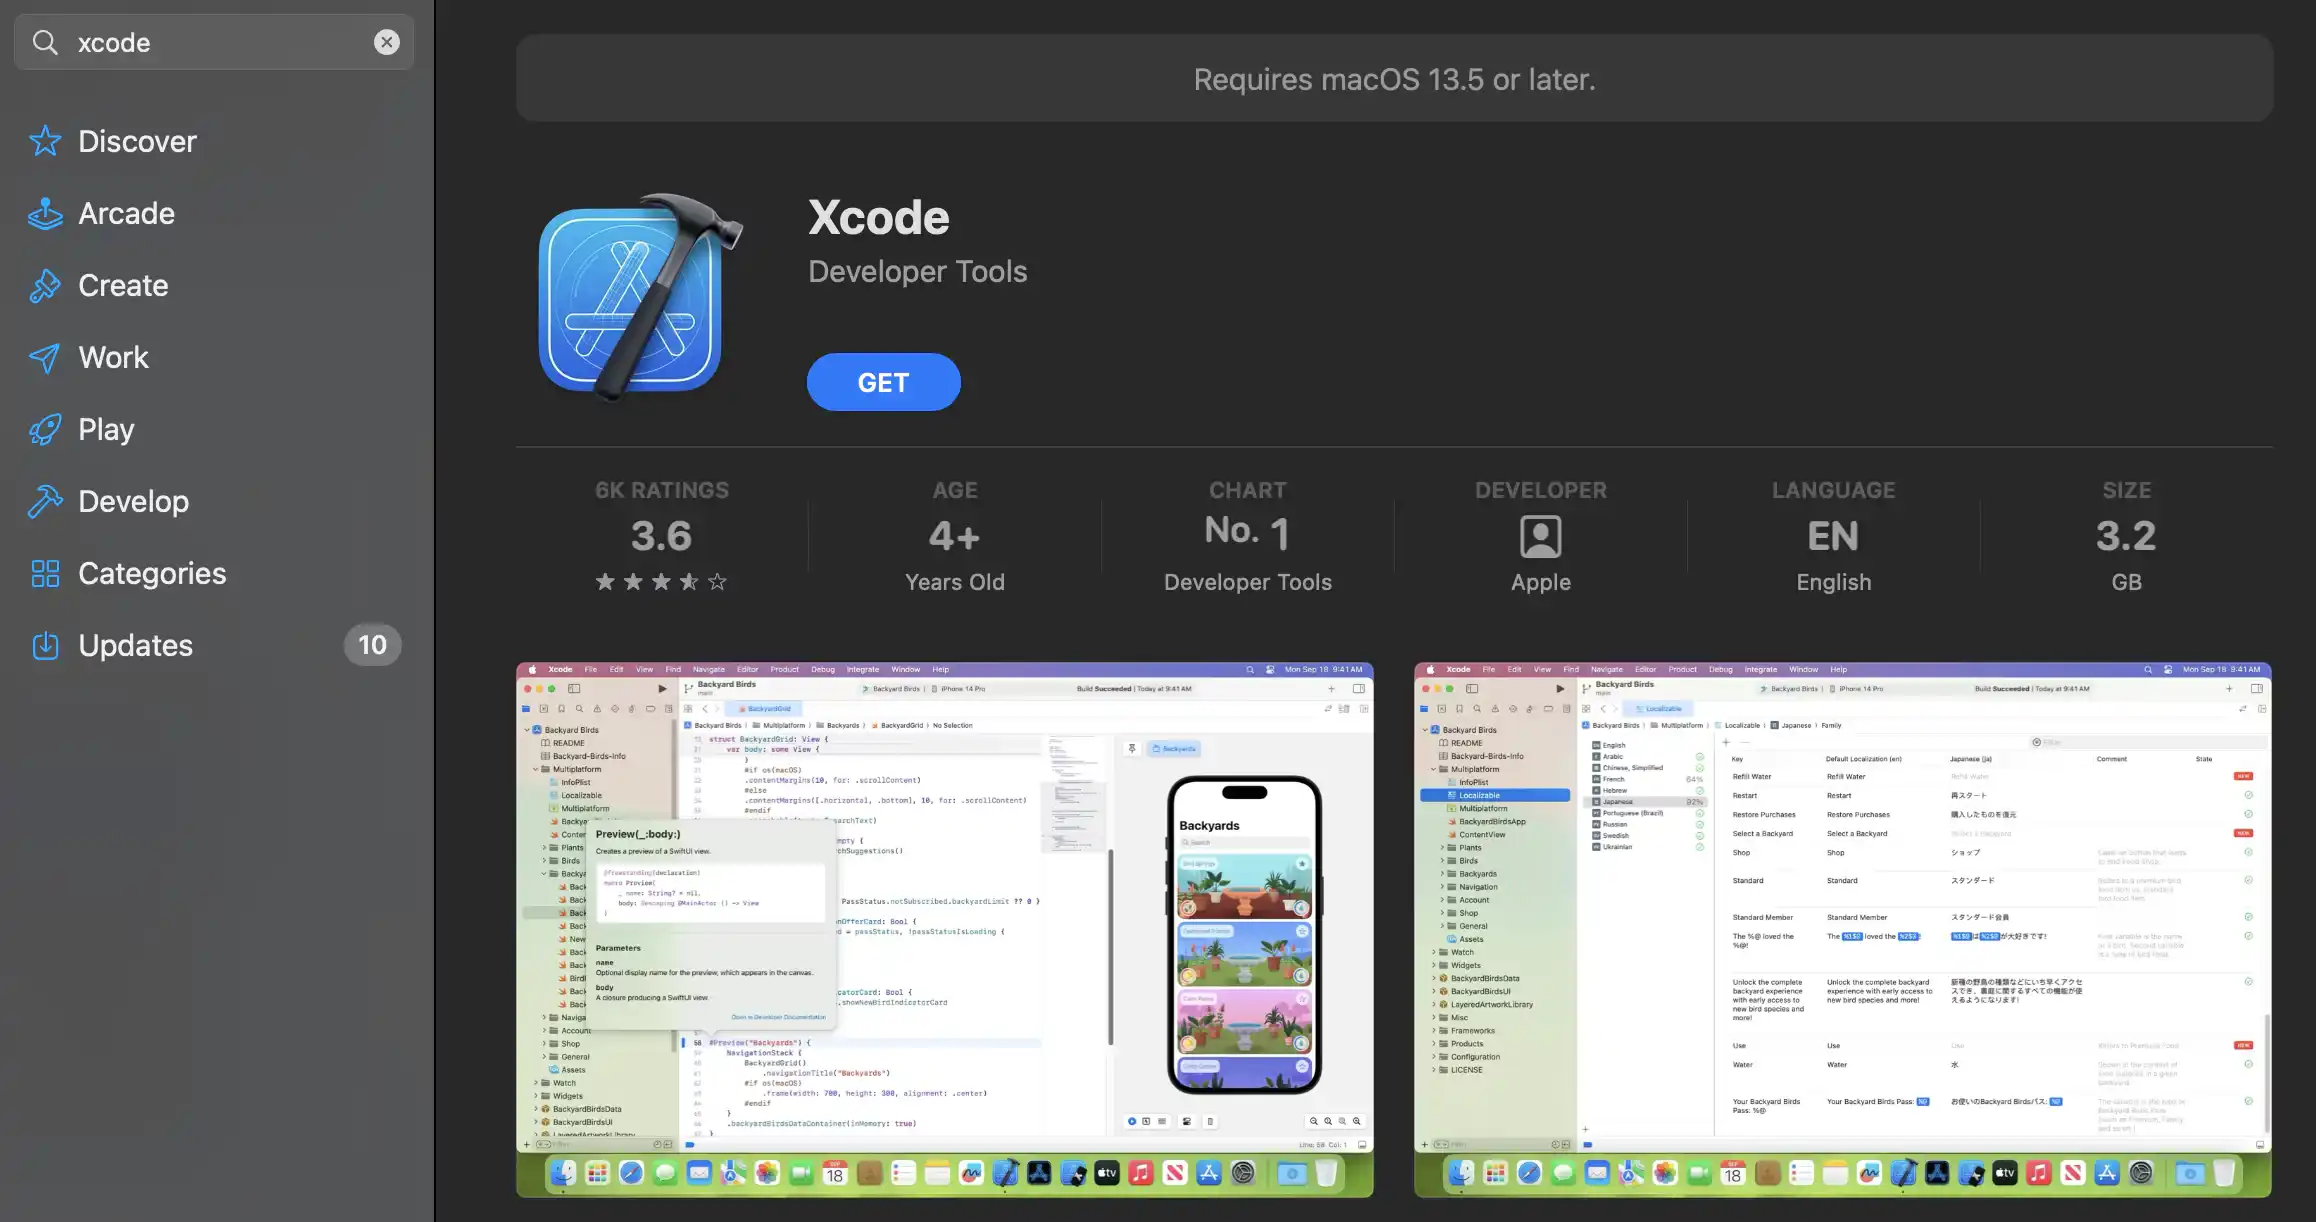
- In the search results, you should see "Xcode" listed. It is typically the first result, but you can click on it to view more details.
- Click the GET button next to Xcode. You may be prompted to sign in with your Apple ID or use your touch ID/face ID for verification. After confirming your download, the Xcode installer will start downloading.
- The application will appear in your "Applications" folder after the download. You can also find it in the "Launchpad".
- Open Xcode for the first time. You may be prompted to agree to the license agreement and enter your administrator password to install additional components and configure Xcode for development.
- During installation, Xcode may ask if you want to install additional components, such as command-line tools and simulator runtimes. Depending on your development needs, you can choose to install these components.
How to Install Xcode With Command Line Tools?
You can install Xcode using command line tools independently of the full Xcode IDE on your Mac.
Method 1: Using the Terminal
To see if command line tools are already installed on your Mac, open the terminal app (located in the Utilities folder within the Applications folder). Then, type the following command and press Enter:
xcode-select --versionIf you don't have command line tools installed or need to update them, you can do so by running the following command in the terminal:
xcode-select --installAfter clicking Install, you will receive the Xcode license agreement. Read through the terms, and if you agree, click Agree to continue. The installation process will begin.
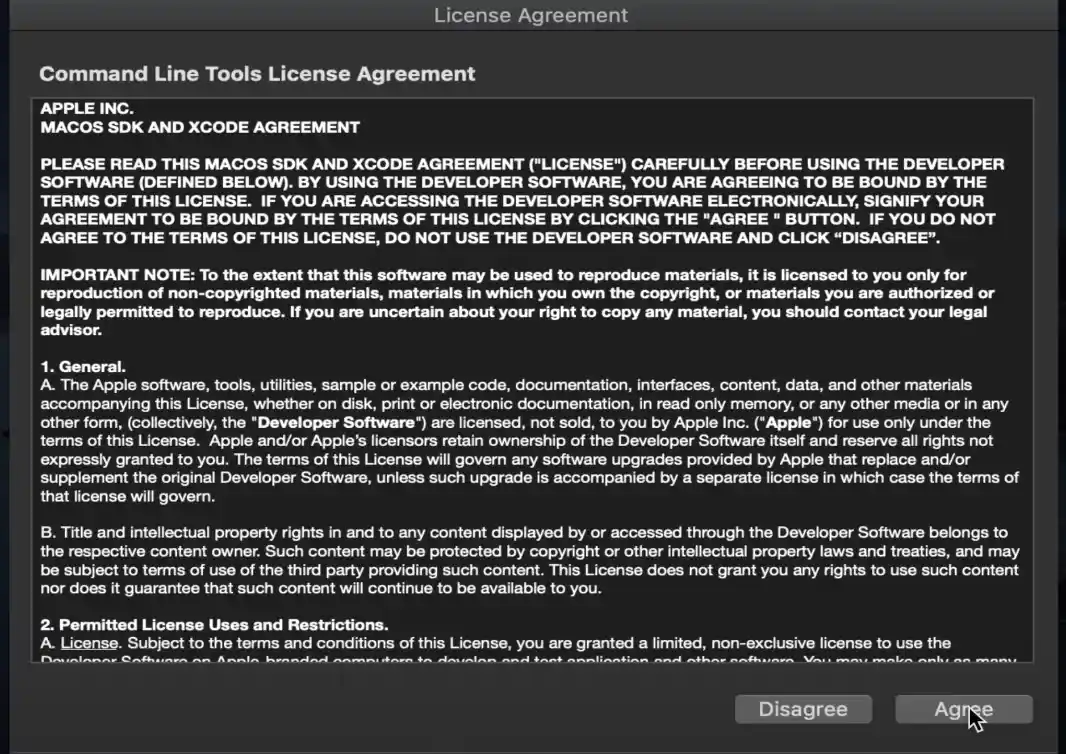
Once the installation is complete, you should see a message indicating that the command line tools are installed.
To verify that the command line tools are properly installed, you can once again run the following command in the terminal:
xcode-select --version
If command line tools are installed, you will see a version number. You'll receive a message indicating they are only found if installed.
After running this command, a dialog box will appear on your screen asking if you want to install the tools. Click the Install button to proceed.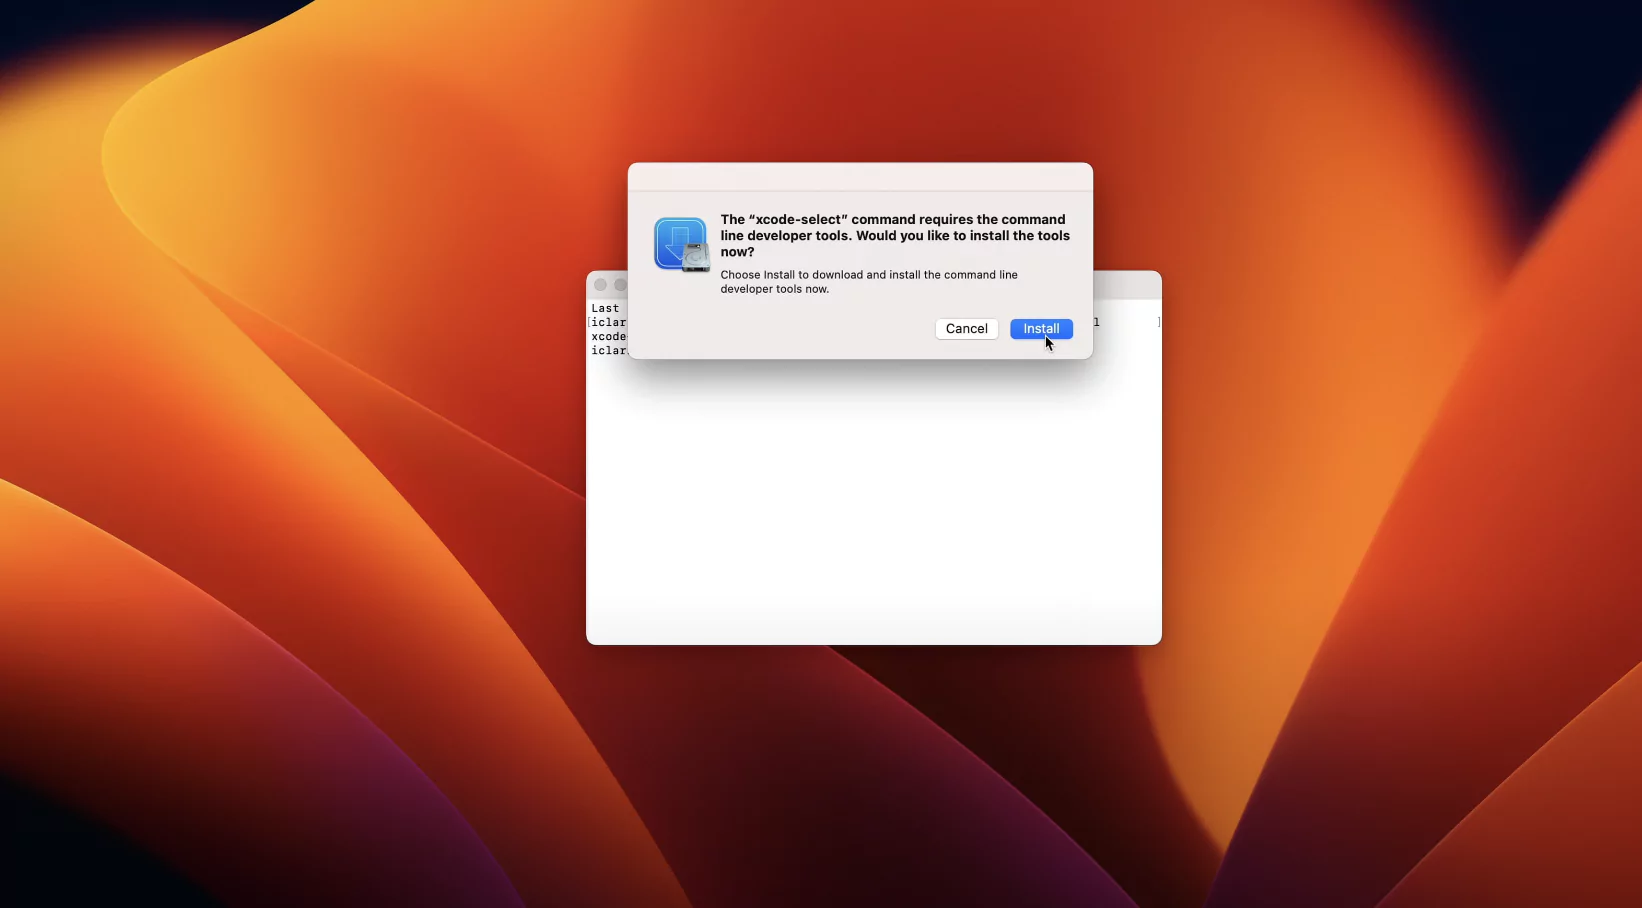
This time, you should see the version number of the installed command line tools.
Method 2: Via Xcode
- If you have Xcode already installed, open it.
- In Xcode, navigate to the menu bar and select "Xcode" > "Preferences."
- In the Preferences window, go to the "Downloads" tab.
- Look for the "Command Line Tools" option in the list of available downloads. You'll see an "Install" button next to it if it's not already installed. Click on "Install" to initiate the installation process.
You can verify the installation by running commands like gcc --version or git --version in the terminal. If these commands return version information, it confirms that the tools were correctly installed and ready for your development projects.
How to Install Xcode on Windows?
Xcode is designed for macOS and not directly available for Windows, but there are ways for developers to use Xcode for Windows:
Windows users can consider emulating or replicating the Xcode development environment on their Windows PCs, allowing them to begin their journey into Apple app development.
- macOS on a VM: Virtualization software like VirtualBox, VMware, or Parallels Desktop allows you to run macOS on a Windows PC, where you can install Xcode. However, this method may not offer the same performance or stability as using a real Mac.
- Cross-Platform Tools: Frameworks like Flutter, React Native, AppGyver, and Xamarin allow you to build iOS apps on Windows, eliminating the need for macOS during development.
- Physical Mac: For consistent iOS app development, investing in a physical Mac or Mac Mini is an ideal solution, offering native support for Xcode.
How to Update Xcode?
Updating Xcode on your Mac is essential to ensure that you have access to the latest features, improvements, and support for the latest Apple platforms and devices.
- Open the "App Store" on your Mac. You can find it in your Applications folder or use Spotlight (Cmd + Space, then type "App Store").
- In the "App Store," click on your Apple ID profile picture in the bottom-left corner to access your account details.
- Scroll down to the "Updates" section. If an update is available for Xcode, it will appear in the list of updates.
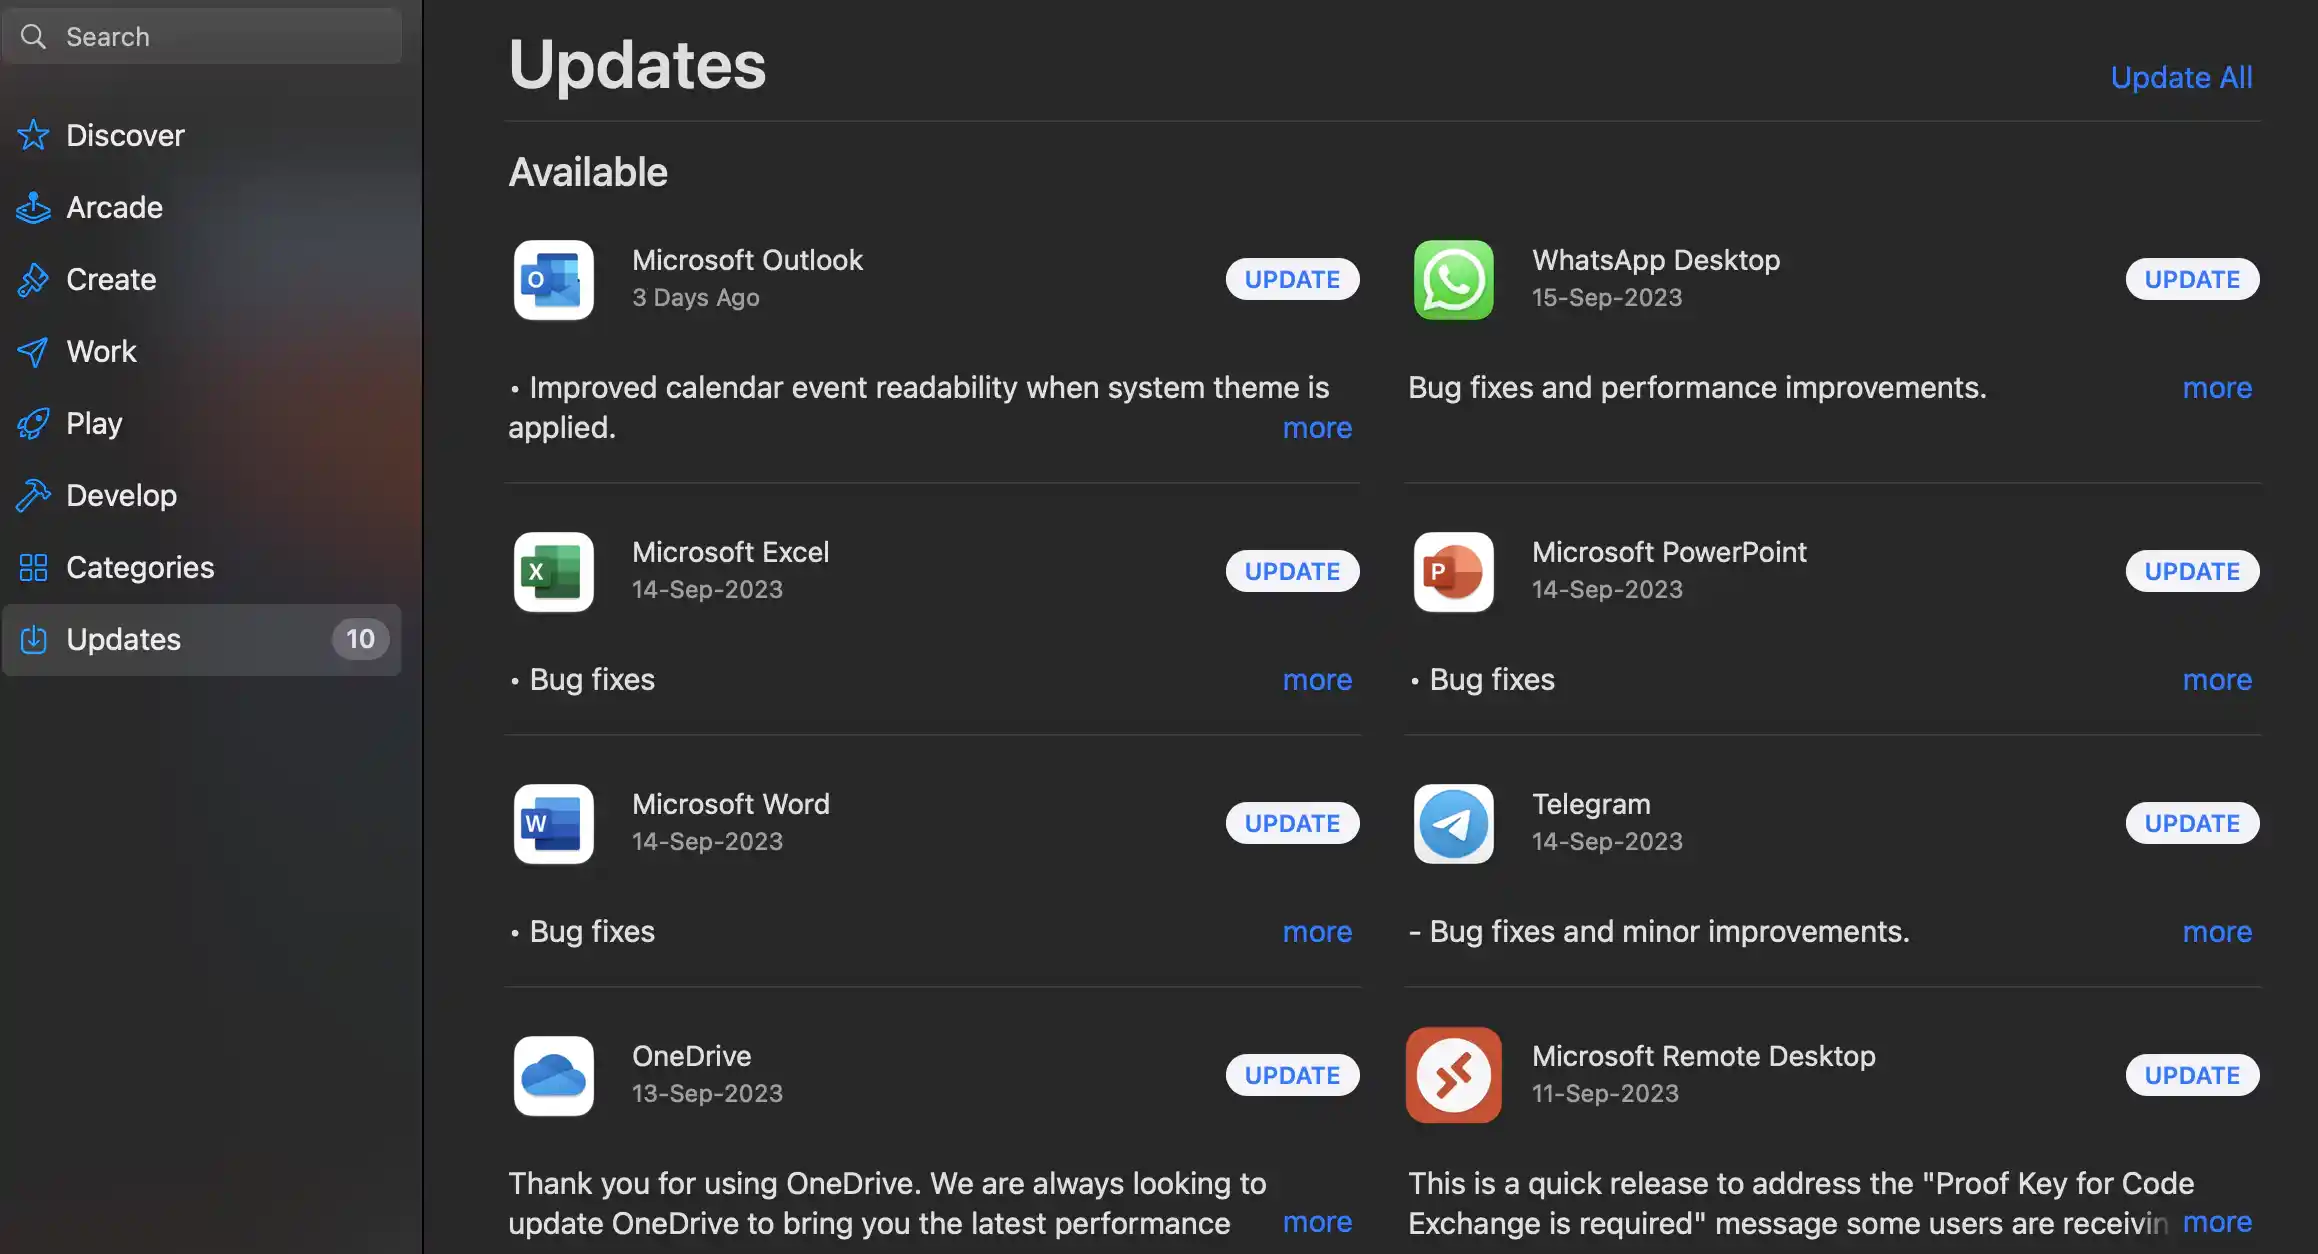
- If an Xcode update is available, you should see a button next to it labeled "Update." Click on this button to start the update process. You may be prompted to enter your Apple ID password or use Touch ID/Face ID for authentication.
- You can check the updated version number by launching Xcode and going to the "Xcode" menu and then click "About Xcode."
Once the update is downloaded and installed, the new version of Xcode should be ready to use.
How to Update Xcode Without the App Store (Advanced Methods)
The Mac App Store download can hang, stall, or fail on large Xcode updates. When that happens, these methods bypass it entirely.
- Download the .xip directly: sign in to the Apple Developer Downloads portal, grab the Xcode .xip archive for the version you need, then double-click to expand it and move it to Applications. This avoids the App Store queue entirely.
- Use xcodes: the popular open-source xcodes version manager lists, downloads, and switches between multiple Xcode versions from the command line, which is useful when you need to keep an older and a newer Xcode side by side.
- Automate with mas-cli: the mas command-line interface for the Mac App Store lets you script Xcode updates in CI or setup scripts without opening the store UI.
How to Create and Export an .ipa File in Xcode
An .ipa file is the packaged iOS app you distribute for testing or release. To generate one, archive the project and export it through the Organizer. For a fuller breakdown of what an IPA file is and what it contains, see the dedicated guide.
- Set the build destination to Any iOS Device (arm64) in the toolbar. You cannot archive while a simulator is selected.
- Go to Product > Archive. Xcode compiles a release build and creates an archive.
- When the Organizer window opens, select the new archive and click Distribute App.
- Choose a distribution method: App Store Connect for release, Ad Hoc for a set of registered test devices, or Development for your team.
- Select your signing team and provisioning profile, then click Export to save the .ipa to disk.
Once you have the .ipa, upload it to a mobile app testing cloud to run it across many real iOS devices at once, rather than installing it on one physical phone at a time.
Productivity Tips and Tricks for Xcode
Productivity is the cornerstone of efficient app development, and Xcode offers many tools and techniques to help developers streamline their workflows:
- Keyboard Shortcuts: Xcode provides an array of keyboard shortcuts to navigate, edit, and debug code quickly. You need to familiarize yourself with common shortcuts and incorporate them into your daily coding routine. This can significantly speed up your workflow.
- Leverage Autocomplete Features: Take advantage of Xcode's robust autocomplete feature. As you type, Xcode intelligently suggests code completions based on your context, saving you from tediously typing out lengthy code segments and ensuring accuracy in your coding.
- Test on Real Devices: Simulators often fall short when it comes to real-world accuracy. Issues like touch behavior or device-specific UI bugs can go unnoticed.
Therefore, consider using a real device cloud by TestMu AI. It is a cloud testing platform that lets you test on real iOS devices. It gives you access to real iOS devices, so you can ensure accurate results, catch device-specific issues, and improve the overall reliability of your tests.
You can also leverage LambdaMax Xcode plugin that connects Xcode to real iOS devices, helping catch these issues early in your workflow.
- Unit Testing: Implement unit testing for your code to catch bugs early and ensure the reliability of your applications. Xcode provides robust tools for writing and running unit tests.
- Debugging Tools: Xcode has a suite of debugging tools to inspect and resolve code issues. Delve into the world of breakpoints, watches, and visualization tools. Regularly utilizing these tools will empower you to identify and rectify bugs efficiently.

How to Uninstall Xcode?
Uninstalling Xcode from your Mac is a straightforward process. Here are the steps to uninstall Xcode:
- Before you begin, make sure that Xcode is not running. If it's open, go to the "Xcode" menu and select "Quit Xcode."
- Open the "Applications" folder on your Mac. You can do this by clicking on the "Finder" icon in the Dock and selecting "Applications" from the sidebar.
- Find the "Xcode" application icon in the "Applications" folder.
- Drag the "Xcode" icon to the Trash (located in the Dock or the far right of the Dock). Alternatively, right-click the Xcode icon and select "Move to Trash."
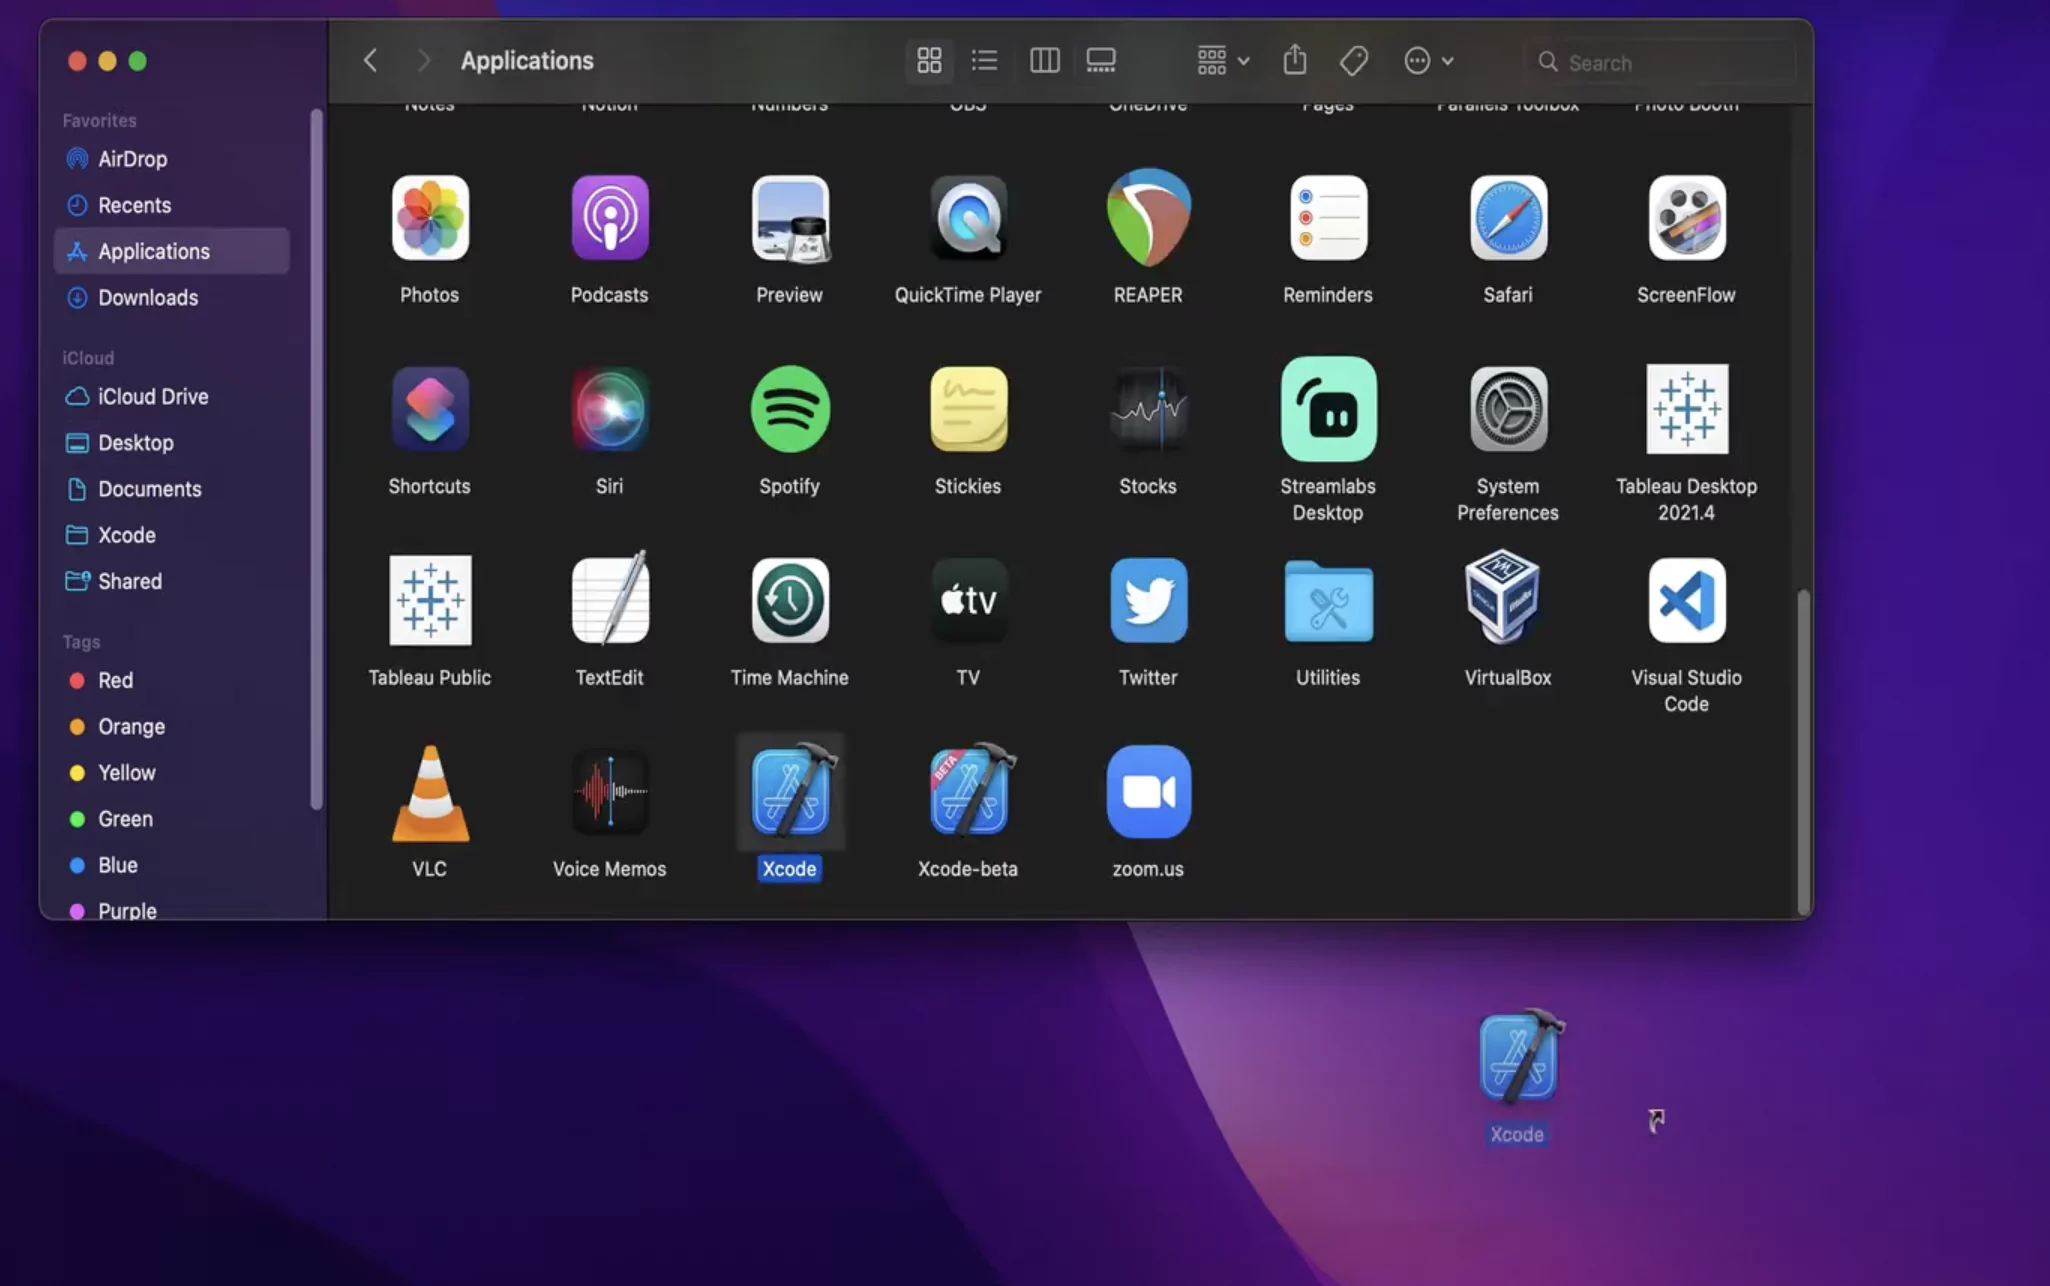
- While Xcode itself is a large application, it may leave behind some supporting files and data that can take up significant disk space. To remove these files, open a Finder window and go to your home directory. You can do this by clicking on your username in the sidebar.
- You'll find a folder in your home directory called "Library." Please note that on macOS versions starting with Catalina (10.15), Apple has default hidden the user's Library folder. You can access it by opening the "Go" menu in Finder and holding down the "Option" key to reveal the "Library" option.
- Within the "Library" folder, locate and open the "Developer" folder.
- Inside the "Developer" folder, you may find folders like "Xcode," "CoreSimulator," and others. Delete these folders to remove any remaining Xcode-related files.
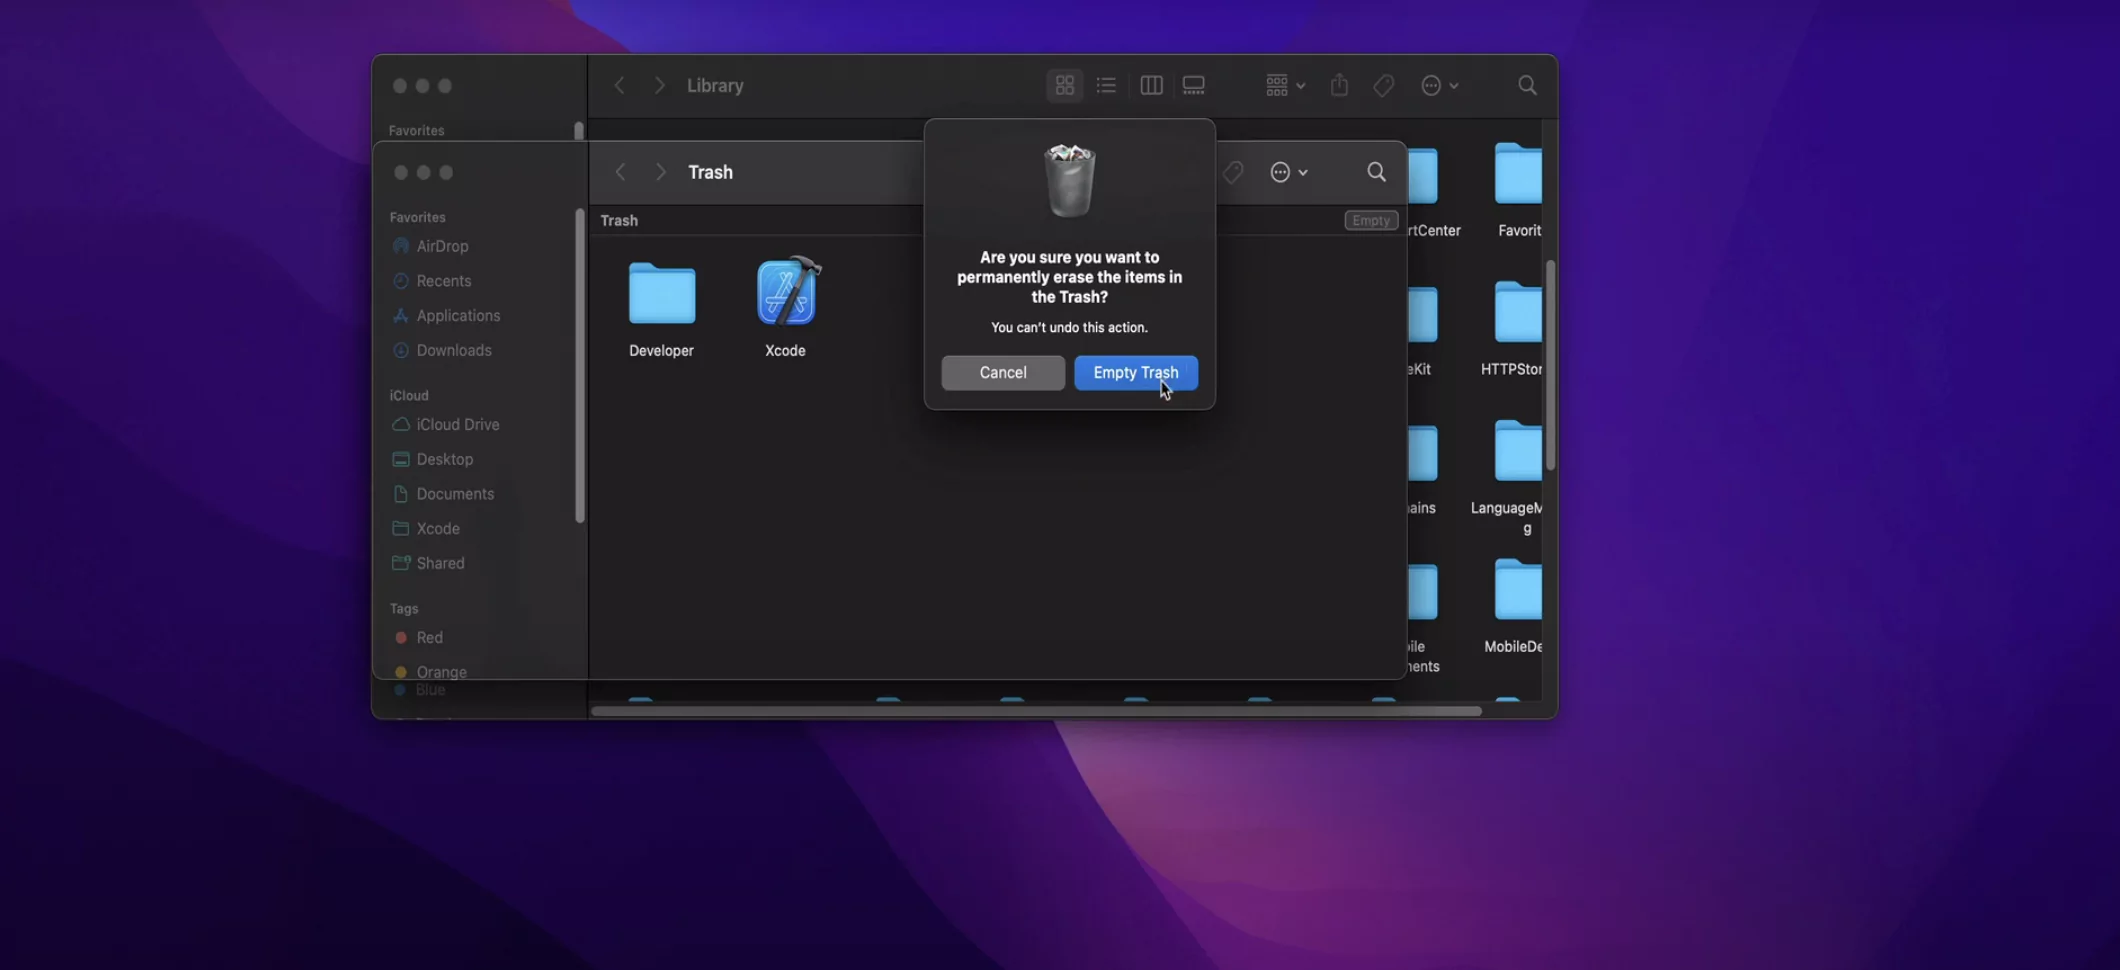
After moving Xcode and any associated files to the Trash, remember to empty the Trash to delete the files from your Mac permanently. Right-click on the Trash icon in the Dock and select "Empty Trash."
Restart your Mac to ensure that any lingering processes or cached files related to Xcode are entirely cleared.
Conclusion
To sum it up, Xcode is the go-to development environment for creating apps across Apple’s platforms, including iOS, macOS, watchOS, and tvOS. We've walked through what Xcode is, what it's used for, and how to install it on both macOS and Windows (via workarounds), along with tips on updating, uninstalling, and getting the most out of its features.
Whether you're setting it up for the first time or refining your workflow with advanced tools, mastering Xcode helps streamline app development and boosts overall productivity. Once familiar with its environment, it becomes much easier to build, test, and optimize high-quality apps that run smoothly across Apple devices.
Citations
- Xcode Developer Resources: https://developer.apple.com/xcode/resources/
Author

Bhavya Hada
Blogs: 29


Bhavya Hada is a Community Contributor at TestMu AI with over three years of experience in software testing and quality assurance. She has authored 20+ articles on software testing, test automation, QA, and other tech topics. She holds certifications in Automation Testing, KaneAI, Selenium, Appium, Playwright, and Cypress. At TestMu AI, Bhavya leads marketing initiatives around AI-driven test automation and develops technical content across blogs, social media, newsletters, and community forums. On LinkedIn, she is followed by 4,000+ QA engineers, testers, and tech professionals.
Reviewer

Himanshu Sheth
Reviewer
Himanshu Sheth is the Director of Marketing (Technical Content) at TestMu AI, with over 8 years of hands-on experience in Selenium, Cypress, and other test automation frameworks. He has authored more than 130 technical blogs for TestMu AI, covering software testing, automation strategy, and CI/CD. At TestMu AI, he leads the technical content efforts across blogs, YouTube, and social media, while closely collaborating with contributors to enhance content quality and product feedback loops. He has done his graduation with a B.E. in Computer Engineering from Mumbai University. Before TestMu AI, Himanshu led engineering teams in embedded software domains at companies like Samsung Research, Motorola, and NXP Semiconductors. He is a core member of DZone and has been a speaker at several unconferences focused on technical writing and software quality.


Xcode FAQs
Did you find this page helpful?
More Related Learning Hubs
TestMu AI forEnterprise
Get access to solutions built on Enterprise
grade security, privacy, & compliance
- Advanced access controls
- Advanced data retention rules
- Advanced Local Testing
- Premium Support options
- Early access to beta features
- Private Slack Channel
- Unlimited Manual Accessibility DevTools Tests