

Next-Gen App & Browser Testing Cloud
Trusted by 2 Mn+ QAs & Devs to accelerate their release cycles


How to Install and Set Up Android Emulators
To install and set up an Android emulator, download and install Android Studio, open the Device Manager (AVD Manager), and create a virtual device by picking a hardware profile and a system image (API level), then launch it. You can also do the whole thing from the command line using sdkmanager to install packages, avdmanager create avd to build the device, and emulator -avd to start it. Enabling hardware acceleration (HAXM, WHPX, AEHD, or KVM) is what makes the emulator fast and usable.
Below you'll find both the beginner-friendly Android Studio route and the command-line route, plus how to configure RAM, storage, and graphics, enable acceleration, fix common errors, and scale beyond a single local Android emulator when you need broader device coverage.
What Is an Android Emulator and Why Use One
An Android emulator is software that simulates a complete Android device — its CPU, memory, sensors, and the Android OS itself — on your computer. Instead of buying a shelf full of phones, you can boot a virtual Pixel, Galaxy, or tablet on your desktop and install, run, and debug apps against it exactly as you would on real hardware.
Each emulator instance is driven by an AVD (Android Virtual Device) — a saved configuration that pairs a hardware profile (screen size, RAM, sensors) with a system image (a specific Android API level, such as API 34 for Android 14). Developers and testers rely on emulators because they are free, scriptable, easy to reset to a clean state, and let you cover many Android versions and screen sizes without owning every device.
- No hardware cost — spin up phones, tablets, and foldables from one machine.
- Version coverage — test old and new Android API levels side by side.
- Repeatable state — wipe data or restore a snapshot to start fresh every run.
- Automation-friendly — launch headless from CI and drive with Appium or Espresso.
Prerequisites and system requirements
Before you begin, confirm your machine can comfortably run a virtual device. The emulator is resource-hungry, so meeting these baselines saves time and avoids acceleration errors later:
- OS — 64-bit Windows 10/11, macOS, or a modern Linux distribution.
- RAM — at least 8 GB (16 GB recommended so the host and AVD both have headroom).
- Disk — 8 GB or more free for the SDK, system images, and AVD data.
- CPU virtualization — Intel VT-x or AMD-V enabled in the BIOS/UEFI for hardware acceleration.
- JDK — current Android Studio bundles its own JDK, so a separate Java install is usually not required.
Also budget time for the first run: downloading Android Studio, the SDK, and a system image can take anywhere from about 30 minutes to a couple of hours depending on your hardware and connection.
Method 1 - Set Up via Android Studio AVD Manager
For most users — and especially beginners — the graphical AVD Manager (now called the Device Manager in newer releases) inside Android Studio is the simplest way to get a working emulator. Android Studio bundles the SDK, the emulator engine, and the hypervisor installer, so you rarely have to touch the command line. Follow these steps:
- Install Android Studio from its official download page and launch it.
- Navigate to Tools > SDK Manager, open the SDK Tools tab, select Android Emulator (and the SDK Platform-Tools), then click Apply to install them.
- Open the Device Manager from Tools > Device Manager (or AVD Manager on older versions) and click Create Device.
- Pick a hardware profile (for example, Pixel 7) and click Next.
- Choose a system image — a release name and API level such as Android 14 (API 34). Click the download icon if the image isn't installed yet, accept the license, and wait for it to finish.
- Give the AVD a name, optionally adjust the advanced settings (RAM, internal storage, graphics), and click Finish.
- Back in the Device Manager, click the Play (▶) button next to your new AVD to launch the emulator.
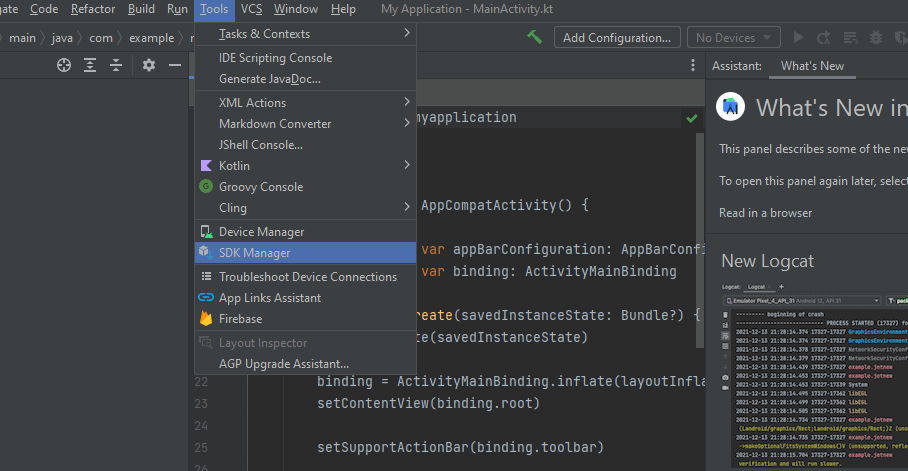
When you install the emulator package from the SDK Tools tab, make sure both Android Emulator and a hypervisor option are selected so acceleration is configured for you. On a typical 64-bit machine you should select an x86_64 system image, which runs far faster than ARM images.
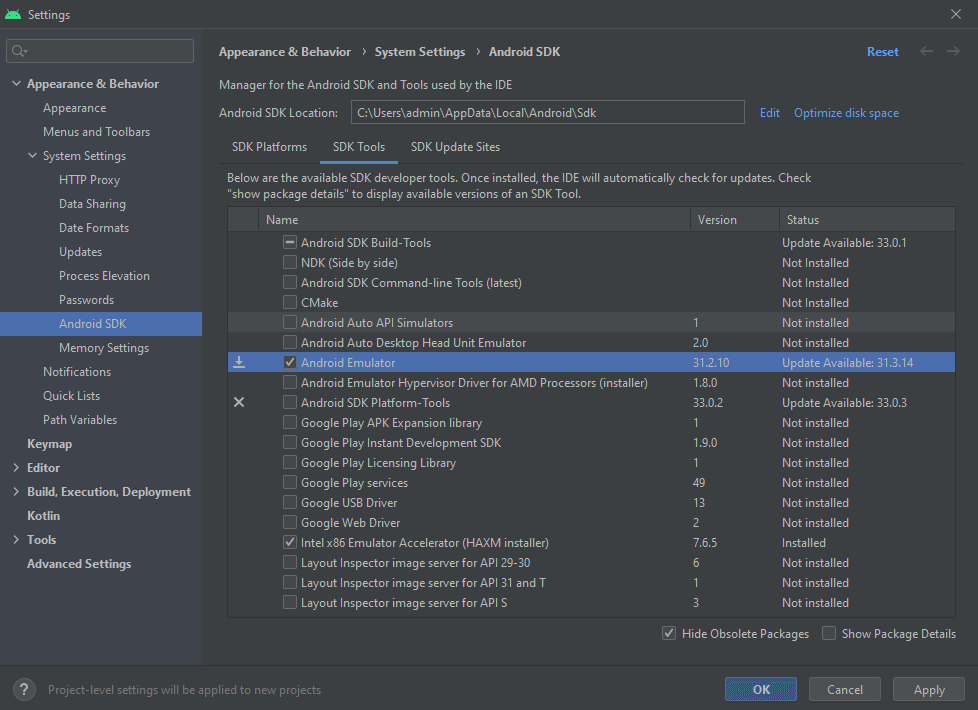
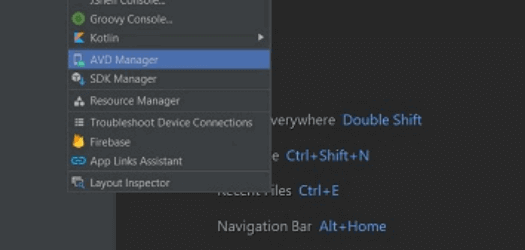
After the packages install, you can manage and launch all of your virtual devices from Tools > Device Manager (AVD Manager). Each AVD you create appears here with a Play button, edit pencil, and dropdown for wiping data or viewing details.
Method 2 - Command-Line Setup (sdkmanager, avdmanager, emulator)
If you are setting up a build server, prefer headless workflows, or just don't want the full IDE, you can create and run an emulator entirely from the terminal using the Android SDK command-line tools. The three binaries you need are sdkmanager (to install packages), avdmanager (to create the AVD), and emulator (to launch it).
Step 1 — Install the required packages with sdkmanager. Install the platform tools, a platform, the emulator, and a system image for the API level you want:
# List everything that is available (and what is already installed)
sdkmanager --list

# Install platform-tools, the emulator, a platform, and a system image
sdkmanager "platform-tools" "emulator" "platforms;android-34" "system-images;android-34;google_apis;x86_64"

# Accept any pending SDK licenses
sdkmanager --licenses
Step 2 — Create the AVD with avdmanager. Point it at the system image you just installed and give the device a name:
# Create a new AVD named "pixel_test" from the API 34 image
avdmanager create avd -n pixel_test \
  -k "system-images;android-34;google_apis;x86_64" \
  --device "pixel_7"

# Confirm it was created
avdmanager list avd
Step 3 — Launch the emulator. Start the virtual device by name. Add flags to tune memory, wipe data, or run without a window on CI:
# Launch the AVD
emulator -avd pixel_test

# Common useful flags:
#   -no-snapshot   start from a clean boot
#   -wipe-data     reset the device to factory state
#   -no-window     run headless (great for CI pipelines)
#   -gpu host      use the host GPU for faster rendering
emulator -avd pixel_test -no-window -gpu host -no-snapshot

# Verify the device is online from another terminal
adb devices
Make sure the SDK's cmdline-tools/latest/bin, platform-tools, and emulator directories are on your PATH (or set the ANDROID_HOME / ANDROID_SDK_ROOT environment variable) so these commands resolve from any folder.
Configuring the Emulator (RAM, Storage, Graphics)
Once the device exists, you can fine-tune it for your machine. In the AVD Manager, click the edit (pencil) icon and open Show Advanced Settings; from the command line, edit the AVD's config.ini. The settings that matter most for performance and realism are described in the list below:
- RAM: Memory given to the virtual device. Recommendation: 2048–4096 MB; leave plenty for the host OS.
- Internal Storage: Disk space for the OS and apps. Recommendation: at least 2 GB, more if you install many APKs.
- Graphics / GPU: How frames are rendered. Recommendation: Hardware - GLES 2.0 for speed; Software only if the GPU fails.
- Multi-Core CPU: CPU cores assigned to the AVD. Recommendation: 2–4 cores for smoother app performance.
You can apply many of the same options as launch flags. For example, override memory and GPU at start-up without editing the config:
# Override RAM and rendering at launch
emulator -avd pixel_test -memory 3072 -gpu host

# Cold boot, then save a snapshot so future launches start instantly
emulator -avd pixel_test -no-snapshot-load
Enabling Hardware Acceleration and Performance Tips
Hardware acceleration is the single biggest factor in emulator speed. Without it the emulator falls back to software CPU emulation and crawls. Acceleration uses your CPU's virtualization extensions (Intel VT-x or AMD-V), so they must be enabled in the BIOS/UEFI first. The right accelerator depends on your operating system and CPU:
- Windows (Intel) — use WHPX (Windows Hypervisor Platform) or AEHD; the legacy HAXM still works but is deprecated.
- Windows (AMD) — use WHPX or AEHD, since HAXM is Intel-only.
- macOS — the built-in Hypervisor.Framework is used automatically.
- Linux — use KVM (Kernel-based Virtual Machine).
You can confirm acceleration is active and see which hypervisor the emulator is using with the built-in check command:
# Report acceleration status and the active hypervisor
emulator -accel-check

# Linux: confirm KVM is available to your user
ls -l /dev/kvm

# List the AVDs the emulator can see
emulator -list-avds
A few more performance tips: on Intel/AMD hosts choose an x86_64 system image over ARM, but on an Apple Silicon (M-series) Mac pick an arm64-v8a image instead so the emulator runs natively and is accelerated by Hypervisor.framework — an x86_64 image would be emulated and slow there. Enable Quick Boot snapshots so the device resumes instantly, set graphics to Hardware - GLES 2.0, and close other heavy apps so the host has spare RAM and CPU for the virtual device.
Setting up on a Mac has a couple of platform-specific quirks around image architecture and permissions. For a dedicated walkthrough, see our guide on Android emulators for Mac.
Common Mistakes and Troubleshooting
- VT-x is disabled in BIOS — the emulator refuses to start with an acceleration error. Reboot into BIOS/UEFI and enable Intel Virtualization Technology (VT-x) or AMD-V (SVM Mode), then save and exit.
- HAXM / hypervisor install fails — HAXM clashes with Hyper-V and is deprecated. On Windows, enable the Windows Hypervisor Platform feature and let the emulator use WHPX or AEHD instead.
- Emulator is extremely slow — you likely picked an ARM image or have no acceleration. Recreate the AVD with an x86_64 image and set graphics to Hardware - GLES 2.0.
- "emulator: command not found" — the SDK tools aren't on your PATH. Add platform-tools, emulator, and cmdline-tools/latest/bin to PATH and set ANDROID_HOME.
- Black screen on boot — a corrupt snapshot or GPU issue. Launch with -no-snapshot -gpu host, or wipe data from the Device Manager and cold boot.
Emulators vs Real Devices and Scaling Coverage
For a deeper comparison of the leading tools and where emulation falls short, our overview of Android emulators — features, benefits, and limitations is a useful companion read.
Emulators are perfect for fast, free, repeatable development and for covering many Android versions early. But they cannot fully reproduce real-world conditions — actual GPU and battery behavior, manufacturer skins (Samsung One UI, Xiaomi MIUI), real network variability, biometric sensors, push notifications, and hardware quirks. Bugs that only appear on a specific OEM device will slip past a generic AVD, so the proven strategy is to develop on emulators and validate on real hardware before release.
Maintaining a large in-house device lab is expensive, which is why teams scale coverage with a cloud. With TestMu AI, you can run the same builds and automated tests across 3000+ real browsers and devices, including a wide range of real Android phones and tablets, without owning any of them. Pair your local AVD workflow with real device cloud testing and mobile app testing to catch device-specific issues that an emulator simply cannot surface.
The migration path is friction-free: an Appium suite written against your local emulator runs against the cloud grid by pointing the driver at the remote hub and setting the desired device capabilities.
# Same Appium test, now targeting a real Android device on the cloud grid
# (configure capabilities such as deviceName, platformVersion, app, and your hub URL)
appium-test --hub "https://USERNAME:ACCESS_KEY@mobile-hub.lambdatest.com/wd/hub" \
  --platformName Android \
  --deviceName "Galaxy S23" \
  --platformVersion 14
Conclusion
Installing an Android emulator comes down to two paths: the beginner-friendly Android Studio AVD Manager, where you click through Create Device, pick a hardware profile and system image, and hit Play; or the command line, where sdkmanager, avdmanager create avd, and emulator -avd do the same job and slot neatly into CI. Whichever you choose, enable hardware acceleration and use an x86_64 image for a fast, usable device — then validate on real hardware to ship with confidence.
Frequently Asked Questions
Do I need Android Studio to run an Android emulator?
No. Android Studio is the easiest path because its AVD Manager bundles everything, but you only really need the Android SDK command-line tools. With sdkmanager, avdmanager, and the emulator binary you can create and launch a virtual device entirely from the terminal, which is ideal for CI servers.
What is an AVD in Android?
An AVD, or Android Virtual Device, is a configuration that defines the hardware profile, system image (Android API level), storage, and settings the emulator uses to simulate a specific phone, tablet, or wearable. Each AVD you create is an independent virtual device you can launch on demand.
Why is my Android emulator so slow?
The most common cause is missing hardware acceleration. Ensure virtualization (Intel VT-x or AMD-V) is enabled in your BIOS, install the correct hypervisor for your CPU, choose an x86 or x86_64 system image rather than ARM, and set the graphics option to Hardware - GLES 2.0 in the AVD settings.
What is the difference between HAXM and WHPX?
Both accelerate the emulator using CPU virtualization. HAXM (Intel Hardware Accelerated Execution Manager) is the older Intel-only option, while WHPX (Windows Hypervisor Platform) is built into Windows and works with both Intel and AMD CPUs. On modern Windows, AEHD or WHPX is now recommended over the deprecated HAXM.
Can I run an Android emulator without a powerful PC?
Local emulators are demanding on RAM and CPU. If your machine struggles, you can use a cloud-based emulator or real device cloud to run Android virtual devices and real devices in the browser, offloading the heavy lifting to remote infrastructure while you test from any laptop.
How long does it take to set up an Android emulator?
Plan for roughly 30 minutes to two hours on a first-time setup. Most of that is downloading Android Studio, the SDK packages, and a system image, which can be several gigabytes. Once the image is cached locally, creating additional AVDs and launching them takes only a minute or two.
Which system image should I choose on an Apple Silicon Mac?
On an M-series (Apple Silicon) Mac, pick an arm64-v8a system image so the emulator runs natively and is accelerated by macOS Hypervisor.framework. An x86_64 image would be emulated and noticeably slower. On Intel or AMD machines, choose x86_64 instead for the best performance.
Related Questions
- Android Emulators for Mac
- How do I configure emulator settings?
- How do I emulate different Android versions and devices?
- How to integrate the simulator with testing tools?
- Why is Appium not able to handle different operating systems or device versions?
- How does real device testing improve app reliability compared to emulators and simulators?

KaneAI - Testing Assistant
World’s first AI-Native E2E testing agent.

TestMu AI forEnterprise
Get access to solutions built on Enterprise
grade security, privacy, & compliance
- Advanced access controls
- Advanced data retention rules
- Advanced Local Testing
- Premium Support options
- Early access to beta features
- Private Slack Channel
- Unlimited Manual Accessibility DevTools Tests