

Power Your Software Testing with AI Agents and Cloud
The Native AI-Agentic Cloud Platform to Supercharge Quality Engineering. Test Intelligently and Ship Faster.


- TestMu AI (Formerly LambdaTest)
- /
- Blog
- /
- Cursor Browser Automation: Automate and Verify Web Flows with AI
Cursor Browser Automation: Automate and Verify Web Flows with AI
How Cursor's built-in Browser tool and Browser MCP work, which approach to pick, and how to verify a browser run in real Chrome with Kane CLI.
Published on:
Cursor browser automation lets the agent drive a real browser, not just read your code. By default Cursor checks your source, not the page a user sees, so a broken screen can still look green.
You feel that gap when a change is visual, not structural. To catch those bugs you need a real browser in the loop, and Cursor drives one two ways: its built-in tool or Browser MCP.
The 2025 Stack Overflow Developer Survey put 84% of developers on AI tools, Cursor among the leaders. Still choosing an editor? Compare Claude Code vs Cursor. Or read Windsurf vs Cursor.
TL;DR
Cursor browser automation means the agent drives a real browser, not just your code. Two tools let it do that, the built-in Browser tool and Browser MCP. Kane CLI is a separate step that reruns the flow on every change and hands back a pass or fail from real evidence.
- Built-in Browser - the @browser tool drives an in-editor Chrome with navigate, click, type, screenshot, console, and network actions, no setup.
- Browser MCP - drives your own local browser through a companion extension, reusing the Chrome profile you are already signed into.
- Kane CLI - runs a natural-language objective in real Chrome and hands back a pass or fail you can trust.
What Is Cursor Browser Automation
Cursor browser automation is when the agent actually drives a browser for you, navigating, clicking, typing, and reading the page, instead of only editing code, so it can check what your app renders.
The idea is not new. What changed is who decides the steps. Classic browser automation pins every click to a selector in Selenium or Playwright, and the script snaps the moment that selector moves.
Cursor flips that around. You describe the outcome you want, and the agent works out the path on the live page as it runs. Nothing is tied to a selector, so a small UI change no longer breaks the run.
The agent still needs a browser to drive, though, and Cursor gives you two. The only real difference is which browser:
- In the editor - the built-in Browser tool launches an isolated browser the agent drives with your approval.
- Your signed-in browser - Browser MCP attaches to the Chrome you already have open.
Both drive a single browser while you watch, and neither hands back a result a pipeline can read. Turning that run into a pass or fail you can act on is a separate job, and we come to it later.
How Cursor's Built-In Browser Tool Works
Cursor's built-in Browser tool opens a browser the agent drives in the editor. You invoke it with @browser, and it can navigate, click, type, scroll, screenshot, and read console and network output.
How to Enable Cursor's Browser Tool
For most people there is nothing to set up. The tool ships with the agent, and you reach it by typing @browser. On enterprise plans, an admin has to switch it on first, under MCP Configuration in the Settings Dashboard.
Using it feels like briefing a teammate. Type @browser, then describe the task in plain words: open localhost:3000, log in with the test account, and confirm the dashboard loads.
The agent navigates, fills the form, and clicks, stopping for your approval before each action until you let the flow run. Then it tells you what it saw, with screenshots and any console errors.
What Cursor's Browser Tool Can Do
One detail is worth knowing. Per Cursor's Browser tool documentation, the agent works from screenshots of the page plus the console and network logs, not a code-level view of the DOM. Because it reads what the page actually shows, it catches a visual break or a runtime error the source alone would hide. The action set is small and fixed:
- Navigate - visit URLs and move between pages.
- Click - click, double-click, right-click, and hover on elements.
- Type - enter text into inputs and forms.
- Scroll - move through long pages to reach content.
- Screenshot - capture what the page looks like for the agent to reason over.
- Console and network - read console errors and HTTP requests to diagnose failures.
Limits of the Built-In Browser Tool
Two defaults shape how it runs. Every action waits for your approval, which keeps it safe to point at your own app but too slow to leave running on its own. It also uses its own per-workspace profile instead of your main Chrome, so a task that leans on your existing login hits a sign-in wall rather than inheriting the session you already have.
Accuracy really does track the model you pick. Cursor recommends Sonnet 4.5, GPT-5, or Auto for the Browser tool, because a weaker model misreads the rendered page and acts on the wrong element.
The ceiling here is structural: one browser, on your machine, one approved action at a time. That makes it an inner-loop tool for checking your own changes, not a way to run a whole suite or reach a service you are logged into somewhere else. For a quick look at a change in my own app, though, it is still the first thing I open.

Note: Cursor can write the automation; TestMu AI Kane CLI runs it in a real Chrome browser and hands back a pass or fail backed by evidence. Start free with TestMu AI or book a demo.
What Browser MCP Is and When to Use It
Browser MCP is a small server plus a browser extension that let the Cursor agent drive the Chrome you already have open, so it works inside your signed-in session instead of a fresh, isolated browser.
How Browser MCP Differs From the Built-In Tool
The difference from the built-in tool is attachment, not ability. The built-in tool launches its own browser; Browser MCP connects the agent to the Chrome you are already running, so your cookies, logins, and open tabs come along with it. A task behind an authenticated dashboard just runs, with no sign-in to script.
Browser MCP rides the Model Context Protocol, the same open standard our MCP automation testing guide walks through.
In practice, that gives you:
- Reuses your session - no re-login for sites you are already authenticated on.
- Local only - the agent drives the browser on your machine, not a cloud instance.
- Cross-client - the same server works with Cursor, VS Code, and other MCP clients.
When to Use Browser MCP
Reach for it when the task depends on being signed in as you: pulling numbers from an internal dashboard, or repeating a chore in an app you stay logged into.
The trade-off is scale. It drives the one browser on your machine, one session at a time, so it cannot fan out across parallel runs or run on a headless server with no display. The variants listed in Cursor's MCP directory all split on that same line.
Which to Use: the Built-In Browser or Browser MCP
Use the built-in Browser tool for quick checks on your own app, where no setup wins. Reach for Browser MCP when the task needs the Chrome you are already signed into, like a dashboard behind a login.
Side by side, the two drivers look like this:
| Approach | How it runs | Best fit |
|---|---|---|
| Built-in Browser | In-editor actions with manual approval, visual screenshots | Quick checks and UI debugging during development |
| Browser MCP | Takes over your local browser via an extension | Authenticated, local tasks in your own session |
In a real workflow you use them in order, and I would keep that order. Prototype the flow in the built-in tool, where feedback is fastest, then switch to Browser MCP for the steps that need a logged-in session.
Both are still supervised runs you watch, though. Turning that into an automatic check that runs on every change is the next step.
How to Automate Browser Flows in Cursor With Kane CLI
Describe the flow to Kane CLI in natural language. It runs it in a real Chrome browser, checks what the page actually renders, and hands back a pass or fail backed by evidence you can replay.
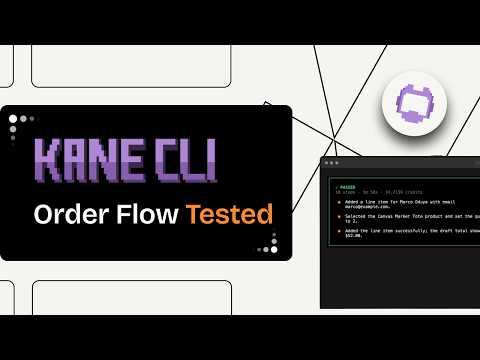
Cursor's built-in tool and Browser MCP both drive a browser live. The problem is what happens after: once the run ends, you are left with nothing a pipeline could store and check. And when the agent says a flow passed, it is still reading the code it wrote, not the page a user sees, so a button wired to the wrong call compiles cleanly and reports green.
That gap is what TestMu AI Kane CLI exists to close. It is an agentic quality verifier: a command-line agent whose whole job is to prove a flow works for a real user, not just that the code compiled.
You hand it the same flow as a natural-language objective, with no selectors to maintain. It drives real Chrome through the DevTools Protocol and checks what the user would actually see.
The parts that matter for a Cursor workflow:
- Natural-language objectives - describe the flow in words; there are no selectors to write or maintain.
- Drives real Chrome - it goes through the DevTools Protocol and only does what a user could.
- A deterministic verdict - it passes only when the page actually reaches the state you described.
- An evidence pack per run - screenshots, a network log, and console output, sealed so you can replay it.
- Standard exit codes - 0 passes, 1 fails, 2 is an environment error, 3 a timeout, so CI can branch on it.
Run it in Agent Mode, headless, and it streams back structured NDJSON that ends in one pass or fail. That is the exact form Cursor's agent or a CI pipeline can read.
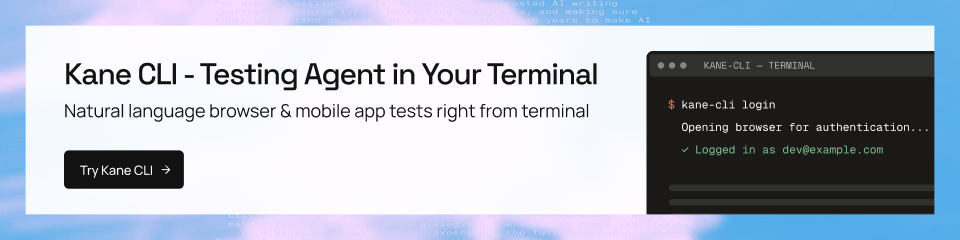
Installing it and running a flow is two commands:
# install
npm install -g @testmuai/kane-cli

# run the flow headless and read the exit code
kane-cli run "open the login page, sign in, confirm the dashboard loads" --agent --headless
echo "exit: $?"
The same objective runs headed on your laptop and headless on a server, with no rewrite in between. The flow Cursor built becomes a check you can rerun and trust, instead of a click-through someone has to remember to repeat. The Kane CLI documentation covers the modes, exit codes, and CI setup in full.
How to Keep Cursor Browser Automation Reliable
Agent-driven runs tend to fail in two ways. A vague objective leaves the next action undecided, and an unsupervised agent commits to whatever it happened to pick. These habits head off both:
- Keep approval on until a flow is proven - auto-run commits the agent's action unseen, so a destructive step runs for real.
- State the success condition, not just the action - without an assertion, clicked counts as done even if the click did nothing.
- Wait on state, not a fixed delay - an agent that acts before the page finishes loading clicks a dead control.
- Match the tool to the login - for authenticated tasks, Browser MCP inherits your session instead of stalling at a sign-in wall.
- Be specific about the target - the blue Submit button in the checkout form resolves more reliably than the button.
- Gate on a verdict, not a transcript - CI can branch on an exit code, never on a paragraph of what happened.
One more thing: keep the objective itself stable. The same sentence should describe the same success every run; reword it and the agent may resolve a different path, and your verdict drifts with it. And when there are conventions the agent should follow on every run, set them once in Cursor rules.
Conclusion
The pieces fit together in one order. Start with the tightest feedback loop: point @browser at a local page, have the agent click through one flow in your own app, and watch how it perceives and acts on the page.
From there, add Browser MCP when a task needs your signed-in session, then move the finished flow to Kane CLI so CI gates on a real pass or fail. Each step builds on the one before it, and if you would rather work from a terminal than the editor, Cursor CLI covers that.
The one move I would not skip is the last one: take a single working flow, turn it into a Kane CLI objective, and run it in your pipeline. Do that, and a broken screen stops shipping as a green checkmark.
Author

Salman Khan
Blogs: 138


Salman is a Test Automation Evangelist and Community Contributor at TestMu AI, with over 6 years of hands-on experience in software testing and automation. He has completed his Master of Technology in Computer Science and Engineering, demonstrating strong technical expertise in software development, testing, AI agents and LLMs. He is certified in KaneAI, Automation Testing, Selenium, Cypress, Playwright, and Appium, with deep experience in CI/CD pipelines, cross-browser testing, AI in testing, and mobile automation. Salman works closely with engineering teams to convert complex testing concepts into actionable, developer-first content. Salman has authored 120+ technical tutorials, guides, and documentation on test automation, web development, and related domains, making him a strong voice in the QA and testing community.
Reviewer

Navin Chandra
Reviewer
Navin Chandra is a Member of Technical Staff at TestMu AI (formerly LambdaTest), building the open-source automation that powers its Selenium and Appium cloud grid. A committer to both Selenium and Appium, he implemented WebDriver BiDi support in Selenium for real-time browser events and bidirectional control and is developing Apple's iOS RemoteXPC protocol in Appium to enable low-level wireless communication with iOS system services. He contributes to Selenium across multiple language bindings as a member of the Selenium GitHub organization. He has served as a Google Summer of Code mentee and mentor at openSUSE and an LFX mentee at CNCF's KubeArmor, and is a SUSE Certified Deployment Specialist. Navin holds a B.Tech in Computer Science.


Cursor Browser Automation FAQs
Did you find this page helpful?
More Related Blogs
TestMu AI forEnterprise
Get access to solutions built on Enterprise
grade security, privacy, & compliance
- Advanced access controls
- Advanced data retention rules
- Advanced Local Testing
- Premium Support options
- Early access to beta features
- Private Slack Channel
- Unlimited Manual Accessibility DevTools Tests