
Next-Gen App & Browser Testing Cloud
Trusted by 2 Mn+ QAs & Devs to accelerate their release cycles


Free Add Border to Image Online
This free tool allows you to add a custom color border around an image and download the framed file in your browser. This tool is built and maintained by TestMu AI (formerly LambdaTest).
Categories
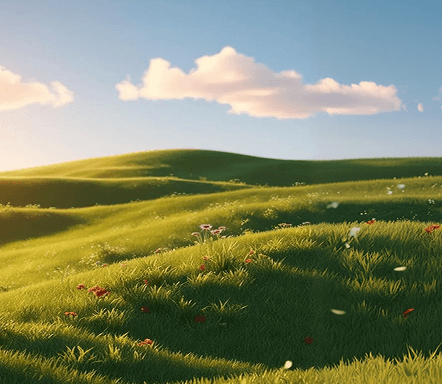


JPG, PNG, WebP, GIF. 30 MB, 8192px, 33.5 MP max.
Pixels on each side.
Hex like #000000 or #fff.
Outside grows canvas. Inside covers edges.
0 means square corners.
JPEG fills transparency with white.
What is an add border to image tool?
An add border to image tool is a free online editor that draws a solid frame around a photo or screenshot and saves the framed file. You choose the border width, color, and whether the frame sits outside or inside the original edges, then download the result without installing desktop software.
This page focuses on raster borders baked into the image pixels. That is different from a CSS border radius generator, which only styles corners in a stylesheet and does not change the image file itself.
How does adding an image border work?
The tool uses the browser Canvas API to size a drawing surface, paint the border color, and place your image with drawImage. When you download, the canvas is exported with toBlob so the framed file stays local on your device.
Outside mode creates a larger canvas and fills the new margin with the border color before drawing the image inset. Inside mode keeps the same width and height, draws the image first, then paints a border ring over the edges with a rounded rectangle path. Corner radius is clamped so the inner and outer frames stay geometrically valid.
All processing happens in your browser. No data is uploaded. Images larger than 8192 px on a side or over 33,554,432 total pixels are rejected before a canvas is allocated, including outside borders that would grow past the limit. Accepted images keep their original width and height.
How to add a border to an image online?
Framing an image takes only a few steps and needs no account:
- Add your image: Drop, upload, or paste a JPG, PNG, WebP, or GIF file up to 30 MB (max 8192 px per side and 33,554,432 pixels), or click Sample to try a demo photo.
- Set the border: Choose width, color, inside or outside mode, corner radius, and download format.
- Click Add Border: Review the framed preview and the output dimensions shown under the result.
- Download or copy: Save the framed PNG, JPEG, or WebP, copy it to the clipboard, or open it in a new tab.
Example: start with an 800 by 600 sample image, set a 24 px black outside border, and click Add Border. The output becomes 848 by 648 pixels with a solid frame around the photo, ready to download.
Use cases for image borders
A pixel border is useful whenever a photo needs a clean frame before you share or publish it:
- Screenshot polish: Add a thin dark frame so a UI capture stands out on light backgrounds in docs and tickets.
- Social and print prep: Create a white margin around a photo before posting or printing, then refine framing with the Crop Image tool.
- Brand-colored frames: Match a hex brand color for product shots, then rotate orientation with the Rotate Image tool if needed.
- Design variations: Pair a bordered photo with the Grayscale Image or Image Inverter tools for alternate looks.
- Rounded presentation frames: Use corner radius for soft card-style edges while keeping the border in the image file.
This tool is maintained by TestMu AI, the team behind a unified testing platform with 50,000+ real devices and 3000+ browsers, so browser-local editing stays private and reliable for QA and design workflows.
Inside vs outside borders
Choosing the right mode depends on whether you can grow the file dimensions or must keep the original size:
- Outside border: Grows the canvas by the border width on every side and keeps the full original image visible. Use this when you want a true frame without covering content.
- Inside border: Keeps the same width and height and paints the frame over the outer pixels. Use this when a platform or layout requires fixed dimensions.
- Geometry checks: If an inside border is wider than half the shorter side, the tool shows a readable error so you can reduce the width or switch to outside mode.
Frequently Asked Questions (FAQs)
How do I add a border to an image online?
Drop, upload, or paste your image into the input panel, then set the border width, color, inside or outside mode, and corner radius. Click Add Border to preview the framed result in your browser. Download the finished file as PNG, JPEG, or WebP, or copy it to your clipboard.
Is the add border to image tool free?
Yes. The add border to image tool is completely free with no signup, login, watermark, or usage limit. You can frame as many photos and screenshots as you need for personal or work projects. The tool is maintained by TestMu AI and runs entirely in your browser.
Does my image leave the browser?
No. All processing happens in your browser with the Canvas API, and nothing is uploaded to a server. Your image never leaves your device, which makes the tool safe for private photos, screenshots, design assets, and confidential product shots you would not want to send elsewhere.
Will the border change the image dimensions?
Outside mode grows the canvas by the border width on each side, so an 800 by 600 image with a 24 px outside border becomes 848 by 648. Inside mode keeps the original width and height and paints the border over the edges without changing the file dimensions.
Which image formats are supported?
You can add a border to JPG, PNG, WebP, and GIF files up to 30 MB, with a maximum of 8192 px per side and 33,554,432 total pixels. After framing, download the result as PNG, JPEG, or WebP. Transparent areas stay transparent in PNG and WebP, while JPEG fills a white background behind them.
Can I choose any border color?
Yes. Use the color picker or enter a custom hex value to choose any solid border color, including black, white, brand colors, and pastel frames. Invalid hex values are rejected before processing so the border always uses a valid color you selected.
Did you find this page helpful?
More Tools
TestMu AI forEnterprise
Get access to solutions built on Enterprise
grade security, privacy, & compliance
- Advanced access controls
- Advanced data retention rules
- Advanced Local Testing
- Premium Support options
- Early access to beta features
- Private Slack Channel
- Unlimited Manual Accessibility DevTools Tests