
Next-Gen App & Browser Testing Cloud
Trusted by 2 Mn+ QAs & Devs to accelerate their release cycles

On This Page
- What Is Selenium?
- Prerequisites For Browser Automation With Selenium & Java
- How To Configure Selenium WebDriver With Eclipse?
- Running your first test script for cross browser automation with Selenium and Java
- Performing Parallel Testing on local Selenium Grid
- Performing Parallel Testing on TestMu AI Selenium Grid
Complete Java Selenium Testing Tutorial: Guide To The Java Automation
Learn Java Selenium testing for web apps with this comprehensive tutorial. Covering setup, scripting & automation using TestMu AI. Start mastering it now.

Shalini Baskaran
December 19, 2025
Most companies measure the success of their digital marketing efforts using traditional approaches such as increased sales, ROI, and leads. However, keeping in mind the importance of the customer experience, companies have started to measure the vital metrics of user experience like click-throughs, conversion rates, time spent on site, DAU (Daily Active Users), MAU (Monthly Active Users), etc.
As per a Walker report, customer experience will have more weightage in 2020 than both price & product, as 86% of consumers will pay more for a better user experience. However, customer experience has fast become a top priority for businesses, and 2022 will be no different.
")
Cross browser testing plays a pivotal role in providing a seamless user experience across different browsers, platforms, and devices. But what happens if your registration form starts failing in Safari or Mozilla Firefox or Internet Explorer? Companies are relying on cross browser compatibility testing to test their web applications on different browsers and browser versions, else there is a high probability of losing customers!
In this Selenium Java testing tutorial, you will see how to run your first script for browser automation with Selenium and Java programming language.
If you’re new to Selenium and wondering what it is then we recommend checking out our guide – What is Selenium?
What Is Selenium?
Selenium is the most popular web browser automation framework. It is used by software developers and testers to test the functionality of a website across multiple browsers.
This Selenium Java testing tutorial will take you through what is Selenium, how it works, and deep dive into how to use it to automate your website (or web apps) using the Java programming language.
It has four major components designed for different purposes, and the selection of these components depends upon the testing requirement. The four components are
- Selenium IDE
- Selenium RC
- Selenium WebDriver
- Selenium Grid

If you want to perform browser automation on different browsers such as Chrome, Firefox, Edge, Internet Explorer, etc., Selenium WebDriver is an ideal choice.

What Is Selenium WebDriver
Selenium WebDriver is a browser-specific driver that provides an interface to write and execute the browser automation scripts for testing web applications. It binds with any popular programming language via browser-specific drivers, thereby providing the ideal environment for realizing automated testing. It supports most browsers through the corresponding browser-specific drivers. Selenium can also be integrated with language-supported frameworks via browser-specific drivers.
Automated tests using Selenium WebDriver can also be used to expedite the testing and release processes by integrating with top CI/CD tools like Jenkins, TeamCity, GitLab CI, and more.
Prerequisites for cross browser automation with Selenium and Java
To perform cross browser Selenium Java testing, you must ensure that the below prerequisites are met.
Java
Step 1: Depending on the operating system (Mac, Windows, or Linux), download JDK with JRE (32 or 64 bit) and then install it.
Step 2: Create a new environment variable JAVA_HOME and define the value to JDK installation location in the system.
To create the environment variable, please navigate as shown below:
Right-click “This PC”–> Properties –>Advanced system settings –> Environment variables –> System Variables –> Add a variable JAVA_HOME with the path of the JDK installation folder.
For Example, JAVA_HOME → C:\Program Files\Java\jdk-9
Step 3: Update the path to the bin folder of the JDK installation folder. In the path variable of the System variables, add the value %JAVA_HOME%\bin.
Step 4: Verify the successful installation of Java in your system by using the following command in the command prompt:
java --version
IDE(Integrated Development Environment)
Download the latest version of any IDE depending upon your Operating System (32 or 64 bit) and install it in your system for Selenium Java testing automation. For example, you can download Eclipse or download IntelliJ as they are one of the preferred IDE’s.
Drivers
There are different types of drivers, each supporting a specific browser. You can download them from the official Selenium website.
You can also find a documentation page in each driver section to understand the compatibility of the driver and the browser version. For example, below is the compatibility of the Gecko driver with the required version of Selenium and Firefox.

Are you looking to take your Java development skills to the next level? Are you interested in earning a test automation certification that will help in accelerating your testing career? Well, TestMu AI offers Selenium Java 101 test automation certification through which developers can boost their Selenium Java testing skills.
Austin Siewert
CEO, Vercel
Discovered @TestMu AI yesterday. Best browser testing tool I've found for my use case. Great pricing model for the limited testing I do 👏
2M+ Devs and QAs rely on TestMu AI
Deliver immersive digital experiences with Next-Generation Mobile Apps and Cross Browser Testing Cloud
Here’s a short glimpse of the Selenium Java 101 certification offered by TestMu AI:
How To Configure Selenium WebDriver With Eclipse?
Creating the first project for cross browser automation with Selenium and Java and completing it successfully would require a lot of patience. However, the below steps would assist in taking a step forward.
In this Selenium Java testing tutorial, you will see how to create your project either as a Java or a Maven project.
Creating a Java project in Eclipse IDE
Step 1: Launch the Eclipse IDE.
Step 2: Go to File → New → Project. Specify the name of the project and click Finish.

Step 3:Create a package and a class file within the same package. Select the modifier as public and click Finish.

Step 4: To add the referenced libraries, right-click on the project🡪Build Path 🡪Configure Build Path and add the external jars.
 Selenium and Java” width=”733″ height=”477″ class=”aligncenter size-full wp-image-12553″ />
Before we get our hands dirty with Selenium Java testing automation, let’s look at how to instantiate the intended web browser. Here is how you can instantiate Chrome browser in a Selenium WebDriver project:
- For Chrome Browser
WebDriver driver = new ChromeDriver();
- For Firefox Browser
WebDriver driver = new FirefoxDriver();
or the browser driver that is inline with the browser on which Selenium automation tests have to be performed.
WebDriver is basically an interface. A WebDriver instance is created and cast to the browser driver class. The Selenium WebDriver class offers methods like get(), quit(), close(), etc. that are used for specific purposes.
Consider an example for testing login functionality in a single browser. To test this, we need the correct URL of the website and the valid login credentials of a registered user.
First, we have to specify the driver’s path and then instantiate the appropriate browser for that driver.
For Firefox
System.setProperty("WebDriver.gecko.driver","C:\Users\shalini\Downloads\geckodriver-v0.26.0-win64\geckodriver.exe");
    WebDriver driver = new FirefoxDriver();
For Chrome
System.setProperty("WebDriver.chrome.driver","C:\Users\shalini\Downloads\chromedriver\chromedriver.exe");
    WebDriver driver = new ChromeDriver();
For Edge
System.setProperty("WebDriver.edge.driver","C:\Users\shalini\Downloads\edgedriver_win64\msedgedriver.exe");
    WebDriver driver = new EdgeDriver();
For Opera
System.setProperty(“WebDriver.opera.driver”,”C:\Users\shalini\Downloads\operadriver\operadriver_win64\operadriver.exe”);
    WebDriver driver = new OperaDriver();
For Internet Explorer
System.setProperty("WebDriver.ie.driver", " C:\Users\shalini\Downloads\ieDriver\IEDriverServer.exe”);
    WebDriver driver=new InternetExplorerDriver();
Selenium also provides the advantage of running the cross browser automation tests in a web application without a GUI. Such a browser is called a headless browser, and the testing carried out in such a browser is called Headless browser testing.
Since the browser GUI is not shown during the test process, you can expect exceptional performance and blazing-fast speed. HtmlUnit driver and headless options of Chrome, Firefox, etc. are some of the examples to carry out headless browser testing.
After instantiating the driver, we need to navigate to the website.
driver.get("https://opensource-demo.orangehrmlive.com/");
Assert if the current page title does not match with the desired title.
String pageTitle = driver.getTitle();
    System.out.println("The title of this page is ===> " +pageTitle);
    Assert.assertEquals("OrangeHRM", pageTitle);
To test the login functionality, the first step is to locate the desired WebElements in Selenium on which we need to perform interactions. Once you know how to access a web element, you can easily perform any browser actions using them.
Below are the eight different Selenium locators that the WebDriver supports to locate elements:
- id
- name
- className
- tagName
- linkText
- partialLinkText
- cssSelector
- xpath
Let us use the id locator to locate the elements. The basic requirement for this test would be the user should be allowed to enter his username and password and click the Login button.
driver.findElement(By.id("txtUsername")).sendKeys("Admin");
    driver.findElement(By.id("txtPassword")).sendKeys("admin123");
    driver.findElement(By.id("btnLogin")).click();
Once the tests for Selenium Java testing automation are executed, you need to close the browser instance, which is considered the best practice in finishing the test execution.
You can close the browser by using two different WebDriver commands, these are:
- close(): Closes the current browser window.
- quit(): Quit all the instantiated browser instances.
Below is the code snippet for testing the login functionality in a single browser for cross browser Selenium automation testing.
driver.close(); // Closes the single browser window accessed by the WebDriver instance
    driver.quit();   // Closes all the open browser windows instances
Below is the code snippet for testing the login functionality in a single browser for browser automation with Selenium & Java.
package WebDriverProject;

import org.junit.Assert;
import org.openqa.selenium.By;
import org.openqa.selenium.WebDriver;
import org.openqa.selenium.firefox.FirefoxDriver;

public class LoginClass {

	public static void main(String args[]) {

		System.setProperty("WebDriver.gecko.driver","C:\Users\shalini\Downloads\geckodriver-v0.26.0-win64\geckodriver.exe");

      		WebDriver driver = new FirefoxDriver();                    //initialise the WebDriver

     		 driver.get("https://opensource-demo.orangehrmlive.com/"); //define the url

		String pageTitle = driver.getTitle();		//get the title of the webpage
		System.out.println("The title of this page is ===> " +pageTitle);
		Assert.assertEquals("OrangeHRM", pageTitle);	//verify the title of the webpage

		driver.findElement(By.id("txtUsername")).clear();//clear the input field before entering any value
		driver.findElement(By.id("txtUsername")).sendKeys("Admin");//enter the value of username
		driver.findElement(By.id("txtPassword")).clear();
		driver.findElement(By.id("txtPassword")).sendKeys("admin123");//enter the value of password
		driver.findElement(By.id("btnLogin")).click();		//click Login button
		System.out.println(“Successfully logged in”);
		driver.quit();
		}
}
Here’s your free opportunity for automated browser testing.
Creating A Maven Project In Eclipse
The primary advantage of having a Maven project is that we get all our dependencies (JARS) added automatically, allowing users to reuse the same jars across multiple projects.
In addition, Maven automatically downloads the necessary files from the repository when building the project. You can also refer to our Maven tutorial to learn how to use Maven for Selenium automation testing.
Step1: Download Maven
Step2: Add MAVEN_HOME system variable

Set the path which points to the bin directory of the maven directory.

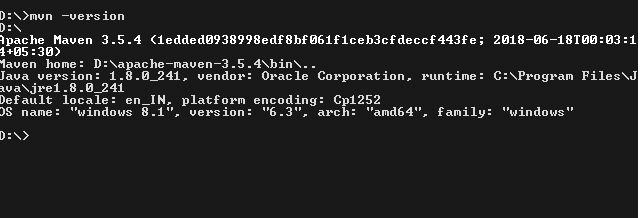
Step 3 : To verify successful installation of Maven, type mvn –version in command prompt.
We can use the same code as in the Java testing Project example. The necessary dependencies are added in pom.xml, thereby avoiding the need to manually add jar files in the project.
Pom.xml

<project
xmlns="http://maven.apache.org/POM/4.0.0"
xmlns:xsi="http://www.w3.org/2001/XMLSchema-instance" xsi:schemaLocation="http://maven.apache.org/POM/4.0.0 http://maven.apache.org/xsd/maven-4.0.0.xsd">
  <modelVersion>4.0.0</modelVersion>
  <groupId>demoProject</groupId>
  <artifactId>demoProject</artifactId>
  <version>0.0.1-SNAPSHOT</version>
  <build>
	<sourceDirectory>src</sourceDirectory>
	<plugins>
  	<plugin>
    	<artifactId>maven-compiler-plugin</artifactId>
    	<version>3.8.0</version>
    	<configuration>
      	<source>1.8</source>
      	<target>1.8</target>
    	</configuration>
  	</plugin>
	</plugins>
  </build>

  <dependencies>
            	<dependency>
	          <groupId>org.seleniumhq.selenium</groupId>
	          <artifactId>selenium-java</artifactId>
	          <version>3.141.59</version>
            	</dependency>
<dependency>
                             <groupId>junit</groupId>
	           <artifactId>junit</artifactId>
	            <version>4.10</version>
	             <scope>test</scope>
</dependency>
  </dependencies>
</project>
Running your first test script for cross browser automation with Selenium and Java
In this section of the Selenium Java testing Tutorial, I will run a test script and perform automated browser Java testing on Firefox, Chrome, and Opera browsers to test the website’s login feature on these browsers.
In case you’re not familiar with cross browser testing, I will explain in the section below:
Overview Of Cross Browser Testing
Since each browser has its own rendering engine, there is a high probability that the web page might render differently on various web browsers. This is because the web elements in your web page might not be compatible with the said browsers. This is why you need to perform cross browser testing to make sure that your website is compatible with the desired web browsers.
Cross browser testing involves testing the web application in multiple browsers like testing on Chrome browser and other browsers like Firefox, Microsoft Edge, Internet Explorer, Opera, etc.
Need For Cross Browser Testing
Availability of different browsers, devices, and platforms has increased the need for cross browser testing. The purpose of cross browser testing is to provide a consistent behavior and experience across all browsers, devices, and platforms. Some of the most common areas addressing cross browser compatibility issues are:
- Image orientation
- Font size mismatch
- JavaScript implementation might differ in different browsers
- Page alignment
- CSS styles can render differently while testing website on IE 8 than in more recent versions of Internet Explorer and Google Chrome
- Minimal (or no) support for HTML5
Thus the goal of cross browser testing is to ensure your users are able to access all content and execute all of the basic functions on your website without any major issues.
Implementing Cross Browser Testing in Selenium WebDriver
Cross browser testing can be performed by integrating the TestNG framework with Selenium WebDriver. Let us try to use the same application to check the login functionality in various browsers. If you are new to the TestNG framework, you can go through the TestNG tutorial to get started with the framework.
Integrating TestNG with WebDriver
Step 1: Go to Help –> Install Software.
Step 2: Click Add and enter the below link in the location field.
Step 3: Click Add

Step 4: Select TestNG and click Next

Step 5: Click Next.

Step 6: Accept the terms of the license agreement and click Finish.

Sometimes you may get a security warning while installing. Click Install anyway.

Step 7: Restart the eclipse to complete the installation.
Read – A Complete Guide For Your First TestNG Automation Script
Running the test script for cross browser automation with Selenium and Java
Consider the test scenario where a user wants to login to a website in multiple browsers and ensure that the webpage implementation and styles are the same across all the browsers.
In the below code, we perform the cross browser testing in Firefox, Chrome, and Opera browsers.
//Running The Script For Browser Automation With Selenium & Java  tutorial//

package com.LoginPage;

import java.util.concurrent.TimeUnit;

import org.openqa.selenium.By;
import org.openqa.selenium.WebDriver;
import org.openqa.selenium.chrome.ChromeDriver;
import org.openqa.selenium.firefox.FirefoxDriver;
import org.openqa.selenium.opera.OperaDriver;
import org.testng.annotations.AfterClass;
import org.testng.annotations.AfterTest;
import org.testng.annotations.BeforeTest;
import org.testng.annotations.Parameters;
import org.testng.annotations.Test;

public class LoginTest {

	public WebDriver driver;

	@BeforeTest
	@Parameters("browser")
	public void setUp(String browser) {

		if(browser.equalsIgnoreCase("Firefox")) {
System.setProperty("WebDriver.gecko.driver", "C:\Users\shalini\Downloads\geckodriver-v0.26.0-win64\geckodriver.exe");
			driver = new FirefoxDriver();
		}

		else if (browser.equalsIgnoreCase("GoogleChrome")) {
System.setProperty("WebDriver.chrome.driver", "C:\Users\shalini\Downloads\chromedriver\chromedriver.exe");
			driver = new ChromeDriver();
		}

		else if(browser.equalsIgnoreCase("Opera")) {
						  System.setProperty("WebDriver.opera.driver","C:\Users\shalini\Downloads\operadriver\operadriver_win64\operadriver.exe");
			driver = new OperaDriver();
		}
	}

	@Test
    	public void Login() {

		driver.get("https://opensource-demo.orangehrmlive.com/");
		driver.manage().timeouts().implicitlyWait(10, TimeUnit.SECONDS);
		String pageTitle = driver.getTitle();
		System.out.println("The title of this page is ===> " +pageTitle);

		driver.findElement(By.id("txtUsername")).clear();
		driver.findElement(By.id("txtUsername")).sendKeys("Admin");

		driver.findElement(By.id("txtPassword")).clear();
		driver.findElement(By.id("txtPassword")).sendKeys("admin123");

		driver.findElement(By.id("btnLogin")).click();

  }

	@AfterTest
	public void tearDown() {
		driver.quit();
	}
}
To execute the test case in different browsers, we need to create an XML file that configures the suite and runs them. This file allows you to configure the tests, set the priority, list the dependency of tests, include or exclude any class, method, or tests, perform parallel testing, parameterize the values by using the annotation @Paramters, etc.
As per requirements, we have to parameterize the value of different browsers used for automated browser Java testing.
Please follow the below steps to create a TestNG.xml file:
Step 1: Right your project → New → File
Step 2: Add the name of the file to be used and click Finish.
<?xml version="1.0" encoding="UTF-8"?>
<!DOCTYPE suite SYSTEM "http://testng.org/testng-1.0.dtd">
<suite name="TestSuite">
<test name="ChromeBrowserTest">
<parameter name="browser" value="GoogleChrome"/>
<classes>
<class name="com.LoginPage.LoginTest">
</class>
</classes>
</test>
<test name="FirefoxBrowserTest">
<parameter name="browser" value="Firefox" />
<classes>
<class name="com.LoginPage.LoginTest">
</class>
</classes>
</test>
<test name="OperaBrowserTest">
<parameter name="browser" value="Opera" />
<classes>
<class name="com.LoginPage.LoginTest">
</class>
</classes>
</test>
</suite>
Right-click the TestNG.xml file and select Run As →TestNG suite

Common exceptions in cross browser automation testing
Exceptions are events that cause the Java program to end abruptly without giving the expected output. Below are the most common exceptions that occur when executing tests in Selenium WebDriver.
1. org.openqa.selenium.NoSuchElementException
NoSuchElementException occurs when the Selenium WebDriver can’t locate an element.
2.java.lang.IllegalStateException: The driver executable does not exist:
This exception occurs when the driver is not found in the specified path
3. org.openqa.selenium.firefox.NotConnectedException: Unable to connect to host 127.0.0.1 on port 7055 after 45000ms
This is due to the version incompatibility of the browser and the Selenium. Check the compatibility of the browser and the driver on the download page of the driver.
4. org.openqa.selenium.StaleElementReferenceException
This exception might occur when a web element is no longer present on the web page. To overcome this exception, users can use dynamic XPath instead of a static XPath.
Watch this video to learn how to handle Stale Element Reference Exceptions in Selenium with Java.
Performing parallel testing on local Selenium Grid
In this section of the Selenium Java testing tutorial, we deep dive into performing parallel testing on a local Selenium Grid. When performing cross browser automation with Selenium and Java, you might want to run your test script against several browsers & OS combinations. This is why running your test sequentially might turn out to be time-consuming and a non-scalable process.
Let’s say you want to run cross browser tests on 50 browsers & OS combinations Also, each test script takes about 100 seconds to run a test script. If you run these tests sequentially you’ll take a total of 5000 seconds to run these tests. This is essentially around 1 hour 23 min. That’s a lot of time! Don’t you think so?
But if you run tests in parallel, let’s say you run five parallel sessions, where you run five tests simultaneously. Total time would come down to 1000 seconds, i.e., 16 mins approx. So you end up saving more than an hour of your time.

Parallel testing in Selenium is realized using a Selenium Grid. Selenium Grid routes test commands to browser instances on remote machines (that match the desired test combination). Here are the two main components of the Selenium Grid:
- Hub (server): The WebDriver client gives the access request to the Hub
- Node (remote device): Node is the Selenium WebDriver instance on remote machines. The Hub passes the test execution request to the Node that is a best match of the test combination (in terms of browser, browser version, and operating system).
The WebDriver client performs test execution on a remote system through remoteWebDriver. RemoteWebDriver has two important components – the Client and the Server. Along with the Selenium Hub URL, the desired browser capabilities are also passed to the method that initiates the instantiation of a Remote WebDriver.
Read – Speed Up Automated Parallel Testing In Selenium With TestNG
Performing parallel testing on TestMu AI Selenium Grid
It is always a good practice to run tests in parallel on an online Selenium Grid to speed up the overall execution time of your Selenium Java testing automation. For example, suppose you have an extensive number of tests or those take more time to execute. In that case, using Selenium WebDriver with Java or any other language might compel you to use parallel testing for speeding up the tests and achieving the best possible results.
TestMu AI is a powerful cloud-based cross browser testing platform that helps you execute cross browser test scenarios in multiple online browsers simultaneously. TestMu AI allows developers to test web apps for cross browser compatibility across 2000+ different browsers, OS, resolutions, devices, etc.
To get started, you need to create an account on TestMu AI using your email address. Once you sign up on TestMu AI, you will be provided a unique username and an accesskey located at your TestMu AI profile section. Then, the browser capabilities can be generated using the TestMu AI capabilities generator, as shown below.
//Parallel testing for Browser automation with Selenium & Java tutorial//

package com.ParallelTestInGrid;

import java.net.MalformedURLException;
import java.net.URL;
import java.util.concurrent.TimeUnit;

import org.openqa.selenium.By;
import org.openqa.selenium.remote.DesiredCapabilities;
import org.openqa.selenium.remote.RemoteWebDriver;
import org.testng.annotations.AfterTest;
import org.testng.annotations.BeforeTest;
import org.testng.annotations.Parameters;
import org.testng.annotations.Test;
public class gridTesting {
    String username = "USERNAME";			//Enter your username
    String accesskey = "ACCESSKEY";			//Enter your accesskey
    static RemoteWebDriver driver = null;
    String gridURL = "@hub.lambdatest.com/wd/hub";

    boolean status = false;

    @BeforeTest
	@Parameters("browser")
	public void setUp(String browser)throws MalformedURLException
	{
		if(browser.equalsIgnoreCase("chrome"))
		{
        DesiredCapabilities capabilities = new DesiredCapabilities();
        capabilities.setCapability("browserName", "chrome"); 	//To specify the browser
        capabilities.setCapability("version", "70.0");		//To specify the browser version
        capabilities.setCapability("platform", "win10"); 		// To specify the OS
        capabilities.setCapability("build", "LambdaTestApp");               //To identify the test
        capabilities.setCapability("name", "LambdaTestGridExample");
        capabilities.setCapability("network", true); 		// To enable network logs
        capabilities.setCapability("visual", true); 			// To enable step by step screenshot
        capabilities.setCapability("video", true);			// To enable video recording
        capabilities.setCapability("console", true); 			// To capture console logs
        try {
            driver = new RemoteWebDriver(new URL("https://" + username + ":" + accesskey + gridURL), capabilities);
        } catch (MalformedURLException e) {
            System.out.println("Invalid grid URL");
        } catch (Exception e) {
            System.out.println(e.getMessage());
        }
		}

		else if(browser.equalsIgnoreCase("Firefox"))
		{
        DesiredCapabilities capabilities = new DesiredCapabilities();
        capabilities.setCapability("browserName", "Firefox");	//To specify the browser
        capabilities.setCapability("version", "76.0");		//To specify the browser version
        capabilities.setCapability("platform", "win10"); 		// To specify the OS
        capabilities.setCapability("build", "LambdaTestApp");	//To identify the test
        capabilities.setCapability("name", "LambdaTestGridExample");
        capabilities.setCapability("network", true); 		// To enable network logs
        capabilities.setCapability("visual", true); 			// To enable step by step screenshot
        capabilities.setCapability("video", true); 		                  // To enable video recording
        capabilities.setCapability("console", true); 			// To capture console logs
        try {
            driver = new RemoteWebDriver(new URL("https://" + username + ":" + accesskey + gridURL), capabilities);
        } catch (MalformedURLException e) {
            System.out.println("Invalid grid URL");
        } catch (Exception e) {
            System.out.println(e.getMessage());
        }
}
}


        @Test
        public void Login() {
            driver.get("https://opensource-demo.orangehrmlive.com/");
    		String pageTitle = driver.getTitle();
    		System.out.println("The title of this page is ===> " +pageTitle);
    		driver.manage().window().maximize();

		driver.manage().timeouts().implicitlyWait(10, TimeUnit.SECONDS);

    		driver.findElement(By.id("txtUsername")).clear();
    		driver.findElement(By.id("txtUsername")).sendKeys("Admin");

    		driver.findElement(By.id("txtPassword")).clear();
    		driver.findElement(By.id("txtPassword")).sendKeys("admin123");

    		driver.findElement(By.id("btnLogin")).click();

		System.out.println("successfully logged in");


    }

     @AfterTest
     public void tearDown() {
    	 driver.quit();
}


}
TestNG.xml
<?xml version="1.0" encoding="UTF-8"?>
<!DOCTYPE suite SYSTEM "http://testng.org/testng-1.0.dtd">
<suite name="TestSuite" parallel="tests">
<test name="ChromeBrowserTest">
<parameter name="browser" value="chrome"/>
<classes>
<class name="com.ParallelTestInGrid.gridTesting">
</class>
</classes>
</test>
<test name="FirefoxBrowserTest">
<parameter name="browser" value="Firefox" />
<classes>
<class name="com.ParallelTestInGrid.gridTesting">
</class>
</classes>
</test>
<test name="OperaBrowserTest">
<parameter name="browser" value="Opera" />
<classes>
<class name="com.LoginPage.LoginTest">
</class>
</classes>
</test>
</suite>
Once the Selenium Java testing automation is completed, you can view the results in the TestMu AI Automation tab. Here you can see the complete information about the browser automation tests. You can find the browser information which was used for testing and the time taken for the test execution.
The most interesting part of LambaTest Grid is that it provides an option of video recording of the test execution. You can play the video to know how the browser was automated and what has caused the error in case of any failed test.
Note: Experience reliable automated testing with Selenium Testing Tool on a cloud grid of 3000+ browsers and operating systems.
Cross browser automation test results in Automation Tab
The timeline tab shows the number of builds recorded. You can toggle Test View from Build View to see the list of executed tests. TestMu AI provides an option to filter the tests/Build based on the date,users,build name and the status.

The Automation Logs tab provides complete details such as the browser in which the test was automated, the operating system, the status of the test, the execution time of the test, the full page screenshot of every WebDriver command execution, the logs captured while test execution, the test execution video and finally the feature to download all the captured data.

Console output:
The below output for browser automation with Selenium Java testing, shows the successful execution of the test case in two different virtual browsers – Firefox and Chrome in parallel. Click the test case to view the detailed logs.

Also Read: Selenium Java Testing: Page Object Model
Let’s Take A Quick Recap!
In this Selenium Java testing Tutorial, we explored the importance of cross browser automation and Selenium WebDriver along with the Selenium Grid features. We also explored how Selenium Java testing automation can be performed in a single browser, multiple browsers one at a time, or even in parallel. We saw the importance of automated browser Java testing and parallel testing, which provides an idea of wider compatibility. The available tools must be leveraged effectively to ensure that the webpage behaves the same across all browsers.
Testing on different browsers & OS combinations is the key factor for successful test completion for cross browser automation with Selenium and Java, which helps to ensure a better user experience. Your test coverage should ensure that your users get a seamless user experience across their devices. In addition, your Selenium test automation has to provide the confidence that not a single critical defect has been ignored in the product.
I hope you have gained knowledge and interest by reading this cross browser automation with Selenium and Java testing Tutorial. I would love to hear your comments on this article; feel free to share them in the comment section below. Dive into the automation pool and explore a melange of features hidden beneath it. Learn…Explore….Share…!!!!! 😊
Frequently asked questions
Did you find this page helpful?
More Related Hubs
TestMu AI forEnterprise
Get access to solutions built on Enterprise
grade security, privacy, & compliance
- Advanced access controls
- Advanced data retention rules
- Advanced Local Testing
- Premium Support options
- Early access to beta features
- Private Slack Channel
- Unlimited Manual Accessibility DevTools Tests