
Next-Gen App & Browser Testing Cloud
Trusted by 2 Mn+ QAs & Devs to accelerate their release cycles

The Most Detailed Selenium PHP Guide (With Examples)
This is the most detailed Selenium PHP tutorial. Learn how to set up PHP with Selenium, run parallel testing to trim down test execution time, and much more!

Himanshu Sheth
February 24, 2026
The Selenium automation framework supports many programming languages such as Python, PHP, Perl, Java, C#, and Ruby. But if you are looking for a server-side programming language for automation testing, Selenium WebDriver with PHP is the ideal combination.
The Selenium WebDriver APIs (or Selenium WebDriver Bindings) for PHP support was initially developed & maintained by Facebook under facebook/webdriver. However, it is now called php-webdriver and maintained by the community.
PHP’s difficulty level is comparatively less in comparison to languages like Java and Python; hence you should have a go at PHP when trying out Selenium test automation. In this Selenium PHP tutorial, we will go deep into the essential aspects of Selenium test automation with PHP. If you are preparing for an interview you can learn more through Selenium interview questions.
Overview
What Is Selenium PHP?
Selenium PHP refers to using PHP language bindings with Selenium WebDriver to automate web browser interactions. It enables developers and QA engineers to write browser automation scripts in PHP for functional testing, regression testing, and cross-browser validation.
How to Get Started With Selenium PHP for Automation Testing?
To begin using Selenium with PHP, you need a properly configured development and testing environment.
Basic setup includes:
- PHP installed on your system
- Composer for dependency management
- Selenium Server or Selenium Grid running
- Browser drivers such as ChromeDriver or GeckoDriver
- A supported PHP WebDriver library
Once configured, PHP scripts can initialize WebDriver sessions and automate browser actions like navigation, clicking, typing, and form submission.
How to Enable cURL With PHP on Windows?
cURL is required for PHP WebDriver to communicate with the Selenium Server.
To enable cURL in PHP on Windows:
- Open the
php.iniconfiguration file - Locate the line related to
extension=curl - Remove the semicolon to enable the extension
- Restart the web server or local development server
Enabling cURL ensures proper HTTP communication between PHP scripts and Selenium.
What Is PHP-WebDriver?
PHP-WebDriver is a PHP client library that enables browser automation through the WebDriver protocol. It allows developers to interact with web elements like buttons, forms, and links for automated testing. It is commonly used with Selenium to validate and ensure web application functionality.
Getting Started With Selenium PHP For Automation Testing
Before we start this Selenium PHP tutorial, we think it’s a good idea to give you an introduction to PHP quickly. PHP (PHP: Hypertext Preprocessor) is a popular open-source scripting language that is widely used for web applications. The latest stable version of PHP is 7.4.10, and also PHP 8.0.0 (Beta 3) was open for community testing. For Selenium test automation with PHP, we will first download and install the latest stable version of PHP, i.e., 7.4.10, on Windows 10.
Installation of PHP on Windows
Follow the below steps for installing PHP on Windows:
- Download PHP 7.4.10, thread-safe version (i.e. VC15 x64 Thread Safe) from PHP downloads page.

- Unzip the zipped file in C:\PHP7 (or any other preferred folder)

- Go to the location where the PHP executable (php.exe) is present and copy the path to that executable and append it in the Path.


- If required, you can restart the machine to ensure that the settings take effect. To check the PHP installation completion, go to the terminal (or command prompt) and execute the command php –v to check the installed PHP version.


Installation of PHP Composer on Windows
Once PHP is installed, you should install the dependency manager for PHP called Composer. `Composer is a dependency package manager for PHP that helps to manage the dependencies.
When using Selenium WebDriver with PHP for automation testing, the necessary dependencies (including WebDriver bindings for browsers like Chrome & Firefox) have to be added to the composer.json file for downloading and installing the same. We would look into these aspects in the subsequent sections of this Selenium PHP tutorial.
To install Composer on Windows, download the Windows installer and start the installation process. Though the installation process is straightforward, you should ensure not enabling the ‘Developer Mode,’ as it is not necessary for Selenium test automation with PHP.

In the second step of Composer Setup, make sure to enter the correct path to php.exe (In our case, we have installed PHP in c:\PHP7)

Enter the Proxy settings (if any); else press Finish to complete the installation process.

Once the installation is complete, you can check if the Composer has been successfully installed on the system or not by executing the command composer –version on the terminal. This would give the installed version of Composer. If the Composer is not installed, then this command will show the respective message.

Enabling Curl with PHP on Windows
PHP-WebDriver library, which is the PHP language binding for Selenium WebDriver, is dependent on CURL(i.e., Client URL). The same needs to be enabled for PHP.
Let’s move forward with this Selenium PHP tutorial by enabling CURL. For enabling CURL for PHP on Windows, open php.ini in the location where PHP is installed and uncomment the line that mentions curl extension.
extension =curl
Along with curl, we will enable other extensions as well that would be required for Selenium test automation. Shown below is the list of extensions that we have enabled in php.ini available in our system:
extension=bz2
extension=curl
extension=fileinfo
extension=gd2
extension=mbstring
extension=openssl
extension=pdo_mysql
extension=pgsql
extension=shmop
extension=sqlite3
extension=tidy
extension=xmlrpc
extension=xsl
Developers with expertise in PHP development might have a XAMPP server installed on their machines. However, the server is not required for performing automation testing with Selenium Web PHP.
Setting SSL Certificate with PHP on Windows
When executing Selenium test automation scenarios with PHP CURL calls to https URLs, you might encounter the following error:
SSL certificate problem: unable to get local issuer certificate
The error essentially means that the root certificates on the system from where the tests are triggered are invalid.

We need to perform the following steps to fix PHP CURL with a local certificate:
- Download cacert.perm from http://curl.haxx.se/ca/cacert.pem
- Copy the downloaded file to C:\PHP7\extras\ssl (i.e. extras\ssl folder in the location where PHP is installed)

- Modify [curl] section in php.ini with curl.cainfo pointing to C:\PHP7\extras\ssl\cacert.pem
[curl]
; A default value for the CURLOPT_CAINFO option. This is required to be an
; absolute path.
curl.cainfo = "C:PHP7extrassslcacert.pem"
If you are a PHP expert, you can acquire a benchmark industry certification specializing in core PHP programming skills and expand your opportunities to advance your career in PHP automation testing.

Configuring Eclipse for PHP
Several IDEs such as Eclipse, Atom, Komodo Edit, PhpStorm, etc. are available for Selenium WebDriver with PHP development. Some IDEs are open-source (hence free for use), whereas IDEs like PhpStorm come with a 30-day free trial period.
We would be using Eclipse IDE for our Selenium test automation. Follow the steps mentioned below for configuring Eclipse IDE for PHP:
- Download and Install Eclipse with the help of the installation window..
- Once Eclipse is installed, you need to enable support for PHP in Eclipse. The PHP Development Plugin (or PDT Plugin) has to be installed for using PHP in Eclipse.
- Install the PDT update through the update sites, by going to Help? Install New Software options. The update site is http://download.eclipse.org/tools/pdt/updates/7.2


- Once PHP support on Eclipse is enabled, install composer on Eclipse by visiting https://marketplace.eclipse.org/content/composer-php-support
With this, the overall development environment comprising of (PHP + Composer + Eclipse) for Selenium PHP testing is complete.
PHP-WebDriver: Selenium WebDriver Bindings for PHP
The Selenium WebDriver does not interact directly with the web elements (i.e., text boxes, checkboxes, buttons, etc.) on a webpage. Instead, a browser-specific Selenium WebDriver acts as a bridge between the browser and test script. Therefore we need a binding agent that allows us to interact with the web elements, such as PHP-WebDriver.
PHP-WebDriver (earlier called facebook/php-webdriver ) is the language binding for Selenium WebDriver that lets you control the web browsers (under test) from PHP. It is compatible with all major Selenium server versions, i.e., 2.x, 3.x, and 4.x.

Like the Selenium WebDriver library for other languages (i.e., C#, Python, Java, etc.), PHP-WebDriver library also supports JsonWireProtocol (JSON) and implements experimental support for W3C WebDriver. As the browser drivers are responsible for communicating with the respective web browsers, they should be present on the machine where Selenium PHP tests are performed.
Let us see how we can download Selenium WebDriver. For popular browsers, the Selenium WebDriver can be downloaded from the following locations:
For performing Selenium test automation on a local Selenium Grid, the Selenium Grid server (.jar), or remote end, should be started so that it can listen to the commands sent from the browser library. The Selenium commands are then executed on the browser on which tests have to be executed.
The latest Selenium Server (Grid) version is Selenium Grid 4 (i.e. 4.0.0-alpha-6). However, we found that parallel testing using Selenium PHP was not working as expected on Selenium Grid 4, hence we recommend to download Selenium Grid 3 (i.e., 3.141.59).
For simplification, we recommend keeping the Selenium Server jar file and browser drivers in the same directory

Start Selenium Server by executing the following command on the terminal:
java -jar selenium-server-standalone-3.141.59.jar
By default, the Server uses port 4444 for listening to the incoming requests.

PHPUnit and Selenium
PHP supports several test automation frameworks, but PHPUnit is one of the widely used unit-testing frameworks meant for automation testing. Like JUnit, PHPUnit is also an instance of xUnit and works similarly.
The main advantage of PHPUnit is that code issues can be detected at a very early stage during the development process, as the developers themselves perform the testing. The latest version of PHPUnit is 9.3.8, with PHPUnit 10 staged for release in February 2021.

How to install PHPUnit on Windows
For automation testing (or cross-browser testing) on Selenium WebDriver with PHP, we would be using PHPUnit for Selenium testing by configuring it from composer.json in the PHP project. Hence, PHPUnit is managed as a project-level dependency and is not recommended for global installation.
Extensions that aid in analyzing the DOM (Document Object Model) and parsing files in the JSON format are enabled by default in the test framework.
Selenium test automation with PHPUnit
PHPUnit (7.3 and later) supports Selenium WebDriver, and it provides the TestCase class for the WebDriver version. The TestCase class should be extended to get started with Selenium PHP testing.
Utility methods and custom assertions in PHPUnit can be written in an abstract subclass of PHPUnit\Framework\TestCase and deriving the test case classes from that class.

Akin to the Selenium automation frameworks in other popular languages like Python, Java, etc.; PHPUnit also provides methods like setUp() and tearDown() for initialization & de-initialization of the test resources used for automation testing.
<?php
require 'vendor/autoload.php';

use PHPUnitFrameworkTestCase;

class ClassNameTest extends TestCase
{

	public function setUp(): void
	{
		/* Setup (or initialization) method goes here */
	}

	public function tearDown(): void
	{
		/* tearDown (or de-initialization) method goes here */
	}

	/*
	 * test
 	*/
	public function test_scenario_1()
	{
		/* Test Method implementation goes here */
	}

Writing Tests for PHPUnit
When using PHPUnit for automation testing with Selenium, it is important to follow the below rules:
- The name of files containing test implementation should end with
Test. Hence, valid filenames are xxxTest.php, whereas invalid file names are Testxxx.php, xxxtest.php, etc. This is how the PHPUnit framework identifies files that might contain test methods. An example of a valid file name is shown below:
- As the TestCase class has to be extended for automation testing, its corresponding namespace (i.e. PHPUnit\Framework\TestCase) has to be imported at the start of the implementation.

- Tests in PHPUnit are public methods that are named as test* Alternatively, there is an option to use the
@testannotation in the method’s docblock to mark it as a test method.
- There is another way to call the test method in PHPUnit, which can be used as an alternative to the previous step. Create an object of the class that is extending the TestCase class and subsequently call the test method.
However, we do not recommend using this approach since the code needs to be updated for calling new test methods each time you implement them.

Advantages of PHPUnit
Here are some of the major reasons why you should use PHPUnit over other automation frameworks for Selenium PHP:
- Issues are detected at an early stage since the developers are responsible for creating and executing the tests.
- Does not require global installation and can be installed (or configured) on a per-project basis.
However, there are some downsides of using PHPUnit over other Selenium WebDriver with PHP automation frameworks. The major shortcoming is that @covers annotation has to be added if multiple functions are being tested. A change in method (or function) name requires an update in the @covers annotation, else tests are skipped for that particular method (or function).
Austin Siewert
CEO, Vercel
Discovered @TestMu AI yesterday. Best browser testing tool I've found for my use case. Great pricing model for the limited testing I do 👏
2M+ Devs and QAs rely on TestMu AI
Deliver immersive digital experiences with Next-Generation Mobile Apps and Cross Browser Testing Cloud
Using Selenium WebDriver APIs with PHPUnit
PHPUnit provides complete support for Selenium WebDriver APIs in the php/webdriver (or facebook/webdriver) package. From PHPUnit 1.8.0 onwards, the package has been renamed from facebook/webdriver to php/webdriver. Selenium web automation tests can be accomplished using this package.
The first step for using the php-webdriver package is installing using the composer: These are the contents of composer.json for installing the PHP WebDriver and PHPUnit (version 9 or above):
{
   "require":{
      "php":">=7.1",
      "phpunit/phpunit":"^9",
      "phpunit/phpunit-selenium": "*",
      "php-webdriver/webdriver":"1.8.0",
   }
}
As seen in composer.json, the availability of PHP 7.1 (or above) is mandatory on the machine where PHP WebDriver 1.8 and PHPUnit 9.xxx (and above) have to be installed. For installing the packages mentioned in composer.json, run the command composer require and hit the ‘Enter button’ twice to proceed with the installation.

Starting the Selenium Grid Server
As stated earlier, when Selenium PHP tests have to be executed on a local Selenium Grid, the Standalone Grid Server has to be started, which, in turn, listens to the commands sent from the Browser Library. The Selenium Grid server receives the corresponding commands and starts a new session using the browser drivers that acts like a hub distributing the commands among multiple nodes.
Since we faced issues with Selenium Grid 4 when used with Microsoft Edge, we opted for Selenium Grid 3 (i.e., 3.141.59). After downloading the Selenium Server jar file, start the server by executing the following command on the terminal:
The server uses port 4444 for listening to the incoming requests.

Creating a browser session
Before a browser session can be established with the web browser under test, Selenium WebDriver for the corresponding browsers has to be downloaded on the machine. It is recommended to keep the Selenium Server jar and browser drivers in the same location (as shown below).

In Selenium PHP, the URL of the running Selenium server has to be passed during the process of creation of browser session.
// selenium-server-standalone-#.jar (version 3.x)
$host = 'http://localhost:4444/wd/hub';
// selenium-server-standalone-#.jar (version 4.x)
$host = 'http://localhost:4444';
This is how you can start the browser of your choice:
- Chrome
use PHPUnitFrameworkTestCase;
use FacebookWebDriverChromeChromeOptions;
use FacebookWebDriverChromeChromeDriver;

protected $webDriver;

$capabilities = DesiredCapabilities::chrome();
$this->webDriver = RemoteWebDriver::create($host, $capabilities);
use PHPUnitFrameworkTestCase;
use FacebookWebDriverFirefoxFirefoxDriver;
use FacebookWebDriverFirefoxFirefoxProfile;
use FacebookWebDriverRemoteRemoteWebDriver;

protected $webDriver;

$capabilities = DesiredCapabilities::firefox();
$this->webDriver = RemoteWebDriver::create($host, $capabilities);
use PHPUnitFrameworkTestCase;
use FacebookWebDriverRemoteRemoteWebDriver;

protected $webDriver;

$capabilities = DesiredCapabilities::microsoftEdge();
$this->webDriver = RemoteWebDriver::create($host, $capabilities);
Read More– Get started with your Selenium Python easy tutorial!!!
Customizing Desired Browser Capabilities
The DesiredCapabilities class has to be imported before customizing the browser capabilities of the browser being used for Selenium web automation.

The setCapability() method of the DesiredCapabilities class sets the capabilities by taking – using the (string, value) input combination.
Here is the sample of disabling SSL certificates support in Firefox

use PHPUnitFrameworkTestCase;
use FacebookWebDriverFirefoxFirefoxDriver;
use FacebookWebDriverFirefoxFirefoxProfile;
use FacebookWebDriverRemoteRemoteWebDriver;

$capabilities = DesiredCapabilities::firefox();
// Disable accepting SSL certificates
// selenium-server-standalone-#.jar (version 3.x)
// $host = 'http://localhost:4444/wd/hub'
$capabilities->setCapability('acceptSslCerts', false);
$this->webDriver = RemoteWebDriver::create($host, $capabilities);
Web automation using Selenium PHP on local Selenium Grid
For demonstration purposes in this Selenium PHP tutorial on the local Selenium Grid, we first set up a PHP project in Eclipse. We name the project as ‘CBT_Project’ and create a folder named test in the project. The test folder will contain the php files that will contain the implementation for Selenium web automation test scenarios.

We use two different test scenarios that are tested on Chrome and Firefox browsers, respectively. Since the Selenium WebDriver with PHP tests are performed on the local Selenium Grid, the machine on which tests are being performed should have Chrome & Firefox browsers, and their respective browser WebDrivers installed on that machine.
Test Scenario – 1 (Browser – Chrome, Platform – Windows 10)
- Navigate to the URL https://www.google.com/ncr
- Locate the Search text box
- Enter ‘TestMu AI’ in the search-box
- Click on the search button and assert if the title does not match with the expected window title
Test Scenario – 2 (Browser – Firefox, Platform – Windows 10)
- Navigate to the URL https://lambdatest.github.io/sample-todo-app/
- Select the first two checkboxes
- Send ‘Yey, Let’s add it to list’ to the textbox with id = sampletodotext
- Click the Add Button and verify whether the text has been added or not
- Assert if the title does not match with the expected window title
Implementation
The first step is creation of composer.json in the root project folder (i.e. CBT_Project) to download the dependencies for the Selenium PHP project under development.
{
   "require":{
      "php":">=7.1",
      "phpunit/phpunit":"^9",
      "phpunit/phpunit-selenium": "*",
      "php-webdriver/webdriver":"1.8.0",
      "symfony/symfony":"4.4",
   }
}
The format of the JSON file (i.e., composer.json) should be validated by going to https://jsonlint.com/. Composer.json contains the list of dependencies required for the project. So in this Selenium PHP tutorial, this list will comprise of:
- PHP (version 7.1 or above)
- PHPUnit (version 9 or above)
- PHPUnit-selenium (latest version)
- PHP-WebDriver (version 1.8.0) – Selenium WebDriver library for automation with Selenium PHP
- Symphony (version 4.4) – Set of reusable PHP components and PHP framework for building web applications, APIs, and micro-services.
To install the dependencies mentioned in composer.json, open the terminal (or command prompt) and run the following command:
composer require
Press the ‘Enter button’ twice to download the dependencies mentioned in composer.json.

On completion, you will have composer.lock and vendor folder inside the project folder (i.e. CBT_Project). The file composer.lock contains information of all the dependencies and the vendor folder contains all the downloaded dependencies.

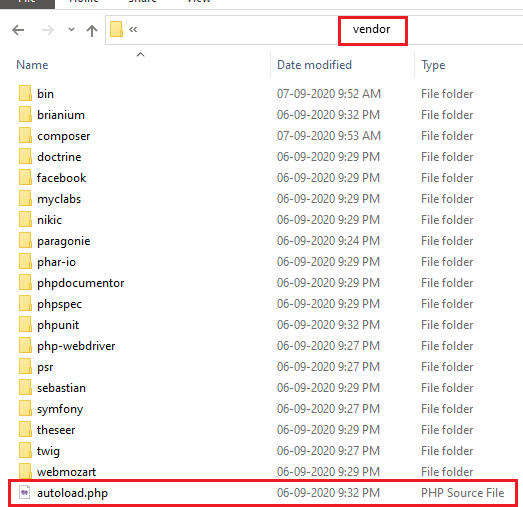
As shown above, composer has generated vendor\autoload.php file. This file can be simply included in the file containing the test implementation so that the classes provided by those libraries can be used without any extra effort.
FileName – GoogleSearchChromeTest.php (Test Scenario – 1)
<?php
require 'vendor/autoload.php';

use PHPUnitFrameworkTestCase;
use FacebookWebDriverChromeChromeOptions;
use FacebookWebDriverChromeChromeDriver;
use FacebookWebDriverFirefoxFirefoxDriver;
use FacebookWebDriverFirefoxFirefoxProfile;
use FacebookWebDriverRemoteDesiredCapabilities;
use FacebookWebDriverRemoteRemoteWebDriver;
use FacebookWebDriverWebDriverBy;

class GoogleSearchChromeTest extends TestCase
{

  protected $webDriver;

  public function build_chrome_capabilities(){
    $capabilities = DesiredCapabilities::chrome();
    return $capabilities;
  }

  public function setUp(): void
  {
    $capabilities = $this->build_chrome_capabilities();
    /* Download the Selenium Server 3.141.59 from
    https://selenium-release.storage.googleapis.com/3.141/selenium-server-standalone-3.141.59.jar
    */
    $this->webDriver = RemoteWebDriver::create('http://localhost:4444/wd/hub', $capabilities);
  }

  public function tearDown(): void
  {
    $this->webDriver->quit();
  }
  /*
  * @test
  */
  public function test_searchTextOnGoogle()
  {
    $this->webDriver->get("https://www.google.com/ncr");
    $this->webDriver->manage()->window()->maximize();

    sleep(5);

    $element = $this->webDriver->findElement(WebDriverBy::name("q"));
    if($element) {
      $element->sendKeys("LambdaTest");
      $element->submit();
    }

    print $this->webDriver->getTitle();
    $this->assertEquals('LambdaTest - Google Search', $this->webDriver->getTitle());
  }
}
?>
Code WalkThrough
Line (2) – autoload.php, the file located in the vendor folder and auto-created by the composer, is imported so that the classes provided the downloaded libraries can be used in the implementation.
require 'vendor/autoload.php';
Line (4) – The TestCase class that is provided by the WebDriver version has to be extended for Selenium web automation with PHP. Hence, the package PHPUnit\Framework\TestCase is imported before the test case classes can be derived from the TestCase class.
use PHPUnitFrameworkTestCase;
Line (5-6) – The ChromeDriver and ChromeOptions class (used for customizing the browser’s DesiredCapabilities) are imported.
use FacebookWebDriverChromeChromeOptions;
use FacebookWebDriverChromeChromeDriver;
Lines (9-10) – The DesiredCapabilities class is imported so that methods for modifying the browser capabilities can be used. The RemoteWebDriver class is primarily responsible for handling all the interactions with the Selenium server. Its package is imported so that the RemoteWebDriver class can be used in the implementation.
use FacebookWebDriverRemoteDesiredCapabilities;
use FacebookWebDriverRemoteRemoteWebDriver;
Line (13) – The class GoogleSearchChromeTest extends TestCase so that methods provided by the TestCase class can be used.
For PHP versions earlier than 7.2, the TestCase class was called PHPUnit_Framework_TestCase, but we recommend using the latest PHP version (i.e., 9.3) since extensions for Selenium PHP are only compatible with newer versions of PHP (7.2 and above).
class GoogleSearchChromeTest extends TestCase
Line (18 – 21) – In the build_chrome_capabilities() method, the DesiredCapabilities of Chrome browser is set. For the demonstration, we have not modified any capabilities of the Chrome browser.
public function build_chrome_capabilities(){
    $capabilities = DesiredCapabilities::chrome();
    return $capabilities;
  }
Line (23 – 30) – As mentioned earlier, the setUp() method in PHPUnit should contain initialization related implementation related to Selenium web automation.sh
The variable $capabilities contain the Chrome browser capabilities set by invoking the build_chrome_capabilities() method.
The create method of the RemoteWebDriver class is used for creating a new instance of Chrome browser. The first parameter is the Selenium server host address that should be started before Selenium PHP tests are executed. The default port of the Selenium server is 4444, and its default address is http://localhost:4444/wd/hub. The second parameter in the create method is Chrome browser capabilities that were earlier set in the code.
public function setUp(): void
  {
    $capabilities = $this->build_chrome_capabilities();
    /* Download the Selenium Server 3.141.59 from
    https://selenium-release.storage.googleapis.com/3.141/selenium-server-standalone-3.141.59.jar
    */
    $this->webDriver = RemoteWebDriver::create('http://localhost:4444/wd/hub', $capabilities);
  }
Lines (32-35) – The tearDown() method contains the implementation for closing the browser session after the tests are done.
public function tearDown(): void
  {
    $this->webDriver->quit();
  }
Lines (36 – 39) – The PHPUnit framework has different mechanisms for location test methods. Methods with names prefixed with tests are considered as test methods (e.g. test_searchTextOnGoogle).
An alternative is using the @test annotation in the method’s DocBlock for marking it as a test method. Further details about annotations in PHPUnit are available here.
/*
  * @test
  */
  public function test_searchTextOnGoogle(){
}
Lines (44 – 46) – The maximize() method of RemoteWebDriver class is used for maximizing the browser window. There are eight locators that are supported by the Selenium WebDriver for locating Web elements, namely – ‘css selector’, ‘class name’, ‘id’, ‘name’, ‘link text’, ‘partial link text’, ‘tag name’ and ‘xpath.
The Inspect tool in Chrome lets you get the information of the required web element (i.e. Search Box).

The methods for locating web elements are implemented in the WebDriverBy class, and the findElement method of RemoteWebDriver class is used with the name locator to locate the search box.
$this->webDriver->manage()->window()->maximize();
sleep(5);
$element = $this->webDriver->findElement(WebDriverBy::name("q"));
Lines (47 – 50) – The sendKeys() method of WebDriverElement simulates the typing in the searched web element i.e. search box. The submit() method helps in submitting the request to the remote server.
if($element) {
      $element->sendKeys("LambdaTest");
      $element->submit();
    }
Line (53) – The assertEquals function which is a built-in function in PHPUnit asserts when the current window title does not match with the expected title.
$this->assertEquals('LambdaTest - Google Search', $this->webDriver->getTitle());
FileName – GoogleSearchFirefoxTest.php (Test Scenario – 2)
<?php
require 'vendor/autoload.php';

use PHPUnitFrameworkTestCase;
use FacebookWebDriverChromeChromeOptions;
use FacebookWebDriverChromeChromeDriver;
use FacebookWebDriverFirefoxFirefoxDriver;
use FacebookWebDriverFirefoxFirefoxProfile;
use FacebookWebDriverRemoteDesiredCapabilities;
use FacebookWebDriverRemoteRemoteWebDriver;
use FacebookWebDriverWebDriverBy;

class GoogleSearchFirefoxTest extends TestCase
{

  protected $webDriver;

  public function build_firefox_capabilities(){
    $capabilities = DesiredCapabilities::firefox();
    return $capabilities;
  }

  public function setUp(): void
  {
    $capabilities = $this->build_firefox_capabilities();
    /* Download the Selenium Server 3.141.59 from
    https://selenium-release.storage.googleapis.com/3.141/selenium-server-standalone-3.141.59.jar
    */
    $this->webDriver = RemoteWebDriver::create('http://localhost:4444/wd/hub', $capabilities);
  }

  public function tearDown(): void
  {
    $this->webDriver->quit();
  }
  /*
  * @test
  */
  public function test_LT_ToDoApp()
  {
      $itemName = 'Item in Selenium PHP Tutorial';
      $this->webDriver->get("https://lambdatest.github.io/sample-todo-app/");
      $this->webDriver->manage()->window()->maximize();
      sleep(5);
      $element1 = $this->webDriver->findElement(WebDriverBy::name("li1"));
      $element1->click();
      $element2 = $this->webDriver->findElement(WebDriverBy::name("li2"));
      $element2->click();
      $element3 = $this->webDriver->findElement(WebDriverBy::id("sampletodotext"));
      $element3->sendKeys($itemName);
      $element4 = $this->webDriver->findElement(WebDriverBy::id("addbutton"));
      $element4->click();
      $this->webDriver->wait(10, 500)->until(function($driver) {
          $elements = $this->webDriver->findElements(WebDriverBy::cssSelector("[class='list-unstyled'] li:nth-child(6) span"));
          return count($elements) > 0;
      });
      sleep(5);
      $this->assertEquals('Sample page - lambdatest.com', $this->webDriver->getTitle());
  }
}
?>
Code WalkThrough
The major part of the implementation remains the same as used for TestCase–1; hence, we would focus only on the code’s major aspects in this walkthrough.
Lines (7 – 8) – The FirefoxDriver and FirefoxProfile classes are imported to make changes to Firefox Profile (if required).
use FacebookWebDriverFirefoxFirefoxDriver;
use FacebookWebDriverFirefoxFirefoxProfile;
Line (10) – The RemoteWebDriver class that implements WebDriver, JavaScriptExecutor, etc. is imported.
use FacebookWebDriverRemoteRemoteWebDriver;
Line (19) – The desired capabilities of the Firefox browser are set.
$capabilities = DesiredCapabilities::firefox();
Line (45 – 46) – The findElement method of RemoteWebDriver class returns WebDriverElement. Here, a web element with the name “li1” is located, and the click() method in WebDriverElement class is used for clicking on the element.
$element1 = $this->webDriver->findElement(WebDriverBy::name("li1"));
$element1->click();
The same operations are performed for web elements with names “li2” and “li3”.

Lines (53 – 56) – A non-blocking wait of 10 seconds is performed using wait(10,500) with a check for the presence of the web element being done every 500 ms. The required web element count returns a non-zero value if the web element is present on the page. In our case, it is the newly added item ‘Item in Selenium PHP Tutorial.’
$this->webDriver->wait(10, 500)->until(function($driver) {
	$elements = $this->webDriver-	>findElements(WebDriverBy::cssSelector("[class='list-unstyled'] li:nth-	child(6) span"));
	return count($elements) > 0;
});
Line (58) – Assert is raised if the current window title does not match the expected window title (i.e. Sample page – lambdatest.com).
$this->assertEquals('Sample page - lambdatest.com', $this->webDriver->getTitle());
Execution
For executing the test code, PHPUnit framework from the vendor folder that was created by Composer, the dependency manager for PHP – PHPUnit offers a number of options that can be obtained via vendor\bin\phpunit --help.

The Selenium Grid Server has to be started before we execute the tests. The server listens to incoming requests on port#4444.

For running the Selenium web automation tests, the PHPUnit command is triggered against individual files [i.e. GoogleSearchChromeTest.php and GoogleSearchFirefoxTest.php].


Shown below is the execution snapshot for the Firefox browser:

Shortcomings of Selenium PHP testing on Local Selenium Grid
In the previous section, we performed Selenium web automation tests on Chrome and Firefox browsers. It won’t be easy if the same tests have to be conducted on browsers like Safari, Internet Explorer, etc. The complexities would multiply further if the tests have to be performed on older and newer versions of a browser, e.g., Chrome, Firefox, Safari, etc.
Selenium PHP test execution on local Selenium Grid has numerous shortcomings, some of which are as follows:
- Selenium web automation on local Selenium Grid is not a scalable option, especially for large projects as a big investment is required in setting up the IT infrastructure.
- Maintenance and upgrade of the Selenium Grid has to be performed on a timely basis.
- The Selenium Grid server has to be started before cross browser testing can be done using Selenium PHP. Automated browser testing on different browser and platform combinations becomes challenging since browser drivers (according to the browser version) have to be downloaded on the local machine.
- Automation testing with Selenium PHP on outdated browsers (like Internet Explorer) and older browser versions becomes a daunting task with local Selenium Grid.
- The advantages of parallel execution can be leveraged to a certain extent on local Selenium Grid, but its potential can only be exploited on a cloud-based Selenium Grid.

Web automation testing using Selenium PHP on cloud-based Selenium Grid
Let’s take this Selenium PHP tutorial forward, shall we? Now that you know the main disadvantages of using local Selenium Grid for Selenium web automation let’s look at how testing can be accelerated using cloud-based Selenium Grid. TestMu AI provides a cloud-based Selenium Grid that lets you perform automation testing with PHPUnit on 3000+ real browsers and operating systems online.
To get started, you have to create an account on TestMu AI. After creating an account, you should make a note of username & access-key from the Profile page. The browser capabilities can be generated using the TestMu AI capabilities generator.

Below are the four test scenarios that would be tested on TestMu AI’s cloud-based Selenium Grid:
Test Scenario – 1 (Browser – Edge 84.0, Platform – macOS High Sierra)
- Navigate to the URL https://www.google.com/ncr
- Locate the Search text box
- Enter ‘TestMu AI’ in the search-box
- Click on the search button and assert if the title does not match with the expected window title
Test Scenario – 2 (Browser – Safari 12.0, Platform – macOS Mojave)
- Navigate to the URL https://lambdatest.github.io/sample-todo-app/
- Select the first two checkboxes
- Send ‘Yey, Let’s add it to list’ to the textbox with id = sampletodotext
- Click the Add Button and verify whether the text has been added or not
- Assert if the title does not match with the expected window title
Test Scenario – 3 (Browser – Firefox 64.0, Platform – OS X Mavericks)
- Navigate to the URL https://www.lambdatest.com/blog/
- Assert if the title does not match with the expected window title
Test Scenario – 4 (Browser – Internet Explorer 11.0, Platform – Windows 10)
- Navigate to the URL https://www.google.com/ncr
- Search for ‘TestMu AI’
- Click on the first test result
- Assert if the title does not match with the expected window title
Implementation (Test Scenario – 1)
<?php
require 'vendor/autoload.php';

use PHPUnitFrameworkTestCase;
use FacebookWebDriverRemoteDesiredCapabilities;
use FacebookWebDriverRemoteRemoteWebDriver;
use FacebookWebDriverWebDriverBy;

$GLOBALS['LT_USERNAME'] = "user-name";
# accessKey:  AccessKey can be generated from automation dashboard or profile section
$GLOBALS['LT_APPKEY'] = "access-key";

class GoogleSearchChromeTest extends TestCase
{

  protected $webDriver;

  public function build_browser_capabilities(){
    /* $capabilities = DesiredCapabilities::chrome(); */
    $capabilities = array(
      "build" => "[PHP] Test-2 on Edge and macOS High Sierra",
      "name" => "[PHP] Test-2 on Edge and macOS High Sierra",
      "platform" => "macOS High Sierra",
      "browserName" => "MicrosoftEdge",
      "version" => "84.0"
    );
    return $capabilities;
  }

  public function setUp(): void
  {
    $capabilities = $this->build_browser_capabilities();
    /* Download the Selenium Server 3.141.59 from
    https://selenium-release.storage.googleapis.com/3.141/selenium-server-standalone-3.141.59.jar
    */
    $url = "https://". $GLOBALS['LT_USERNAME'] .":" . $GLOBALS['LT_APPKEY'] ."@hub.lambdatest.com/wd/hub";
    $this->webDriver = RemoteWebDriver::create($url, $capabilities);
  }

  public function tearDown(): void
  {
    $this->webDriver->quit();
  }
  /*
  * @test
  */
  public function test_searchTextOnGoogle()
  {
    $this->webDriver->get("https://www.google.com/ncr");
    $this->webDriver->manage()->window()->maximize();

    sleep(5);

    $element = $this->webDriver->findElement(WebDriverBy::name("q"));
    if($element) {
      $element->sendKeys("LambdaTest");
      $element->submit();
    }

    print $this->webDriver->getTitle();
    $this->assertEquals('LambdaTest - Google Search', $this->webDriver->getTitle());
  }
}
?>
Code WalkThrough
Except for the browser and OS combination, this test scenario is the same as Test Scenario – 1 (which was used in the demonstration of Selenium PHP on local Selenium Grid).
Lines (13 – 15) – Global variables that hold user-name and access-key obtained from the TestMu AI profile page are declared for usage in the test code.
$GLOBALS['LT_USERNAME'] = "user-name";
# accessKey:  AccessKey can be generated from automation dashboard or profile section
$GLOBALS['LT_APPKEY'] = "access-key";
Lines (24 – 30) – The Desired Capabilities array holding the browser and OS test combination is declared in the build_browser_capabilities() method.
$capabilities = array(
      "build" => "[PHP] Test-2 on Edge and macOS High Sierra",
      "name" => "[PHP] Test-2 on Edge and macOS High Sierra",
      "platform" => "macOS High Sierra",
      "browserName" => "MicrosoftEdge",
      "version" => "84.0"
    );
Lines (40 – 41) – The combination of globals holding the user-name and access-key are used for accessing the TestMu AI Grid URL [@hub.lambdatest.com/wd/hub]
The create method in the RemoteWebDriver class is used for creating WebDriver with the specified desired capabilities. The first parameter to create takes the Selenium Grid URL as input and the second parameter holds the browser capabilities.
$url = "https://". $GLOBALS['LT_USERNAME'] .":" . $GLOBALS['LT_APPKEY'] ."@hub.lambdatest.com/wd/hub";
$this->webDriver = RemoteWebDriver::create($url, $capabilities);
Rest of the implementation is self-explanatory, as it has no dependency on the Selenium Grid on which tests are performed.
Implementation (Test Scenario – 2)
<?php
require 'vendor/autoload.php';

use PHPUnitFrameworkTestCase;
use FacebookWebDriverRemoteDesiredCapabilities;
use FacebookWebDriverRemoteRemoteWebDriver;
use FacebookWebDriverWebDriverBy;

$GLOBALS['LT_USERNAME'] = "user-name";
# accessKey:  AccessKey can be generated from automation dashboard or profile section
$GLOBALS['LT_APPKEY'] = "access-key";

class GoogleSearchFirefoxTest extends TestCase
{

  protected $webDriver;

  public function build_browser_capabilities(){
    /* $capabilities = DesiredCapabilities::firefox(); */
    $capabilities = array(
      "build" => "[PHP] Test-1 on Safari and macOS Mojave",
      "name" => "[PHP] Test-1 on Safari and macOS Mojave",
      "platform" => "macOS Mojave",
      "browserName" => "Safari",
      "version" => "12.0"
    );
    return $capabilities;
  }

  public function setUp(): void
  {
    $capabilities = $this->build_browser_capabilities();
    /* Download the Selenium Server 3.141.59 from
    https://selenium-release.storage.googleapis.com/3.141/selenium-server-standalone-3.141.59.jar
    */
    /* $this->webDriver = RemoteWebDriver::create('http://localhost:4444/wd/hub', $capabilities); */
    $url = "https://". $GLOBALS['LT_USERNAME'] .":" . $GLOBALS['LT_APPKEY'] ."@hub.lambdatest.com/wd/hub";
    $this->webDriver = RemoteWebDriver::create($url, $capabilities);
  }

  public function tearDown(): void
  {
    $this->webDriver->quit();
  }
  /*
  * @test
  */
  public function test_LT_ToDoApp()
  {
    $itemName = 'Item in Selenium PHP Tutorial';
    $this->webDriver->get("https://lambdatest.github.io/sample-todo-app/");
    $this->webDriver->manage()->window()->maximize();
    sleep(5);
    $element1 = $this->webDriver->findElement(WebDriverBy::name("li1"));
    $element1->click();
    $element2 = $this->webDriver->findElement(WebDriverBy::name("li2"));
    $element2->click();
    $element3 = $this->webDriver->findElement(WebDriverBy::id("sampletodotext"));
    $element3->sendKeys($itemName);
    $element4 = $this->webDriver->findElement(WebDriverBy::id("addbutton"));
    $element4->click();
    $this->webDriver->wait(10, 500)->until(function($driver) {
        $elements = $this->webDriver->findElements(WebDriverBy::cssSelector("[class='list-unstyled'] li:nth-child(6) span"));
        return count($elements) > 0;
    });
    sleep(5);
    $this->assertEquals('Sample page - lambdatest.com', $this->webDriver->getTitle());
  }
}
?>
Code WalkThrough
Lines (24 – 30) – Array of browser and OS capabilities is generated using the TestMu AI Capabilities Generator.
$capabilities = array(
      "build" => "[PHP] Test-1 on Safari and macOS Mojave",
      "name" => "[PHP] Test-1 on Safari and macOS Mojave",
      "platform" => "macOS Mojave",
      "browserName" => "Safari",
      "version" => "12.0"
    );
The rest of the implementation is similar to the one used for Test Scenario – 2, which we have used for web automation testing using Selenium PHP on the local Selenium Grid.
Implementation (Test Scenario – 3)
<?php
require 'vendor/autoload.php';

use PHPUnitFrameworkTestCase;
use FacebookWebDriverRemoteDesiredCapabilities;
use FacebookWebDriverRemoteRemoteWebDriver;
use FacebookWebDriverWebDriverBy;

$GLOBALS['LT_USERNAME'] = "user-name";
# accessKey:  AccessKey can be generated from automation dashboard or profile section
$GLOBALS['LT_APPKEY'] = "faccess-key";

class LTBlogTest extends TestCase
{

  protected $webDriver;

  public function build_browser_capabilities(){
    $capabilities = array(
      "build" => "[PHP] Test-4 on Firefox and OS X Mavericks",
      "name" => "[PHP] Test-4 on Firefox and OS X Mavericks",
      "platform" => "OS X Mavericks",
      "browserName" => "Firefox",
      "version" => "64.0"
    );
    return $capabilities;
  }

  public function setUp(): void
  {
    $capabilities = $this->build_browser_capabilities();
    /* Download the Selenium Server 3.141.59 from
    https://selenium-release.storage.googleapis.com/3.141/selenium-server-standalone-3.141.59.jar
    */
    /* $this->webDriver = RemoteWebDriver::create('http://localhost:4444/wd/hub', $capabilities); */
    $url = "https://". $GLOBALS['LT_USERNAME'] .":" . $GLOBALS['LT_APPKEY'] ."@hub.lambdatest.com/wd/hub";
    $this->webDriver = RemoteWebDriver::create($url, $capabilities);
  }

  public function tearDown(): void
  {
    $this->webDriver->quit();
  }
  /*
  * @test
  */
  public function test_LT_Blog()
  {
    $expected_title = "LambdaTest | A Cross Browser Testing Blog";
    $this->webDriver->get("https://www.lambdatest.com/blog/");
    $this->webDriver->manage()->window()->maximize();

    sleep(5);

    print $this->webDriver->getTitle();
    $this->assertEquals($expected_title, $this->webDriver->getTitle());

  }
}
?>
Code WalkThrough
Lines (56 – 57) – The maximize() method of the RemoteWebDriver class is used for maximizing the browser window.
$this->webDriver->get("https://www.lambdatest.com/blog/");
$this->webDriver->manage()->window()->maximize();
Line (62) – The getTitle() method returns the current window title. The title is compared with the expected window title, and assert is raised if the titles do not match.
$this->assertEquals($expected_title, $this->webDriver->getTitle());
Implementation (Test Scenario – 4)
<?php
require 'vendor/autoload.php';

use PHPUnitFrameworkTestCase;
use FacebookWebDriverRemoteDesiredCapabilities;
use FacebookWebDriverRemoteRemoteWebDriver;
use FacebookWebDriverWebDriverBy;

$GLOBALS['LT_USERNAME'] = "user-name";
# accessKey:  AccessKey can be generated from automation dashboard or profile section
$GLOBALS['LT_APPKEY'] = "access-key";

class LTWebsiteTest extends TestCase
{
  protected $webDriver;

  public function build_browser_capabilities(){
    /* $capabilities = DesiredCapabilities::chrome(); */
    $capabilities = array(
      "build" => "[PHP] Test-3 on IE and Windows 10",
      "name" => "[PHP] Test-3 on IE and Windows 10",
      "platform" => "Windows 10",
      "browserName" => "Internet Explorer",
      "version" => "11.0",
      "ie.compatibility" => 11001
    );
    return $capabilities;
  }

  public function setUp(): void
  {
    $capabilities = $this->build_browser_capabilities();
    /* Download the Selenium Server 3.141.59 from
    https://selenium-release.storage.googleapis.com/3.141/selenium-server-standalone-3.141.59.jar
    */
    $url = "https://". $GLOBALS['LT_USERNAME'] .":" . $GLOBALS['LT_APPKEY'] ."@hub.lambdatest.com/wd/hub";
    $this->webDriver = RemoteWebDriver::create($url, $capabilities);
  }

  public function tearDown(): void
  {
    $this->webDriver->quit();
  }
  /*
  * @test
  */
  public function test_LT_Blog()
  {
    $expected_title = "Most Powerful Cross Browser Testing Tool Online | LambdaTest";

    $this->webDriver->get("https://www.google.com/ncr");
    $this->webDriver->manage()->window()->maximize();

    sleep(5);

    $element = $this->webDriver->findElement(WebDriverBy::name("q"));
    if($element) {
      $element->sendKeys("LambdaTest");
      $element->submit();
    }

    /* Click on the first result */
    $search_result = $this->webDriver->findElement(WebDriverBy::Xpath("//h3[.='LambdaTest: Most Powerful Cross Browser Testing Tool Online']"));
    $search_result->click();
    sleep(5);

    print $this->webDriver->getTitle();
    $this->assertEquals($expected_title, $this->webDriver->getTitle());

    print "Test Completed";
  }
}
?>
Code WalkThrough
Lines (67- 68) – The findElement() method of RemoteWebDriver class is used for locating the first search result on Google (for TestMu AI). XPath property of the web element is used for the same. The POM Builder extension in Chrome helps to get the details of any web element on the page with ease.

The click() method is applied on the identified WebElement.
/* Click on the first result */
$search_result = $this->webDriver->findElement(WebDriverBy::Xpath("//h3[.='LambdaTest: Most Powerful Cross Browser Testing Tool Online']"));
$search_result->click();
Line (72) – The window title of the TestMu AI homepage is compared with the expected title. Assert is raised if the titles do not match.
public function test_LT_Blog()
{
	..............................................

	$expected_title = "Most Powerful Cross Browser Testing Tool Online | LambdaTest";
	$this->assertEquals($expected_title, $this->webDriver->getTitle());
	..............................................
	..............................................
}
Execution
As shown below, all the test files are stored in a folder named ‘test’

The following command is used for invoking the test execution
vendorinphpunit --debug test
As shown in the execution screenshot, all four tests are executed serially, and the total execution time is 2 minutes, 1 second.


Completion of test execution
Parallel Testing for PHPUnit on cloud-based Selenium Grid
Automation testing on different combinations of browsers and operating systems can take a significant amount of time. Serial testing is not an ideal solution, irrespective of whether tests are executed on a local Selenium Grid or a cloud-based Selenium Grid like TestMu AI.
As seen in the execution snapshot, our plan on TestMu AI lets you perform five tests in parallel, and serial testing does not provide an opportunity to use this feature offered by the grid.

However, parallel testing in PHPUnit is supported through ParaTest. ParaTest is a command-line tool that lets you run PHPUnit Framework tests in parallel without the necessity of installing any extensions. ParaTest thereby accelerates the execution speed of functional tests, cross-browser tests, as well as integration tests.
Though there are other alternatives to ParaTest, it offers several advantages in comparison to other parallel test runners:
- ParaTest runs tests in ‘N’ parallel processes, and the code coverage output is combined with the test results in a single test report.
- The simple installation process (with no additional configurations) via the Composer
- Test files can be isolated in separate processes, and faster test runs can be achieved by leveraging the advantage of WrapperRunner in ParaTest.
- Supported on Windows, Mac, and Linux.
The latest stable version of ParaTest is 4.0.4, and the project is hosted on GitHub.
How to install ParaTest for PHPUnit
The only way to install ParaTest is through the Composer. Instead of creating a new composer.json, we would be appending the additional step in the existing composer.json
For fetching the latest development version of ParaTest, the following has to be added in composer.json
{
   "require":{
      "brianium/paratest": "dev-master"
   }
}
For fetching the stable version, add the following in composer.json
{
   "require":{
      "brianium/paratest": "0.4.4"
   }
}
Here is the complete content of composer.json (including the requirements of phpunit, php-webdriver, symfony, and more):
{
   "require":{
      "php":">=7.1",
      "phpunit/phpunit":"^9",
      "phpunit/phpunit-selenium": "*",
      "php-webdriver/webdriver":"1.8.0",
      "symfony/symfony":"4.4",
      "brianium/paratest": "dev-master"
   }
}
For installing ParaTest, run composer require and press the ‘Enter button’ twice on the terminal. Here is the snapshot which indicates that ParaTest was downloaded:

The vendor\bin directory would also be updated with the downloaded ParaTest package.


ParaTest Command Line Interface
The ParaTest provides a number of command-line options that facilitate parallel testing. Run vendor\bin\paratest --help to explore different options offered by ParaTest.

The options in ParaTest which we found useful for performing parallel testing in this Selenium PHP tutorial are:

Parallel Testing for PHPUnit using ParaTest
With ParaTest downloaded and ready for use, we can execute the four tests which were executed serially on TestMu AI. For running the four tests in parallel, run the following command on the terminal:
vendorinparatest --processes=4 --verbose=1 --functional test
As shown above, 4 processes are executed in parallel through the –processes option. The –functional option is used for running the test methods in separate processes.

As specified in the ParaTest command, 4 tests can run in parallel on the Grid. The execution of four tests is completed without any issues.

The total time duration for executing the four tests in parallel is 41 seconds, 243 milliseconds. On the other hand, the serial execution of these tests on cloud-based Selenium Grid was 2 minutes, 1 second.

Parallel testing on TestMu AI using ParaTest

Serial Testing on TestMu AI using PHPUnit
Hence, parallel testing in PHPUnit using ParaTest resulted in overall savings of 80 seconds, which is a significant number if automation tests have to be run across many browsers and platform combinations.
Wrap Up
So in this Selenium PHP tutorial, we have seen that PHP is one of the widely used server-side programming languages used for web automation testing. Like other popular programming languages, PHP also supports the Selenium framework. Hence, Selenium PHP is the ideal combination for automated browser testing (or automation testing).
PHPUnit is the default unit testing framework in PHP; hence it does not require any separate installation. Parallel testing in PHPUnit can be performed using ParaTest, a popular tool that sits on top of the PHPUnit framework. It can be used without installing any additional extensions.
Parallel testing in PHPUnit using ParaTest can reap more benefits when used on a cloud-based Selenium Grid like TestMu AI, as tests on different browsers and operating system combinations can be performed in parallel. It also avoids the need to start up the Selenium Grid server and install Selenium WebDriver for different browsers on which Selenium web automation tests have to be performed.
The combination of Selenium PHP, ParaTest, and cloud-based Grid is ideal for exploiting the features of PHP, ParaTest, and Selenium for accelerating automation testing in PHPUnit.
We hope this Selenium PHP tutorial will help you and your team kickstart your local testing, as well as parallel testing. Thank you for reading. If you have any issues or questions, don’t hesitate to reach out via the comment section below.
Austin Siewert
CEO, Vercel
Discovered @TestMu AI yesterday. Best browser testing tool I've found for my use case. Great pricing model for the limited testing I do 👏
2M+ Devs and QAs rely on TestMu AI
Deliver immersive digital experiences with Next-Generation Mobile Apps and Cross Browser Testing Cloud
Did you find this page helpful?
More Related Hubs
TestMu AI forEnterprise
Get access to solutions built on Enterprise
grade security, privacy, & compliance
- Advanced access controls
- Advanced data retention rules
- Advanced Local Testing
- Premium Support options
- Early access to beta features
- Private Slack Channel
- Unlimited Manual Accessibility DevTools Tests