
Next-Gen App & Browser Testing Cloud
Trusted by 2 Mn+ QAs & Devs to accelerate their release cycles

How to Use Selenium Proxy for Browser Automation
Learn how to set up and run Selenium Proxy with Python to bypass IP bans, handle geo-restrictions, and scale browser automation securely.

Alex Anie
January 12, 2026
Proxies are dedicated servers that can be used to bypass restricted content or block IP addresses between a user and a website. When using a Selenium proxy with Python and Selenium WebDriver, you can route your requests through various IP addresses, helping you avoid bot detection, bypass rate limits, and access geo-restricted content. Using Selenium proxy enables a scalable, reliable scraping system.
Overview
What Is Selenium Proxy?
Selenium proxy allows you to route browser traffic through different IP addresses, helping automation scripts avoid detection, bypass rate limits, and access geo-restricted content. When integrated with Python and Selenium WebDriver, proxies enable scalable, reliable, and privacy-conscious browser automation.
Key Features of Selenium Proxy
- Bypass Restrictions: Access geo-blocked or limited websites.
- Avoid IP Blocking: Rotate proxies to prevent detection during scraping or testing.
- Enhanced Privacy: Mask your real IP to simulate traffic from different regions.
- Seamless Integration: Works with Python Selenium WebDriver locally or on cloud Selenium Grids.
Steps to Set Up Selenium Proxy
- Install Dependencies: Add Selenium, WebDriver Manager, and dotenv to your Python environment.
- Configure Proxy Settings: Define proxy server, port, and authentication if needed.
- Apply Browser Options: Pass proxy details into Chrome or Firefox WebDriver options.
- Launch Browser with Proxy: Start a Selenium WebDriver session routed through the proxy.
- Navigate and Test: Open the target website to verify traffic routing.
- Handle Exceptions: Catch proxy errors like timeouts or connection failures.
- Close Browser: End the session to free system resources.
from selenium import webdriver
options = webdriver.ChromeOptions()
options.add_argument("--proxy-server=http://123.45.67.89:8080")
driver = webdriver.Chrome(options=options)
driver.get("https://whatismyipaddress.com")
What Is a Selenium Proxy?
A Selenium proxy (or proxy server) acts as an intermediary between your automation script and the target server. When Selenium sends a request, the proxy forwards it to the destination server, receives the response, and passes it back. This setup masks your actual IP address, making the request appear as though it’s coming from a different location.
By rotating IP addresses through a Selenium proxy, you can send multiple simultaneous requests without being easily detected or rate-limited. This is especially helpful for accessing geographically restricted content, bypassing IP bans, and maintaining anonymity while scraping or automating website interactions.
When integrated with Selenium, a well-configured Selenium proxy not only reduces the risk of being blocked but also simulates user activity from various regions and ensures scalable, reliable automation testing.
To fully grasp how a Selenium proxy integrates into browser automation, it’s important to understand what is Selenium WebDriver, since WebDriver is the backbone that manages browser interactions.
Key Features of Selenium Proxy
When working with Selenium for browser automation, proxies open up a wide range of possibilities beyond just sending requests.
Here are some of the most valuable features you can leverage with Selenium proxy:
- Bypass Restrictions: Access geo-blocked or region-specific websites by routing Selenium sessions through different servers. Perfect for testing localized content.
- Avoid IP Blocking: Rotate proxies to mimic real traffic and prevent detection during scraping or large-scale automation.
- Enhanced Privacy: Mask your real IP and simulate requests from multiple regions for safer testing and experimentation.
- Seamless Integration: Easily configure proxies with Selenium WebDriver, locally or on cloud Selenium Grids, for scalable testing.
Note: Always validate your proxies before running Selenium scripts to avoid failures. Try TestMu AI Now!
Setting Up Selenium Proxy
To set up a proxy in Selenium, the first step is to choose the programming language and web driver you want to work with.
Selenium supports multiple languages, including Python, Java, JavaScript (Node.js), C#, Ruby, and Kotlin, as well as different browser drivers such as Chrome, Firefox, and Edge.
Depending on the WebDriver you choose, the configuration and setup vary, and require a different configuration to run.
To get started, you can use Python for scripting and Chrome WebDriver for browser automation to integrate proxy configurations into Selenium.
This combination is widely used due to its simplicity, flexibility, and strong community support, making it ideal for demonstrating how to integrate proxy configurations into your Selenium setup.
Installing Required Packages
Before getting started, ensure that Python is installed on your computer. You can verify this by running the following command in your terminal:
python --version
This should return the version number of Python currently installed. If Python is not installed, you can download and install it from the official Python website.
Once Python is set up, it’s time to install the necessary packages for our project. Open your terminal in your preferred text editor. If you’re using Visual Studio Code, press Ctrl + J to open the terminal panel.
Run the following command to install the required dependencies:
pip install selenium webdriver-manager python-dotenv
You can also install colorama to enable colored output in the terminal. This is helpful for debugging and enhanced readability:
pip install colorama
After installation, you can confirm that all packages are properly installed by running:
pip list
Output:

This confirms that your development environment is correctly set up and ready for Selenium automation with proxy support.
Basic Proxy Configuration
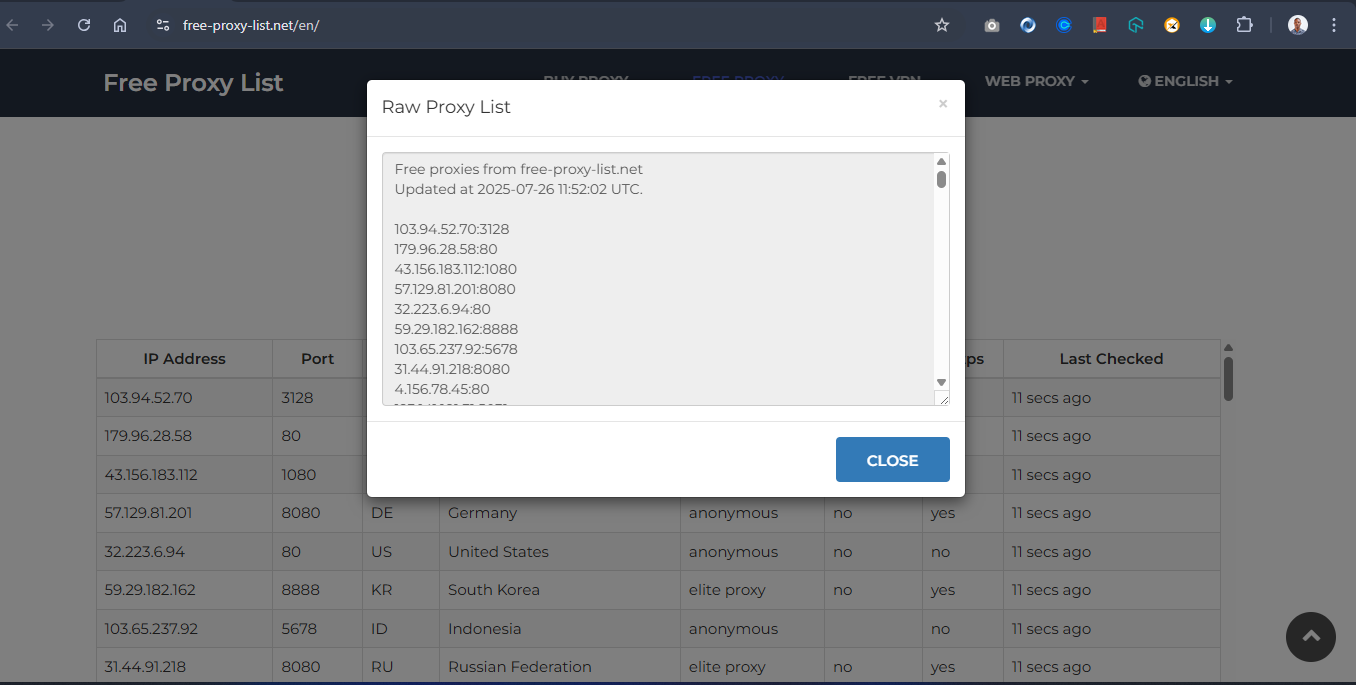
To start configuring with Selenium proxy, you first need a list of proxies to work with. One reliable source for free public proxies is free-proxy-list.net, which provides proxies from various countries and regions.
Free proxies often have limitations. Many are unreliable because they’re heavily used, slow, or incompatible with certain platforms. That’s why it’s a good practice to test them first before use.

On the website, click the “Get Raw List” button to copy a list of proxies. These proxies will be in the format IP:PORT.
Note: While free proxies are useful for testing, they are often unreliable. For production workloads, use premium proxy providers such as Bright Data, Oxylabs, or ScraperAPI that offer stable IP pools and compliance guarantees.
Next, create a new Python file named proxy_utils.py. Inside it, define a variable called proxy_list and paste your copied proxies as a list. Then, add the following Python code:
import requests

from colorama import init, Fore, Style
init(autoreset=True)


# List of proxies to check from https://free-proxy-list.net/en/#
proxy_list = [
    "85.215.64.49:80",
    "161.35.70.249:8080",
    "139.59.1.14:80",
    "113.160.132.195:8080",
    "123.30.154.171:7777",
    "8.211.194.78:1081",
    "47.238.134.126:81",
    "35.180.23.174:3128",
    "133.18.234.13:80",
    "219.65.73.81:80",
    "114.6.27.84:8520",
    "4.156.78.45:80",
    "3.101.76.84:18242",
    "205.198.65.77:80",
    "195.158.8.123:3128",
    "5.78.129.53:80",
    "4.245.123.244:80",
    "92.67.186.210:80",
    "23.247.136.248:80",
    "23.247.136.254:80",
    "78.47.127.91:80",
    "45.146.163.31:80",
    "4.195.16.140:80",
    "108.141.130.146:80",
    "124.108.6.20:8085",
    "59.7.246.4:80",
    "95.47.239.65:3128",
    "89.117.145.245:3128",
    "179.60.53.25:999",
    "41.59.90.171:80",
    "185.123.101.160:80",
    "198.49.68.80:80",
    "123.141.181.24:5031",
    "103.75.119.185:80",
    "37.187.74.125:80",
    "41.191.203.161:80"
]

def find_working_proxy(test_url, proxies=proxy_list, timeout=5):
    """Return first working proxy that gives 200 status for test_url."""
    for proxy in proxies:
        proxy_conf = {"http": f"http://{proxy}", "https": f"http://{proxy}"}
        try:
            print(Fore.YELLOW + f"=== Please wait! program is currently routing for the correct `proxy` ===")

            response = requests.get(test_url, proxies=proxy_conf, timeout=timeout)
            if response.status_code == 200:
                from colorama import Fore

print(Fore.GREEN + f"✓ Working proxy found: {proxy}" + Fore.RESET)

                return proxy
            else:
                print(Fore.RED + f"× Bad status from {proxy}: {response.status_code}")
        except Exception as e:
            print(Fore.RED + f"× Proxy failed: {proxy} -- {e}")
    return None
The Python script above tests a list of HTTP proxies to determine which one is usable, i.e., successfully returns a 200 OK status when accessing a given URL.
The find_working_proxy() function accepts three parameters:
- test_url: The URL to test the proxy against.
- proxies: The list of proxies to loop through.
- timeout: The maximum number of seconds to wait for each response.
The function loops through each proxy in the list and sends a request through it. If a request returns a 200 status, the proxy is considered working and is returned. If none of the proxies succeed, the function returns None.
This script is particularly useful when working with public proxies, as it automates the process of selecting a working IP.
You can then integrate the working proxy into your Selenium Python scripts for automation, reducing request errors and improving reliability in your browser automation tasks.
Running Selenium Proxy
In the previous section on configuring Selenium proxy, you built a proxy configuration system using the find_working_proxy() function. This function loops through a list of free proxies and returns the first one that successfully connects (i.e., returns a 200 OK status).
Now, to implement a real-world scenario, you will scrape a list of datasets through a working proxy. This demonstrates how Selenium proxy can help mask your real location while performing automation tasks and shows how to connect a proxy to a Selenium test.
For this example, you will use the TestMu AI Playground site as the target for scraping and testing your Selenium proxy setup.
Code Implementation:
Create a new Python file and name it scrape_blog.py, and type out the code below.
import time
from selenium import webdriver
from selenium.webdriver.chrome.options import Options
from selenium.webdriver.common.by import By
from selenium.webdriver.chrome.service import Service
from webdriver_manager.chrome import ChromeDriverManager
from selenium.webdriver.support.ui import WebDriverWait
from selenium.webdriver.support import expected_conditions as EC

from proxy_utils import find_working_proxy

# Define the target URL (can vary per script)
test_url = "https://ecommerce-playground.lambdatest.io/index.php?route=extension/maza/blog/home"

# Get a healthy proxy
working_proxy = find_working_proxy(test_url)
if not working_proxy:
    print("  No working proxy found.")
    exit()

# Set up Selenium with working proxy
options = Options()
options.add_argument(f'--proxy-server=http://{working_proxy}')
options.add_argument('--headless=new')
options.add_argument('--disable-blink-features=AutomationControlled')

driver = webdriver.Chrome(
    service=Service(ChromeDriverManager().install()),
    options=options
)

# ----- 4. Open Target Page -----
driver.get(test_url)
time.sleep(3)

# ----- 5. Extract First Carousel Slides -----
all_cards = []

try:
    # ----- Wait until the first carousel appears -----
    wait = WebDriverWait(driver, 10)
    first_carousel = wait.until(EC.presence_of_element_located((By.CSS_SELECTOR, ".swiper-wrapper")))

    # Now find the child slides inside the first carousel
    cards = first_carousel.find_elements(By.CLASS_NAME, "swiper-slide")

    for card in cards:
        try:
            title = card.find_element(By.CSS_SELECTOR, ".title a").text.strip()
            author = card.find_element(By.CSS_SELECTOR, ".author a").text.strip()
            comments = card.find_element(By.CSS_SELECTOR, ".comment").text.strip()
            views = card.find_element(By.CSS_SELECTOR, ".viewed").text.strip()

            all_cards.append({
                "title": title,
                "author": author,
                "comments": comments,
                "views": views
            })
        except Exception as e:
            print("⚠️ Error parsing card:", e)

except Exception as e:
    print(f  Failed to locate carousel: {e}")

# ----- Output Results -----
print(f"
 Scraped using proxy: {working_proxy}")
for i, card in enumerate(all_cards, 1):
    print(f"
Card {i}:")
    print(f"  Title   : {card['title']}")
    print(f"  Author  : {card['author']}")
    print(f"  Comments: {card['comments']}")
    print(f"  Views   : {card['views']}")

# ----- Cleanup ----------------------------
driver.quit()
Code Walkthrough:
- Import Modules: The script starts by importing all necessary modules: Selenium libraries for browser automation, webdriver-manager to manage Selenium ChromeDriver, and proxy_utils to use the find_working_proxy() function created earlier.
from proxy_utils import find_working_proxy
test_url = "https://ecommerce-playground.lambdatest.io/index.php?route=extension/maza/blog/home"
working_proxy = find_working_proxy(test_url)
- Enables headless mode.
- Disables automation detection features.
- Blog title
- Author name
- Number of comments
- Number of views
These are stored as dictionaries in the all_cards list.
print(f"
Card {i}:")
print(f"  Title   : {card['title']}")
print(f"  Author  : {card['author']}")
print(f"  Comments: {card['comments']}")
print(f"  Views   : {card['views']}")
Test Execution:Now, type the command below to run the script:
python scrape_blog.py

Running Selenium proxy locally can strain your system, limit parallel testing, and make it difficult to manage multiple browsers, OS versions, or unstable proxies. These issues can slow down automation and cause frequent test failures.
Cloud testing platforms provide a scalable and reliable way to run tests. With robust infrastructure, dependable proxies, and pre-configured browser environments, you can execute proxy-enabled tests in parallel across different browsers and operating systems.
This makes it easier to monitor executions in real time, test across multiple geolocations, and avoid the hassle of complex local setups and maintenance. One such platform that offers all these capabilities is TestMu AI.

Running Selenium Proxy on Cloud
To scale proxy-based tests across different browsers and OS, A useful platform for this is TestMu AI, a GenAI-native test execution platform that provides a Selenium Grid online with 3,000+ browser, OS combinations. This setup lets you run proxy-enabled tests in parallel, monitor executions in real-time, and eliminate the need for local infrastructure.
Note: Proxies in Selenium are most commonly used in QA testing scenarios such as geo-testing, performance monitoring, and restricted network simulation. If using proxies for scraping, always comply with site terms and laws.
Here, to implement Selenium proxy on TestMu AI, all you need to do is move your Selenium test to the cloud and configure your code for scalable, cloud-based execution.
To get started with Selenium proxy on TestMu AI, follow the steps given below:
- Create a New File: Create a Python file named track_product.py and paste your test code.
- Set Up Credentials: Get your Username and Access Key from the TestMu AI dashboard under Account Settings > Password & Security. Save them in a .env file to keep them secure and avoid public exposure.
- Update the Selenium Grid URL: Use the credentials in your script when connecting to TestMu AI’s Selenium Grid:
- Configure Capabilities: Define key automation testing parameters, such as browser, version, operating system, and additional test settings, to ensure your tests run in the exact environment you need.
Example for Chrome:
You can generate the required Selenium proxy capabilities using the TestMu AI Automation Capabilities Generator.
Code Implementation:
import time
from selenium import webdriver
from selenium.webdriver.common.by import By
from selenium.webdriver.support.ui import WebDriverWait
from selenium.webdriver.support import expected_conditions as EC
from proxy_utils import find_working_proxy

import os
from dotenv import load_dotenv

# Load variables from .env
load_dotenv()

username = os.getenv("LT_USERNAME")
access_key = os.getenv("LT_ACCESS_KEY")

# LambdaTest Hub URL
grid_url = f"https://{username}:{access_key}@hub.lambdatest.com/wd/hub"

# Define the target URL
test_url = "https://ecommerce-playground.lambdatest.io/index.php?route=product/category&path=34"

# 1. Get a working proxy
working_proxy = find_working_proxy(test_url)
if not working_proxy:
    print(“ No working proxy found.")
    exit()

# 2. Set desired capabilities for LambdaTest
options = webdriver.ChromeOptions()
options.add_argument(f'--proxy-server=http://{working_proxy}')
options.add_argument('--disable-blink-features=AutomationControlled')
# options.add_argument('--headless=new')

lt_capabilities = {
    "browserName": "Chrome",
    "browserVersion": "latest",
    "platformName": "Windows 11",
    "seCdp": True,
    "LT:Options": {
        "username": username,
        "accessKey": access_key,
        "build": "E-commerce Product Details",
        "project": "Product List",
        "name": "Get the product info",
        "selenium_version": "4.19.0",
        "w3c": True,
        "visual": True,
        "video": True,
    },
}

for key, value in lt_capabilities.items():
    options.set_capability(key, value)

# 3. Create a Remote WebDriver session
try:
    driver = webdriver.Remote(
        command_executor=grid_url,
        options=options
    )

    driver.get(test_url)
    WebDriverWait(driver, 10).until(
        EC.presence_of_element_located((By.CSS_SELECTOR, "#entry_212408 > div"))
    )

    # Scrape details
    name = driver.find_element(By.CSS_SELECTOR, "#entry_212408 > div > div:nth-child(1) > div > div.caption > h4 > a").text.strip()
    image_url = driver.find_element(By.CSS_SELECTOR, "#mz-product-grid-image-28-212408 > div > div.carousel-item.active > img").get_attribute('src')
    price = driver.find_element(By.CSS_SELECTOR, "#entry_212408 > div > div:nth-child(1) > div > div.caption > div > span").text.strip()

    print(f"
 Scraped using proxy: {working_proxy}
")
    print(f"🔹 Product : {name}")
    print(f"🔹 Price   : {price}")
    print(f"🔹 image Url   : {image_url}")

except Exception as e:
    print(f" Error during scraping: {e}")

finally:
    if 'driver' in locals():
        driver.quit()
Code Walkthrough:
- Load Environment Variables: Load TestMu AI credentials from the .env file using load_dotenv().
- Get Credentials: Retrieve LT_USERNAME and LT_ACCESS_KEY using os.getenv().
- Set Grid URL: Construct the TestMu AI Selenium Grid URL with your credentials.
- Define Target URL: Specify the product page to scrape.
- Find Working Proxy: Use find_working_proxy(test_url) to select a proxy that successfully connects.
- Configure Chrome Options: Set Chrome options, including proxy server, disabling automation detection, and headless mode if needed.
- Set TestMu AI Capabilities: Define browser, version, OS, project, build, and additional test settings.
- Create Remote WebDriver: Start a Selenium session on TestMu AI with the configured options and capabilities.
- Open Target Page: Navigate to the product page using driver.get().
- Wait for Elements: Use WebDriverWait to ensure the product elements are loaded before scraping.
- Scrape Product Details: Extract product name, price, and image URL using Selenium locators.
- Print Results: Display the scraped product information along with the proxy used.
- Clean Up: Close the Selenium session using driver.quit() to free cloud resources.
Test Execution:Once your environment is configured, run the test script using:
python track_product.py

TestMu AI Dashboard Output:

For more details, check out the documentation on running Selenium Tests Behind The Proxy.
Using Selenium Proxy with Authentication
Small-scale websites can often be tested or scraped using free random proxies. However, when dealing with large-scale platforms like Amazon, which frequently update their DOM structure and dynamically render content, free proxies are often insufficient.
For these complex sites, you’ll need a premium proxy service that offers reliable IPs and supports proxy authentication (such as username and password).
Most commercial proxy services provide credentials like:
- Proxy host
- Proxy port
- Username
- Password
- (Sometimes an API key or session token)
Here, you will learn how to set up an authenticated Selenium proxy. You’ll see how to send a request through a proxy server that requires credentials and verify that the proxy is working by retrieving your IP and location from a target site.
Code Implementation:Create a new Python file as auth_proxy.py, and type the following code below
import zipfile
import os
import time
from selenium import webdriver
from selenium.webdriver.chrome.options import Options
from selenium.webdriver.common.by import By
from selenium.webdriver.chrome.service import Service
from webdriver_manager.chrome import ChromeDriverManager

# -------------------------
# Proxy credentials & info
# -------------------------
proxy_host = "proxy.example.com"   # Replace with actual proxy host
proxy_port = "8080"                # Replace with actual proxy port
proxy_user = "your_username"       # Replace with your proxy username
proxy_pass = "your_password"       # Replace with your proxy password

# Target URL to visit after setting up the proxy
test_url = "https://ipinfo.io/json"

# -------------------------
# Create a Chrome extension to handle proxy auth
# -------------------------

plugin_file = 'proxy_auth_plugin.zip'

manifest_json = f"""
{{
    "version": "1.0.0",
    "manifest_version": 2,
    "name": "Proxy Auth Extension",
    "permissions": [
        "proxy",
        "tabs",
        "unlimitedStorage",
        "storage",
        "<all_urls>",
        "webRequest",
        "webRequestBlocking"
    ],
    "Background": {{
        "scripts": ["background.js"]
    }},
    "minimum_chrome_version":"22.0.0"
}}
"""

background_js = f"""
var config = {{
        mode: "fixed_servers",
        rules: {{
        singleProxy: {{
            scheme: "http",
            host: "{proxy_host}",
            port: parseInt({proxy_port})
        }},
        bypassList: ["localhost"]
        }}
    }};

chrome.proxy.settings.set({{value: config, scope: "regular"}}, function() {{}});

function callbackFn(details) {{
    return {{
        authCredentials: {{
            username: "{proxy_user}",
            password: "{proxy_pass}"
        }}
    }};
}}

chrome.webRequest.onAuthRequired.addListener(
    callbackFn,
    {{urls: ["<all_urls>"]}},
    ['blocking']
);
"""

# Create ZIP file with the extension content
with zipfile.ZipFile(plugin_file, 'w') as zp:
    zp.writestr("manifest.json", manifest_json)
    zp.writestr("background.js", background_js)

# -------------------------
# Set up Chrome options
# -------------------------
options = Options()
options.add_argument('--headless=new')
options.add_extension(plugin_file)

# Optional: Remove "automated" detection
options.add_experimental_option("excludeSwitches", ["enable-automation"])
options.add_experimental_option('useAutomationExtension', False)

# -------------------------
# Start Chrome WebDriver
# -------------------------
driver = webdriver.Chrome(
    service=Service(ChromeDriverManager().install()),
    options=options
)

# -------------------------
# Visit the target URL
# -------------------------
try:
    print("Opening target page using authenticated proxy...
")
    driver.get(test_url)
    time.sleep(3)

    # Retrieve and display IP address from response
    body = driver.find_element(By.TAG_NAME, "body").text
    print(" Proxy Auth Worked -- Page Output:
")
    print(body)

except Exception as e:
    print("  Failed to load page or extract content:", e)

finally:
    driver.quit()

# -------------------------
# Cleanup plugin file
# -------------------------
if os.path.exists(plugin_file):
    os.remove(plugin_file)
Code Walkthrough:
- Implement Proxy Authentication: Since Chrome does not natively support proxy authentication via command-line flags, implement the code using a temporary Chrome extension that injects the proxy credentials.
- Embed Credentials: Include the username and password in a background script within the extension.
- Launch Chrome with Proxy: Start Chrome in headless mode with the extension and proxy configured.
- Test Proxy Connection: Visit a test page like https://ipinfo.io/json to confirm that the proxy is working.
- Extract IP and Location: Use Selenium to extract the IP address and location details from the page.
- Clean Up: Remove the temporary extension ZIP after the test is complete.
Note: Always store proxy credentials securely in environment variables or secret managers (like AWS Secrets Manager or Vault) instead of hardcoding them into scripts
Text Execution:
Use the following command in your terminal to print the output.
python auth_proxy.py
Output:
Proxy Auth Worked -- Page Output:

{
  "ip": "102.89.40.60",
  "city": "Lagos",
  "region": "Lagos",
  "country": "NG",
  "loc": "6.4541,3.3947",
  "org": "AS29465 MTN NIGERIA Communication limited",
  "timezone": "Africa/Lagos",
  "readme": "https://ipinfo.io/missingauth"
}
When using premium proxy services, Selenium proxy setup instructions may vary slightly depending on the provider. Always refer to the proxy provider’s documentation for details.
Implement a Rotating Selenium Proxy
When scraping large and dynamic platforms like Amazon or Alibaba, it’s common to encounter strict anti-bot mechanisms. These websites can easily detect automated scraping tools like Selenium, especially if multiple requests originate from the same IP address.
If your script repeatedly hits a website with a single proxy IP, it risks being rate-limited, flagged, or completely blocked.
Using a rotating Selenium proxy helps you avoid detection by randomly switching between multiple proxy IPs during the script’s execution. This simulates requests from different users across various locations, making your automation look more natural and harder to detect.
In this example, you’ll use a list of public proxies. Each time your script runs, a random proxy is selected from the list to make a request. You can use https://ipinfo.io/json
Code Implementation:
Create a file named proxy_geo_checker.py and type the following code:
import random
import json
from selenium import webdriver


# some code snippet commented here…

# Initialize colorama
init(autoreset=True)

# Proxy list (public proxies may be unreliable)
proxy_list = [
    "195.158.8.123:3128",
    "85.215.64.49:80",
    "161.35.70.249:8080",
    "139.59.1.14:80",
    "41.59.90.171:80",
    "185.123.101.160:80",
    "198.49.68.80:80",
    "123.141.181.24:5031",
    "103.75.119.185:80",
    "37.187.74.125:80",
    "41.191.203.161:80"
]

# Randomly choose one
proxy = random.choice(proxy_list)

# Set up Selenium with proxy
chrome_options = Options()
chrome_options.add_argument(f'--proxy-server=http://{proxy}')
chrome_options.add_argument('--disable-blink-features=AutomationControlled')
chrome_options.add_argument('--headless=new')

driver = webdriver.Chrome(
    service=Service(ChromeDriverManager().install()),
    options=chrome_options
)

try:
    url = "https://ipinfo.io/json"
    driver.get(url)

    # Wait for the page to load and extract the raw JSON text
    WebDriverWait(driver, 10).until(
        EC.presence_of_element_located((By.TAG_NAME, "pre"))
    )
    json_text = driver.find_element(By.TAG_NAME, "pre").text
    data = json.loads(json_text)

    # Extract details
    print(Fore.GREEN + f"
✅ Proxy Used     : {proxy}")
    print(Fore.CYAN + f"🌐 IP Address     : {data.get('ip', 'N/A')}")
    print(Fore.CYAN + f"🏙️  City           : {data.get('city', 'N/A')}")
    print(Fore.CYAN + f"📍 Region         : {data.get('region', 'N/A')}")
    print(Fore.CYAN + f"🌍 Country        : {data.get('country', 'N/A')}")
    print(Fore.CYAN + f"⏰ Timezone       : {data.get('timezone', 'N/A')}")
    print(Fore.CYAN + f"🔌 ISP (Org)      : {data.get('org', 'N/A')}")
    print(Fore.CYAN + f"📡 Location (Lat,Lon): {data.get('loc', 'N/A')}")

except Exception as e:
    print(Fore.RED + f"
❌ Error: {e}")
finally:
    driver.quit()
Code Walkthrough:
- Import Modules: Load Selenium, Chrome WebDriver, Colorama, and random for proxy selection.
- Select Proxy: Randomly pick one IP from the proxy_list using random.choice().
- Configure Browser: Launch Chrome with the selected proxy in headless mode and disable automation detection.
- Open Target URL: Navigate to https://ipinfo.io/json to check the proxy.
- Extract Data: Read the JSON response to get IP address, city, country, ISP, and geolocation.
- Clean Up: Close the browser session with driver.quit().
Test Execution:
Type the command below in the terminal to run the script.
python proxy_geo_checker.py
Output:
ANIE@Anie MINGW64 ~/Desktop/Anie/webdev/blogs/LambdaTest/selenium-proxy/code (main)
$ python proxy_geo_checker.py

DevTools listening on ws://127.0.0.1:54240/devtools/browser/a29e15f0-ea69-4063-9b0e-c28320b20ea5

✅ Proxy Used     : 161.35.70.249:8080
🌐 IP Address     : 161.35.70.249
🏙️  City          : Frankfurt am Main
📍 Region         : Hesse
🌍 Country        : DE
⏰ Timezone       : Europe/Berlin
🔌 ISP (Org)      : AS14061 DigitalOcean, LLC
📡 Location (Lat,Lon): 50.1155,8.6842
The output shows where the Selenium proxy appears to be located, helping verify that the rotating proxy is working as intended.
Handling Selenium Proxy Errors
Working with a Selenium proxy comes with its own set of challenges, such as network instability, poor proxy quality, and configuration mismatches. These issues can quickly lead to failed tests, blocked IPs, or inconsistent results.
To avoid common pitfalls and maximize performance, it’s essential to understand how to properly handle proxy-related issues and implement optimization strategies.
Here are some common Selenium proxy errors you might face and effective ways to solve them:
- Problem: When faced with net::ERR_PROXY_CONNECTION_FAILED, it’s due to an invalid proxy or a proxy server being down.Solution: Validate proxies before starting Selenium; skip or retry invalid ones.
- Problem: When faced with net::ERR_TUNNEL_CONNECTION_FAILED, it’s because the proxy cannot tunnel HTTPS traffic.Solution: Ensure the proxy supports HTTPS.
- Problem: SSL Handshake Failed occurs due to a broken SSL certificate or an incompatible protocol.Solution: Switch to a different HTTPS proxy or update Selenium/WebDriver versions.
- Problem: Timeouts and long page loads happen when the proxy server is slow or overloaded.Solution: Use high-quality or paid proxies; implement timeouts and fallback proxies.
- Problem: Blocked or CAPTCHA pages occur when the proxy IP is blacklisted or flagged as suspicious.Solution: Rotate proxies frequently; combine with user-agent spoofing or CAPTCHA solvers.
Apart from errors related to Selenium proxy, there are many other common exceptions in Selenium that you might encounter.
Best Practices of Selenium Proxy
For effective Selenium testing, a Selenium proxy helps route traffic securely and manage requests without triggering site blocks. By validating proxies, preferring HTTPS support, and rotating them, you can maintain consistent and reliable test execution.
- Use HTTPS Proxies: Prefer HTTPS proxies for better security, compatibility, and ease of use.
- Test Proxy Before Use: Always validate that the proxy works with your target site to avoid runtime failures. Implement a health-check script to ensure proxies return valid HTTP status codes (e.g., 200 OK).
- Rotate Proxies: Use rotating proxies for large-scale scraping or automation to prevent IP bans and rate-limiting. Rotate through a list of proxies periodically or per request batch.
- Check Latency and Speed: Select proxies with low latency to ensure your Selenium automation runs efficiently.
- Avoid Free Proxies for Critical Tasks: Free proxies can be unreliable, slow, or blocked; consider premium proxies for important tasks.
- Use Proxy Authentication When Needed: For secure or paid proxies, integrate the username and password correctly in your Selenium proxy setup.
- Limit Requests per Proxy: Avoid sending too many requests from a single proxy to reduce the risk of detection.
- Integrate with Headless Browsers: Ensure your Selenium proxy setup works with headless mode if your automation requires it. Headless browsers consume fewer resources but may trigger anti-bot measures; combine with proxy and browser fingerprinting tweaks.
- Use Exponential Backoff for Retries: If a proxy fails, retry the operation with gradually increasing delays to reduce server stress.
- Log Proxy Usage: Keep logs of working/failing proxies, response times, and proxy activity to troubleshoot issues and monitor performance.
- Consider Geolocation Needs: Choose proxies from regions relevant to your testing or scraping requirements.
Conclusion
A Selenium proxy is an essential tool for large-scale scraping and testing, helping you bypass restrictions, avoid rate limits, and simulate real-user behavior across different locations. From simple HTTP setups to rotating and authenticated proxies, each method enhances the reliability of your automation.
By combining Selenium with effective proxy strategies and best practices, you can build more resilient, efficient, and scalable automation scripts. Whether you’re testing locally, handling authentication, or deploying to the cloud with platforms like TestMu AI, mastering Selenium proxy integration gives you a strong edge in modern web automation.
Citations
- Selenium official Docs: https://www.selenium.dev/documentation/
- TestMu AI official website: https://www.lambdatest.com/support/docs
- TestMu AI Github: https://github.com/TestMu AI/python-selenium-sample
- Python: https://www.python.org/
- Enables headless mode.
- Disables automation detection features.
- Blog title
- Author name
- Number of comments
- Number of views
Running Selenium Proxy on Cloud
gridURL = "@hub.lambdatest.com/wd/hub"
ChromeOptions browserOptions = new ChromeOptions();
browserOptions.setPlatformName("Windows 10");
browserOptions.setBrowserVersion("121.0");
HashMap<String, Object> ltOptions = new HashMap<String, Object>();
ltOptions.put("username", "YOUR_LT_USERNAME");
ltOptions.put("accessKey", "YOUR_LT_ACCESS_KEY");
ltOptions.put("project", "Selenium Proxy ");
ltOptions.put("w3c", true);
browserOptions.setCapability("LT:Options", ltOptions);
Handling Selenium Proxy Errors
Best Practices of Selenium Proxy
Conclusion
Citations
Frequently asked questions
Did you find this page helpful?
More Related Hubs
TestMu AI forEnterprise
Get access to solutions built on Enterprise
grade security, privacy, & compliance
- Advanced access controls
- Advanced data retention rules
- Advanced Local Testing
- Premium Support options
- Early access to beta features
- Private Slack Channel
- Unlimited Manual Accessibility DevTools Tests