
Next-Gen App & Browser Testing Cloud
Trusted by 2 Mn+ QAs & Devs to accelerate their release cycles

On This Page
- What is Continuous Integration?
- What is Jenkins?
- Advantages of Jenkins
- What is Jenkins Pipeline?
- Why Use Jenkins Pipeline?
- What is Jenkinsfile?
- How to Install and Run Jenkins on Windows?
- Jenkins Pipeline Concepts
- Integrating Jenkins Pipeline with Cloud Selenium Grid
- Creating a Jenkins Pipeline and Running your First Test
Jenkins Pipeline: Getting Started Tutorial For Beginners [With Examples]
This Jenkins pipeline tutorial will help you create your first Jenkins pipeline and run Selenium automation in Jenkins through an online Selenium Grid.

Salman Khan
January 13, 2026
Jenkins CI/CD has always been the go-to option for DevOps professionals and beginners. It has more than 22K Stars and 8.5K Forks on GitHub. Being one of the oldest CI/CD market players, Jenkins has huge community support with more than 1900+ plugins to help professionals ship faster through their Jenkins pipeline.
If you’re just starting your CI/CD adventure or want a quick refresher on the Jenkins pipeline, you’ve come to the perfect spot!
This Jenkins pipeline tutorial will provide all the information needed to set up a Jenkins pipeline and a detailed explanation of the underlying concepts. You will also learn to perform automation testing using Selenium in the Jenkins pipeline through an online Selenium Grid.
For beginners, I will talk about the basic principles of continuous integration before we dive deeper into this Jenkins pipeline tutorial. If you are already familiar with it, feel free to skip this section. If you’re looking to improve your Jenkins interview skills, check out our curated list of Jenkins Interview Questions.
What is Continuous Integration?
Continuous Integration (CI) is a development approach in which members work on the same project and coordinate to integrate their work more frequently. The code is integrated into a shared repository, and any integration is tested by automated test cases or sequences to look for an error. Each team member is expected to integrate their code at least once a day or more as and when required.
CI’s definition was first developed almost two decades ago to prevent “integrating chaos,” which occurs when integration is postponed to the end of production. The CI tool immediately tests the code once it is committed and the software build process is completed.
If the test is passed, the CI tool deploys the code and pushes it into production. This entire process of committing, building, testing, and deploying goes on continuously in software development, and thus it is known as “Continuous Integration.”
The CI process consists of four key elements that help in the execution:
- Hosted CI Tool Solution
- Virtual Machine
- Version Control System
- Tools
It has always been a major challenge for firms to set up, configure, and manage a constant workflow. Owing to rapid changes over the last few years, software development has taken a big step forward since the introduction of Continuous Integration & Continuous Delivery (CI/CD). Now that you understand what role CI plays in software development, we can move on to this Jenkins pipeline tutorial’s central objective.

What is Jenkins?

Jenkins is a continuous integration open-source tool. It has been developed using Java. This allows real-time monitoring and recording of discrete improvements to a more comprehensive codebase. It lets developers easily identify and fix bugs in their codebase and simplify the validation of their builds. Jenkins is one of the best CI/CD tools because it closely monitors repetitive jobs and assists in automated execution during a project’s production.
It is a cloud-based system that can work as a standalone application running on a server. Alternatively, it can utilize a web server like Glassfish, JBoss, or WebSphere. Using Jenkins, developers can speed up their product creation cycle because Jenkins can simplify the build and test instantly. Jenkins promotes the entire software development life cycle (SDLC) by designing, testing, monitoring, deploying, and other cycle phases.
Advantages of Jenkins
- An open community operates Jenkins. They host monthly public meetings and seek feedback from customers on the progress of the Jenkins initiative.
- Jenkins also embraces cloud-based design to facilitate cloud-based platforms.
- Jenkins offers over 1900+ extensions in its plugins folder. Jenkins is much more efficient and matures through plugins than other tools.
- Jenkins offers fantastic support for parallel test execution. This helps accelerate existing test processes by running them in parallel.
While Jenkins offers multiple benefits for developers, it is not perfect. Some of the major pain points of using Jenkins are complicated installation & customization, outdated layout, and the need for prior project management experience.
Yet these points are not significant enough to stop developers from adopting Jenkins because it still offers few of the best features in the whole CI/CD universe. The next section of this Jenkins pipeline tutorial will explain why Jenkins is still the first choice for developers worldwide.
This Jenkins tutorial will help beginners and professionals learn how to use Jenkins, one of the most popular CI/CD tools used in DevOps.
What is Jenkins Pipeline?

Inside Jenkin, a pipeline is a series of events or tasks interconnected in a particular order. A Jenkins pipeline is a set of modules or plugins that enable the implementation and integration of continuous delivery pipelines within Jenkins.
The Jenkins pipeline has an expandable automation system for building basic or complicated ‘template’ distribution pipelines via the domain-specific language (DSL) used in the pipeline. There are four states of continuous delivery in the Jenkins pipeline:
- Build
- Deploy
- Test
- Release
We will discuss these states in detail in the following sections of this Jenkins pipeline tutorial. Let’s talk more about why you need the Jenkins pipeline.
Why Use Jenkins Pipeline?
As explained above in this Jenkins pipeline tutorial, Jenkins significantly delivers high-quality applications or products. We know that Jenkins has proved to be a specialist in continuous integration, continuous testing, and continuous delivery. It uses a feature called Jenkins pipeline for continuous delivery, which is the ability to release apps regularly at an interval. This process ensures that the software is always ready for production.
To dive deeper into this Jenkins pipeline tutorial, we need to understand the advantages of the Jenkins pipeline.
Advantages of Jenkins Pipeline
The highlight of Jenkins pipeline is that it offers the feature to define the complete deployment flow-through configuration and code. It states that all the standard Jenkins jobs can be written manually as an entire script and managed with a version control system.
It’s essentially following the discipline of ‘pipeline as code.’ Hence, instead of creating multiple jobs for each process, we can code the entire workflow and place it in a Jenkins file. Below are some reasons one might consider before using the Jenkins pipeline for Jenkins test automation with Selenium.
- By using Groovy DSL (Domain Specific Language), it models easy to complex pipelines as code.
- The code is stored as a text file called ‘Jenkinsfile’ that can be scanned into Source Code Management.
- It supports complex pipelines by adding conditional loops, forks, or joining operations and allowing parallel execution tasks.
- It improves user experience by integrating user feedback into the pipeline.
- It’s resilient in terms of unplanned restart.
- It can resume from the checkpoints saved.
- It can incorporate multiple additional plugins and add-ins.
Next up, we will learn about Jenkinsfile in this Jenkins pipeline tutorial.
What is Jenkinsfile?
To proceed with our Jenkins pipeline tutorial, we need to understand the role of Jenkinsfile. It is a text file that stores the whole process as code in our local machine. It can be reviewed in a Source Code Management (SCM) platform like Git. It is instrumental as it helps the developers to view, edit, and test the code whenever required.
The Jenkinsfile is written using the Groovy Domain-Specific Language and can be generated using a text editor or the Jenkins instance configuration tab.
There are two different types in which the Jenkins pipeline can be constructed.
- Declarative pipeline
- Scripted pipeline
Declarative Pipeline
The Declarative pipeline is a recent inclusion in the Jenkins pipeline. It introduces a more streamlined and opinion-driven syntax built upon the existing pipeline sub-systems.
Every valid Declarative pipeline needs to be enclosed within a pipeline block, as illustrated below:
pipeline{
    /* insert Declarative Pipeline here */
}
The fundamental principles and language constructs applicable within the Declarative pipeline adhere to Groovy’s syntax guidelines with particular deviations:
- The primary structure of the pipeline necessitates a block format, specifically enclosed within pipeline .
- Elimination of semicolons as statement separators; each statement requires its line.
- Blocks should comprise Sections, Directives, Steps, or Assignment statements.
- Treating a property reference statement as a no-argument method invocation, such that, for instance, ‘input’ is interpreted as ‘input()’.
Jenkinsfile (Declarative Pipeline)
pipeline {
    agent { docker { image 'maven:3.3.3' } }
    stages {
        stage('build') {
            steps {
                sh 'mvn --version'
            }
        }
    }
}
Generating Jenkins Pipeline Code Using Declarative Directive Generator
The Directive Generator simplifies the process of selecting and configuring Declarative directives, facilitating the creation of respective directive configurations for utilization within the Declarative pipeline.
This tool empowers users to efficiently generate the pipeline code about various Declarative pipeline directives, including agent, options, when, and more. Through an intuitive dropdown menu and a user-friendly form, individuals can precisely define their preferences and values.
Once the form is completed, clicking ‘Generate Declarative Directive’ will showcase the pipeline code in the designated area below. This generated code can be effortlessly copied into the appropriate sections of your Jenkinsfile, either within the pipeline block for overarching directives or within a stage block for directives specific to stages. For further guidance on directives, please consult the online syntax documentation.
Scripted Pipeline
The Scripted pipeline, akin to the Declarative pipeline, is constructed upon the foundational pipeline sub-systems. In contrast to the Declarative approach, the Scripted pipeline functions as a versatile domain-specific language (DSL) developed using Groovy. This enables users to leverage the extensive functionalities offered by the Groovy language, granting significant expressive capabilities and adaptability in constructing continuous delivery pipelines.
Within the Scripted pipeline, execution occurs sequentially, following a top-down approach within a Jenkinsfile, akin to the execution model in conventional Groovy or other scripting languages. Consequently, implementing flow control relies on Groovy expressions, such as conditional statements like if/else constructs.
Jenkinsfile (Scripted Pipeline)
/* Requires the Docker Pipeline plugin */
node('docker') {
    checkout scm
    stage('Build') {
        docker.image('maven:3.3.3').inside {
            sh 'mvn --version'
        }
    }
}
Generating Jenkins Pipeline Code Using Snippet Generator
The Snippet Generator facilitates familiarity with the pipeline script code for defining diverse procedural steps. Select a step of interest from the provided list, configure it as desired, and generate the pipeline script. You’ll obtain a corresponding statement tailored to call that step with your specified configuration. You can copy and paste the entire statement into your script or selectively extract the pertinent options. Note that most parameters are optional and can be excluded from your script, retaining their default values when omitted.
How to Install and Run Jenkins on Windows?
It’s time to get to the best part of this Jenkins pipeline tutorial and start the whole setup process. First of all, we need to install Jenkins. Jenkins can be installed on either Windows, Unix, or macOS systems. In this Jenkins pipeline tutorial, we will concentrate on Windows installation.
Pre-requisites
Before downloading Jenkins on your Windows system, Jenkins needs the following prerequisites:
Hardware Specifications:
- 512 MB of RAM to run Jenkins on your device or laptop.
- 1 GB of storage on your hard drive.
Software Specifications:
- Latest Java Development Kit (JDK) or Java Runtime Environment (JRE) versions based on your system configuration, 32-bit or 64-bit.
You can learn more about setting Jenkins on your system through this blog on setting Jenkins pipeline Environment Variables.
Steps For Installation
Step 1: Once all the prerequisites are met, download Jenkins from this web address https://jenkins.io/download/

Step 2: Once you open the Jenkins download page, you will be prompted to select the platform you intend to download Jenkins. Click on Windows (or other options based on your system). For this Jenkins pipeline tutorial, we will be choosing Windows.

Unzip the downloaded kit. Double-click the unzipped jenkins.msi file. You may also use the .war file to install Jenkins as a Java Package. This is recommended if you are focused on Jenkins test automation with Selenium in non-headless mode.
Step 3: Select Next button to continue the installation of Jenkins on your windows computer or laptop.

Step 4: Select the directory where you’d like Jenkins version to be installed (the default setting is C:\Program Files (x86)\Jenkins), then press the Next tab.

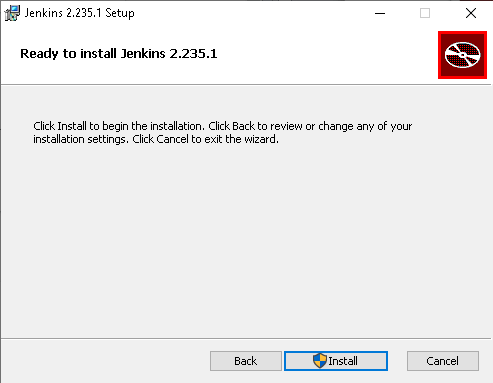
Step 5: Click on Install.

Step 6: Upon finishing the Jenkins setup process, you can continue further and start the setup. The next steps should instruct you on how to unblock the Jenkins submission. Upon completion of the Jenkins installation phase, a window tab will show up requesting for the Administrator’s initial password.
Step 7: You have to proceed to the below path in your web browser to access Jenkins. localhost:8080
Once you can navigate the URL above, it will indicate that Jenkins has been properly installed on the system.

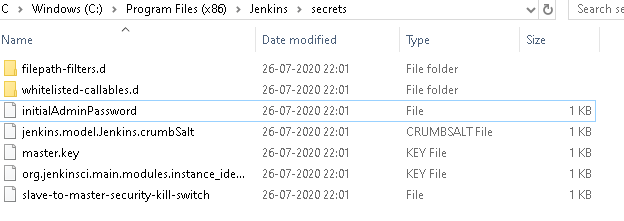
Step 8: The initial Administrator password can be located in the Jenkins setup path. A file named Initial Admin Password can be located at installation-directory >\Jenkins\secrets\ initialAdminPassword
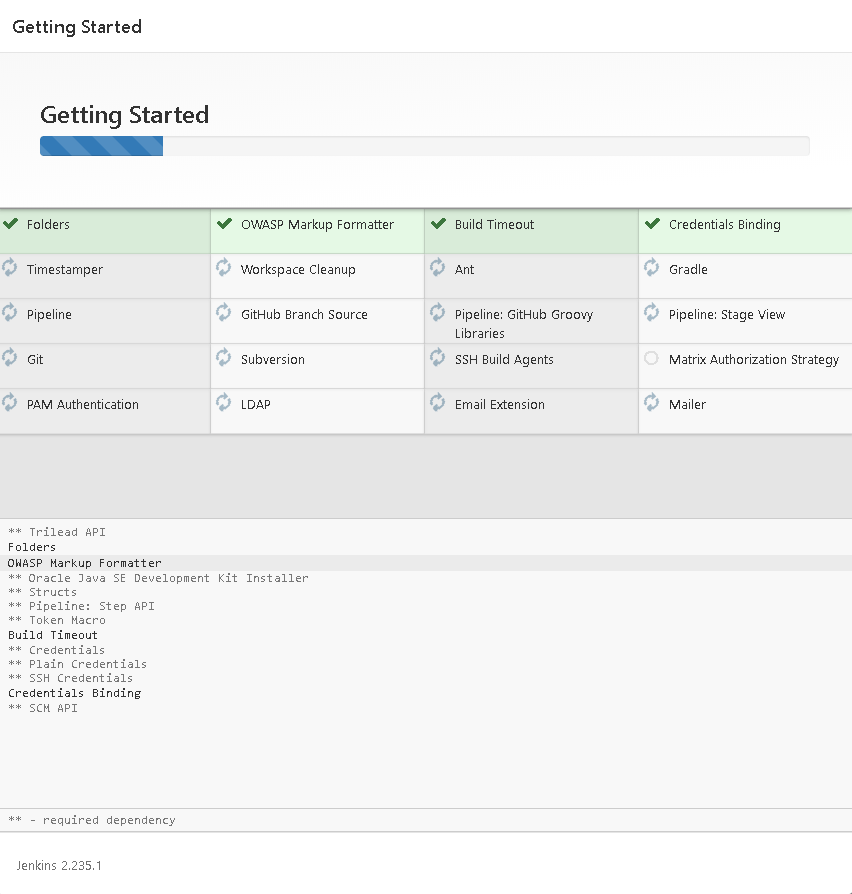
Step 9: Once you have entered the password on the Jenkins login page, you will now be prompted to choose the requisite plugins for your personalized project. You can select the Install suggested plugin for proceeding with the default list of plugins, or you can choose the plugins you want by clicking on Select plugins to install.

You will then see a Getting Started page that will install all the necessary plugins required to get you started with Jenkins CI/CD.
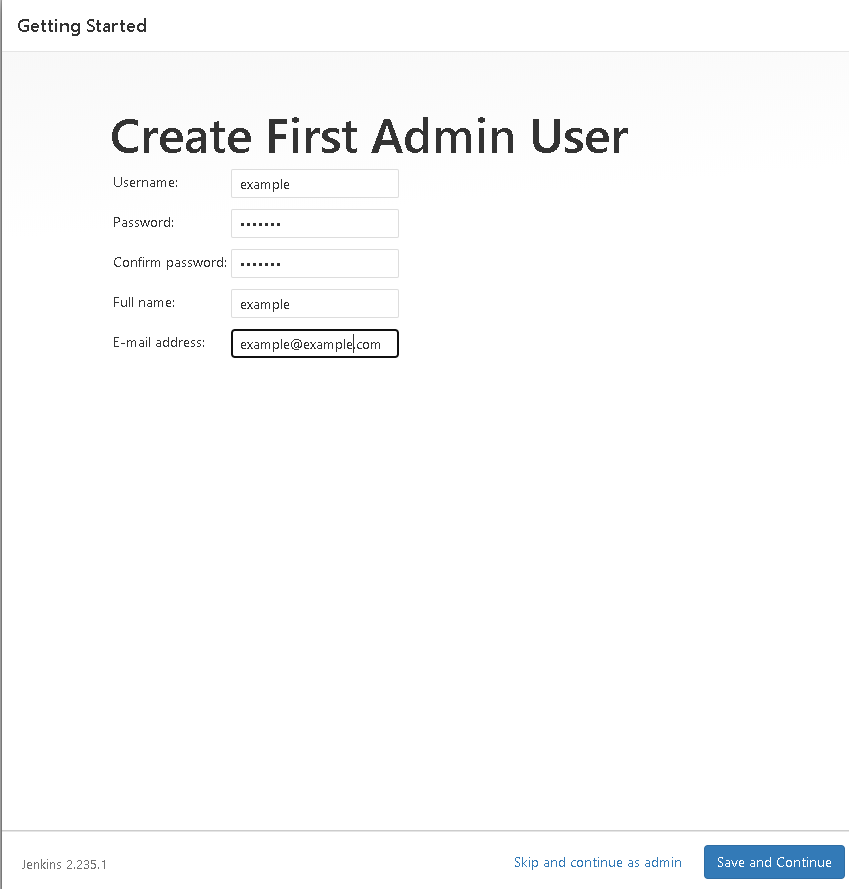
Step 10: Once all the recommended plugins have been downloaded, the Create First Admin User tab will appear. Fill all boxes with the account info you like and press the Save and Continue option.
Step 11: Once this information is duly filled, a webpage may ask you for URL data. This URL is utilized to set the default configuration path for Jenkins. Keep it as it is to prevent any confusion later on. Nevertheless, if another program is still utilizing an 8080 port, you can either stop that program from using the port and make Jenkins’ space and then save the settings.
Or you can change the port number, which we recommend in this Jenkins pipeline tutorial. To change the port, go to < Jenkins-installation-folder >\Jenkins\jenkins.xml
Search for the httpPort and change it from 8080 to any port number of your choice. Jenkins is set to listen to port 8080 by default.
You might be prompted to have administrator rights for implementing this port change. Follow this-
<service>
  <id>Jenkins</id>
  <name>Jenkins</name>
  <description>This service runs Jenkins automation server.</description>
  <env name="JENKINS_HOME" value="%BASE%"/>
  <!--
    if you'd like to run Jenkins with a specific version of Java version, specify a full path to java.exe.
    The following value assumes that you have java in your PATH.
  -->
  <executable>%BASE%jreinjava</executable>
  <arguments>-Xrs -Xmx256m -Dhudson.lifecycle=hudson.lifecycle.WindowsServiceLifecycle -jar "%BASE%jenkins.war" --httpPort=9090 --webroot="%BASE%war"</arguments>
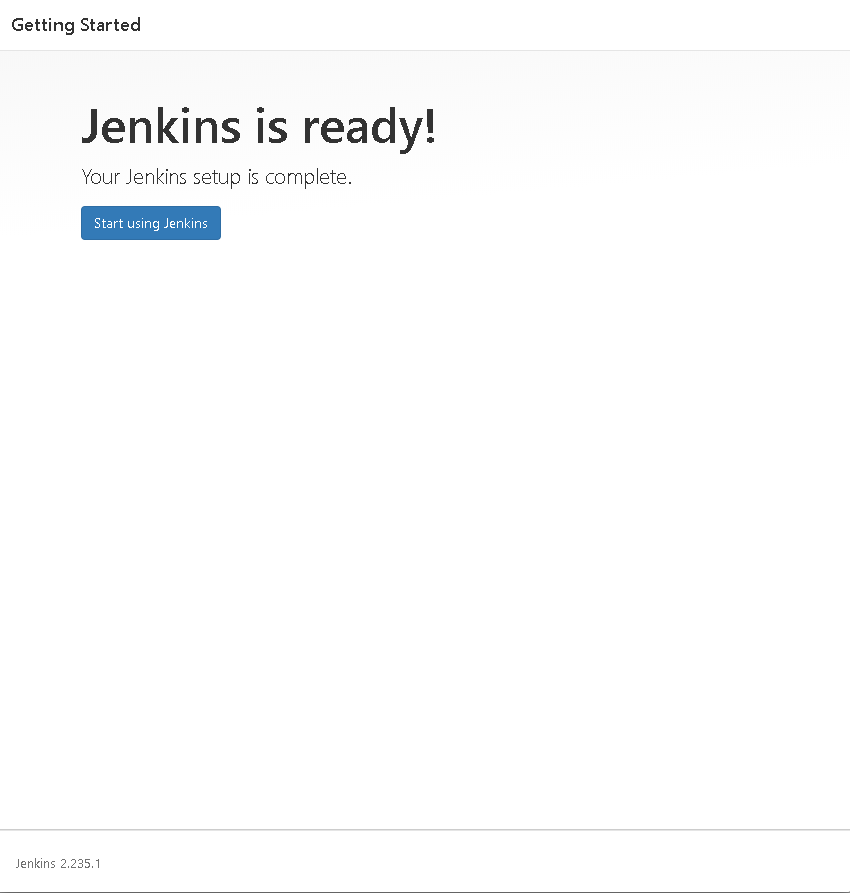
Once you do this, you’re through with Jenkins deployment. After this step, the Jenkins account will be set up and is ready to use.
Step 12: Jenkins is enabled, and we’re almost finished. Before we switch to build as per this Jenkins pipeline tutorial, we will need to customize Jenkins to recognize other resources like Java, Maven, etc.
Click on ‘Manage Jenkins.’ After this, select ‘Global Tool Configuration’ and ‘JDK Installation.’ Include the JDK version’s name in the JDK Name line and access the Java route in the ‘JAVA_HOME’ portion.
Uncheck the ‘Install Automatically’ radio option because there might be a risk that Selenium may not help if the latest Java version is modified. Save the changes and continue.

Jenkins Pipeline Concepts
We hope that Jenkins is up and running in your Windows system, following the steps mentioned above in this Jenkins pipeline tutorial. Before moving ahead with Jenkins test automation with Selenium, it is time to get accustomed to some of the crucial concepts of this Jenkins pipeline tutorial. Here they are
Pipeline
It is a user-defined framework that includes all the processes like create, check, deploy, etc. In a Jenkinsfile, it’s a list of all the levels. All of the stages and steps within this block are described. This is the fundamental block to the syntax of a declarative pipeline.
pipeline  {
 }
Node
A node is a system running a complete workflow. It’s an integral part of the syntax of the scripted pipeline.
node  {
}
Some standard sections are available to declarative and scripted pipelines. These are:
Agent
An agent is described as a directive that can run multiple builds using just one Jenkins instance. This feature helps spread the workload to various agents and execute multiple projects within Jenkins’s single instance. It instructs Jenkins to assign the builds to an executor.
A single agent may be defined for a whole Jenkins pipeline or different agents may be assigned to execute each stage within a pipeline. Some of the most commonly used Agent parameters are:
- Any: Runs the stage pipeline on any available agent.
- None: This parameter is added to the root of the pipeline. It means there is no global agent for the entire pipeline, and each stage must define its agent.
- Label: Performs on the labeled agent in the pipeline/stage.
- Docker: This parameter uses a docker container as a pipeline execution environment or as a specific level. For example, the docker can pull an image of Ubuntu. This image can now run multiple commands as an execution environment.
pipeline {
    agent {
        docker {
            image  'ubuntu'
                }
            }
        }
Stages
This section includes all of the work that needs to be completed. The work is defined in the form of stages. Within this Directive, there may be more than one level. Each stage executes a particular task.
pipeline {
agent any
    stages {
        stage ('Build') {

        }
        stage ('Test') {

        }
        stage ('QA') {

        }
        stage ('Deploy') {

        }
        stage ('Monitor') {

        }

    }
 }
Steps
Within a stage block, the pipeline can be described as a series of steps. Such steps are performed in sequence for the execution of a level. Within a Steps guideline, there must be at least one step.
pipeline {
    agent any
        stages {
            stage ('Build') {
                steps {
                    echo
                    'Running build phase. '
                }
            }
        }
    }
Integrating Jenkins Pipeline with Cloud Selenium Grid
The point of this Jenkins pipeline tutorial was not just to get acquainted with Jenkins or the pipeline itself. Yes, we wanted to help you set up a Jenkins pipeline but then you must be wondering what’s the purpose of this entire setup. As pointed out earlier in this Jenkins pipeline tutorial, Jenkins pipeline is quite helpful in executing Selenium. To implement this, Jenkins provides various plugins for integration with various tools and utilities while monitoring productivity.
To start with Jenkins test automation with Selenium, TestMu AI Jenkins plugin is one such plugin to help you speed up automated cross browser testing. With the TestMu AI Jenkins plugin, we can easily automate our test scripts by connecting the Jenkins CI instance to the TestMu AI Selenium grid.
TestMu AI Selenium grid offers a range of 3000 + browsers and browser versions to achieve higher browser coverage to conduct cross browser testing.
Integrating Jenkins with TestMu AI will increase your test quality and coverage by
- Configuring the credentials for TestMu AI and the job scheduled with Jenkins.
- Performing a setup and tearing down the binary TestMu AI Tunnel file to conduct automated cross browser testing even on your local web applications.
- Providing all test data, such as video logs, network logs, and screenshots, in each step performed at various stages with your Jenkins job via TestMu AI.
For Jenkins test automation with Selenium, you would require access to the following:
- A TestMu AI account.
- An existing server with the Jenkins CI (version 2.138.2+)
- A root-access Jenkins Client.
Configuring TestMu AI Jenkins Plugin
To move ahead with the most exciting section of this Jenkins pipeline tutorial, we would need to download the TestMu AI Jenkins plugin, as explained below, to run our Selenium tests on TestMu AI using Jenkins. Before installing Jenkins, access to the administrator level is required.
Before installing the TestMu AI Jenkins plugin, ensure no active build jobs in execution or queue.
Step 1: First, we click on Manage Jenkins and then Manage Plugins.Step 2: Then, we navigate and click on the Available tab.Step 3: Search for TestMu AI in the filter search box on the tab.Step 4: You will find a list of plugins on which to proceed and select TestMu AI.Step 5: To install the TestMu AI Jenkins plugin, select the checkbox before TestMu AI.Step 6: After successfully installing the plugin, you can find the TestMu AI Jenkins plugin under your installed plugins.
Sometimes, your newly installed plugins fail to synchronize with the Jenkins plugins you have available. This is quite common. You can do this if you fail to find TestMu AI under your available plugins section. Refresh the Jenkins plugin list by simply clicking the Check Now button, and you will get a list with new plugins from the Jenkins update center.
Once the TestMu AI Jenkins plugin is installed, we must integrate our Selenium WebDriver tests with Jenkins by configuring the TestMu AI credentials in the Jenkins CI server. This step is essential to proceed with Jenkins test automation using Selenium or perform automated cross browser testing.
Configuring TestMu AI Credentials
To proceed with this Jenkins pipeline tutorial configuration, we would need to work with the Jenkins UI. We don’t have to prepare the script from scratch to execute the test. We can reuse our local test script and add some minor configuration changes that will enable us to connect to the cloud platform.
One of the most vital things for us to communicate to the TestMu AI platform is to get our access key token. The access key tokens are private keys that enable us to connect to the cloud platform and execute automated tests. This access key is unique for everyone and should not be shared with other users. You can fetch and regenerate it from the Profile section of your user account, as shown below.

Alternatively, we can fetch the access key, username, and hub details from the Web Automation Dashboard. You’ll need to click the key-shaped icon near the Help button, as shown in the image screenshot below.

This can be set as below in the script-
$ export LT_USERNAME= {your lambdatest username}

$ export LT_ACCESS_KEY= {your lambdatest access_key}
$ set LT_USERNAME= {your lambdatest username}

$ set LT_ACCESS_KEY= {your lambdatest access_key}
- Click Credentials on Jenkins Home Page.
- Select System under the Credentials tab to display the System page.
- Select Global Domain credentials (Unrestricted) in the System to open the page for Global credentials.
- Click on Add Credentials to open the credentials page where we add the access details.
- Enter relevant data in all the fields and click Verify Credentials.
- Then click the OK button after verification.
- Jenkins generates the ID on the Credential page, and we save the changes.
After successfully attaching your credentials, Jenkins creates an ID. To get this ID for using TestMu AI credentials, you’d need to go to Jenkins’s homepage and click on the Credentials tab on the left side of the navigation screen.
From the Jenkins home page, click on Credentials from the menu on the left. TestMu AI credentials can be copied from this ID.
Next, we would need to use the TestMu AI Jenkins plugin to enable TestMu AI Tunnel to perform cross browser testing on locally hosted web pages or files.

Creating a Jenkins Pipeline and Running your First Test
In the last section of this Jenkins pipeline tutorial, we will create a Jenkins pipeline of our own and then run our first test. Below is the sample Jenkins file for the pipeline with the required configuration details.
#!/usr/bin/env groovy

node {
    withEnv(["LT_USERNAME=Your LambdaTest UserName",
    "LT_ACCESS_KEY=Your LambdaTest Access Key",
    "LT_TUNNEL=true"]){

    echo env.LT_USERNAME
    echo env.LT_ACCESS_KEY

   stage('setup') {

      // Get some code from a GitHub repository
    try{
      git 'https://github.com/LambdaTest/nightwatch-selenium-sample.git'

      //Download Tunnel Binary
      sh "wget https://s3.amazonaws.com/lambda-tunnel/LT_Linux.zip"

      //Required if unzip is not installed
      sh 'sudo apt-get install --no-act unzip'
      sh 'unzip -o LT_Linux.zip'

      //Starting Tunnel Process
      sh "./LT -user ${env.LT_USERNAME} -key ${env.LT_ACCESS_KEY} &"
      sh  "rm -rf LT_Linux.zip"
    }
    catch (err){
      echo err
   }

   }
   stage('build') {
      // Installing Dependencies
      sh 'npm install'
    }

   stage('test') {
          try{
          sh './node_modules/.bin/nightwatch -e chrome,edge tests'
          }
          catch (err){
          echo err
          }
   }
   stage('end') {
     echo "Success"
     }
Step 1: We create a New Project for the Pipeline by navigating to Jenkins and then click on New Item.

Step 2: Next, we select Pipeline from the given list of options.

Step 3: Then, we will scroll down to Advanced Project Options, paste the pipeline script code we saw above into the code pane, and hit the Save button.

You’re now ready to run your first test using the TestMu AI Jenkins plugin.
Step 4: We need to set up a test build, which can be quickly done via the Jenkins UI by clicking Build Now.

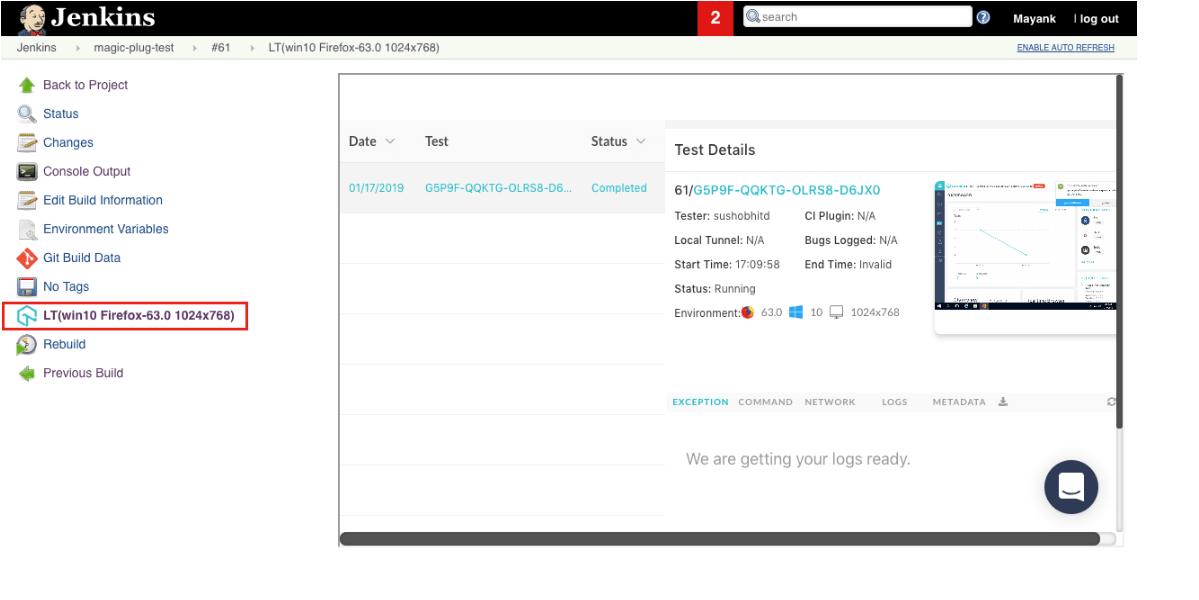
Step 5: We can see a new build generated under the build history as we click Build Now. The console logs output can be viewed by clicking on the Build.
Clicking on the TestMu AI Icon on the left will provide more details about the Selenium tests. This will also provide more insight into Jenkins test automation with Selenium, like the test sessions, video logs, etc., on the page loaded.

Conclusion
A well-defined Jenkins pipeline can help shorten production times and improve the quality of applications. It provides a definitive structure to your building process, committing, automation testing, and deployment.
I hope this Jenkins pipeline tutorial was helpful for you and that you can create your first Jenkins pipeline successfully and incorporate automation testing using an online Selenium grid like TestMu AI.
Happy Testing!
Frequently asked questions
Did you find this page helpful?
More Related Hubs
TestMu AI forEnterprise
Get access to solutions built on Enterprise
grade security, privacy, & compliance
- Advanced access controls
- Advanced data retention rules
- Advanced Local Testing
- Premium Support options
- Early access to beta features
- Private Slack Channel
- Unlimited Manual Accessibility DevTools Tests