Okta Scim User Provisioning
Prerequisites
Integrate SCIM With TestMu AI:
- You will need an Enterprise plan with TestMu AI.
- SSO must be already integrated. Please complete TestMu AI SSO & Okta Integration
Integrating SCIM with Okta
Step 1: Sign in to your TestMu AI account. Don't have an account, register for free.
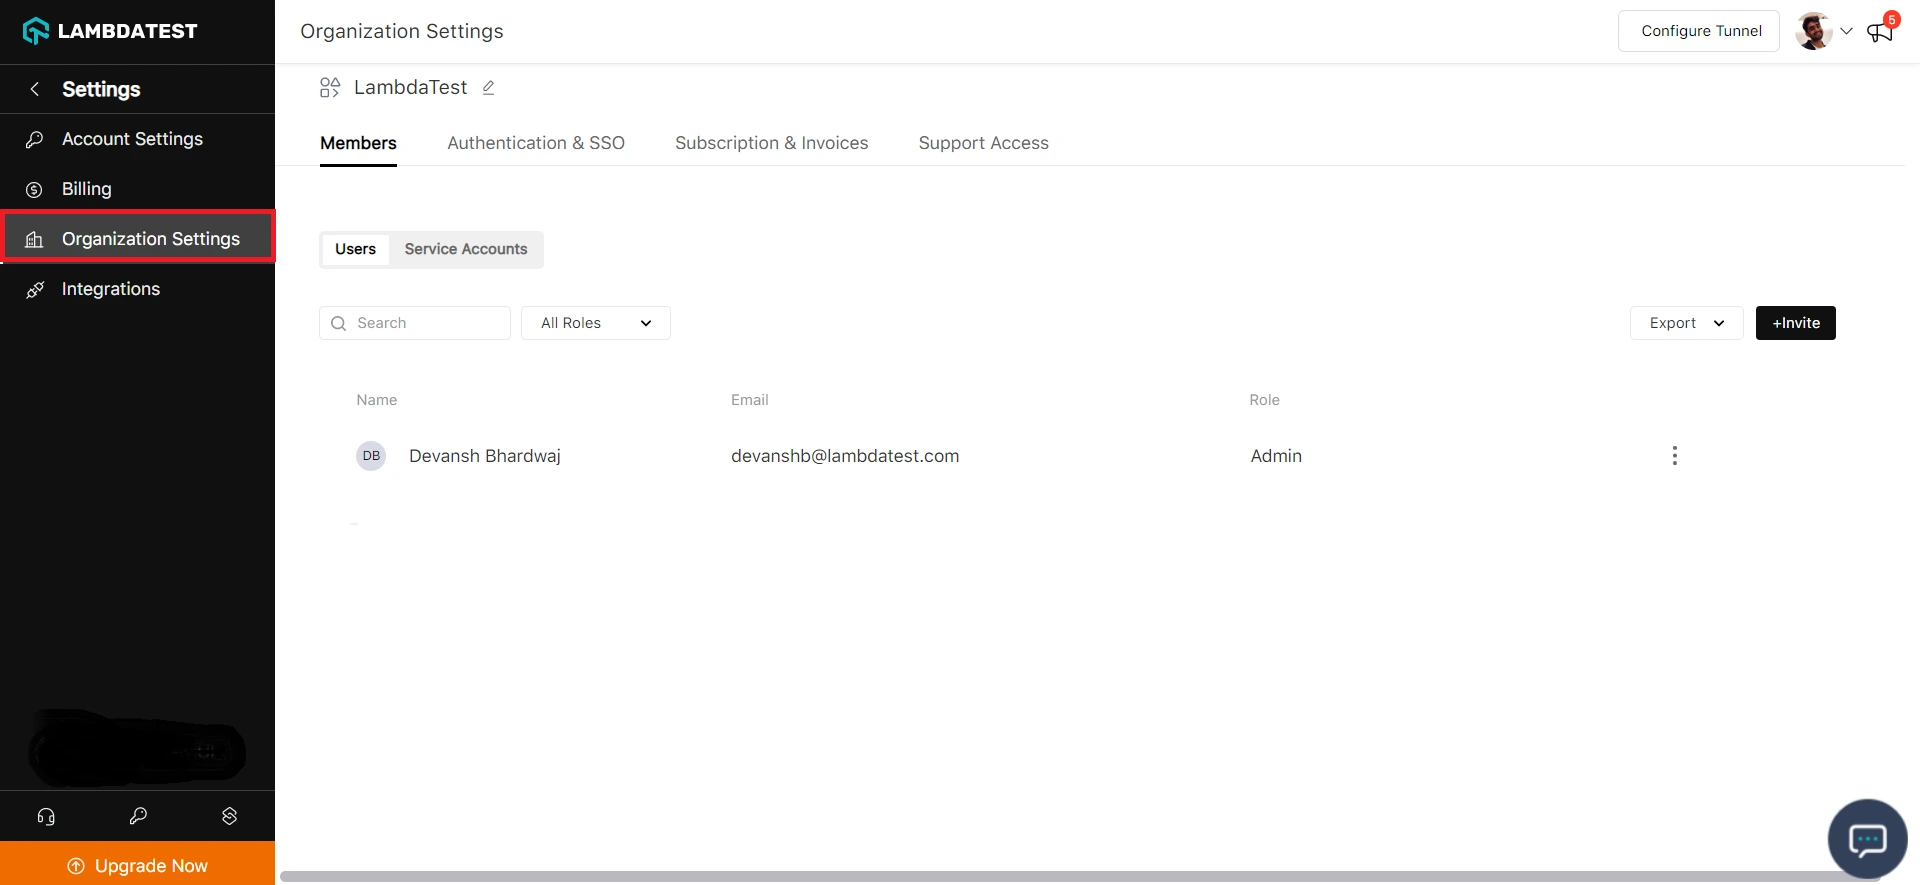
Step 2: Head to Settings and select Organization Settings from the dropdown.
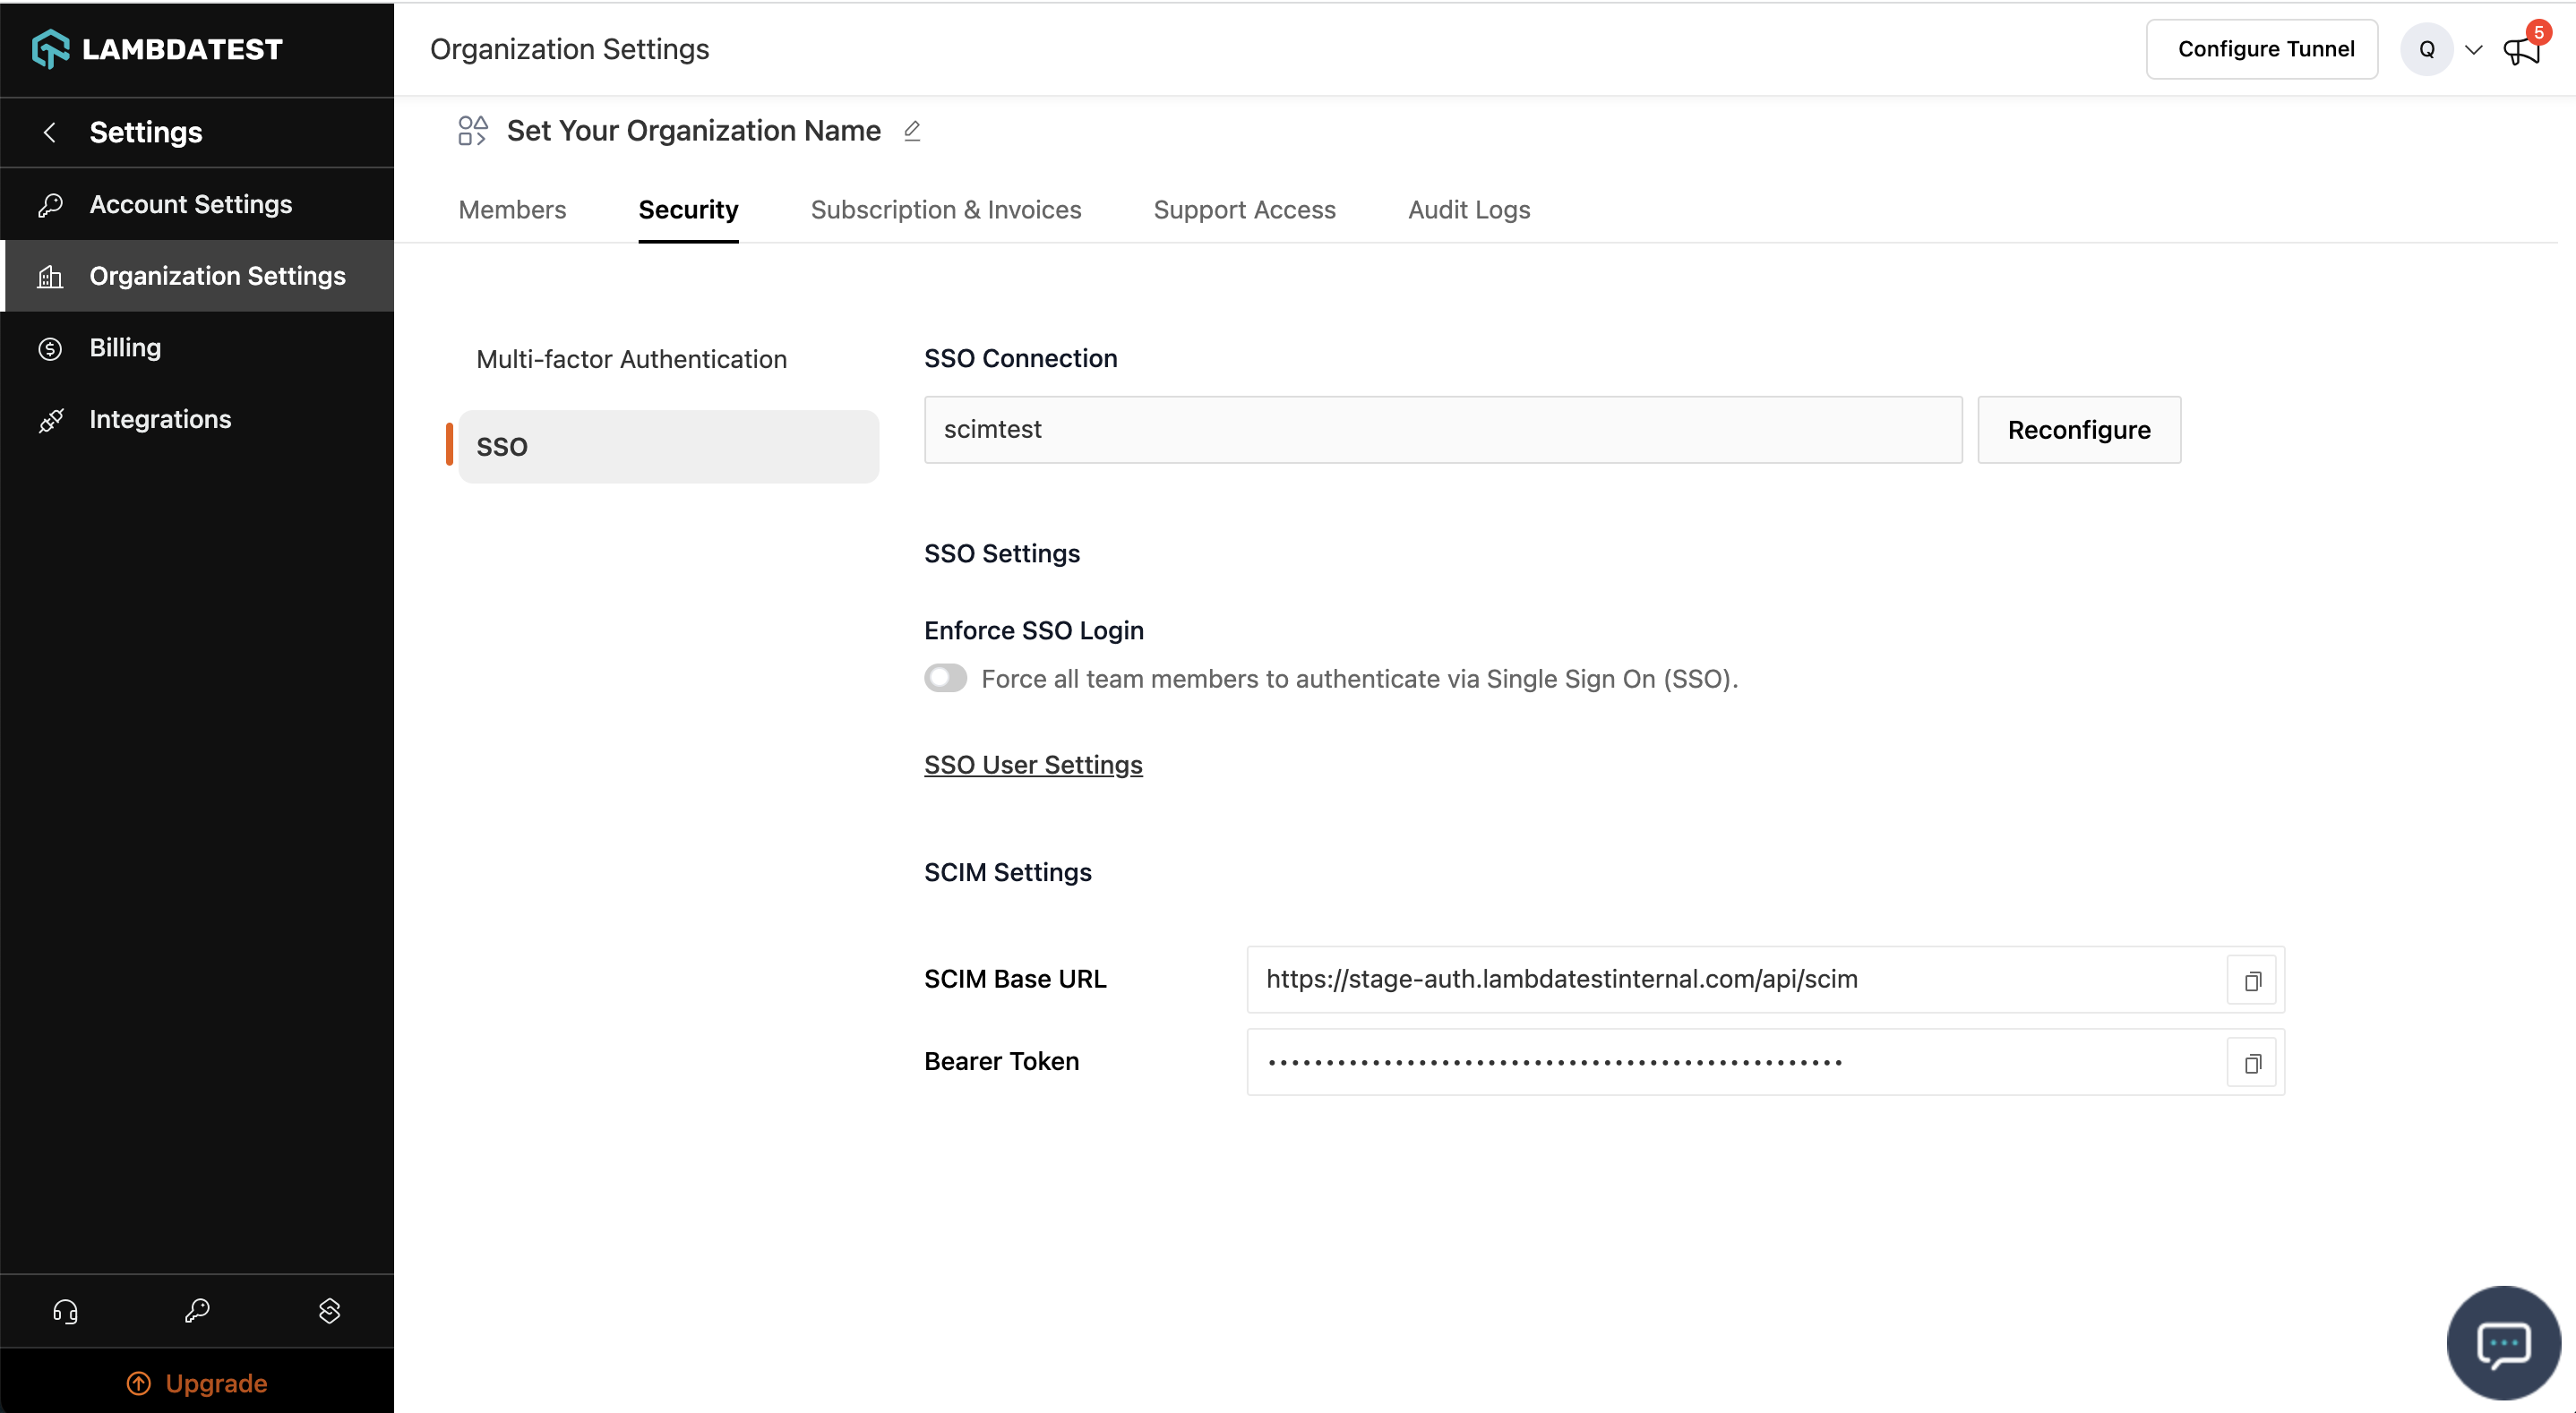
Step 3: Head to the Authentication and SSO tab and click and copy the SCIM Base URL and Bearer Token option.
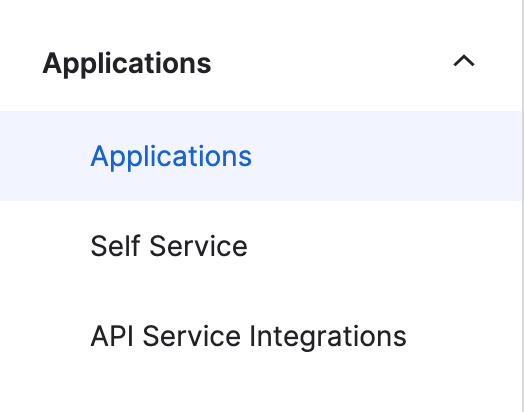
Step 4: Sign in to the Okta. Select Enterprise Applications, then select Applications tab.
Step 5: In the applications list, select application used for TestMu AI SSO setup
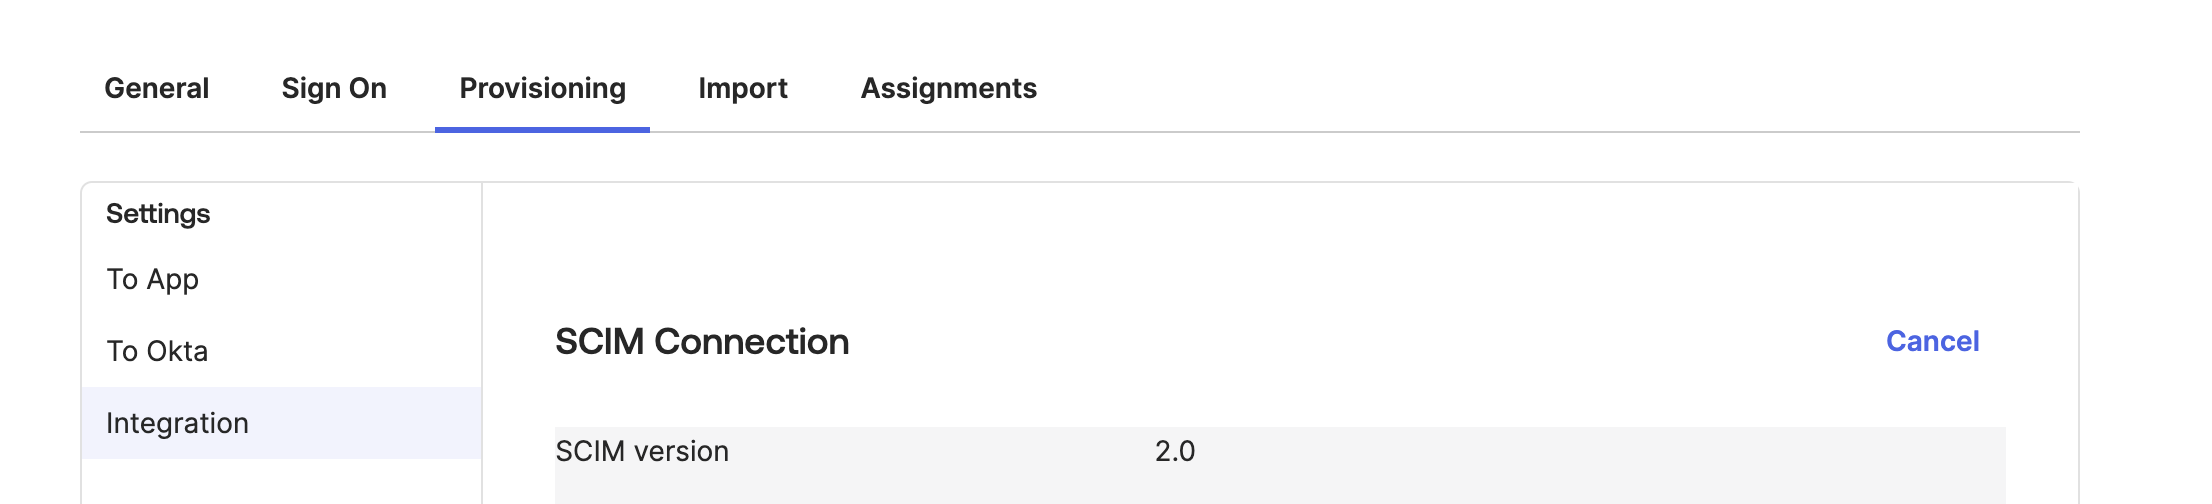
Step 6: Select the Provisioning tab.
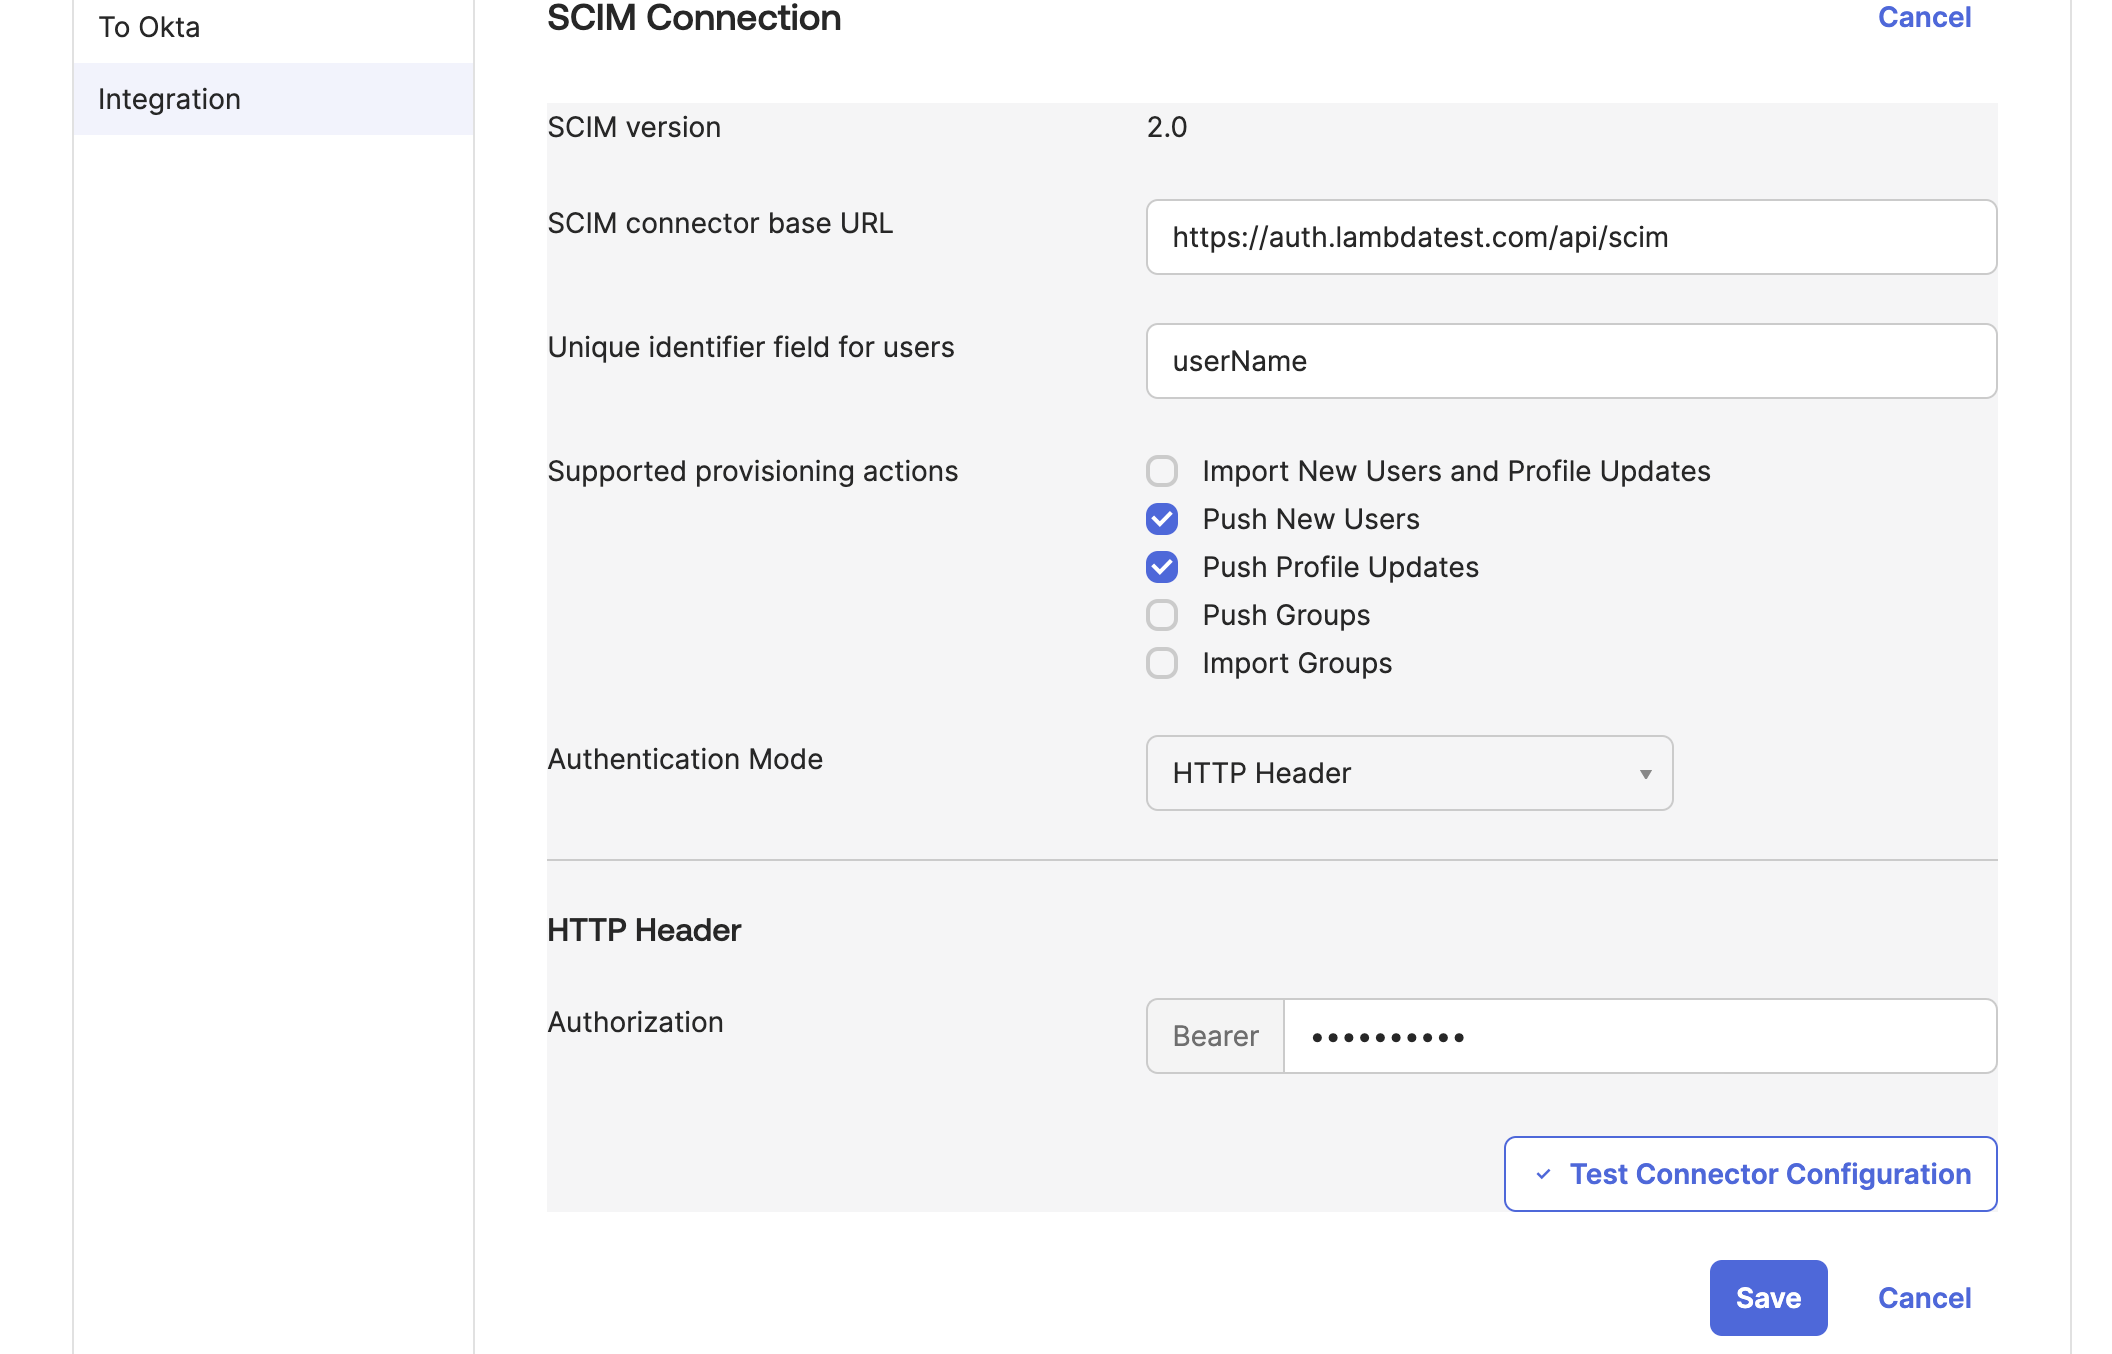
Step 7: Under the Integration section, input your TestMu AI SCIM Base URL-https://auth.lambdatest.com/api/scim and Bearer Token retrieved earlier in Step 3.
Unique identifier field for users field must be set to userName Click Test Connection to ensure Okta can connect to TestMu AI. If the connection fails, ensure your TestMu AI account has Admin permissions and try again.
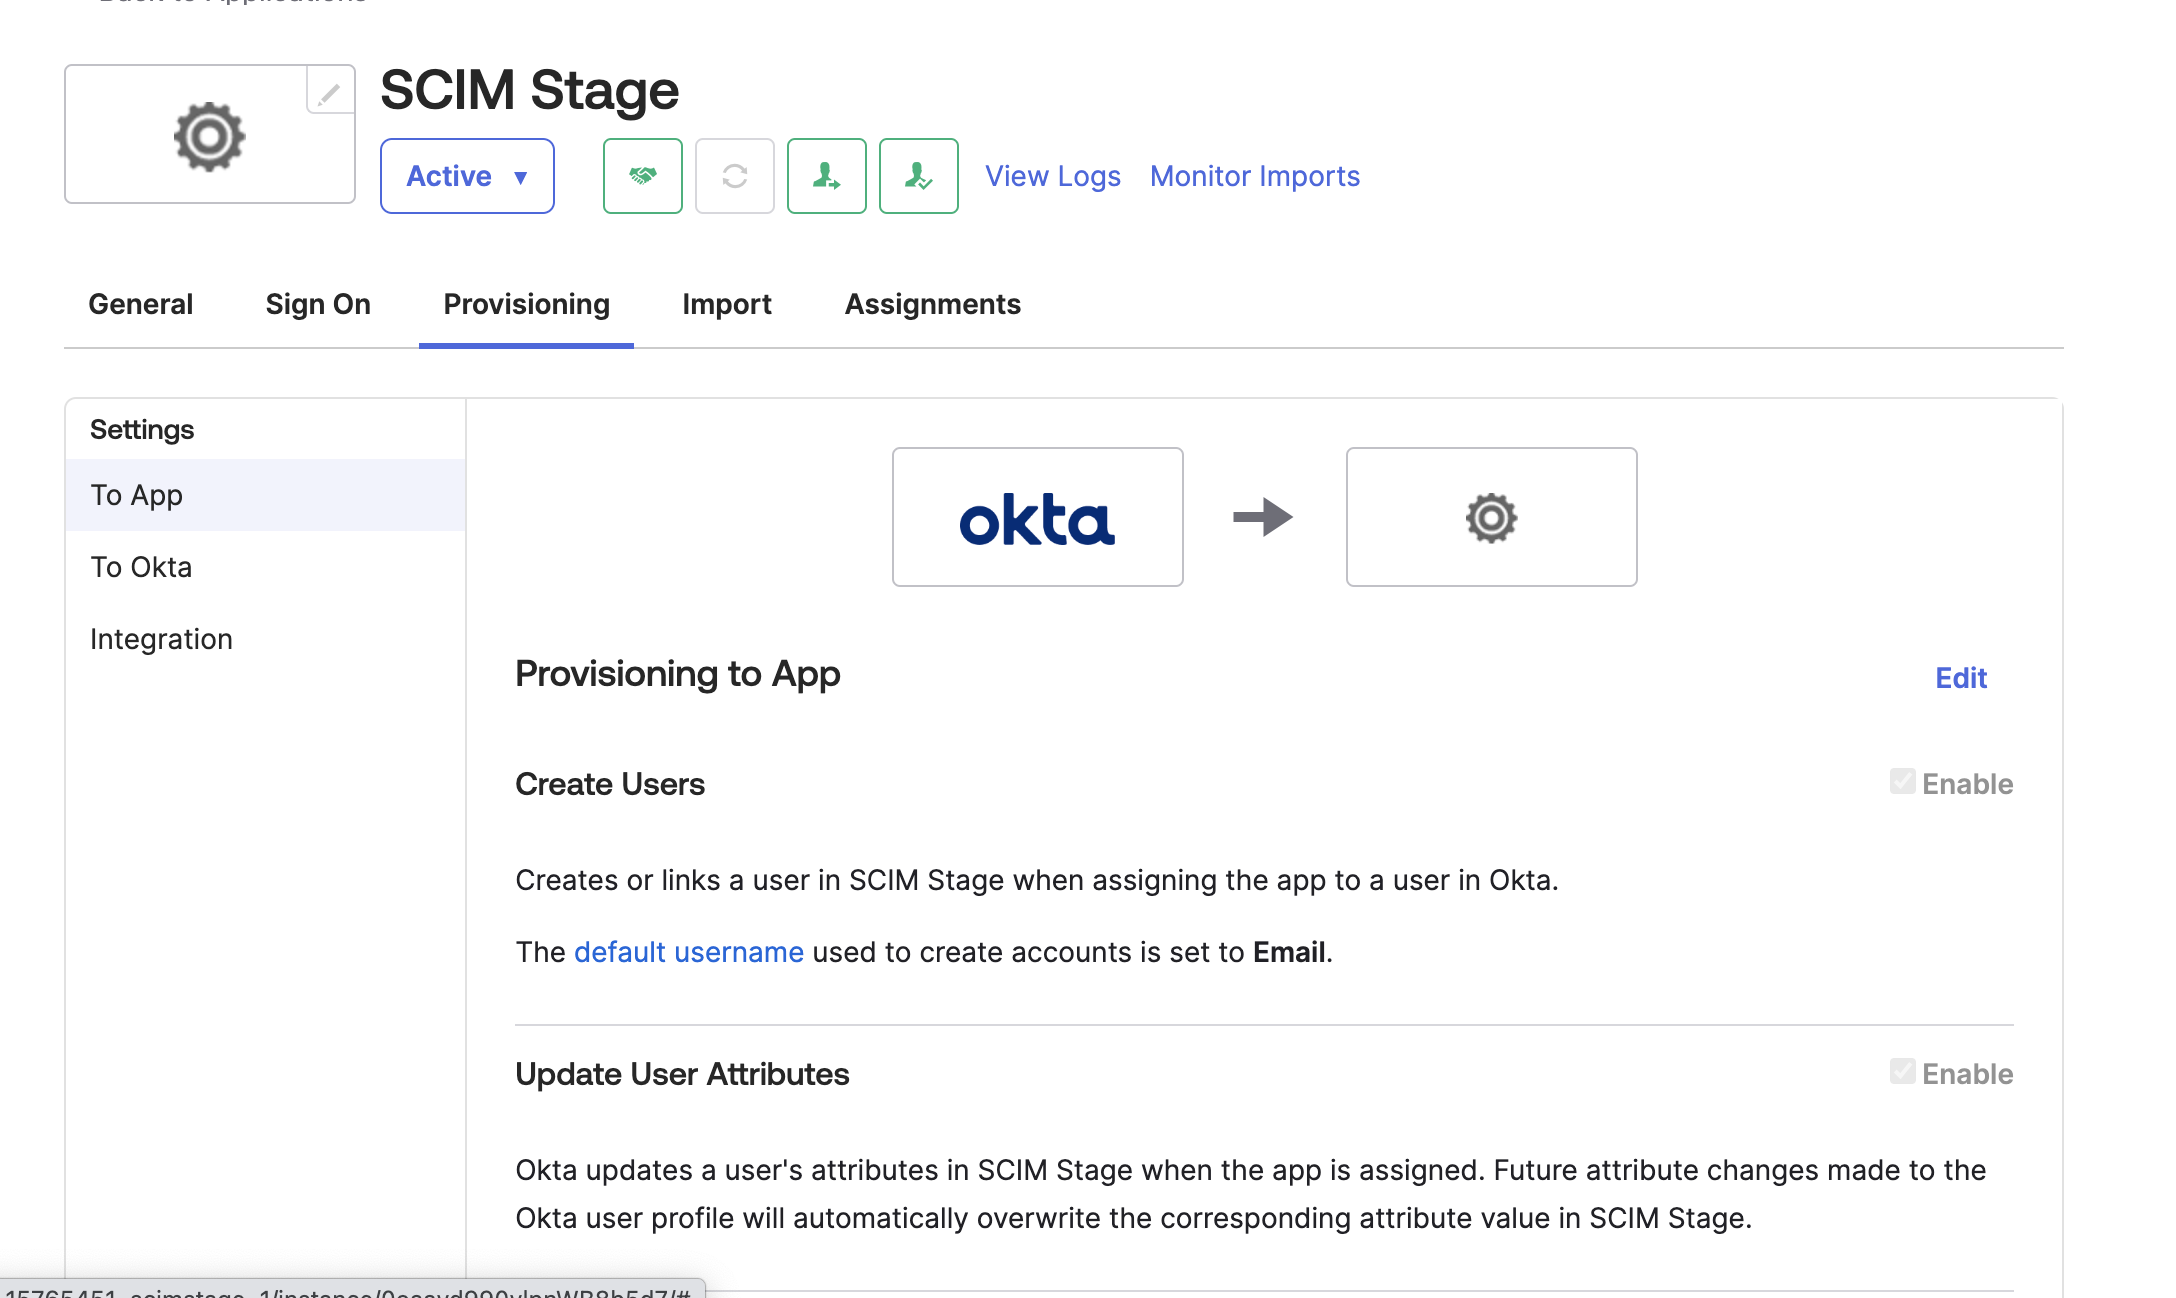
Step 8: Now navigate to App tab
Step 9: Review the User Attribute mappings:
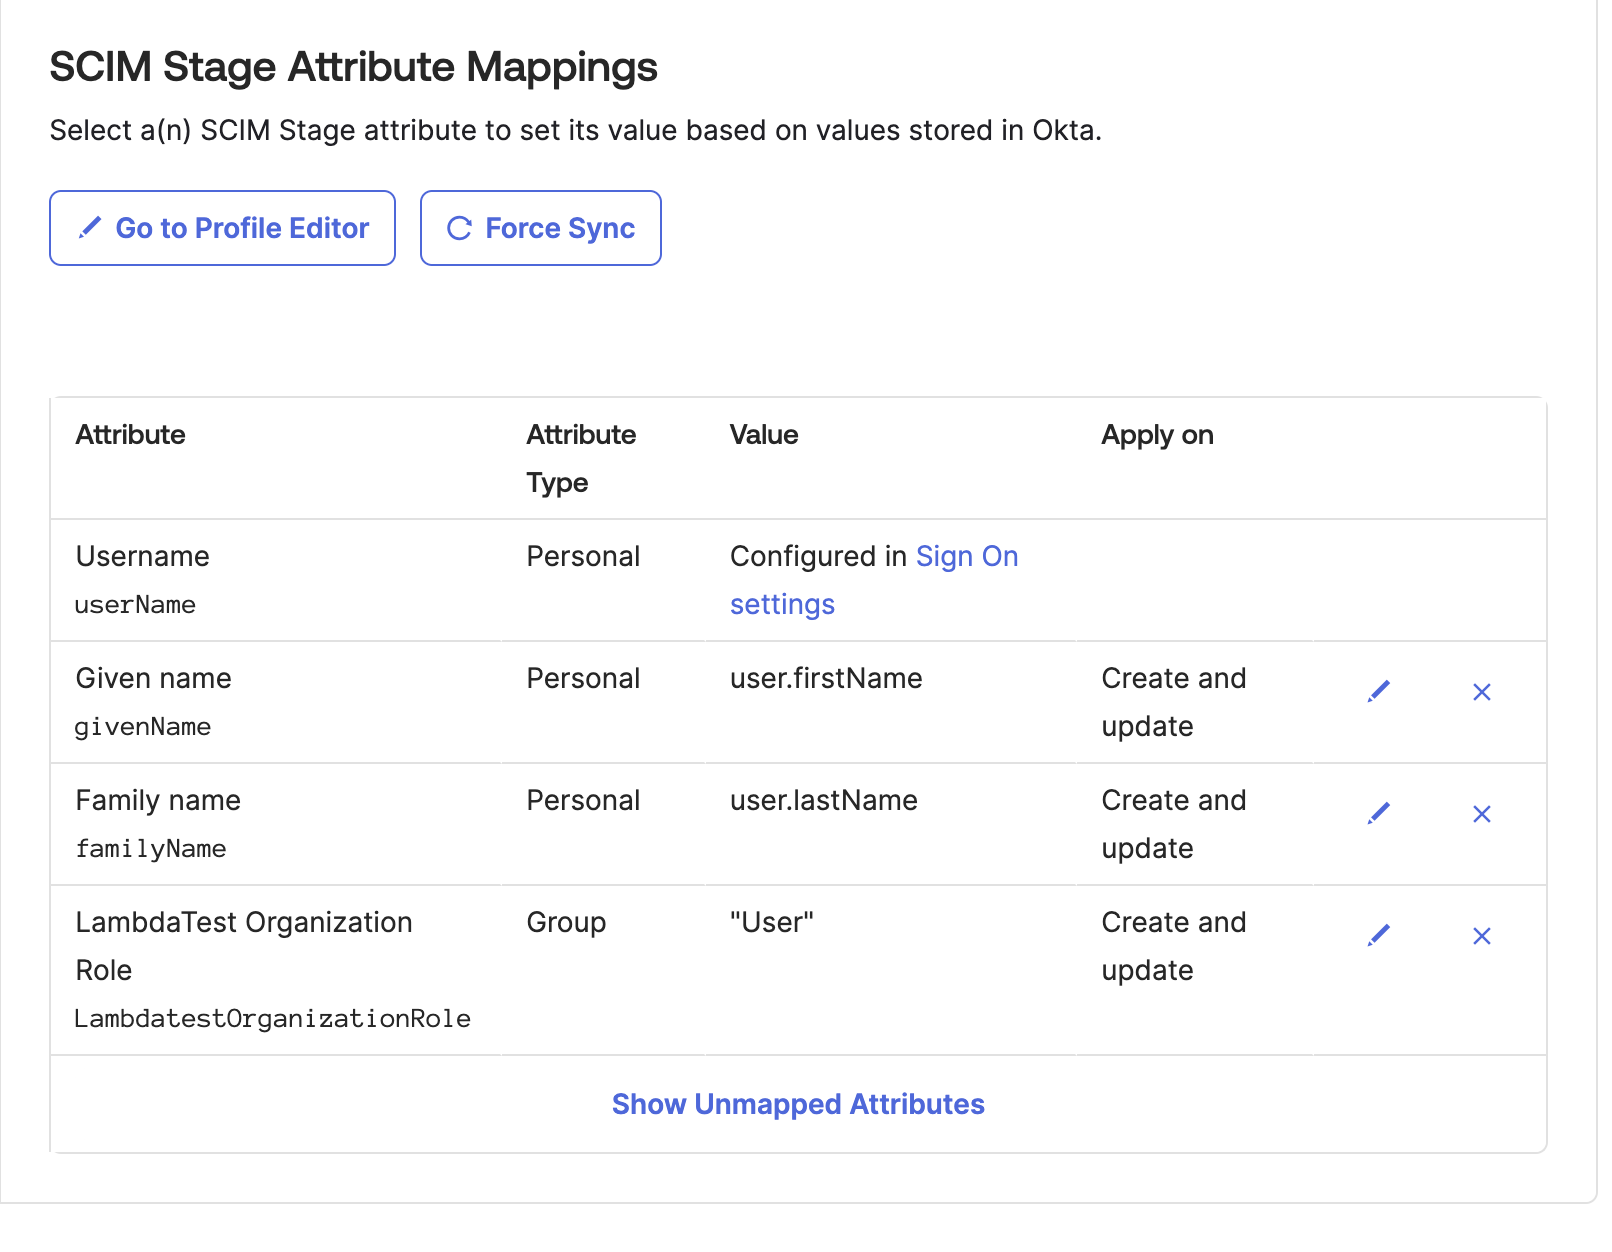
userName, Active, name.givenName, name.familyName are required attributes
Creating Custom Attributes
For creating custom attribute in Okta, go to Directory > Profile Editor > Add Attribute > Create Custom Attribute
urn:ietf:params:scim:schemas:extension:LambdaTest:2.0:User:OrganizationRole:
urn:ietf:params:scim:schemas:extension:LambdaTest:2.0:User:LambdatestGroup : Applicable only if organisation has group support active)
Enter Display Name as per your choice Enter Variable name as OrganizationRole Enter External name as OrganizationRole Enter External namespace as urn:ietf:params:scim:schemas:extension:TestMu AI:2.0:User
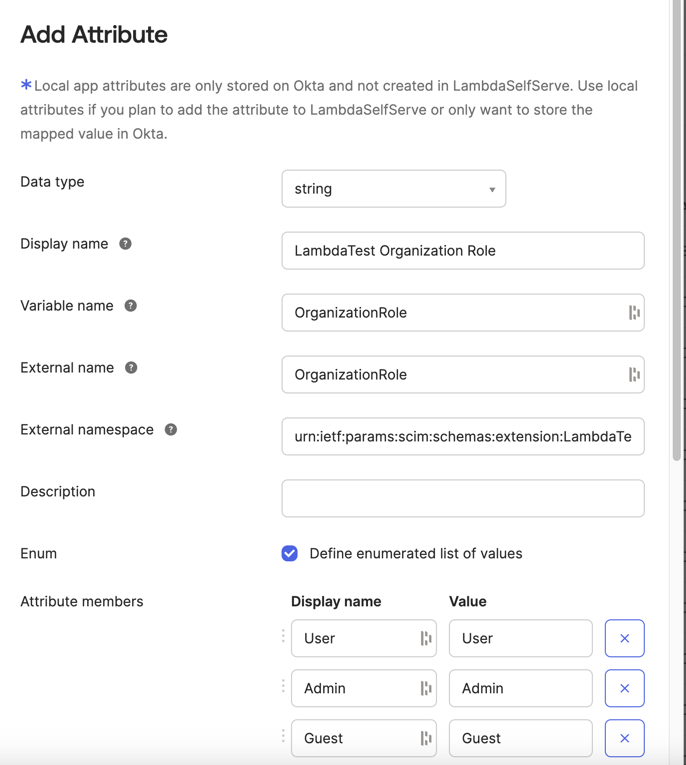
Set the data type as String Select Enum as Yes Enter the values as Admin, Guest, User

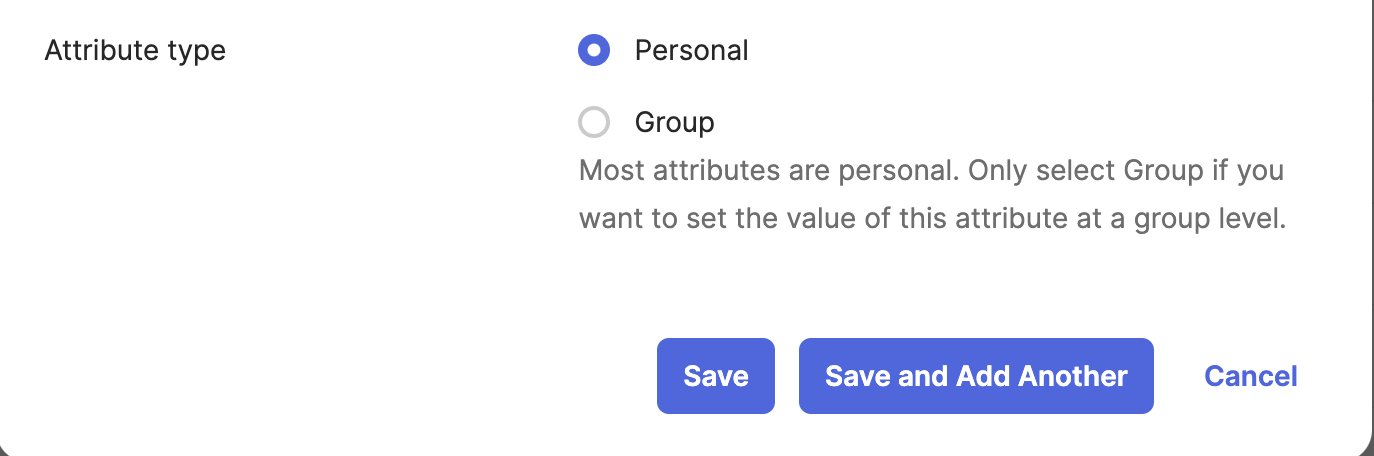
Also if you want to assign this attribute at a okta group level choose AttributeType as Group
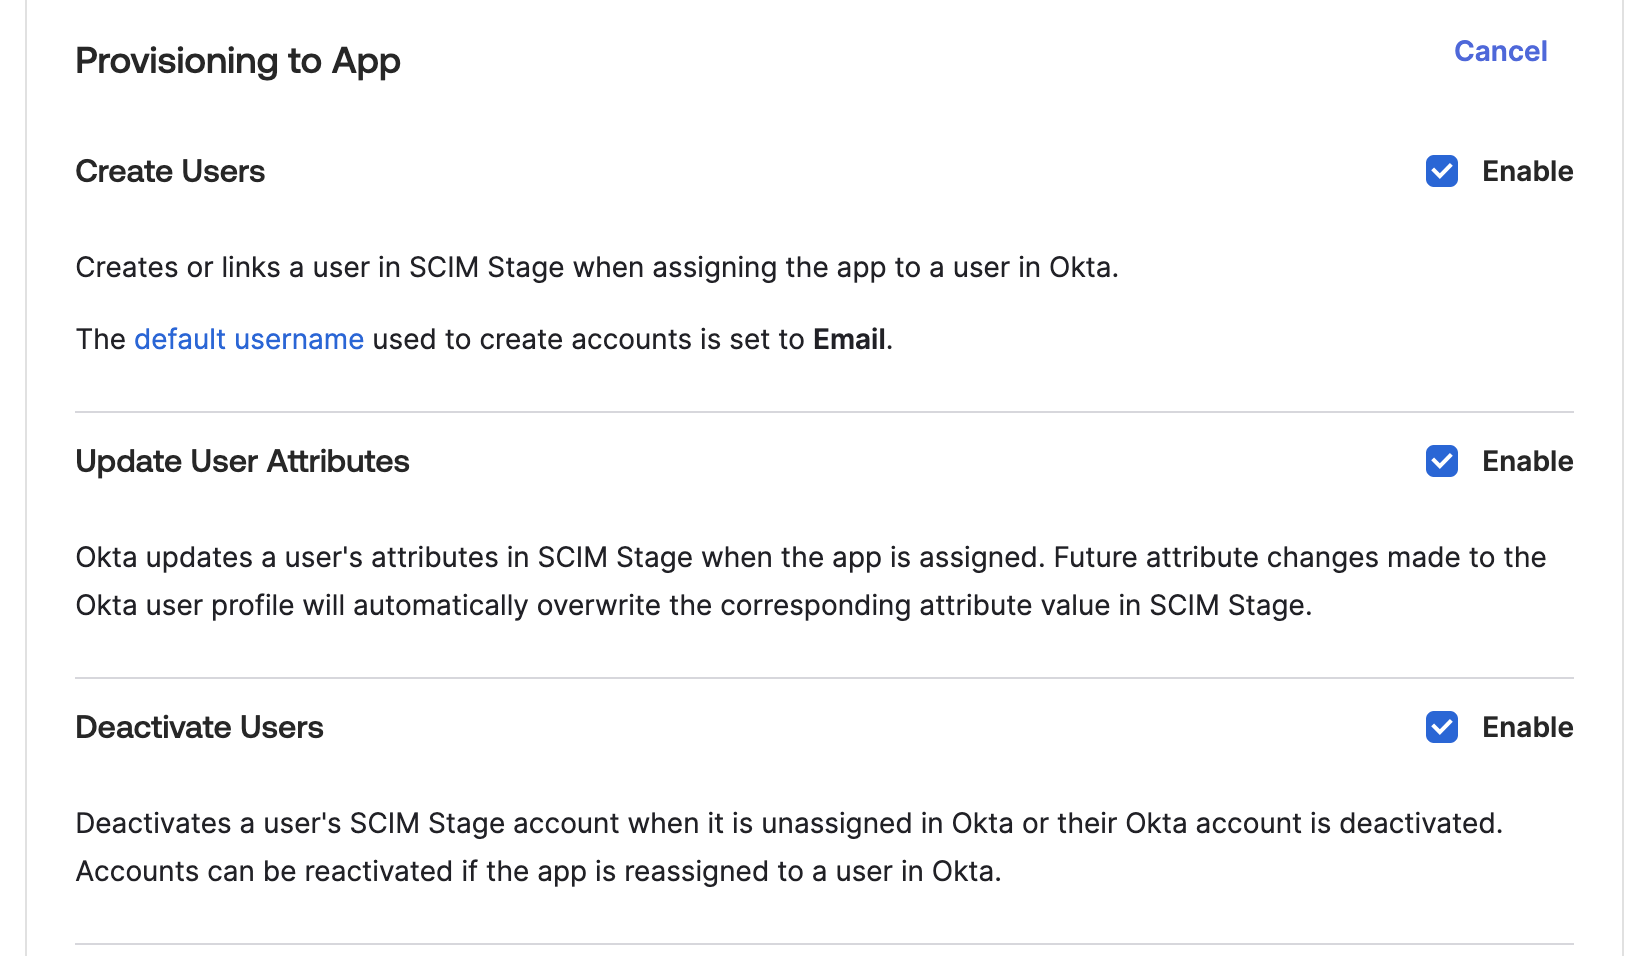
Step 10: To enable the Okta provisioning service for TestMu AI, set Create Users, Update User Attributes and Deactivate Users to enabled
Pushing Groups from Okta
Once user provisioning is working, you can push Okta groups to TestMu AI for automatic team, concurrency group, or sub-org assignment.
Group Provisioning must be enabled for your org. Contact 24/7 chat support to activate it.
Step 1: In Okta, go to your TestMu AI application > Push Groups tab.
Step 2: Click Push Groups > choose Find groups by name or Find groups by rule.
Step 3: Search for or select the groups you want to push, then click Save.
Step 4: Okta will immediately push the group and its members to TestMu AI via SCIM.
Step 5: In TestMu AI, go to Settings > Organization Settings > SCIM Group Provisioning to view the pushed groups and configure mappings.
Setting Roles on Okta Groups
To assign TestMu AI roles (Admin, User, Guest) to all members of an Okta group:
- In your Okta app's Push Groups settings, the
LambdatestRolesattribute is sent automatically if configured - Alternatively, set
LambdatestRolesin the SCIM group extension:urn:ietf:params:scim:schemas:extension:LambdaTest:2.0:Group - The role applies to all members of the group. When a user is in multiple groups, the highest role wins (Admin > User > Guest)
What Happens After Pushing
| Okta Action | TestMu AI Effect |
|---|---|
| Push a group | Group created, mapping rules evaluated, members synced |
| Add member to group | Member added to all mapped TestMu AI entities |
| Remove member from group | Member removed (if no other group maps them there), role recomputed |
| Rename group in Okta | Group renamed, mapped entity renamed to match, rules re-evaluated |
| Unlink/delete pushed group | Group soft-deleted, members safely unassigned, roles recomputed |
For details on mapping, conflicts, and rules, see the SCIM Provisioning guide.
That's all you need to know about TestMu AI SCIM Auto User Provisioning with Okta. In case you have any questions please feel free to reach out to us via the 24/7 chat support or email us over support@testmuai.com.
