Manage SSO Connection
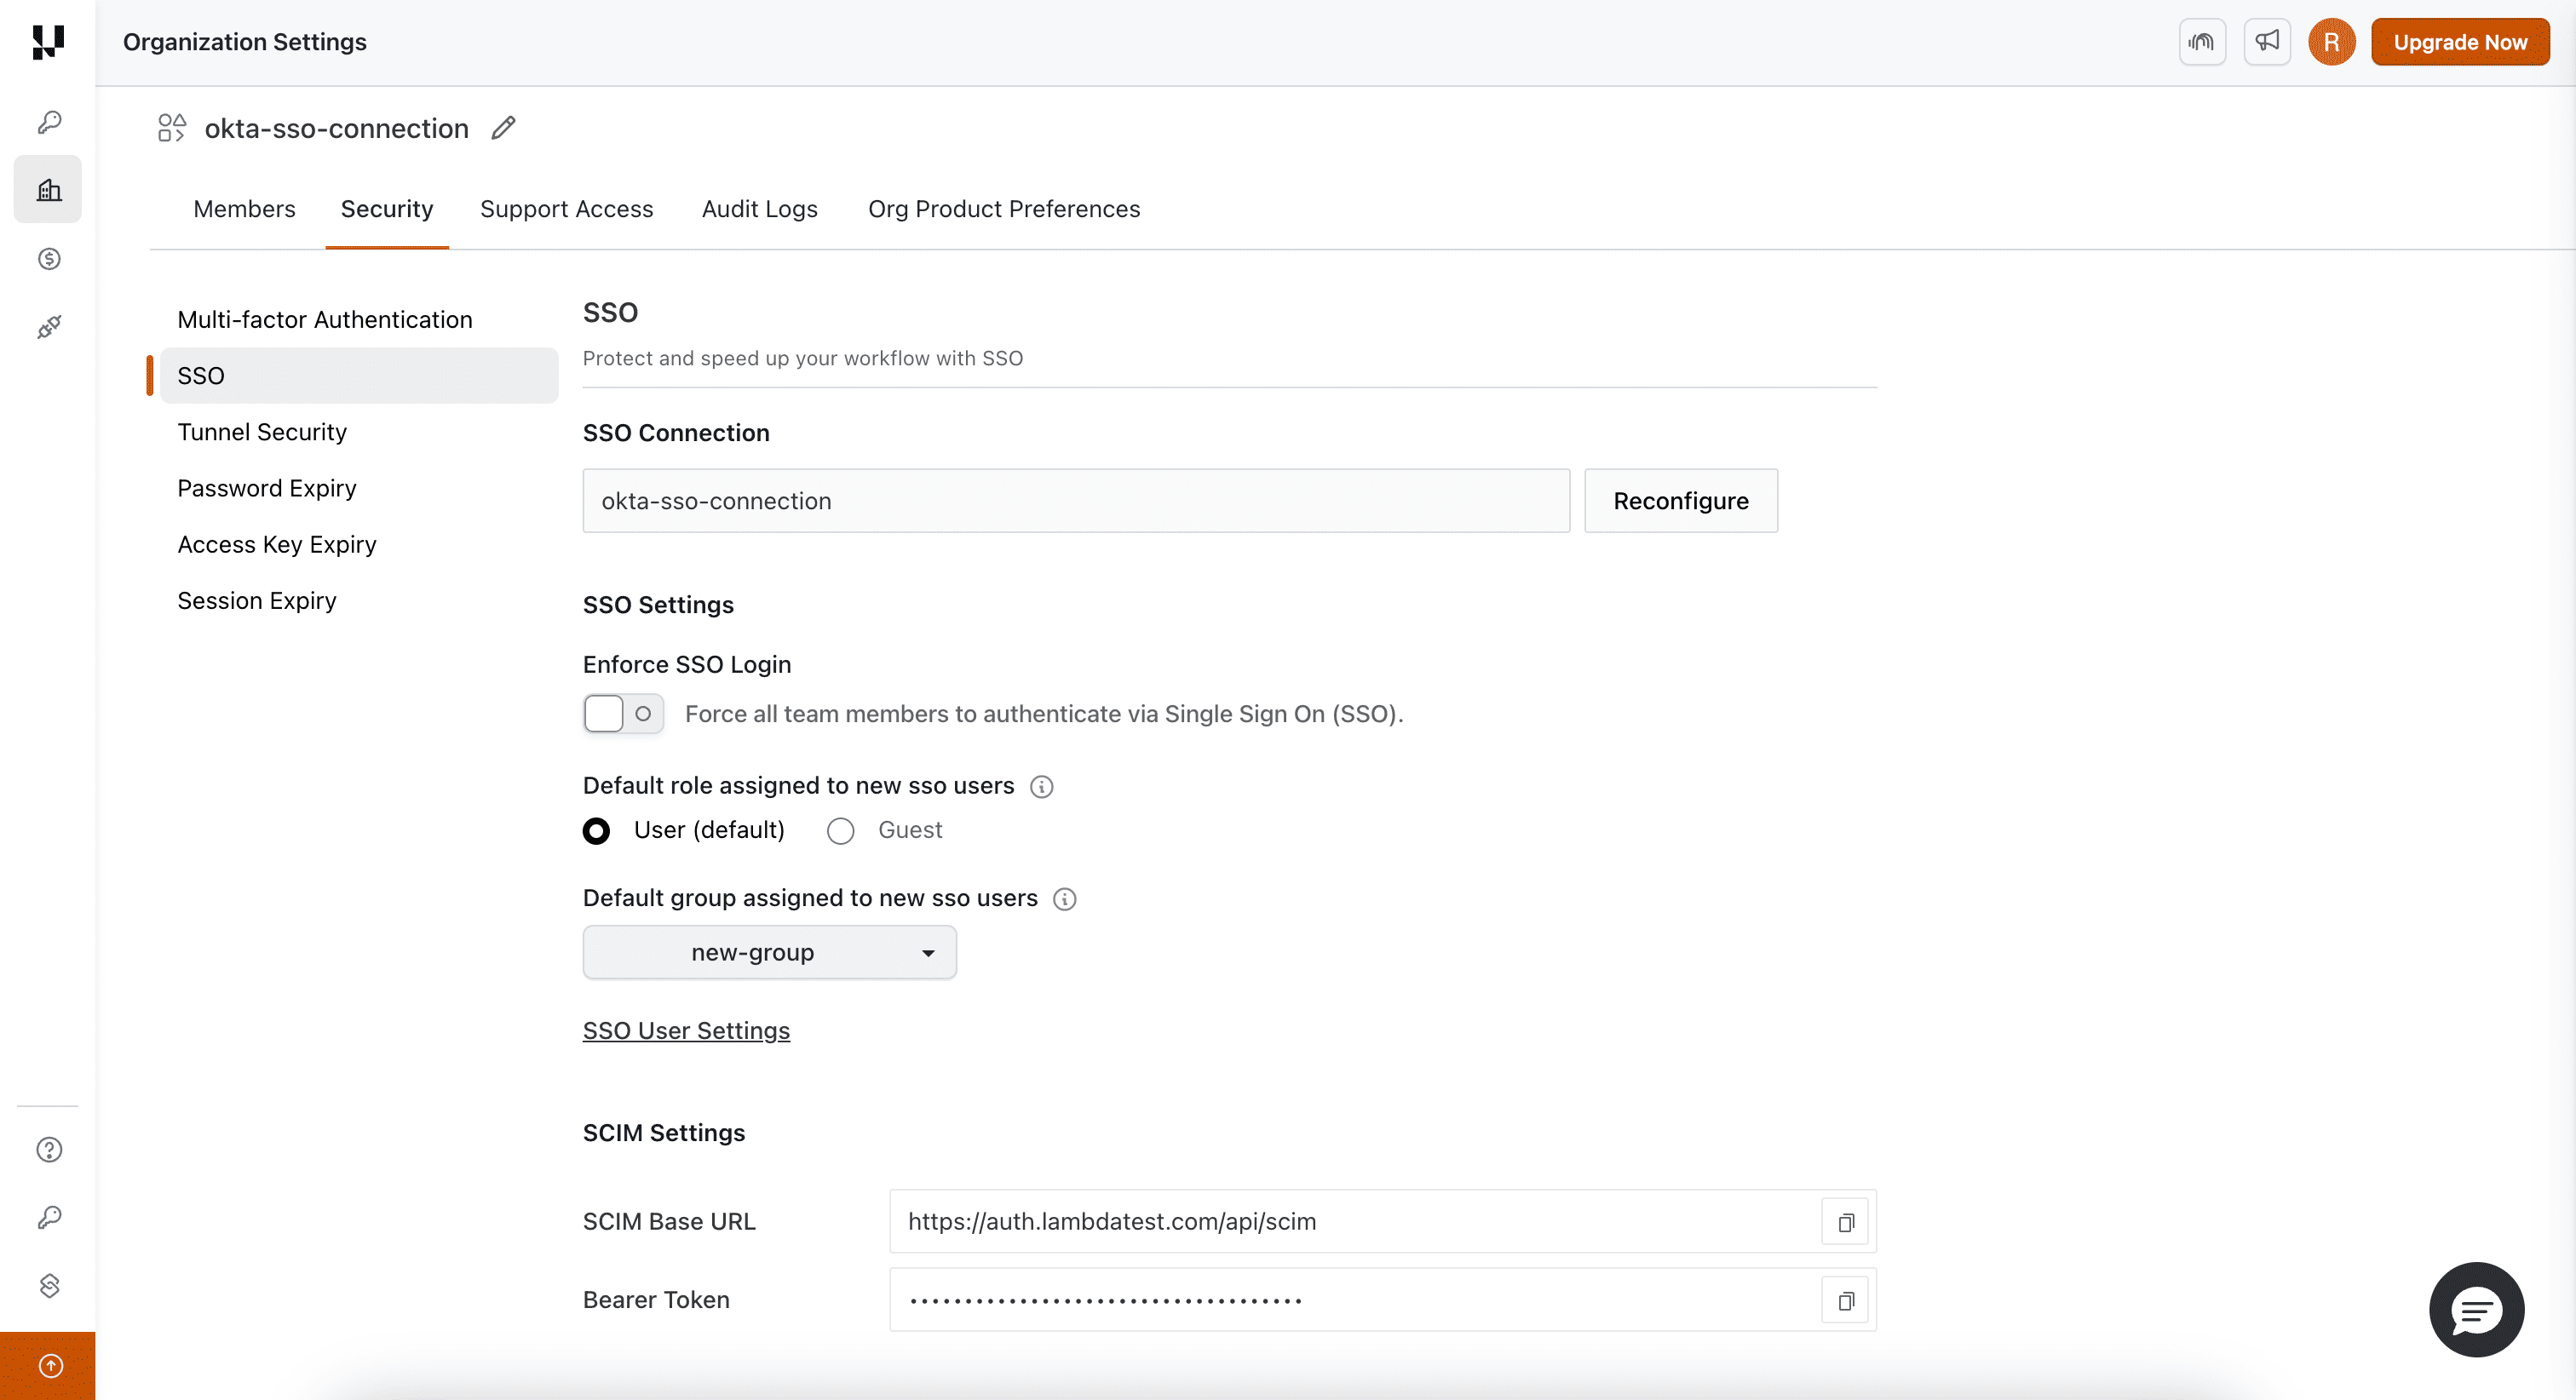
Before proceeding you need to navigate to SSO Section in the Security tab of Organization Settings.
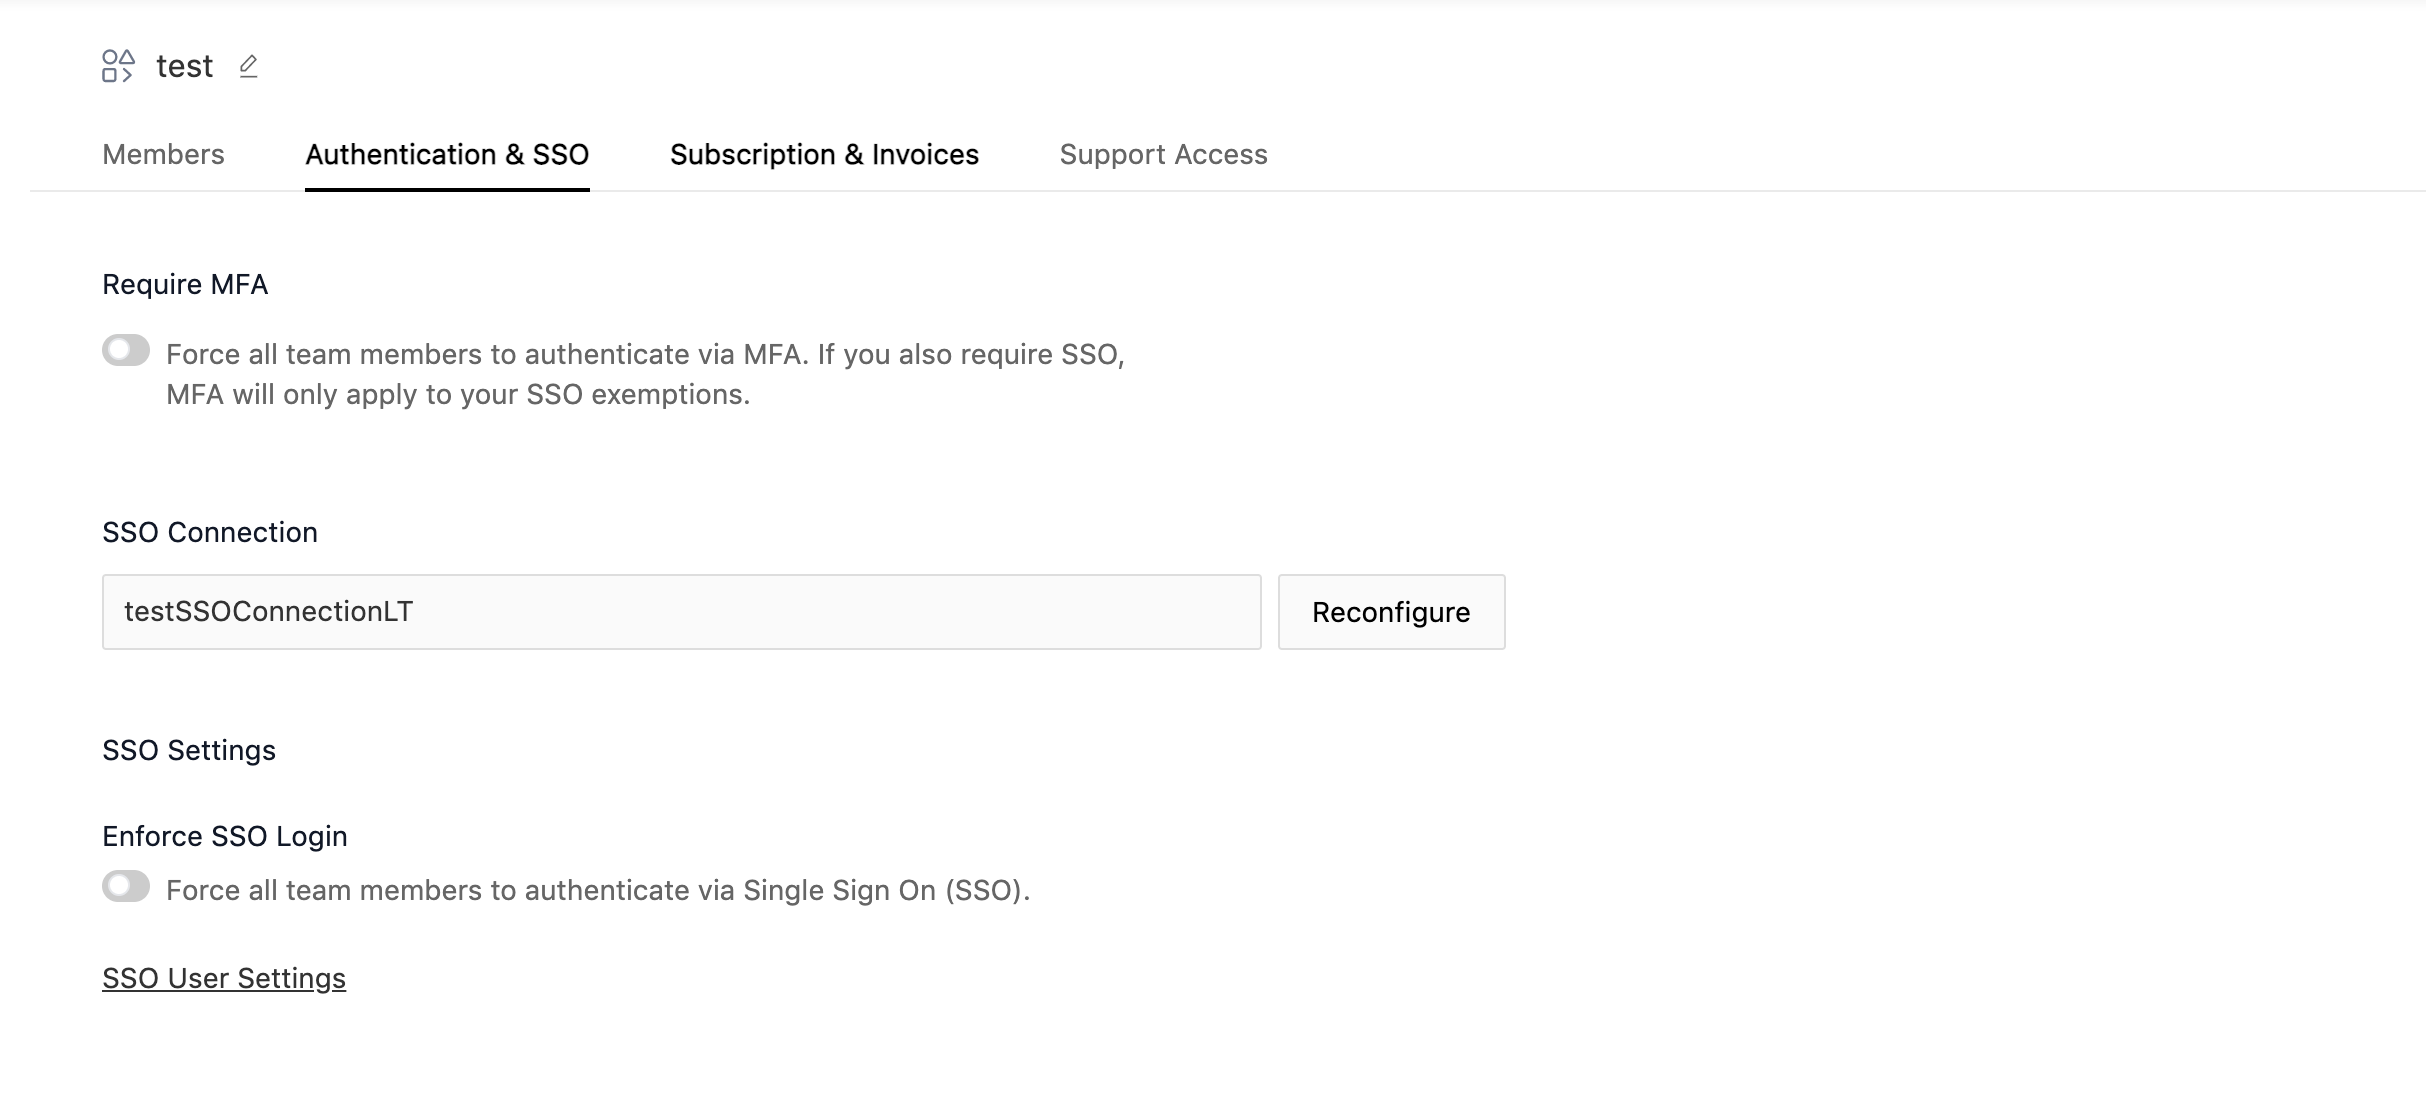
Reconfigure SSO Connection
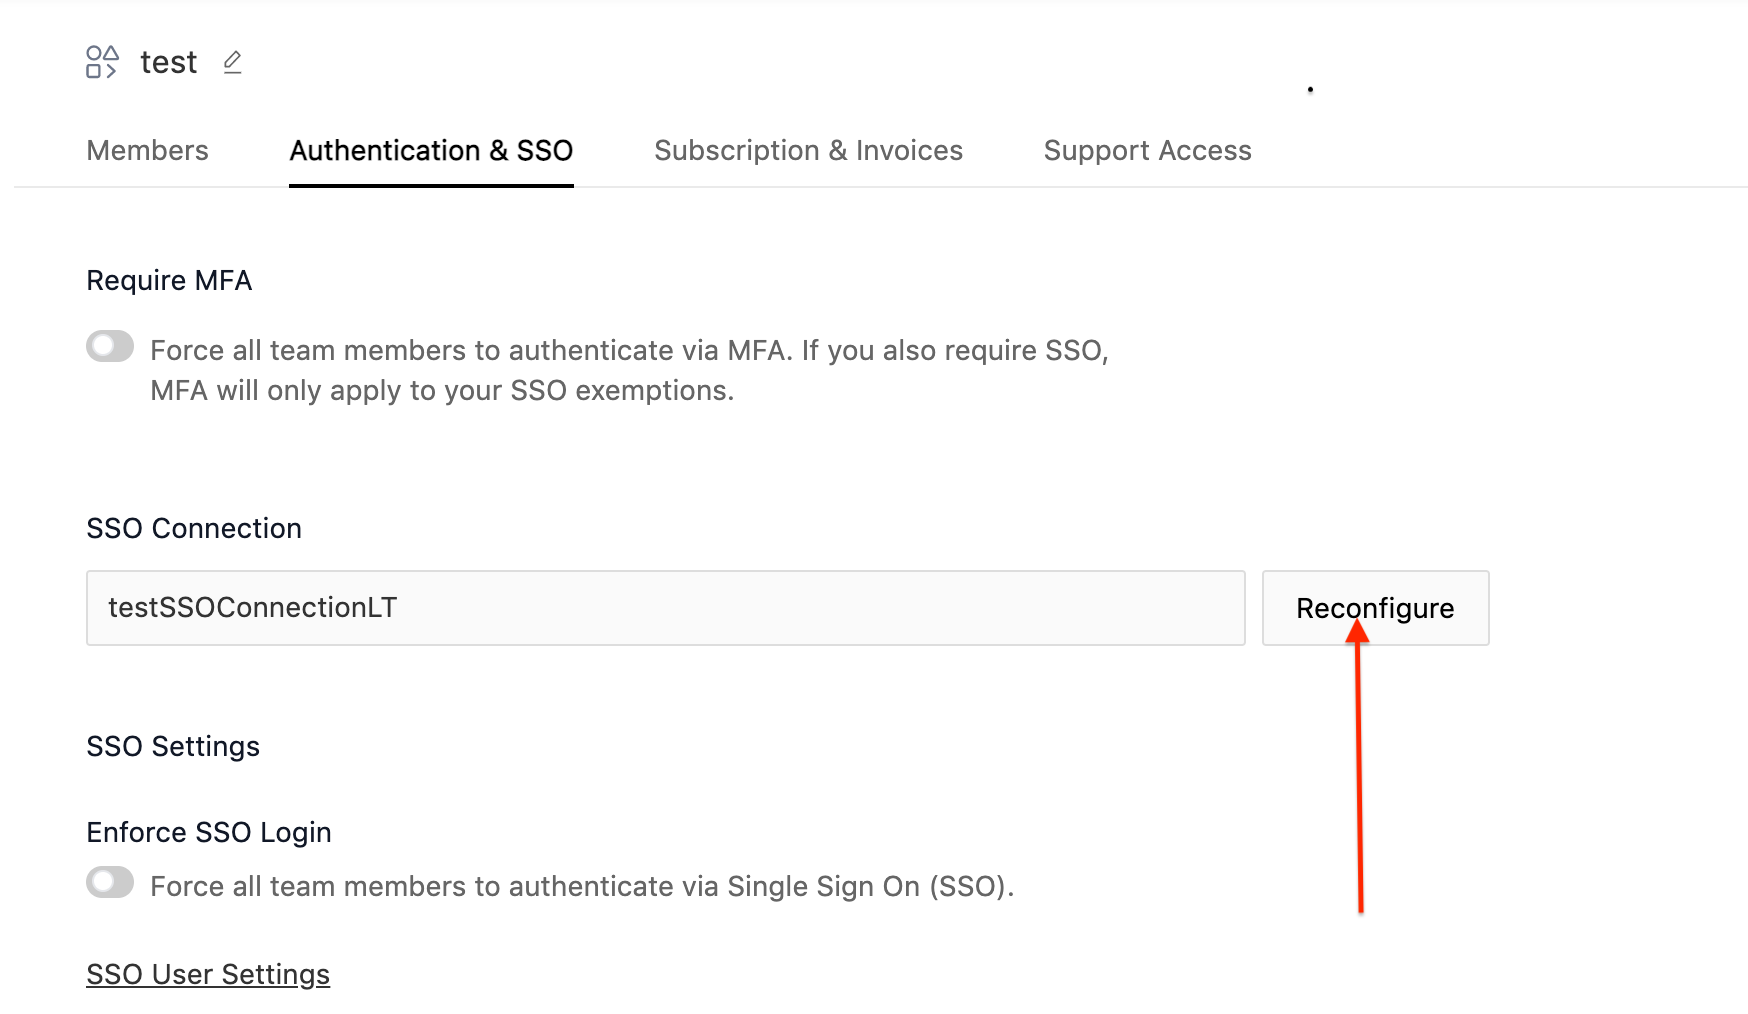
- For Updating the SSO connection, click on Reconfigure.
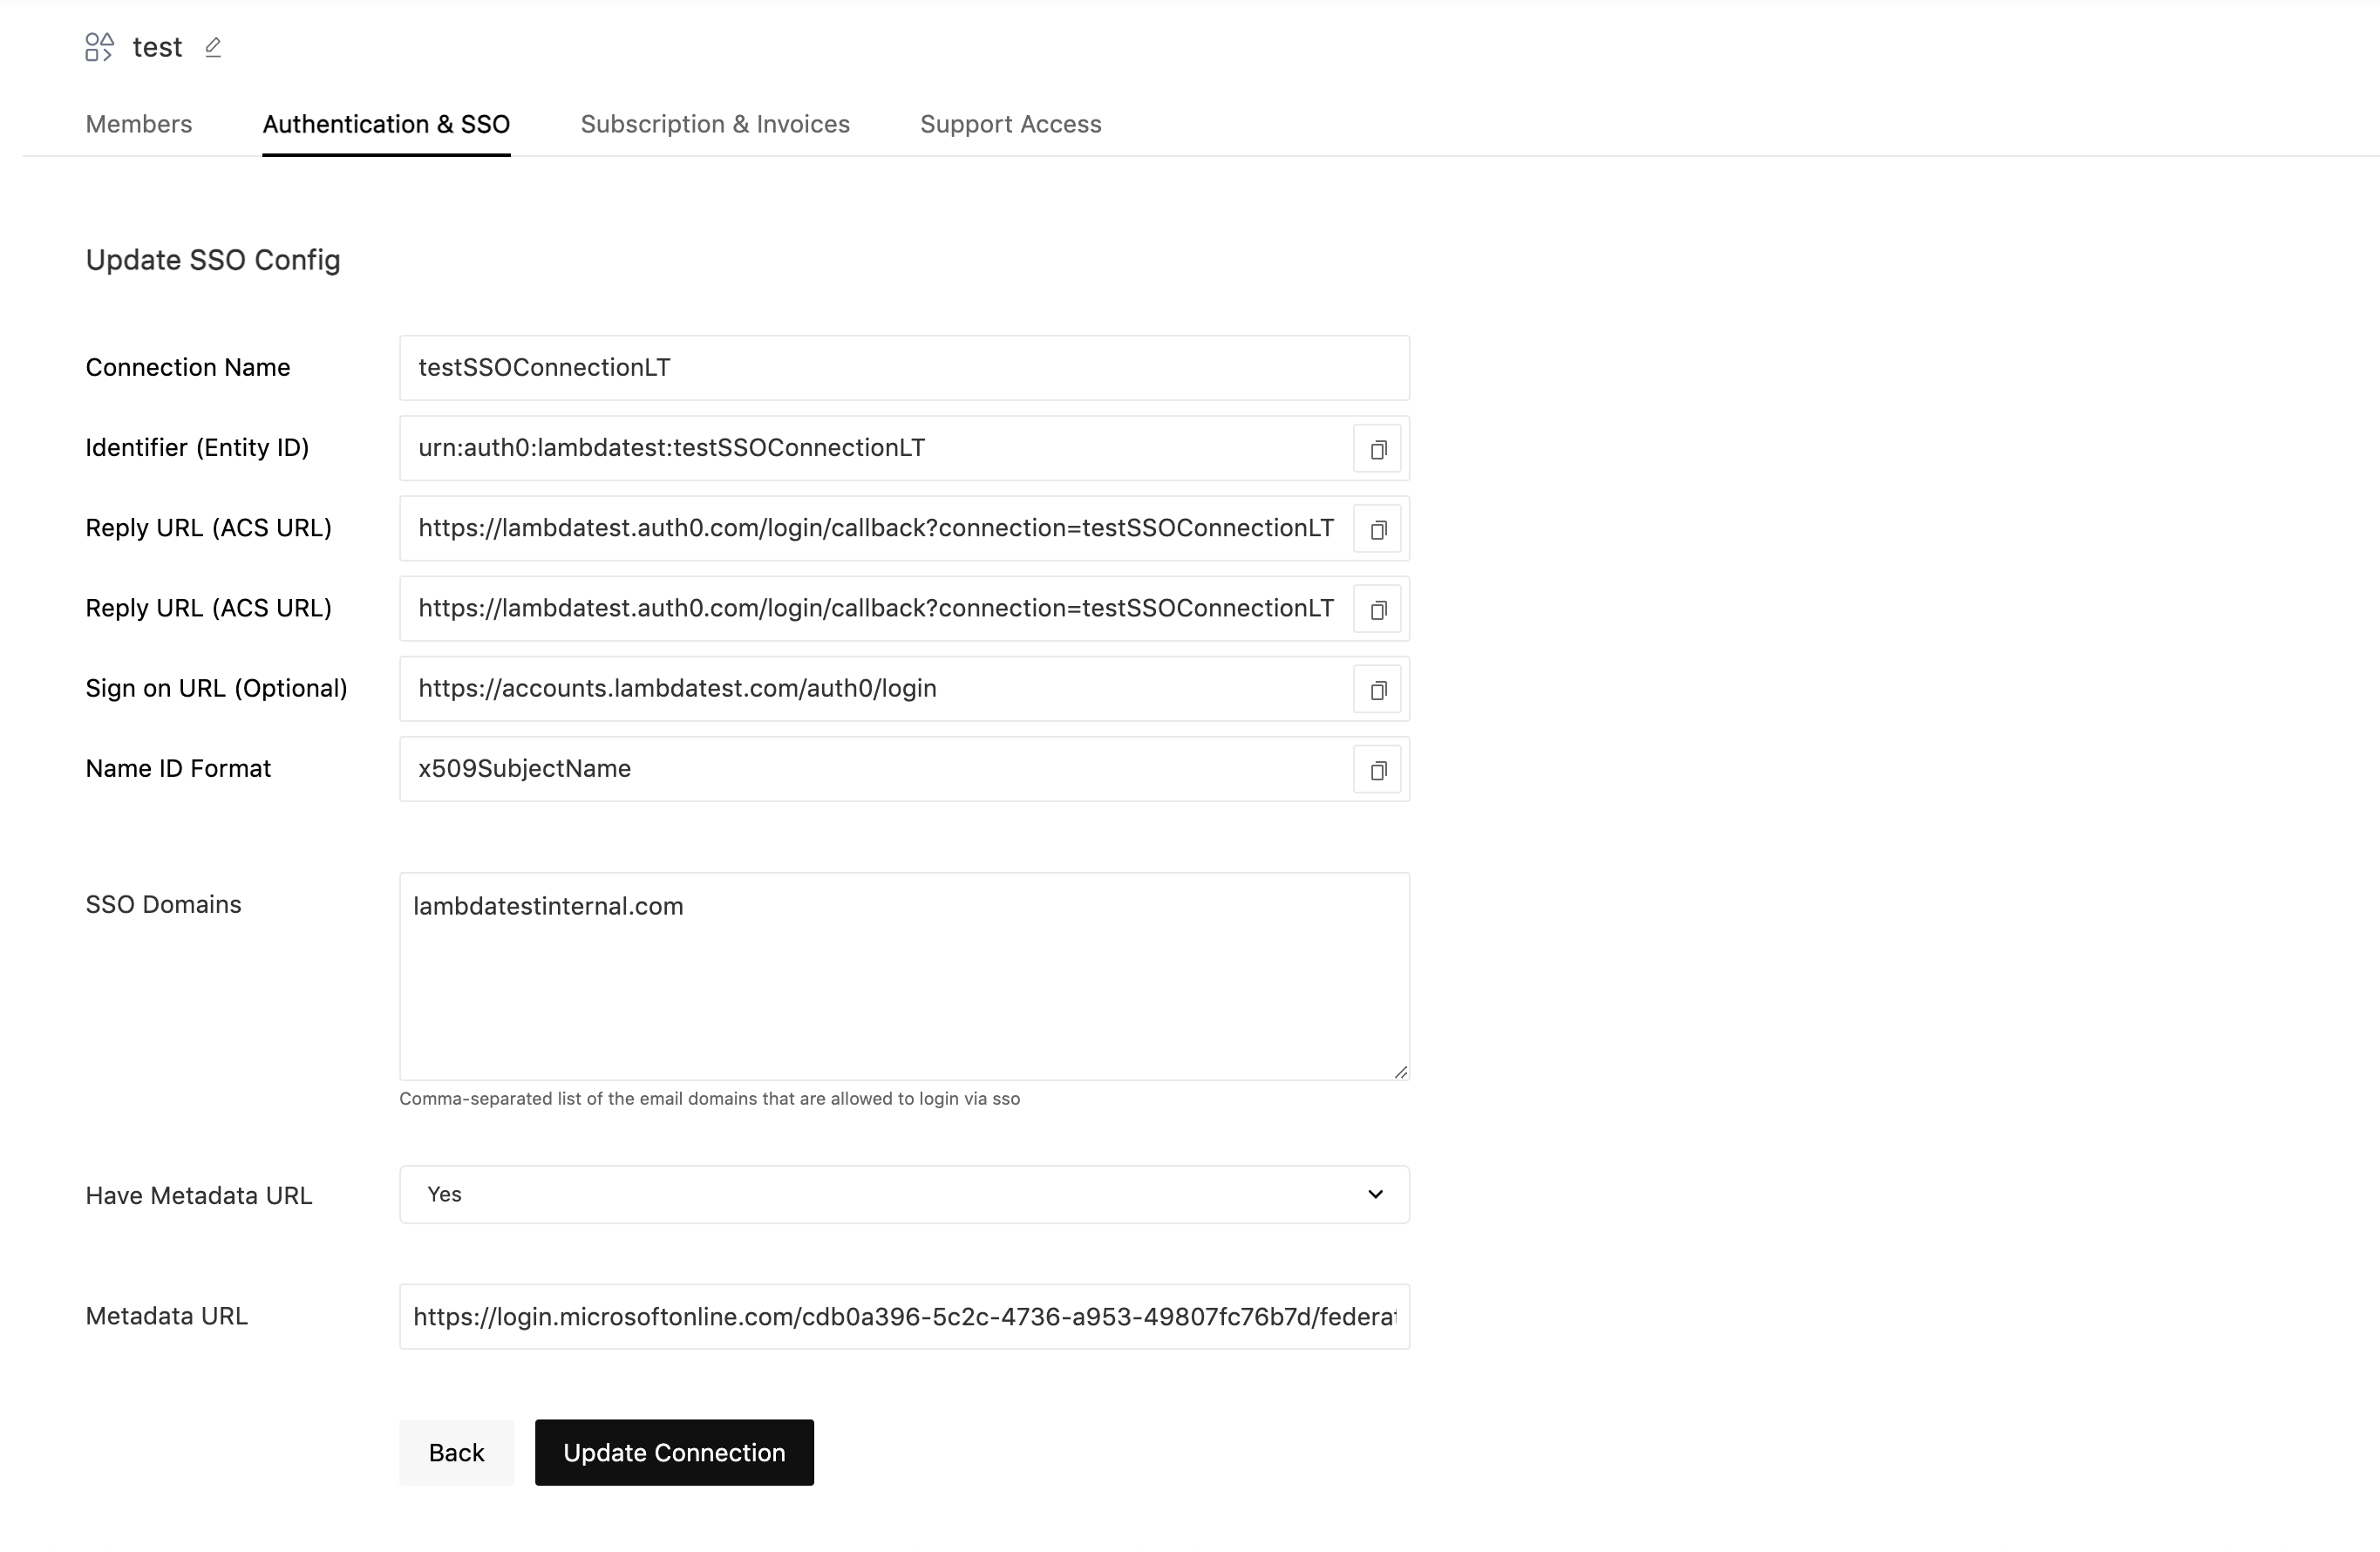
- Update the fields you need to change and click on Update Connection.
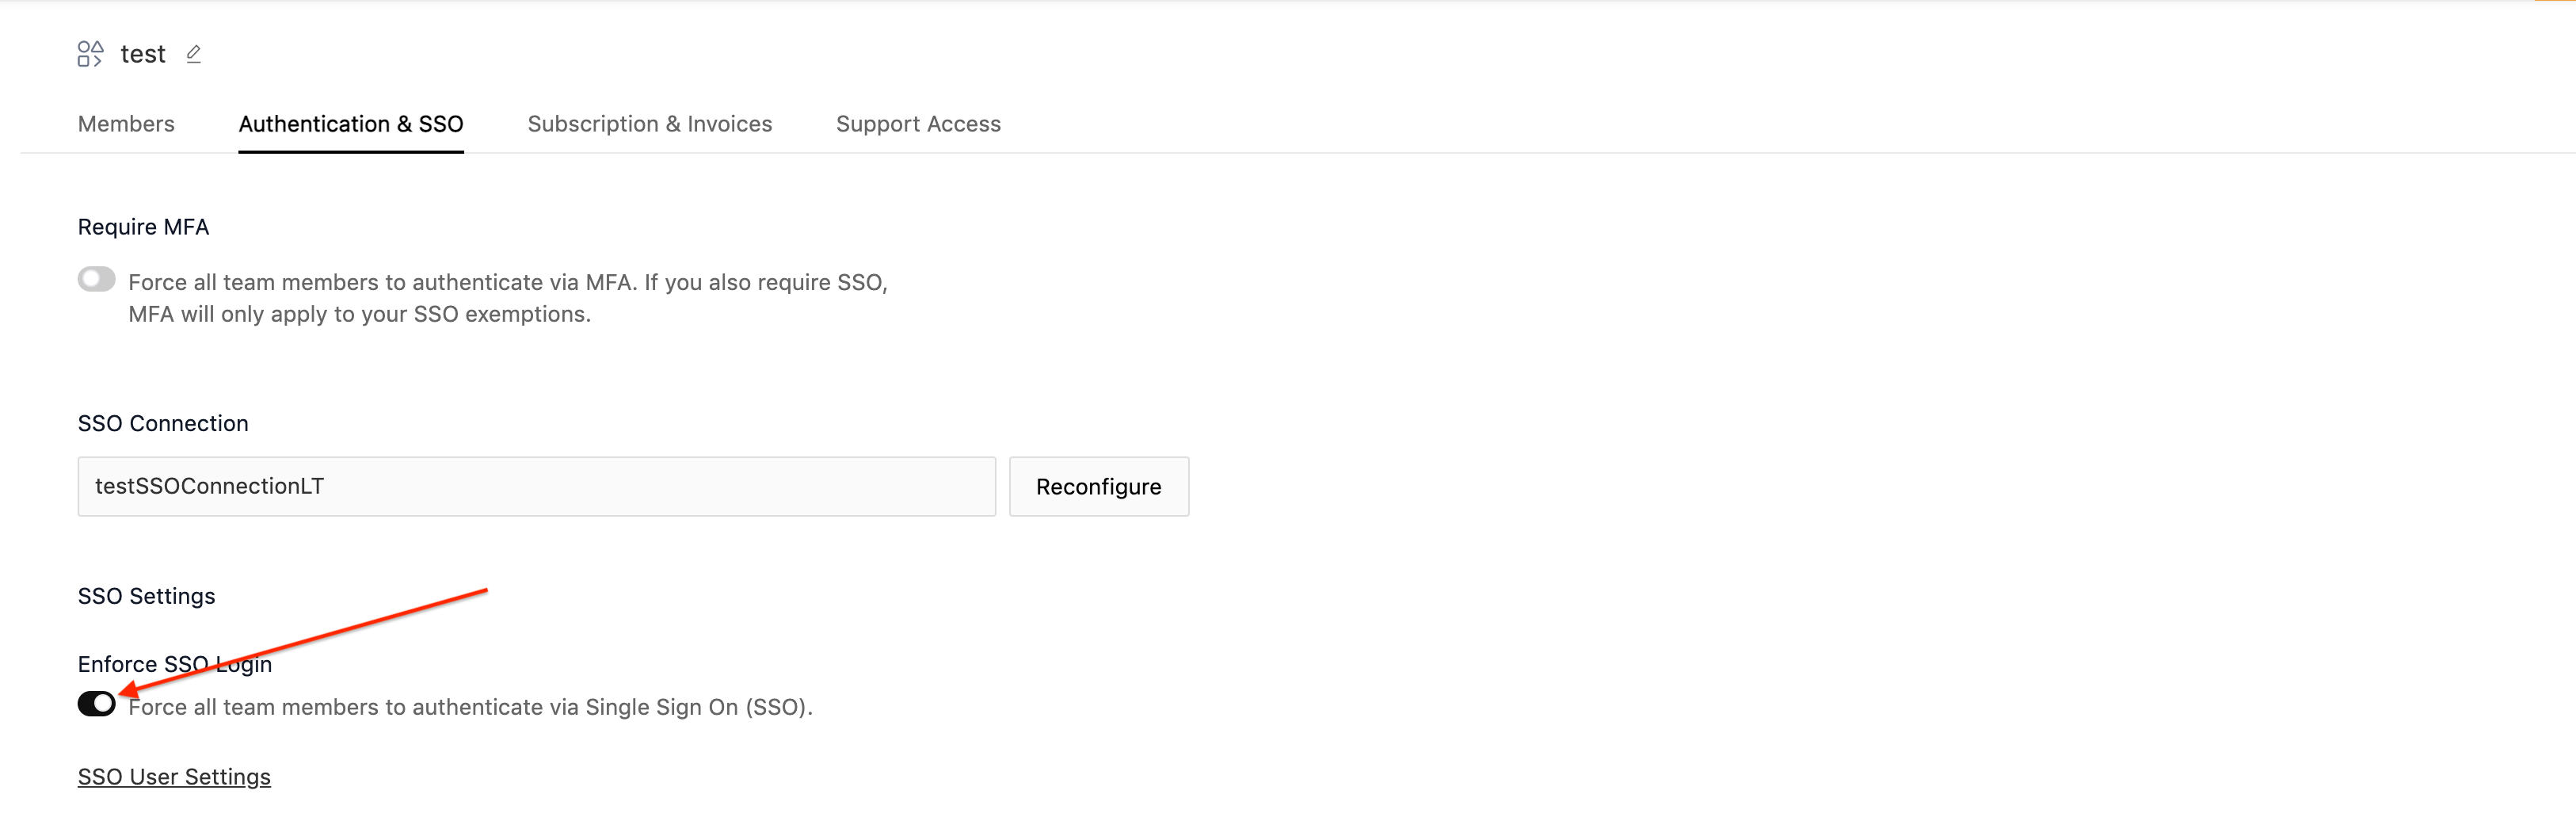
Enforce SSO Login (Forcing Users to Log in with SSO Only)
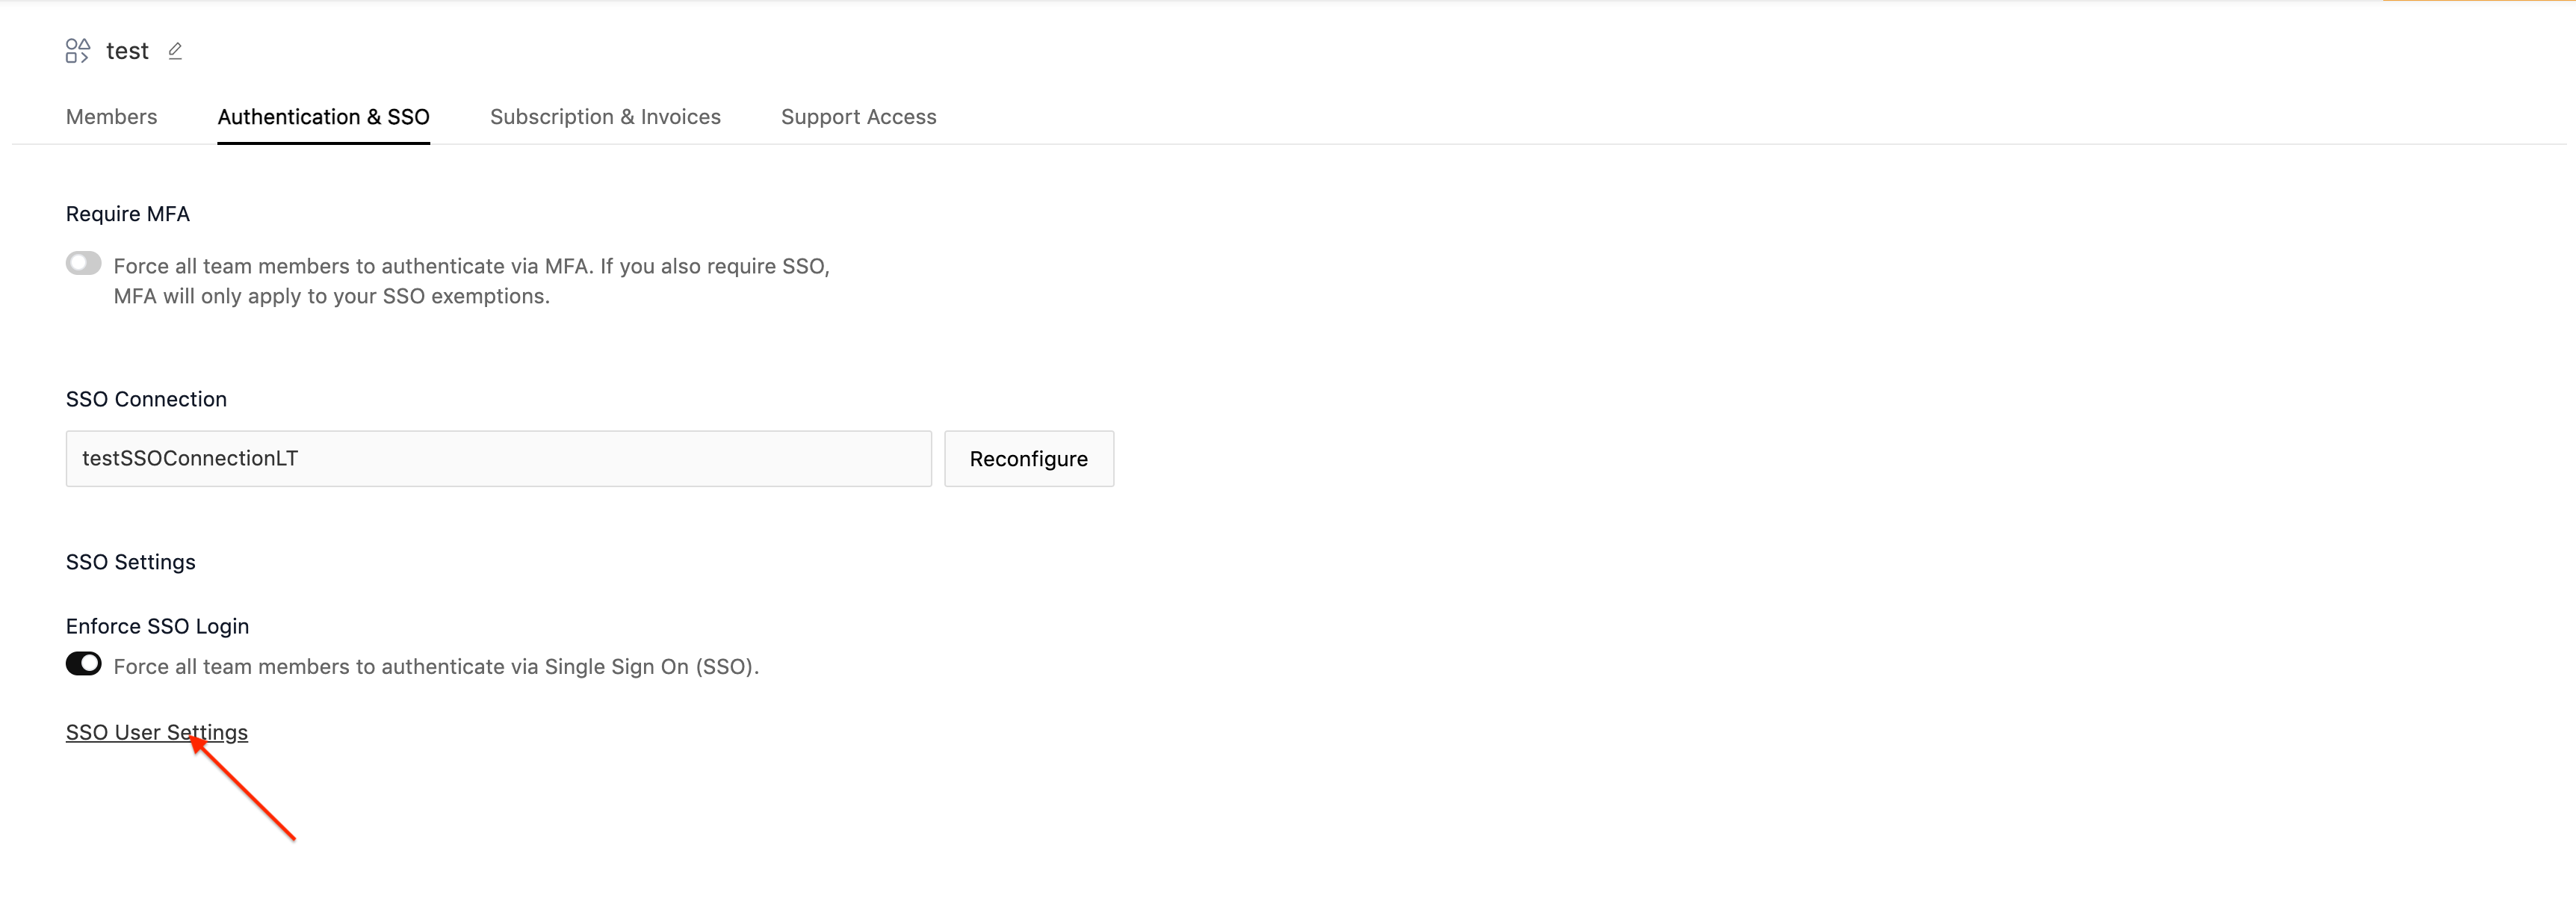
- For Enforcing SSO login, click on Enforce SSO Login Toggle.
Exempt Users From SSO Login
-
For Exempting users from SSO login (Allows Users to Log in with TestMu AI Credentials and Social Auth), click on SSO User Settings.
-
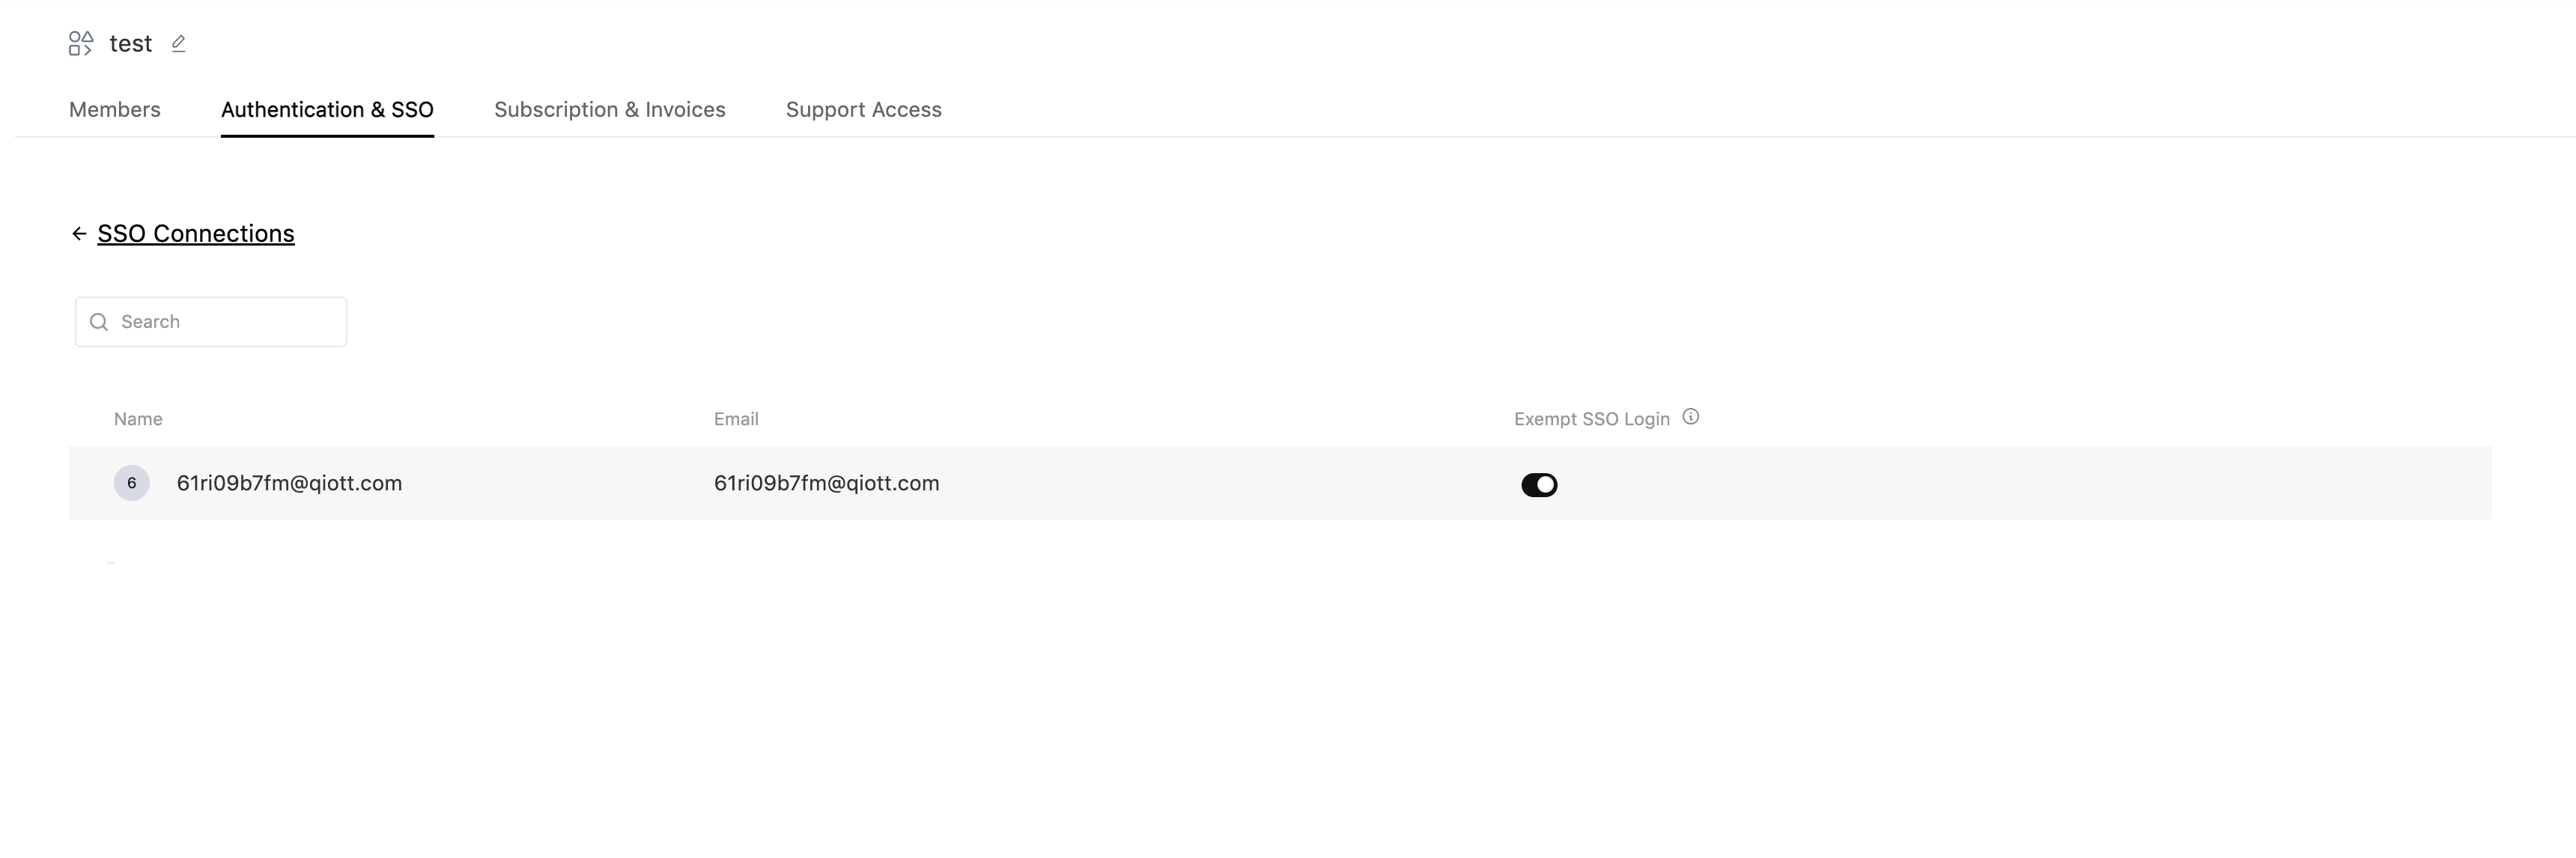
Check the toggle for the users you want to exempt from SSO login
Assign a Group to SSO-Provisioned Users
By default, users signing in through SSO for the first time (Just-in-Time provisioning) are added to your organization's Default group. If your organization uses Groups, you can assign these users to a specific group instead — for example, to apply that group's concurrency limits to everyone who signs in through SSO. The group currently used for SSO provisioning is marked with an SSO group badge on the Groups page.
You can set it from either place:
From the Groups page
- Open the Members tab and go to Groups.
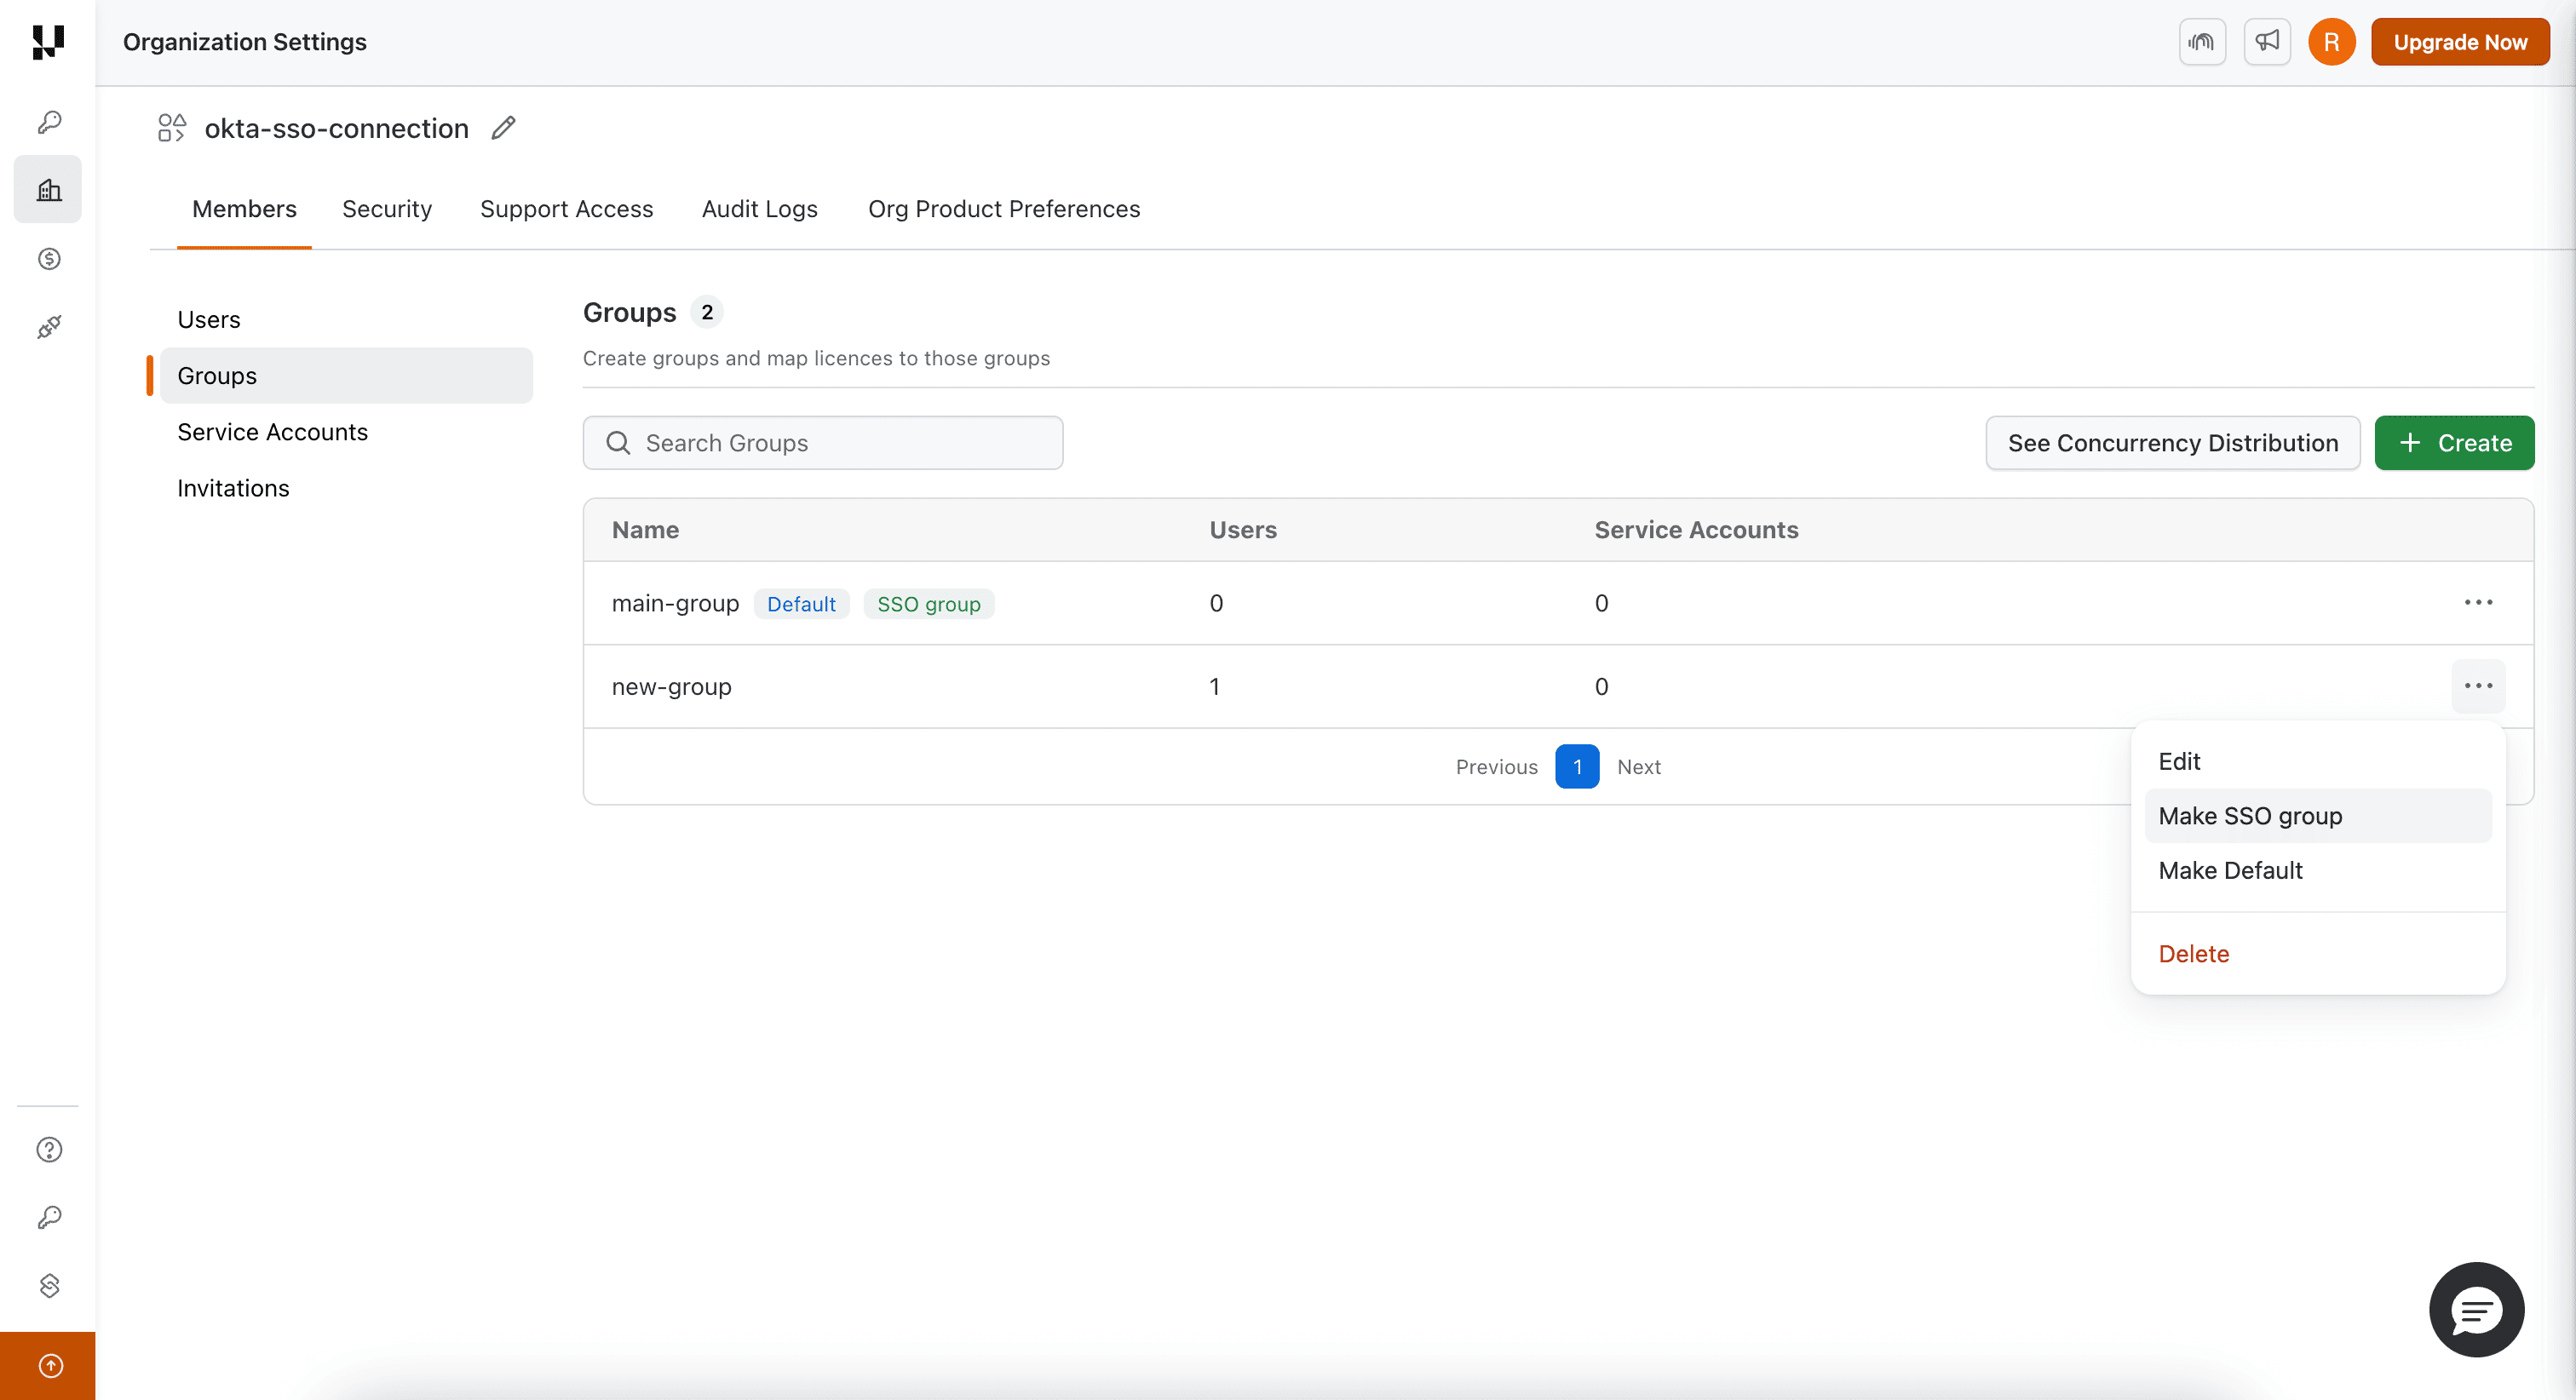
- Click the ⋯ menu on the group you want, then select Make SSO group.
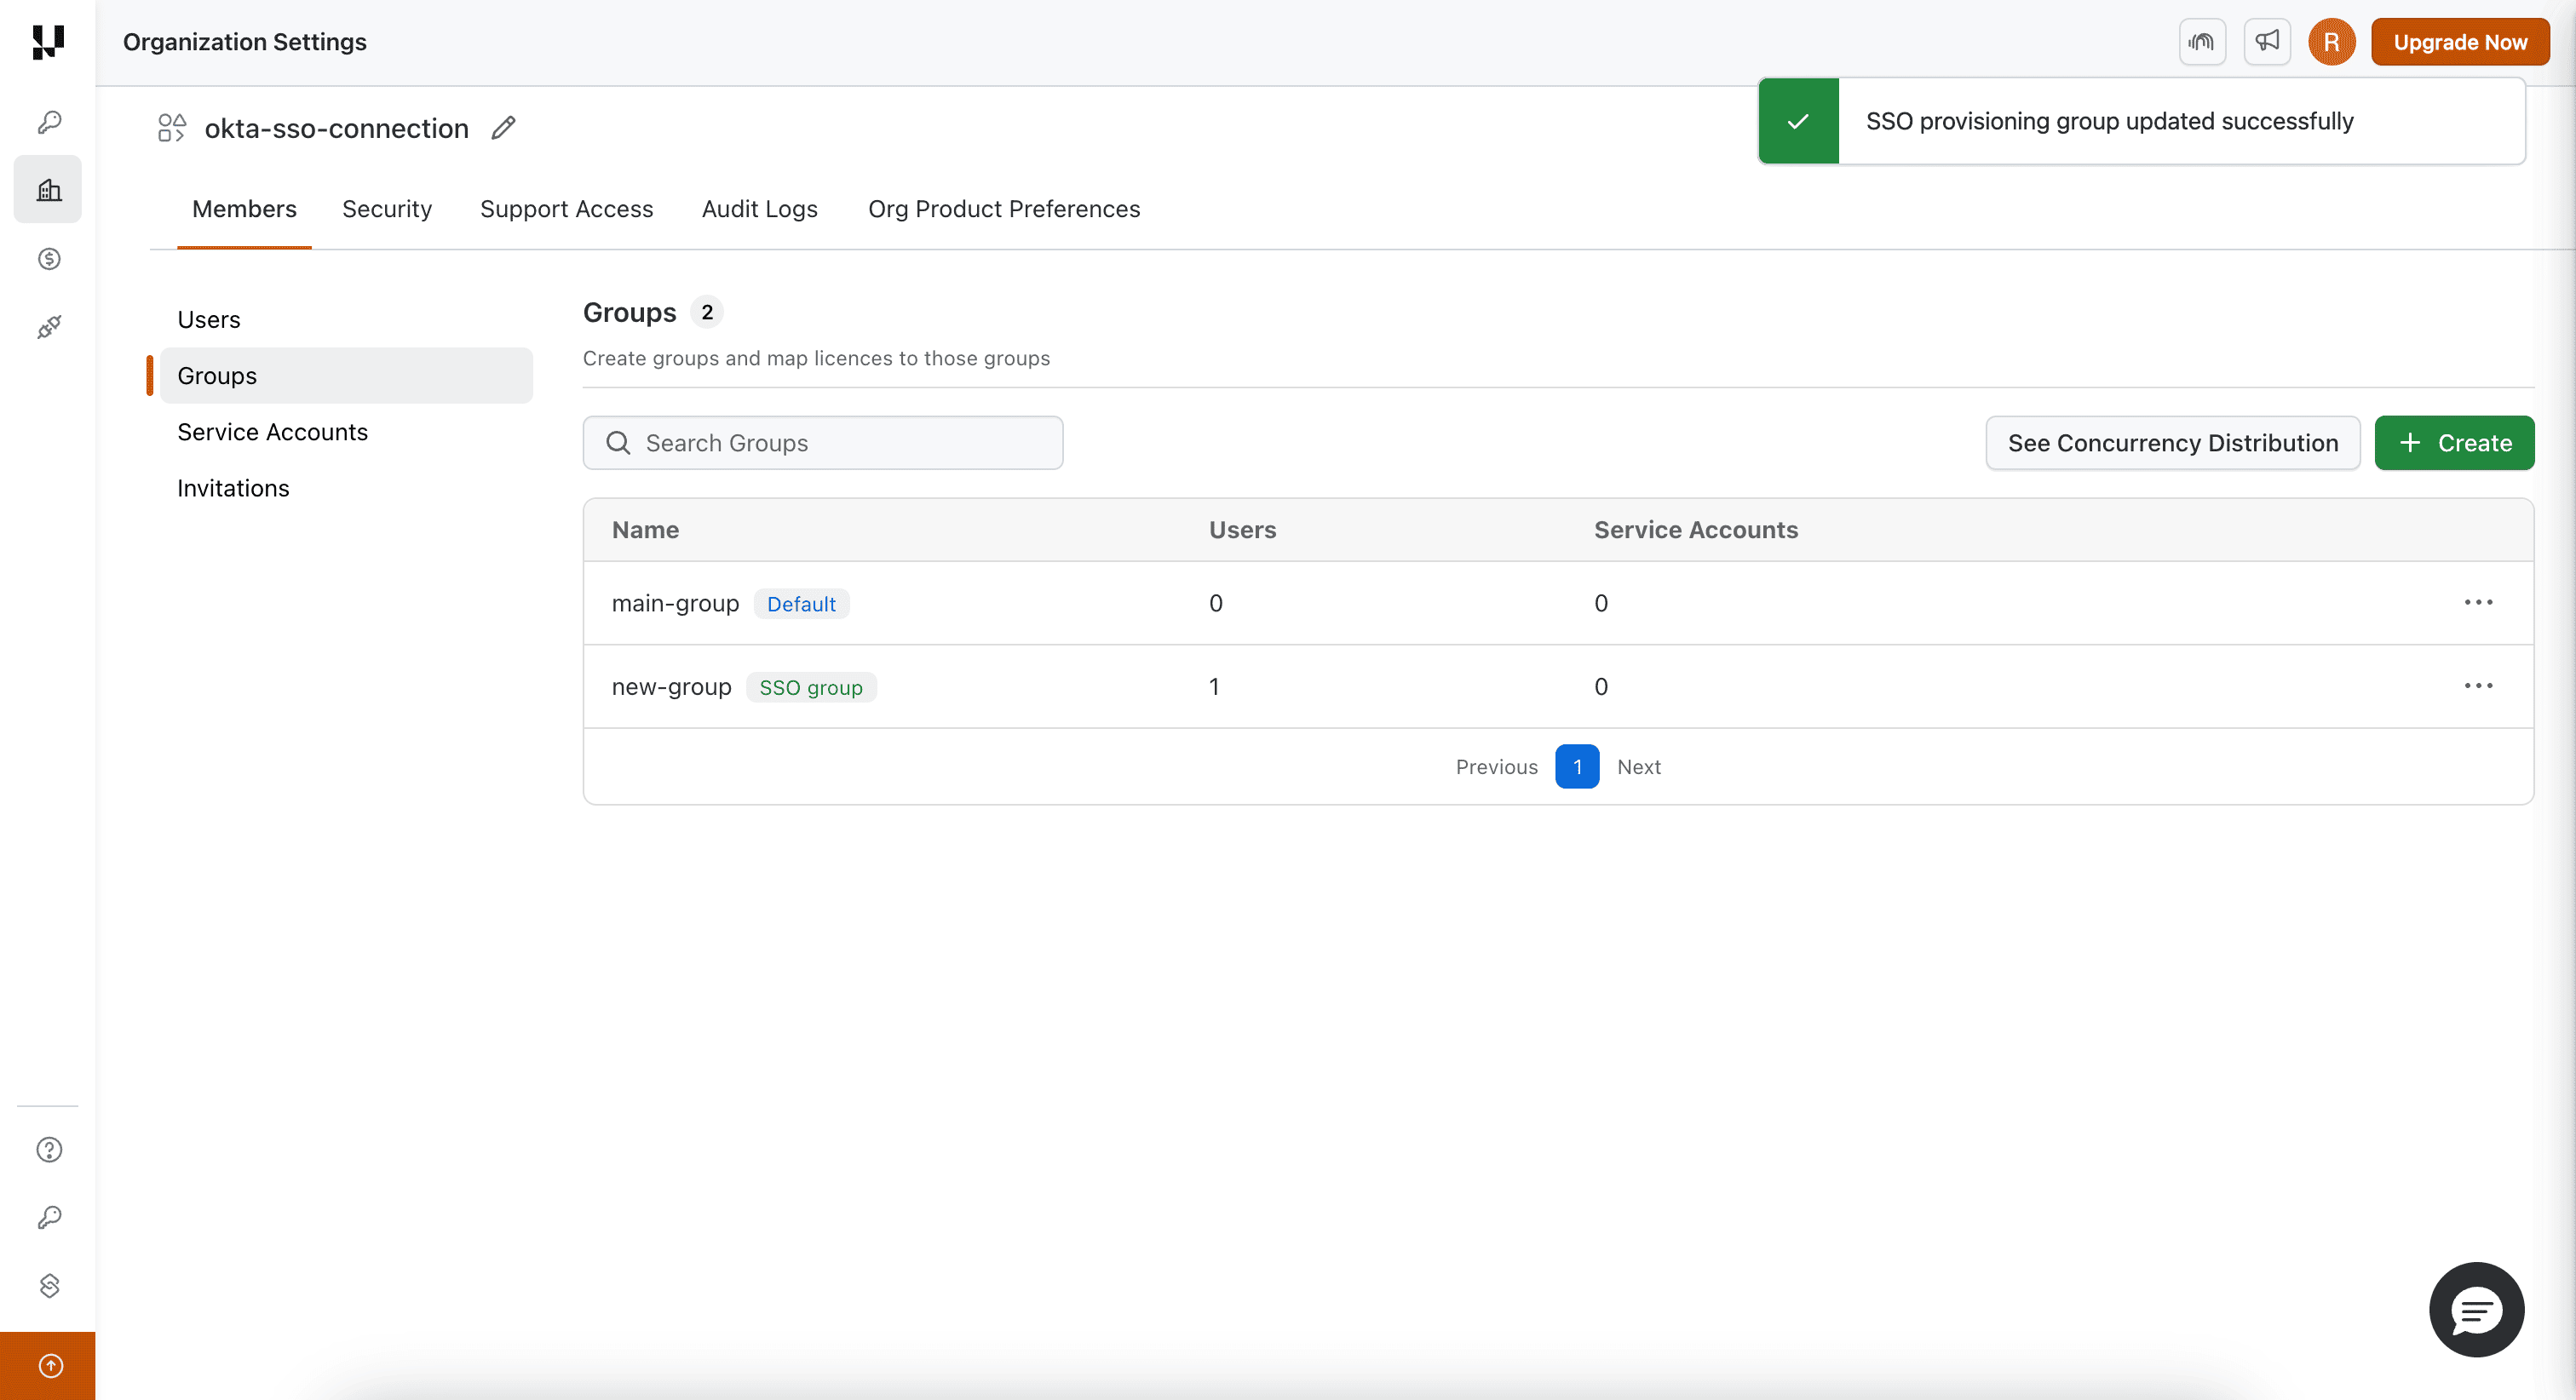
- The group is now marked with an SSO group badge.
From the SSO settings page
- Open the Security tab and go to SSO.
- Under Default group assigned to new SSO users, select a group from the dropdown. Your selection is saved automatically.
Note: This option is available only when Groups are enabled for your organization. If no group is selected, SSO-provisioned users are added to your Default group. A group that is currently set as the SSO provisioning group can't be deleted — assign a different group first.
That's all you need to know for Managing TestMu AI SSO Integration. In case you have any questions please feel free to reach out to us via the 24/7 chat support or email us over support@testmuai.com.


 Chat with Us