User Management
With Organization Settings in TestMu AI, you have the ability to effortlessly invite your team members to your TestMu AI Account. TestMu AI offers a range of roles that can be assigned to users.
At present, TestMu AI supports the following roles:
Admin: This role grants full access to all the features and functionalities of TestMu AI, enabling the user to administer the account effectively. Allows organization admins to stop running tests under any user account.
User: Users with this role have access to all the subscribed products and are able to execute and stop their own tests. However, certain Organization Settings, such as Team Management, Subscriptions & Invoices, Authentication & SSO, remain inaccessible.
Guest: This role provides the ability to view test logs, analytics, and other reports. However, guests do not have the privilege to initiate test runs.
By leveraging the flexibility of Organization Settings, you can seamlessly manage your team members and their respective roles within your TestMu AI Account.
Access Organization Settings
To open Organization Settings:
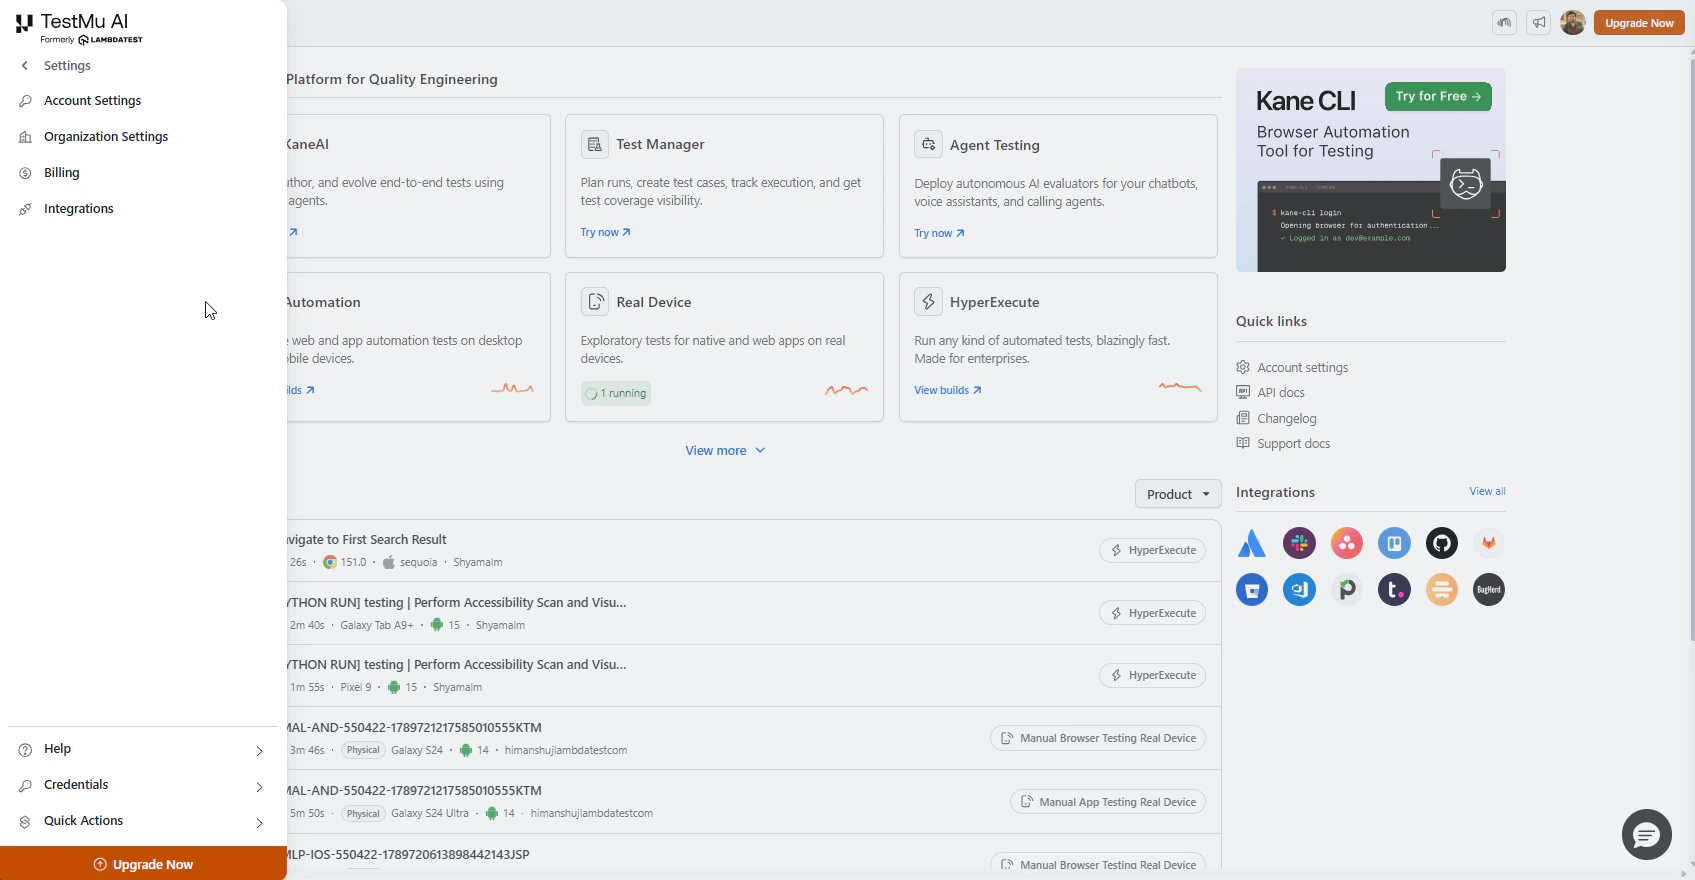
- From the TestMu AI dashboard, click Settings in the left menu.
- Select Organization Settings.
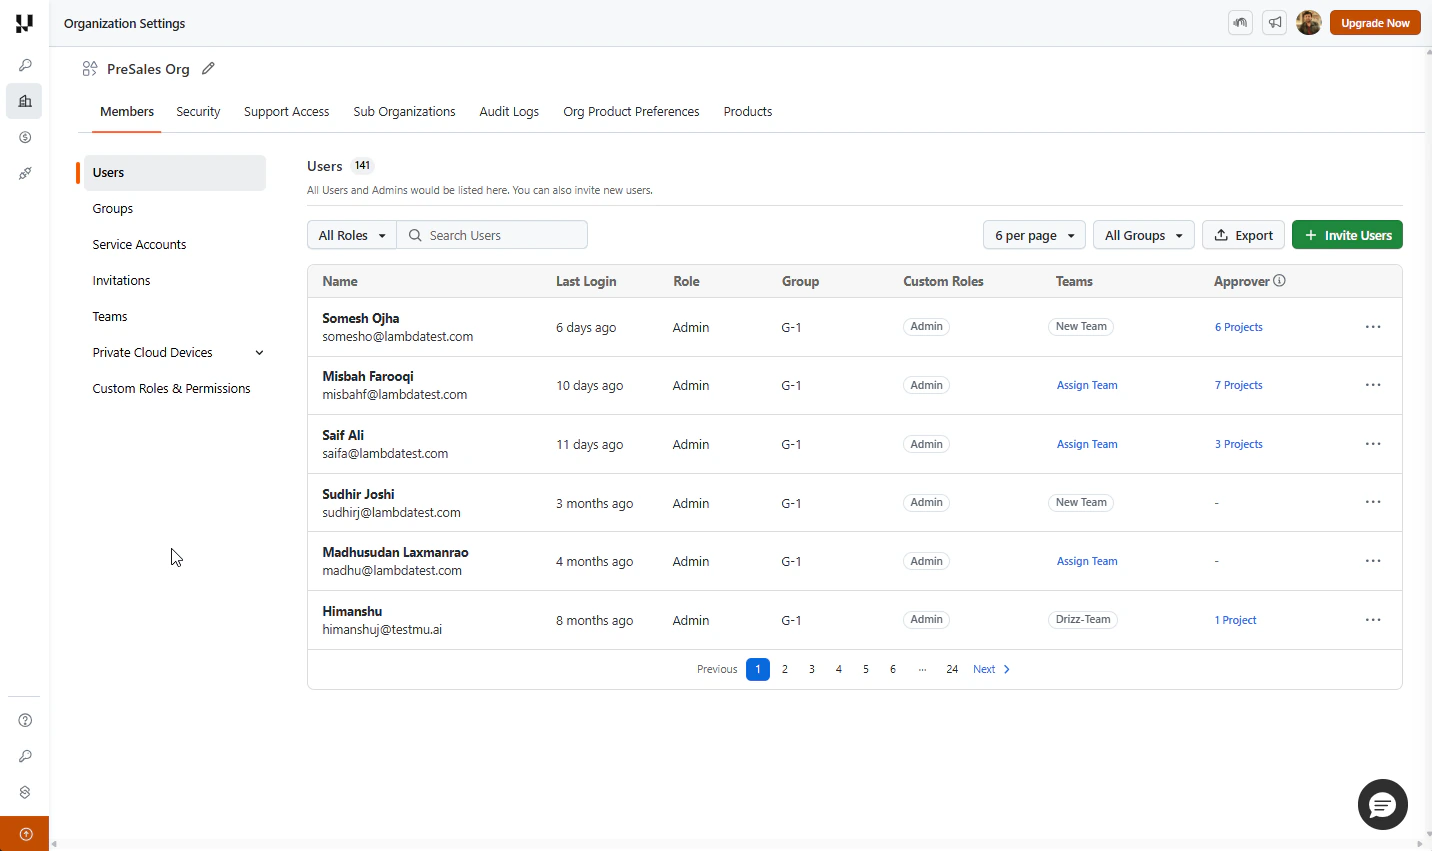
The Members tab lists everyone in your organization. From here you can invite users, view a user's credentials, change a password, or remove a user.
Invite Users To Your TestMu AI Account
To invite one or more teammates to your TestMu AI account:
- On the Users page, click Invite Users.
- In the Email Address field, type an email and press Enter to add it. Repeat to invite several people at once.
- Select a Role for the invitees: Admin, User, or Guest.
- Select a Group to control the test concurrency available to them.
- (Optional) Add one or more Teams to apply their predefined permissions.
- Click Set Roles & Permissions to configure access, then confirm to send the invitations.
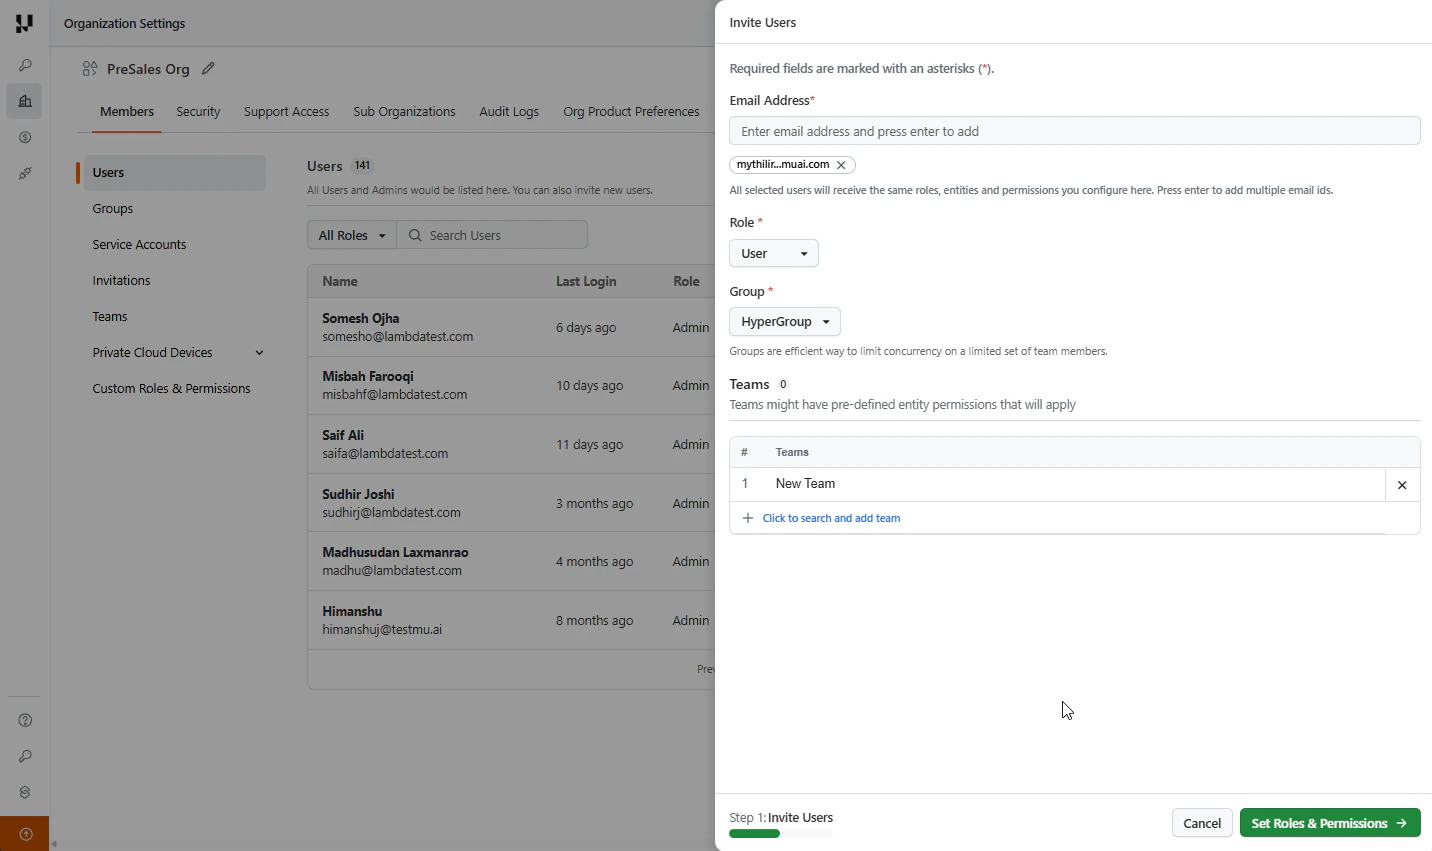
They would be granted access to TestMu AI with the role you selected while inviting.
View Sent Invitations
To review the invitations you have already sent:
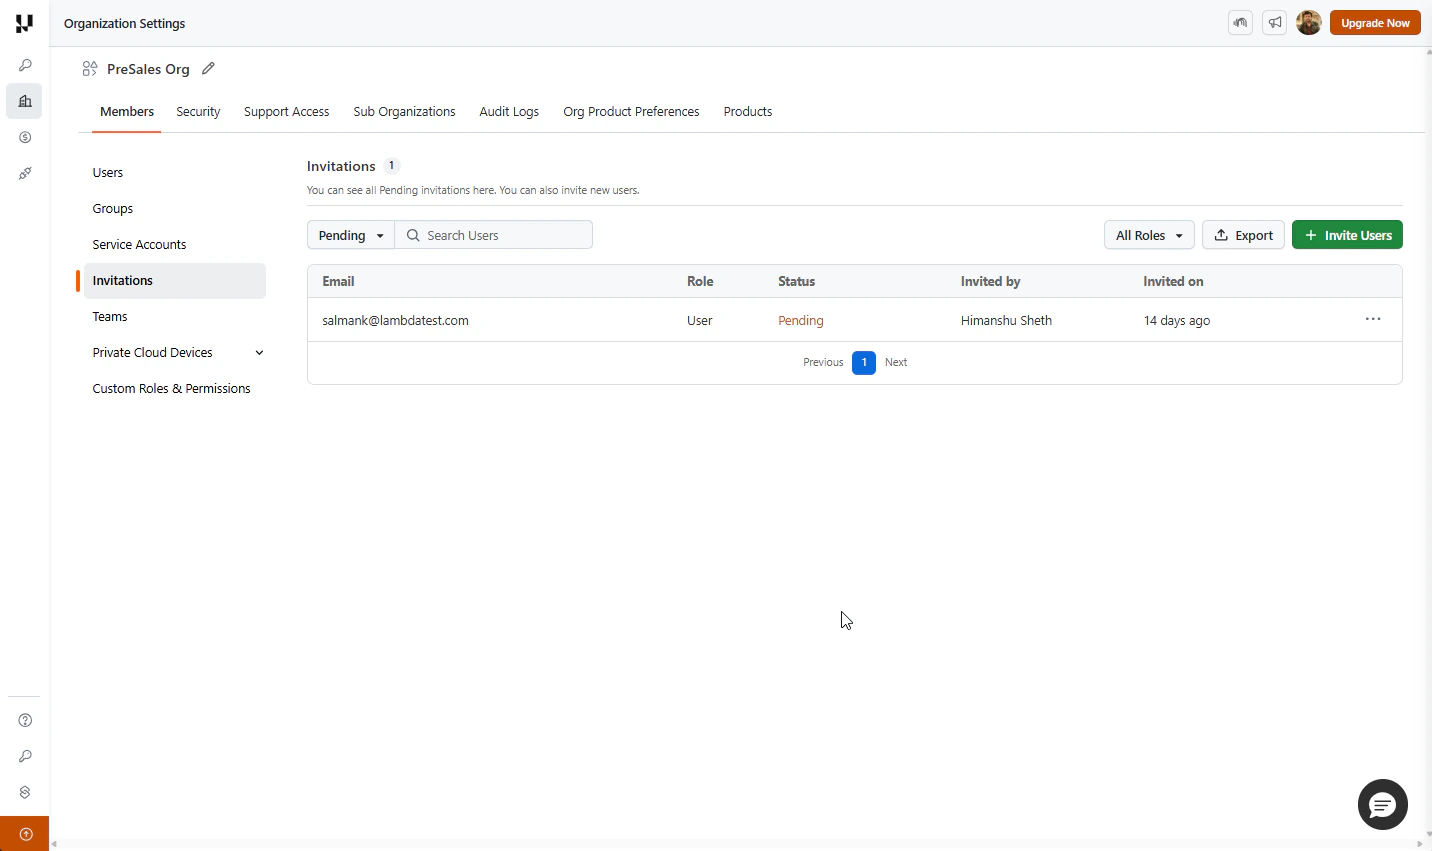
- In Organization Settings, open the Members tab and select Invitations from the left menu.
- The list opens on the Pending filter. Change the status filter to view invitations in other states.
Each row shows the invitee's email, assigned role, status, who sent the invite, and when it was sent.
Managing Users
As an administrator, you can:
- View the list of users.
- View a user's username and access key.
- Change a user's password.
- Delete a user.
- Export users, service accounts, and invitations.
- Change how many users appear per page.
1. View the list of users
In Organization Settings, open the Members tab and select Users from the left menu. Every user is listed with their Name, Last Login, Role, Group, Custom Roles, Teams, and Approver. Use the search box or the role and group filters to find a specific user.
2. View a user's username and access key
A user's username and access key authenticate their tests on TestMu AI, for example in CI/CD pipelines. To view them:
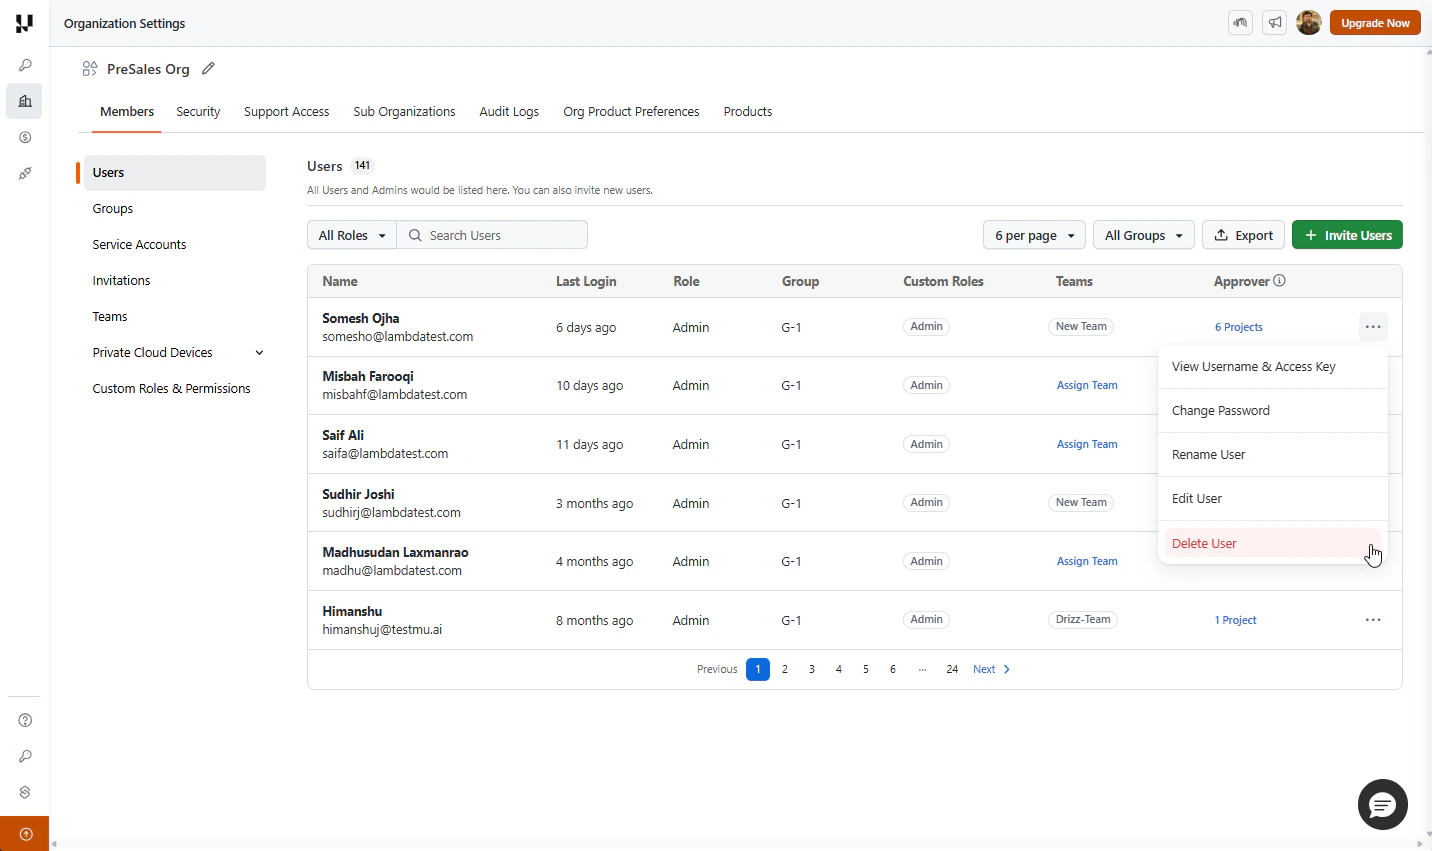
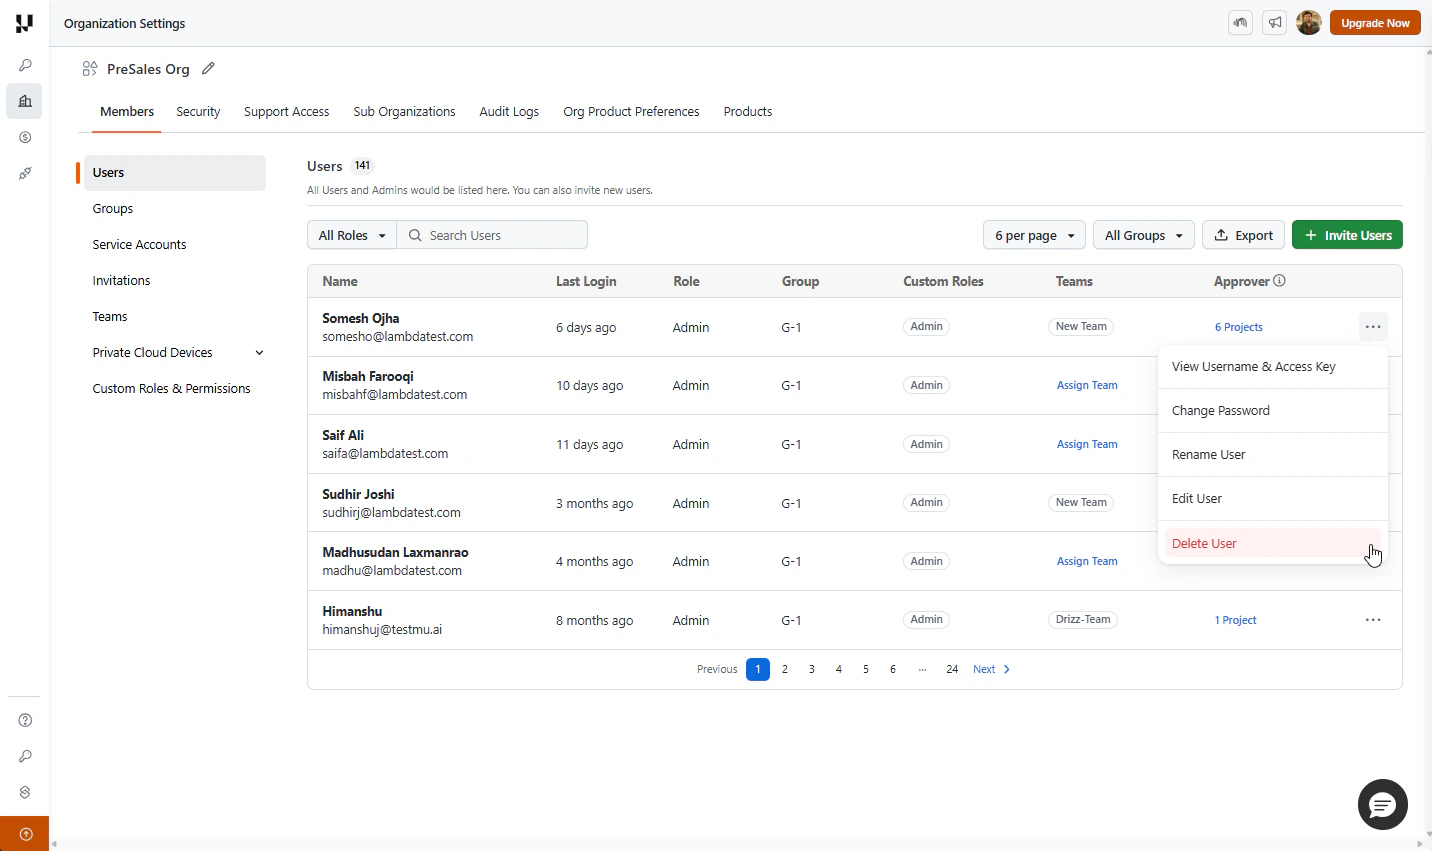
- In the Users list, click the ⋯ (more) icon in the user's row.
- Select View Username & Access Key.
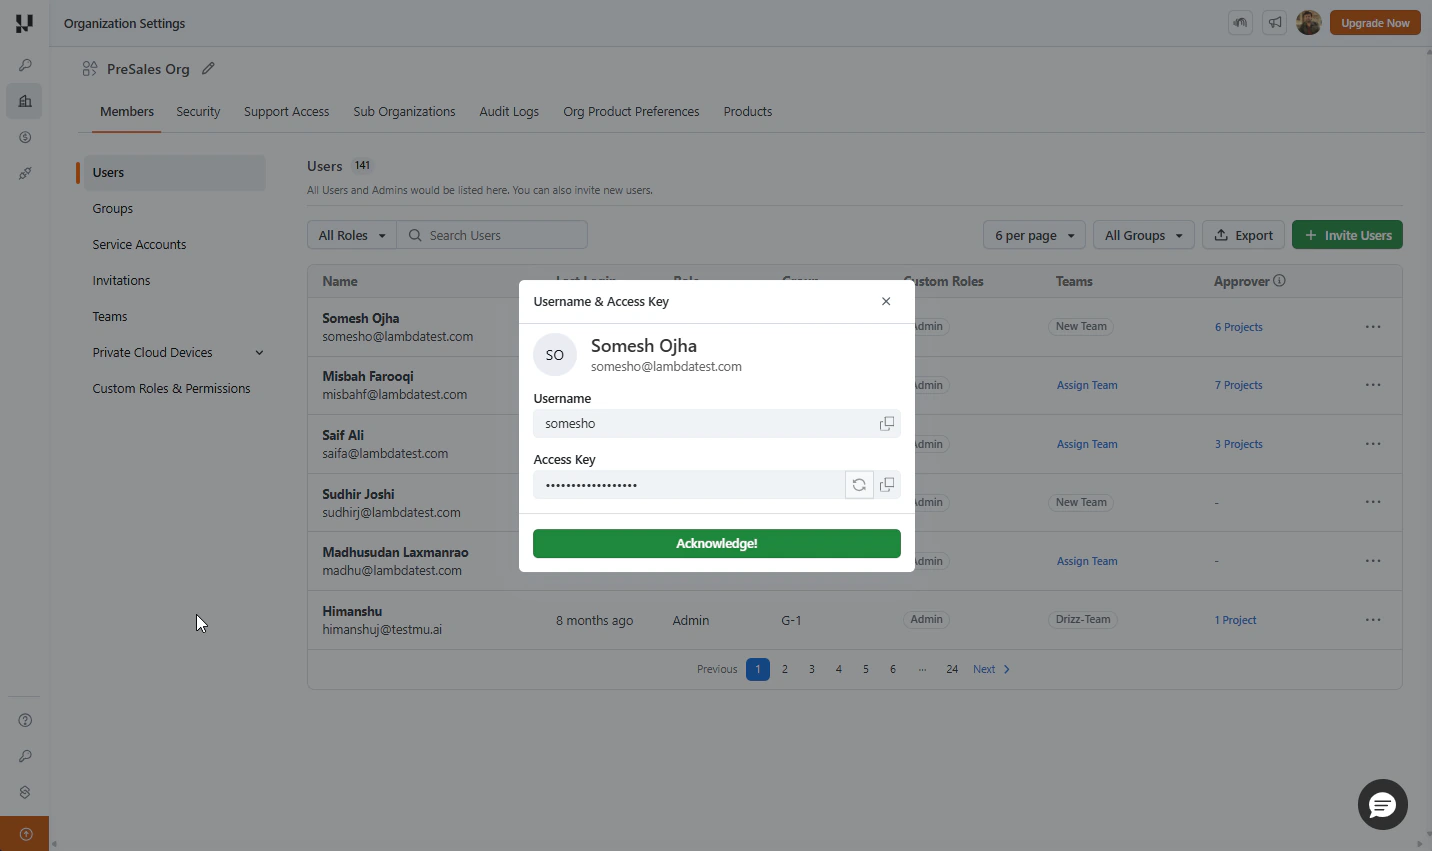
- Use the copy icon to copy the Username or Access Key, or click the regenerate icon to reset the access key.
Selecting View Username & Access Key opens a modal with the user's Username and Access Key.
3. Change a user's password
As an Admin, you can set a new password for any user in your TestMu AI account:
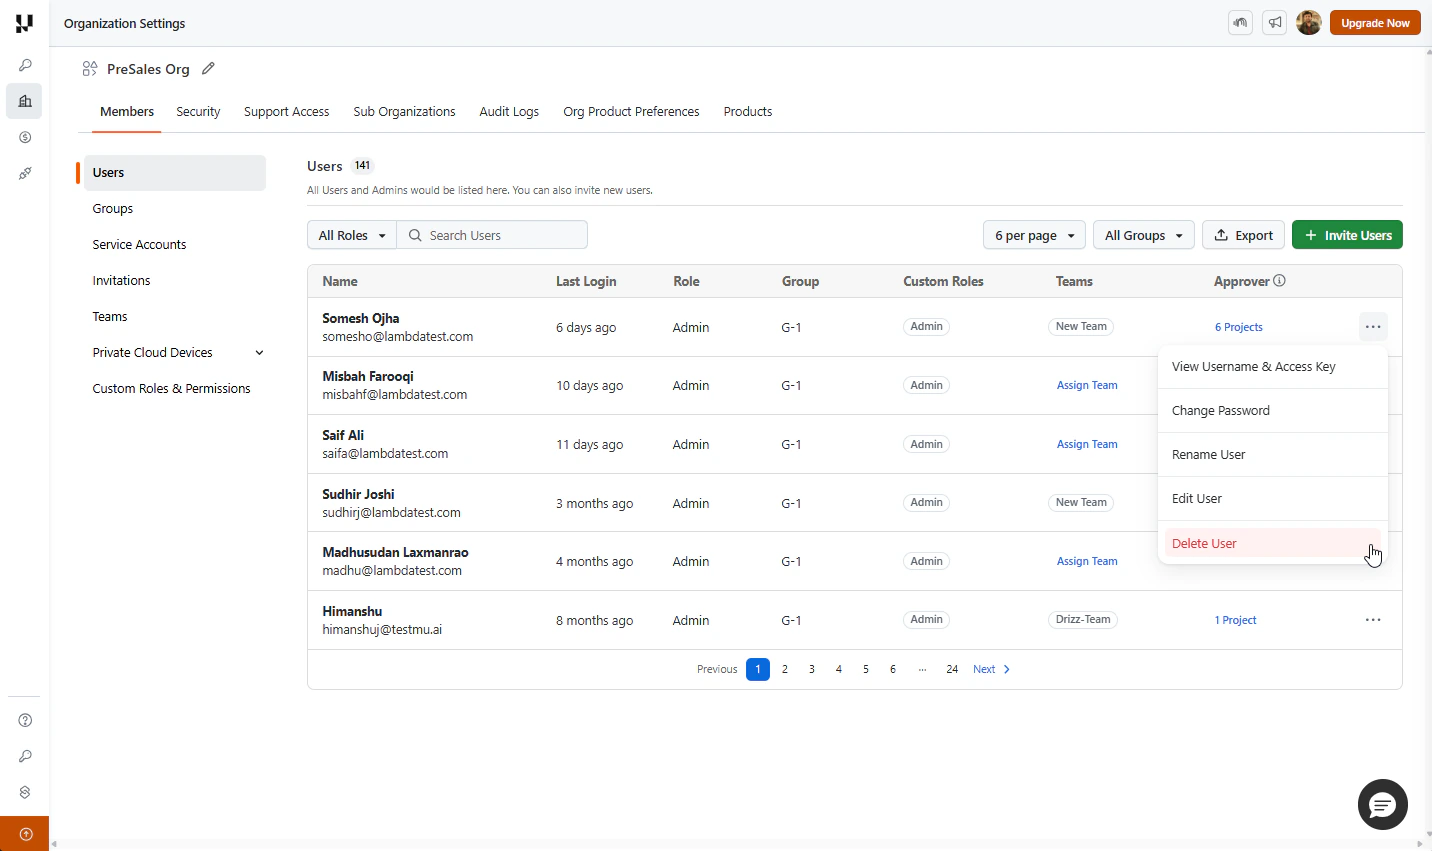
- In the Users list, click the ⋯ (more) icon in the user's row.
- Select Change Password.
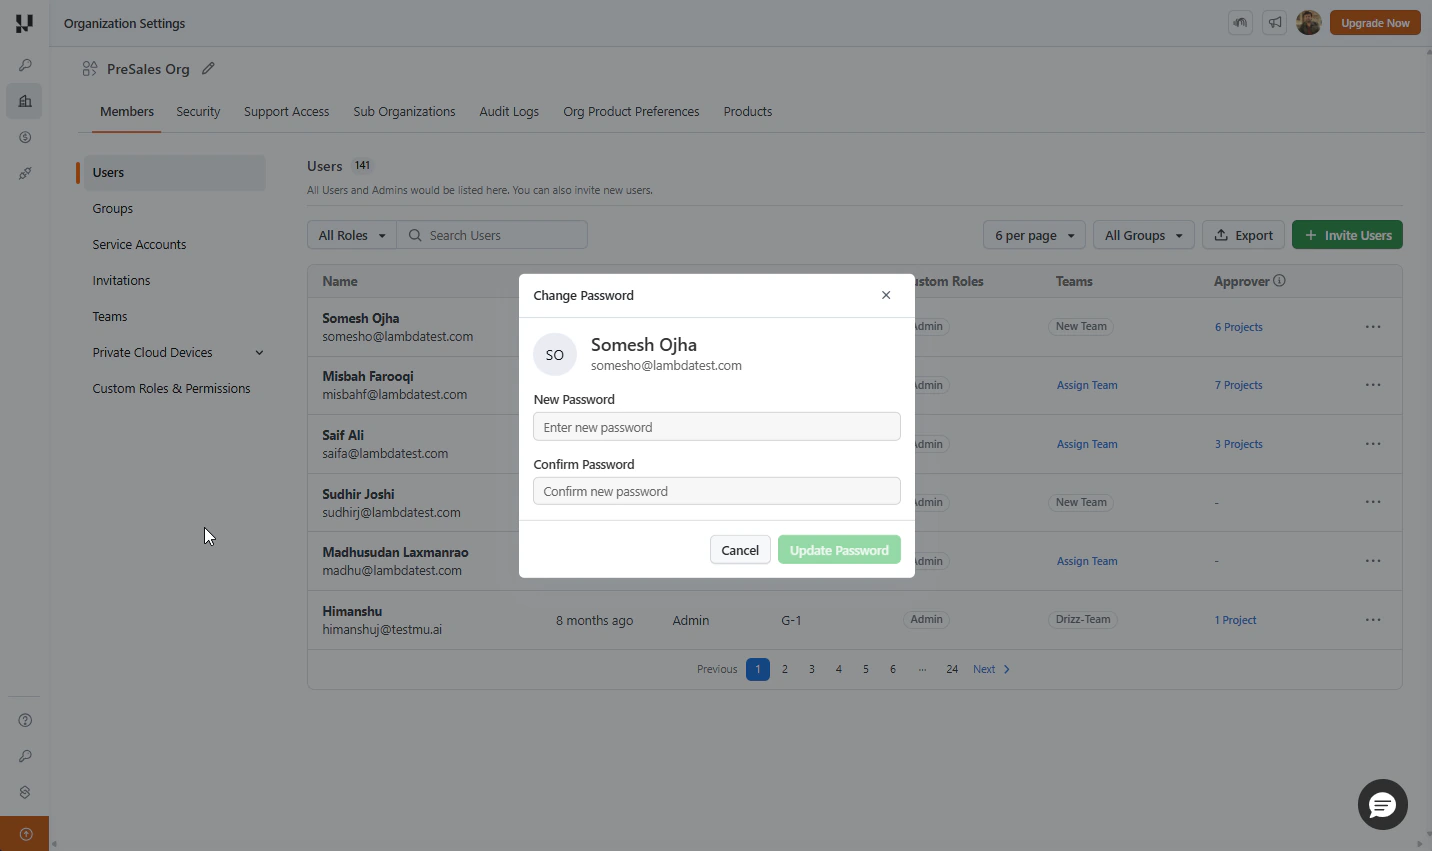
- Enter the new password in New Password, re-enter it in Confirm Password, then click Update Password.
Selecting Change Password opens a modal where you set the new password.
4. Delete a user
As an Admin, you can remove a user from your TestMu AI account:
- In the Users list, click the ⋯ (more) icon in the user's row.
- Select Delete User.
- In the confirmation prompt, confirm the deletion. The user is removed from your organization immediately.
5. Export users, service accounts, and invitations
You can export your organization's data as a downloadable file:
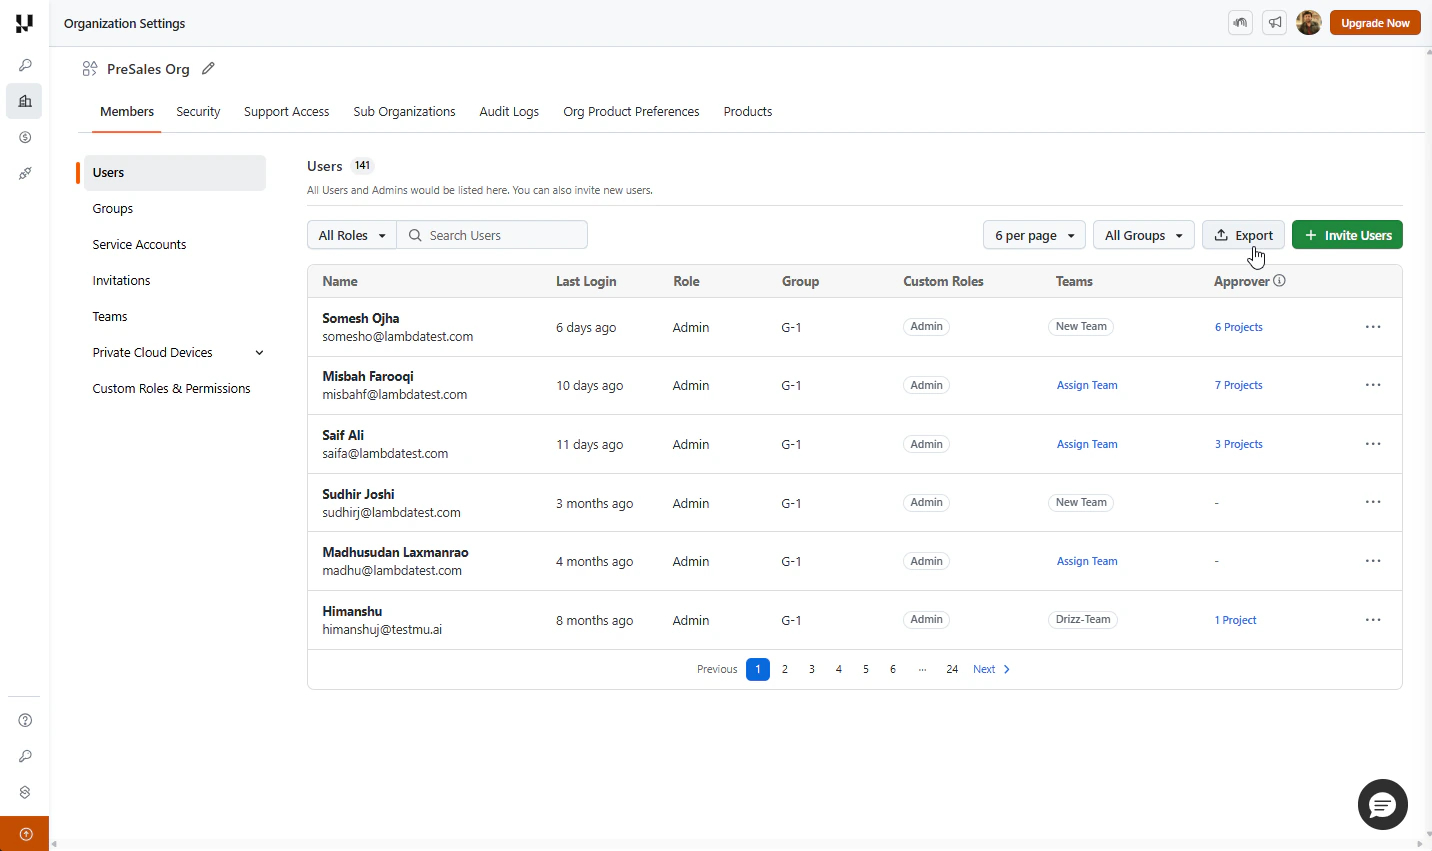
- On the Users page, click Export at the top-right of the table.
- Choose what to export: Users, Service Accounts, or Invitations. The selected list downloads to your machine.
6. Change how many users appear per page
Use the per page dropdown above the user table to control how many users are shown at once: 6, 15, 30, or 50 per page.
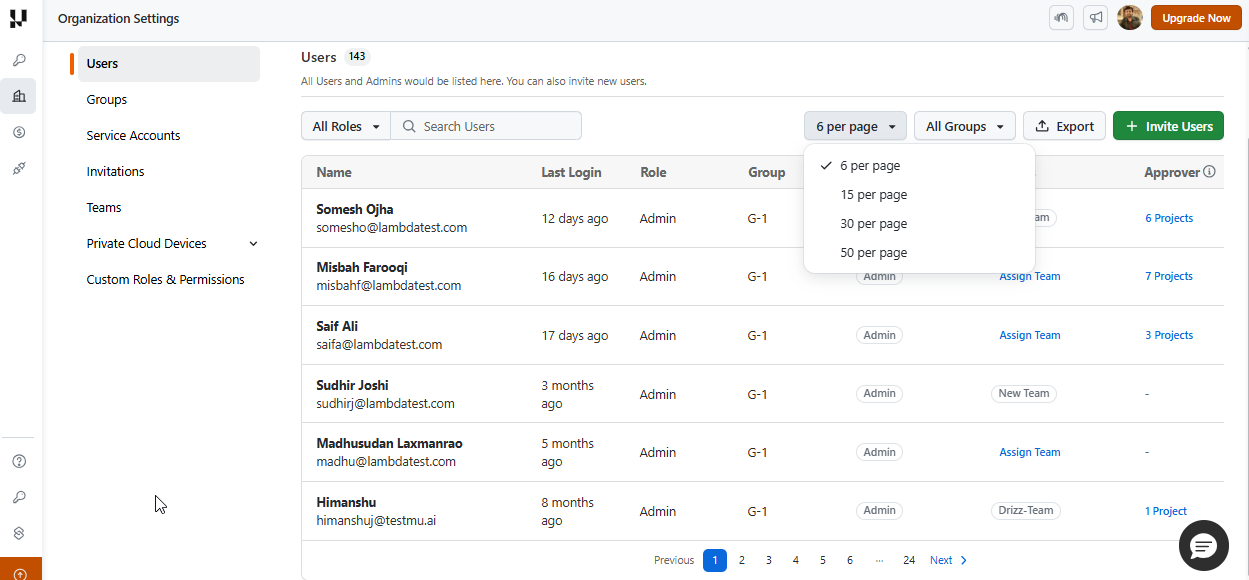
When the list is longer than the selected page size, use the Previous and Next controls at the bottom of the table to move between pages.


 Chat with Us