JumpCloud User Provisioning
JumpCloud is a cloud-based directory-as-a-service (DaaS) platform that provides comprehensive identity and access management (IAM) capabilities for organizations. It offers a centralized platform to manage and secure user identities, devices, and applications across a variety of environments, including cloud, on-premises, and hybrid infrastructures.
In the documentation, we will discuss how to integrate JumpCloud with TestMu AI:
Prerequisites
- You will need an Enterprise plan with TestMu AI.
- The SSO connection must be already established with TestMu AI. Learn how to create a SSO Connection with TestMu AI.
Steps to Integrate SCIM with JumpCloud
-
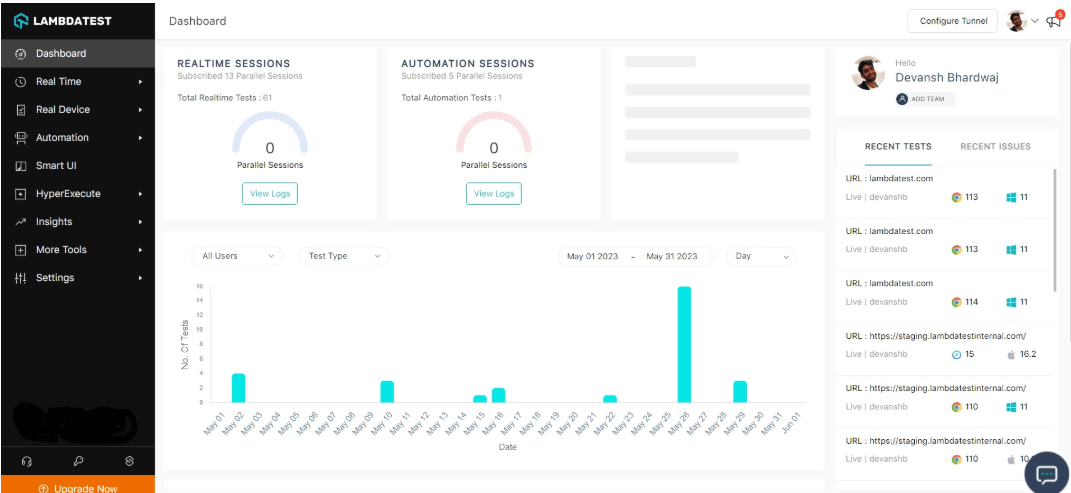
Step 1: Sign in to your TestMu AI account. Don't have an account, register for free.
-
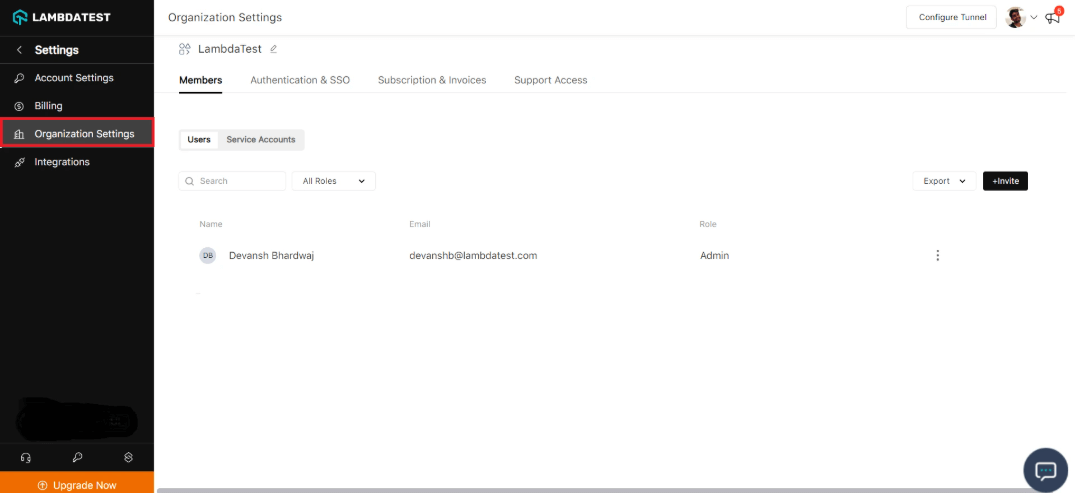
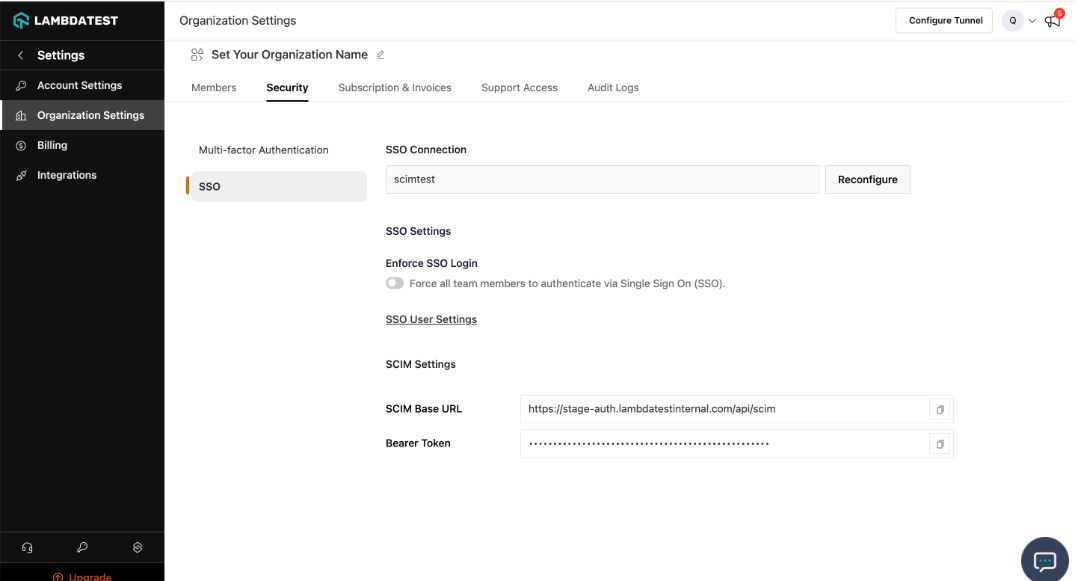
Step 2: Head to Settings > Organization Settings from the dropdown.
-
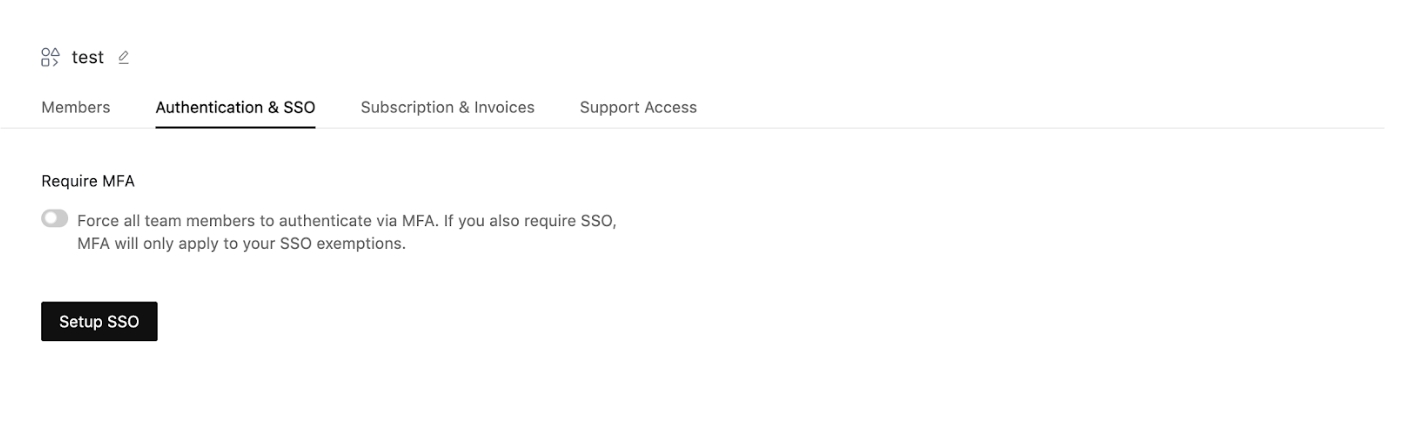
Step 3: Go to TestMu AI Authentication & SSO settings and click on Setup SSO. Head to the Authentication and SSO tab and click and copy the SCIM Base URL and Bearer Token option.
-
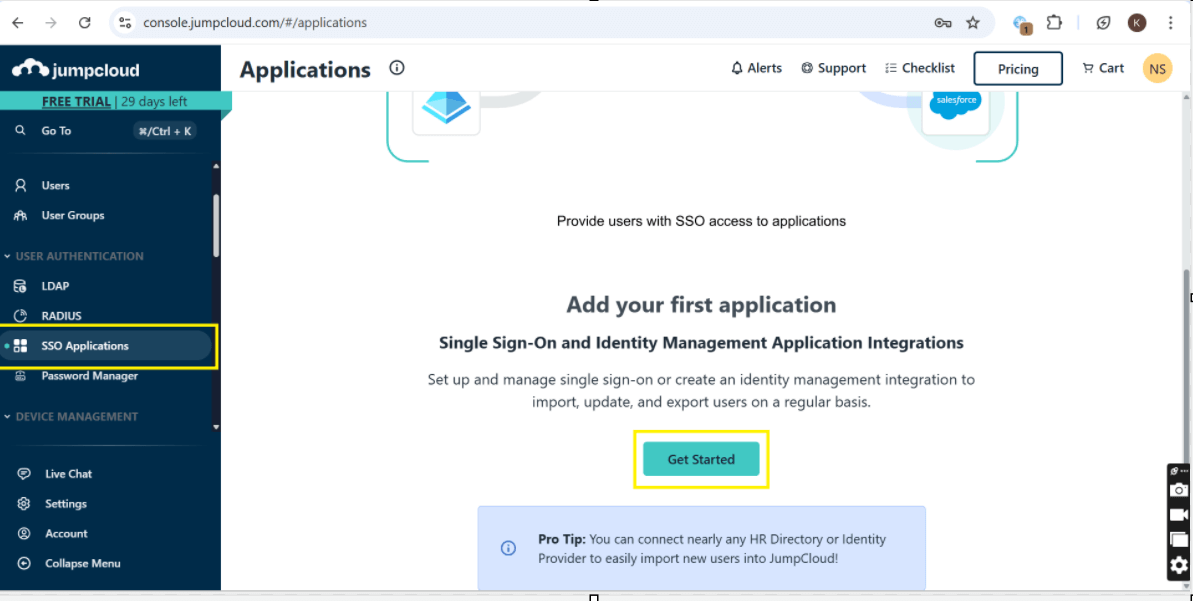
Step 4: Log in to JumpCloud. Go to JumpCloud Admin Console. Log in with your admin credentials. Sign in to the Jump-cloud. Select SSO Applications, then select Get Started.
-
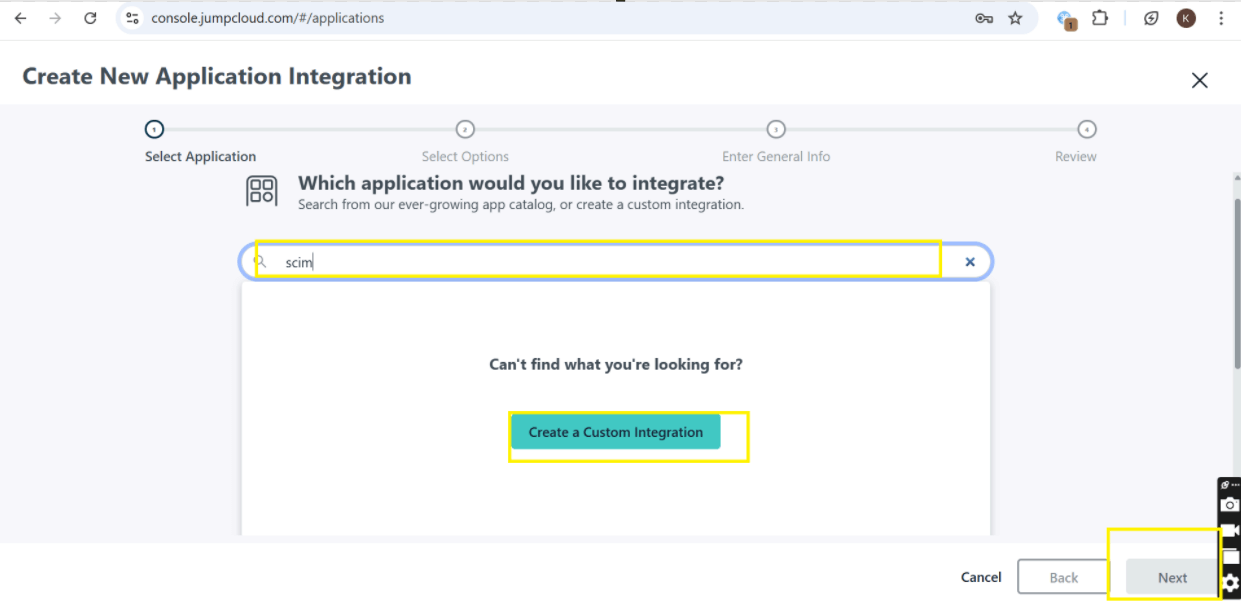
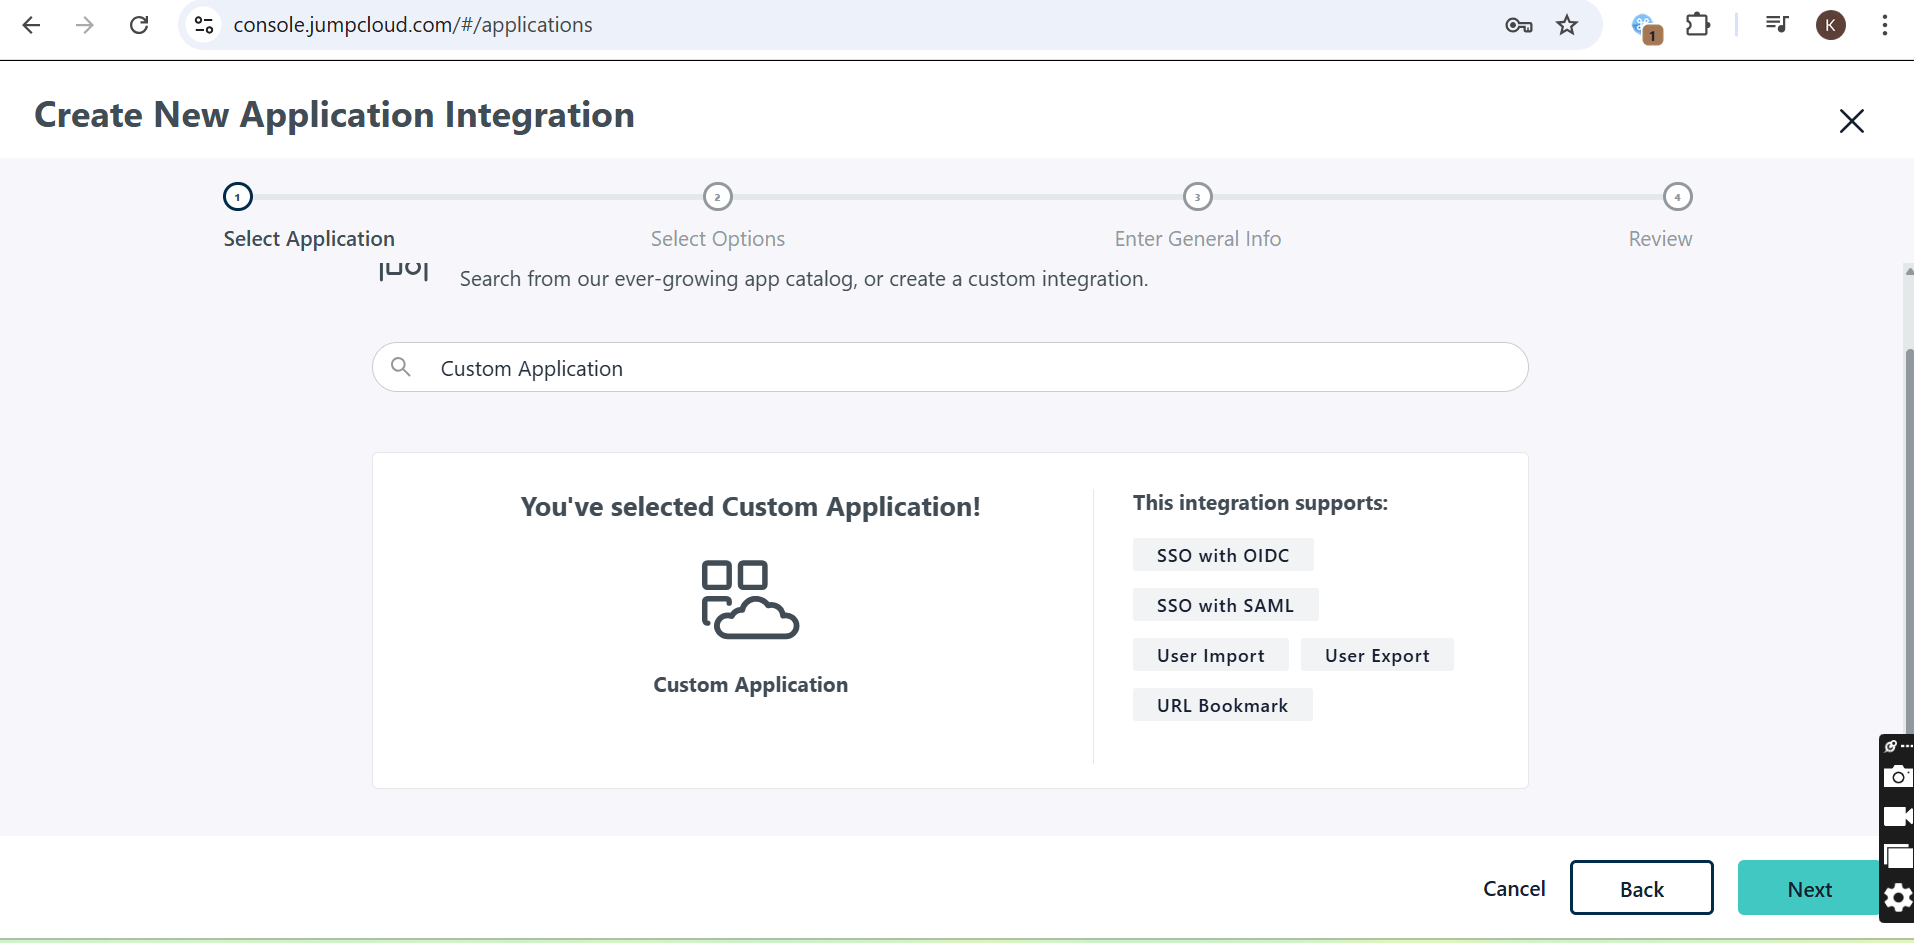
Step 5: Search for SCIM and then click on "Create Custom Integration" and then click next.
-
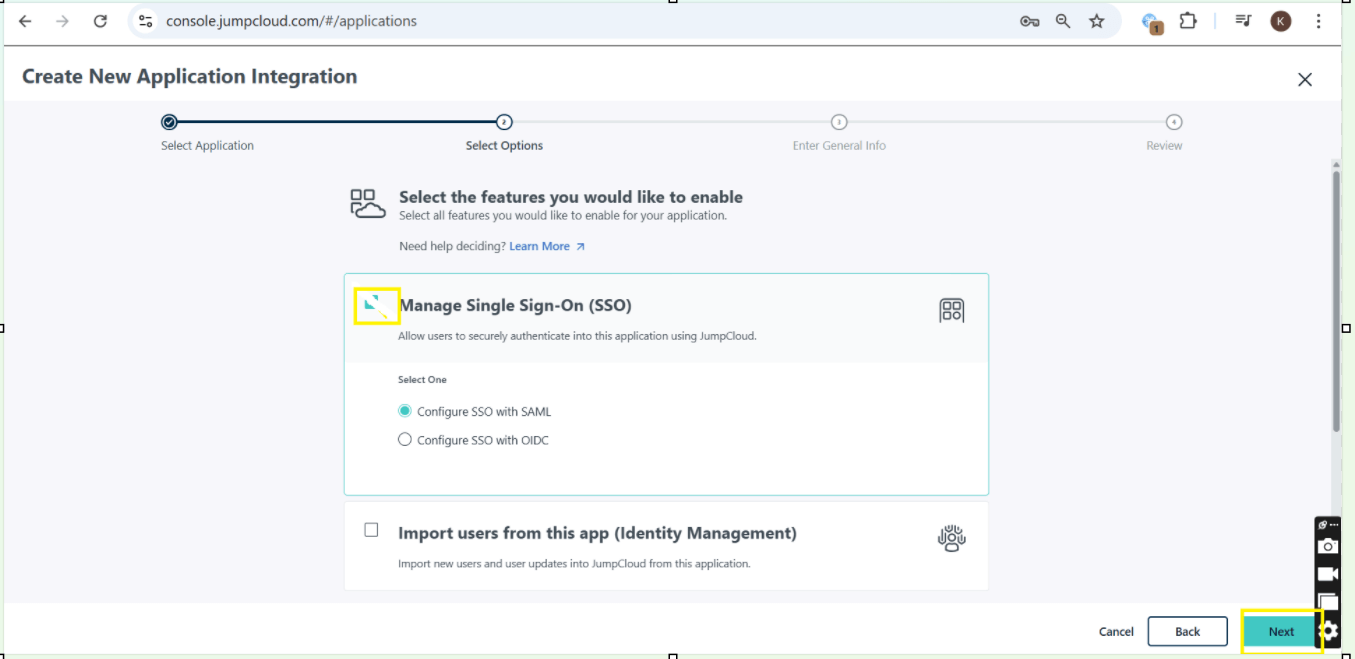
Step 6: Check the box for "Manage Single Sign-On (SSO)" and then click "Start."
-
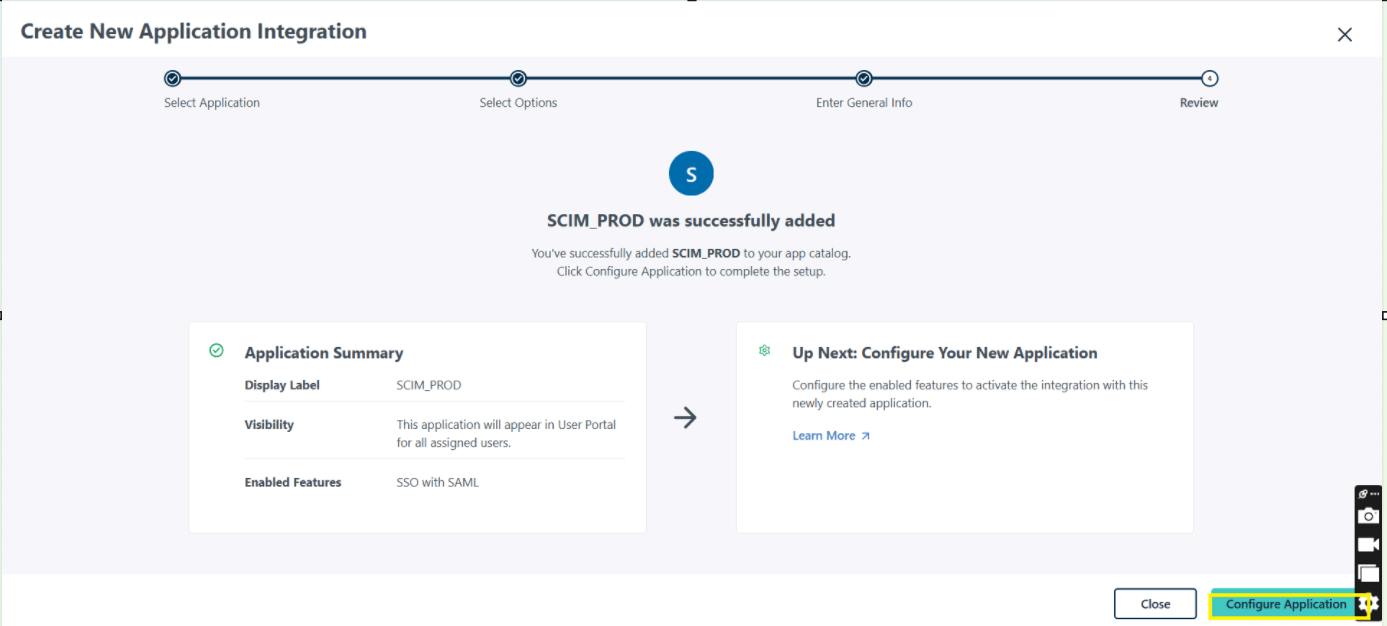
Step 7: Enter the name for Display Label, then click the Save Application and click configure Application.

-
Step 8: Go to TestMu AI Authentication & SSO settings and click on Setup SSO.
-
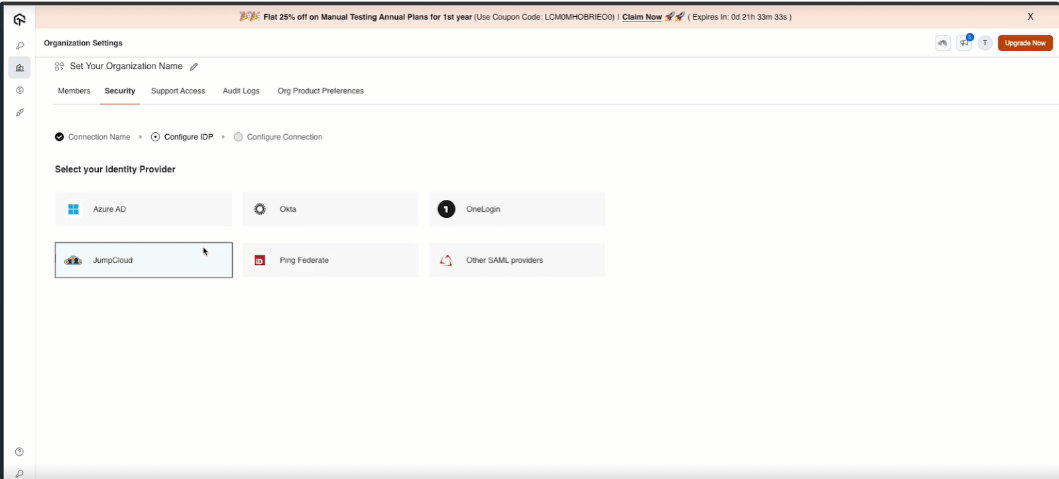
Enter the Connection Name and Click on Add New Connection. and Select your Identity Provider.

-
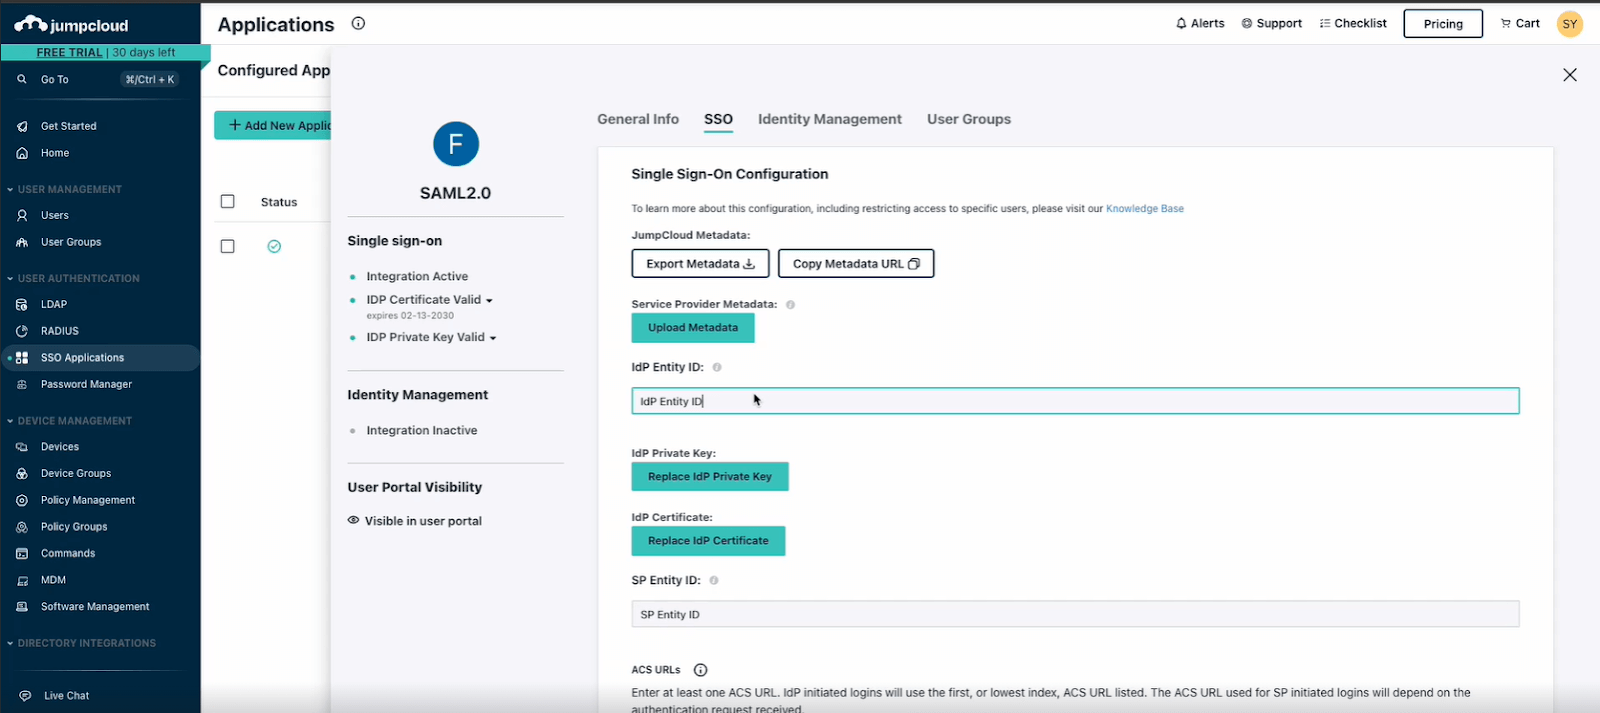
Step 9: Copy the required SSO details from TestMu AI, including:
- IdP Entity ID
- SP Entity ID
- ACS URL
- Subject Name
- Login URL

-
Step 10: Configure TestMu AI SSO Integration Using SAML.
-
Go to TestMu AI Dashboard > Authentication & SSO Settings.
-
Click Setup SSO. Enter a Connection Name and click Add New Connection.
-
Select JumpCloud as your Identity Provider (IdP)
-
Copy the required SSO details from TestMu AI, including:
- IdP Entity ID
- SP Entity ID
- ACS URL
- Subject Name
- Login URL
-
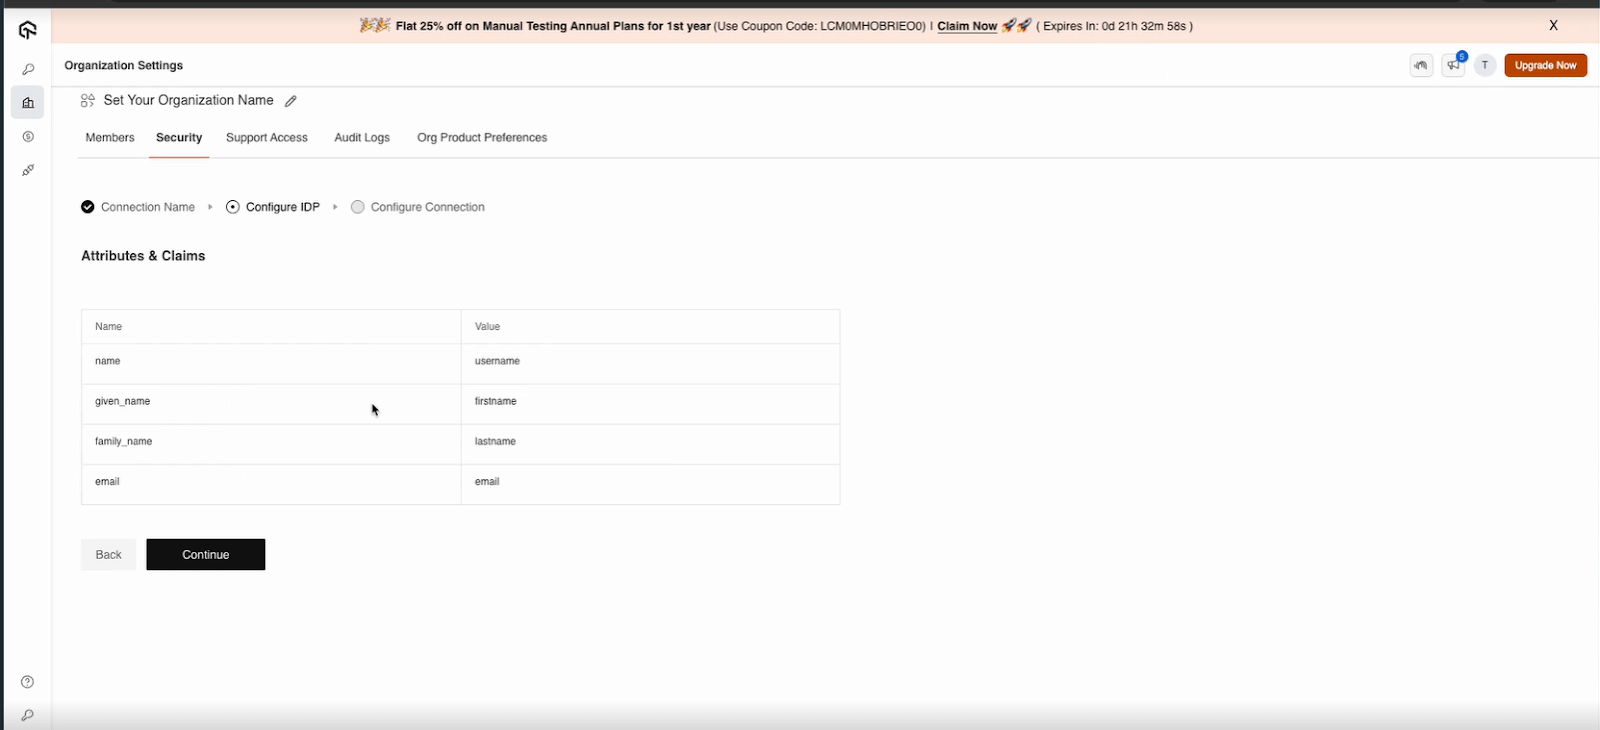
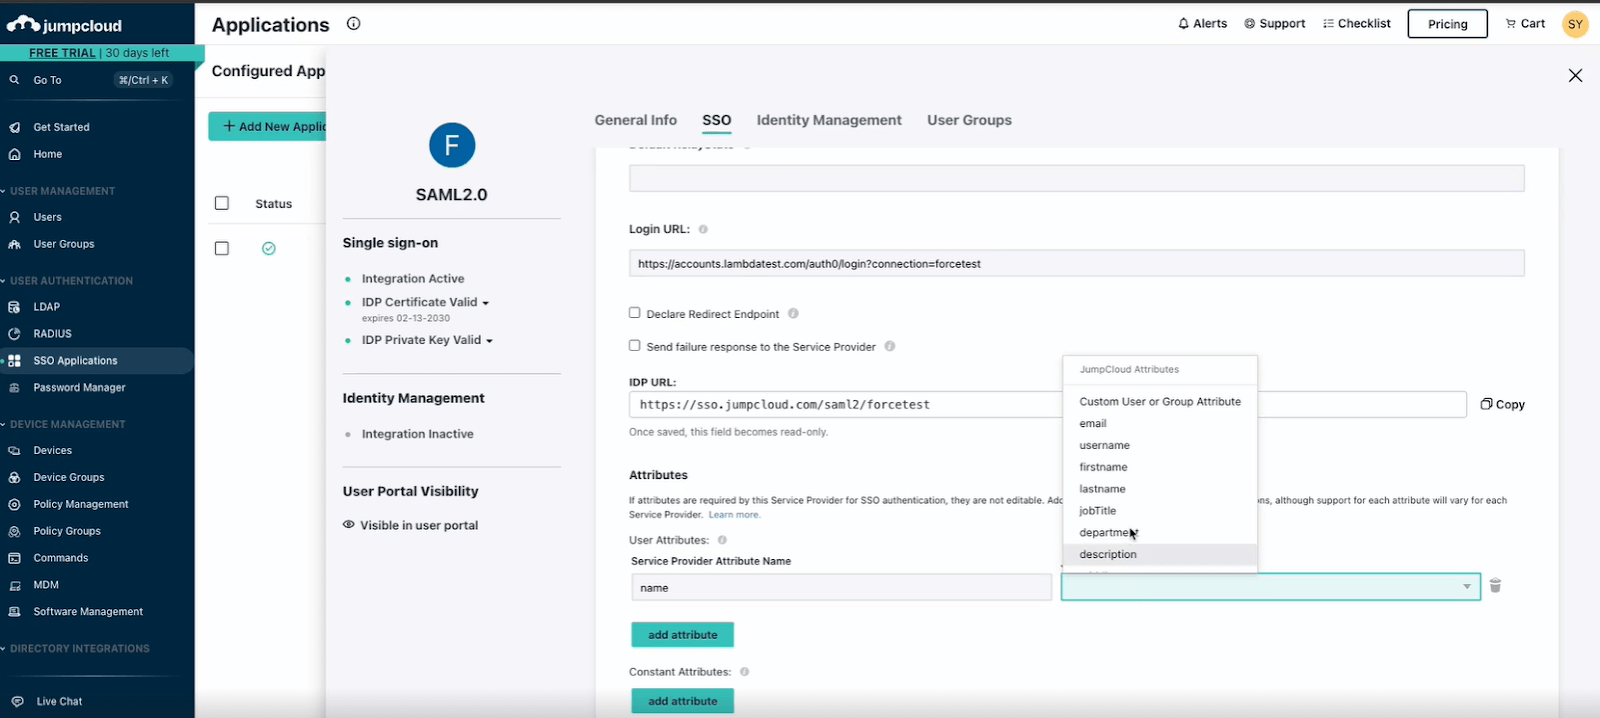
Click Add Attribute in jumpcloud, enter the necessary details, and save the configuration. (IdP)
-
Copy the Metadata URL from JumpCloud.
-
Step 11: Finalize the Integration
-
Copy the Metadata URL from JumpCloud.
-
Go to TestMu AI Dashboard and paste the Metadata URL.
-
Add the SSO domain in TestMu AI and click Create Connection.
-
Assign users to the SSO connection in JumpCloud and Save the configuration.
-
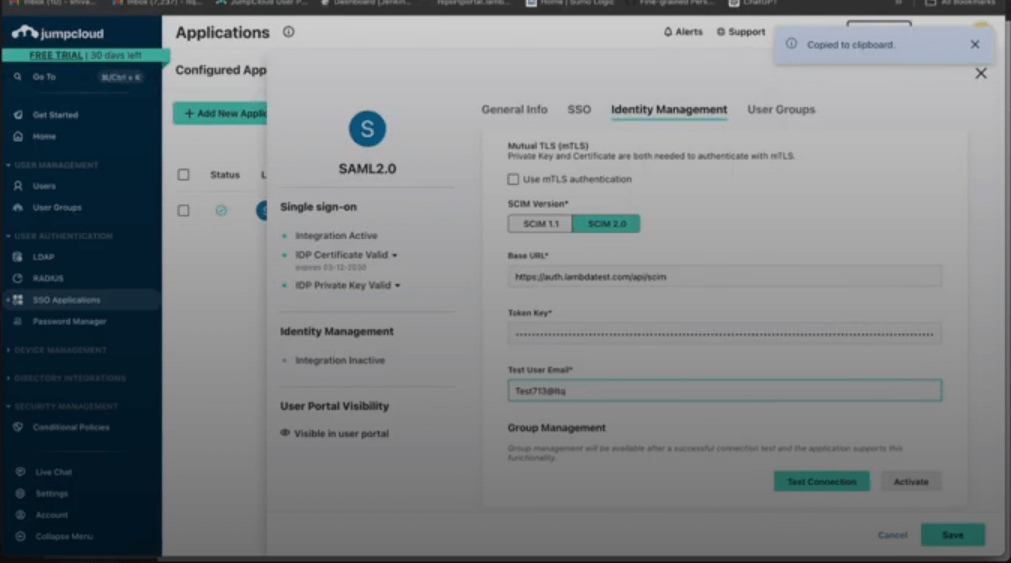
Step 12: Go to TestMu AI Dashboard and go SSO connection. Copy Bearer Token and SCIM Base URL.
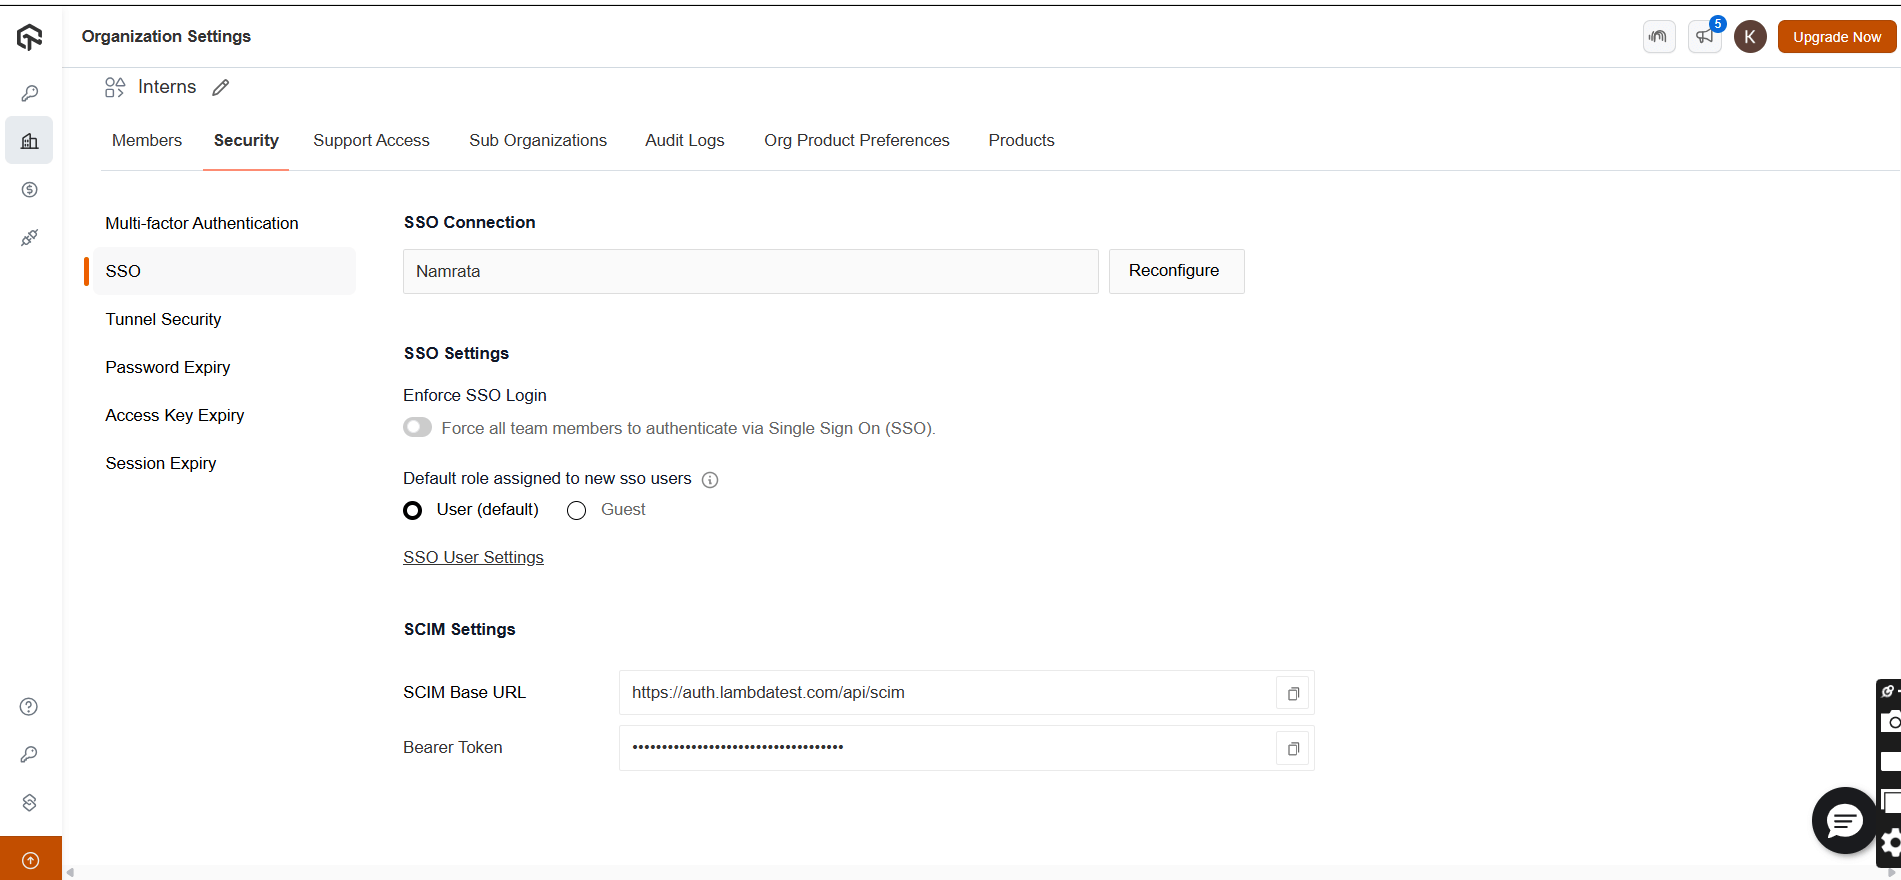
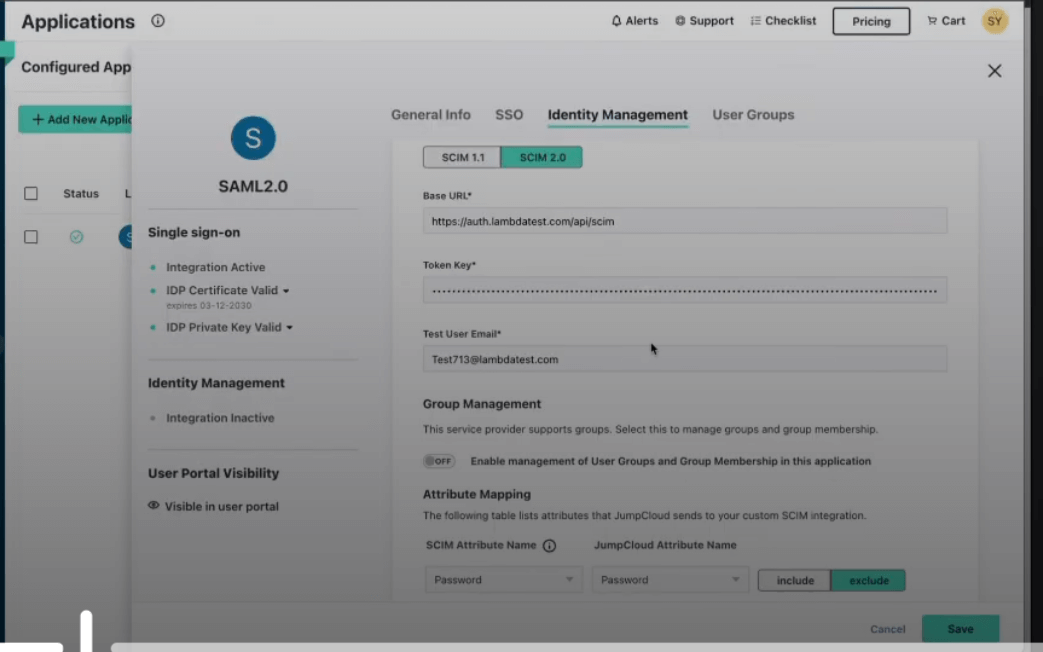
-
Step 13: Go Identity Management and paste SCIM Base URL and Bearer Token. and then click Save button.
Provisioning Groups from JumpCloud
Once SCIM user provisioning is working, you can also push JumpCloud user groups to TestMu AI.
Group Provisioning must be enabled for your org. Contact 24/7 chat support to activate it.
Step 1: In JumpCloud Admin Console, go to your TestMu AI SSO Application > User Groups tab.
Step 2: Select the user groups you want to provision to TestMu AI.
Step 3: Click Activate to start pushing group membership via SCIM.
Step 4: In TestMu AI, go to Settings > Organization Settings > SCIM Group Provisioning to view the synced groups and configure mappings.
What Happens After Provisioning
| JumpCloud Action | TestMu AI Effect |
|---|---|
| Group activated for provisioning | Group created, mapping rules evaluated, members synced |
| User added to group | Member added to all mapped TestMu AI entities |
| User removed from group | Member removed (if no other group maps them there), role recomputed |
| Group renamed | Group renamed, mapped entity renamed to match, rules re-evaluated |
| Group deactivated/deleted | Group soft-deleted, members safely unassigned, roles recomputed |
For details on mapping, conflicts, and rules, see the SCIM Provisioning guide.
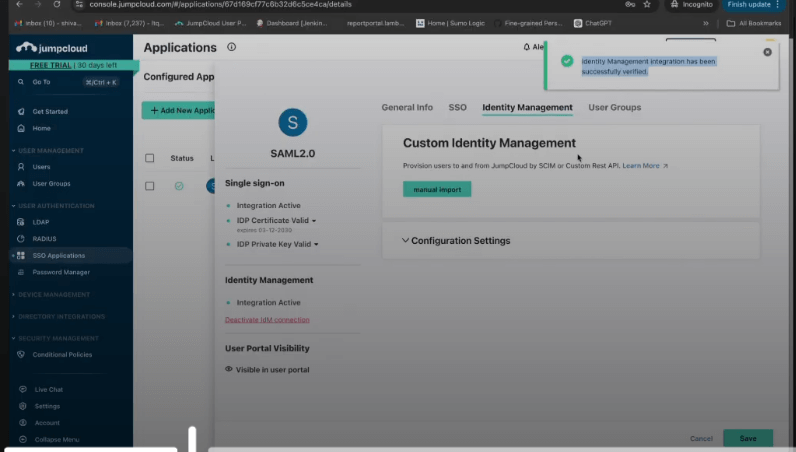
- Step 14: Enter email that does not exist on TestMu AI platform and provide test email details, and click Test Connection and activate button.