Roles and Permissions (RBAC)
TestMu AI Roles and Permissions (RBAC) allows organization admins to define fine-grained access control across products, projects, and features. With Custom Roles and Permissions, you can control which team members have access to specific products, what actions they can perform, and ensure that each user only sees what is relevant to their role.
This is especially useful for large enterprises with multiple teams where different groups need access to different parts of the platform, for example, one team working exclusively with KaneAI and Test Manager, while another only needs access to SmartUI and Automation.
Custom Roles and Permissions is an enterprise-level feature. Please contact your account manager or reach out to support@testmuai.com to get it enabled for your organization.
Prerequisites
- You must be an Admin of your TestMu AI organization.
- Ensure your organization has the RBAC feature enabled by the TestMu AI team.
- Familiarity with User Management and Team Management is recommended.
Understanding Default Roles
Navigate to Organization Settings > Custom Roles & Permissions from the left sidebar. You will see the Custom Roles & Permissions page displaying all existing roles in your organization.
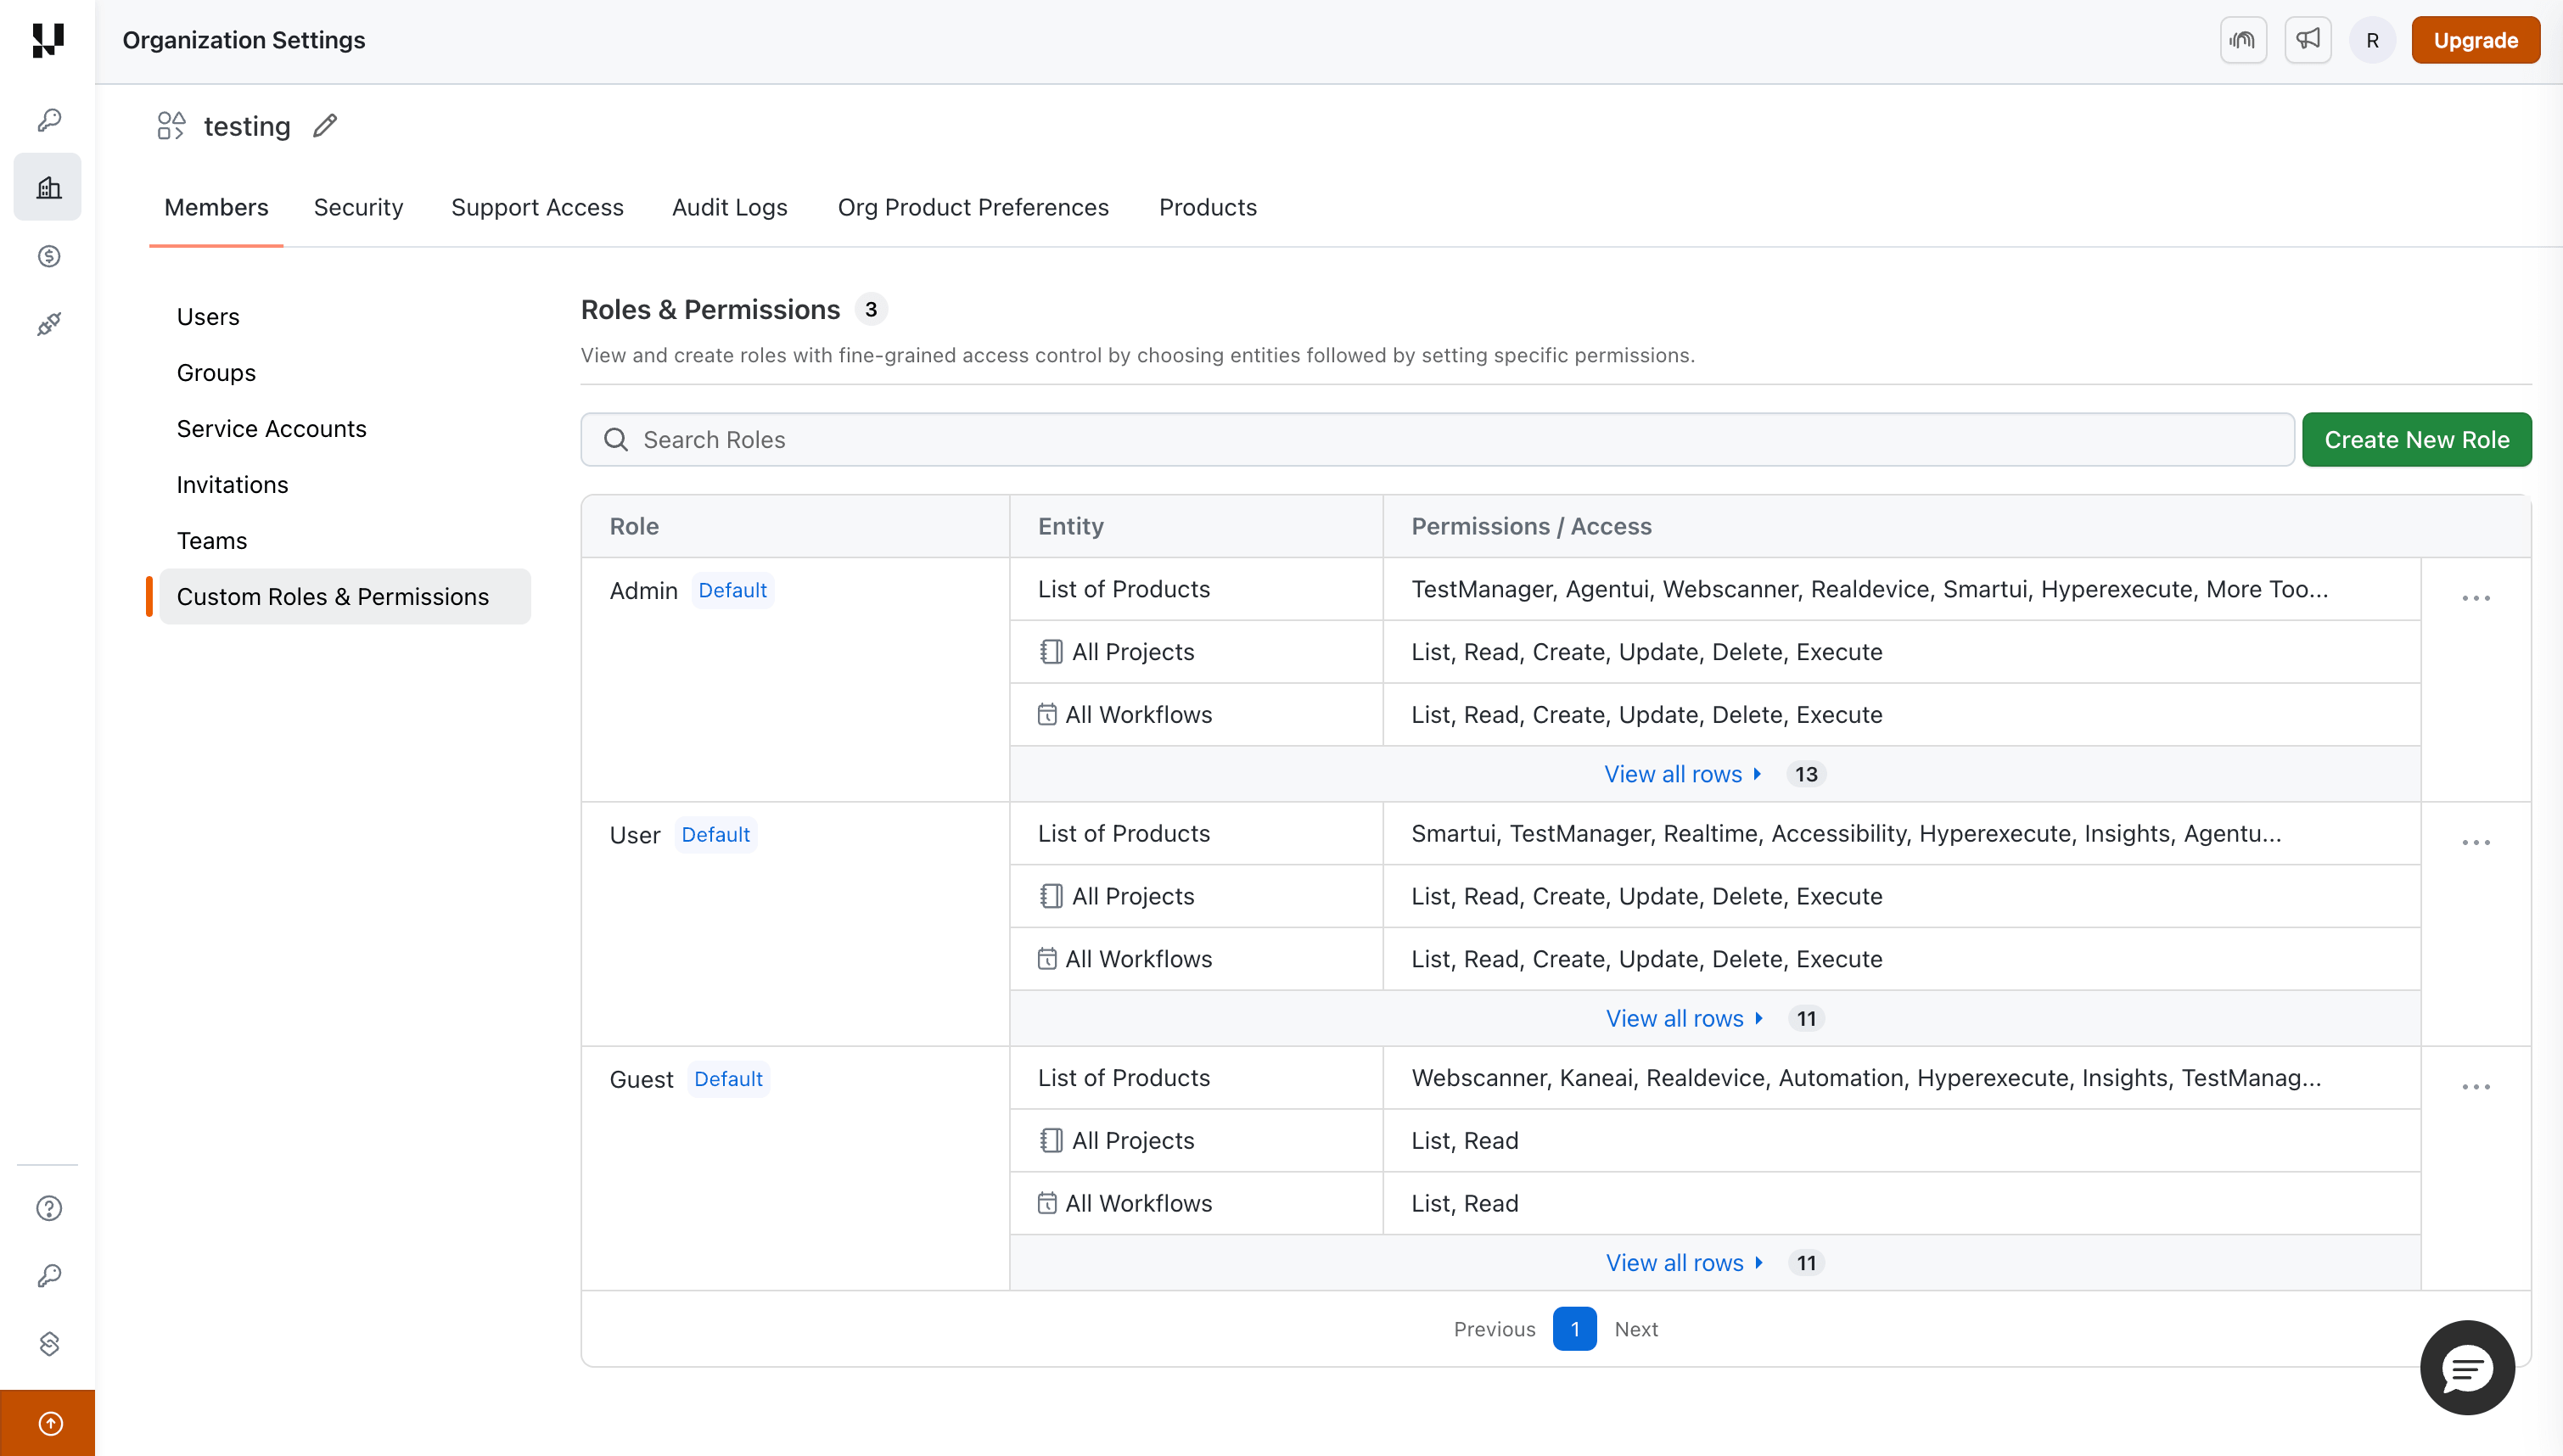
TestMu AI provides three default roles out of the box:
| Role | Description | Entity Permissions |
|---|---|---|
| Admin | Full access to all products and entities, plus organization-level administration such as settings, billing, integrations, and user and team management. | List, Read, Create, Update, Delete, Execute on all entities, plus organization administration |
| User | Full permissions on all products and entities, but without organization-level administration. | List, Read, Create, Update, Delete, Execute on all entities |
| Guest | Read-only access across products. | List, Read only on entities |
Roles are auto-applied at login.
When a user is assigned more than one role, their effective permissions are the combination of all assigned roles, and the most permissive access applies. Permission changes take effect on the user's next request or page load, no re-login is required.
Creating and Applying Custom Roles
Custom roles give you the flexibility to tailor access permissions to match your organization's specific needs. Unlike the default roles (Admin, User, Guest), which cannot be edited, custom roles allow you to define exactly which products, entities, and actions each team member can access. To set up custom permissions, you need to create a custom role.
Step 1: On the Custom Roles & Permissions page, click the Create New Role button in the top-right corner.
Step 2: In the Create New Role dialog, enter a Role Name that clearly describes the role's purpose (e.g., "SmartUI Tester", "KaneAI Developer", "QA Lead").
Step 3: You can configure product-level access or entity-level access based on your requirements. Entity-level access is covered in detail below.

Step 4: Click Create to complete the process.
Step 5: Assign the custom role to users or teams based on your use case:
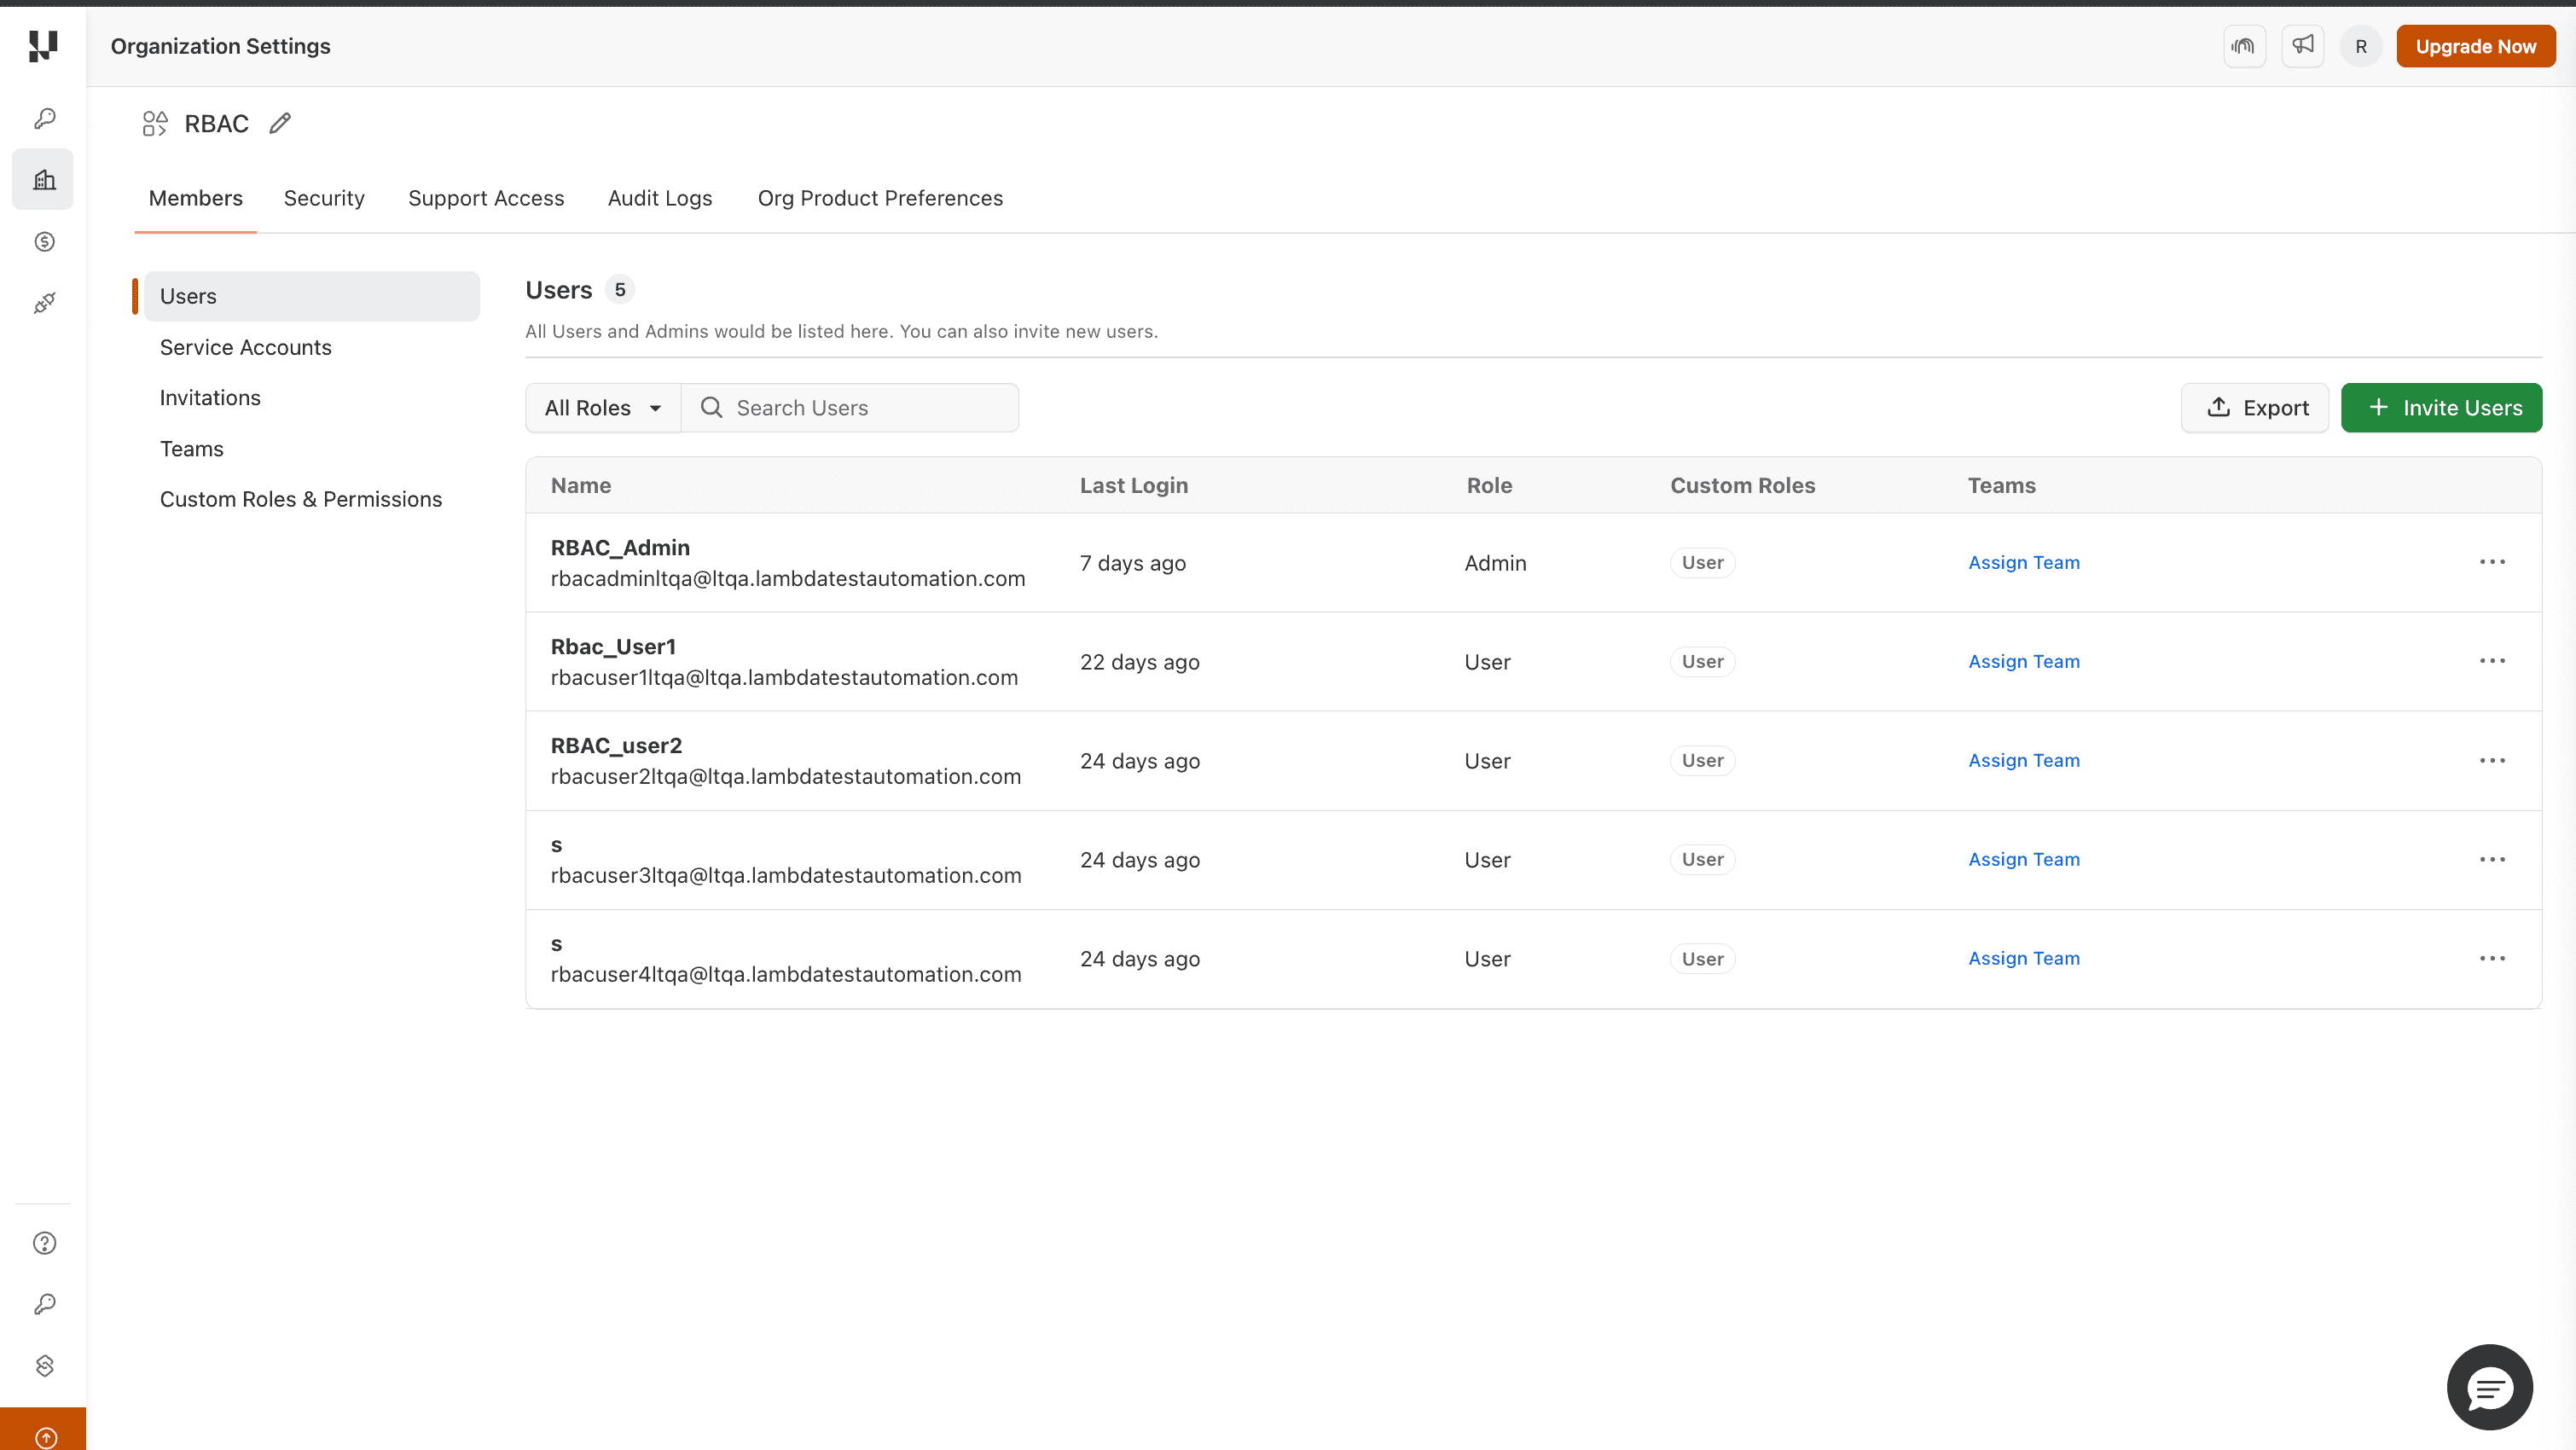
- To assign to individual users: Navigate to Organization Settings > Members, click on the user's row or the options menu, and assign the custom role.
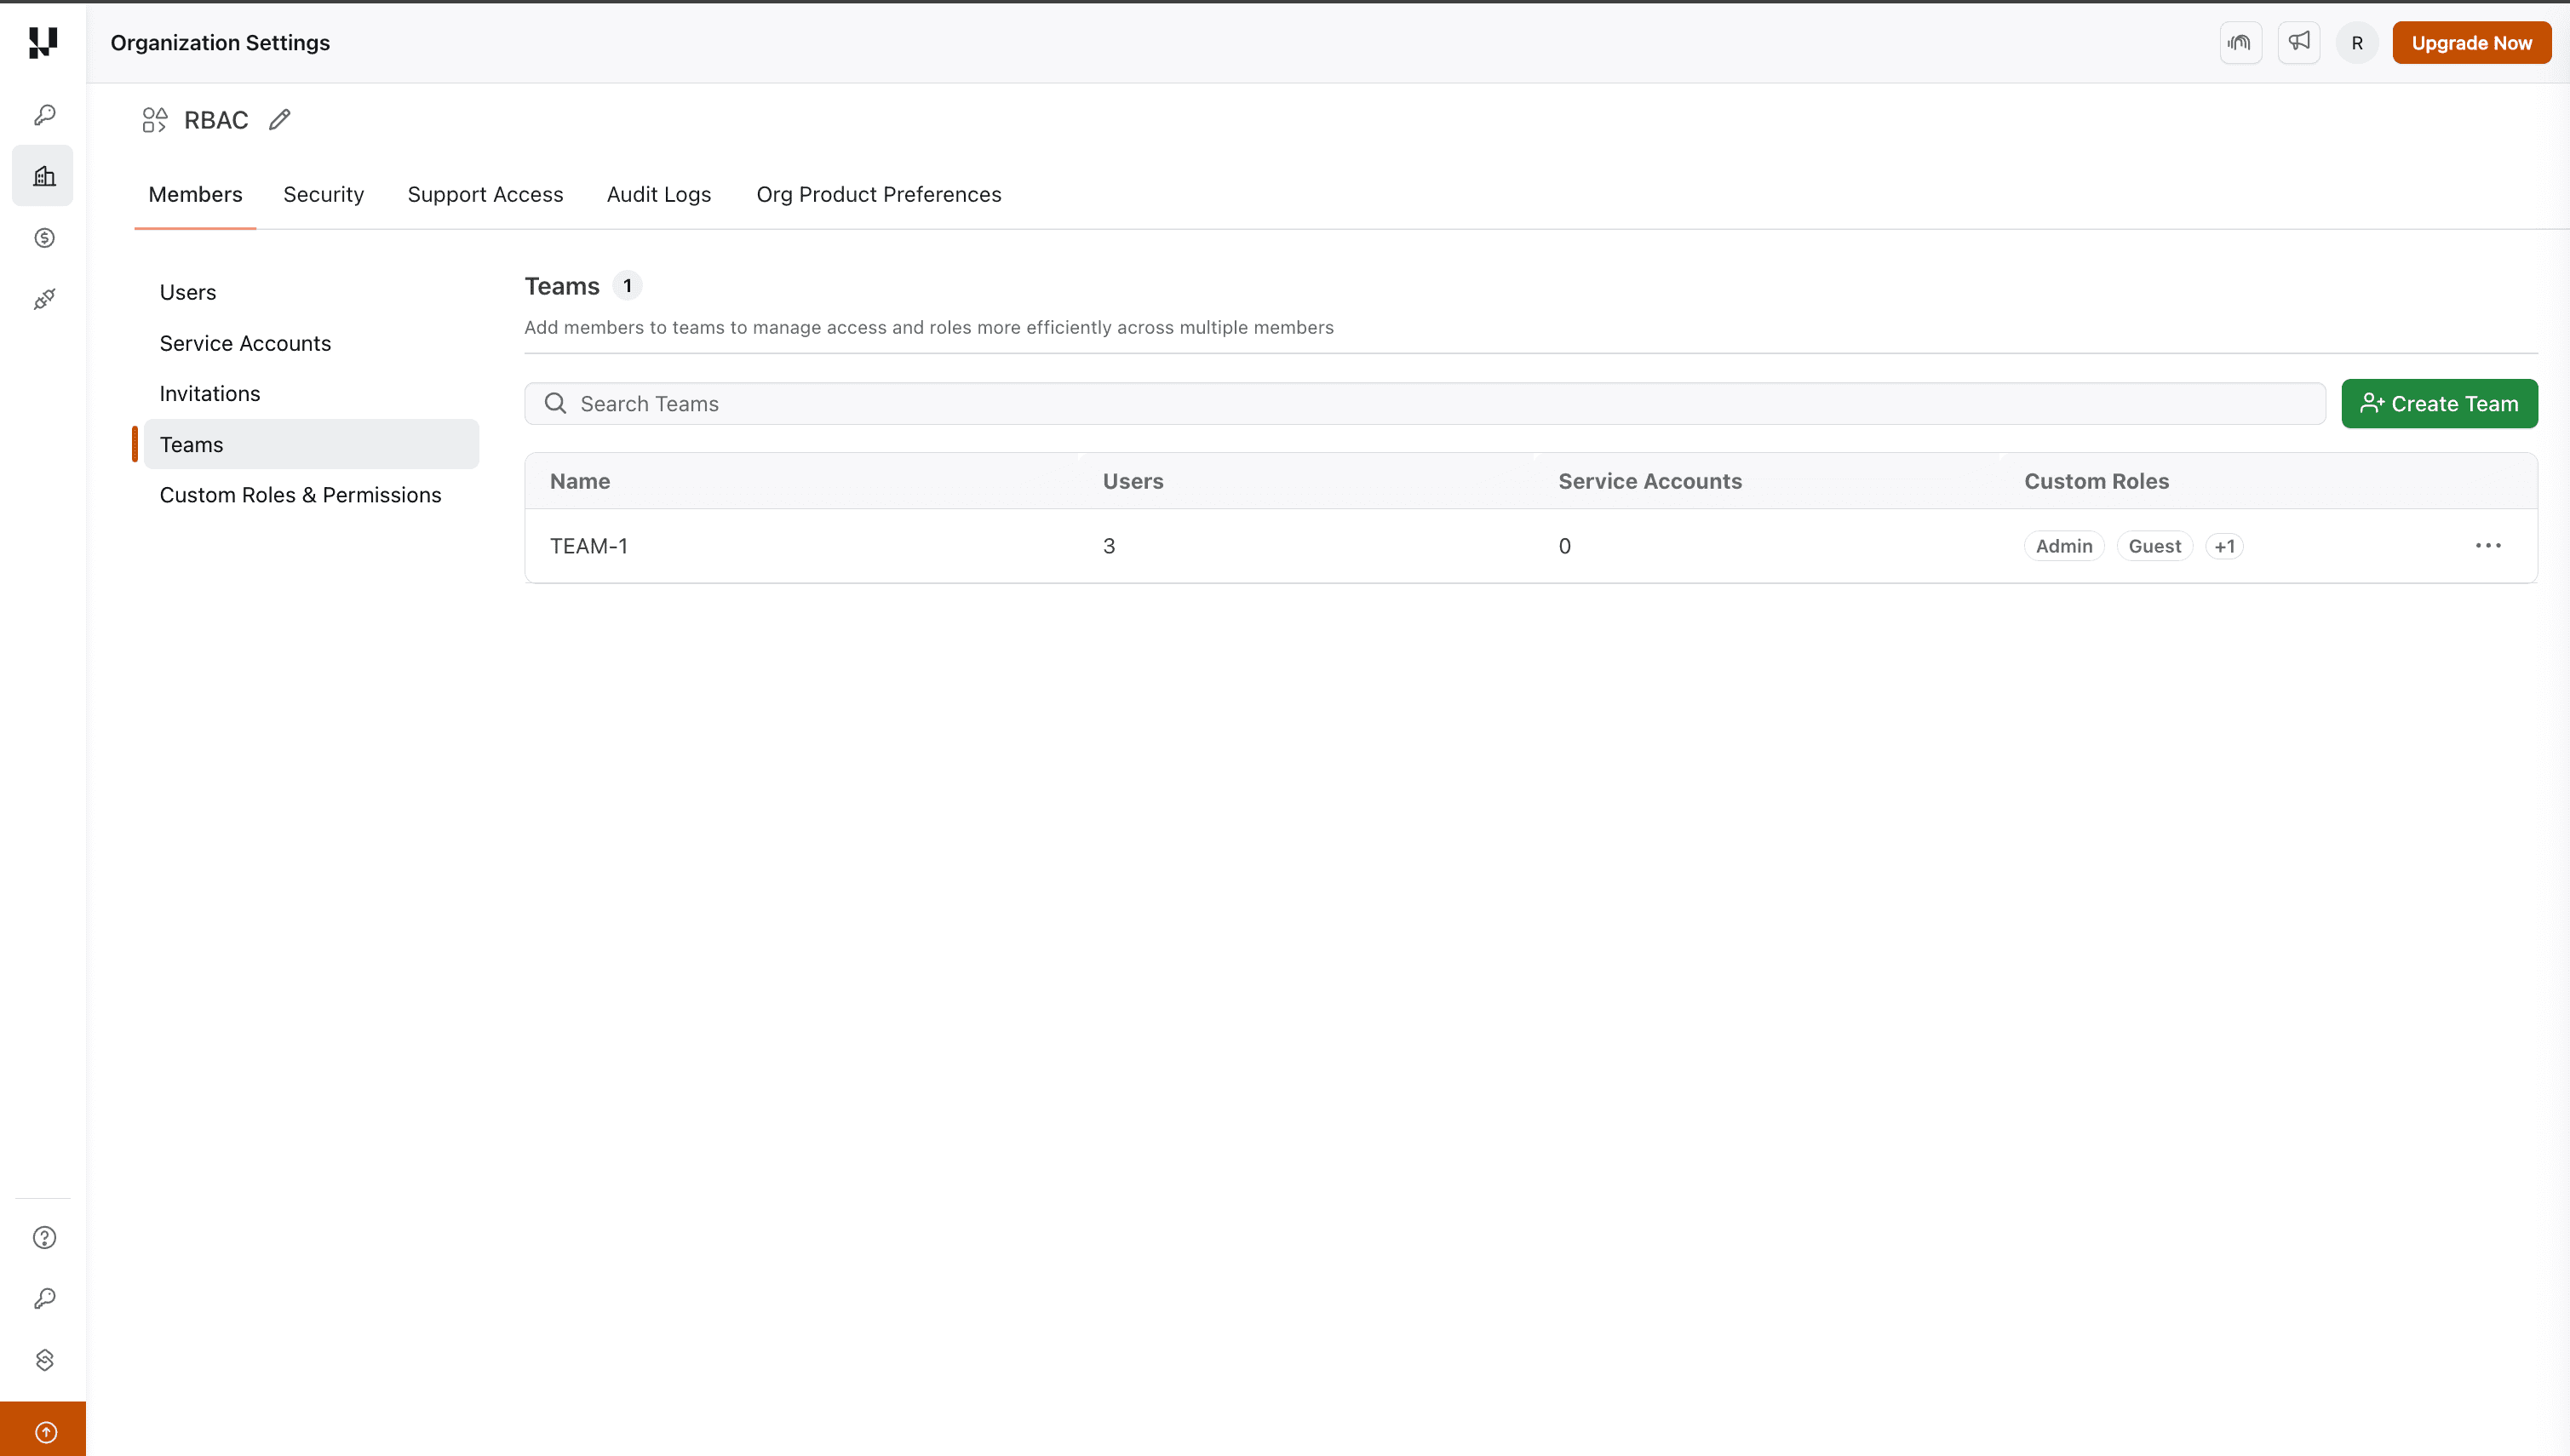
- To assign to a team: Navigate to Organization Settings > Teams, select a team, and assign the desired custom role. All members of the team will automatically inherit the same permissions.
Entity Level Access
Entity-level access allows you to configure granular permissions for specific items and product areas within the platform. Each product exposes its own set of entities, and you can grant specific permissions on each one.
Entity-level access is available for the following products:
| Product | Entities |
|---|---|
| Test Manager | Projects, Test Runs, Test Cases and Test Case Instances |
| Automation | Projects, Builds, Test Case Instances |
| HyperExecute | Projects, Workflows, Organization Settings |
| SmartUI | Projects, Builds |
| Analytics & Insights | Projects (applied to dashboards and reports, read-only) |
Each product exposes a different set of entities. Here is what each one represents.
Test Manager
- Projects: A workspace that groups all test cases, test runs, and related assets for one application or team.
- Test Runs: A grouping of test cases with chosen browser, device, and OS configurations, created to execute and track them together.
- Test Cases: Individual test scenarios stored in a centralized repository and reused across multiple test runs.
- Test Case Instances: The per-configuration executions of a test case inside a test run, each tracked with its own status.
Automation
- Projects: A container that groups related automation builds and sessions and serves as the unit you scope access to.
- Builds: A named grouping of automation test sessions, set through the build capability, used to collect and filter related executions.
- Test Case Instances: Individual automation test sessions executed on a specific browser, OS, or device configuration within a build.
HyperExecute
- Projects: A centralized space for organizing and managing test executions by grouping similar tests, controlling access, and tracking progress.
- Workflows: Schedule-driven orchestration that runs HyperExecute jobs on a defined schedule, without requiring CI/CD integration.
- Organization Settings: Organization-level HyperExecute preferences, such as auto-mute tests and test viewing preferences.
SmartUI
- Projects: A container that groups all visual regression builds and screenshots for a single application.
- Builds: A named collection of screenshots grouped for visual comparison and baseline management within a project.
Analytics & Insights
- Projects: The read-only reporting scope that controls which dashboards and reports a user can view.
Entity-level access for App Automation is planned for an upcoming release. The exact set of entities, and the actions available on each, can vary from one product to another.
Select Specific Entities
When creating or editing a role, you can assign permissions to specific items rather than to all items of a type, for example, granting access only to selected Test Manager projects or to specific HyperExecute projects.
Granular Control
For supported products, you can configure fine-grained permissions on each entity using the following permission levels:
- List: View items in a list.
- Read: View item details.
- Create: Create new items.
- Update: Modify existing items.
- Delete: Remove items.
- Execute: Run or trigger items (for example, abort a build or trigger a HyperExecute job).
Not every permission level applies to every entity. For example, Analytics & Insights is a read-only reporting surface, so only List and Read apply there.
Product Level Access
Product-level access lets you control which TestMu AI products a user can see and interact with. This is the most impactful RBAC setting as it determines what shows up on a user's dashboard, sidebar, and which URLs they can visit.
When creating or editing a role, add List of Products as an entity and select only the products this role should have access to, such as KaneAI, HyperExecute, SmartUI, and more.
What happens when a product is restricted?
- The product is hidden from the sidebar and dashboard for the user.
- If a user tries to directly access a restricted product URL, they are redirected to a 403 page.
When to use Product Level Access
- Security & compliance:Restrict sensitive products like Insights or Settings to admins and leads only, ensuring regular testers don't have access to org-level analytics or configurations.
- Onboarding new members:New team members can be given a limited role with access to only Real Time and Automation while they ramp up, then gradually expanded to include KaneAI and HyperExecute.
- Client or vendor access:External contractors working on a specific product area (e.g., mobile testing) can be restricted to only Real Device and Automation without exposing the rest of the platform.
