Grouping SmartUI Screenshots by Test Cases
TestMu AI’s SmartUI allows you to organize your visual regression screenshots logically by linking them to the automation test cases they were captured in. Grouping screenshots by test cases reduces triage fatigue and allows you to review visual differences with full automation execution context.
This guide’s recommended flow is Selenium on the grid + SmartUI Hooks (smartUI.project in Java LT:Options and smartui.takeScreenshot in the browser). That path works with Hooks-oriented SmartUI projects (including many Omni projects) and matches the Capability Generator output in the TestMu AI dashboard.
It also covers how to get one Automation / SmartUI build with multiple captures (for example, five logical test cases), how to use Group by → Test Case in SmartUI, the Automation → SmartUI Screenshots tab, and bulk approve or reject. An optional Node SDK + visual: true flow is included for Web-only SmartUI projects.
Audience & Prerequisites
- Audience: QA Engineers and Developers running automated visual tests on TestMu AI.
- Prerequisites (recommended — Hooks):
- LambdaTest username and access key:
LT_USERNAME,LT_ACCESS_KEY. - SmartUI project wired through
smartUI.projectin JavaLT:Options(same string as Smart UI Project Name in the dashboard, e.g.sampleornew). smartui.takeScreenshotwith ascreenshotNameper capture when you want multiple named screenshots in one run.- For SmartUI CLI static or exec workflows, a
PROJECT_TOKENfrom that project (often ends with#<projectSlug>matching the project name).
- LambdaTest username and access key:
- Prerequisites (optional — Node SDK +
visual: true): The SmartUI project must be Web type; Omni names withsmartUIProjectName+visual: truecause hubfailed to validate project— see Omni vs Web. Prefer the Hooks flow above for Omni / Hooks projects. - On the grid, grouping metadata usually comes from session
name, suite/project, or runner test titles. For localsmartui exec+ Cypress or Playwright, see the SmartUI SDK docs.
smartui capture (static URLs) uploads screenshots to a build but does not attach automation test-case metadata. To validate Group by → Test Case with real folders, run automation on the grid (for example the Java Hooks flow, or Cypress/Playwright with smartui exec) so captures are tied to test/session identity.
Recommended flow: Java Selenium + SmartUI Hooks
Use this when your SmartUI project is Hooks-oriented (dashboard Capability Generator shows smartUI.project and you capture with smartui.takeScreenshot). This is the right default for many Omni projects; you do not need visual: true or smartUIProjectName on the hub for this path.
Clone and credentials
Clone the official sample:
git clone https://github.com/LambdaTest/java-selenium-sample
cd java-selenium-sample
Set credentials (macOS/Linux):
export LT_USERNAME='<your-lambdatest-username>'
export LT_ACCESS_KEY='<your-lambdatest-access-key>'
For SmartUI CLI jobs (capture/exec/upload), also set PROJECT_TOKEN from the SmartUI project (suffix after the last # usually matches the project slug, e.g. #sample):
export PROJECT_TOKEN='<your-token>#sample'
Capabilities and webhook
Paste Java capabilities from the dashboard Capability Generator into your test class under src/test/com/lambdatest/ (this repo uses src/test/com/..., not src/test/java/...). The important SmartUI line is:
ltOptions.put("smartUI.project", "<Smart UI Project Name>");
Use the same string as Smart UI Project Name in the UI (e.g. new, sample, or Java-Selenium as in the sample).
After navigation, call the SmartUI hook (use a different screenshotName per step or per logical test so screenshots do not overwrite each other):
Map<String, Object> config = new HashMap<>();
config.put("screenshotName", "<Your Screenshot Name>");
((JavascriptExecutor) driver).executeScript("smartui.takeScreenshot", config);
The runnable reference for Hooks + SmartUI (no DevTools) is:
src/test/com/lambdatest/SmartUI.java
Run it:
mvn clean install exec:java -Dexec.mainClass="com.lambdatest.SmartUI" -Dexec.classpathScope=test -e
To align SmartUI.java with your dashboard project name, change the smartUI.project value in that file to match your Smart UI Project Name.
src/test/com/lambdatest/BasicAuthentication.java is useful for generated caps pasted from the UI, but that sample uses Chrome DevTools on the grid; you may need a matching selenium-devtools-vNN dependency on your classpath if the remote Chrome major version does not match bundled CDP. Prefer SmartUI.java for a minimal Hooks-only run.
Use mvn versions:display-dependency-updates only if you want to inspect dependency updates; it is not required to execute tests.
For more Java options, see the SmartUI Selenium Java SDK.
Multiple test cases, one build (Hooks pattern)
Use this when you want one Automation / SmartUI build with several captures that can be reviewed under Group by → Test Case.
Rules
- Same
smartUI.project(and samePROJECT_TOKENwhen using the CLI) for the whole run. - Same
buildinLT:Optionsfor every session that should belong to the same Automation build. - Distinct
screenshotNamevalues for eachsmartui.takeScreenshotcall so each capture is a separate asset in the build. - Test case folders: vary the session
nameinLT:Optionsper test method or per parallel session when you need multiple Test Case groups (same pattern as multi-session Selenium suites). For one session with multiple hooks, grouping still uses automation metadata from that session — alignname/ suite with your runner (JUnit/TestNG method names, etc.) per your organization’s conventions. - You can run sessions sequentially or in parallel as long as
buildandsmartUI.projectstay consistent.
Optional: Node SDK + visual: true (Web SmartUI projects only)
Use @lambdatest/selenium-driver smartuiSnapshot + visual: true + smartUIProjectName only when the SmartUI project is Web type. Omni project names cause failed to validate project on the hub for this path — use the Hooks flow instead.
Workspace sample (five sessions, five names, one build):
smartui-node-sample/sdk/sdkCloud.js
Pattern: constant build, unique name per session, visual: true, smartUIProjectName set to the Web project name, then smartuiSnapshot(driver, screenshotName) per session.
Cypress / Playwright / other
- Use
smartui exec(or your CI job) with a single--buildNamefor the whole suite. - Map each
it/ test (or file) to a unique snapshot name; consult the SmartUI SDK docs fortestName,suiteName, ortestCaseIdon your stack.
Viewing Grouped Screenshots in SmartUI
By default, screenshots in a SmartUI build are listed flatly.
To view them hierarchically:
- Open your SmartUI Project and select the build you wish to review.
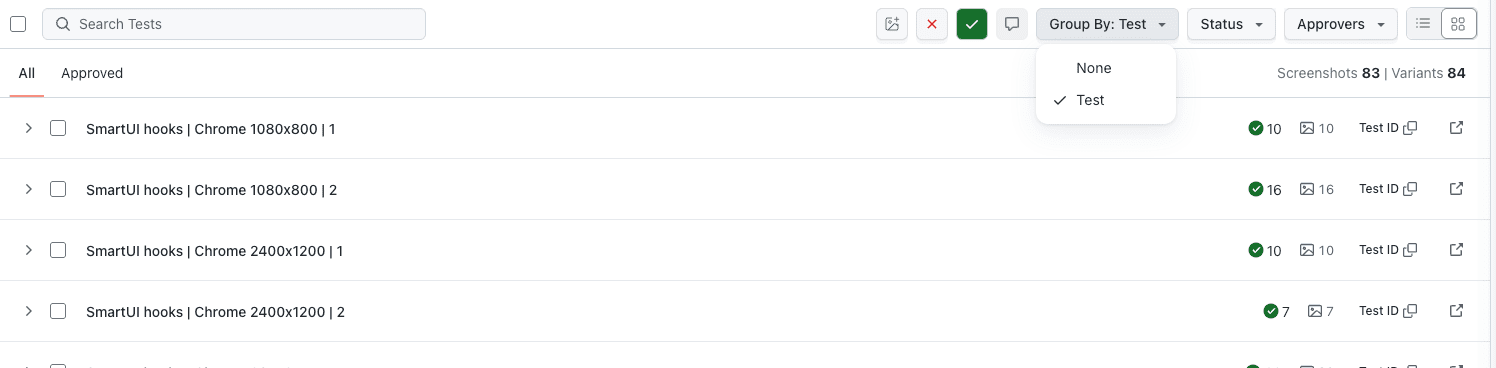
- At the top right of the build view, click the Group By dropdown menu.
- Select Test Case.
- Your screenshots will now be grouped into folders representing each automation test case.
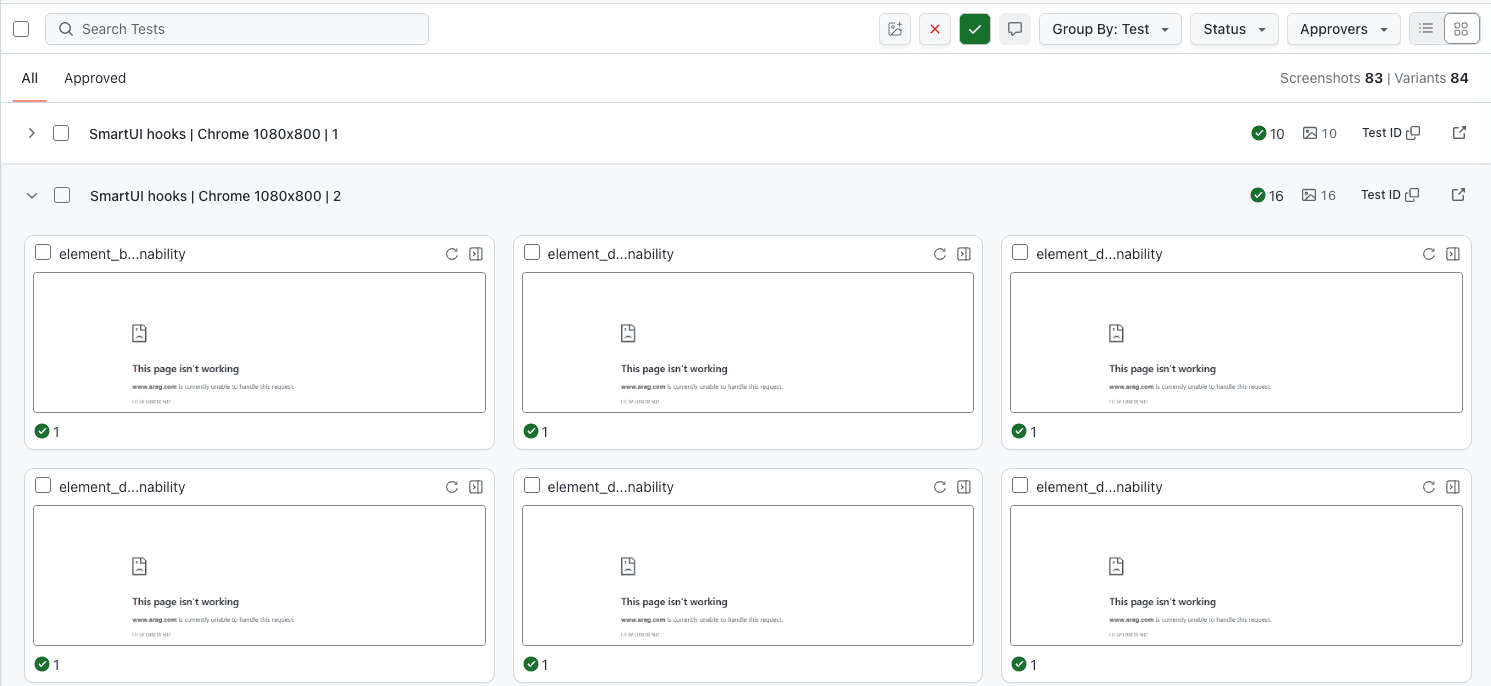
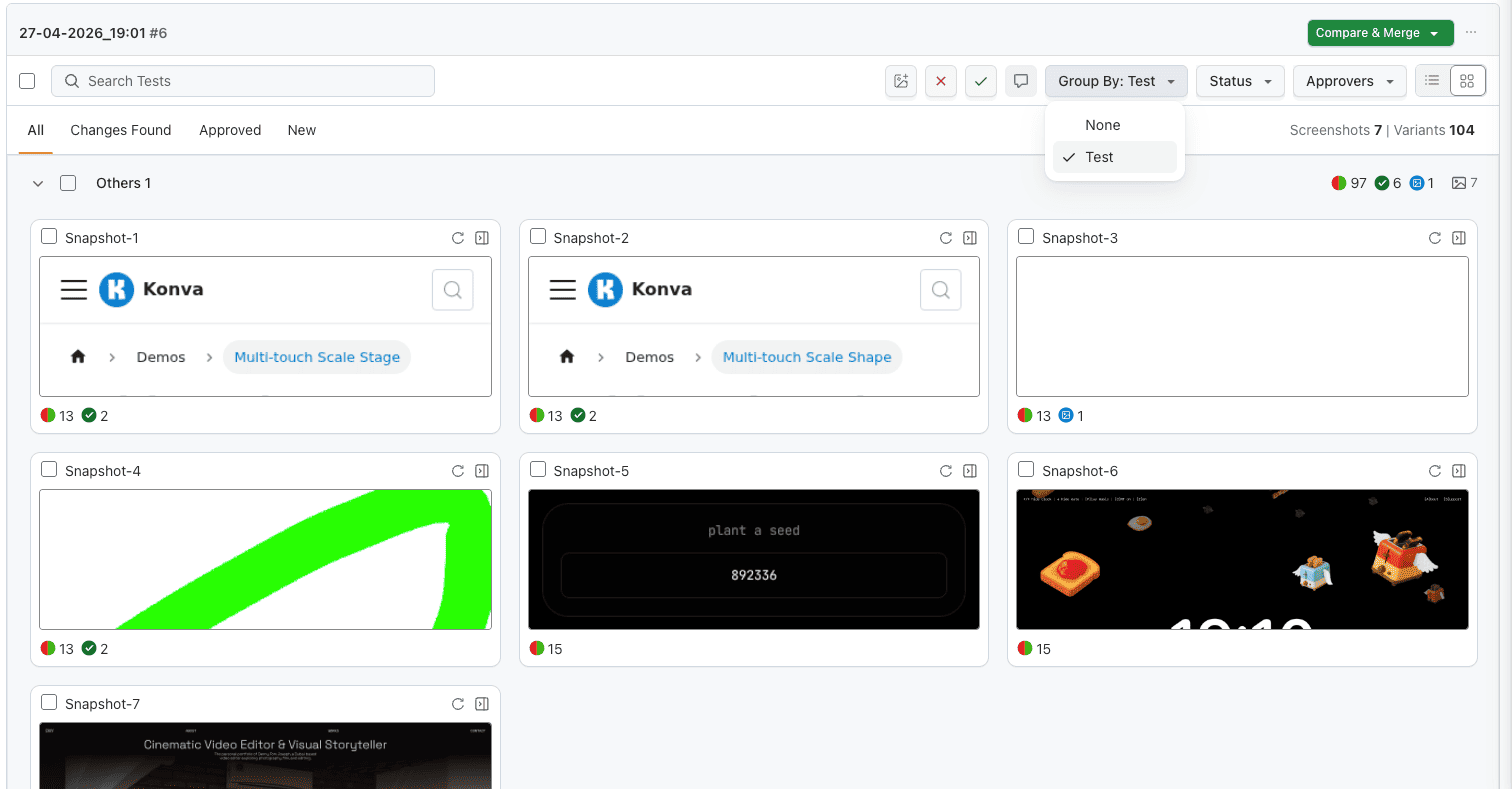
Expanding and Collapsing Groups
- Click the arrow icon or the folder name next to a test case to expand or collapse its screenshots.
- The group header provides a summary, including the total number of screenshots, the number of unreviewed/approved/rejected screenshots, and the average mismatch percentage for that specific test case.

The Automation SmartUI Tab
You can review visual differences without leaving your test automation execution context.
- Navigate to your Automation dashboard and select a test run.
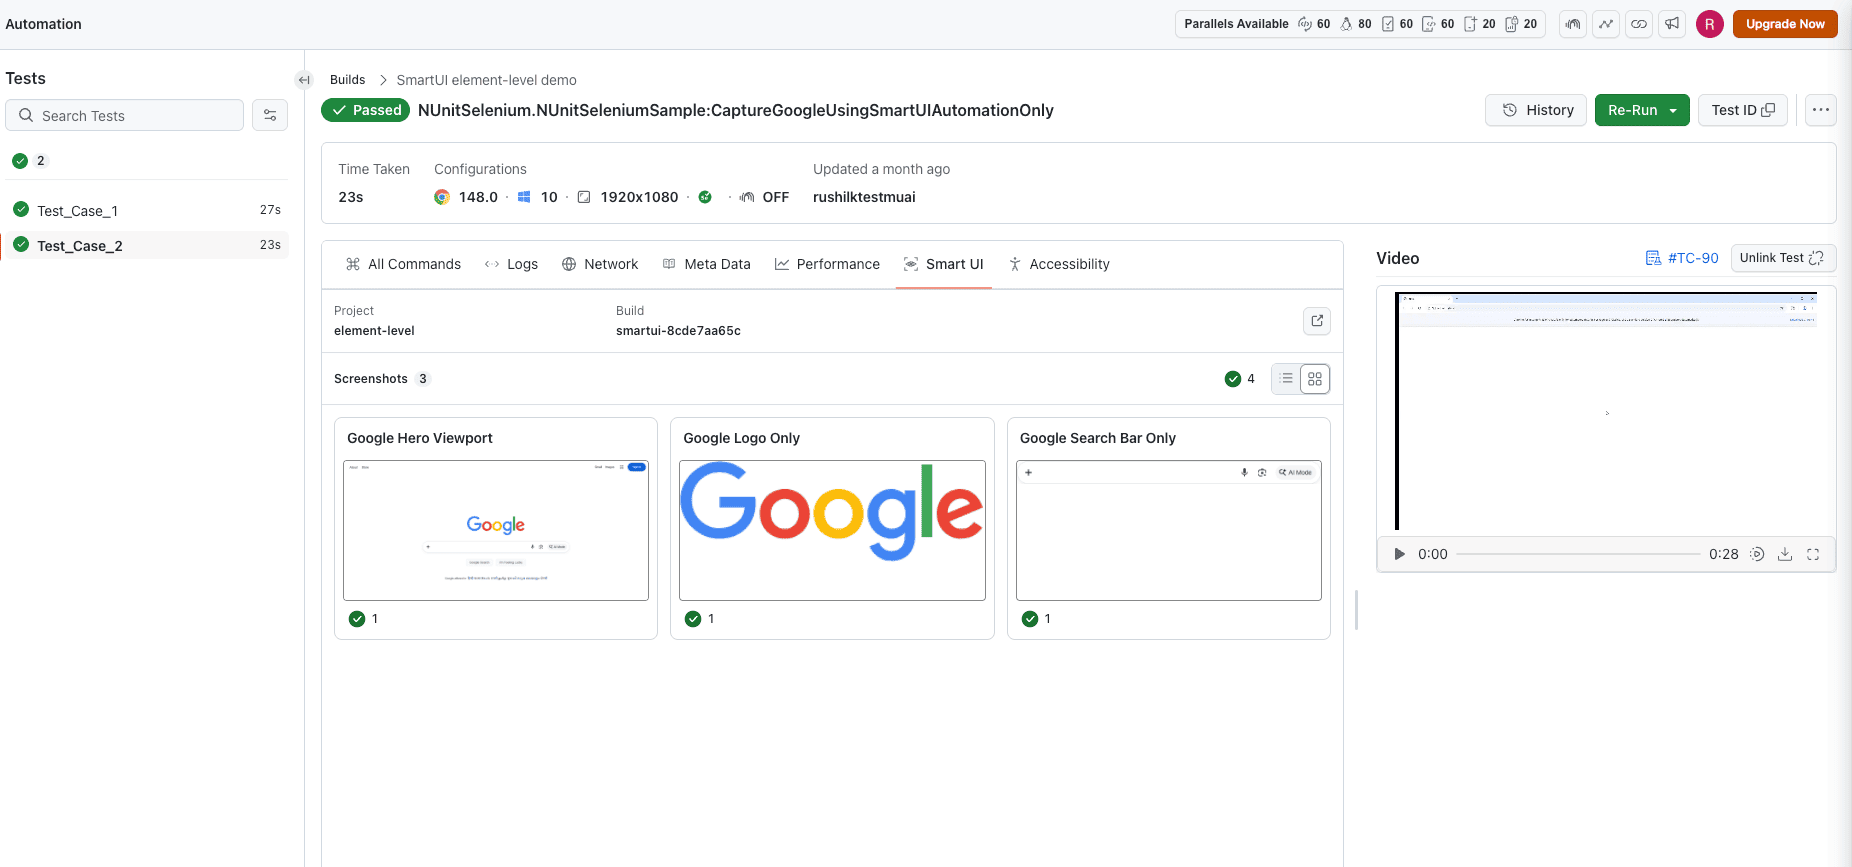
- In the test detail view, locate the SmartUI Screenshots tab alongside the traditional Overview, Logs, and Network tabs.
- The tab badge will display the total number of screenshots captured during this specific test execution.
- Click the tab to view a thumbnail grid of all screenshots. Each thumbnail displays its status, mismatch percentage, and environment details.
- Click any thumbnail to open the Comparison Viewer Modal to perform side-by-side, slider, or diff-overlay visual inspections right from the Automation page.
Bi-directional Navigation
You can seamlessly jump between SmartUI and Automation contexts:

From SmartUI to Automation
If you are reviewing a test group in SmartUI and want to see the automation logs, click the View in Automation → link located under the group header. This will open the specific automation test detail page with the "SmartUI Screenshots" tab pre-selected.
From Automation to SmartUI
If you are in the Automation dashboard and prefer the full-screen SmartUI review experience, click the Open in SmartUI → link at the top of the SmartUI tab. This will navigate you to the SmartUI Build Review page with the relevant test group already expanded and focused.
Executing Bulk Actions
When reviewing a large number of screenshots, you can triage them efficiently using bulk actions at the test case group level.
Group by Test Case uses the same bulk-action workflow as the standard (flat) build view: select screenshots via the group checkbox on a test-case folder (or pick individual thumbnails), then use Approve All / Reject All on the floating action bar. You are only changing how screenshots are organized—not which bulk controls are available.
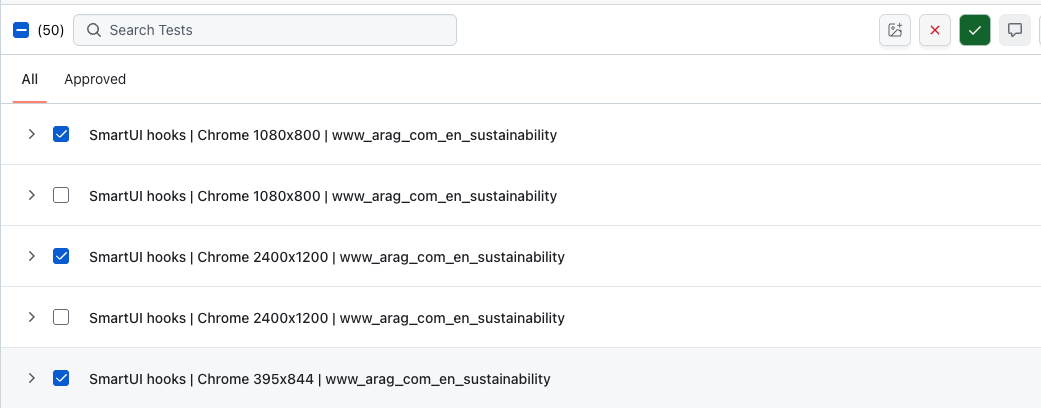
- Ensure your view is grouped by Test Case.
- To select all screenshots within a test case, check the Group Checkbox located on the test group header.
- A floating Bulk Action Bar will appear at the bottom of the screen.
- Click ✓ Approve All to accept the actual screenshots as the new baselines for all selected items.
- Click ✗ Reject All to reject the selected visual differences.
- To cancel your selection, click the ✕ button on the action bar.
You can expand a group and check or uncheck individual screenshots before applying a bulk action. The group checkbox will show an indeterminate state [-] if only a partial selection is made.
Status Filters
To focus your review efforts, use the status filter pills at the top of the SmartUI build view. These filters work seamlessly with the grouped view:
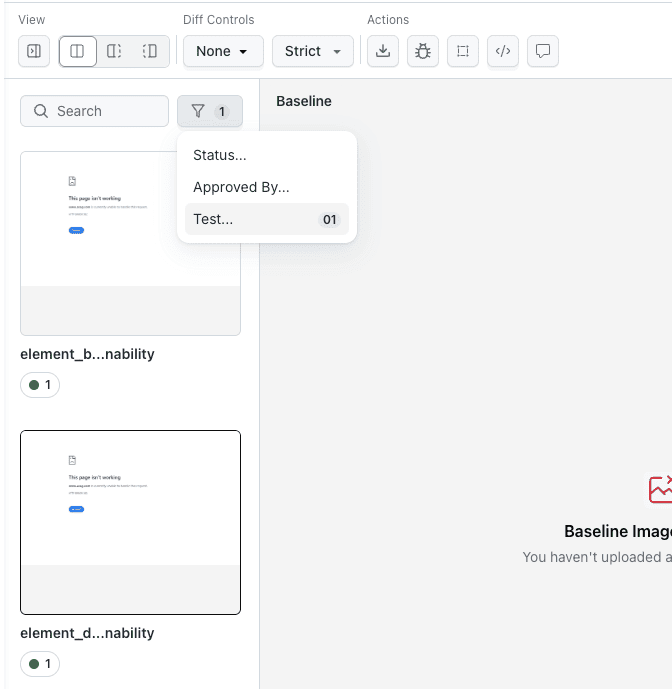
- All (Gray): Displays all screenshots.
- To Review (Amber): Displays only screenshots with unreviewed mismatches.
- Approved (Green): Displays only approved screenshots.
- Rejected (Red): Displays only rejected screenshots.
Empty test groups will automatically hide if none of their screenshots match the selected filter.
Troubleshooting
SmartUI or Automation build fails: failed to validate project (Omni vs Web)
Symptoms: The first session may start and even capture a snapshot, then the run stops with a hub error such as: The project name … already exists with platform type omni. Please use different project name or create a new project of web platform type. The SmartUI CLI may still show ✔ Build finalized with errors or a non-zero exit code.
Likely cause: You are using visual: true with smartUIProjectName (Node / SDK snapshot style), but the SmartUI project is Omni. That combination requires a Web SmartUI project. The recommended Hooks flow (smartUI.project + smartui.takeScreenshot) does not use this hub validation path.
Fix:
- In the SmartUI dashboard, create a Web visual project (or open an existing Web project).
- Use that project’s token as
PROJECT_TOKENforsmartui exec/ CLI. - Set Selenium
smartUIProjectNameto that project’s name exactly (if you use an env override such asSMARTUI_PROJECT_NAME, it must match the Web project, not an Omni project).
Hooks vs SDK: Omni-only or mixed-type projects are often used with Hooks (smartui.takeScreenshot and smartUI.project in Java). The Omni vs Web hub error applies when you combine an Omni project name with visual: true and smartUIProjectName (Node-style SDK snapshots on the grid). For Hooks-first flows, follow the Hooks projects and Java Selenium section and the Capability Generator for your tool.
Screenshots appear in a "Flat" view despite grouping enabled
Likely Cause: The automation execution did not inject the testName or suiteName metadata into the SmartUI capture event.
Fix: Ensure you are using the latest version of the SmartUI SDK. If running tests locally, check the SDK documentation for your specific framework on how to explicitly pass testName as an environment variable or argument during capture.
All screenshots appear under one test case, or grouping shows a single folder
Likely Cause: Every session used the same automation test name (or the runner did not vary the test identifier).
Fix: Give each of the five tests a unique session name / test title while keeping build identical so you still get one SmartUI build.
Screenshots split across multiple SmartUI builds
Likely Cause: build or project / PROJECT_TOKEN differed between runs.
Fix: Use one shared build string and one SmartUI project for all five sessions in that validation run.
You used smartui capture and Group by Test Case is empty or useless
Likely Cause: Static URL capture does not send automation test metadata.
Fix: Run the five scenarios through Automation + SDK or smartui exec, then open the build and set Group By → Test Case.
Limits and Notes
- Group actions are optimized for performance and will complete in under 2 seconds for up to 50 items. For larger test suites, processing might briefly pause.
- When navigating via deep links, your current state (including applied filters and zoom levels) is preserved.
- "View in Automation" links will only be available if the visual captures were tied to a valid automation session ID on the platform.
