Running Puppeteer Tests on HyperExecute
HyperExecute runs your Puppeteer suites at scale across popular JavaScript test runners. Pick your runner below, clone the matching sample repository, and trigger the job with the HyperExecute CLI. The setup steps are identical, only the sample repository changes.
Prerequisites
To run Puppeteer tests on HyperExecute from your local system, you need:
- Your TestMu AI Username and Access Key.
- The HyperExecute CLI, kept in the root of your test suite.
- The HyperExecute YAML file, which is included in each sample repository below.
Set Up the CLI and Environment Variables
The CLI is used for triggering the tests on HyperExecute. It is recommend to download the CLI binary on the host system and keep it in the root directory of the suite to perform the tests on HyperExecute.
You can download the CLI for your desired platform from the below mentioned links:
Now, you need to export your environment variables LT_USERNAME and LT_ACCESS_KEY that are available in the TestMu AI Profile page.
Run the below mentioned commands in your terminal to setup the CLI and the environment variables.
- Linux / MacOS
- Windows
export LT_USERNAME="undefined"
export LT_ACCESS_KEY="undefined"
set LT_USERNAME="undefined"
set LT_ACCESS_KEY="undefined"
Run a Puppeteer Test in Your Runner
- Mocha
- Jest
- CodeceptJS
Mocha is a versatile JavaScript testing framework often used in conjunction with Puppeteer for testing web applications. With support for asynchronous testing and various reporting options, Mocha enables the creation of robust test suites. When combined with Puppeteer, Mocha facilitates end-to-end testing of web pages by allowing developers to control browser interactions.
You can execute your Mocha framework tests on HyperExecute via two different methods:
- Using Local System - You can use your own local machine to execute tests.
- Using Gitpod Platform - Execute tests using GitPod. (Requires a Gitpod account)
Download the Sample Repository
Download or Clone the code sample for the Mocha framework from the TestMu AI GitHub repository to run the tests on the HyperExecute.
 View on GitHub
If you are using your own project, make sure you update the Hub endpoint in your tests file.
By setting up the Hub endpoint, you establish the communication channel between your tests and the browser nodes, enabling effective test distribution and execution.
Configure the desired capabilities based on your test requirements. For example:
exports.capabilities = {
	"browserName": "Chrome",
	"browserVersion": "122.0",
	"LT:Options": {
		"username": "YOUR_USERNAME",
		"accessKey": "YOUR_ACCESS_KEY",
		"platformName": "Windows 10",
		"project": "Untitled",
		"w3c": true,
		"plugin": "node_js-mocha"
	}
};
You can also use dev and beta browser versions. To generate capabilities for your test requirements, you can use our inbuilt 🔗 Capabilities Generator.
Configure YAML in your Test Suite
Configure your YAML file as per your use cases using key value pairs.
In this sample YAML file, we have mentioned:
- version of the YAML file
- Timeouts for executing your project
- Mode of execution is Autosplit. You can also opt for Matrix or Hybrid mode.
- Pre and Post commands
- Reports and Artefacts that will be generated after the completion of tests
- and other necessary YAML Parameters
---
version: 0.1

runson: linux

globalTimeout: 90
testSuiteTimeout: 90
testSuiteStep: 90

autosplit: true

retryOnFailure: true
maxRetries: 1

concurrency: 2

pre:
  - npm install

cacheKey: '{{ checksum "package.json" }}'
cacheDirectories:
  - node_modules

testDiscovery:
  type: raw
  mode: remote
  command: grep -lr 'describe' specs/*.spec.js

testRunnerCommand: npm test $test

jobLabel: [puppeteer-Mocha, linux, autosplit]
Execute your Test Suite
NOTE : In case of MacOS, if you get a permission denied warning while executing CLI, simply run
chmod u+x ./hyperexecuteto allow permission. In case you get a security popup, allow it from your System Preferences → Security & Privacy → General tab.
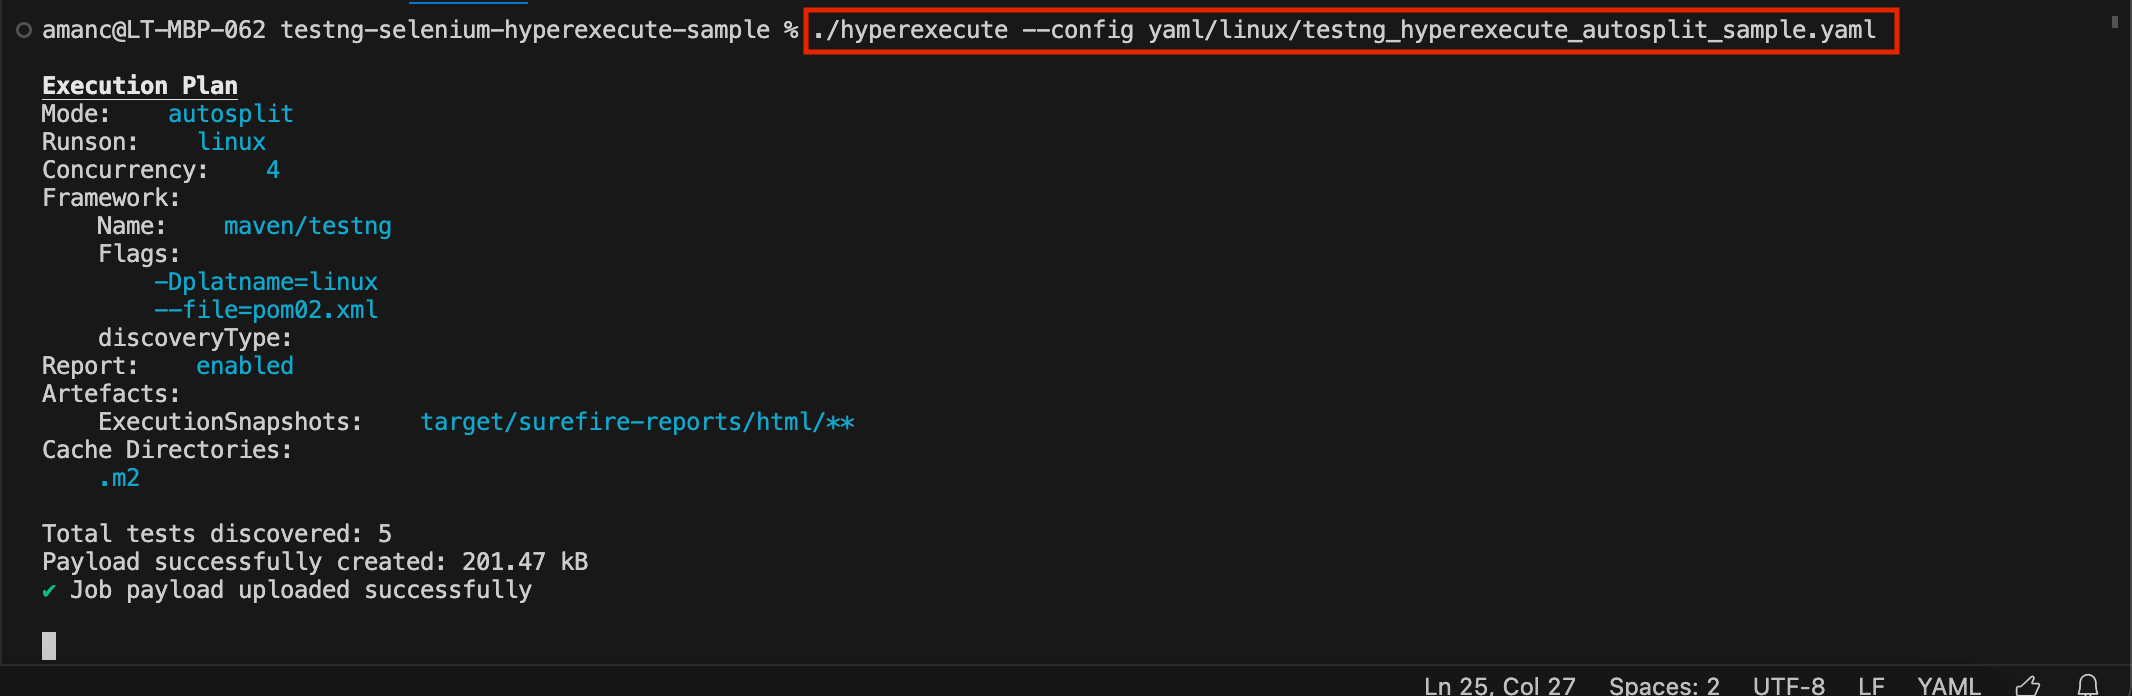
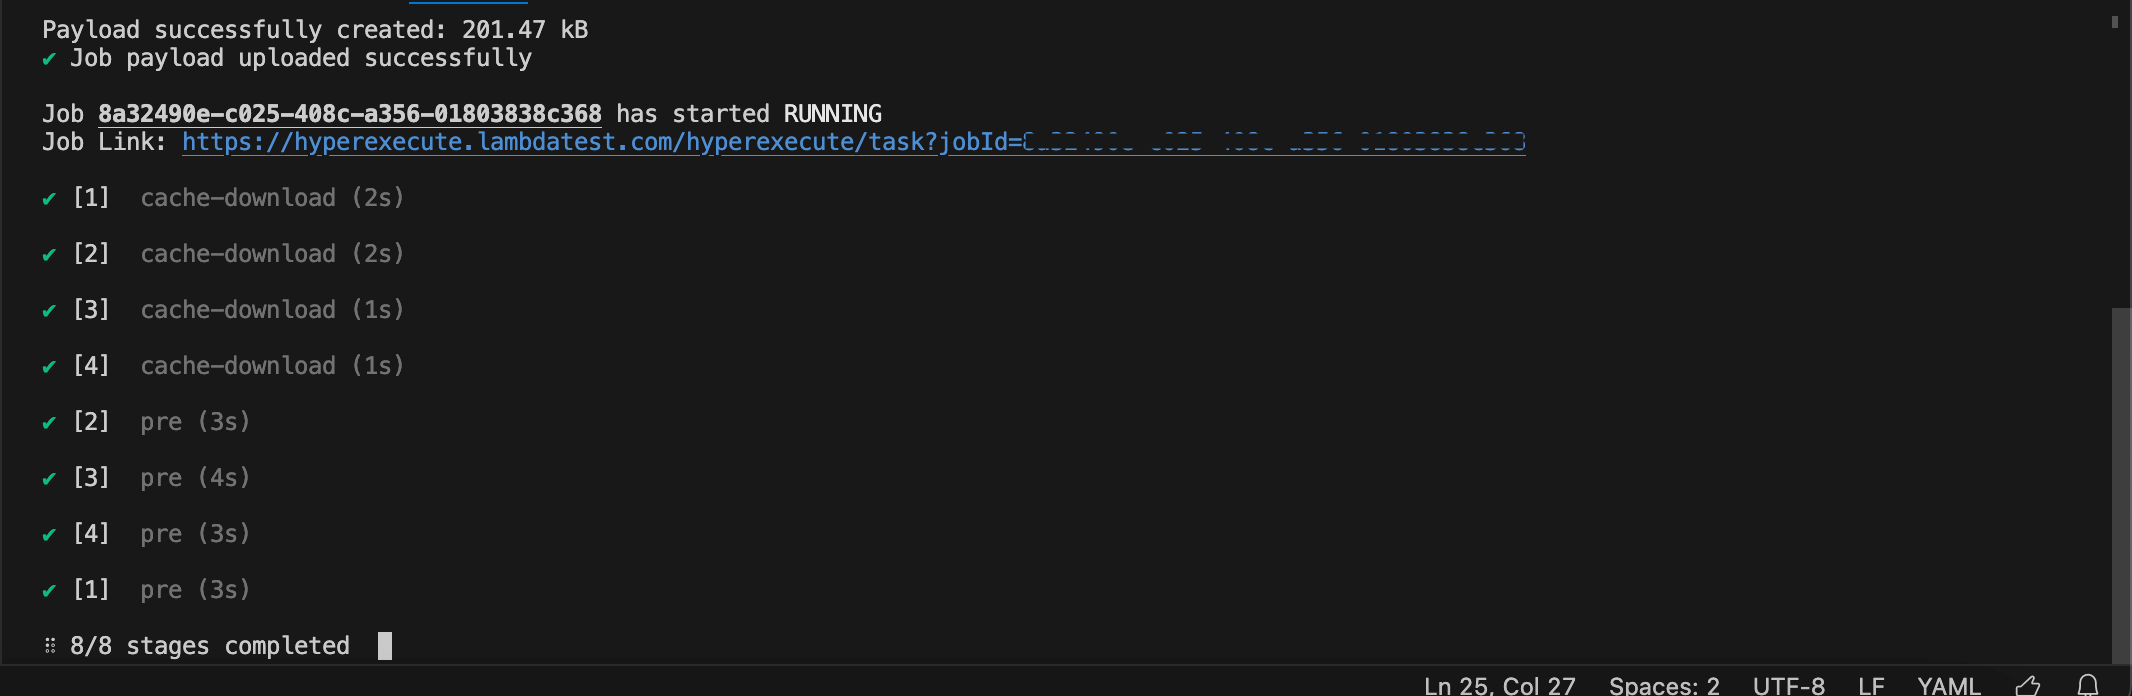
Run the below command in your terminal at the root folder of the project:
./hyperexecute --config RELATIVE_PATH_OF_YOUR_YAML_FILE
OR use this command if you have not exported your username and access key.
./hyperexecute --user undefined --key undefined --config RELATIVE_PATH_OF_YOUR_YAML_FILE
Monitor the Test Execution
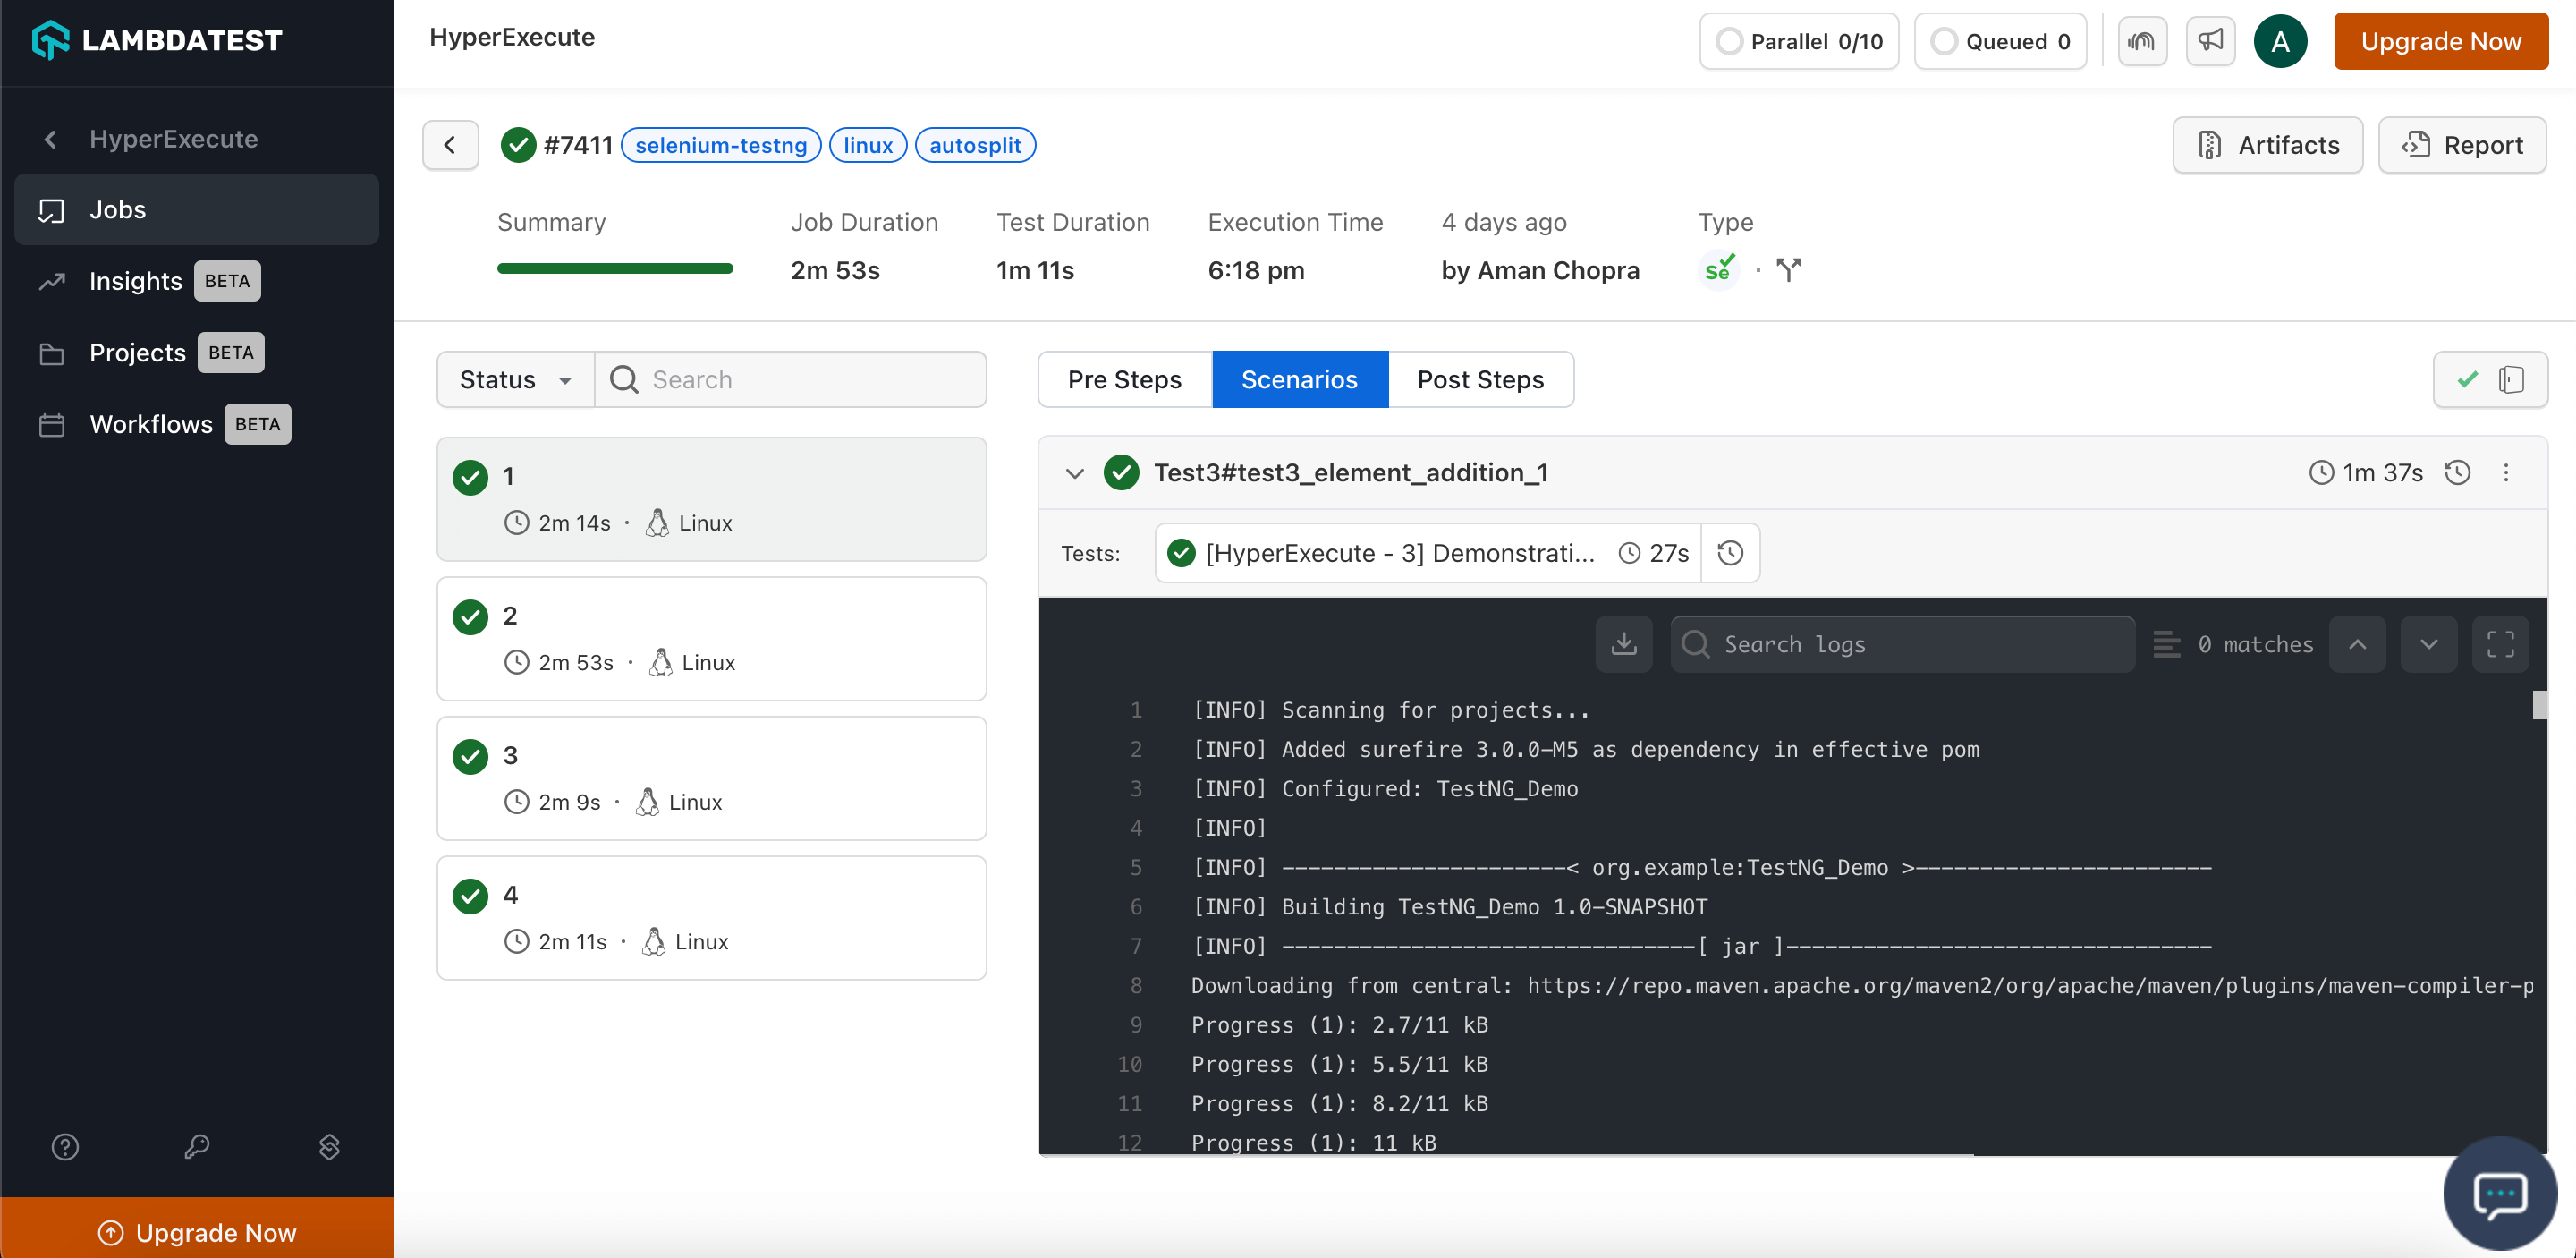
Visit the HyperExecute Dashboard and check your Job status.
Download Artifacts and Reports
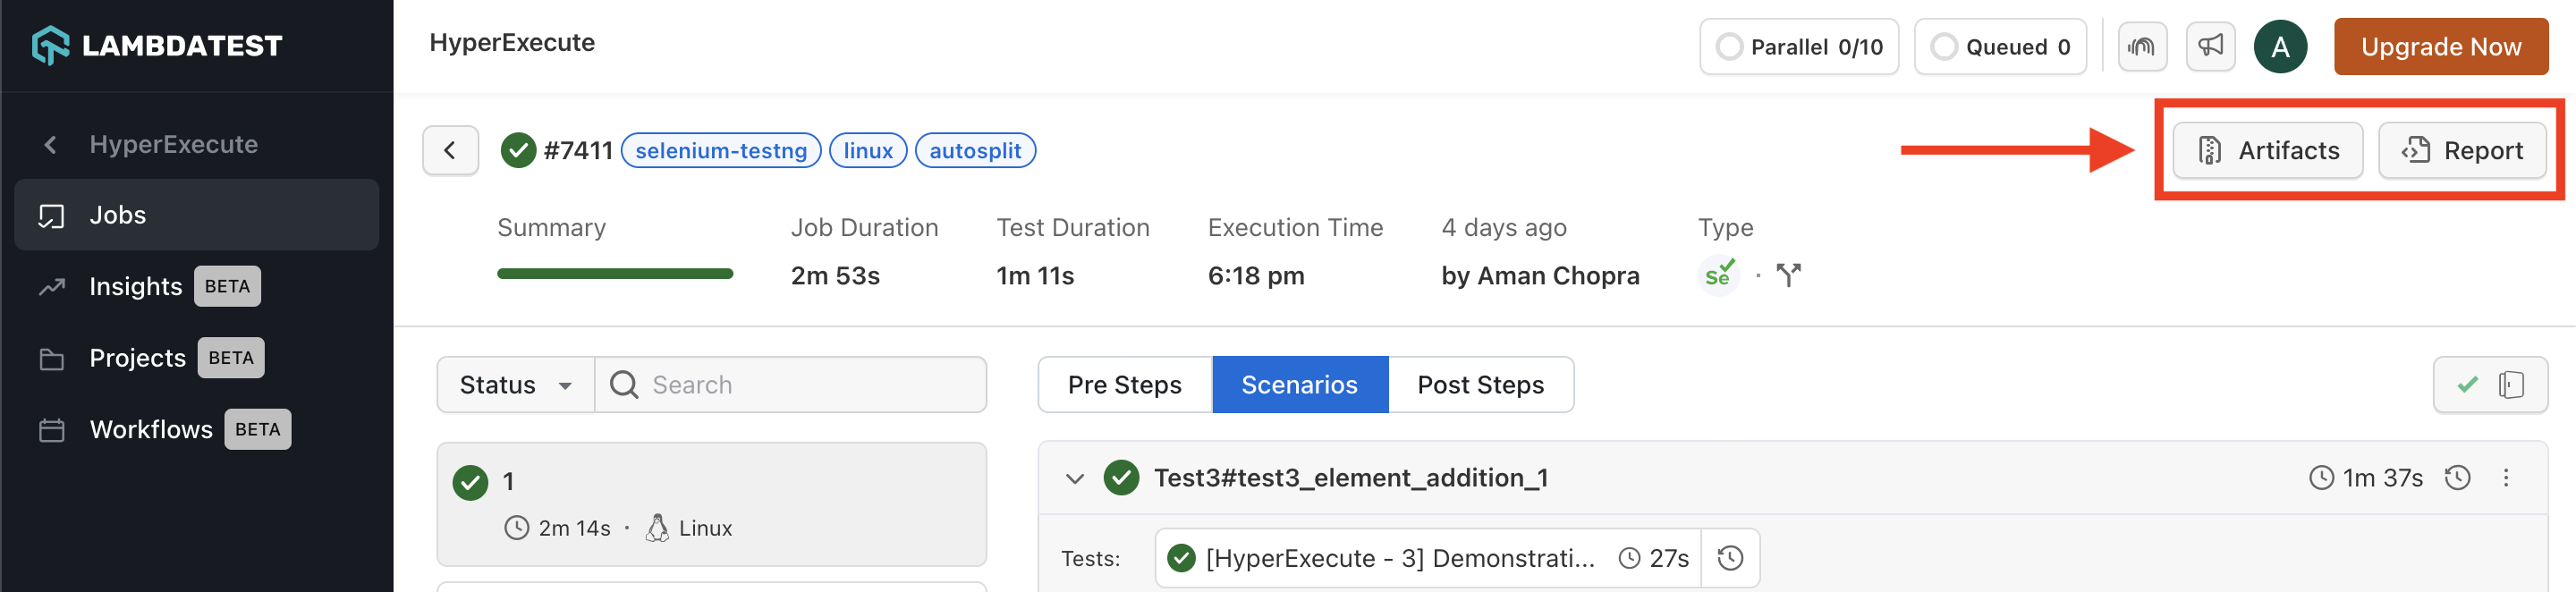
HyperExecute also facilitates the provision to download the Artifacts and Reports on your local machine. Click on the corresponding button to download your generated artifacts and reports.
Testing Using Gitpod
You can also use the Gitpod platform to execute our sample repository. It will fetch all the sample codebases and trigger the CLI to execute the tests.
Follow the below steps to run Test using Gitpod:
Step 1: Click 'Open in Gitpod' button. You will be redirected to Login/Signup page. This button is configured to redirect you to the Gitpod platform where you will be able to execute our sample repository.

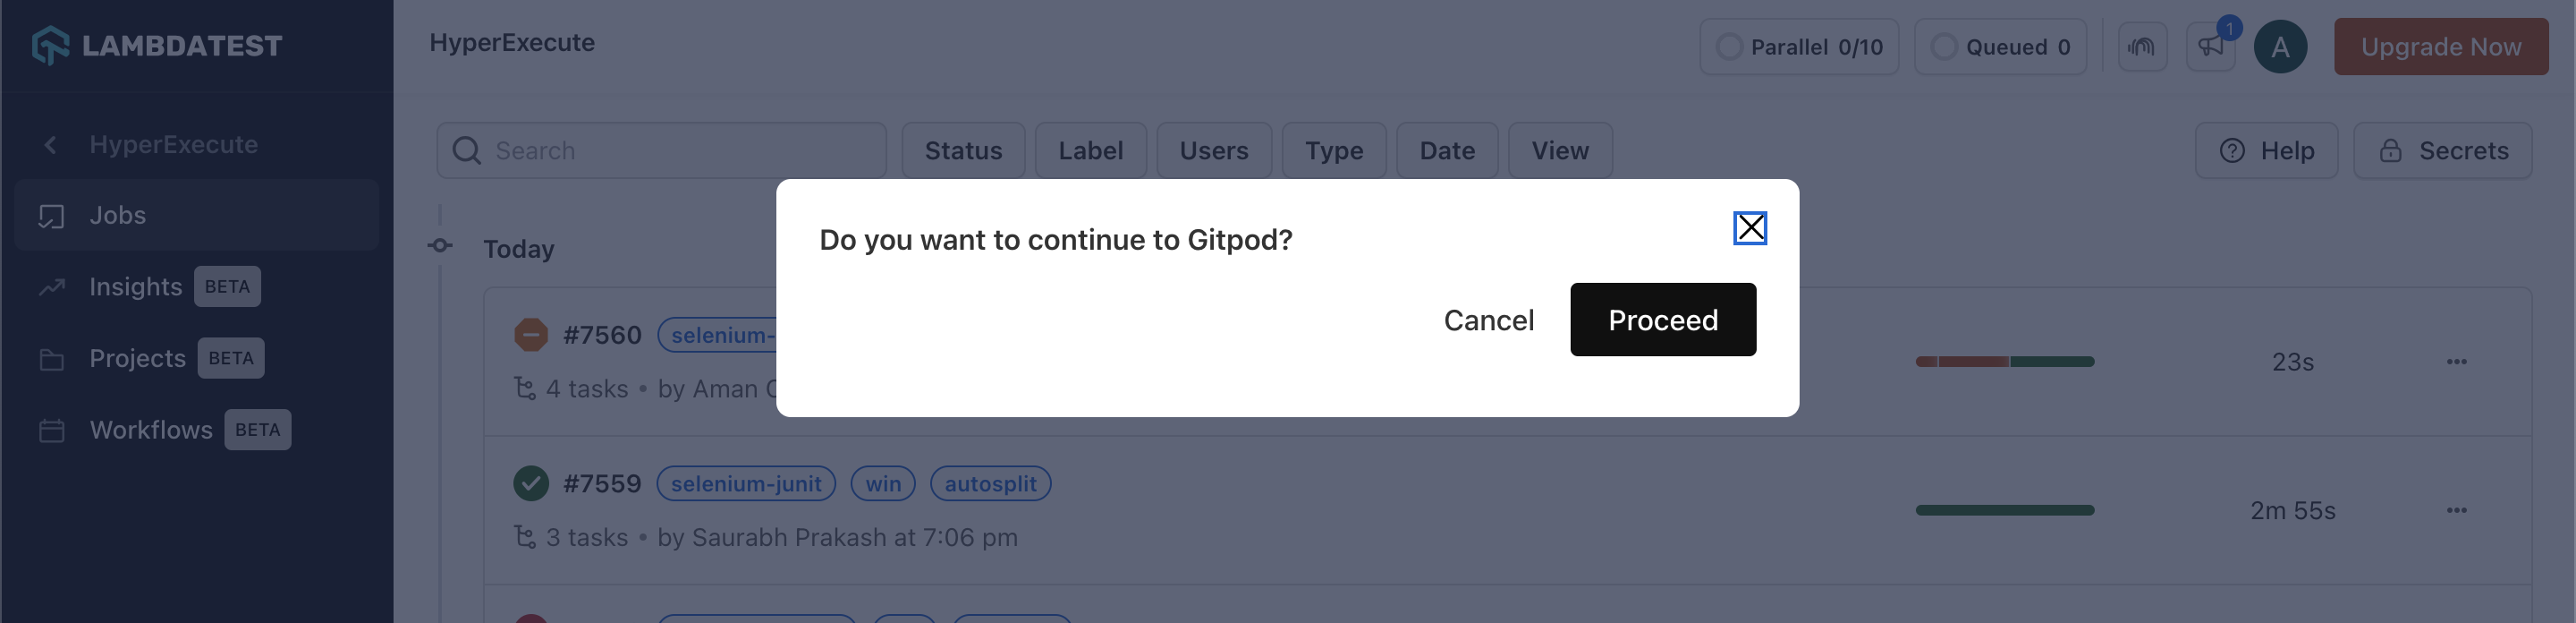
Step 2: Login with TestMu AI credentials. Once logged in, a pop-up confirmation will appear, asking you to 'Proceed' to the Gitpod editor in a new tab. The current tab will display the HyperExecute Dashboard.
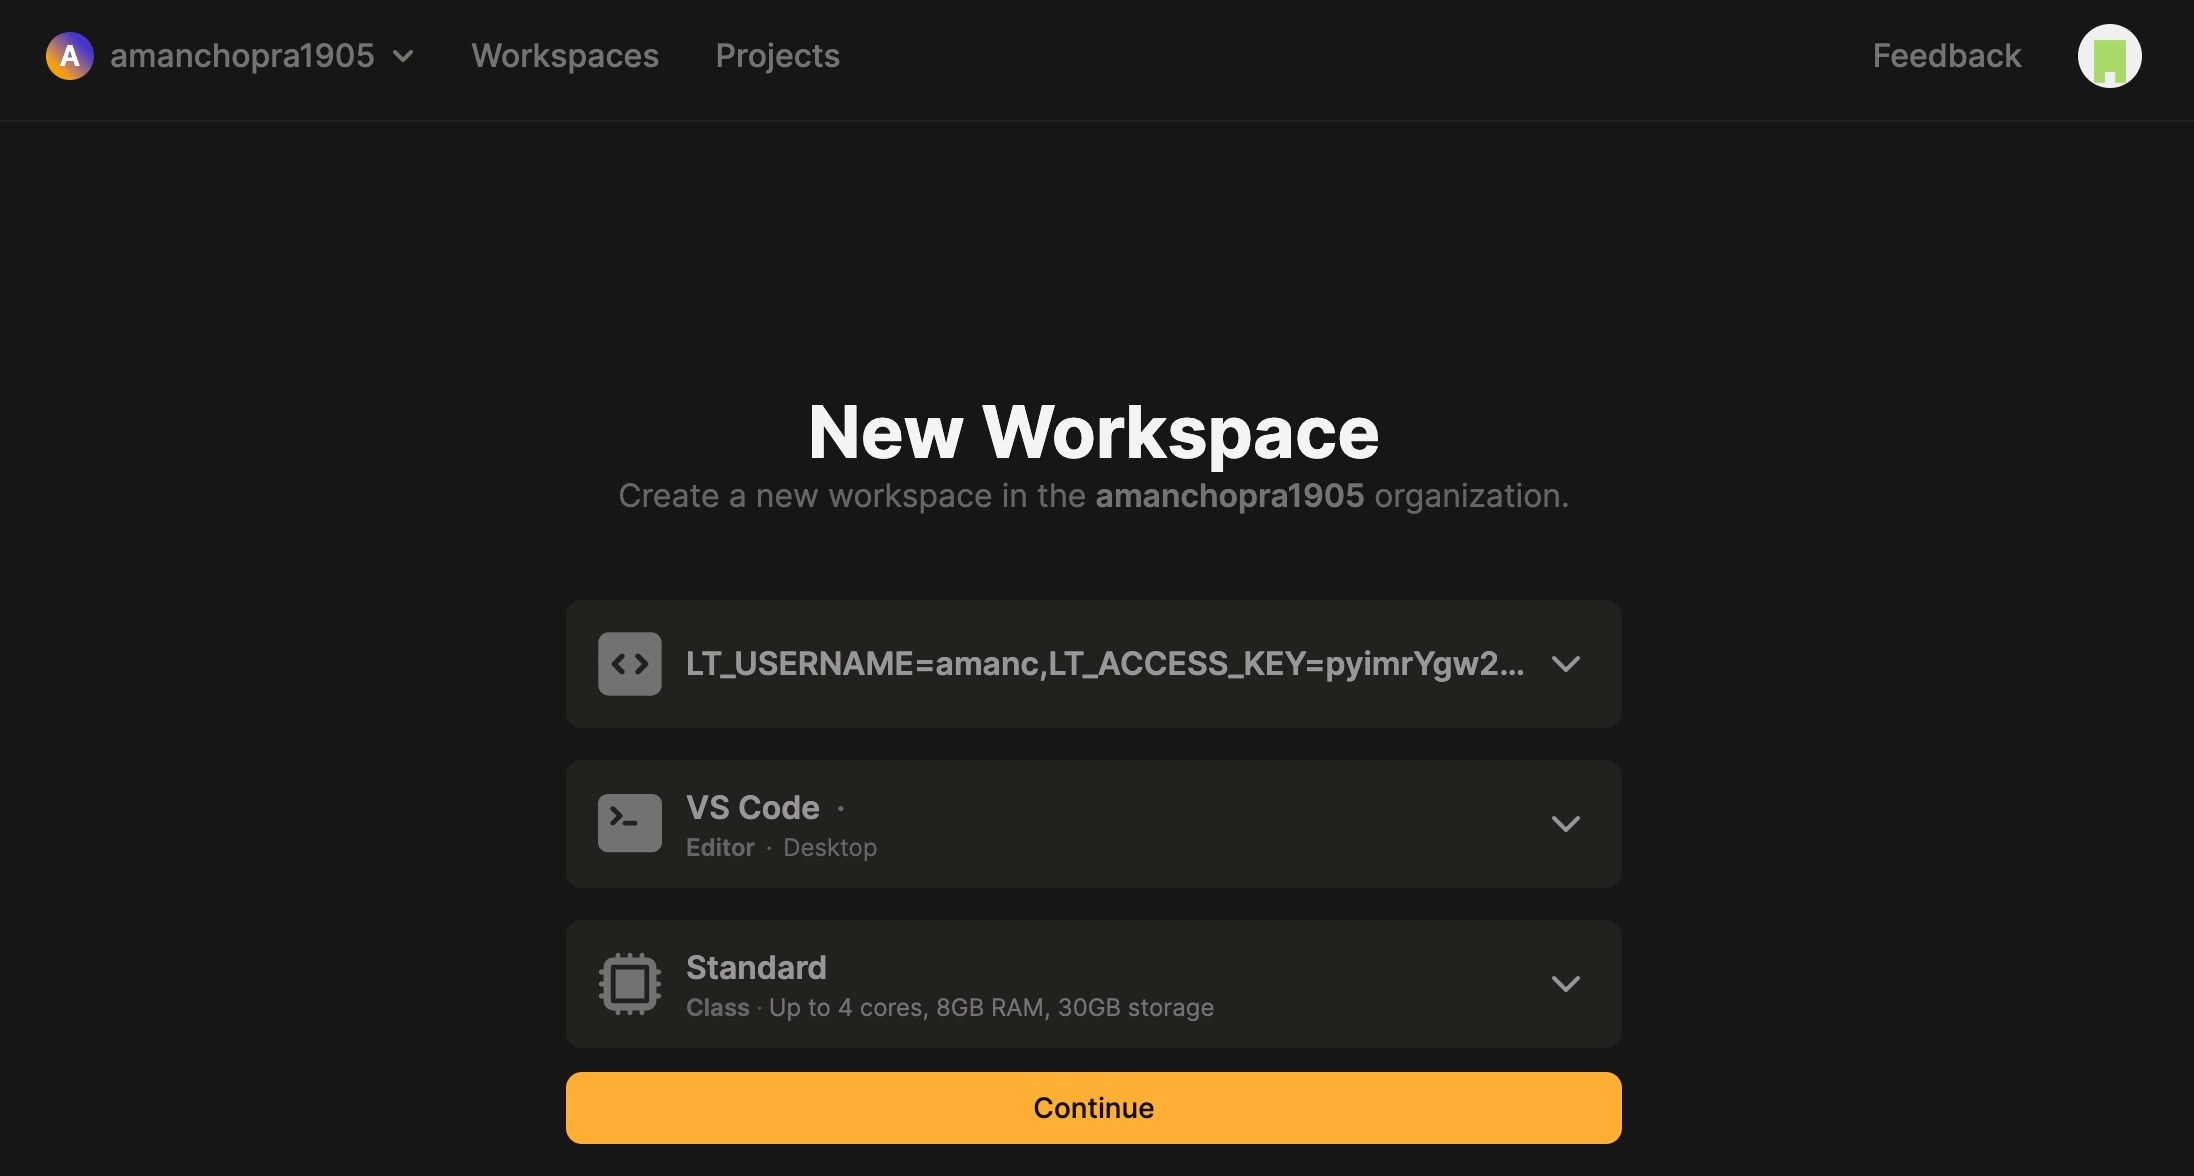
Step 3: Choose your preferred editor (we recommend VS Code Editor)
Step 4: As you are running a sample project, Fetching of the Test Scripts, HyperExecute YAML, HyperExecute CLI and Triggering your tests using the Execution Command will be automated.
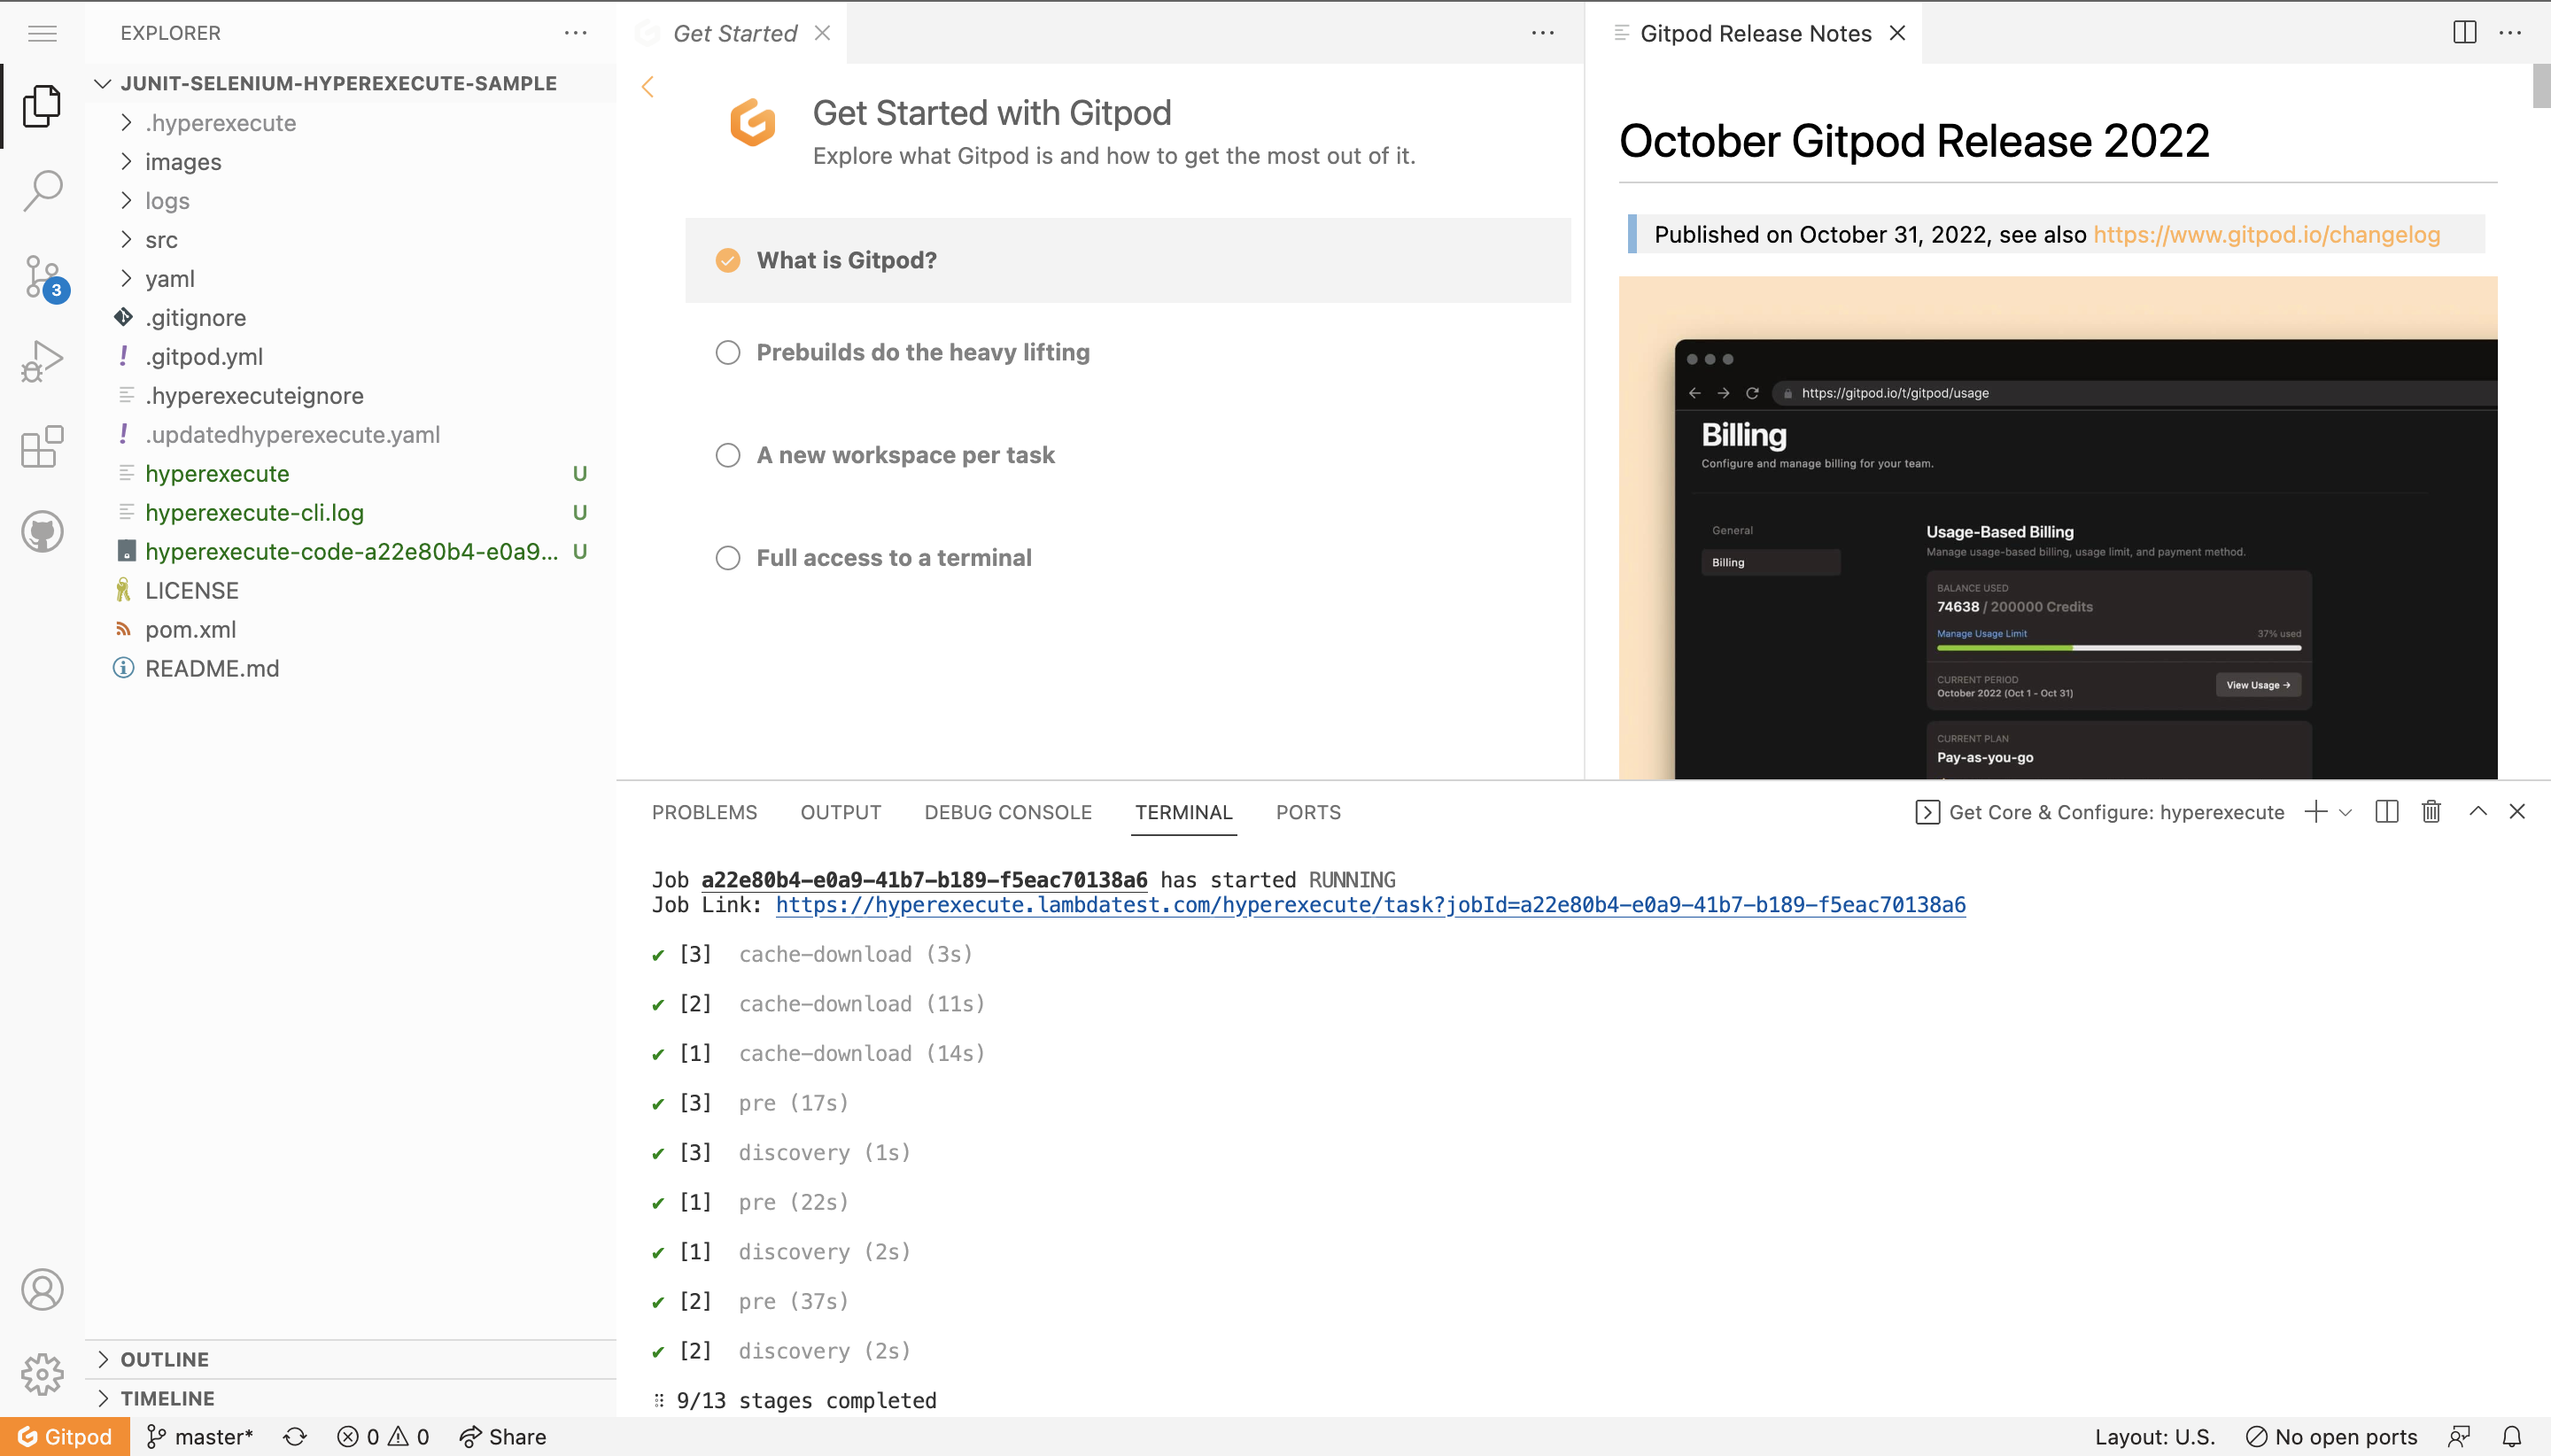
Step 5: Once you see the Job Link in the logs, you can visit the HyperExecute dashboard to see the tests getting executed.
You can also implement Secret Keys in your YAML file.
Navigation in Automation Dashboard
Every test run on the HyperExecute has a unique jobId associated with it. Each jobId can in turn constitute single (or multiple) groupId(s). You can visit HyperExecute Automation Dashboard for checking the status of the test execution.
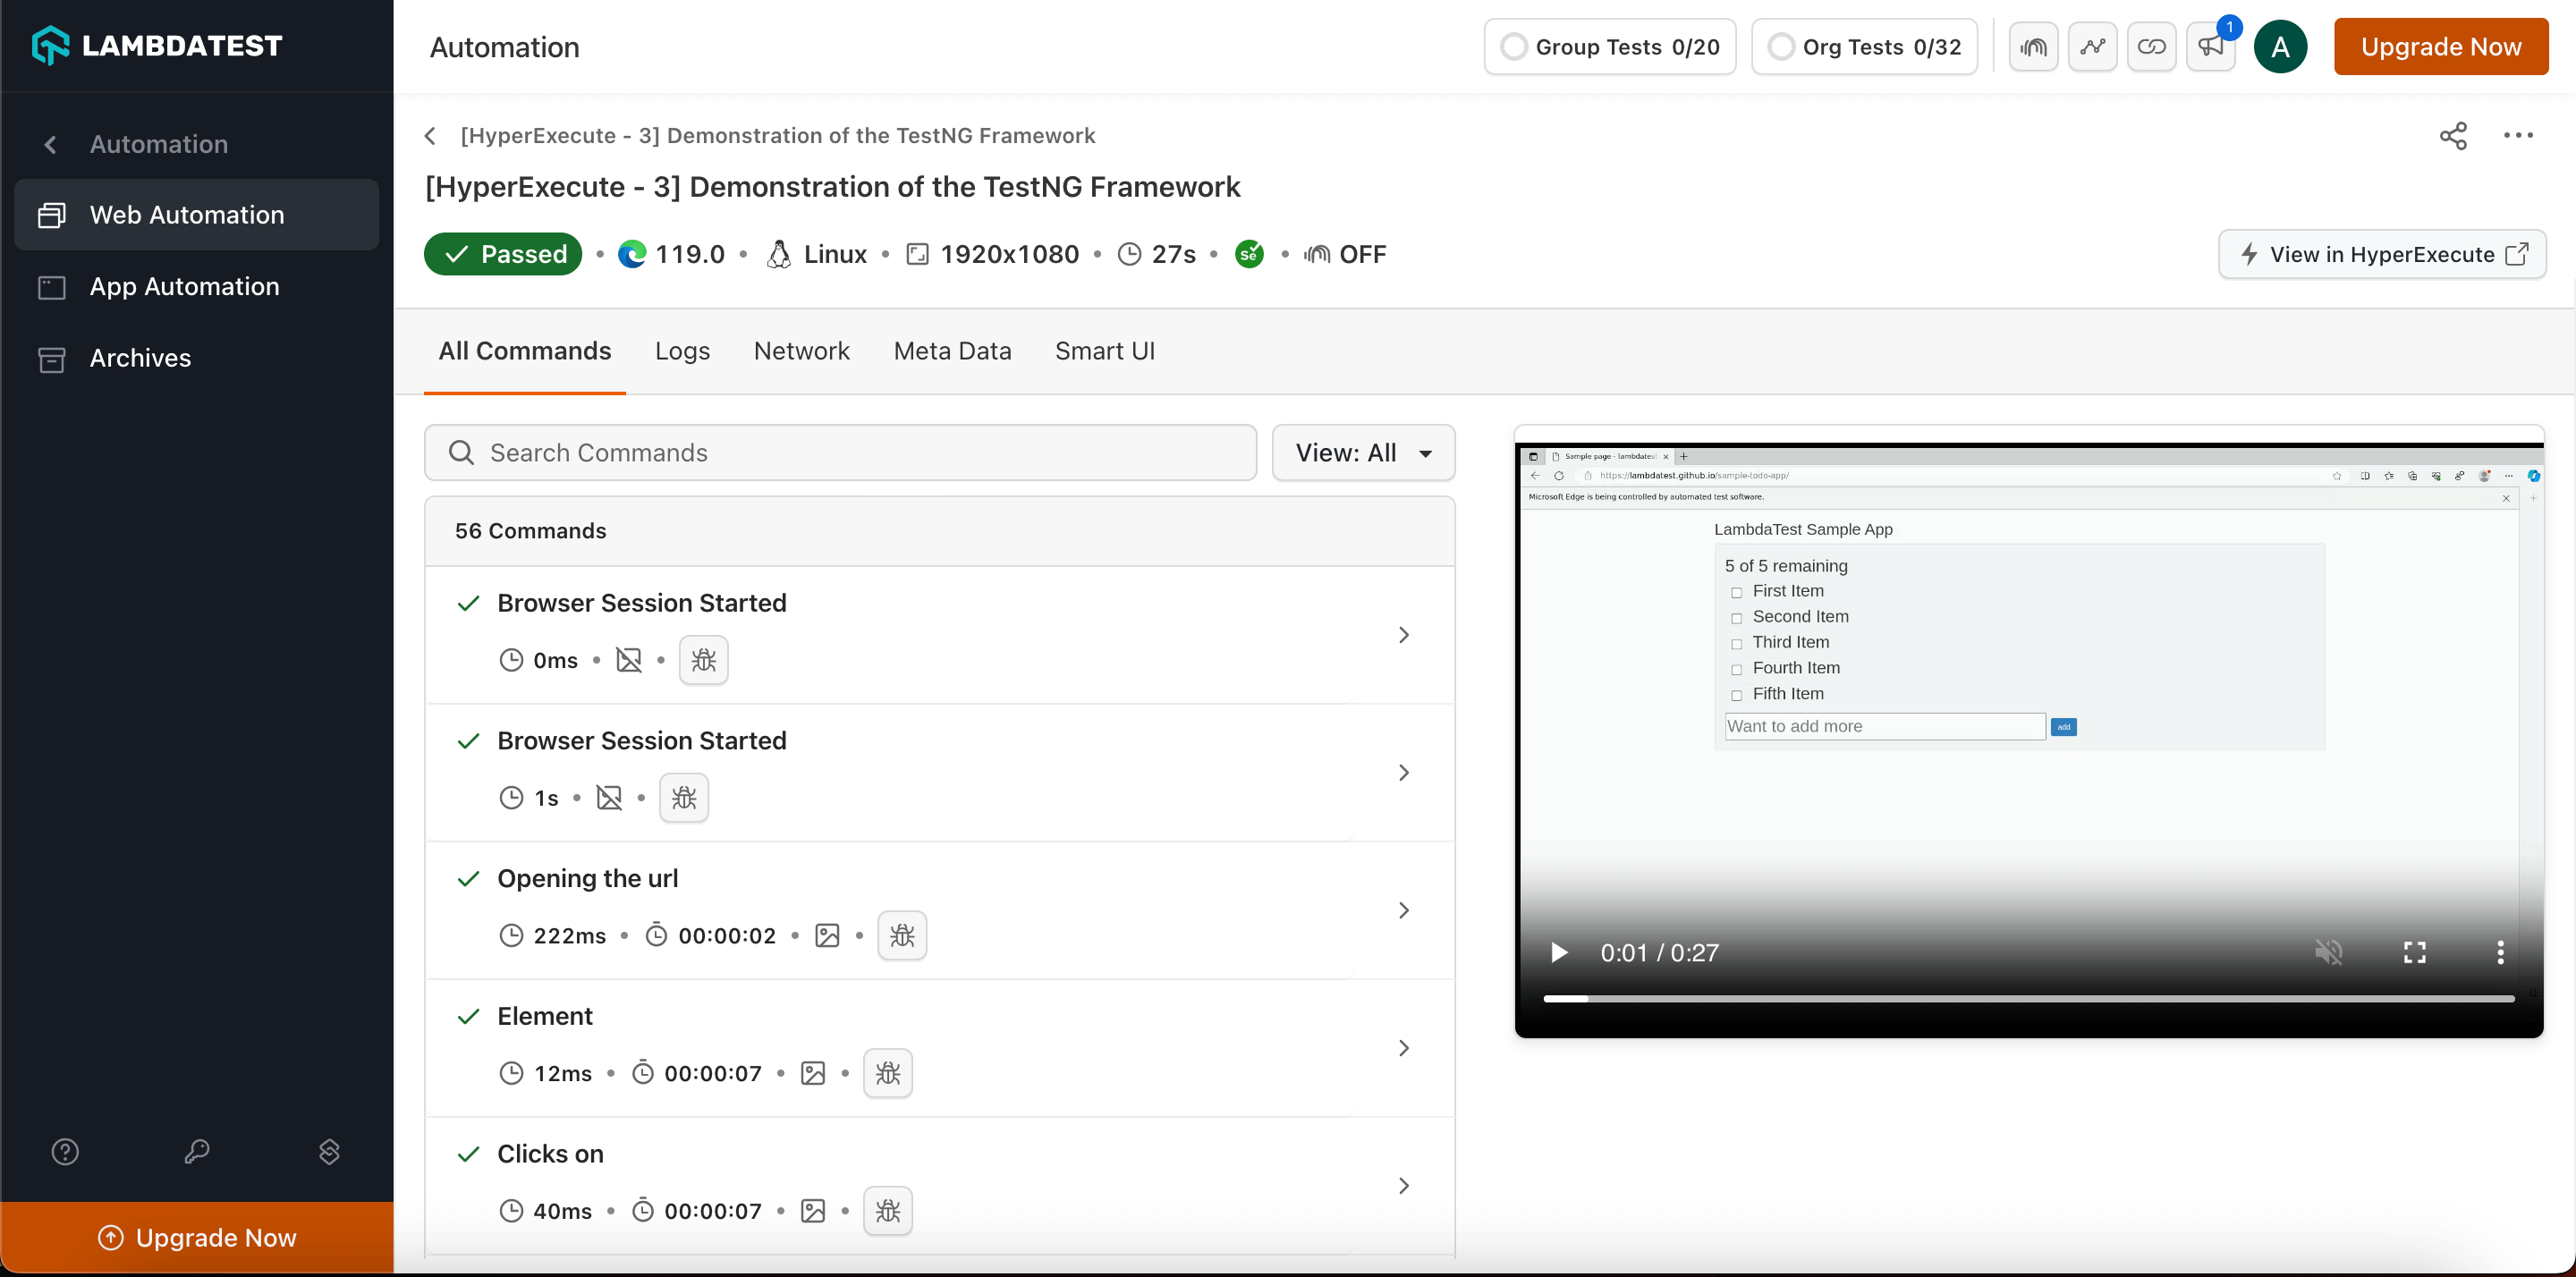
You can seamlessly navigate between JobId's and taskId's. You need to click on the testID to navigate from the HyperExecute logs to the Automation Dashboard.
The snapshot below shows the videos, logs and other meta data for that specific test_ID
Jest is a JavaScript testing framework commonly paired with Puppeteer for testing web applications. Specifically designed for JavaScript, Jest provides a simple and efficient platform for writing unit tests, integration tests, and end-to-end tests using Puppeteer.
You can execute your Jest framework tests on HyperExecute via two different methods:
- Using Local System - You can use your own local machine to execute tests.
- Using Gitpod Platform - Execute tests using GitPod. (Requires a Gitpod account)
Configure Your Test Suite
You can use your own project to configure and test it. For demo purposes, we are using the sample repository.
Download or Clone the code sample for the Jest framework from the TestMu AI GitHub repository to run the tests on the HyperExecute.
View on GitHubIf you are using your own project, make sure you update the Hub endpoint in your tests file.
By setting up the Hub endpoint, you establish the communication channel between your tests and the browser nodes, enabling effective test distribution and execution.
Configure the desired capabilities based on your test requirements. For example:
const capability = {
	"browserName": "Chrome",
	"browserVersion": "122.0",
	"LT:Options": {
		"username": "YOUR_USERNAME",
		"accessKey": "YOUR_ACCESS_KEY",
		"platformName": "Windows 10",
		"project": "Untitled",
		"w3c": true,
		"plugin": "node_js-jest"
	}
}
You can also use dev and beta browser versions. To generate capabilities for your test requirements, you can use our inbuilt 🔗 Capabilities Generator.
Configure YAML in your Test Suite
Configure your YAML file as per your use cases using key value pairs.
In this sample YAML file, we have mentioned:
- version of the YAML file
- Timeouts for executing your project
- Mode of execution is Autosplit. You can also opt for Matrix or Hybrid mode.
- Pre and Post commands
- Reports and Artefacts that will be generated after the completion of tests
- and other necessary YAML Parameters
version: 0.1

runson: linux

globalTimeout: 90
testSuiteTimeout: 90
testSuiteStep: 90

autosplit: true

retryOnFailure: true
maxRetries: 1

concurrency: 2

pre:
  - npm install

cacheKey: '{{ checksum "package.json" }}'
cacheDirectories:
  - node_modules

testDiscovery:
  type: raw
  mode: remote
  command: grep -lr 'describe' specs/*.spec.js

testRunnerCommand: npm test -- $test

jobLabel: [puppeteer-JestJS, linux, autosplit]
Execute your Test Suite
NOTE : In case of MacOS, if you get a permission denied warning while executing CLI, simply run
chmod u+x ./hyperexecuteto allow permission. In case you get a security popup, allow it from your System Preferences → Security & Privacy → General tab.
Run the below command in your terminal at the root folder of the project:
./hyperexecute --config RELATIVE_PATH_OF_YOUR_YAML_FILE
OR use this command if you have not exported your username and access key.
./hyperexecute --user undefined --key undefined --config RELATIVE_PATH_OF_YOUR_YAML_FILE
Monitor the Test Execution
Visit the HyperExecute Dashboard and check your Job status.
Download Artifacts and Reports
HyperExecute also facilitates the provision to download the Artifacts and Reports on your local machine. Click on the corresponding button to download your generated artifacts and reports.
Testing Using Gitpod
You can also use the Gitpod platform to execute our sample repository. It will fetch all the sample codebases and trigger the CLI to execute the tests.
Follow the below steps to run Test using Gitpod:
Step 1: Click 'Open in Gitpod' button. You will be redirected to Login/Signup page. This button is configured to redirect you to the Gitpod platform where you will be able to execute our sample repository.
Step 2: Login with TestMu AI credentials. Once logged in, a pop-up confirmation will appear, asking you to 'Proceed' to the Gitpod editor in a new tab. The current tab will display the HyperExecute Dashboard.
Step 3: Choose your preferred editor (we recommend VS Code Editor)
Step 4: As you are running a sample project, Fetching of the Test Scripts, HyperExecute YAML, HyperExecute CLI and Triggering your tests using the Execution Command will be automated.
Step 5: Once you see the Job Link in the logs, you can visit the HyperExecute dashboard to see the tests getting executed.
You can also implement Secret Keys in your YAML file.
Navigation in Automation Dashboard
Every test run on the HyperExecute has a unique jobId associated with it. Each jobId can in turn constitute single (or multiple) groupId(s). You can visit HyperExecute Automation Dashboard for checking the status of the test execution.
You can seamlessly navigate between JobId's and taskId's. You need to click on the testID to navigate from the HyperExecute logs to the Automation Dashboard.
The snapshot below shows the videos, logs and other meta data for that specific test_ID
CodeceptJS is a versatile JavaScript testing framework that supports Puppeteer for end-to-end testing of web applications. It introduces a human-readable syntax and a versatile architecture that allows writing tests in a natural language style.
You can execute your Codecept framework tests on HyperExecute via two different methods:
- Using Local System - You can use your own local machine to execute tests.
- Using Gitpod Platform - Execute tests using GitPod. (Requires a Gitpod account)
Configure Your Test Suite
You can use your own project to configure and test it. For demo purposes, we are using the sample repository.
Download or Clone the code sample for the CodeceptJS framework from the TestMu AI GitHub repository to run the tests on the HyperExecute.
View on GitHubIf you are using your own project, make sure you update the Hub endpoint in your tests file.
By setting up the Hub endpoint, you establish the communication channel between your tests and the browser nodes, enabling effective test distribution and execution.
You can also use dev and beta browser versions. To generate capabilities for your test requirements, you can use our inbuilt 🔗 Capabilities Generator.
Configure YAML in your Test Suite
Configure your YAML file as per your use cases using key value pairs.
In this sample YAML file, we have mentioned:
- version of the YAML file
- Timeouts for executing your project
- Mode of execution is Autosplit. You can also opt for Matrix or Hybrid mode.
- Pre and Post commands
- Reports and Artefacts that will be generated after the completion of tests
- and other necessary YAML Parameters
---
version: "0.1"

globalTimeout: 90
testSuiteTimeout: 90
testSuiteStep: 90

runson: linux

autosplit: true

retryOnFailure: false
maxRetries: 1

concurrency: 2

pre:
  - npm install

cacheKey: '{{ checksum "package.json" }}'
cacheDirectories:
  - node_modules

testDiscovery:
  type: raw
  mode: remote
  command: grep -lr 'Scenario' *test.js

testRunnerCommand: npx codeceptjs run $test --steps

jobLabel: [puppeteer-CodeceptJS, linux, autosplit]
Execute your Test Suite
NOTE : In case of MacOS, if you get a permission denied warning while executing CLI, simply run
chmod u+x ./hyperexecuteto allow permission. In case you get a security popup, allow it from your System Preferences → Security & Privacy → General tab.
Run the below command in your terminal at the root folder of the project:
./hyperexecute --config RELATIVE_PATH_OF_YOUR_YAML_FILE
OR use this command if you have not exported your username and access key.
./hyperexecute --user undefined --key undefined --config RELATIVE_PATH_OF_YOUR_YAML_FILE
Monitor the Test Execution
Visit the HyperExecute Dashboard and check your Job status.
Download Artifacts and Reports
HyperExecute also facilitates the provision to download the Artifacts and Reports on your local machine. Click on the corresponding button to download your generated artifacts and reports.
Testing Using Gitpod
You can also use the Gitpod platform to execute our sample repository. It will fetch all the sample codebases and trigger the CLI to execute the tests.
Follow the below steps to run Test using Gitpod:
Step 1: Click 'Open in Gitpod' button. You will be redirected to Login/Signup page. This button is configured to redirect you to the Gitpod platform where you will be able to execute our sample repository.
Step 2: Login with TestMu AI credentials. Once logged in, a pop-up confirmation will appear, asking you to 'Proceed' to the Gitpod editor in a new tab. The current tab will display the HyperExecute Dashboard.
Step 3: Choose your preferred editor (we recommend VS Code Editor)
Step 4: As you are running a sample project, Fetching of the Test Scripts, HyperExecute YAML, HyperExecute CLI and Triggering your tests using the Execution Command will be automated.
Step 5: Once you see the Job Link in the logs, you can visit the HyperExecute dashboard to see the tests getting executed.
You can also implement Secret Keys in your YAML file.
Navigation in Automation Dashboard
Every test run on the HyperExecute has a unique jobId associated with it. Each jobId can in turn constitute single (or multiple) groupId(s). You can visit HyperExecute Automation Dashboard for checking the status of the test execution.
You can seamlessly navigate between JobId's and taskId's. You need to click on the testID to navigate from the HyperExecute logs to the Automation Dashboard.
The snapshot below shows the videos, logs and other meta data for that specific test_ID
Once the CLI prints the job link, open the HyperExecute Dashboard to watch tests run in real time and download artifacts and reports.
Next Steps
Continue with these related guides:
 Chat with Us
 Ask the Community