How to Run Maestro Tests on HyperExecute
Overview
Run your Maestro tests on HyperExecute with YAML 0.2. The Prerequisites, CLI setup, and app upload apply to every run. From there, execute your suite as standard Maestro flows, or with Maestro and Cucumber (BDD) if your tests are written in Gherkin. Both approaches conclude with the shared reporting step.
Prerequisites
To run the Tests on HyperExecute from your Local System, you are required:
- Your TestMu AI Username and Access key
- HyperExecute CLI in order to initiate a test execution Job .
- Setup the Environmental Variable
- HyperExecute YAML file which contains all the necessary instructions.
Setting Up HyperExecute CLI for Maestro
The CLI triggers your tests on HyperExecute. Download the binary on the host system and keep it in the root directory of your test suite.
You can download the CLI for your desired platform from the links below:
Uploading Your App for Maestro
Upload your android application (.apk file) or iOS application (.ipa file) to the TestMu AI servers using our REST API. You need to provide your Username and AccessKey in the format Username:AccessKey in the cURL command for authentication.
Enter your local path of the code repository instead of <YOUR_LOCAL_APP_PATH> in the below cURL command.
curl -u "undefined:undefined" -X POST "https://manual-api.lambdatest.com/app/upload/realDevice" -F "appFile=@"<YOUR_LOCAL_APP_PATH>"" -F "name="sampleApp""
Response of above cURL will be a JSON object containing the
App IDof the format -<APP123456789012345678901234567>and will be used in the next step.
Running Maestro Tests
Your tests are plain Maestro flow files that run directly on the grid, with no BDD layer on top.
Setting Up Your Test Suite
You can use your own project to configure and test it. For demo purposes, we use the sample repository.
Download or Clone the code sample for the Maestro framework from the TestMu AI GitHub repository to run the tests on the HyperExecute.
 View on GitHub
Configuring the HyperExecute YAML
Enter your APP_ID in the YAML file that you fetched when uploading your application. Choose your target device below.
- Android-Emulator
- Android-Real Device
- iOS-Simulator
To enable this for your organizaton, connect with us through our 24/7 chat support or drop us an email to support@testmuai.com.
loading...
loading...
To enable this for your organizaton, connect with us through our 24/7 chat support or drop us an email to support@testmuai.com.
loading...
HyperExecute now supports tunnel capabilities for Maestro tests running on both virtual devices and real devices using the Raw Framework configuration.
Running Tests on iOS Virtual Devices
To run tests on iOS Virtual Devices, make the following changes in your hyperexecute.yaml file:
- Change the
runsonkey toios26. - Set the
devicesarray to["iPhone 17"].
Here is the complete hyperexecute.yaml for running Maestro tests on iOS Virtual Devices:
# Define the version of the configuration file
version: "0.2"

# Enable autosplit for test execution
autosplit: true

# Set the concurrency level for test execution (2 devices in parallel)
concurrency: 2

# Specify the target platform for test execution (iOS in this case)
# runson: ios
runson: ios26

# Enable dynamic allocation of resources
dynamicAllocation: true

# Test framework configuration
framework:
  # Name of the test framework (raw in this case)
  name: raw
  args:
    # List of devices to run tests on (iPhone 17 on iOS 26.0 in this case)
    # devices: [".*-.*", ".*-.*", ".*-.*"]
    devices: ["iPhone 17"]
    # devices: [".*-26.0"]
    # Enable or disable video recording support
    video: true
    # Enable or disable device log support
    deviceLog: true
    # App ID to be installed (mandatory field, using <app_id>)
    # x86 build
    # appId: lt://APP10160362031781245339521143 #Need to upload .zip file
    # ARM Build for iOS 26.0 & above
    appId: lt://APP123456789012345678901234567
    # Build name for identification on the automation dashboard
    buildName: maestro-t1
    # Timeout for device queue
    queueTimeout: 600
    # Configuration fields specific to running raw tests
    # region: ap
    disableReleaseDevice: true
    reservation: false
    isRealMobile: false
    network: true
    platformName: ios

env:
  MAESTRO: true
  MAESTRO_LOGS_DIR: MaestroLogs

# Pre-install required dependencies using pip
# will need java and maestro inside the container
pre:
  - chmod +x maestro-test/setup-script-iOS.sh
  - chmod +x ./maestro-test/runTest_ios.sh
  - ./maestro-test/setup-script-iOS.sh

# Test discovery configuration
testDiscovery:
  # Command to discover tests from the test.txt file
  command: cat ./maestro-test/discover-iOS.txt
  # Test discovery mode can be static/dynamic
  mode: static
  # Test type is raw (custom test implementation)
  type: raw

# Command to run the tests using the testRunnerCommand
testRunnerCommand: ./maestro-test/runTest_ios.sh $test

# Only report the status of the test framework
frameworkStatusOnly: true

report: true
partialReports:
  - location: .
    type: xml
    frameworkName: junit

jobLabel: ['HYP', 'Maestro', 'iOS', Simulator]
Ensure that the app is built for ARM or Universal (Dual-Architecture) and not as an x86-only binary. As shown in the appId field above, use the ARM build for iOS 26.0 and above.
Executing Your Test Suite
VerifiedNOTE : In case of MacOS, if you get a permission denied warning while executing CLI, simply run
chmod u+x ./hyperexecuteto allow permission. In case you get a security popup, allow it from your System Preferences → Security & Privacy → General tab.
./hyperexecute --user undefined --key undefined --config RELATIVE_PATH_OF_YOUR_YAML_FILE
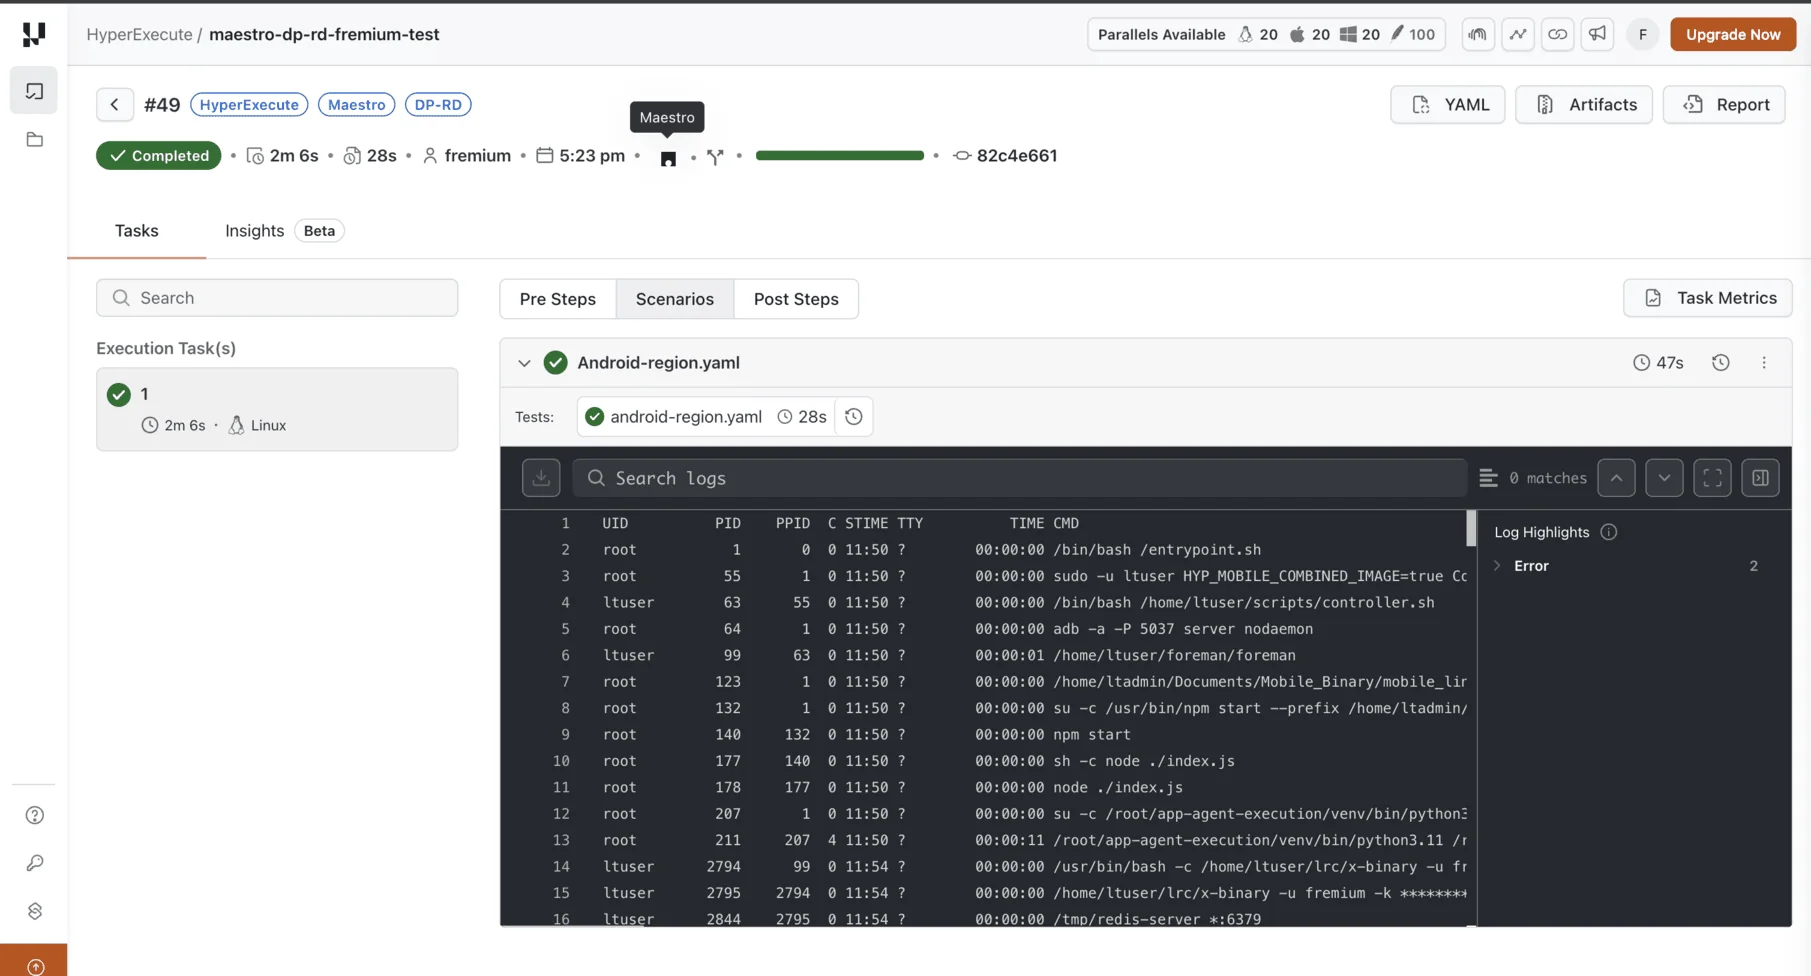
When the job completes, the HyperExecute dashboard shows your Maestro run and its status:
Running Maestro Tests with Cucumber BDD
Your tests are Gherkin .feature files, and Cucumber runs the same Maestro flows underneath. Compared to the Maestro path above, only the test suite layout and a couple of YAML keys change.
Setting Up Your Test Suite
You can use your own project. For demo purposes, we use the Maestro + Cucumber sample repository.
Download or clone the Maestro + Cucumber sample from the TestMu AI GitHub repository to run the tests on HyperExecute.
View on GitHub
The suite is organized so that Cucumber sits on top of Maestro:
| Path | Purpose |
|---|---|
features/ | Gherkin .feature files, one scenario per behavior |
step_definitions/ | Glue code that maps each Gherkin step to a Maestro flow |
flows/ | The underlying Maestro flow files |
cucumber.js | Cucumber profiles (android, ios) |
A feature file reads as plain behavior:
@android @navigation
Feature: Navigation

  @regression
  Scenario: User opens search from the home screen
    Given the Wikipedia app is installed
    When I launch the app
    And I skip onboarding if shown
    And I tap the search icon
    Then the search input should be visible
Configuring the HyperExecute YAML
The Cucumber YAML uses the same raw framework as the Maestro flow, with a few additions so cucumber-js can drive Maestro:
- A
runtimeblock (Java + Node) is added socucumber-jscan run. - Tests are discovered dynamically:
testDiscovery.commandruns./discover/<platform>.sh, which lists the.featurefiles to execute. testRunnerCommandruns each feature through Cucumber via./support/run-<target>.sh $test.partialReportsreads the JUnit XML that Cucumber writes to thereports/folder.
- Android-Emulator
- Android-Real Device
- iOS-Simulator
loading...
loading...
loading...
The Cucumber sample installs the app with appPath (drop your build into the apps/ folder). To run against a build you already uploaded, replace appPath with appId: lt://<APP_ID>.
Executing Your Test Suite
Run the CLI exactly as in the Maestro section, pointing --config at your Cucumber hyperexecute.yaml:
./hyperexecute --user undefined --key undefined --config RELATIVE_PATH_OF_YOUR_YAML_FILE
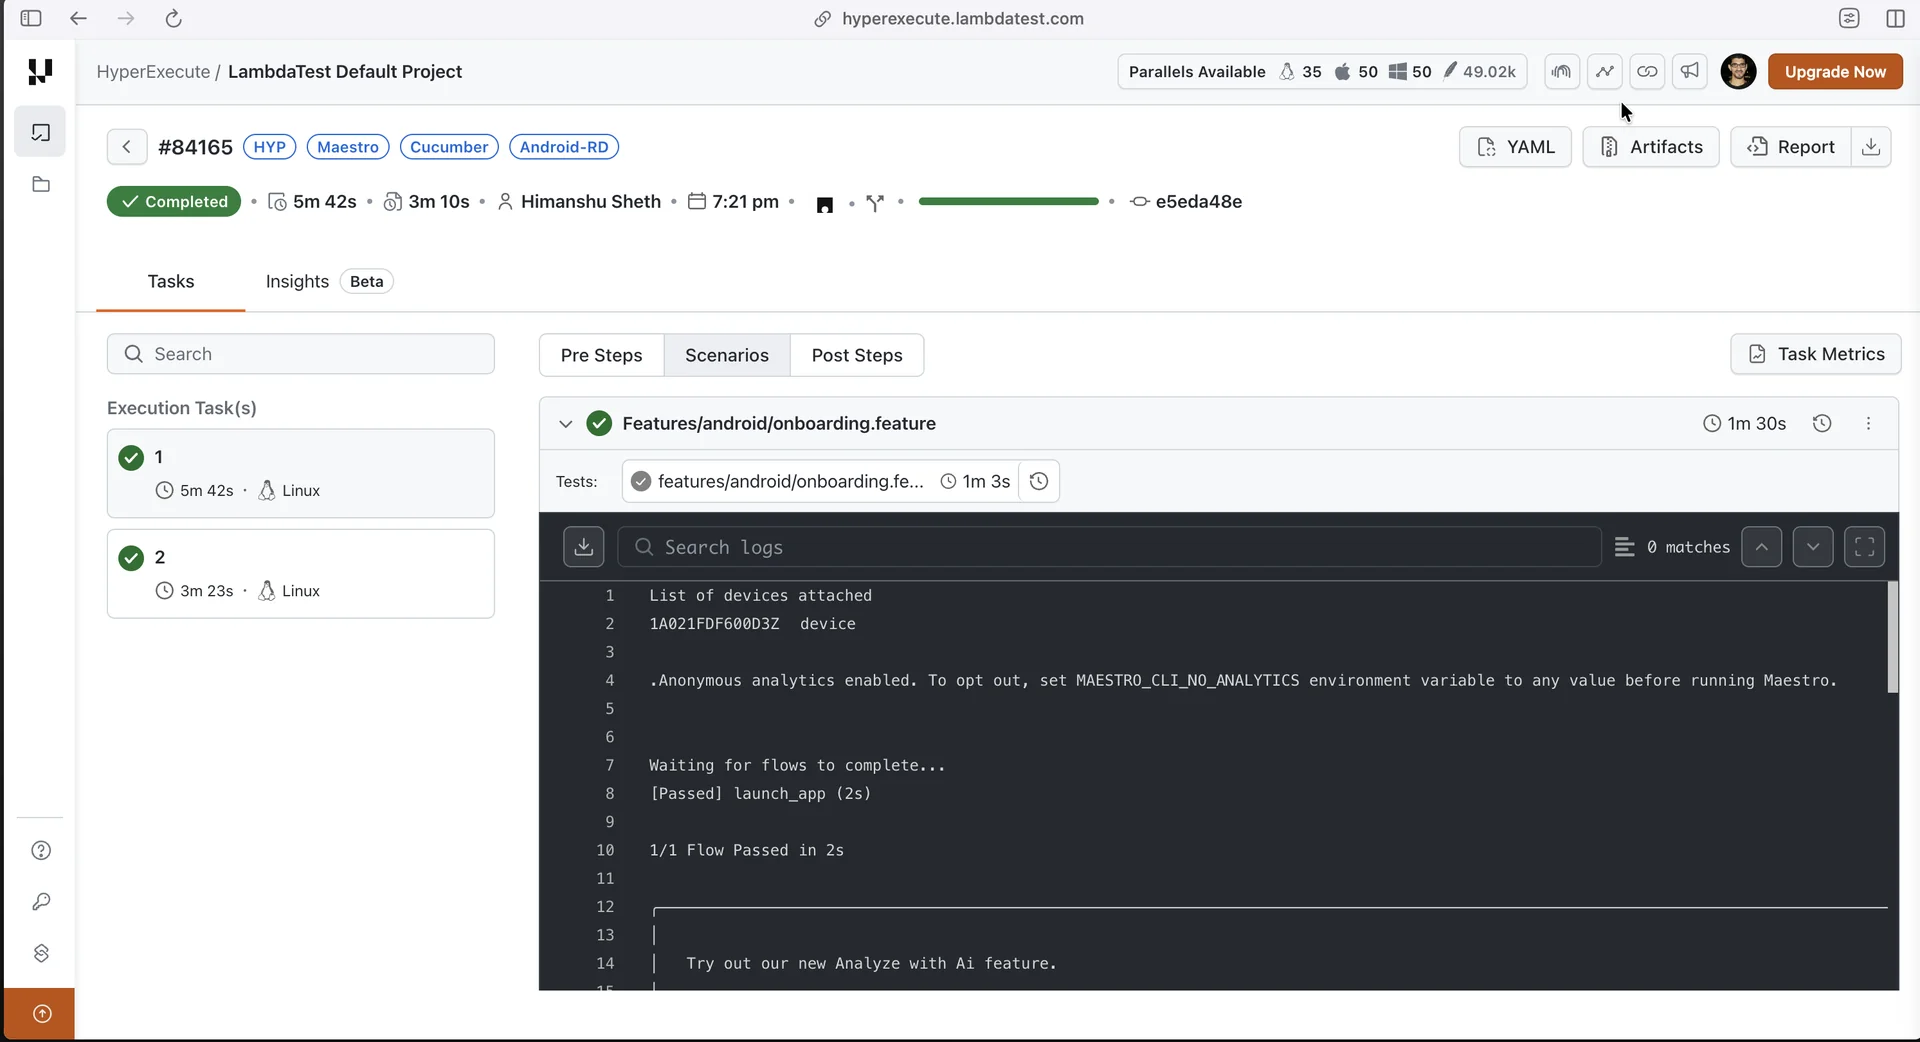
When the job completes, the HyperExecute dashboard shows your Cucumber run with each feature scenario and its status:
Generating the JUnit XML Report for Maestro
Both approaches feed HyperExecute a JUnit XML report through partialReports, with a small difference in setup:
- Maestro: add the
--format junitflag torunTest.sh(steps below). - Maestro + Cucumber: reporting is already wired.
./support/run-<target>.shrunscucumber-jswith--format junit:reports/<feature>.xml, and the YAML'spartialReports(pointing atreports/) picks it up. You can skip step 1 below.
- Update the
runTest.shfile to include the--format junitflag in the maestro test command:
/home/ltuser/.maestro/bin/maestro test $1 --debug-output ./MaestroLogs --format junit
The above command will generate a report.xml file in the root directory after each test execution. Here is the complete reference of the runTest.sh file:
loading...
When running on iOS real devices, you need to use a dedicated script since the execution flow differs slightly from iOS simulators and Android.
Verifiedloading...
- Update your HyperExecute YAML file to enable the native reporting in HyperExecute using the generated JUnit XML files.
report: true
partialReports:
  - location: .
    type: xml
    frameworkName: junit
📘 Use Cases
Use Case 1: One Test per Task
If you're executing one test per task, a single report.xml will be generated per job. These individual reports can then be merged later for a consolidated result.
Use Case 2: Multiple Tests on the same Task
In this case, the report.xml file gets overwritten after each test execution. This results in only the last test's results being preserved. To prevent overwriting, update your testRunnerCommand in the hyperexecute.yaml file to rename the report after each test:
testRunnerCommand: ./maestro-test/runTest.sh $test && mv report.xml $test.xml
This ensures that each test result is saved with a unique name like test1.xml, test2.xml, etc.
Launching Pre-Installed Apps with Maestro
In some cases, you may want to test against a pre-installed application on the device (instead of uploading and installing a new APK/IPA). Maestro supports this by allowing you to specify the app’s package identifier (Android) or bundle identifier (iOS) in your test configuration.
Identifying the App ID (Package Name / Bundle ID)
For Android:
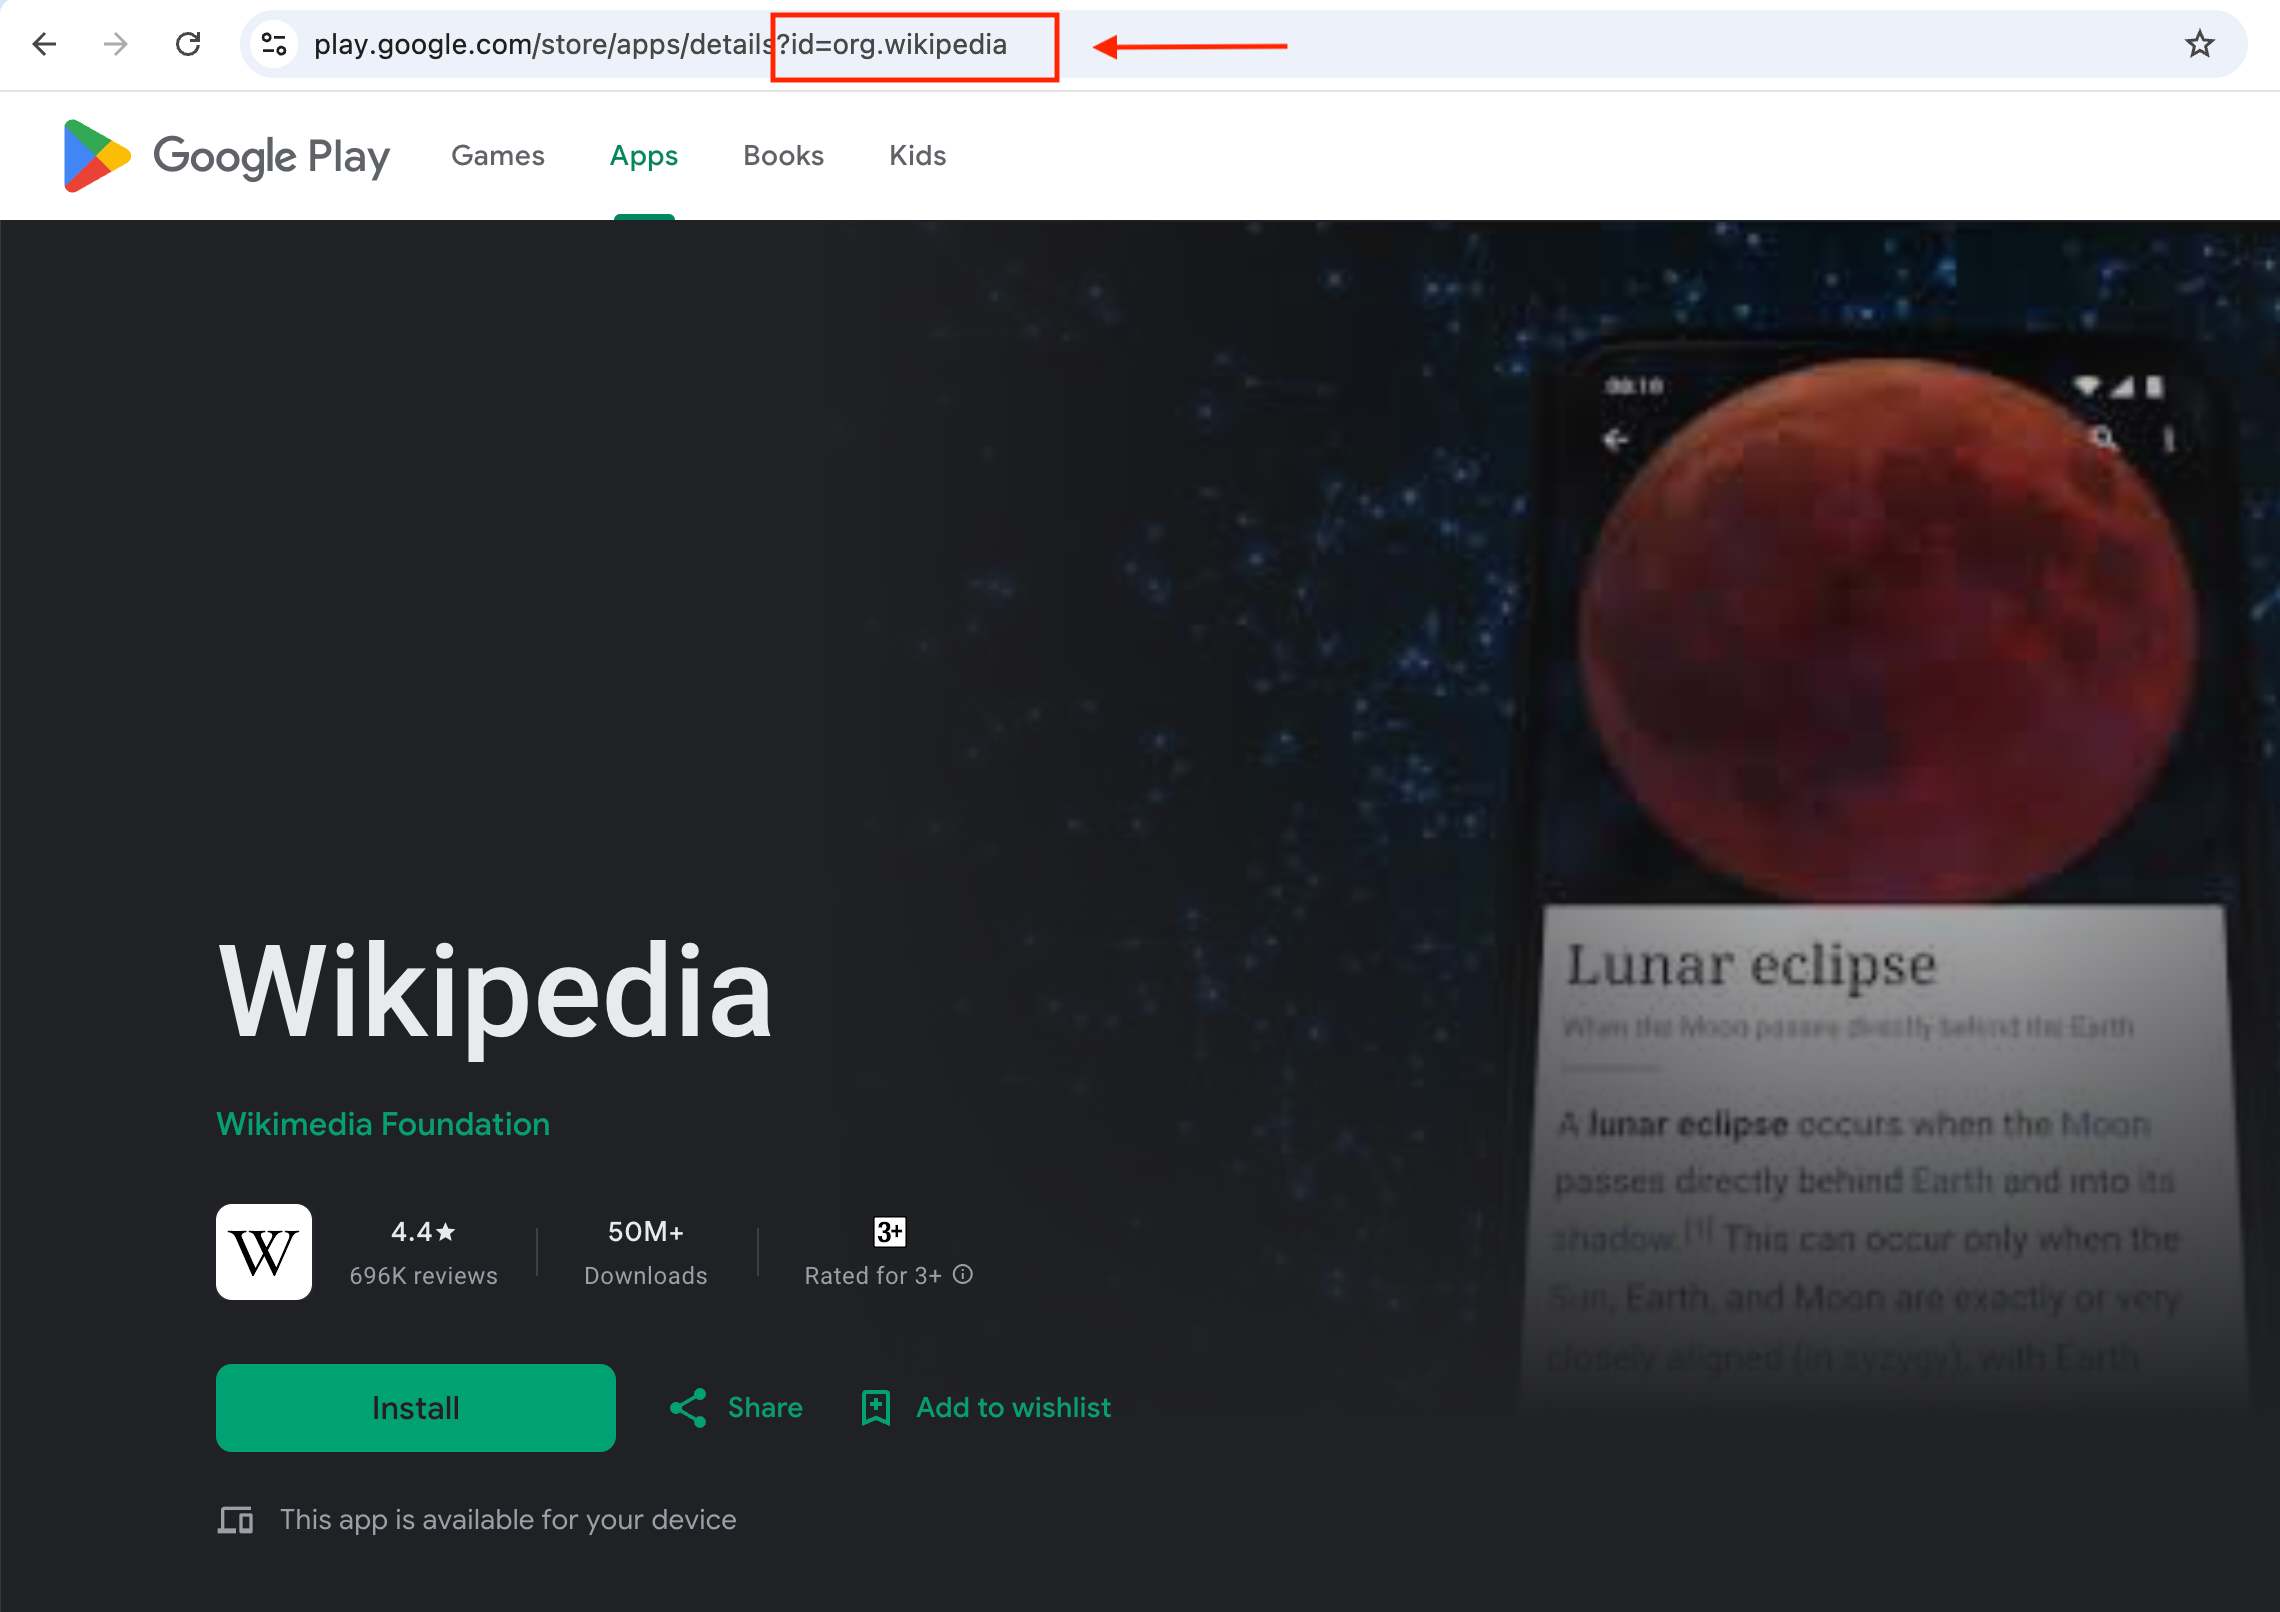
- Visit the app’s page on the Google Play Store.
- The id parameter in the URL is the package name.
- Example: For the Wikipedia app →
org.wikipedia.
For iOS:
- Identify the bundle identifier (e.g., com.apple.Preferences for Settings).
Updating Your HyperExecute Configuration
You can configure your YAML files to launch the pre-installed app instead of uploading a new one.
Verified...//
framework:
name: raw
args:
appId: stock
and the launcher yaml file to tells maestro to use the pre-installed Wikipedia app.
Verifiedloading...
Executing Your Test Suite
VerifiedNOTE : In case of MacOS, if you get a permission denied warning while executing CLI, simply run
chmod u+x ./hyperexecuteto allow permission. In case you get a security popup, allow it from your System Preferences → Security & Privacy → General tab.
./hyperexecute --user undefined --key undefined --config RELATIVE_PATH_OF_YOUR_YAML_FILE
The Wikipedia app will open directly on the device, and your Maestro test steps will execute against it.
Example: Wikipedia Search Flow
VerifiedappId: org.wikipedia
----
launchApp
tapOn: "Search Wikipedia"
inputText: "Maestro framework"
pressKey: Enter
assertVisible: "Mobile UI testing"
Explanation:
- launchApp: Opens the Wikipedia app.
- tapOn: "Search Wikipedia" → Focuses the search bar.
- inputText: "Maestro framework" → Enters the text.
- pressKey: Enter → Submits the search.
- assertVisible: "Mobile UI testing" → Validates results.
Best Practices
- Make sure the app is already installed on the device; otherwise, Maestro cannot launch it.
- The same approach works for iOS using the bundle identifier.
- You can also switch between multiple apps in a single flow by providing different appId values in separate steps.


 Chat with Us