Gatling Automation on HyperExecute
Gatling is an open-source load and performance testing framework designed for testing web applications. It uses a powerful Scala-based DSL to define test scenarios and is capable of simulating thousands of concurrent users, making it ideal for stress and performance testing.
🚀 Why Choose HyperExecute for Gatling Performance Testing?
While Gatling is powerful on its own, running large-scale performance tests using traditional setups often introduces significant bottlenecks:
⚠️ Common Challenges with Traditional Runners
- Infrastructure Limitations: Tests run sequentially or on underpowered machines, leading to long execution times.
- Manual Setup & Maintenance: Developers must handle environment configuration, dependency resolution, and runtime orchestration manually.
- Limited Scalability: Scaling tests across multiple machines requires complex setup and resource coordination.
- Debugging Overhead: Analyzing failures or performance issues often involves sifting through scattered logs and inconsistent outputs.
✅ How HyperExecute Solves These Challenges
TestMu AI’s HyperExecute platform is purpose-built to streamline and supercharge your Gatling test execution:
- ⚡ Smart Test Distribution: Automatically splits and runs tests across multiple machines for faster execution and optimal resource utilization.
- �🧪 Isolated, Reproducible Environments: Each test job runs in its own isolated environment with managed dependencies for consistent results.
- 📊 Built-in Reporting & Artifact Management: Uploads Gatling reports and logs as artifacts that can be easily accessed and analyzed post-run.
- 🔁 Built-in Retry & Stability Handling: Supports automatic retries for failed scenarios to minimize false negatives and flakiness.
- 🔍 Deep Debugging Insights: Rich logs, structured output, and centralized monitoring help you trace performance bottlenecks with ease.
🚀 Result: Scalable, Reliable, and Faster Gatling Test Cycles
By integrating Gatling with HyperExecute, you can move beyond traditional limitations and run large-scale load tests with speed, precision, and confidence. This guide provides a structured approach to integrating the Gatling performance testing framework with the TestMu AI HyperExecute platform.
Prerequisites
To run the Tests on HyperExecute from your Local System, you are required:
- Your TestMu AI Username and Access key
- HyperExecute YAML file which contains all the necessary instructions.
- HyperExecute CLI in order to initiate a test execution Job .
- Setup the Environmental Variable
Run a Sample Project
Step 1: Download Project
You can use your own project to configure and test it. For demo purposes, we are using the sample repository.
Download or Clone the code sample for the Gatling Performance Testing from the TestMu AI GitHub repository to run the tests on the HyperExecute.
 View on GitHub
Step 2: Download the CLI in your Project
Download the HyperExecute CLI and copy it into the root folder of the downloaded sample repository.
Step 3: Configure your hyperexecute.yml file
The core of HyperExecute configuration lies in the hyperexecute.yaml file. Let’s understand how it is constructed — step by step:
1. Define Test Environment and Execution Strategy
The first step is to define the environment your tests will run on using the runson parameter. You can also configure intelligent parallelization and test exit conditions.
version: 0.1
runson: linux   # OS to run the tests (e.g., linux, win)
autosplit: true
concurrency: 1   # Defines the number of test sessions to run concurrently
scenarioCommandStatusOnly: true
2. Dependency Resolution with Maven
Before running the actual performance test, ensure all project dependencies are resolved locally for a reproducible build. This step pulls all required Maven dependencies to a local directory (.m2), ensuring environment consistency.
pre:
  - mvn -Dmaven.repo.local=./.m2 dependency:resolve
3. Configure Test Discovery (Optional)
Test discovery determines what files or test suites should be run. You can customize this to dynamically scan simulation classes.
testDiscovery:
  type: raw
  mode: static
  command: echo "Test"
The command is a placeholder here. In advanced setups, you can provide a script to programmatically discover test files.
4. Configure the Test Execution Command
Specify the command that runs your Gatling tests via Maven:
testRunnerCommand: mvn gatling:test
5. Add Background Services (Optional)
If your test depends on a backend server or application under test, you can spin it up in the background:
background:
  - mvn spring-boot:run -Dspring-boot.run.main-class=dev.simonverhoeven.gatlingdemo.GatlingDemoApplication || true
When autosplit is enabled, this command can be intelligently distributed across runners.
6. Upload Test Reports
Once the test completes, use uploadArtefacts to store Gatling reports:
uploadArtefacts:
  - name: TestReport
    path:
    - target/gatling/**
These will be visible in the HyperExecute logs UI after the run.
7. Add Retry Logic (Optional)
You can automatically retry failed tests to avoid flakiness.
retryOnFailure: true
maxRetries: 1
Here is a complete working YAML configuration that runs Gatling performance tests on linux runners via HyperExecute:
loading...
📘 For a deeper understanding and project-specific configurations, check out the YAML documentation.
Step 4: Execute your Test Suite
From the project root directory, execute the below CLI command in your terminal:
./hyperexecute --user undefined --key undefined --config hyperexecute.yaml
NOTE : In case of macOS, if you get a permission denied warning while executing CLI, simply run
chmod u+x ./hyperexecuteto allow permission. In case you get a security popup, allow it from your System Preferences → Security & Privacy → General tab.
Run Gatling Tests via HyperExecute UI
In addition to CLI-based execution, HyperExecute provides a UI-based approach to configure and run Gatling performance tests directly from the dashboard.
Step 1: Setup your Gatling Project
- Go to the HyperExecute Project's Dashboard and click on the New Project button.
- Select Gatling as your performance testing framework.
- Browse and upload your Gatling simulation files (
.java) to create a new performance test project. - Click on the Save button.
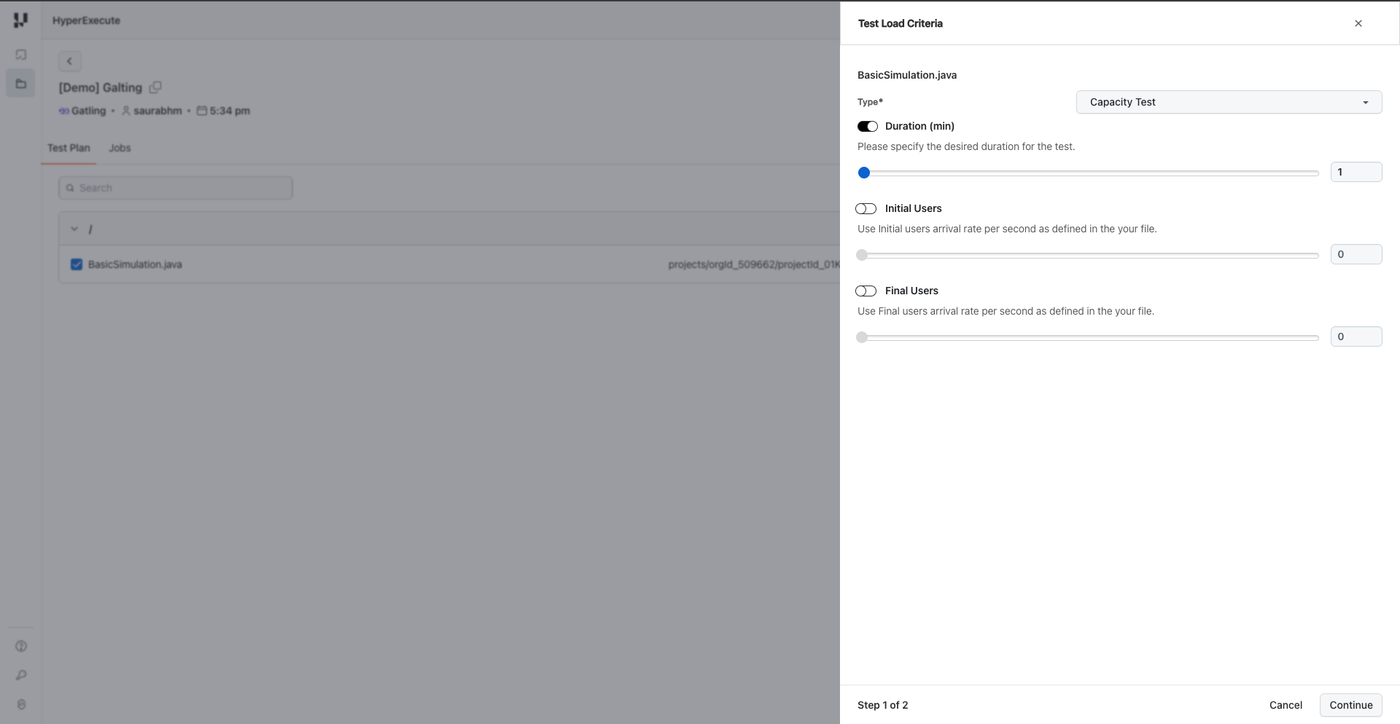
Step 2: Configure Test Load Criteria
Select your simulation file and click on the Run button. A configuration modal will appear with the following options:
- Capacity Test
- Stress Test
- Soak Test

Test Types
HyperExecute supports three types of performance tests:
| Test Type | Description | Use Case |
|---|---|---|
| Capacity Test | Learn how your application scales and monitor when performance starts to decrease | Determine maximum load capacity |
| Stress Test | Simulate a load peak to find out if your application crashes and recovers | Test system stability under extreme conditions |
| Soak Test | Simulate regular production use and monitor how your application behaves over time | Identify memory leaks and performance degradation |
Configuration Parameters
Depending on the selected test type, configure the following parameters:
Capacity Test:
- Duration (min): Specify the desired duration for the test
- Initial Users: Starting user arrival rate per second
- Final Users: Target user arrival rate per second
Stress Test:
- Duration (min): Specify the desired duration for the test
- Total Injected Users: Total number of virtual users to inject
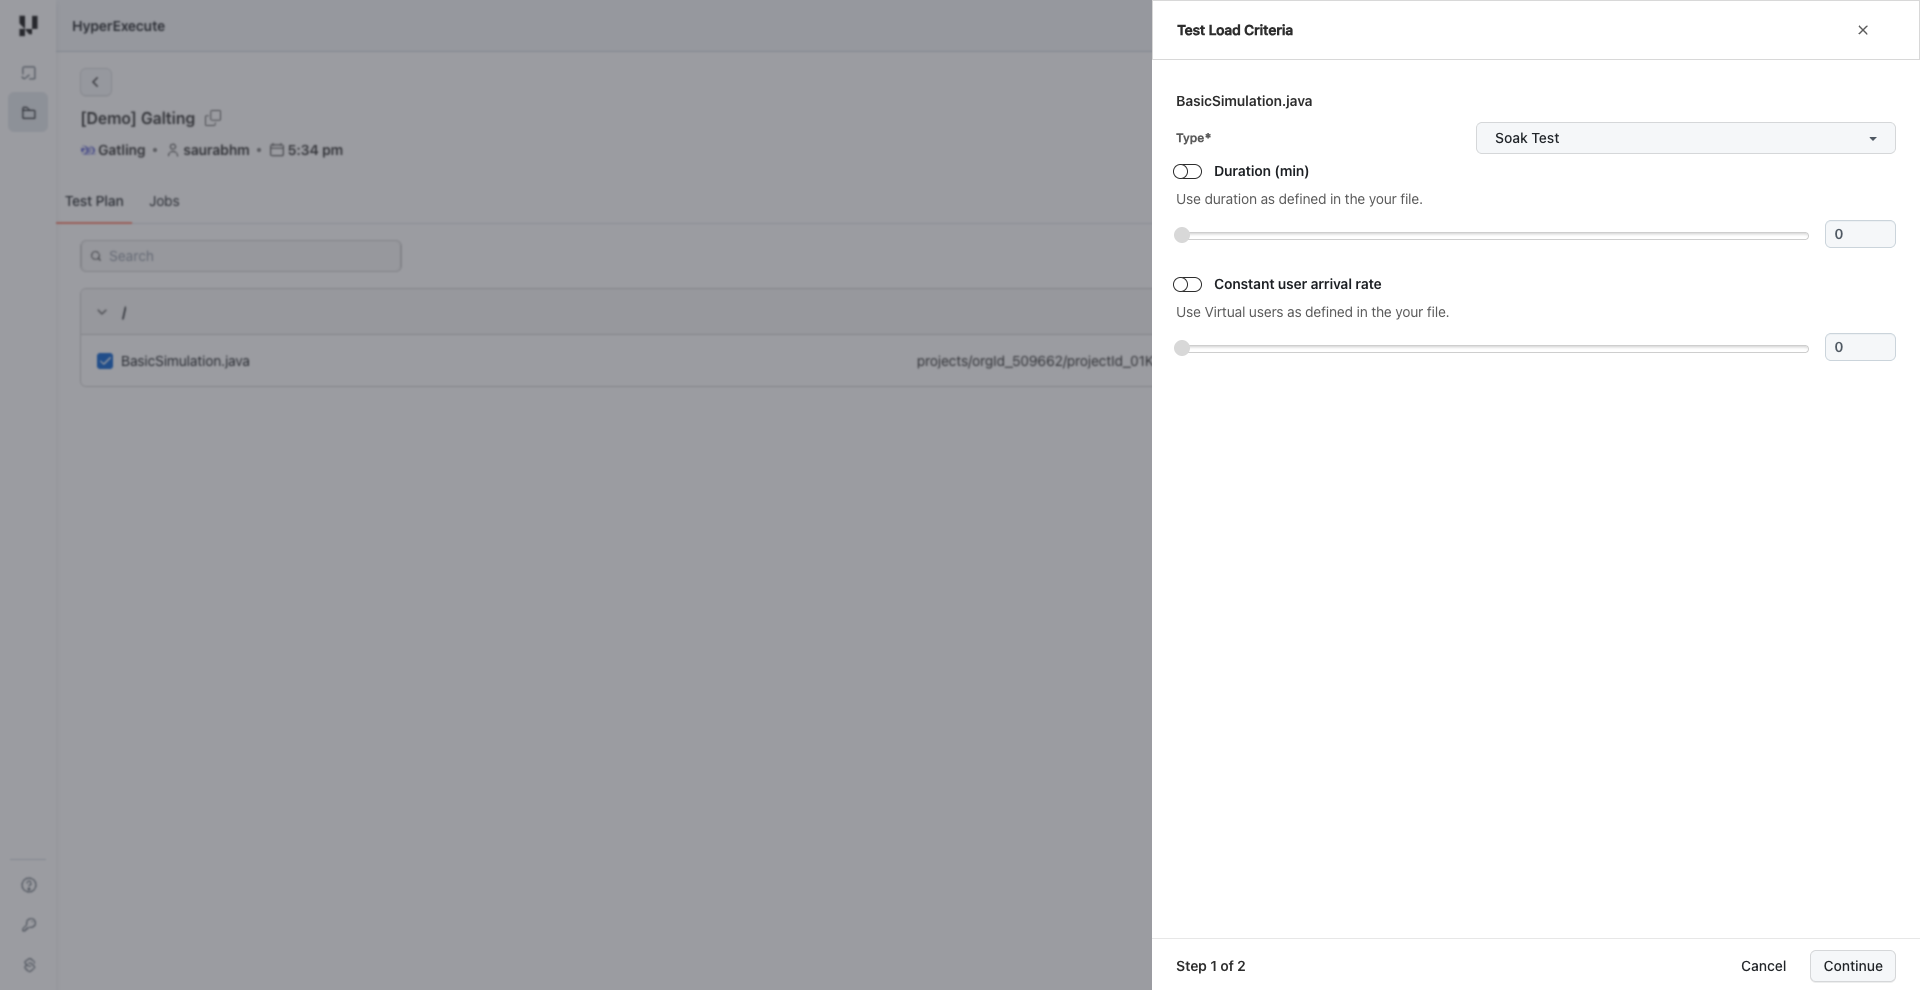
Soak Test:
- Duration (min): Specify the desired duration for the test
- Constant User Arrival Rate: Steady rate of users per second throughout the test
Click Continue to proceed to load distribution configuration.
Step 3: Configure Test Load Distribution
Configure how the load should be distributed across regions and machines:
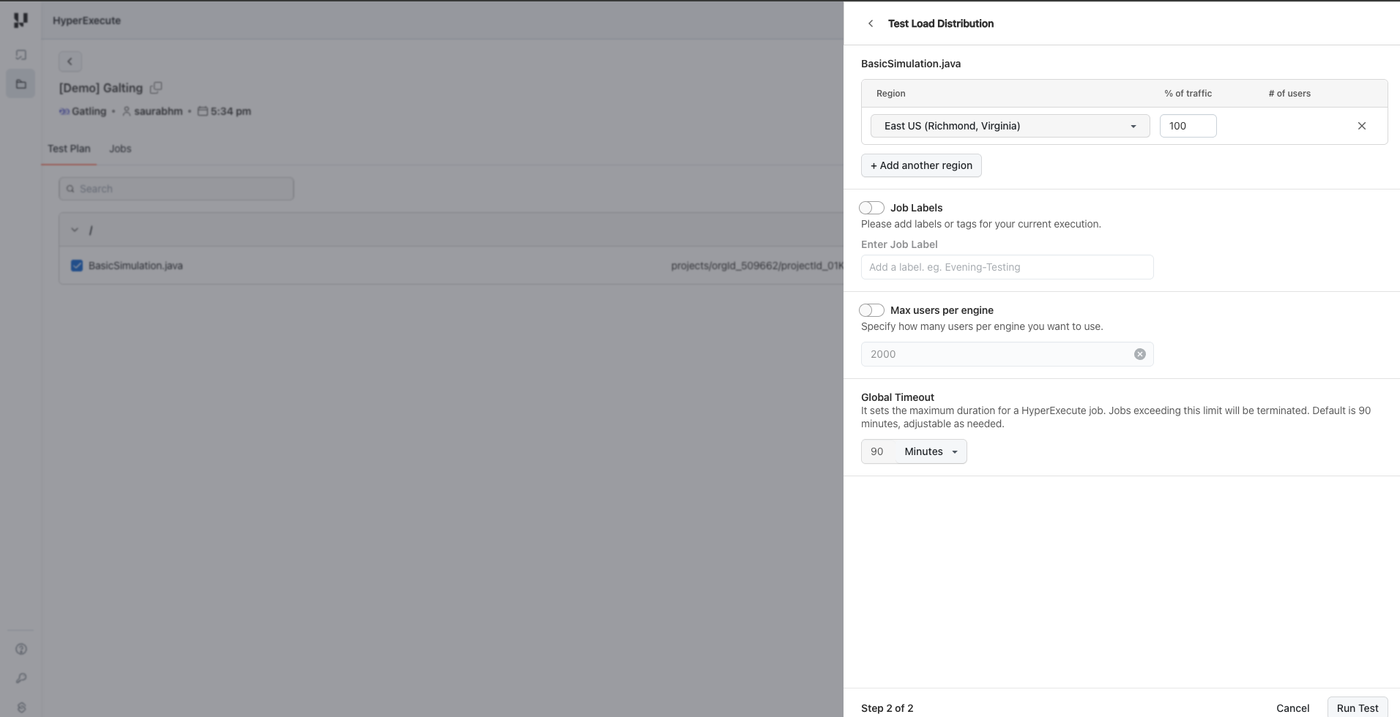
-
Region: Select the geographic region(s) for test execution
- East US (Richmond, Virginia) - default
- West US 2 (Moses Lake, Washington)
- Central India (Pune, Maharashtra)
- Southeast Asia (Singapore)
- Brazil South (São Paulo State, Brazil)
- Mexico Central (Querétaro State, Mexico)
-
% of Traffic: Distribute load percentage across selected regions
-
Job Labels: Add meaningful labels or tags for better identification and traceability
-
Max Users per Engine: Specify the maximum number of virtual users per engine (default: 2000)
-
Global Timeout: Set the maximum duration for the HyperExecute job (default: 90 minutes)
Click Run Test to start the execution.
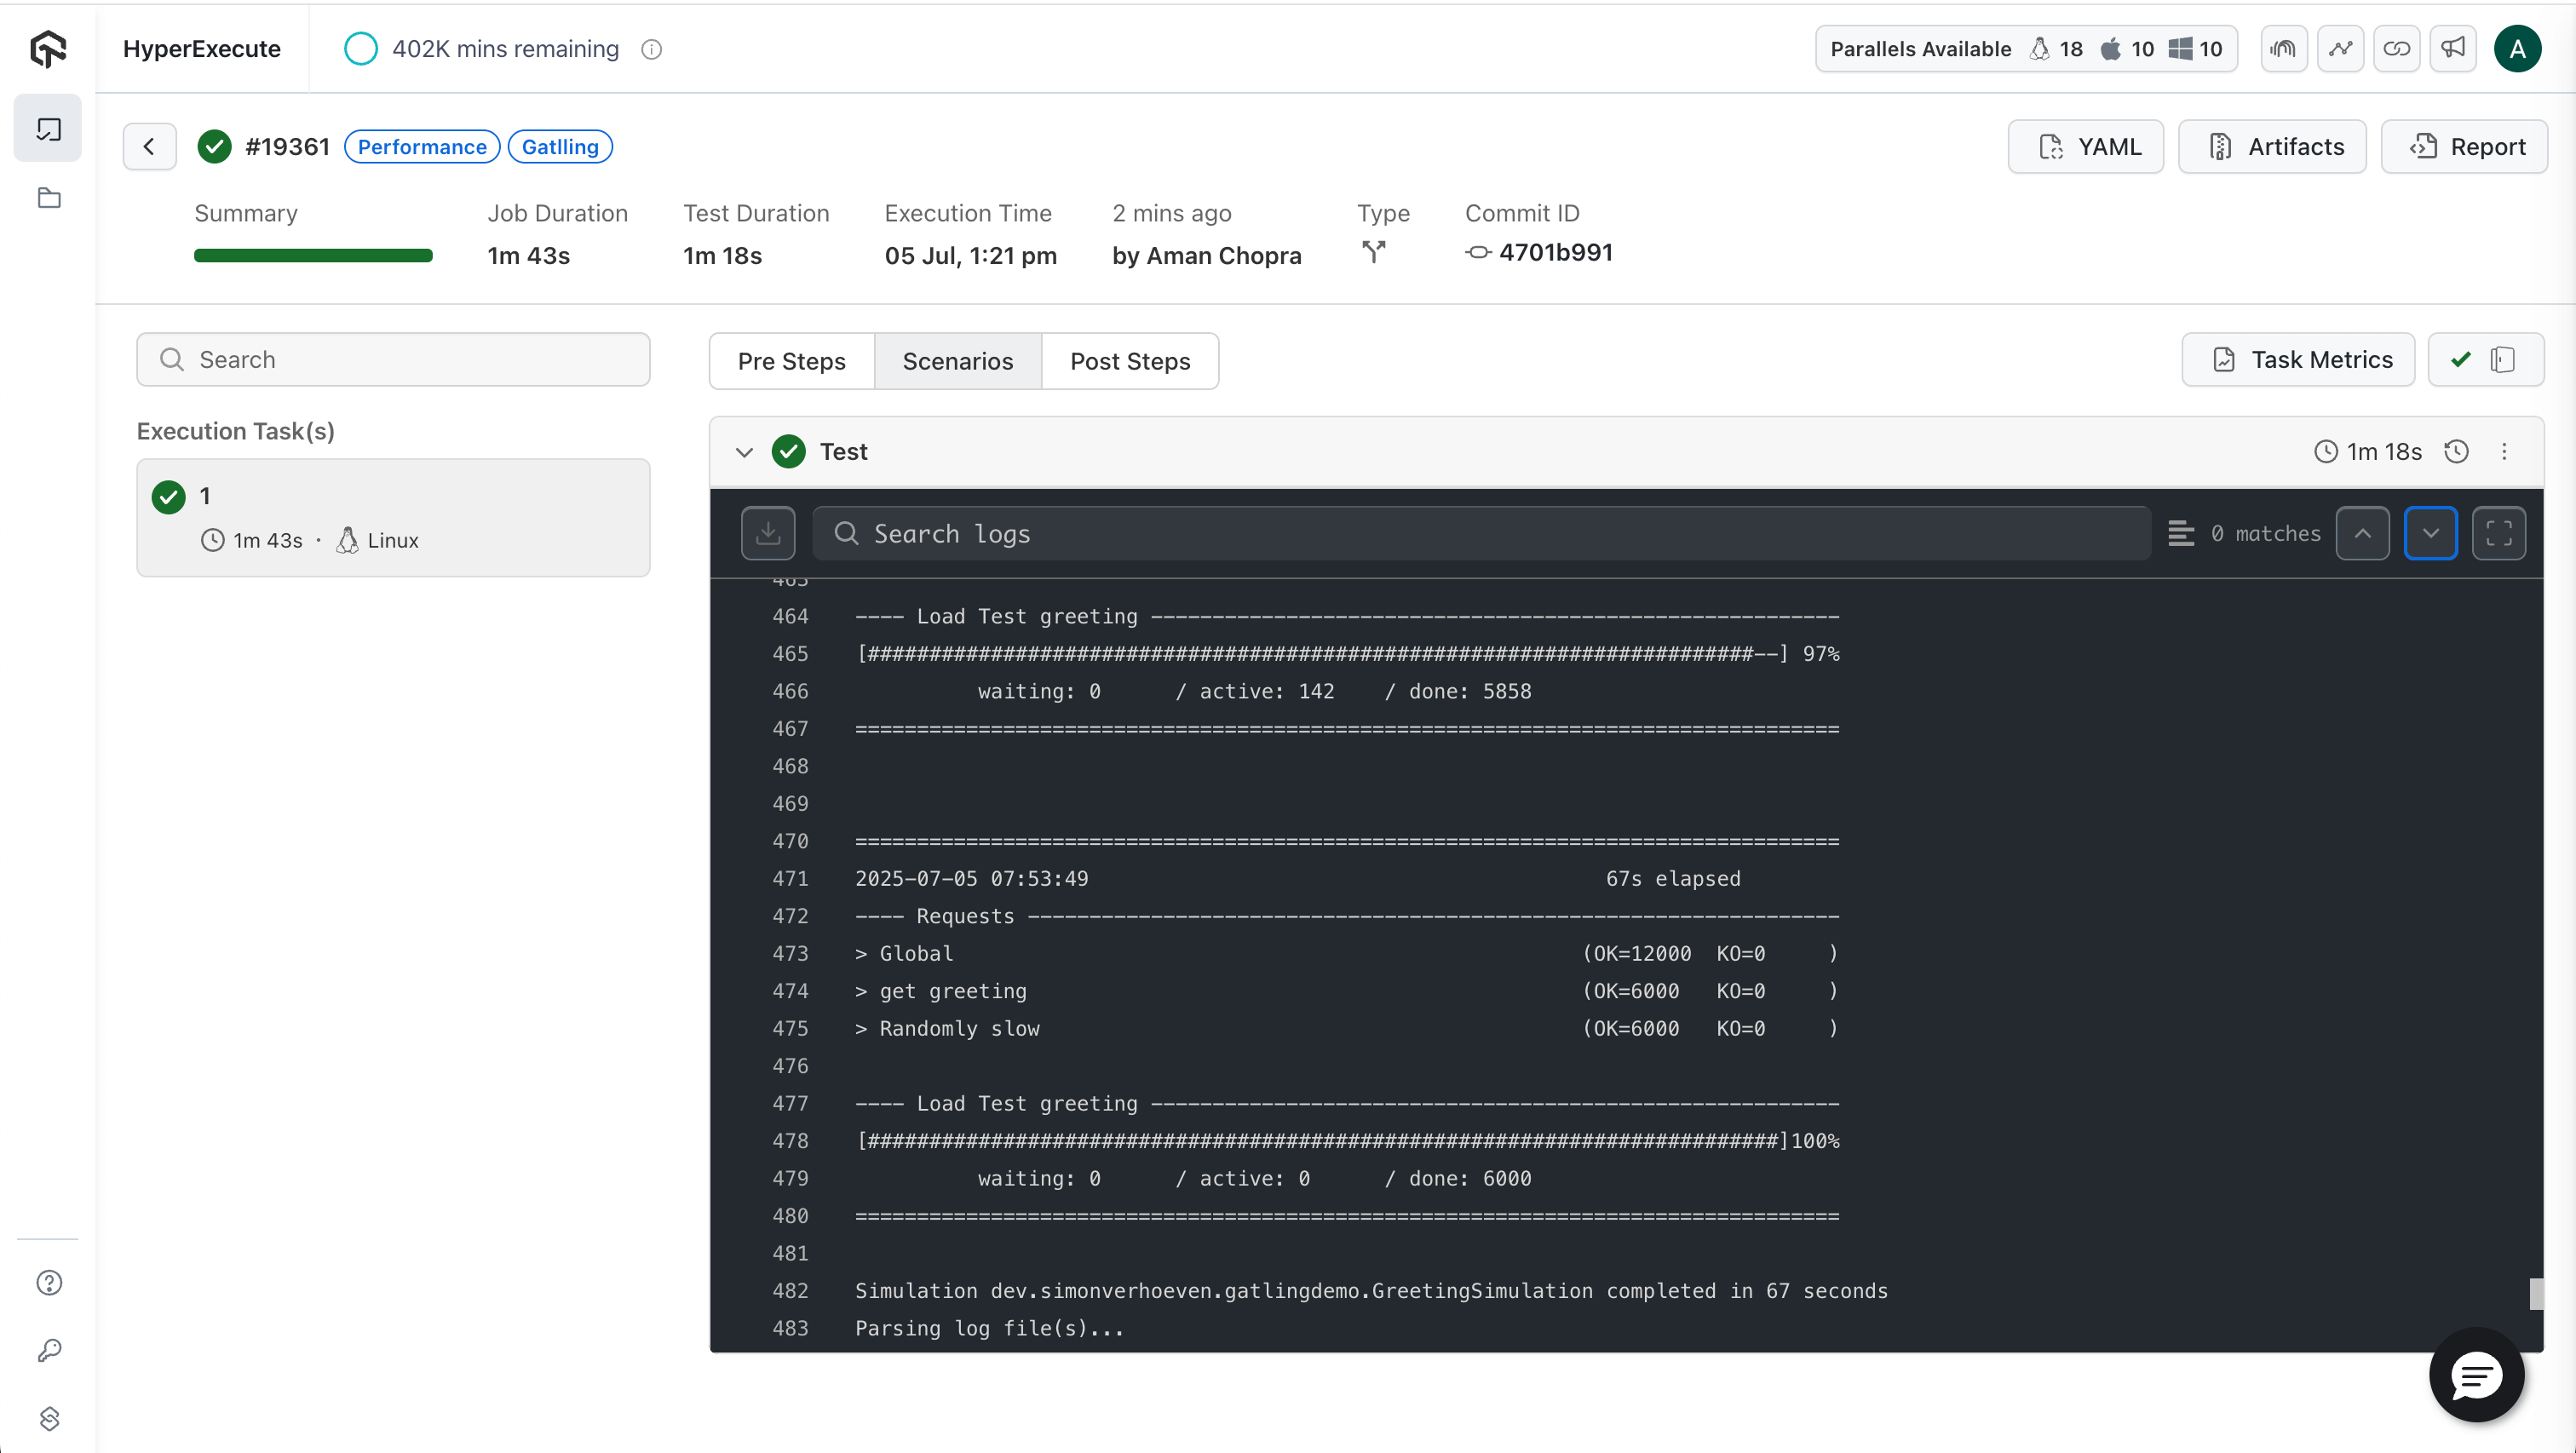
Step 4: Analyze Your Test Results
After the test execution completes, navigate to the Jobs section to analyze results:
- Job Summary: View job duration, test duration, execution time, and status
- Scenarios Tab: Monitor individual scenario execution and validate if tests ran for the required duration
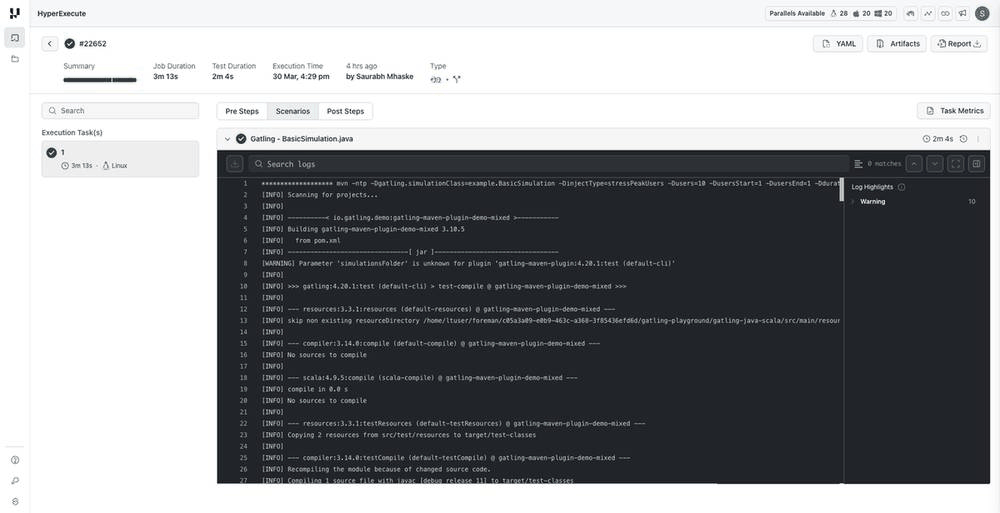
- Logs: View detailed execution logs including Maven build output and Gatling simulation logs
- Artifacts: Access test artifacts including Gatling HTML reports
- Report: Download the consolidated HTML report for detailed analysis
Click the Report button in the job details page to download the consolidated Gatling HTML report containing response time distributions, throughput graphs, and error analysis.
Sample Simulation Code
To leverage the UI-based configuration, your Gatling simulation should read parameters passed via system properties. Add the following load profile methods to your simulation class:
/**
 * Open workload model - users arrive at a specified rate
 */
public static OpenInjectionStep openLoadProfile() {
  String injectType = System.getProperty("injectType", "constantUsersPerSec");
  int users = Integer.getInteger("users", 10);
  int duration = Integer.getInteger("duration", 30);
  int rampDuration = Integer.getInteger("rampDuration", 60);
  int usersStart = Integer.getInteger("usersStart", users / 2);
  int usersEnd = Integer.getInteger("usersEnd", users);

  switch (injectType.toLowerCase()) {
    case "soaktest":
      // Gradual ramp up followed by sustained load - ideal for soak tests
      return rampUsers(users).during(Duration.ofSeconds(rampDuration));

    case "capacitytest":
      // Gradual increase to find capacity limits
      return rampUsersPerSec(1).to(users).during(Duration.ofSeconds(duration));

    case "stresspeakusers":
      return stressPeakUsers(users).during(Duration.ofSeconds(duration));

    case "rampuserspersec":
      return rampUsersPerSec(usersStart).to(usersEnd).during(Duration.ofSeconds(duration));

    case "constantusers":
      return rampUsers(users).during(Duration.ofSeconds(rampDuration));

    default:
      return constantUsersPerSec(users).during(Duration.ofSeconds(duration));
  }
}

/**
 * Closed workload model - maintains constant concurrent users
 */
public static ClosedInjectionStep closedLoadProfile() {
  int users = Integer.getInteger("users", 10);
  int duration = Integer.getInteger("duration", 30);
  String injectType = System.getProperty("injectType", "constantUsersPerSec");

  switch (injectType.toLowerCase()) {
    case "soaktest":
    case "capacitytest":
      // For soak/capacity tests, ramp up to target concurrent users then maintain
      return rampConcurrentUsers(1).to(users).during(Duration.ofSeconds(duration));
    default:
      return constantConcurrentUsers(users).during(Duration.ofSeconds(duration));
  }
}

/**
 * Determine which workload model to use based on test type
 */
private PopulationBuilder getPopulationBuilder() {
  String workloadModel = System.getProperty("workloadModel", "open");
  String injectType = System.getProperty("injectType", "constantUsersPerSec");

  // Use closed model for soak and capacity tests by default
  if ("closed".equalsIgnoreCase(workloadModel) ||
      "soaktest".equalsIgnoreCase(injectType) ||
      "capacitytest".equalsIgnoreCase(injectType)) {
    return scenario.injectClosed(closedLoadProfile());
  } else {
    return scenario.injectOpen(openLoadProfile());
  }
}
Download or Clone the code sample for the Gatling Performance Testing from the GitHub repository to run the tests on the HyperExecute.
View on GitHubAdvanced Parameters
Optimize your test pipeline using the following advanced features:
- ✅ Smart Test Splitting – Automatically distribute tests across parallel runners
- ⚡ Fail Fast – Stop test runs on the first failure
- 📊 Detailed Reports – Real-time terminal logs & rich test reports
