Media Injection on Real Devices
TestMu AI's Media Injection empowers you to test various camera-related functionalities (Image Injection and Video Injection) of your app across a vast array of real mobile devices. This innovative feature supports image capture testing, QR code scanning verification and Barcode scanning assessment.
Use Cases
- URL-embedded QR code scans
- Digital check processing
- Real-time video streaming and playback
- Video capture and upload workflows
How It Works
The Image and Video Injection processes leverages Sensor Instrumentation technology. When activated for a test session, it injects TestMu AI's proprietary camera module into your application and emulates or supersedes the native Android/iOS camera SDK
Key Features
- Extensive device compatibility (50,000+ real devices)
- Comprehensive support for image and video based functionalities
- Effortless integration with existing test environments
- For iOS apps signed with Enterprise Certificates, app resigning (a prerequisite for using the Image Injection tool) is not available.
Supported Camera APIs
Below given is the list of Camera APIs which are supported by TestMu AI Image Injection tool. Please ensure that your app uses these APIs only to enable Video Injection.
- iOS >= version 13
- Android >= version 9
| Supported APIs |
|---|
didFinishPickingMediaWithInfo API of UIImagePickerController iOS SDK class for capturing an image. 📕 For details, please check Apple documentation |
AVCapturePhoto iOS SDK class for receiving captured photos from AVCapturePhotoOutput API. 📕 For details, please check Apple Documentation. |
| Supported APIs |
|---|
CameraX API is used. 📕 For details, please check CameraX documentation |
Camera API is used. 📕 For details, please check [Camera documentation] (https://developer.android.com/training/camera-deprecated) |
Camera2 API is used. 📕 For details, please check Camera2 documentation |
ACTION_IMAGE_CAPTURE is standard Intent action that can be sent to have the camera application capture an image and return it. 📕 For details, please check MediaStore documentation |
Supported Camera Video APIs
Below given is the list of Camera APIs which are supported by TestMu AI Video Injection tool. Please ensure that your app uses these APIs only to enable Image Injection.
- iOS >= version 13
- Android >= version 13
| Supported APIs |
|---|
captureOutput(_:didOutput:from:) method of AVCaptureVideoDataOutputSampleBufferDelegate protocol. 📕 For details, please check Apple Documentation |
| Supported APIs |
|---|
ImageReader class for accessing video frames from the camera output. 📕 For details, please check ImageReader documentation |
Image and Video Injection in Real Device App Testing
This feature helps you inject any video or image which you want your app to click or scan through the device camera. You just need to follow the steps given below:
Step 1: Click on the Real Devices > App Testing
Step 2: Select your required device and upload your application which supports the camera APIs listed above.
Step 3: Now, hover over your app and click on the Settings icon. Toggle the Image Injection and Video Injection option and click on Save Changes button. Click on Start to run your app on the selected device.
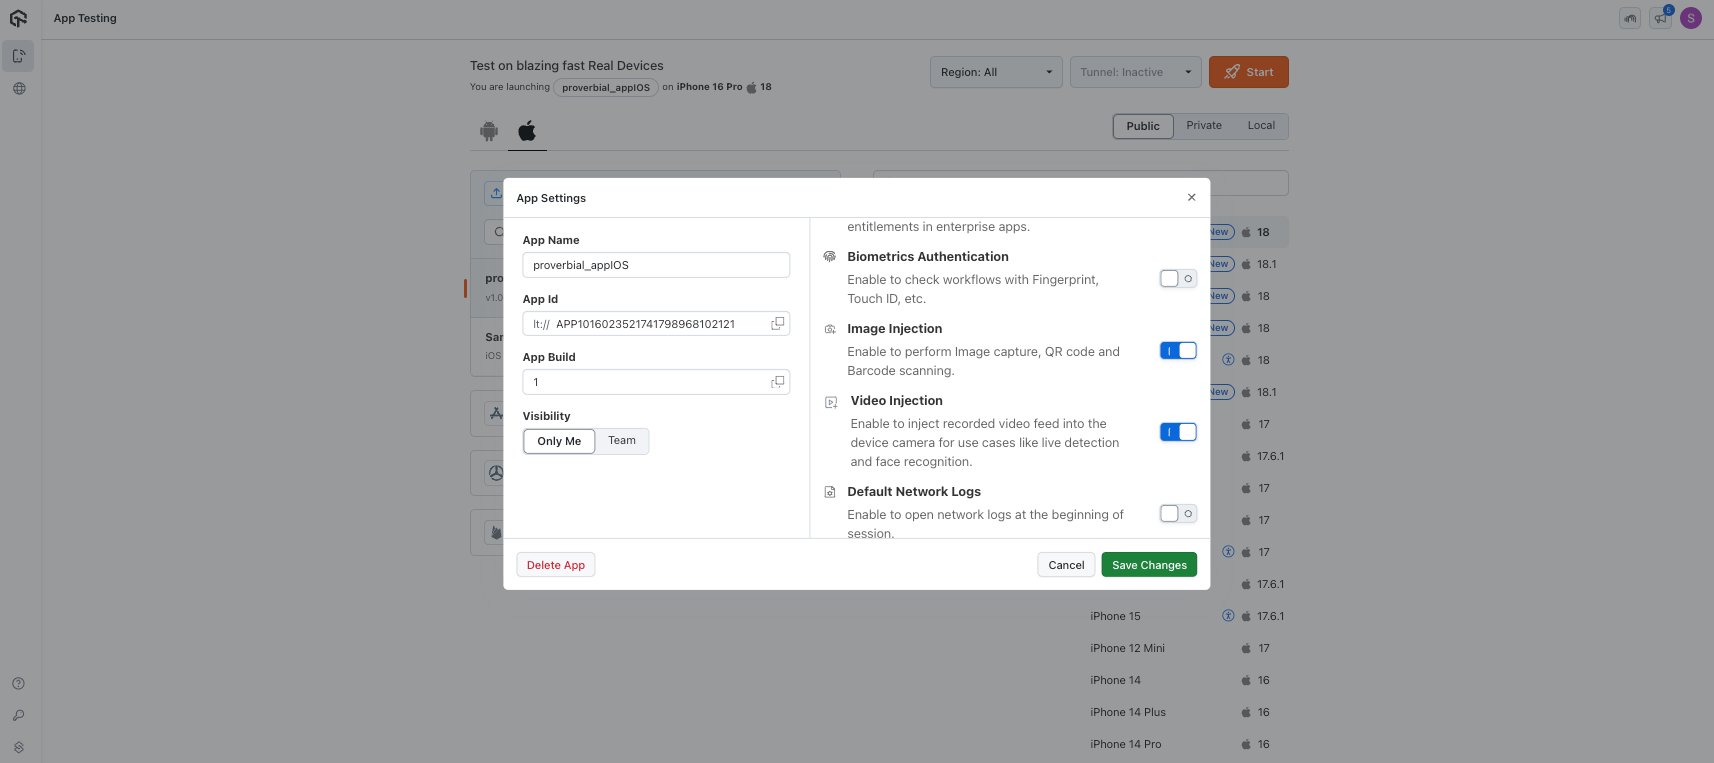
Step 4: You can see the video and image preview in the Media Injection section. You can delete, reupload and inject the image or video from here.
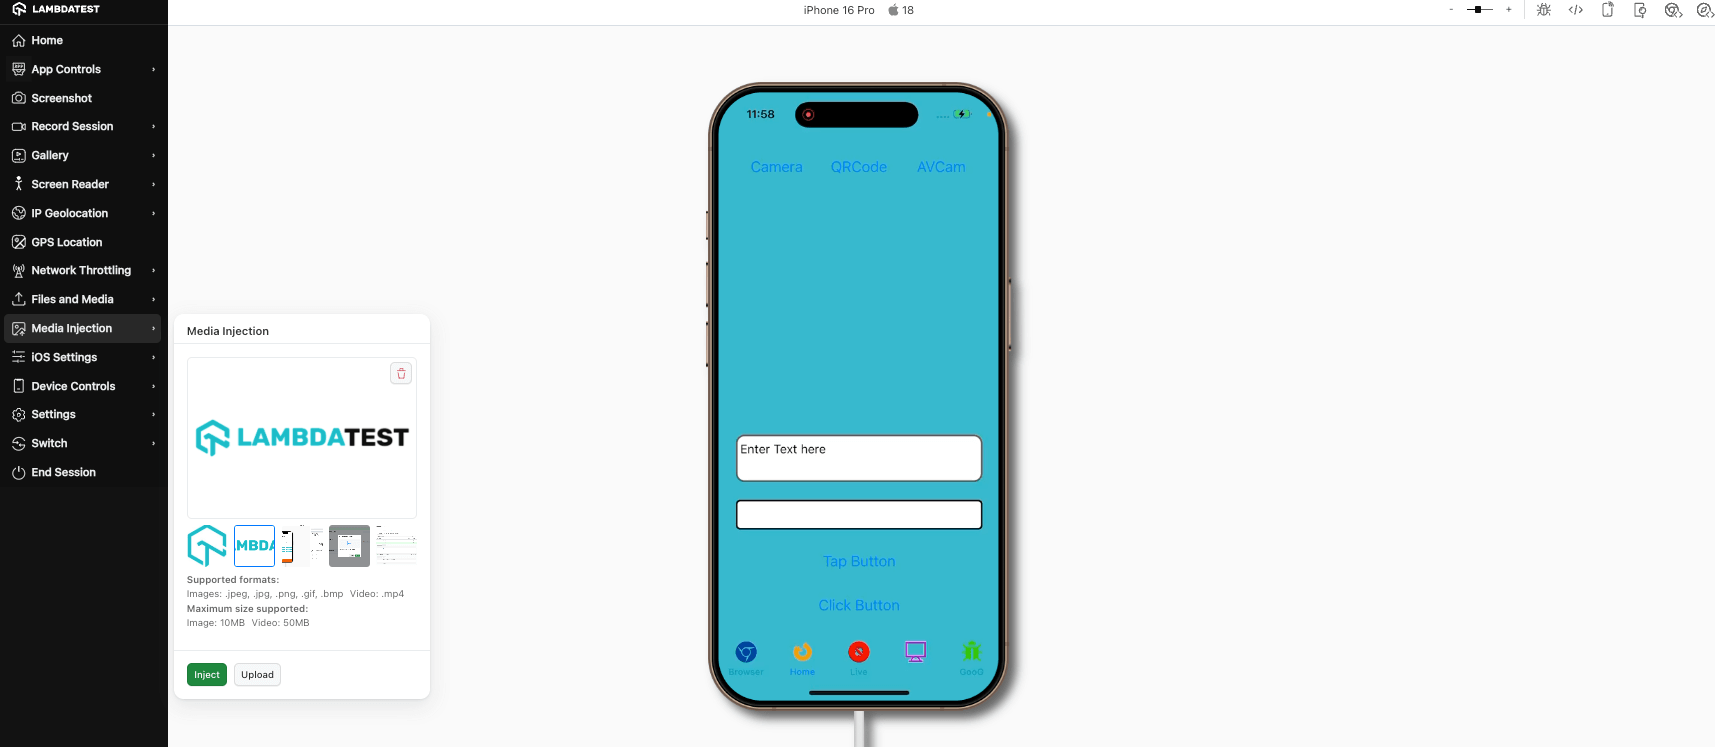
Step 5: After the above config, click on the Start button to start the session. Now, go to Device Controls in the toolbar as shown below. Select Media Injection and click Inject to upload the desired video or image from your computer to the app.
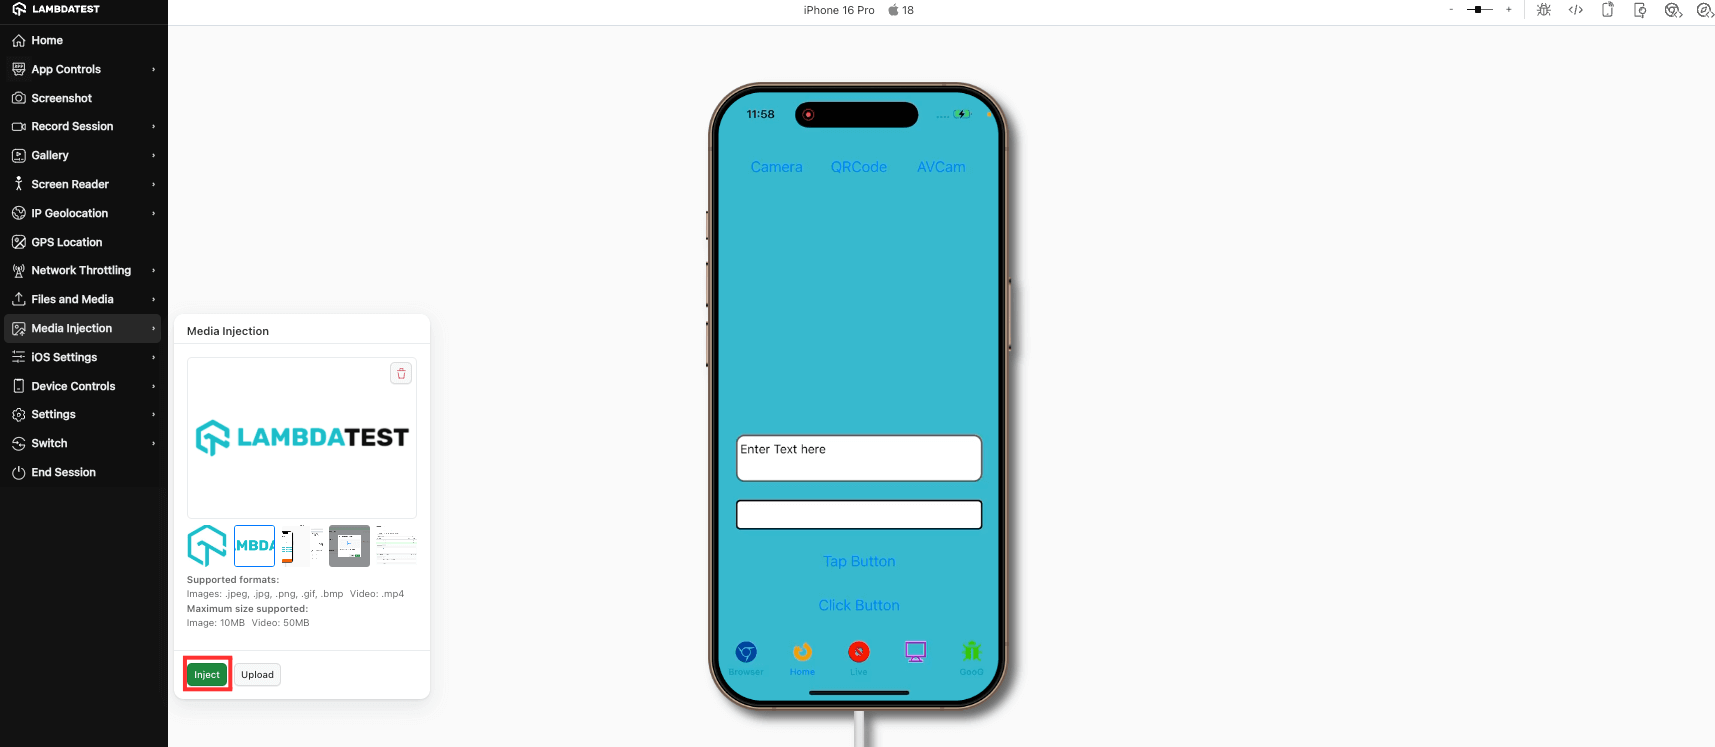
Step 6: Now go to camera feature in your app, the camera pops up. When you click the image from your app, you will see a black image. Please proceed with the same by clicking on Use Photo.
Step 7: The black image is now replaced with an injected image or video.
The clicked image is black because the Cameras of TestMu AI Real Devices are taped for security reasons. Thus we inject image through Sensor Instrumentation.
Image Injection in Real Device Browser Testing
You can also inject an image into web pages that open the device camera, such as KYC selfie and ID capture steps, document scanners, and QR scanners. The web page sees your uploaded image as a camera named LambdaTest Injected Camera, instead of the real device camera. This works in Browser Testing on real devices, and in App Testing for web pages inside Android apps.
Image injection for mobile browsers and in-app web pages is enabled per organization. If the Media Injection option does not appear in a browser session, the feature is not yet switched on for your account.
To unlock this feature, please contact your TestMu AI support representative, reach out to our [24×7 Chat Support], or email us at support@testmuai.com.
Supported browsers and surfaces
| Platform | Browser or surface | Minimum version | Notes |
|---|---|---|---|
| Android | Chrome | - | |
| Android | Web pages inside native apps (KYC SDKs, hybrid apps) | - | Use App Testing and enable Image Injection for the app, as described in the previous section. |
| iOS | Safari | iOS 16 | No setup needed. |
| iOS | Chrome | iOS 17, Chrome 115 | Needs Chrome's Web Inspector setting. See iOS Chrome setup. |
- Available on real devices only. Other Android browsers, web pages inside iOS apps, and virtual devices are not supported.
- Images only. Video injection is not supported for browsers or in-app web pages.
Steps to inject an image
Step 1: Start a session. Use Real Devices > Browser Testing on Android Chrome, iOS Safari, or iOS Chrome. For a web page inside an Android app, use Real Devices > App Testing.
Step 2: Go to Device Controls in the toolbar, select Media Injection, and upload or pick an image.
Step 3: Open the camera on the web page. If the camera was already open before you uploaded the image, reload the page or reopen the camera step.
Step 4: To change the image, upload another one. The camera picture changes live, without a page reload. New pages and new tabs keep showing the latest image.
iOS Chrome: turn on Web Inspector
Chrome on iOS allows image injection only when Chrome's own Web Inspector setting is on. The setting is off by default.
- Public devices: TestMu AI turns the setting on automatically between sessions. You don't need to do anything.
- Private (dedicated) devices: turn it on once. In Chrome, go to ⋯ > Settings > Content Settings > Web Inspector and turn it On. Then close and reopen Chrome. The setting stays on for later sessions.
What to expect
- Image fit: the whole image is shown, not cropped, in the page's orientation. Empty space is padded. For face or liveness steps, use a tightly cropped portrait image so the face fills the frame.
- Permission prompt: the camera permission prompt usually does not appear while injection is on.
- Android in-app web pages: until the first image is uploaded, the page shows the real camera. The first upload switches it to the image live.
Troubleshooting
| Issue | Cause | Fix |
|---|---|---|
| The page still shows the real camera | The camera was opened before the image was uploaded. | Reload the page or reopen the camera step. |
| Upload fails on iOS Chrome | Chrome's Web Inspector setting is off (private devices). | Turn on Web Inspector. |
| Injected image disappears, or upload fails on iOS | Safari DevTools is open in the session. | Close DevTools, then upload the image again. |
| Upload fails on iOS | No browser tab is open. | Open a tab, then upload. |
| Web pages inside an Android app show the real camera | The app was uploaded before this feature was released. | Upload the app again. |
On iOS, a failed upload currently shows a generic error message. Use the table above to find the cause.
For automated tests on mobile browsers, see Camera Image Injection.

 Chat with Us