Apple Pay Testing on Real Devices
Apple Pay is Apple’s secure digital wallet and payment system that enables in-app and web purchases with an extra layer of protection. Testing of Apple Pay is essential to validate the user experience, including wallet selection, passcode entry, and transaction confirmation.
With TestMu AI App Live, you can test Apple Pay flows on Real iOS Devices. This guide walks you through enabling Apple Pay, configuring wallets, running the application, and completing transactions manually.
This feature is available exclusively with the Real Device Plus Live Plan.
To unlock this feature, purchase or upgrade to the required plan. If you need assistance, please contact your TestMu AI support representative, reach out to our [24×7 Chat Support], or email us at support@testmuai.com.
Use Cases
- Manual Checkout Testing: Ensure Apple Pay works correctly across different devices.
- Wallet Verification: Confirm users can select the correct card type (Visa, MasterCard, etc.).
- Passcode Flow: Validate that passcode entry and Assistive Touch work as expected.
- End-to-End Transaction Confirmation: Simulate real user behavior to confirm Apple Pay transactions.
Supported Devices
Currently, Apple Pay manual testing in App Live is supported on these iOS real devices:
| iOS Device | iOS Version |
|---|---|
| iPhone 17 | 26 |
| iPhone 16 | 18 |
| iPhone 15 | 17 |
| iPhone 14 | 16 |
| iPhone 13 | 15 |
We are actively working on expanding coverage to all supported iOS devices on TestMu AI Real Device Cloud.
Manual Apple Pay Workflow in App Live
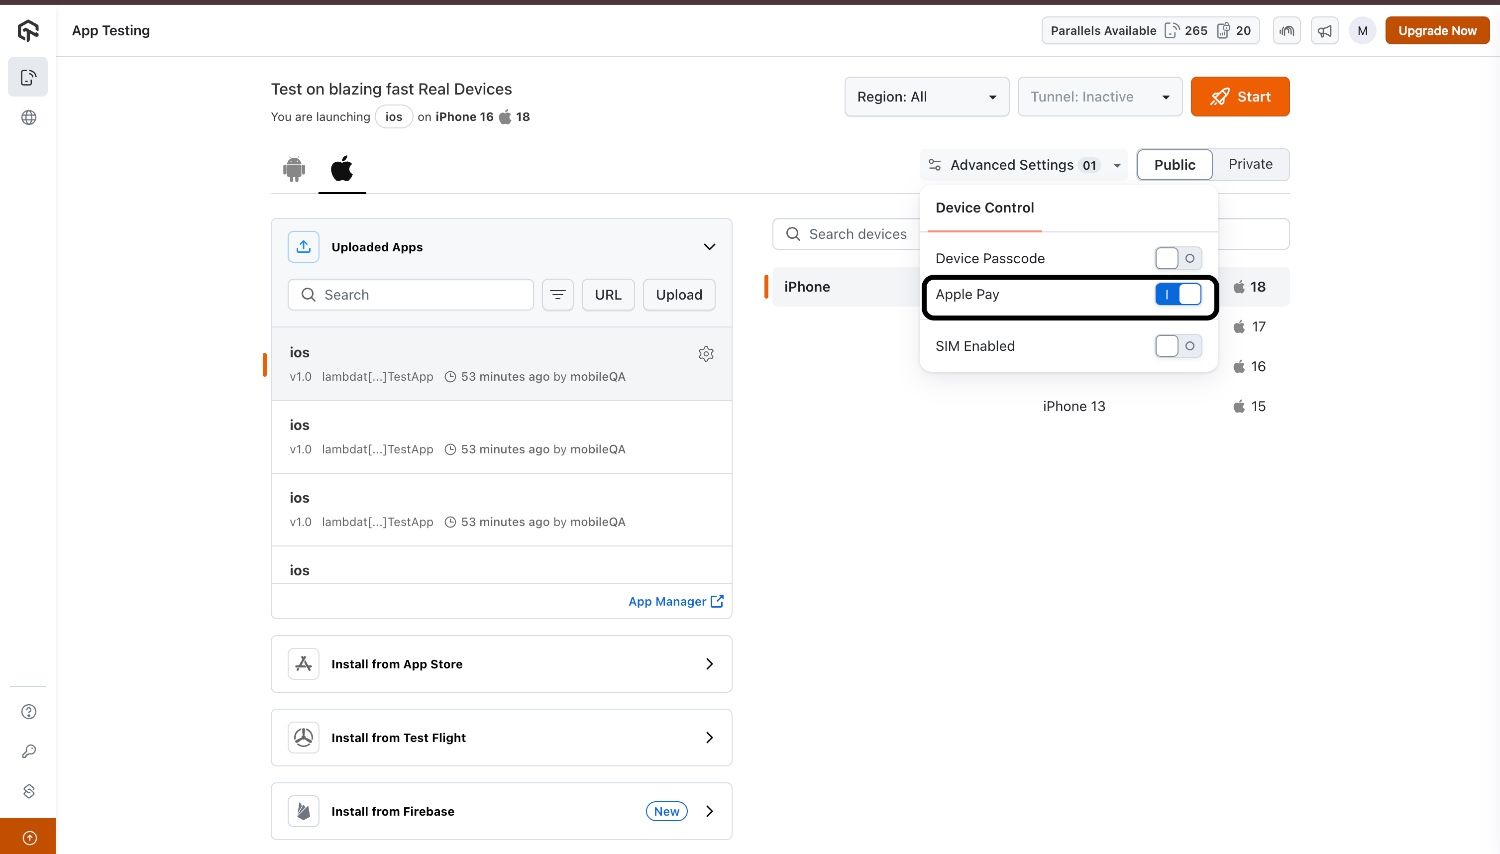
Step 1: Enable Apple Pay in Advanced Settings
- Open App Testing Live or Browser Testing Live and select your desired iOS device.
- Navigate to Advanced Settings.
- Locate the Apple Pay toggle and enable it, and confirm the device selection accordingly.
Step 2: Configure Wallet
- Within the app, select the option to configure Wallet inside iOS settings.
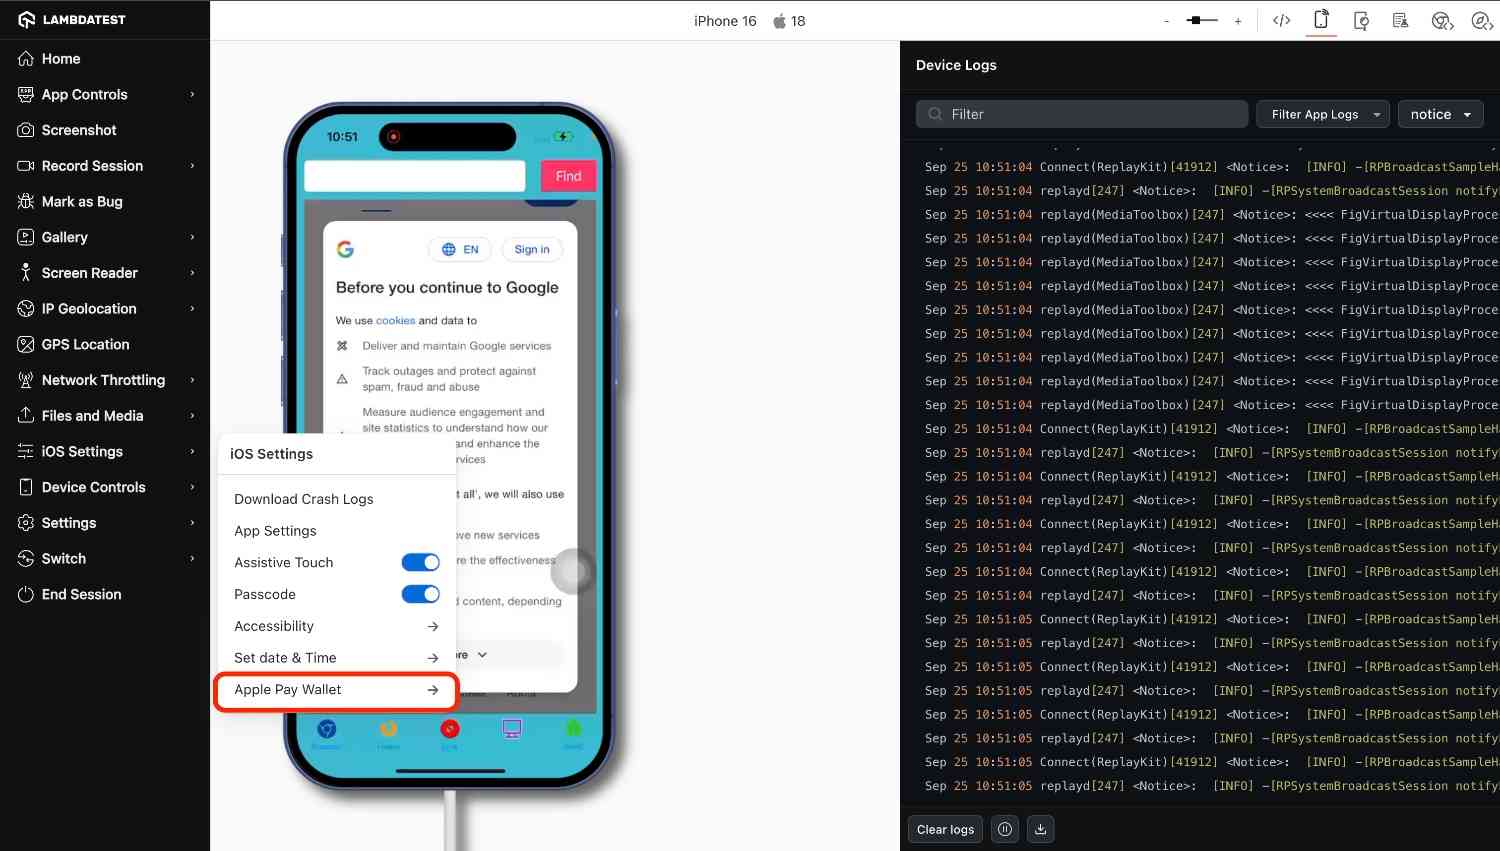
- User can choose any of the four options: American Express, Visa, MasterCard, Discover Global Network.
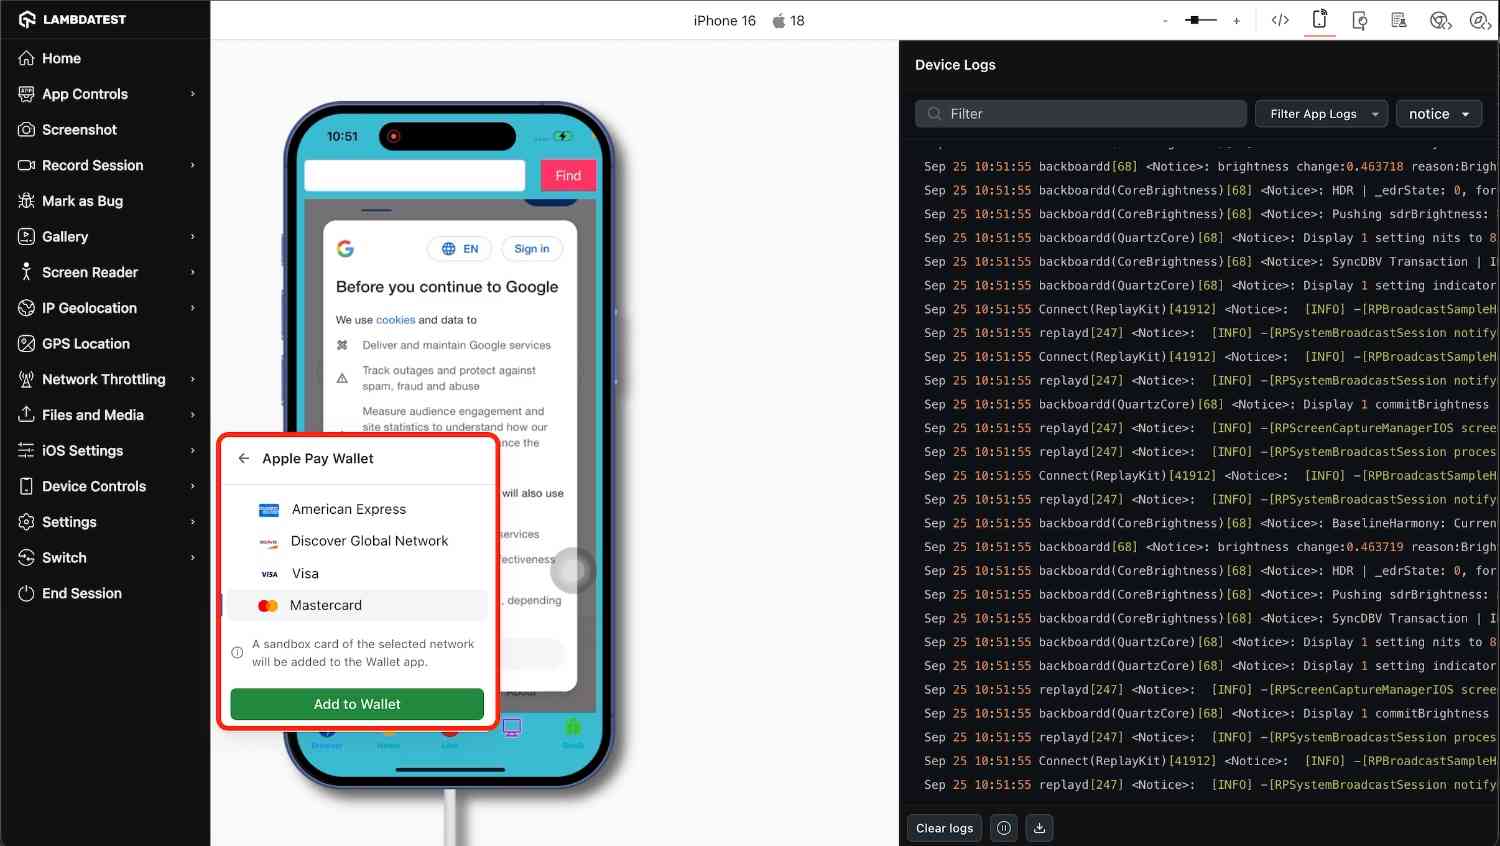
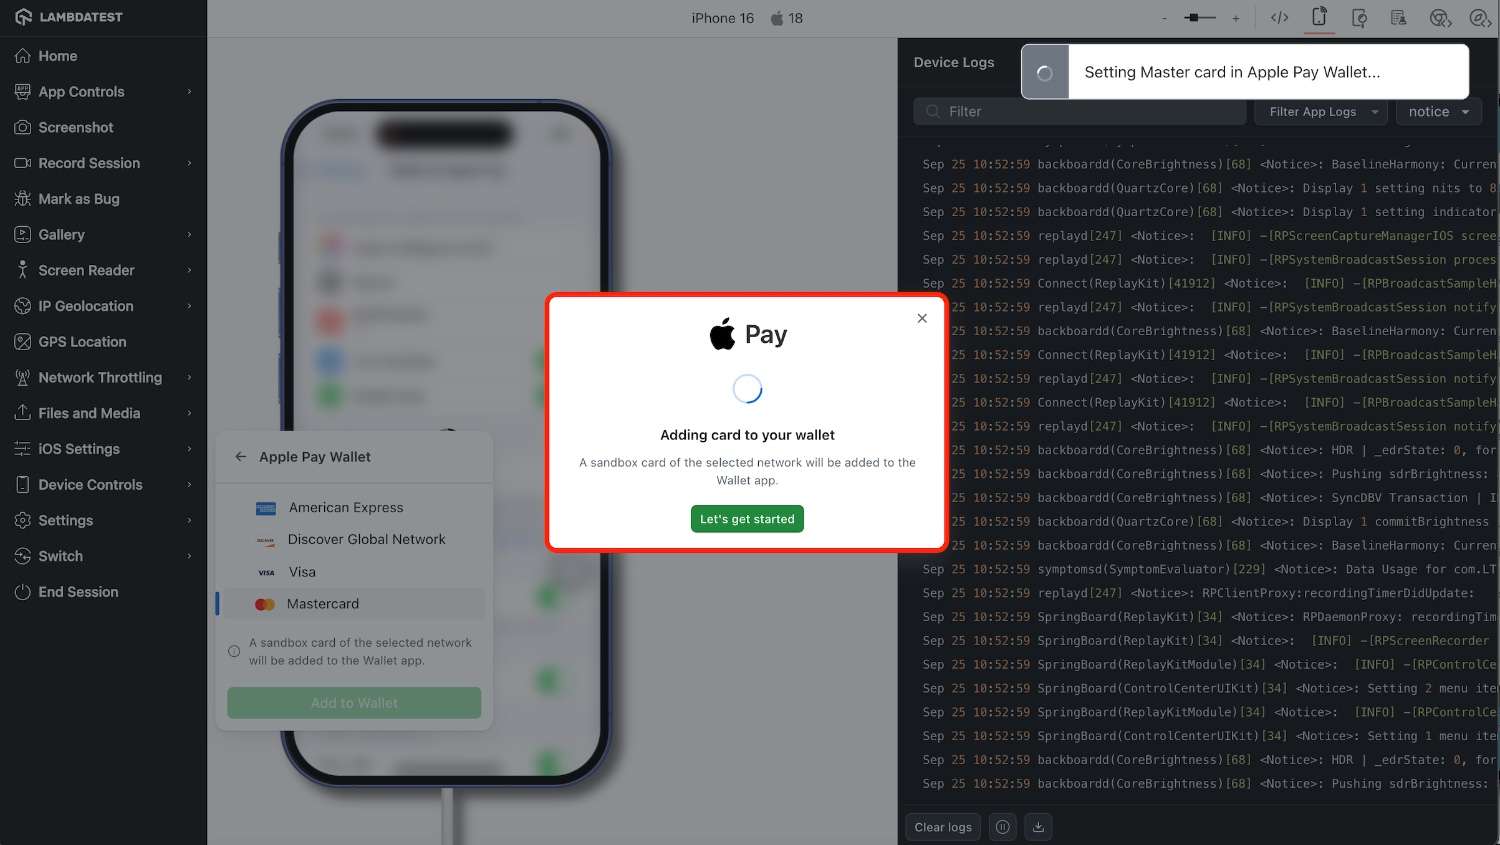
- Wait 1–3 minutes for Apple Pay to configure.
Step 4: Use Apple Pay in App Live
Within the App Live session, you can use Apple Pay via the Assistive Touch option. Simply click on Apple Pay, and you will be prompted to enter the device passcode (default is 123456). Once the passcode is entered, you can complete a payment through Apple Pay, simulating a real user transaction.
- Within a single session, only one card can be selected. To switch cards, you’ll need to start a new session and continue adding your desired card.
FAQs
Q: Why does adding my card to Apple Wallet time out (could not add card failure)?
Adding a sandbox or demo card to Apple Wallet may occasionally time out during the provisioning process. This can happen for several reasons, including temporary card-network or wallet-service availability issues.
Please try adding a different card and attempt the process again. If the issue continues, please contact our support team for further assistance.
Q: Why am I unable to enter the PIN on the payment screen?
On iOS 26, a keyboard is not available for PIN entry on the payment screen. To proceed, open the Confirm Payment dialog from the left-side menu option (iOS Settings > Apple Pay Wallet) and tap Confirm to confirm the card and complete the payment.
Q: Why does “Hold Near Reader” appear?
The Hold Near Reader prompt appears when Apple Pay is opened directly through Assistive Touch without first initiating a payment from an app or website.
For example, when visiting the Apple Pay Demo website, opening Apple Pay directly before clicking the Pay button and reaching the screen that displays the final checkout amount will trigger the Hold Near Reader prompt.
To avoid this, first initiate the payment flow on a supported website or application, then select Apple Pay at checkout.


 Chat with Us