Getting Started with TestMu AI's SmartUI Figma-App CLI
SmartUI Figma-App CLI lets you compare mobile app screenshots captured on real devices with your Figma design frames to detect visual mismatches and ensure accurate implementation of mobile UI.
The workflow has two halves. First you upload your Figma frames to SmartUI as the baseline using the CLI. Then you run your Appium test suite on the real device cloud so your app screenshots land in the same project and get compared against those frames. This guide covers both halves end to end.
Prerequisites
- Node.js and npm installed
- TestMu AI SmartUI account with App Automation plan
- Your TestMu AI Username and Access Key from the Account Settings page
- Figma Personal Access Token (how to get one)
- An Appium test suite for your app
- Your app uploaded to the real device cloud so you have an
app_url. See Upload your app
Understanding the Tokens and Credentials
The Figma-App workflow needs four values across its two halves. Two are used by the CLI upload, two by the Appium run.
| Token | Where It Is Used | Description |
|---|---|---|
PROJECT_TOKEN | Env Variable | Your SmartUI project token. Authenticates the CLI upload |
FIGMA_TOKEN | Env Variable | Your Figma Personal Access Token to authenticate with the Figma API |
LT_USERNAME | Env Variable | Your TestMu AI username. Used in the Appium grid URL |
LT_ACCESS_KEY | Env Variable | Your TestMu AI access key. Used in the Appium grid URL |
figma_file_token | designs.json | Figma file ID, extracted from the Figma file URL |
figma_ids | designs.json | List of frame or node IDs you want to compare visually |
Do not set any of these to an empty string. The CLI treats an empty value as an error and exits with
Missing FIGMA_TOKEN in Environment Variables (or the matching LT_USERNAME / LT_ACCESS_KEY message),
while leaving the same variable unset is accepted. If you hit that message, check for a stray
export FIGMA_TOKEN= in your shell.
Example Figma URL:
https://www.figma.com/design/abc12345/file-name?node-id=2417-58969
figma_file_token:abc12345figma_ids:2417-58969Older Figma links use
/file/instead of/design/. Both forms carry the file ID in the same position.
Step-by-Step Guide
1. Create a SmartUI Project
- Visit smartui.lambdatest.com
- Click New Project
- Select Real Devices as the platform
- Enter:
- Project Name (required)
- Approver(s) (required, pre-filled with your own user)
- Tags (optional)
- Click Continue
Note down both the project name and the project token. You need the token for the CLI upload and the name for your Appium capabilities.
2. Install SmartUI CLI
Verifiednpm install -g @lambdatest/smartui-cli
3. Generate and Edit Configuration
Run the following to create your initial design file:
Verifiednpx smartui config:create-figma-app designs.json
The file must have a .json extension, and the command refuses to overwrite a file that already exists.
Sample designs.json
Verified
{
  "mobile": [
    {
      "name": "Pixel 8",
      "platform": ["android 14"],
      "orientation": "portrait"
    }
  ],
  "figma": {
    "depth": 1,
    "configs": [
      {
        "figma_file_token": "abc12345",
        "figma_ids": ["2417-58969"],
        "screenshot_names": ["homepage"]
      }
    ]
  }
}
Configuration Options
| Config Key | Description | Usage |
|---|---|---|
mobile[].name | Device name. This must be an exact match for a supported device, and the same device you run your Appium test on. An unsupported value fails validation with unsupported mobile device name. The generated config seeds valid examples you can start from. | Mandatory |
mobile[].platform | Operating system and version for the device, for example ["android 14"] or ["ios 17"]. | Optional |
mobile[].orientation | Either portrait or landscape. No other value is accepted. | Optional |
figma.depth | Positive integer controlling how deep into the Figma document tree the fetch traverses. The generated config uses 1. | Optional |
figma.configs[].figma_file_token | File token for your Figma file. You can list multiple files in the same configuration. | Mandatory |
figma.configs[].figma_ids | List of node or frame IDs you want to compare. Values must be unique. | Mandatory |
figma.configs[].screenshot_names | Names given to the uploaded frames. If you supply this array it must have exactly the same number of entries as figma_ids, in the same order. Names must be unique across the whole file. | Optional |
smartIgnore | Top level boolean accepted by the config schema and forwarded with the upload. | Optional |
If you add a property that is not listed above, the CLI logs Additional property "<name>" is not allowed as a warning and then continues with the upload. The extra key is ignored rather than applied, so check for this warning if a setting you added appears to have no effect.
4. Set Environment Variables
Set all four values before running the upload.
Verified- MacOS/Linux
- Windows - CMD
- PowerShell
export PROJECT_TOKEN="123456#1234abcd-****-****-****-************"
export FIGMA_TOKEN="figd_****************************************"
export LT_USERNAME="YOUR_USERNAME"
export LT_ACCESS_KEY="YOUR_ACCESS_KEY"
set PROJECT_TOKEN="123456#1234abcd-****-****-****-************"
set FIGMA_TOKEN="figd_****************************************"
set LT_USERNAME="YOUR_USERNAME"
set LT_ACCESS_KEY="YOUR_ACCESS_KEY"
$env:PROJECT_TOKEN="123456#1234abcd-****-****-****-************"
$env:FIGMA_TOKEN="figd_****************************************"
$env:LT_USERNAME="YOUR_USERNAME"
$env:LT_ACCESS_KEY="YOUR_ACCESS_KEY"
5. Upload your Figma designs as the baseline
Verifiednpx smartui upload-figma-app designs.json --buildName "figma-baseline" --markBaseline
Uploaded frames are stored with a .png suffix. A frame named homepage in screenshot_names becomes homepage.png in the build. Remember this, because your app screenshot names have to match it in Step 8.
Optional Flags
| Flag | Description |
|---|---|
--markBaseline | Mark this build as a new baseline for future runs |
--buildName | Assign a custom name to this comparison build |
--fetch-results [filename] | Poll for build results after the upload. Accepts an optional output file name, for example results.json |
Example
Verifiednpx smartui upload-figma-app designs.json --buildName "v1.0.0" --markBaseline --fetch-results results.json
6. Upload your app
Your Appium test needs an app that lives on the real device cloud. Upload your .apk or .ipa and note the app_url that is returned.
curl -u "$LT_USERNAME:$LT_ACCESS_KEY" \
-X POST "https://manual-api.lambdatest.com/app/upload/realDevice" \
-F "appFile=@/path/to/your/app.apk" \
-F "name=YourAppName"
The response contains an app_url field, already in lt://APP... form, which is the value you pass as the app capability in the next step. For other upload options see Upload your app.
7. Configure your Appium capabilities
This is the half that produces the app screenshots. Use the same device here as in designs.json so both sides are captured at the same viewport.
let capabilities = {
  deviceName: "Pixel 8",          // must match mobile[].name in designs.json
  platformName: "android",
  platformVersion: "14",          // must match mobile[].platform
  isRealMobile: true,             // Mandatory
  app: "lt://APP_ID",             // Mandatory
  visual: true,                   // Mandatory
  name: "Figma app comparison",
  build: "Real Device App Build",
  "smartUI.project": "<Your Project Name>", // Mandatory, the project NAME not the project token
  "smartUI.build": "<Your Build Name>",     // Optional
  "smartUI.baseline": false,                // Leave false, your Figma build is the baseline
};

let gridUrl =
  "https://" +
  "<Your Username>" +
  ":" +
  "<Your Access Key>" +
  `@mobile-hub.lambdatest.com/wd/hub`;

let driver = await new webdriver.Builder()
  .usingServer(gridUrl)
  .withCapabilities(capabilities)
  .build();
The app side is identified by smartUI.project, which takes the project name. The PROJECT_TOKEN you exported in Step 4 authenticates the CLI upload only. It is not used by the Appium capabilities.
visual: true is mandatory. Without it no screenshots are sent to SmartUI and the build is reported with an Error status.
8. Capture screenshots with matching names
Add the screenshot hook after the point in your script where the screen you care about is rendered.
Critical: Figma frames are stored with .png appended, so your app screenshot names must include the extension to line up with them.
// ❌ Wrong, will not match the Figma frame
await driver.execute("smartui.takeScreenshot=homepage");

// ✅ Correct, matches the Figma frame homepage.png
await driver.execute("smartui.takeScreenshot=homepage.png");
When you pass a config object, the screenshot name key is screenshotName. Passing name throws
Error response status: 1 and the test fails.
// ❌ Wrong, throws
await driver.execute("smartui.takeScreenshot", {name: "homepage.png"});

// ✅ Correct
await driver.execute("smartui.takeScreenshot", {screenshotName: "homepage.png"});
- Appium NodeJS
- Appium Java
- Appium Python
// simple form
await driver.execute("smartui.takeScreenshot=homepage.png");

// config form
await driver.execute("smartui.takeScreenshot", {screenshotName: "homepage.png"});
// the Selenium interface is JavascriptExecutor, with a lower case s in script
((JavascriptExecutor) driver).executeScript("smartui.takeScreenshot=homepage.png");
driver.execute_script("smartui.takeScreenshot=homepage.png")
Run your test suite as you normally would.
Verifiednpm i && node your_test_script.js
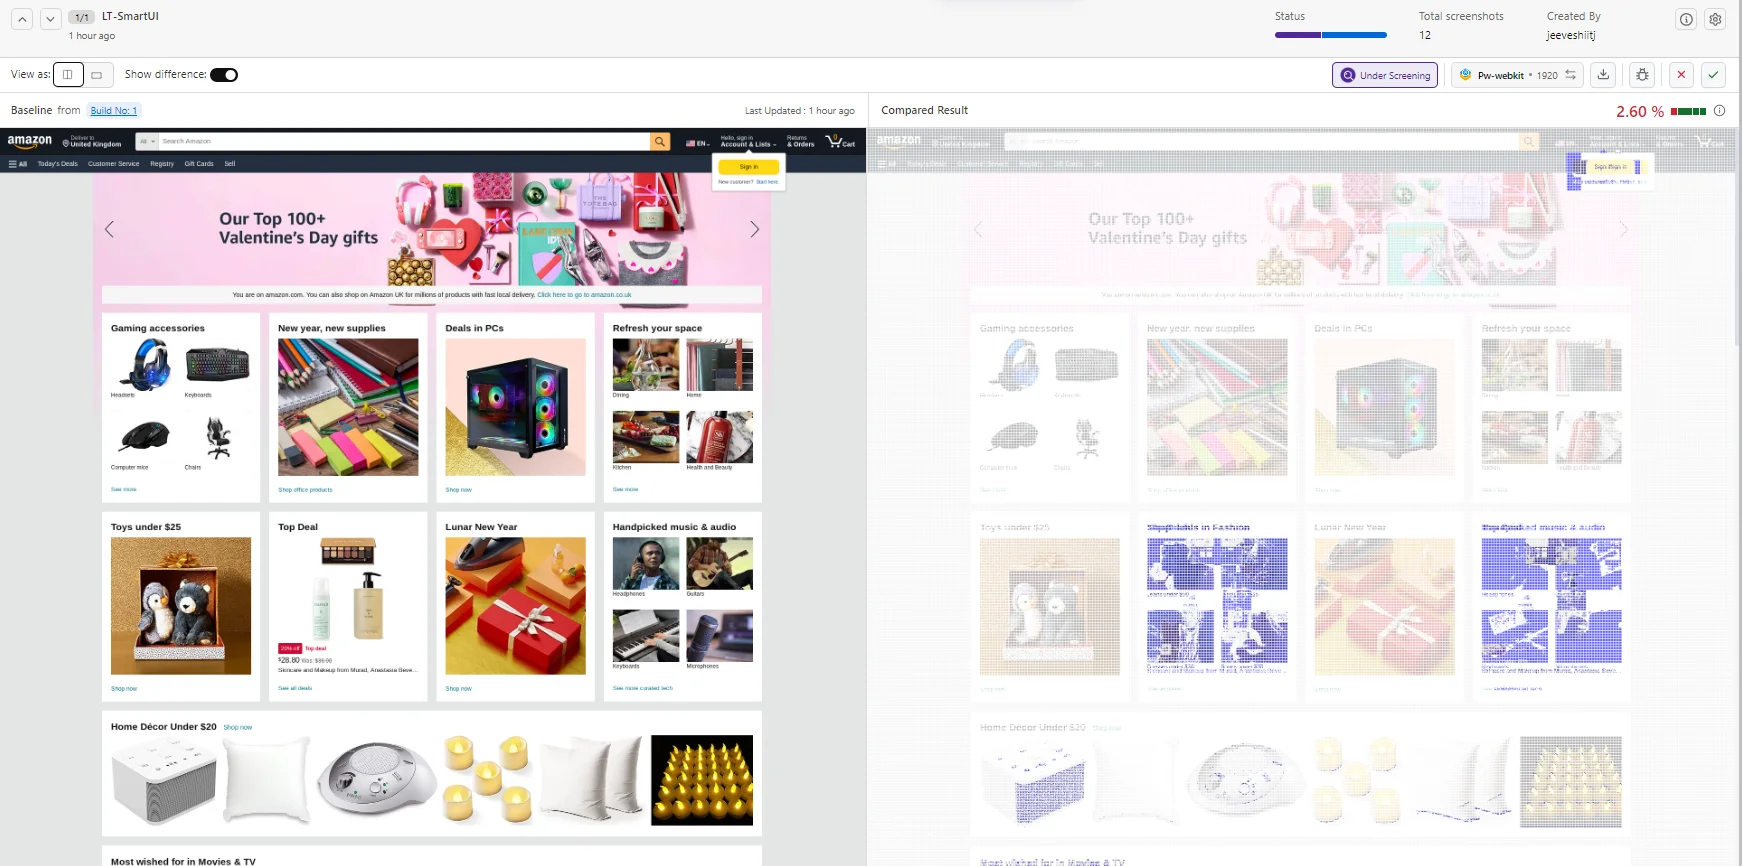
9. View SmartUI Results
You can see the SmartUI dashboard to view the results. This will help you identify the Mismatches from the existing Baseline build and do the required visual testing.
How the comparison is paired
Three things have to line up for a Figma frame and an app screenshot to be compared:
- Same project. The CLI upload targets it by
PROJECT_TOKENand the Appium run targets it bysmartUI.project. Both must resolve to the same Real Devices project. - Figma build is the baseline. Upload the Figma designs with
--markBaseline, or approve that build on the dashboard. Your app run then becomes the comparison build. - Screenshot names match exactly. A frame stored as
homepage.pngis only compared against an app screenshot namedhomepage.png.
The device in designs.json and the device in your capabilities should also match, so both sides are captured at the same viewport.
Best Practices
Verified- Build Names
- Screenshot Names
- Device Names
- CI Runs
Build Names
Give each run a build name you can trace back to a release or a commit.
npx smartui upload-figma-app designs.json --buildName "v1.0.0"
Screenshot Names
- Good:
homepage-screen,login-form,dashboard-tab - Avoid:
test1,screenshot,design-1 - Ensure
screenshot_namesin your config match the order offigma_ids, and that the two arrays are the same length - Keep names unique across the whole config file. Duplicates fail validation with
Found duplicate screenshot names in figma config - Remember the
.pngsuffix on the app side
Device Names
- Use the exact device name string.
Pixel 8is valid,pixel8andPixel-8are not - Use the same device in
designs.jsonand in your Appium capabilities. A Figma frame captured for one viewport will not line up with a screenshot taken on a device of a different size - Keep
orientationconsistent between your Figma frames and the device - Start from the file produced by
npx smartui config:create-figma-app, which seeds valid device names
CI Runs
- Set all four environment variables as secrets in your pipeline
- Use
--fetch-resultsso the pipeline polls for the build outcome after the upload returns - Refresh the Figma baseline as a separate job, not on every commit, so design changes are a deliberate step
Troubleshooting
Uploads fail with an authentication error
Verified- Verify Environment Variables
- Verify Figma Token
- Check Project Type
Check that all four values are set in the shell you are running from.
echo $PROJECT_TOKEN
echo $FIGMA_TOKEN
echo $LT_USERNAME
echo $LT_ACCESS_KEY
A missing LT_USERNAME or LT_ACCESS_KEY is the most common cause. The CLI reports the missing variable by name.
Ensure the Figma token is valid and has not expired. Generate a new token from Figma Settings.
- Ensure the project is created as Real Devices type, not CLI
- Verify the project exists on the SmartUI dashboard
- Verify
PROJECT_TOKENbelongs to that same project
The config file is rejected
- Check File Token
- Validate Node IDs
- Check Array Lengths
- Unknown Properties
- Verify the
figma_file_tokenin yourdesigns.jsonmatches the file ID from the Figma URL - Ensure the account behind your Figma token has access to that file
- Confirm the
figma_idsin your configuration are valid and unique - Check that the nodes still exist in the Figma file
- Increase
figma.depthif nested frames are not being picked up
If you supply screenshot_names, it must have the same number of entries as figma_ids. A mismatch fails with Mismatch in Figma Ids and Screenshot Names in figma config.
An unrecognised key does not stop the upload, it only logs Additional property "<name>" is not allowed and is then ignored. If a setting seems to have no effect, look for that warning and check it against the Configuration Options table above.
The upload fails while fetching from Figma
Verified- Figma rate limit
- Token cannot see the file
The upload authenticates and then fails during Processing App Figma with a message like:
Failed to retrieve figma files, Figma API rate limit reached for your token.
Your file is on the 'starter' plan tier, and your token's rate-limit bucket is 'low'.
Figma applies the lowest rate-limit bucket to tokens that act as a Viewer or Collab seat on a file, which includes free Starter workspaces. A handful of uploads in quick succession is enough to exhaust it.
What helps:
- Wait before retrying. Short backoff often is not enough, so leave a longer gap between attempts
- Reduce how many
figma_idsyou fetch per run, and avoid re-running the upload while iterating on unrelated config - Use a token belonging to an Editor seat on a paid Figma tier, which is placed in a higher bucket
A direct call to the Figma REST API can still succeed while the upload fails, because the upload makes several calls per run.
If the message is Invalid token rather than a rate limit, the token itself is being rejected. Regenerate it from Figma Settings and make sure it carries the file_content:read scope, which is what allows reading file contents and rendering images.
Figma frames and app screenshots are not being compared
- Check Screenshot Names
- Check Project Match
- Verify Device Sizes
- No App Screenshots Appear
- Ensure app screenshots include the
.pngextension, for examplehomepage.png - Verify names match exactly between the Figma config and your Appium code, including case
- Ensure
screenshot_namesmatches the order offigma_ids
- Verify
smartUI.projectin your capabilities is the project name for the same project whose token you used for the CLI upload - Confirm the Figma build was marked as the baseline, either with
--markBaselineor by approving it on the dashboard
- Ensure the device in
designs.jsonmatches the device in your Appium capabilities - Verify orientation matches on both sides
- Check that your Figma frame dimensions match the device viewport
- Confirm
visual: trueis set in your capabilities. Without it the build is reported asErrorand no screenshots reach SmartUI - Confirm
isRealMobile: trueis set - Confirm the screenshot hook runs after the screen has finished rendering
If you encounter issues not covered here:
- Review the Comprehensive Troubleshooting Guide for detailed solutions
- Check Figma CLI Documentation for basic Figma workflows
- Check Figma-Web CLI Documentation for web comparison workflows
- Visit TestMu AI Support for additional resources
- Contact support at support@testmuai.com or use 24/7 Chat Support
Additional Resources
- Comprehensive Troubleshooting Guide
- Figma CLI Documentation
- Figma-Web CLI Documentation
- Appium Hooks Documentation
- SmartUI Appium SDK
- Upload your app to the real device cloud
- Baseline Management
- Running Your First Project
- SmartUI API Documentation
- How to generate a Figma token
- SmartUI CLI Docs
- Appium + SmartUI Node Sample
Run seamless visual comparisons between real device screenshots and Figma designs with SmartUI CLI. Start validating your mobile UI today!


 Chat with Us