Modules
Modules in KaneAI let you group a sequence of test steps into a single reusable unit. Instead of re-authoring the same steps in every test case, you create a module once and import it wherever it is needed. This reduces duplication, improves consistency, and makes maintenance easier — when a workflow changes, you update the module and propagate the change across test cases.
Modules support variables, parameters, and secrets, so you can pass dynamic data into each module execution rather than hard-coding values.
Module Listing Page
The Modules section shows all available modules in your project. From here you can:
- Browse existing modules and see how many test cases each module is linked to
- Click on any module to view its details, version history, and linked test cases
- Create a new module
Create a Module
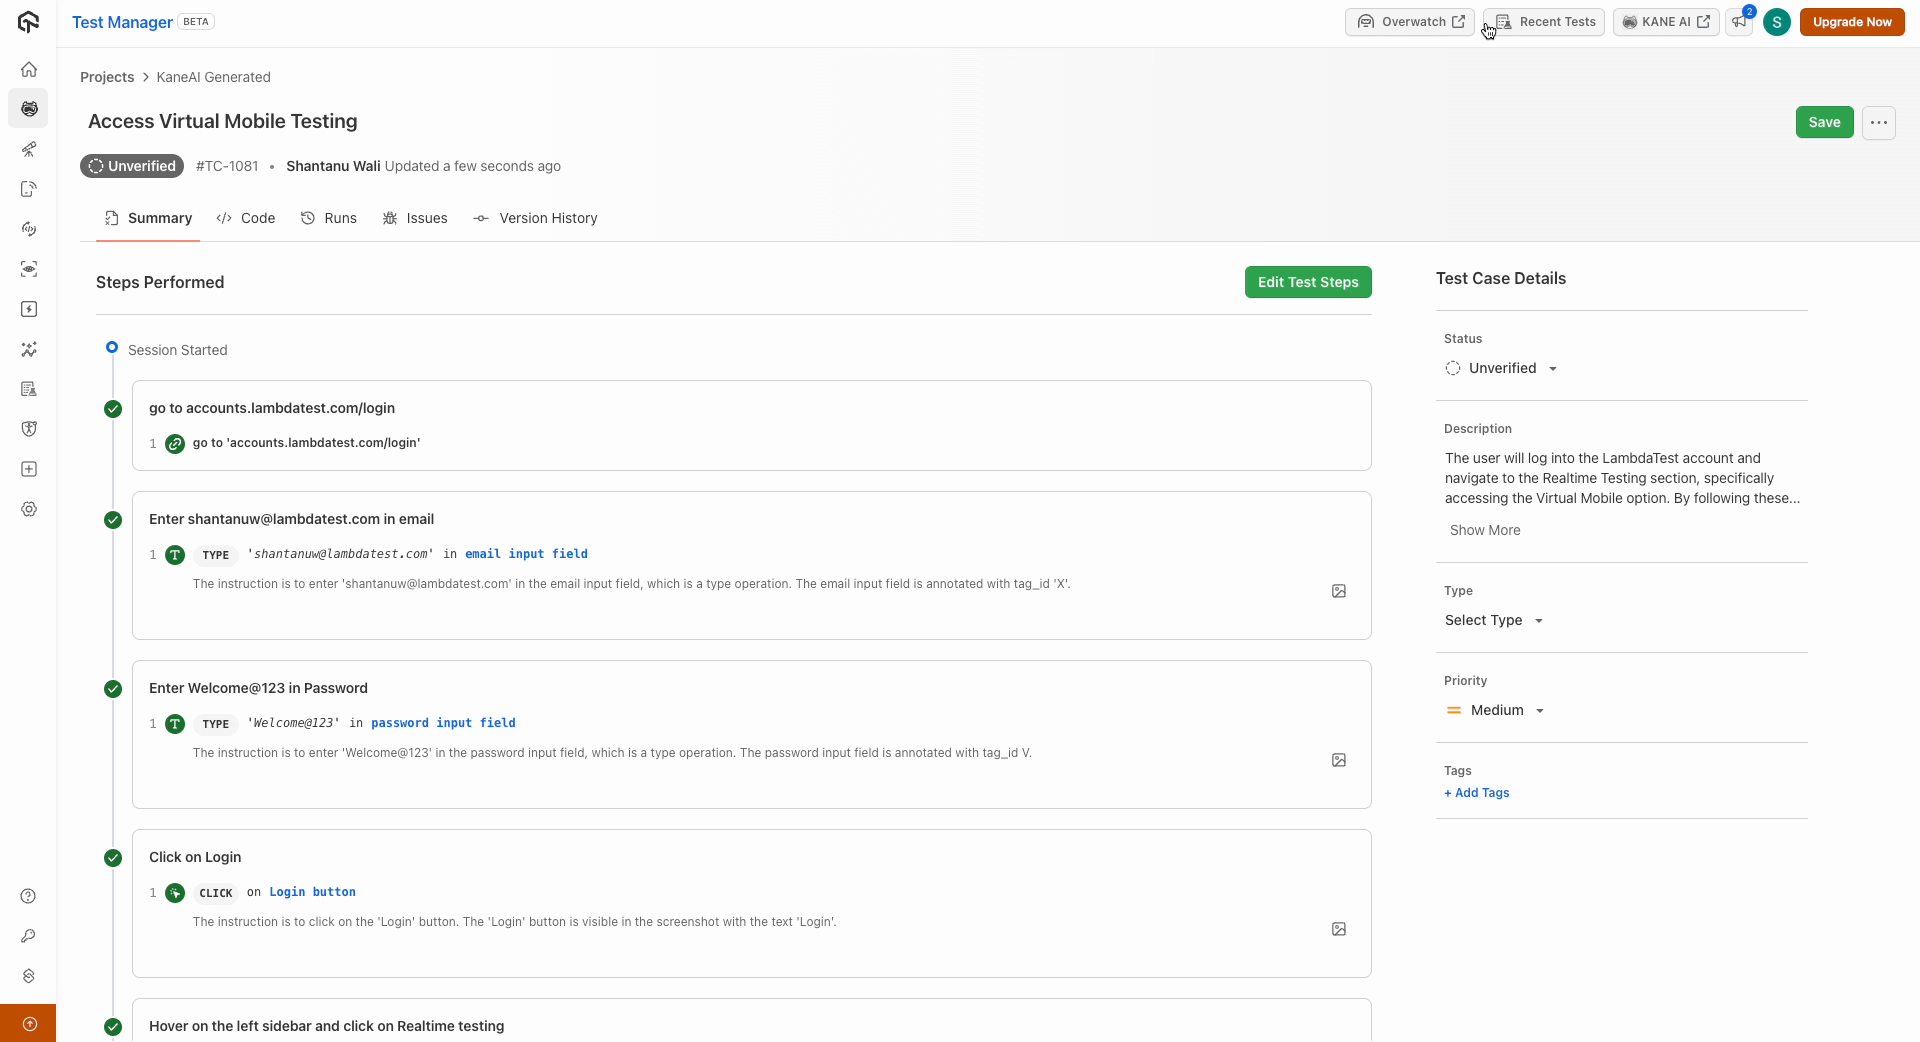
You create modules by extracting test steps from an active KaneAI session.
Step 1: Author Test Steps
Begin by authoring your test in KaneAI and executing the steps that you want to turn into a module.
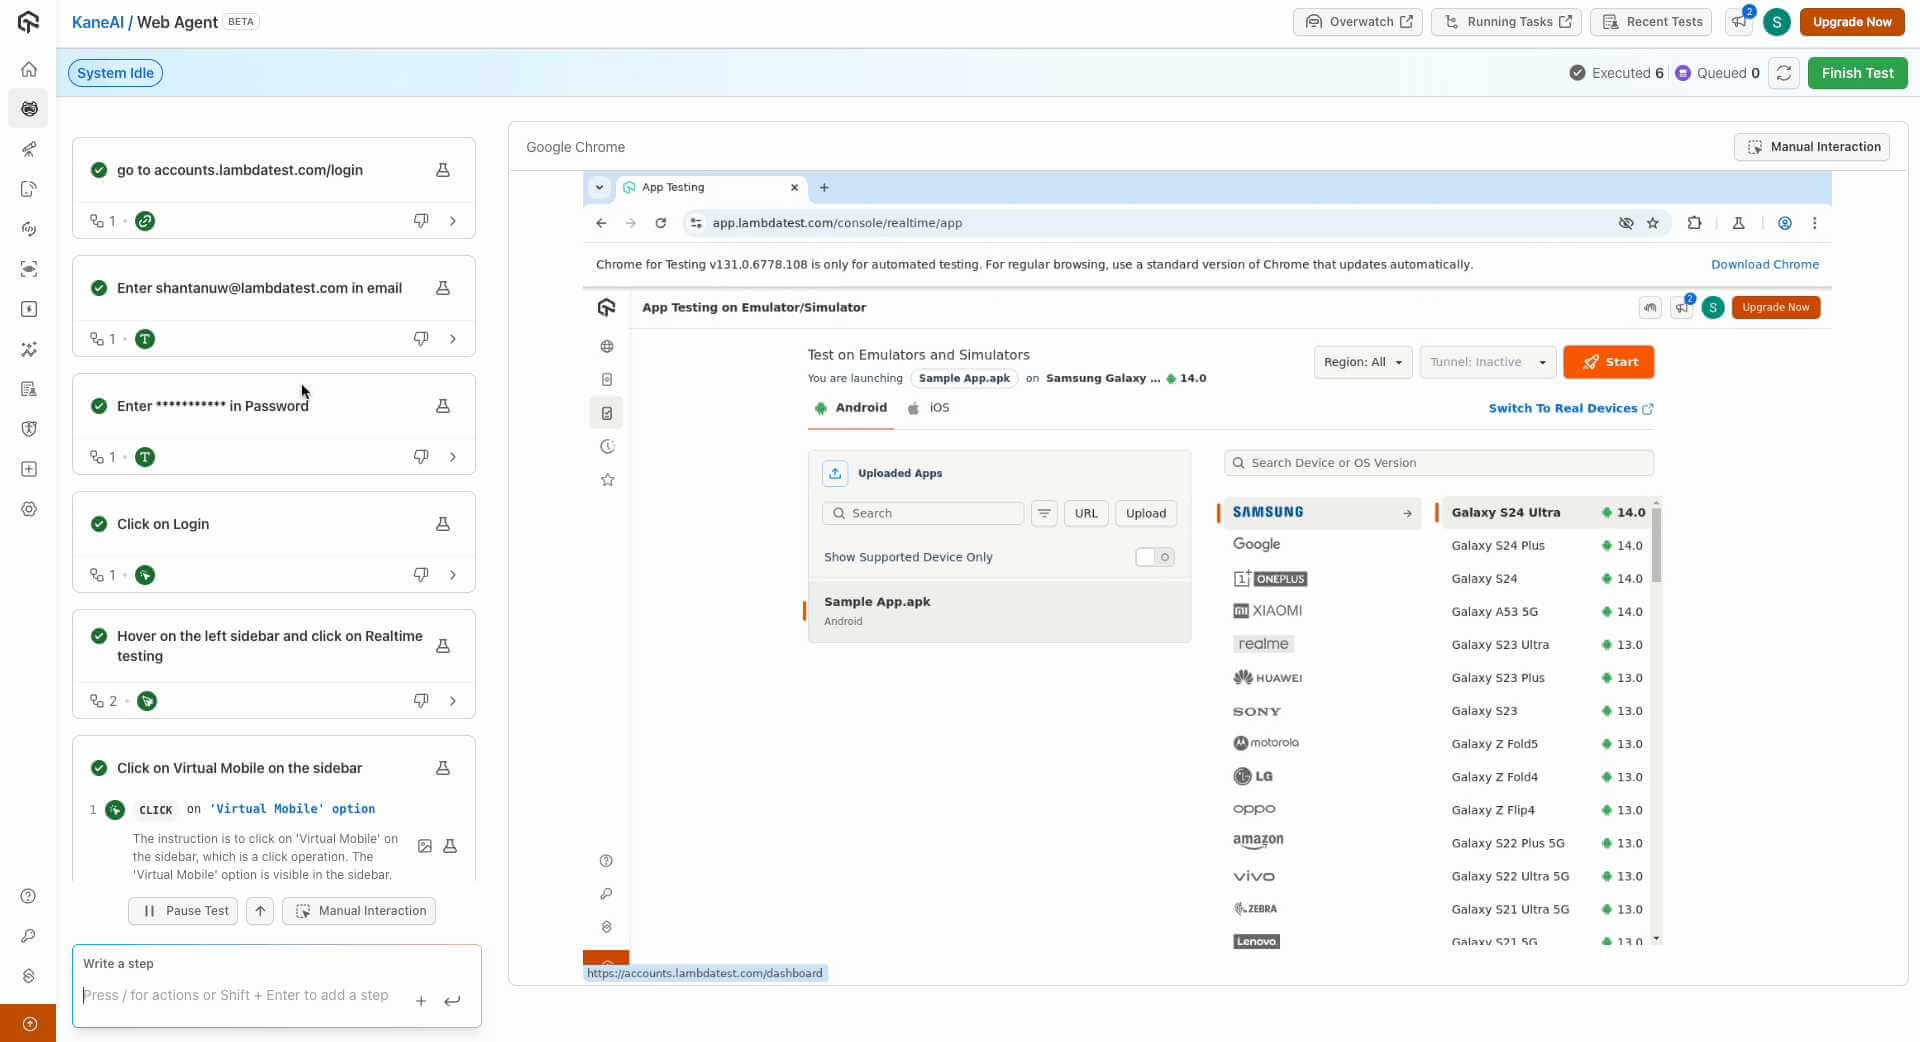
Step 2: Select Test Steps
- Click the Pause Test button.
- Select the test steps you want to include in the module. For example, highlight the steps that handle login functionality.

Step 3: Define Module Properties
- Click Create Module.
- Enter the module details:
- Name — A descriptive name (e.g.,
[Web] Login Flow) - Description — What the module does and when to use it
- Tags — Keywords for easier discovery
- Name — A descriptive name (e.g.,
- Click Create Module to save.
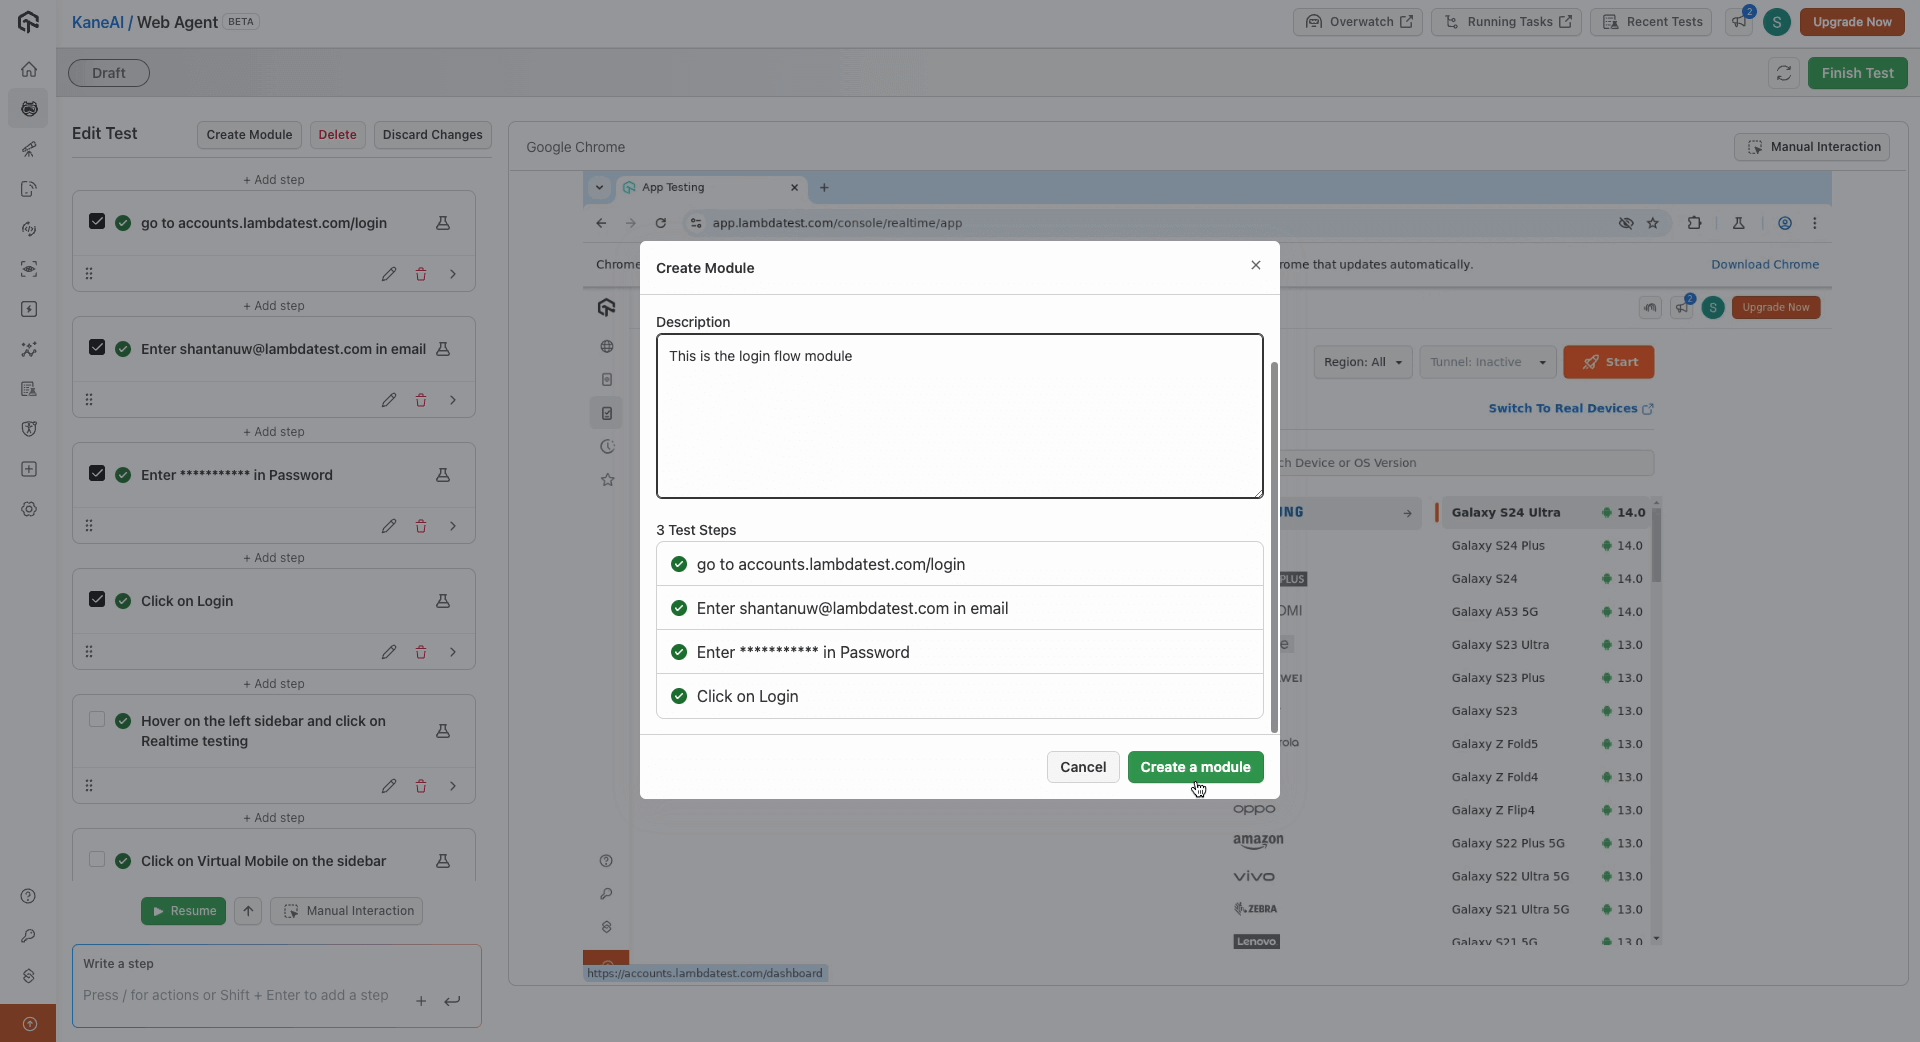
The selected steps are now saved as a reusable module with an initial version.
Use a Module in a Test
Once a module exists, you can import it into any KaneAI test.
Step 1: Open a Test
Create a new test or open an existing one in the KaneAI web agent.
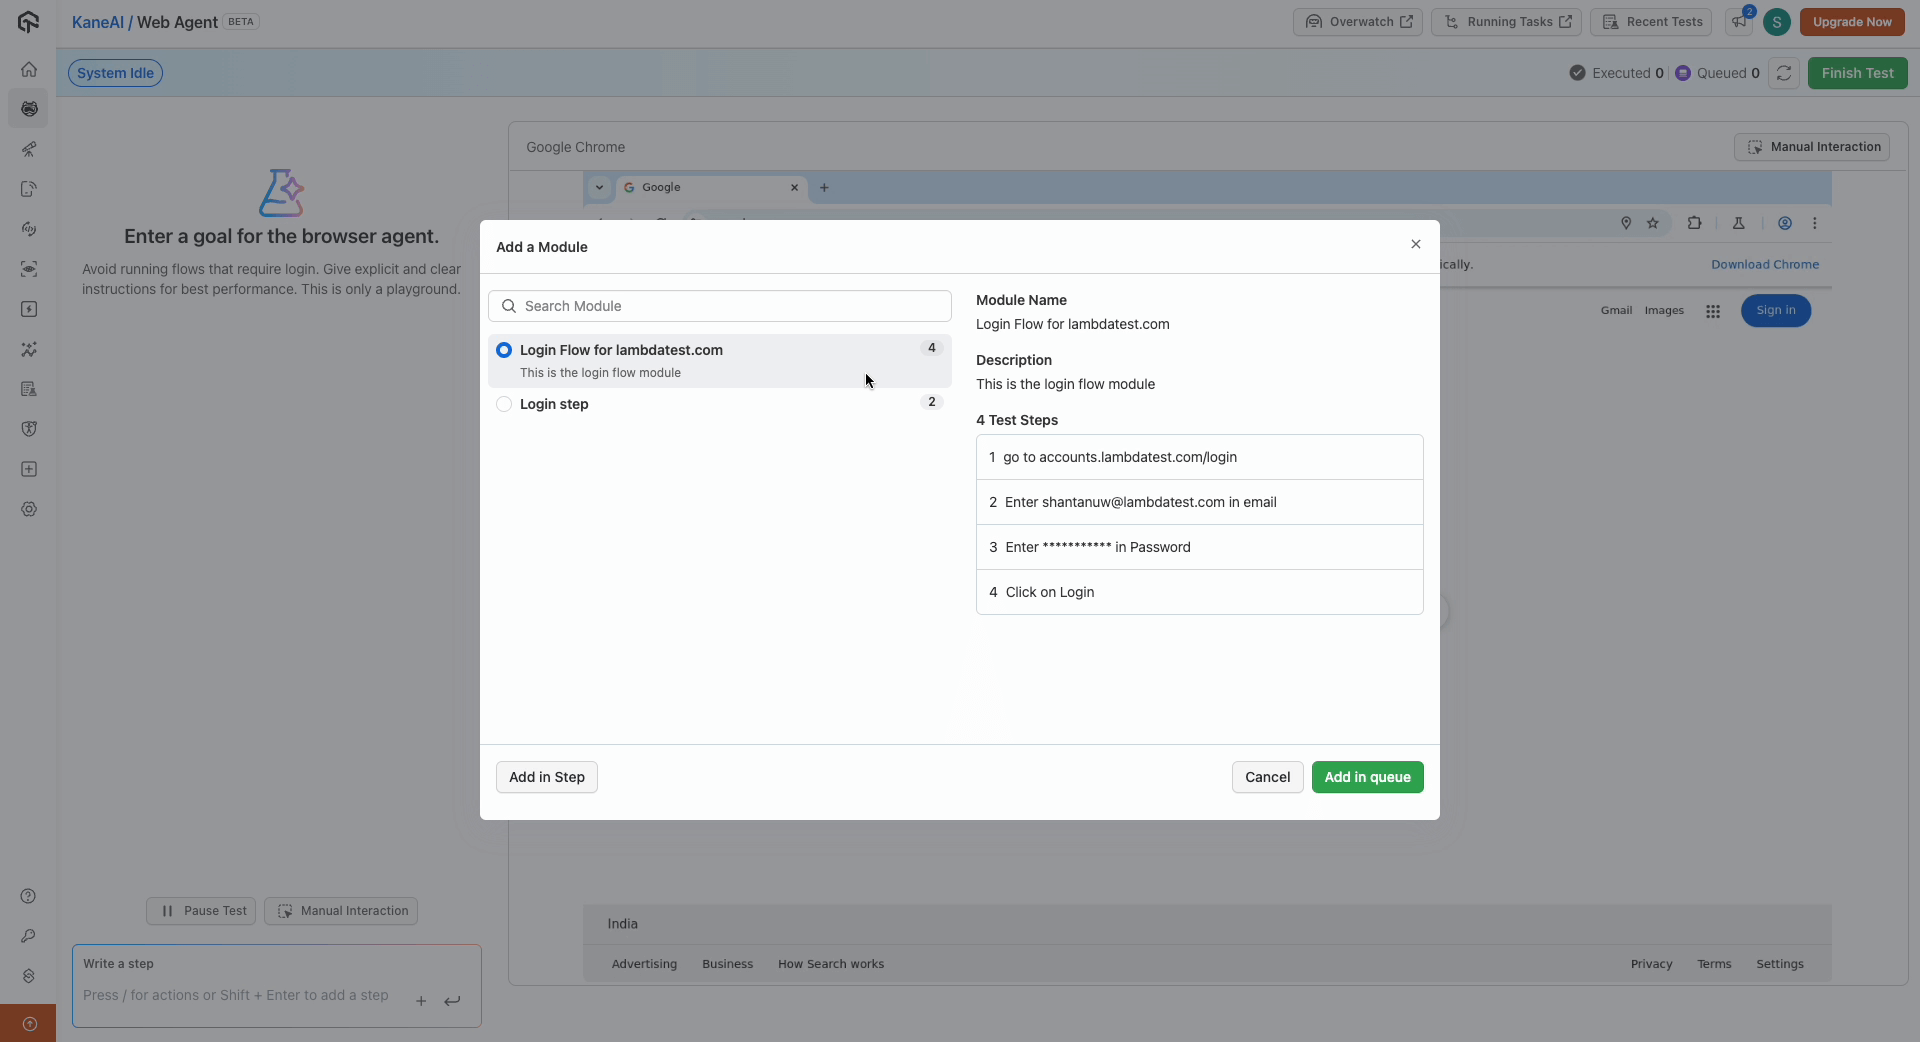
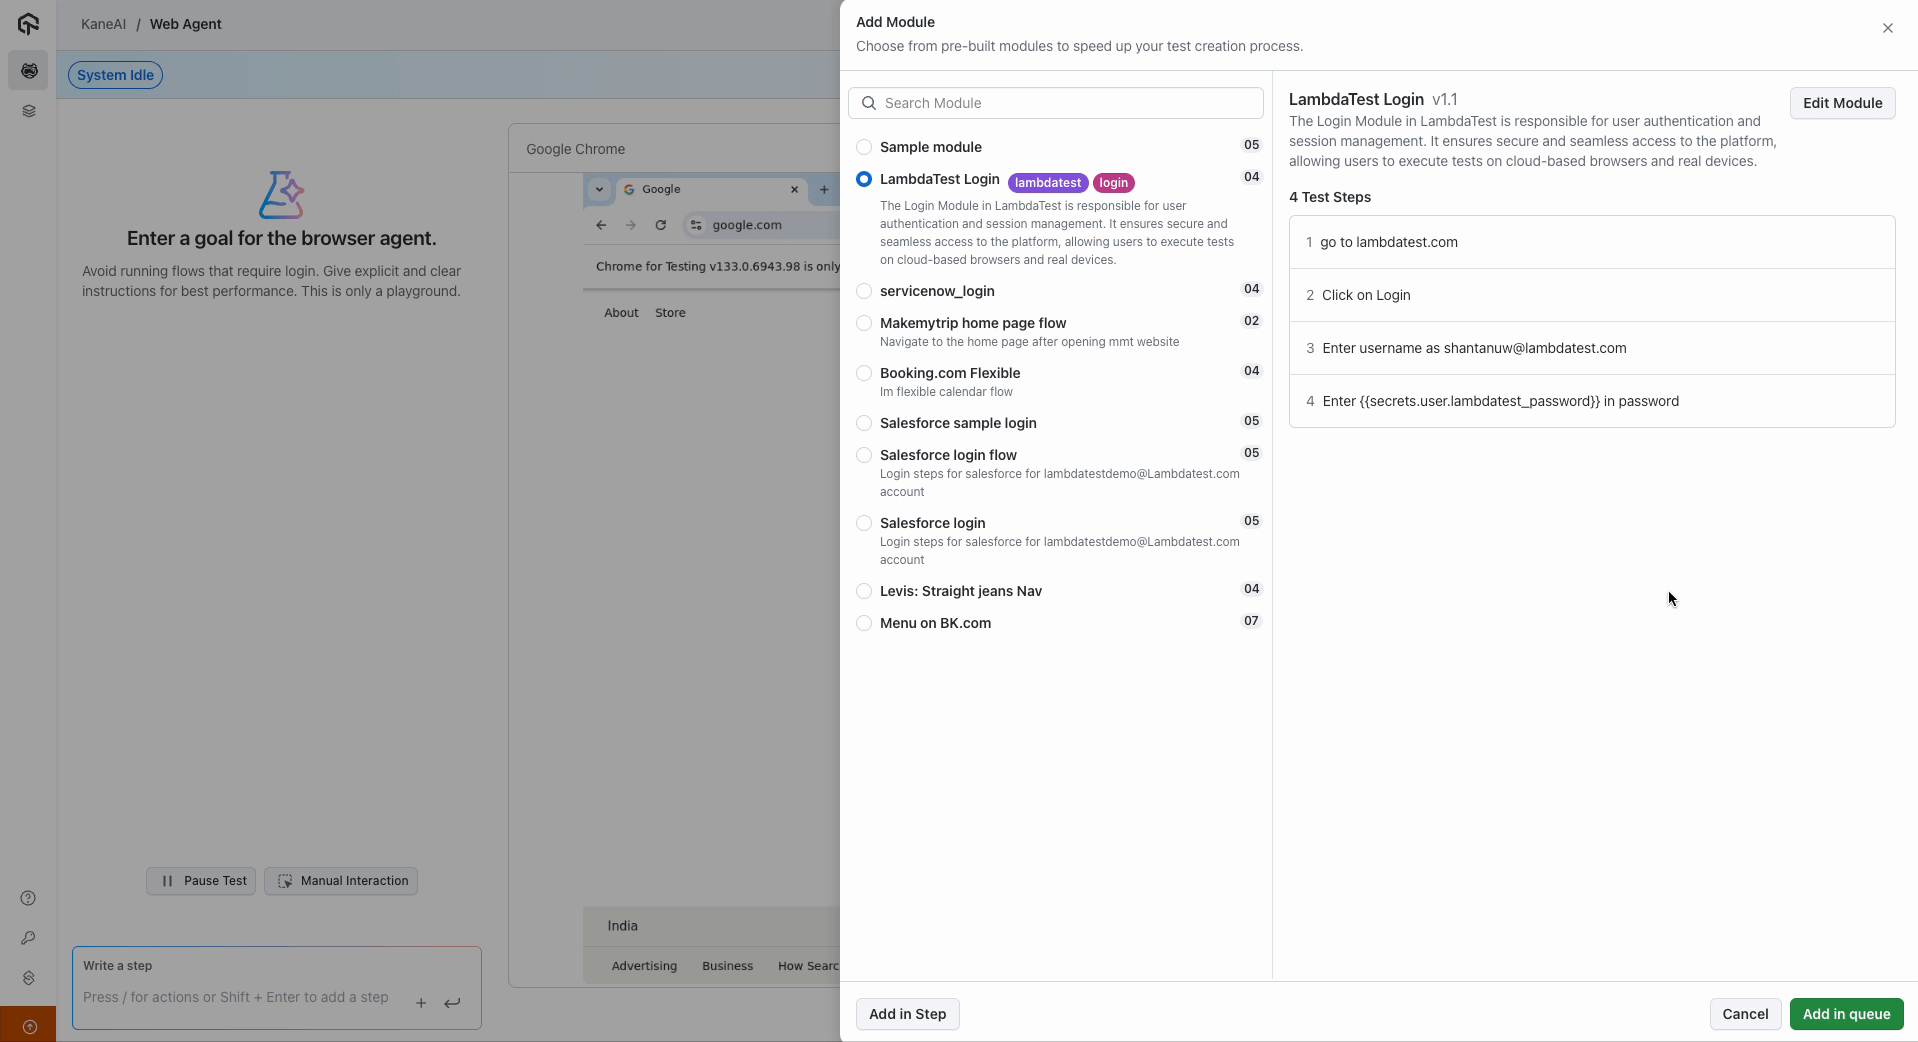
Step 2: Import the Module
Use either method to access the modules menu:
- Click the plus (+) icon in the test interface
- Type a slash (/) to invoke the command menu and select Add Module
Browse the list of available modules and select the one you need.
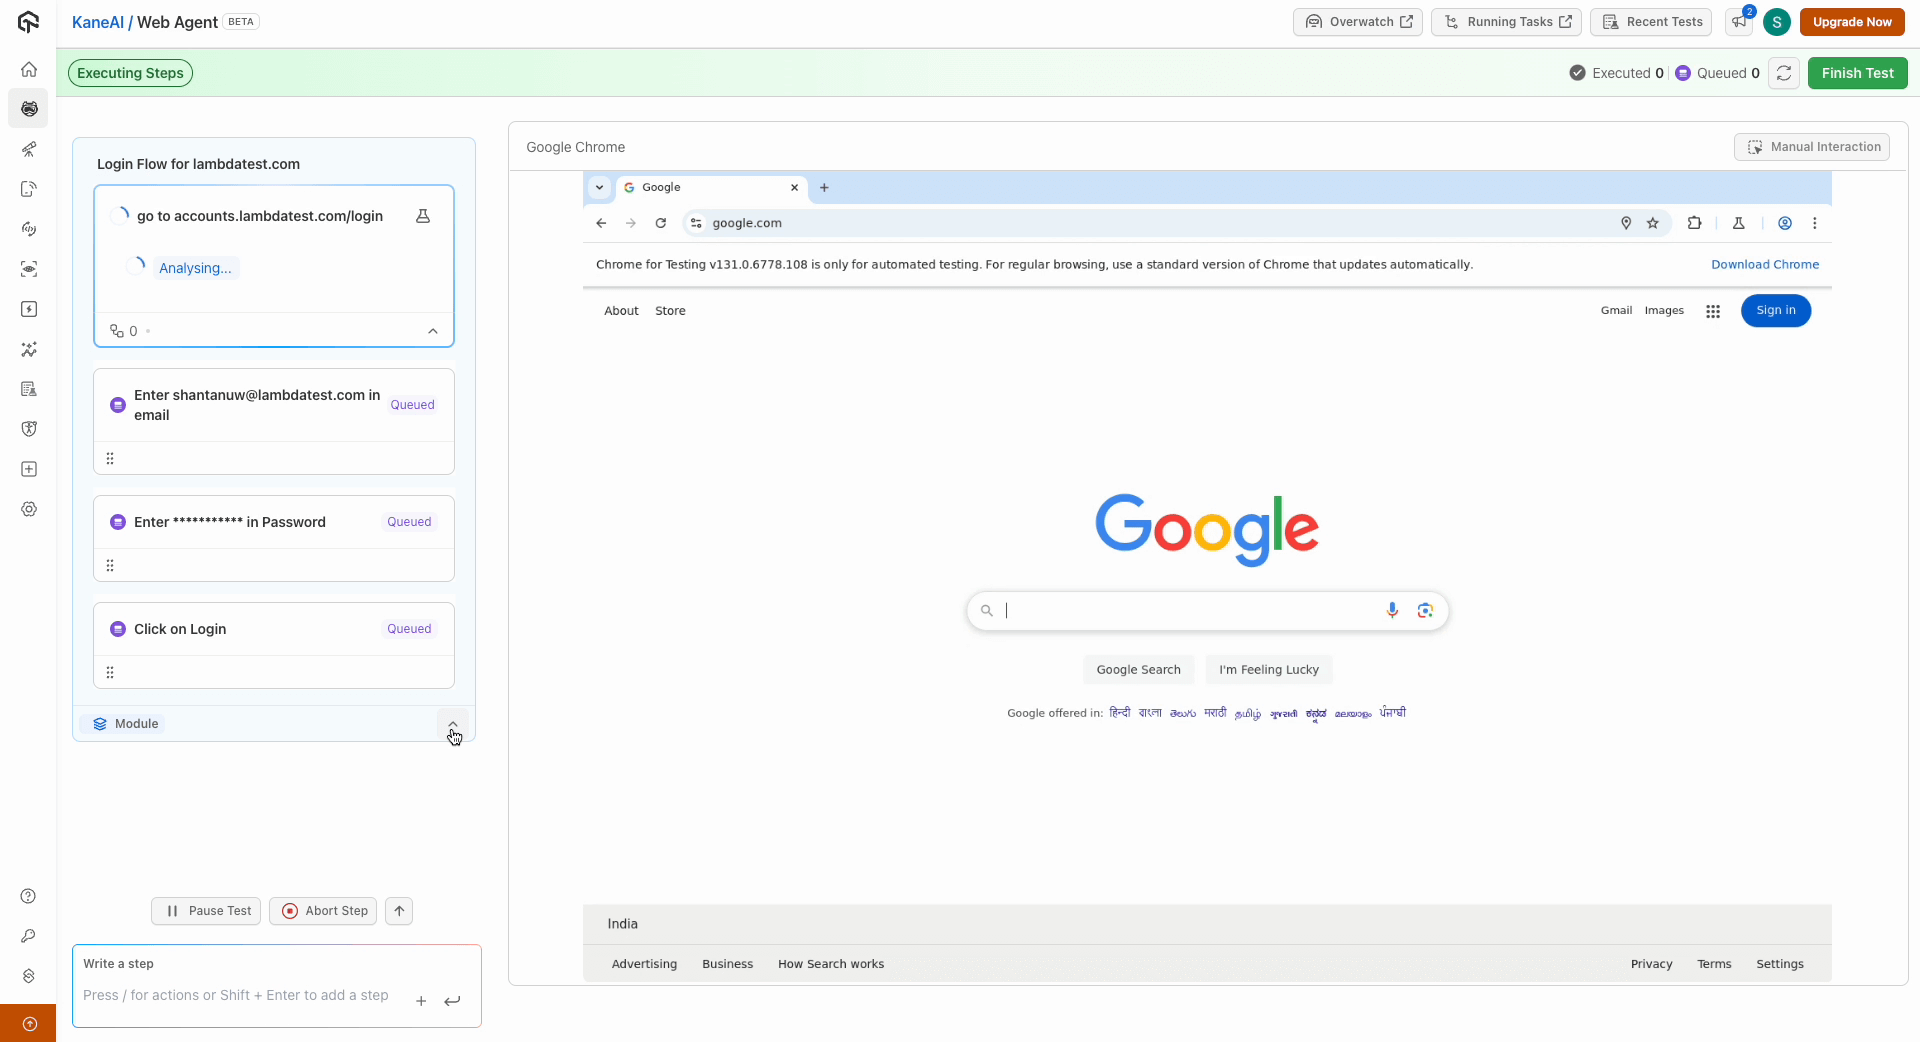
Step 3: Execute
Click Add in Queue to execute the module's test steps. The steps run automatically as part of the test.
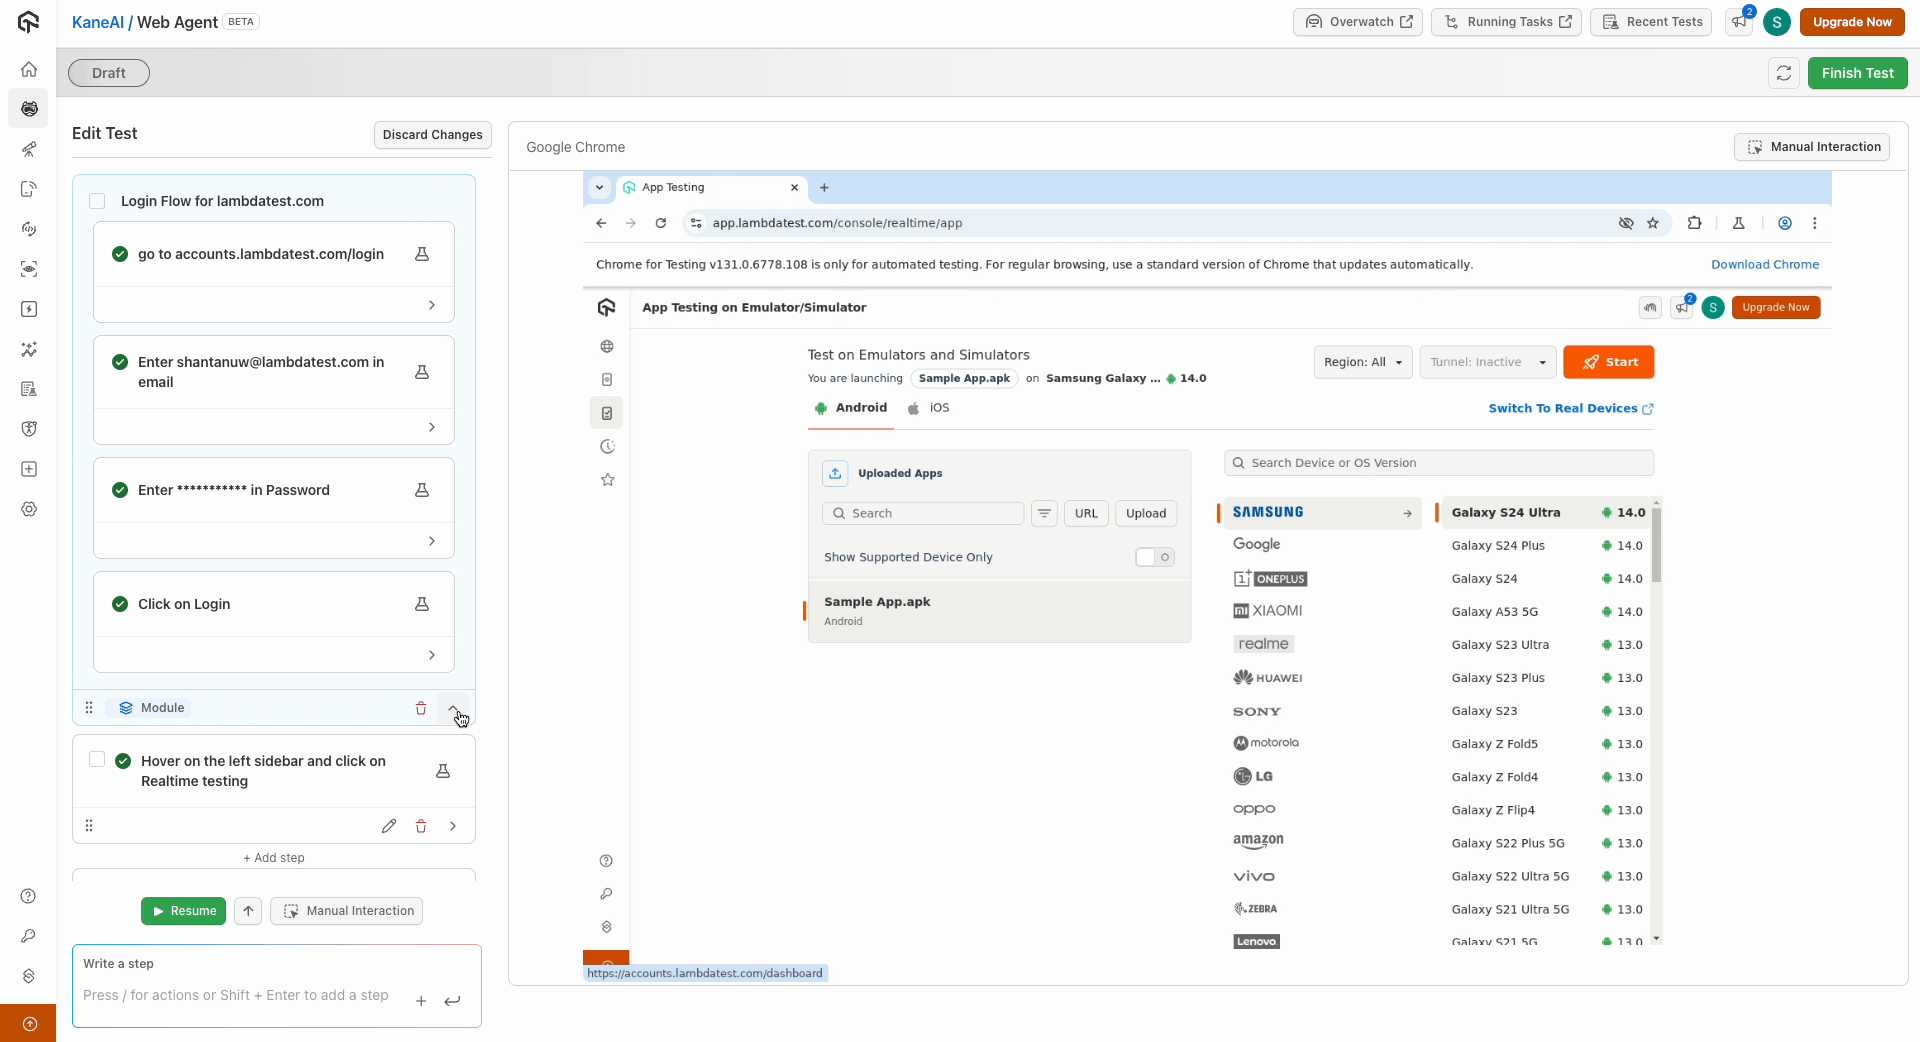
Edit a Module
Click on an existing module from the Module listing page to modify its steps or properties.
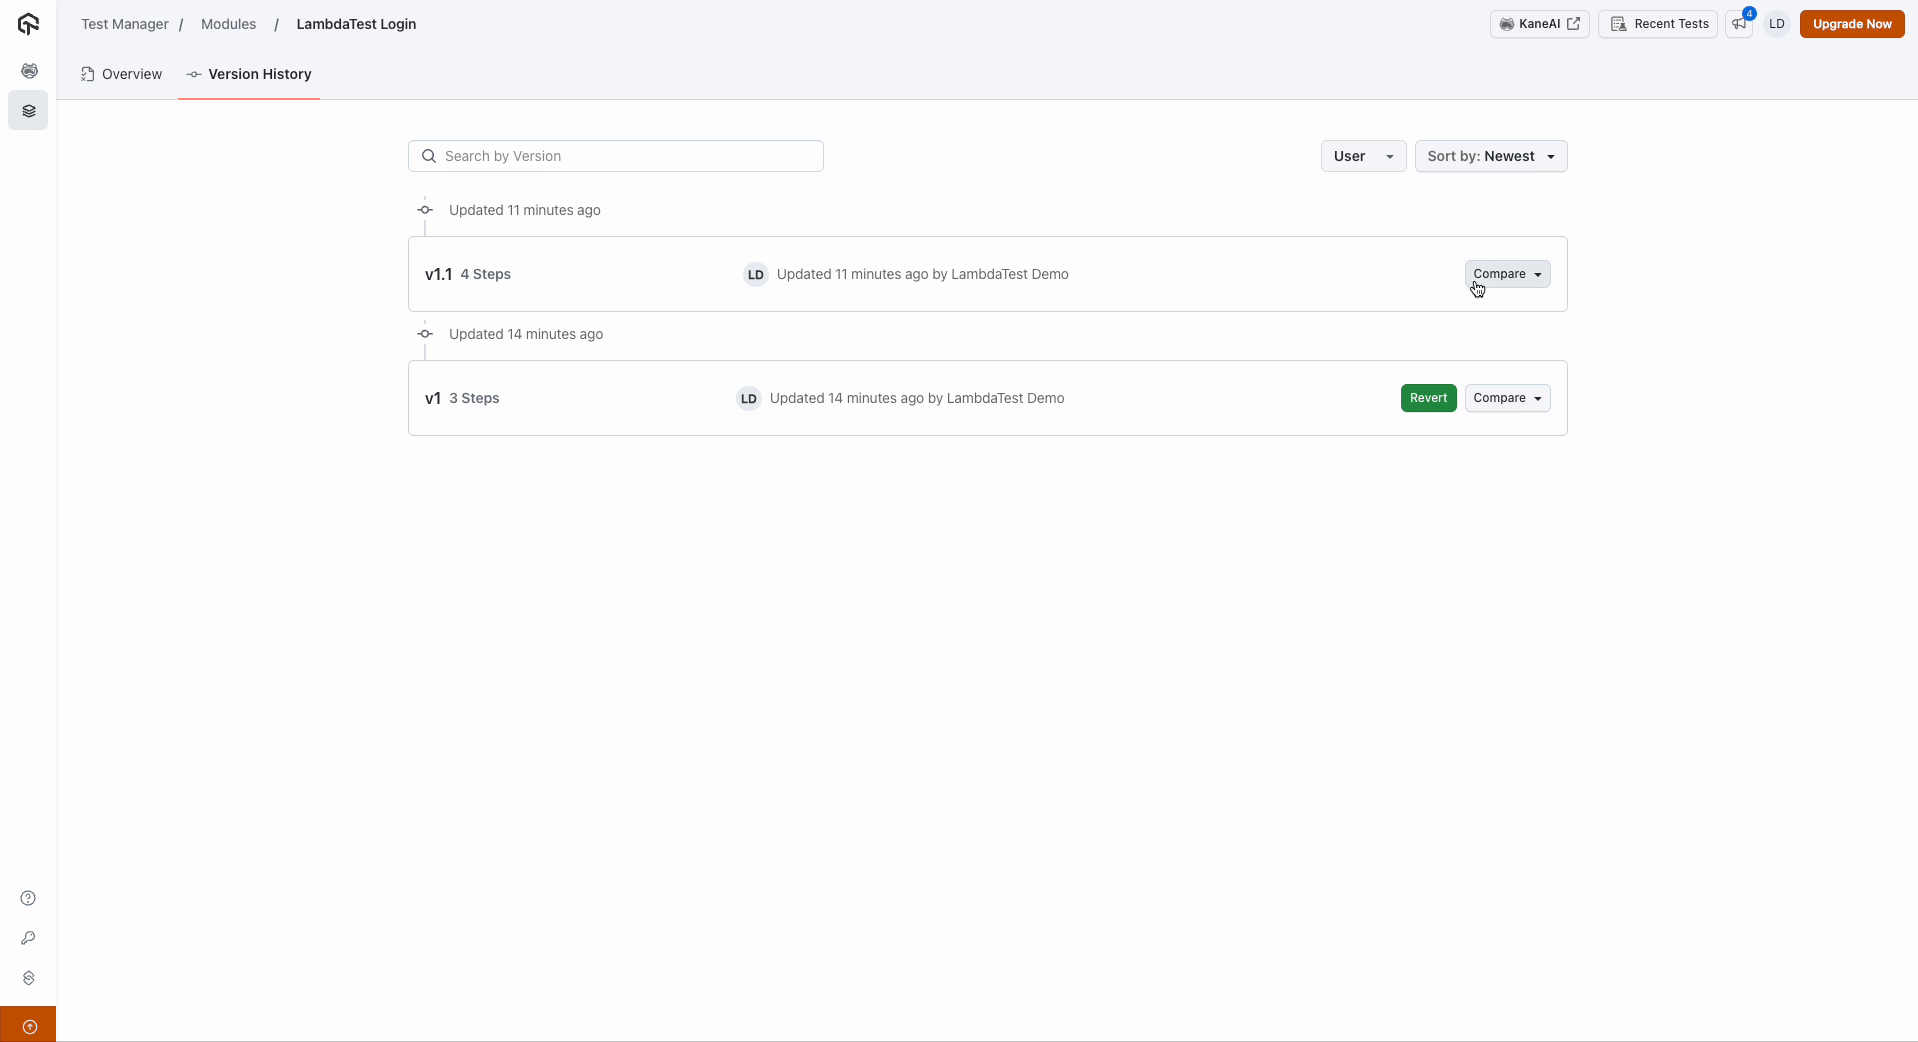
When you save changes to a module, a new version is created automatically. See Versioning and Enhancements for details on how version history works.
Delete a Module
You can delete modules that are no longer needed from the module listing page.
- Navigate to the Modules section.
- Locate the module you want to delete.
- Click the meatball menu (...) icon on the module card.
- Select Delete.
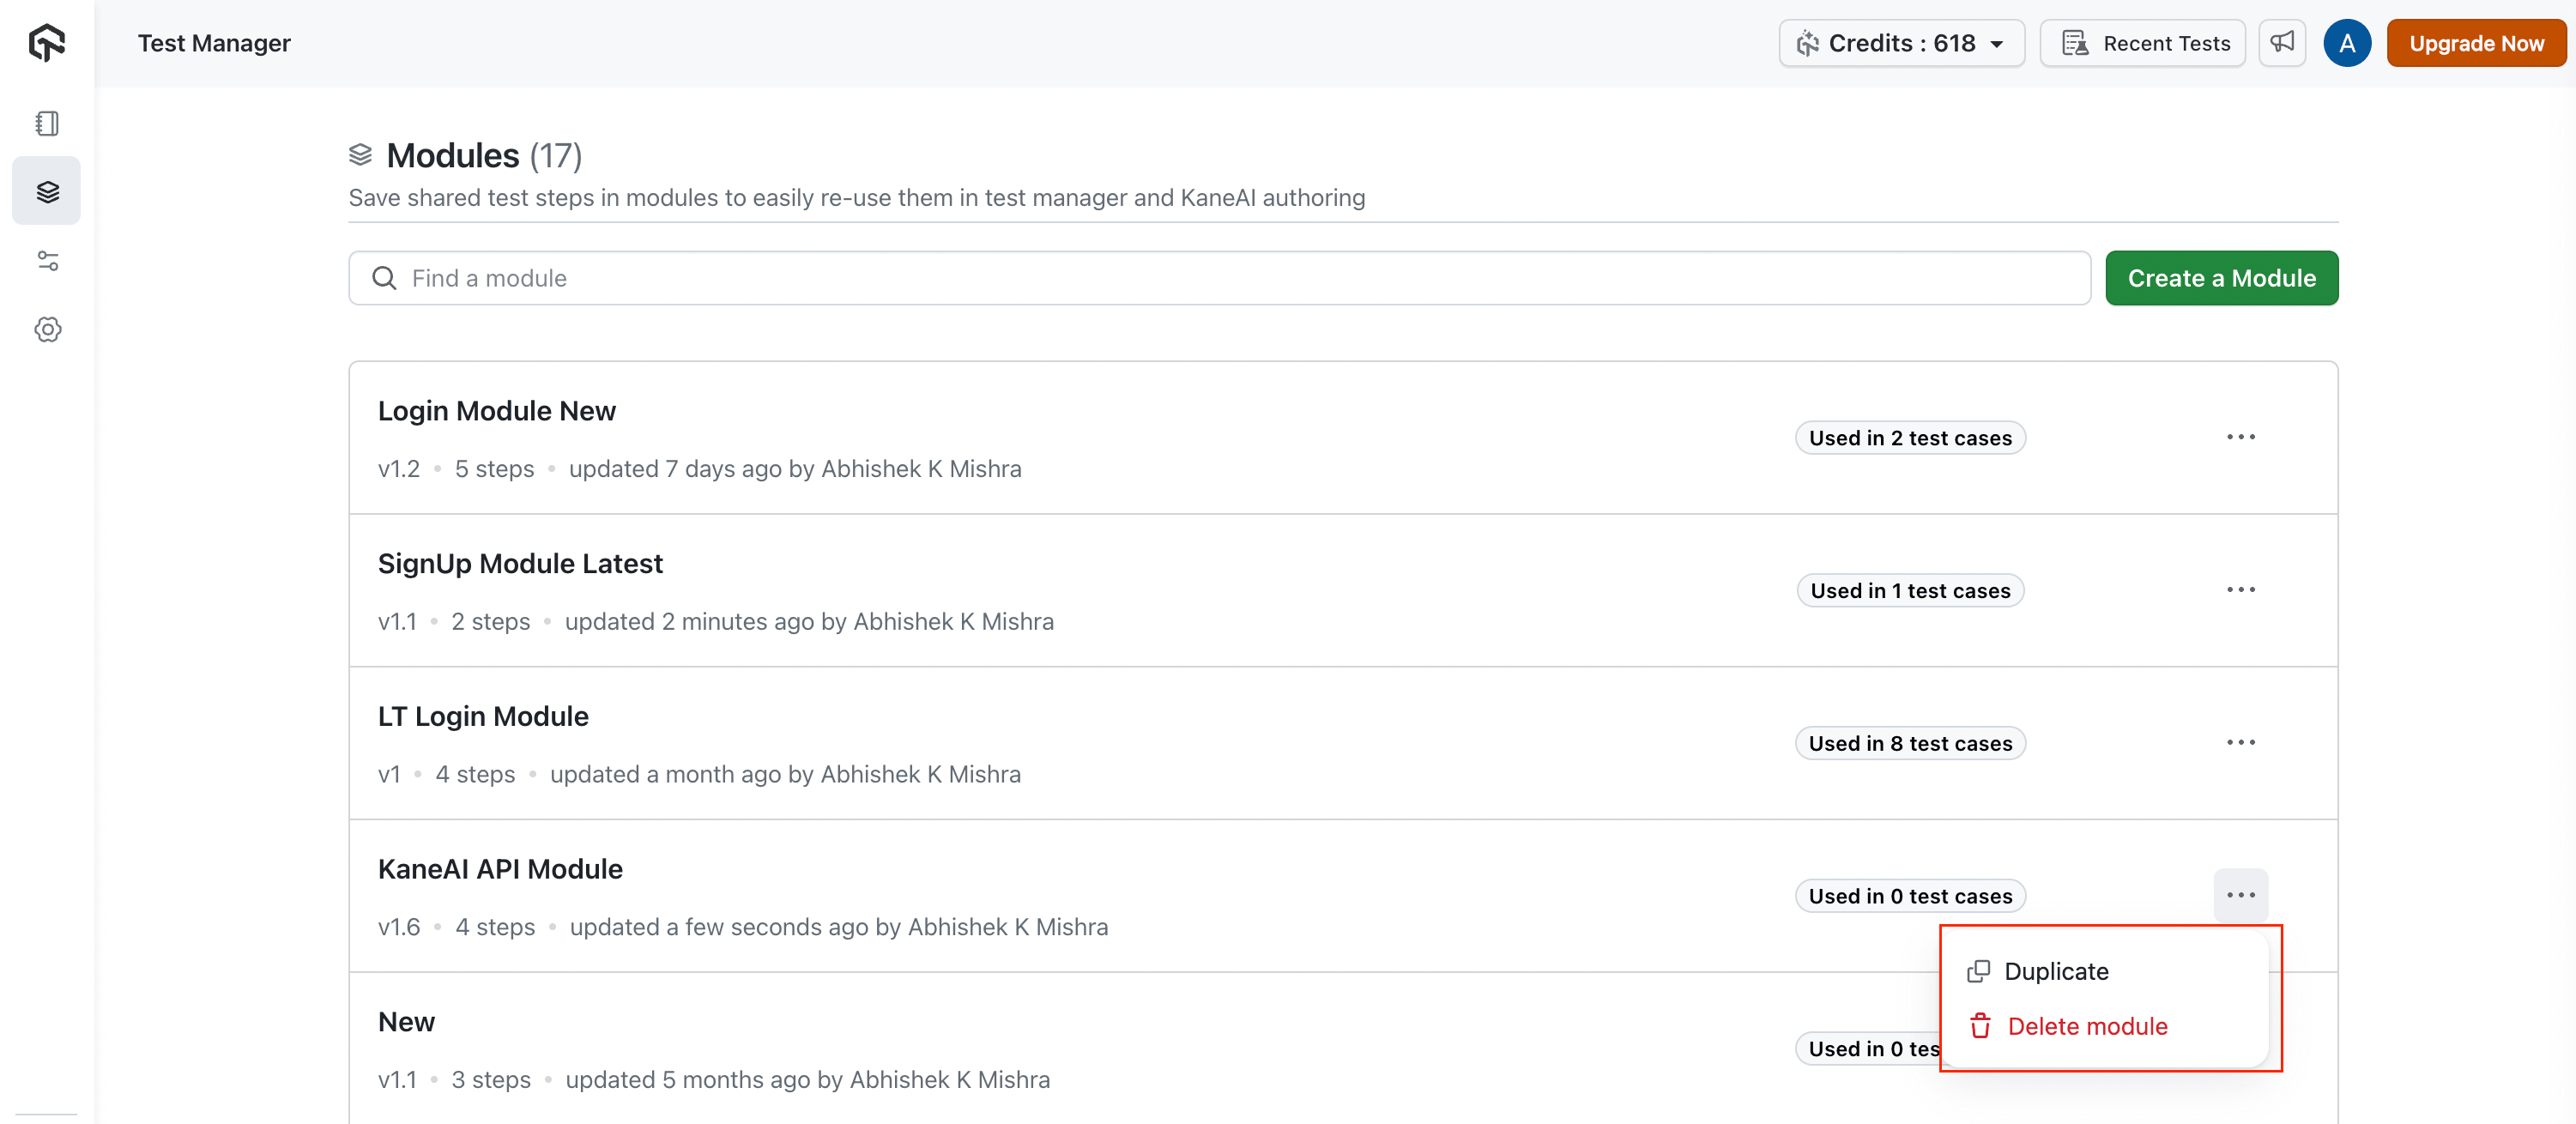
Only modules that are not linked to any test cases can be deleted. If a module is currently used in one or more test cases, the delete option will be disabled. You must first remove the module from all linked test cases before deleting it.
Best Practices
Create Platform-Specific Modules
Modules in KaneAI are platform-specific. Each platform has distinct interaction patterns, element selectors, and navigation flows, which means the same user action (e.g., tapping vs. clicking, scrolling behavior, keyboard input) behaves differently across platforms. A module authored on one platform may produce unexpected results when used on another.
Create separate module copies for each target platform. For example, if you have a login workflow that needs to run across platforms, create a distinct module for each:
| Module Name | Platform |
|---|---|
[Web] Login Flow | Desktop Web |
[Android-App] Login Flow | Android App |
[Android-Browser] Login Flow | Android Browser |
[iOS-App] Login Flow | iOS App |
[iOS-Browser] Login Flow | iOS Browser |
Use Prefixes and Tags Together
Adopt a consistent name prefix and tag strategy to make platform context immediately clear and modules easy to filter.
Name prefixes — Add a platform prefix at the start of every module name:
[Web]— Desktop Web modules[Android-App]— Android native app modules[Android-Browser]— Android browser modules[iOS-App]— iOS native app modules[iOS-Browser]— iOS browser modules
Tags — Add platform tags to each module so you can filter the module listing by platform:
desktop-web,android-app,android-browser,ios-app,ios-browser
Using both prefixes and tags together gives you the best of both worlds: prefixes make the platform obvious at a glance when importing a module into a test, while tags let you filter the module listing page to show only modules for a specific platform.
You can extend this convention for other distinctions:
[Web][Staging]— Environment-specific modules[Android-App][Auth]— Feature-area grouping- Tags like
login,checkout,onboarding— Workflow-based categorization
Keep Modules Focused
Each module should represent a single, cohesive workflow (e.g., login, checkout, form submission). Avoid creating overly large modules that combine unrelated steps — they become harder to maintain and less reusable.
Use Variables and Parameters
Instead of hard-coding values like usernames, URLs, or test data into module steps, use variables and parameters. This lets you reuse the same module across different test scenarios by passing in different data at execution time.
Write Clear Descriptions
Add a meaningful description to every module so other team members understand what it does without reading every step. Include the target platform, expected preconditions, and what state the application will be in after the module runs.
Related Guides
- Versioning and Enhancements — Track changes, compare versions, and revert modules
- Bulk Module Update — Update a module version across multiple test cases in one action
