WordPress Plugin
With TestMu AI plugin for WordPress, you can generate automated screenshots of your web pages and post directly from your WordPress platform.
How To Install & Use TestMu AI WordPress Plugin?
Step 1: Login to your WordPress account.
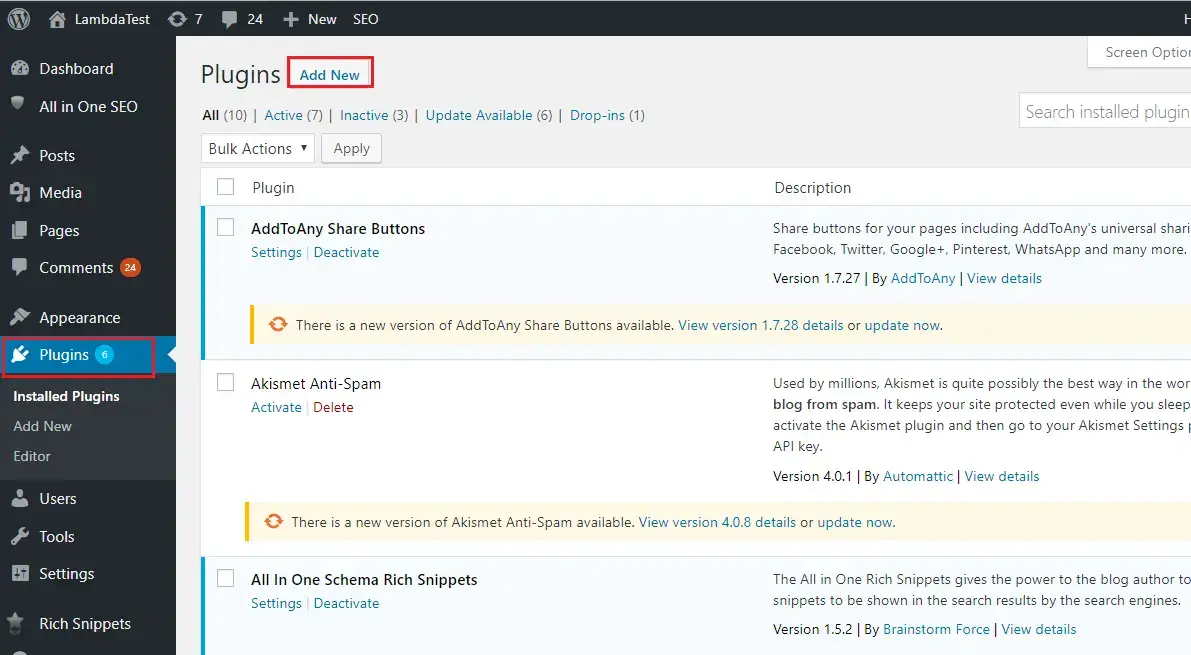
Step 2: Goto plugins and click on Add New plugin button.
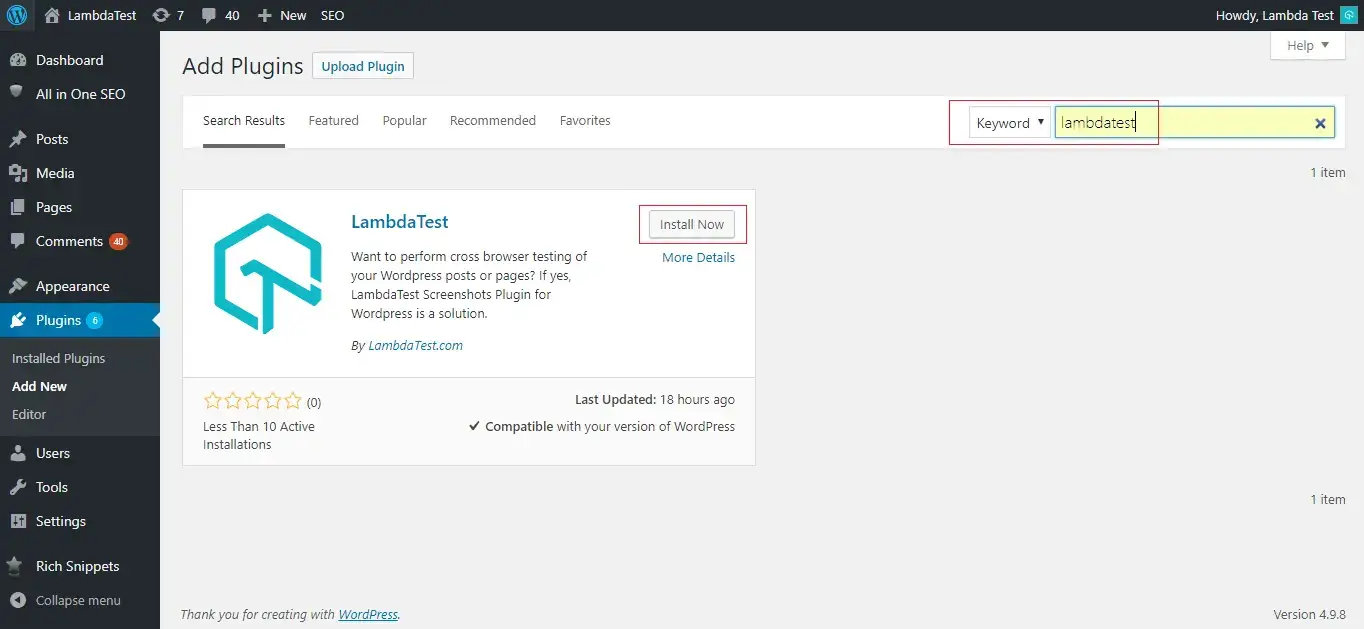
Step 3: Search for TestMu AI keyword in search bar and click on install button.
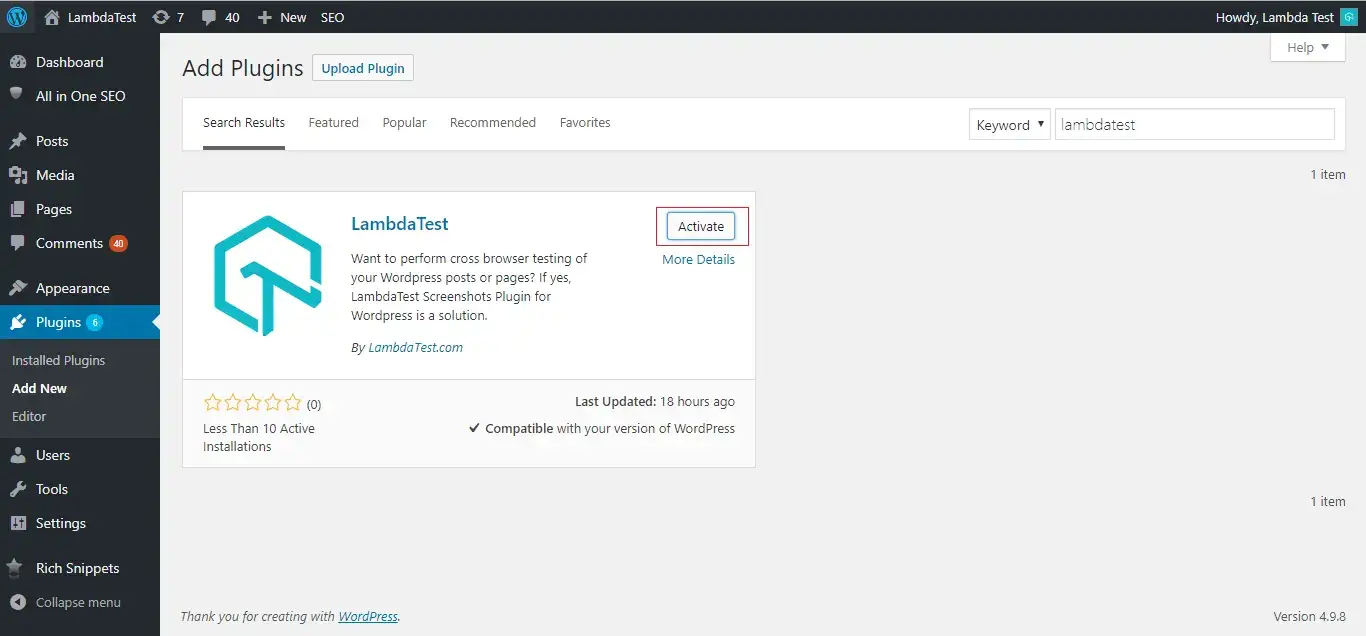
Step 4: Click on Activate button and you are all set with TestMu AI plugin.
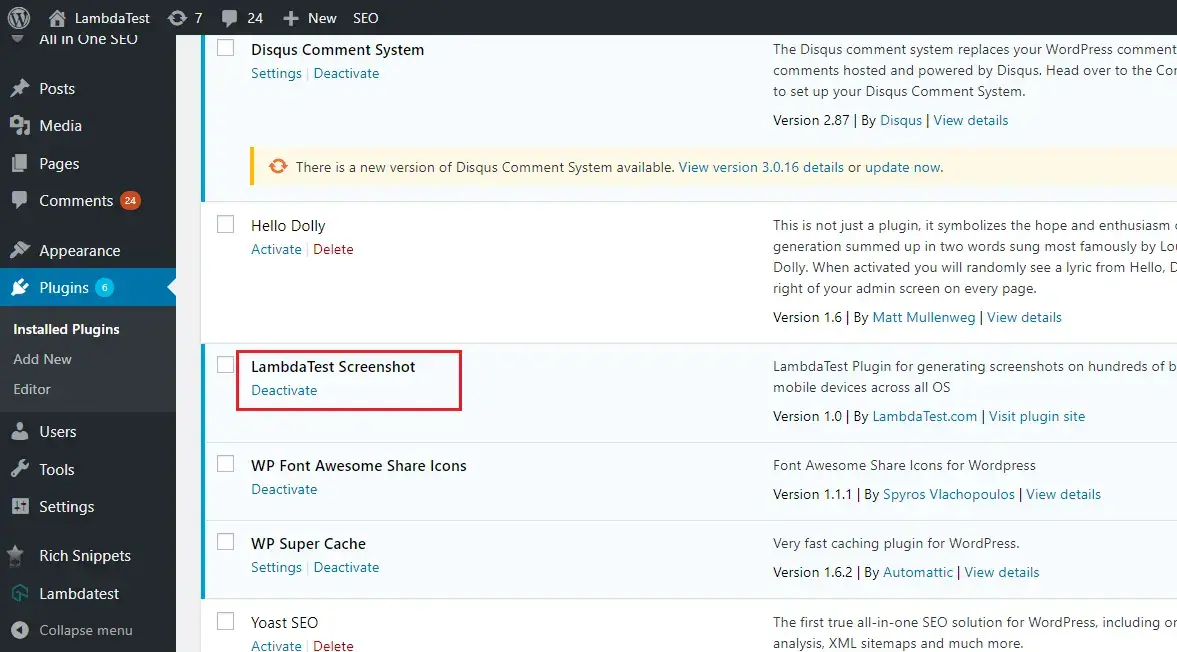
Step 5: Now you can see TestMu AI Screenshot in plugin option on your WordPress platform.
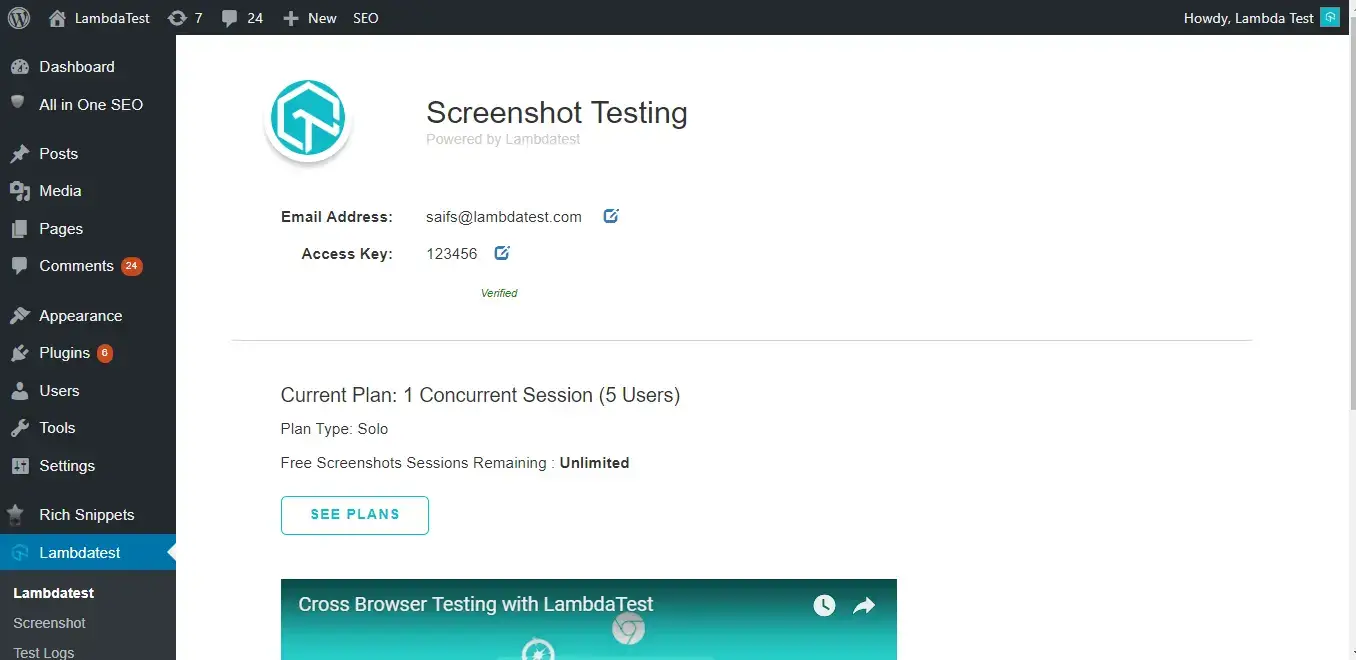
Step 6: Now go to TestMu AI plugin and add TestMu AI profile account details.
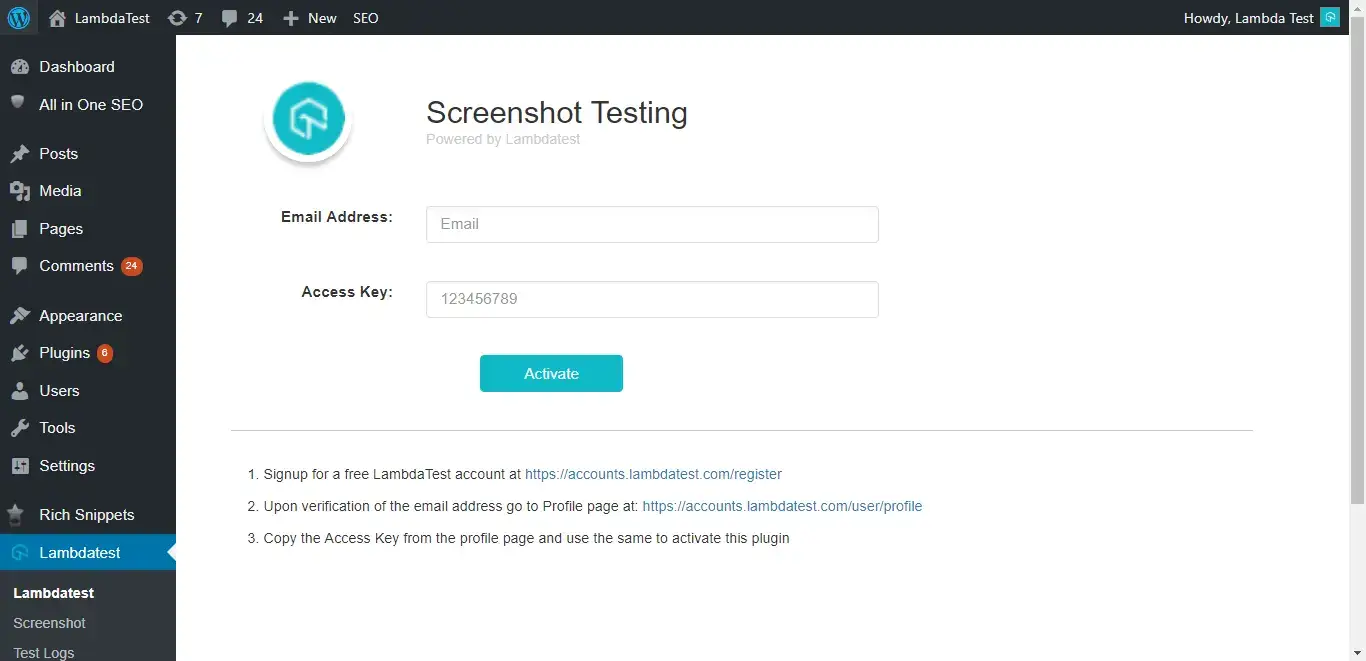
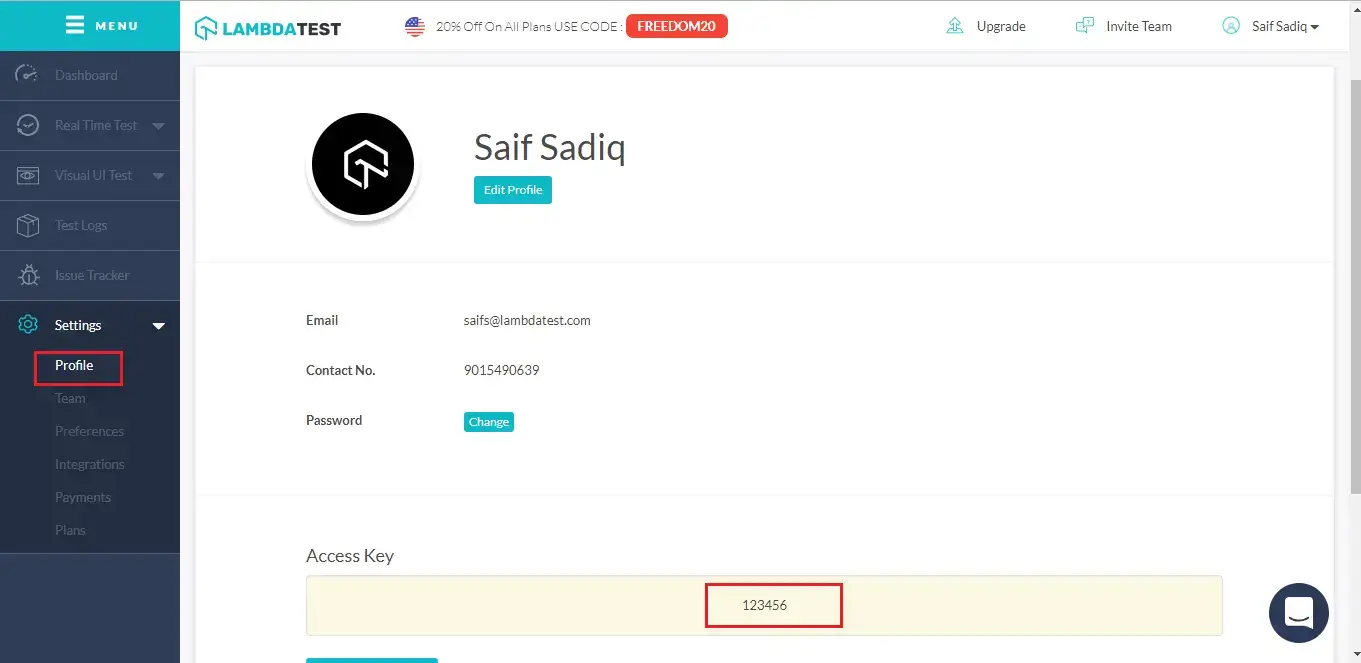
Step 7: Go to profile section on your TestMu AI account and copy access key.
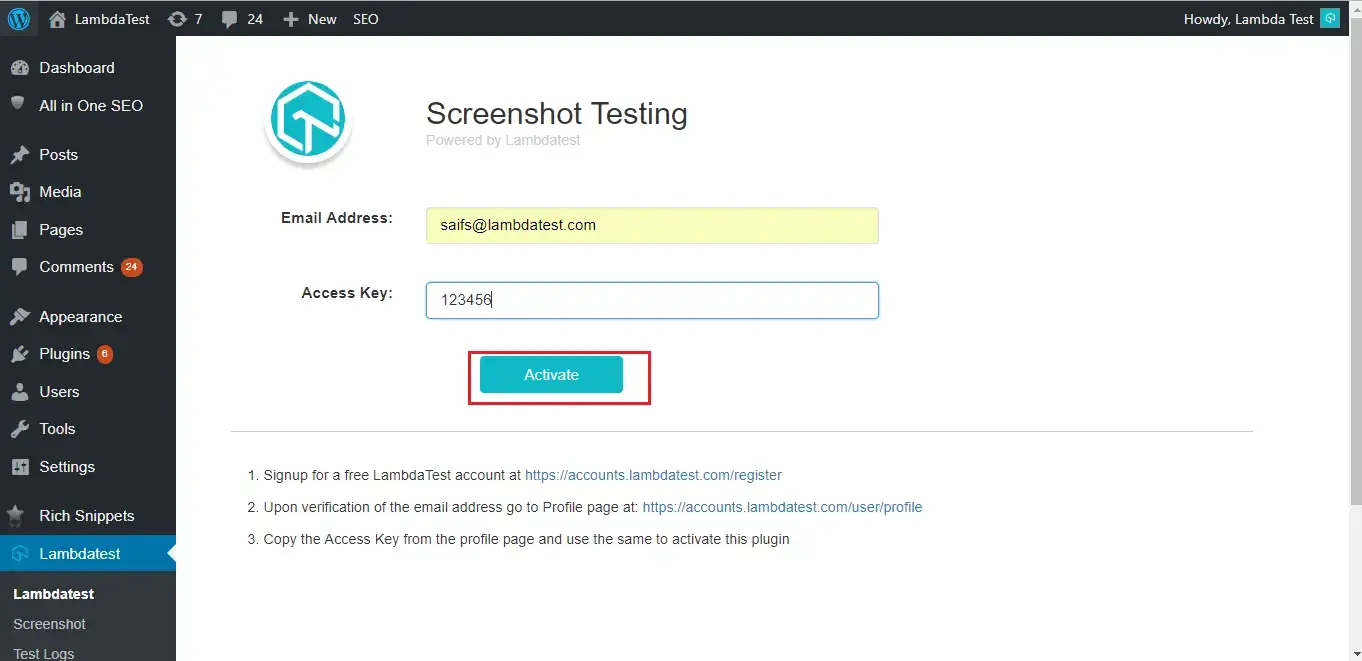
Step 8: Add Email address and paste Access key in your WordPress platform. Click on Activate button.
Step 9: You are all set with WordPress plugin.
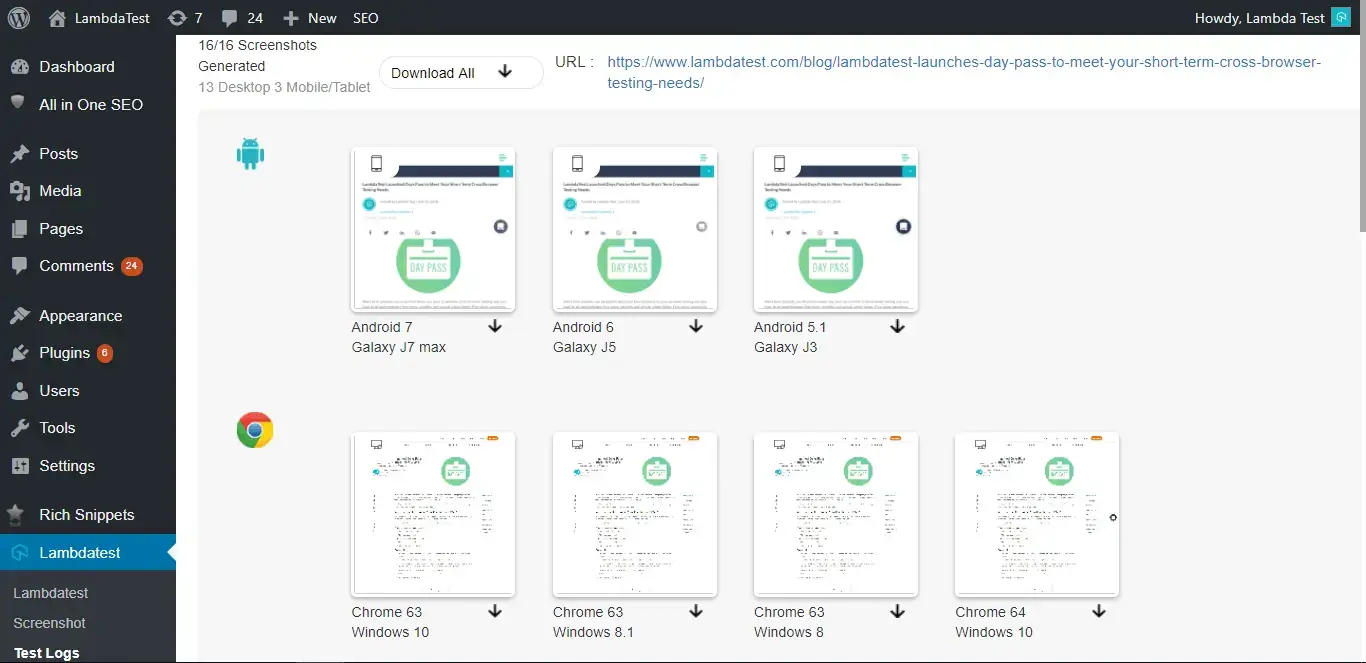
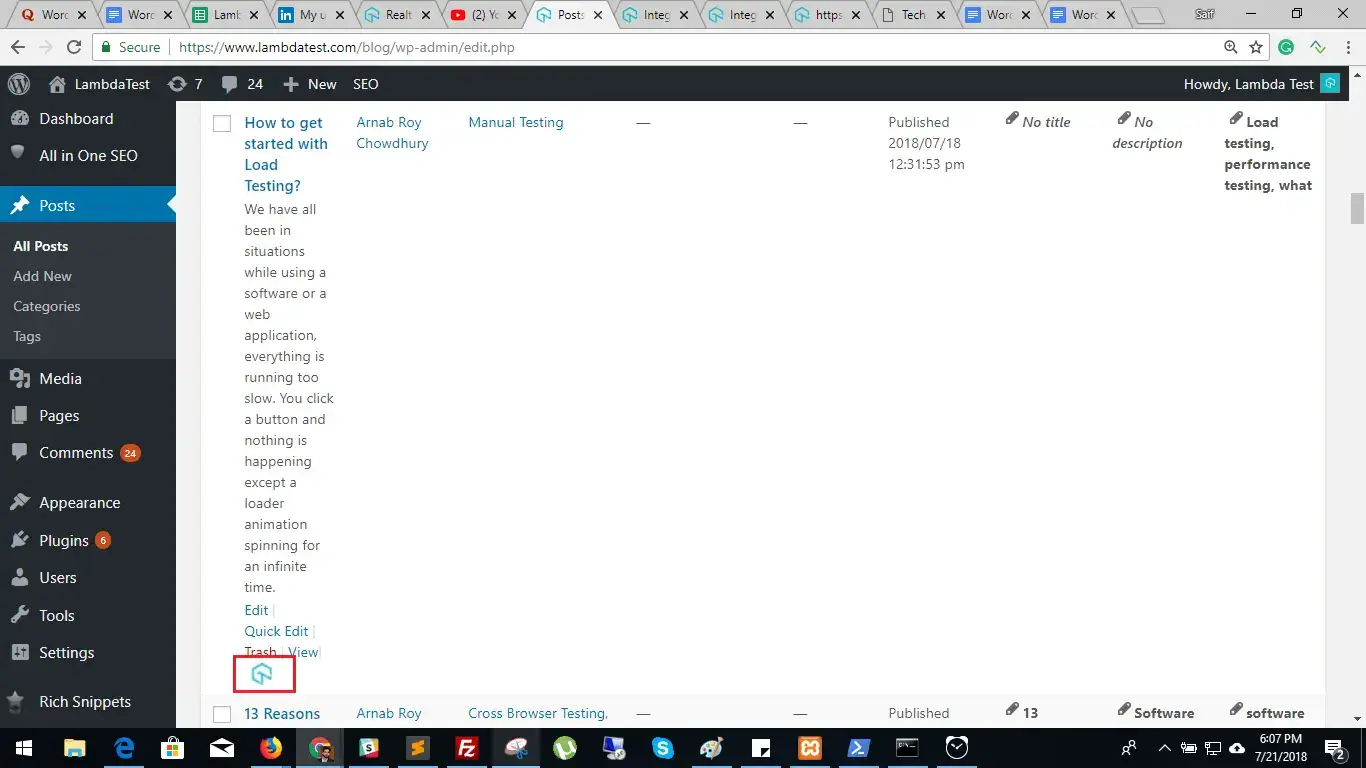
Step 10: Now you can Generate Automated Screenshots of your web pages or posts with TestMu AI plugin. Go to All Posts and you will TestMu AI icon below every post. Click on that icon.
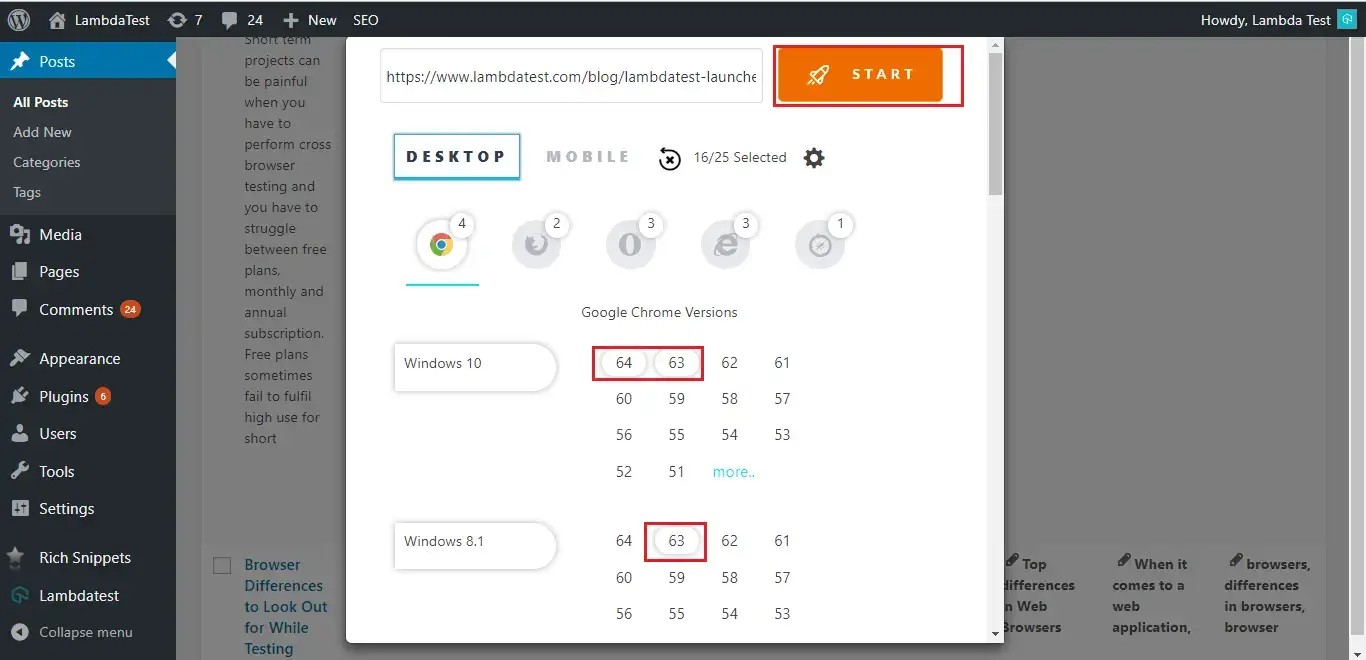
Step 11: Now select the browser, browser version and mobile devices where you want to take screenshots and hit Start button.
Step 12: Here all the screenshots are generated.