SmartUI Testing on HyperExecute with the SDK
The SmartUI SDK runs your existing test suite on HyperExecute with smartui exec, capturing visual snapshots for regression testing. Pick your framework from the tabs below to configure and run your tests.
Prerequisites
To run the Tests on HyperExecute from your Local System, you are required:
- Your TestMu AI Username and Access key
- HyperExecute CLI in order to initiate a test execution Job .
- Setup the Environmental Variable
- HyperExecute YAML file which contains all the necessary instructions.
- Login to TestMu AI SmartUI with your credentials.
- An existing Android application file (
.apk) — required for the Maestro (app-based) flow. - Node.js and npm installed on your system.
Step 1: Create a SmartUI Project
The first step is to create a project with the application in which we will combine all your builds run on the project. To create a SmartUI Project, follow these steps:
- Go to Projects page
- Click on the
new projectbutton - Select the platform as CLI or Web for executing your
SDKtests. - Add name of the project, approvers for the changes found, tags for any filter or easy navigation.
- Click on the Submit.
After creating the project, you will get your PROJECT_TOKEN. You need to keep this project token safe as it will be used in the further steps below.
Set Up and Run Your Tests
Select your framework below and follow the remaining steps to configure and execute your SmartUI SDK tests on HyperExecute.
- Selenium
- Cypress
- Playwright
- Puppeteer
- Maestro
Selenium is supported in both JavaScript and C#. Choose your language below.
- JavaScript
- C#
Step 2: Setup Your Test Suite
You can use your own project to configure and test it. For demo purposes, we are using the sample repository.
Download or Clone the code sample for the Selenium - JavaScript framework from the TestMu AI GitHub repository to run the tests on the HyperExecute.
 View on GitHub
Configure Your Test Suite
In the sdkCloud.js file, update the following capabilities
let capabilities = {
  "LT:Options": {
    project: "PROJECT_NAME", // Enter your Project Name
    name: "TEST_NAME", // Provide the name of your test
    build: "BUILD_NAME", // Mention your desired build name
  },
};
Step 3: Setup the CLI in your Test Suite
After cloning / downloading the sample repo, you need to setup the CLI and the environment variables.
Download the HyperExecute CLI
The CLI is used for triggering the tests on HyperExecute. It is recommend to download the CLI binary on the host system and keep it in the root directory of the suite to perform the tests on HyperExecute.
You can download the CLI for your desired platform from the below mentioned links:
Setup Environment Variable
Now, you need to export your environment variables LT_USERNAME and LT_ACCESS_KEY that are available in the TestMu AI Profile page.
Run the below mentioned commands in your terminal to setup the CLI and the environment variables.
- Linux / MacOS
- Windows
export LT_USERNAME="undefined"
export LT_ACCESS_KEY="undefined"
set LT_USERNAME="undefined"
set LT_ACCESS_KEY="undefined"
Step 4: Configure YAML in your Test Suite
You need to edit the PROJECT_TOKEN: "YOUR_PROJECT_TOKEN" flag and enter your project token that show in the SmartUI app after, creating your project.
---
version: 0.1
globalTimeout: 90
testSuiteTimeout: 90
testSuiteStep: 90

runson: win

autosplit: true

retryOnFailure: true
maxRetries: 1

concurrency: 1

env:
  CACHE_DIR: m2_cache_dir
  PROJECT_TOKEN: "YOUR_PROJECT_TOKEN" #Enter your project token here

cacheKey: '{{ checksum "package.json" }}'
cacheDirectories:
  - node_modules

pre:
  - npm install @lambdatest/smartui-cli @lambdatest/selenium-driver selenium-webdriver
  - npx smartui config:create smartui-web.json

post:
  - cat hyp-smartui-sdk.yaml

testDiscovery:
  type: raw
  mode: static
  command: ls sdk/sdkCloud.js

testRunnerCommand: npx smartui exec node sdk/sdkCloud.js --config smartui-web.json

jobLabel: ["smart-ui-sdk", "hyperexecute", "selenium", "javascript"]
It is mandatory to mention these commands in the pre flag to download all the necessary dependencies
pre:
  - npm install @lambdatest/smartui-cli @lambdatest/selenium-driver selenium-webdriver
  - npx smartui config:create smartui-web.json
Step 5: Execute your Test Suite
NOTE : In case of macOS, if you get a permission denied warning while executing CLI, simply run
chmod u+x ./hyperexecuteto allow permission. In case you get a security popup, allow it from your System Preferences → Security & Privacy → General tab.
Run the below command in your terminal at the root folder of the project:
./hyperexecute --config RELATIVE_PATH_OF_YOUR_YAML_FILE
OR use this command if you have not exported your username and access key in the step 3.
./hyperexecute --user undefined --key undefined --config RELATIVE_PATH_OF_YOUR_YAML_FILE
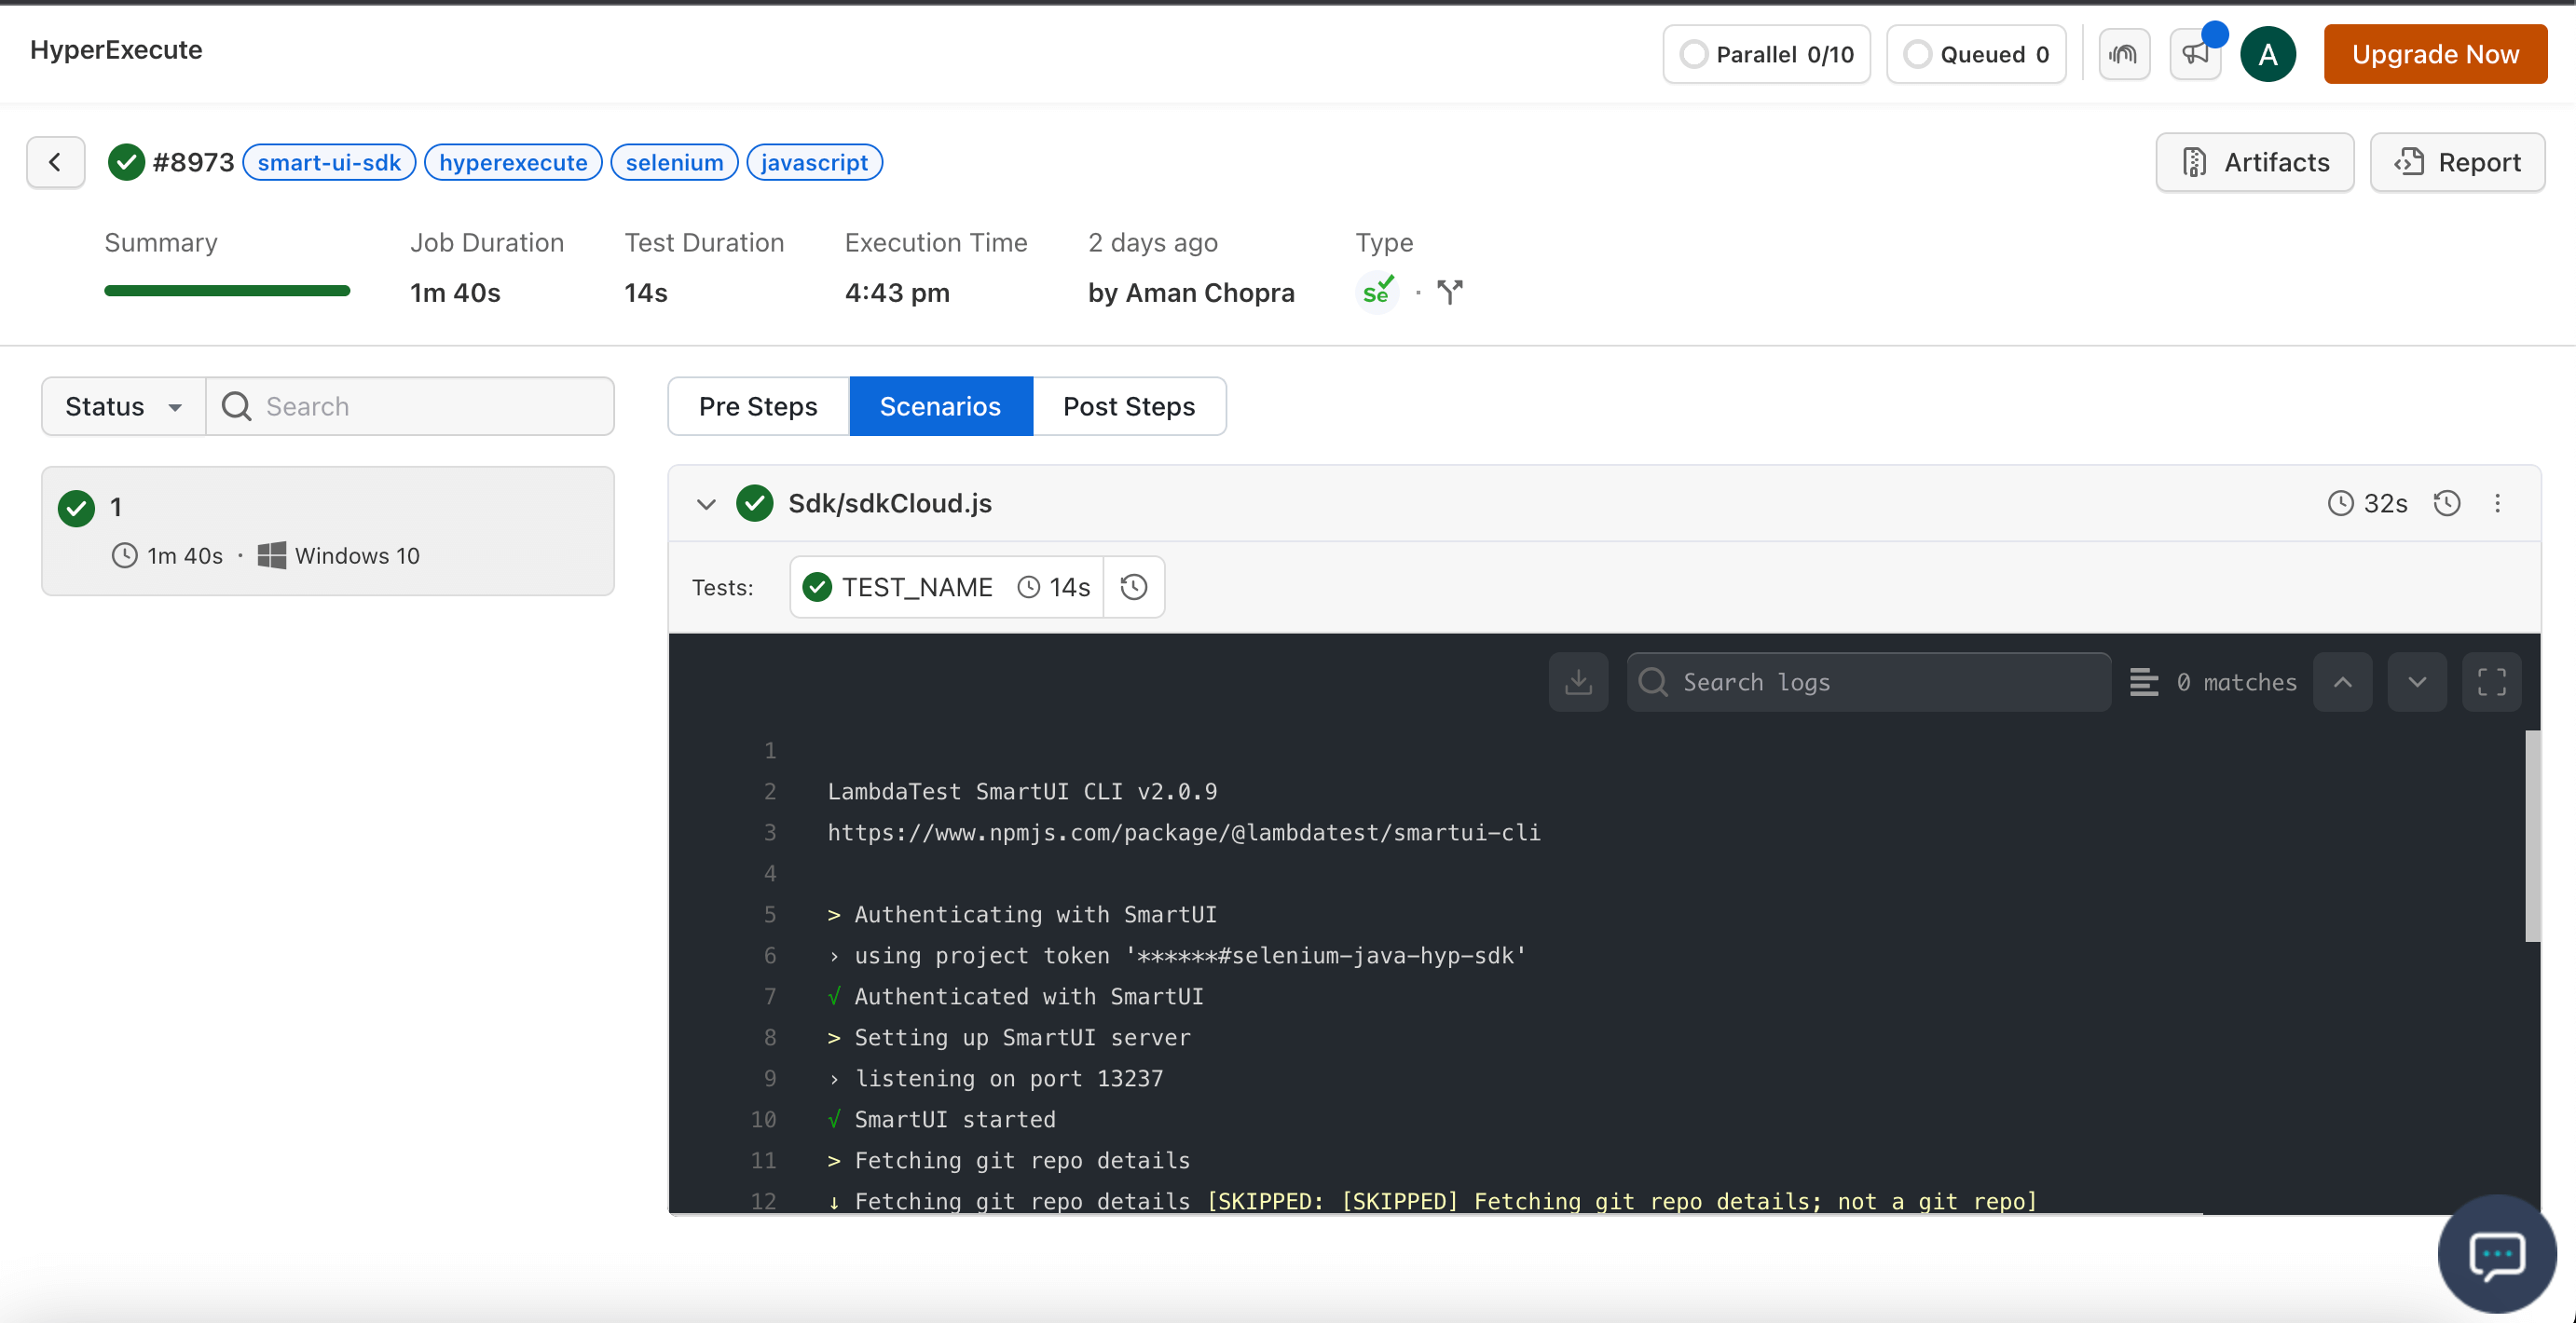
Step 6: Monitor the Test Execution
Visit the HyperExecute Dashboard and check your Job status.
Step 2: Setup Your Test Suite
You can use your own project to configure and test it. For demo purposes, we are using the sample repository.
Update the Dependencies
- Add the following dependencies in your
.csprojfile
<ItemGroup>
    <PackageReference Include="LambdaTest.Selenium.Driver" Version="1.0.1" />
</ItemGroup>
You can check the latest version of TestMu AI.Selenium.Driver and update the latest version accordingly.
Configuring your Project
You can configure your project meta information from here, like build name, project name, defining the platform, browser, browser version, your credentials etc.
var capabilities = new JObject {
    ["browserName"] = "Chrome",
    ["browserVersion"] = "latest",
    ["platformName"] = "Windows 10",
    ["name"] = "<YOUR_PROJECT_NAME>",
    ["build"] = "<YOUR_BUILD_NAME>",
    ["user"] = username,
    ["accessKey"] = accessKey,
    ["network"] = true,
    ["video"] = true,
    ["console"] = true
};
Adding SmartUI function to take screenshot
You can incorporate SmartUI into your custom Selenium automation test (any platform) script by adding the smartuiSnapshot function in the required segment of selenium script of which we would like to take the screenshot, as shown below:
using System;
using System.Threading.Tasks;
using OpenQA.Selenium;
using OpenQA.Selenium.Chrome;
using LambdaTest.Selenium.Driver;

namespace LambdaTest.Selenium.TestProject
{
  public static class LocalTest{
    public static async Task Run(){
      using IWebDriver driver = new ChromeDriver();
      try {
        Console.WriteLine("Driver started");
        driver.Navigate().GoToUrl("Required URL");
        await SmartUISnapshot.CaptureSnapshot(driver, "Screenshot Name"); //utilize this function to take the dom snapshot of your test
      }catch (Exception ex) {
        Console.WriteLine(ex);
      }finally {
          driver.Quit();
      }
    }
  }
}
Step 3: Setup the CLI in your Test Suite
After cloning / downloading the sample repo, you need to setup the CLI and the environment variables.
Download the HyperExecute CLI
The CLI is used for triggering the tests on HyperExecute. It is recommend to download the CLI binary on the host system and keep it in the root directory of the suite to perform the tests on HyperExecute.
You can download the CLI for your desired platform from the below mentioned links:
Setup Environment Variable
Now, you need to export your environment variables LT_USERNAME and LT_ACCESS_KEY that are available in the TestMu AI Profile page.
Run the below mentioned commands in your terminal to setup the CLI and the environment variables.
- Linux / MacOS
- Windows
export LT_USERNAME="undefined"
export LT_ACCESS_KEY="undefined"
set LT_USERNAME="undefined"
set LT_ACCESS_KEY="undefined"
Step 4: Configure YAML in your Test Suite
You need to edit the PROJECT_TOKEN: "YOUR_PROJECT_TOKEN" flag and enter your project token that show in the SmartUI app after, creating your project.
---
version: 0.1
runson: linux

autosplit: true
concurrency: 1

runtime:
  language: dotnet
  version: "8.0"

env:
#  PAT: ${{ .secrets.testKey }}
 PROJECT_TOKEN: <YOUR_PROJECT_TOKEN>

cacheKey: '{{ checksum "package-lock.json" }}'
cacheDirectories:
  - node_modules

pre:
  - dotnet clean
  - dotnet build
  - npm install @lambdatest/smartui-cli
  - dotnet restore
  - npx smartui config:create .smartui.json

testDiscovery:
  type: raw
  mode: remote
  command: echo cloud

testRunnerCommand: npx smartui --config .smartui.json exec -- dotnet run $test

jobLabel: ["smart-ui-sdk", "hyperexecute", "selenium", "csharp"]
Step 5: Execute your Test Suite
NOTE : In case of macOS, if you get a permission denied warning while executing CLI, simply run
chmod u+x ./hyperexecuteto allow permission. In case you get a security popup, allow it from your System Preferences → Security & Privacy → General tab.
Run the below command in your terminal at the root folder of the project:
./hyperexecute --config RELATIVE_PATH_OF_YOUR_YAML_FILE
OR use this command if you have not exported your username and access key in the step 3.
./hyperexecute --user undefined --key undefined --config RELATIVE_PATH_OF_YOUR_YAML_FILE
Step 6: Monitor the Test Execution
Visit the HyperExecute Dashboard and check your Job status.
📕 Learn more about the other supported arguments, how you can handle the dynamic data, and how to capture the screenshot of a specific element
Note : SmartUI SDK only supports Cypress versions >= 10.0.0
Step 2: Setup Your Test Suite
You can use your own project to configure and test it. For demo purposes, we are using the sample repository.
Download or Clone the code sample for the Maestro framework from the TestMu AI GitHub repository to run the tests on the HyperExecute.
View on GitHubAdding SmartUI function to take screenshot
You can incorporate SmartUI into your custom Cypress test script, as shown below:
/// <reference types="cypress" />
describe('Test Case name', () => {
  beforeEach(() => {

    cy.visit('Required URL')
  })

  it('SmartUI Snapshot', () => {
    cy.smartuiSnapshot('Screenshot Name');
  })
})
Step 3: Setup the CLI in your Test Suite
After cloning / downloading the sample repo, you need to setup the CLI and the environment variables.
Download the HyperExecute CLI
The CLI is used for triggering the tests on HyperExecute. It is recommend to download the CLI binary on the host system and keep it in the root directory of the suite to perform the tests on HyperExecute.
You can download the CLI for your desired platform from the below mentioned links:
Setup Environment Variable
Now, you need to export your environment variables LT_USERNAME and LT_ACCESS_KEY that are available in the TestMu AI Profile page.
Run the below mentioned commands in your terminal to setup the CLI and the environment variables.
- Linux / MacOS
- Windows
export LT_USERNAME="undefined"
export LT_ACCESS_KEY="undefined"
set LT_USERNAME="undefined"
set LT_ACCESS_KEY="undefined"
Step 4: Configure YAML in your Test Suite
You need to edit the PROJECT_TOKEN: "YOUR_PROJECT_TOKEN" flag and enter your project token that show in the SmartUI app after, creating your project.
---
version: 0.1
globalTimeout: 90
testSuiteTimeout: 90
testSuiteStep: 90

runson: linux

autosplit: true

cypress: true

retryOnFailure: true
maxRetries: 1

concurrency: 1

env:
  CYPRESS_CACHE_FOLDER: cypressCache
  PROJECT_TOKEN: "YOUR_PROJECT_TOKEN"

cacheKey: '{{ checksum "package.json" }}'
cacheDirectories:
  - node_modules
  - cypressCache

pre:
  - npm install @lambdatest/smartui-cli @lambdatest/cypress-driver cypress@v13
  - npx smartui config:create smartui-web.json

post:
  - cat hyp-smartui-sdk-cypress.yaml

testDiscovery:
  type: raw
  mode: static
  command: ls cypress/e2e

testRunnerCommand: npx smartui --config smartui-web.json exec -- npx cypress run --spec cypress/e2e/smartuiSDKLocal.cy.js --browser chrome --headed

jobLabel: ["smart-ui-sdk", "hyperexecute", "cypress"]
It is mandatory to mention these commands in the pre flag to download all the necessary dependencies
pre:
  - npm install @lambdatest/smartui-cli @lambdatest/cypress-driver cypress@v13
  - npx smartui config:create smartui-web.json
Step 5: Execute your Test Suite
NOTE : In case of MacOS, if you get a permission denied warning while executing CLI, simply run
chmod u+x ./hyperexecuteto allow permission. In case you get a security popup, allow it from your System Preferences → Security & Privacy → General tab.
Run the below command in your terminal at the root folder of the project:
./hyperexecute --config RELATIVE_PATH_OF_YOUR_YAML_FILE
OR use this command if you have not exported your username and access key in the step 3.
./hyperexecute --user undefined --key undefined --config RELATIVE_PATH_OF_YOUR_YAML_FILE
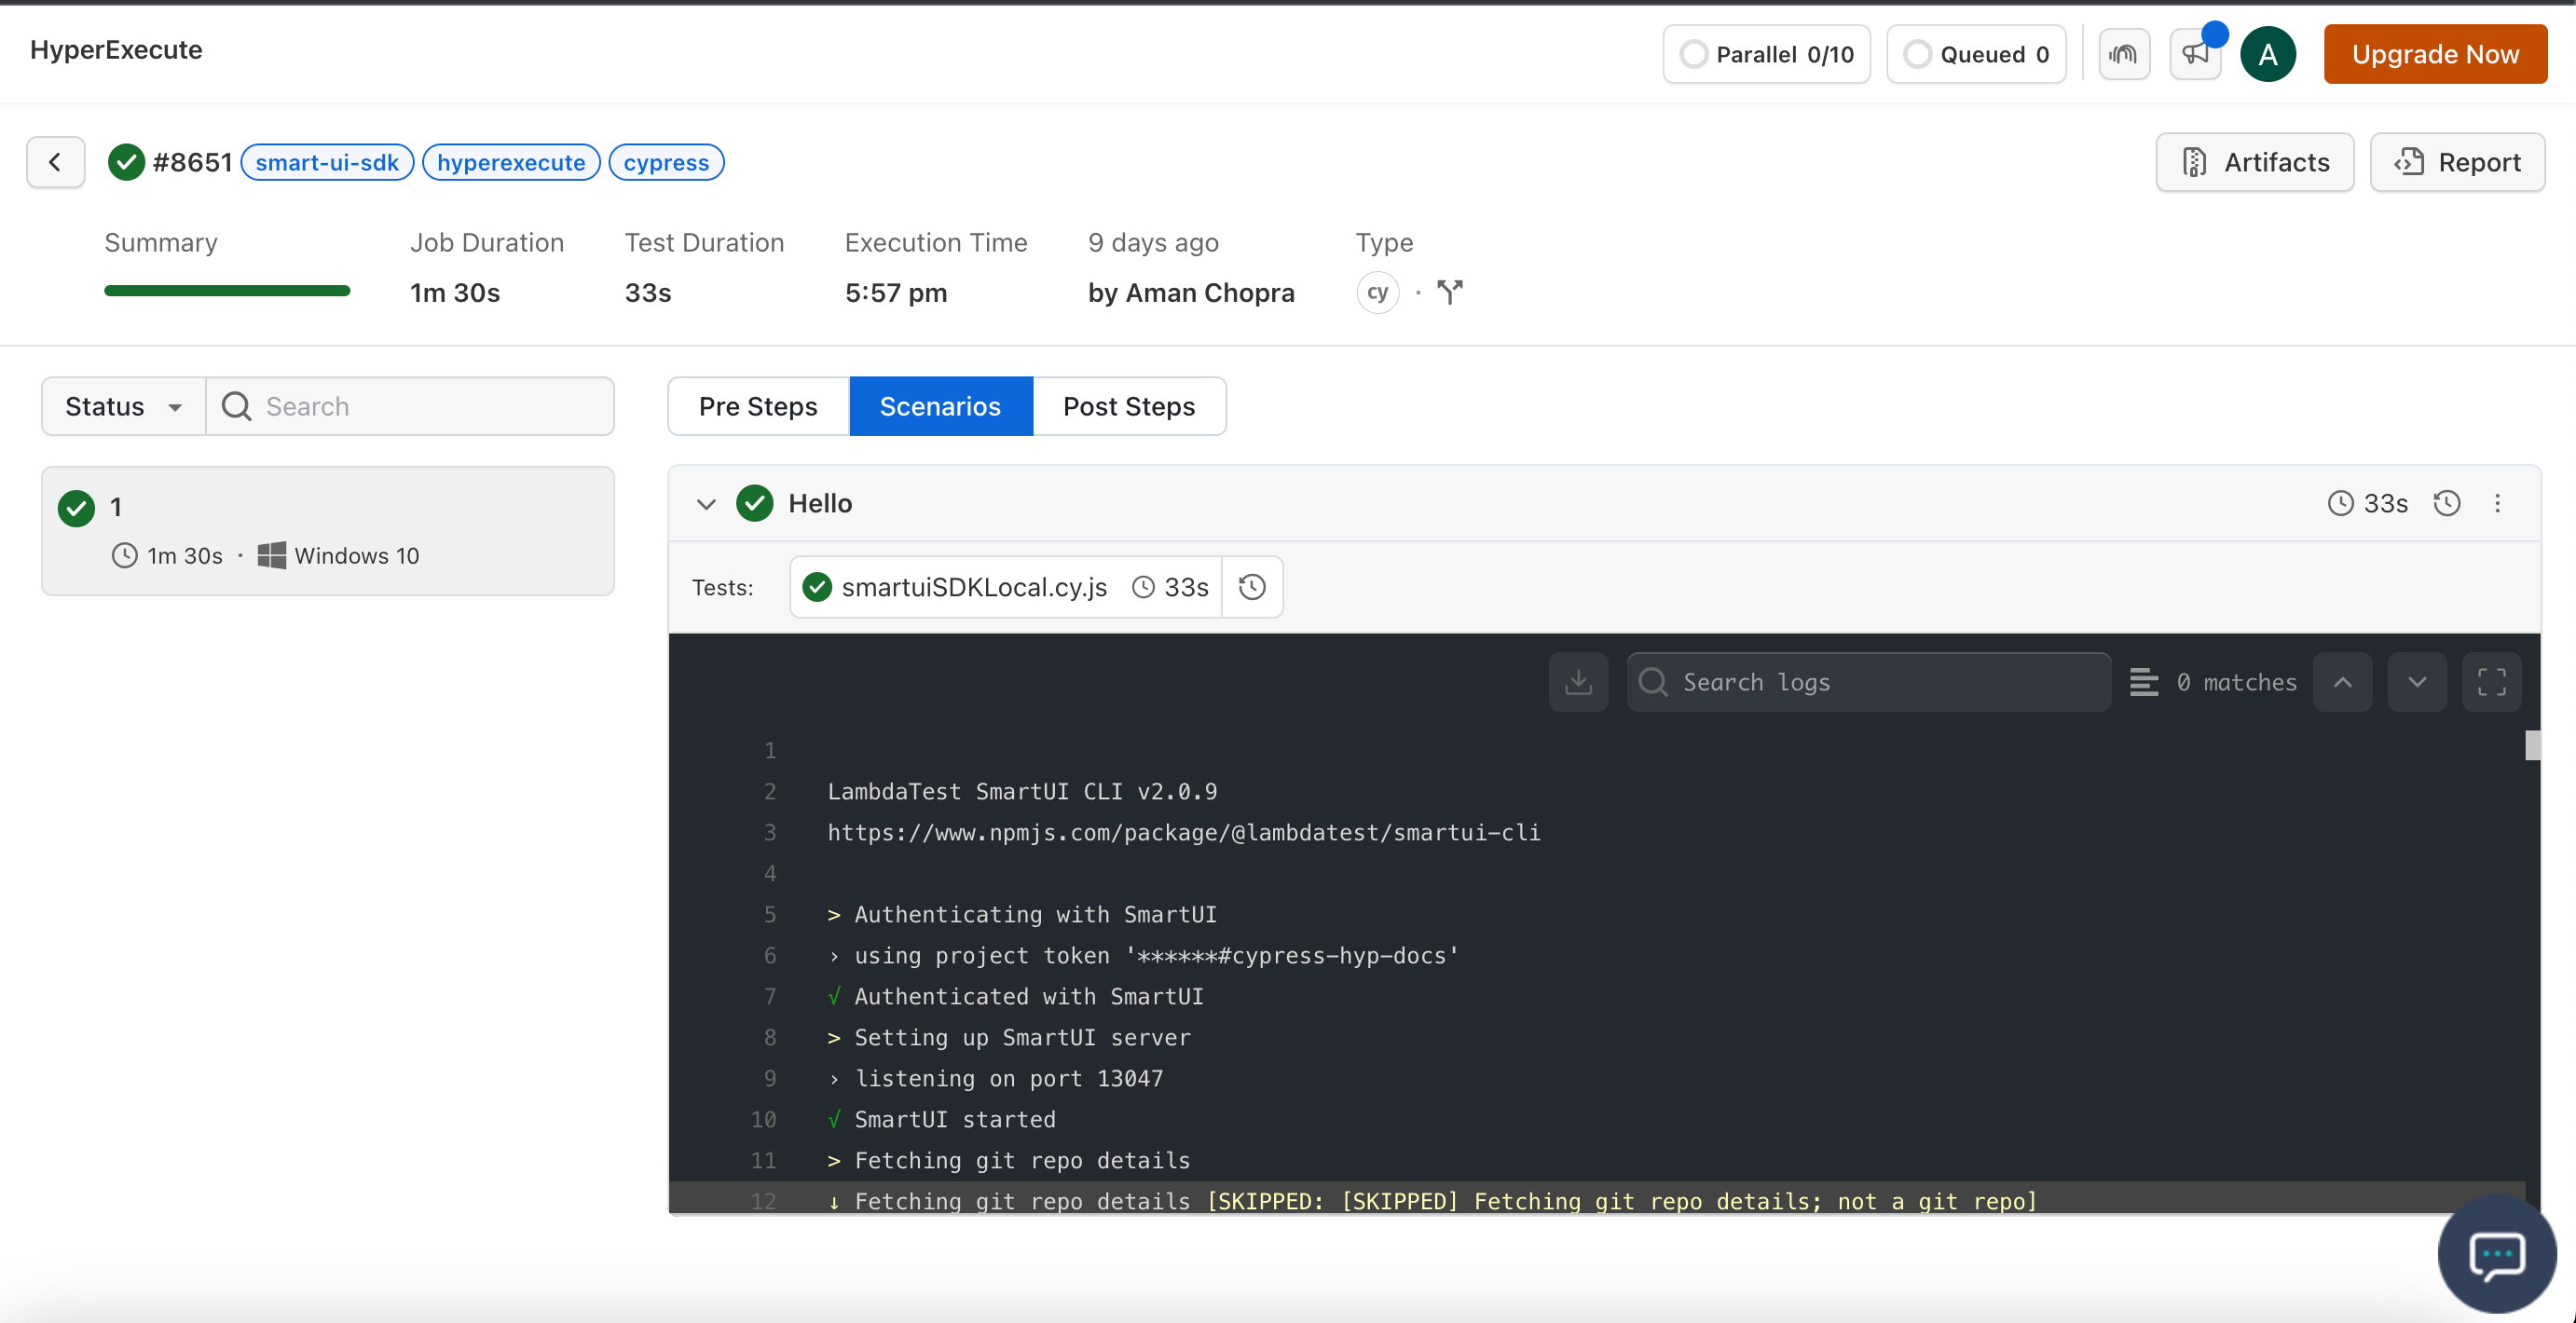
Step 6: Monitor the Test Execution
Visit the HyperExecute Dashboard and check your Job status.
Step 2: Setup Your Test Suite
You can use your own project to configure and test it. For demo purposes, we are using the sample repository.
Download or Clone the code sample for the Maestro framework from the TestMu AI GitHub repository to run the tests on the HyperExecute.
View on GitHubConfigure Your Test Suite
In the playwrightCloud.js file, update the following capabilities
  const capabilities = {
    "LT:Options": {
      build: "Playwright SmartUI Build", // Mention your desired build nameP
      name: "Playwright SmartUI Test", // Provide the name of your test
    },
  };
Step 3: Setup the CLI in your Test Suite
After cloning / downloading the sample repo, you need to setup the CLI and the environment variables.
Download the HyperExecute CLI
The CLI is used for triggering the tests on HyperExecute. It is recommend to download the CLI binary on the host system and keep it in the root directory of the suite to perform the tests on HyperExecute.
You can download the CLI for your desired platform from the below mentioned links:
Setup Environment Variable
Now, you need to export your environment variables LT_USERNAME and LT_ACCESS_KEY that are available in the TestMu AI Profile page.
Run the below mentioned commands in your terminal to setup the CLI and the environment variables.
- Linux / MacOS
- Windows
export LT_USERNAME="undefined"
export LT_ACCESS_KEY="undefined"
set LT_USERNAME="undefined"
set LT_ACCESS_KEY="undefined"
Step 4: Configure YAML in your Test Suite
You need to edit the PROJECT_TOKEN: "YOUR_PROJECT_TOKEN" flag and enter your project token that show in the SmartUI app after, creating your project.
---
version: 0.1
globalTimeout: 90
testSuiteTimeout: 90
testSuiteStep: 90

runson: win

autosplit: true

retryOnFailure: true
maxRetries: 1

concurrency: 1

env:
  PROJECT_TOKEN: "YOUR_PROJECT_TOKEN" #Enter your project token here

pre:
  - npm install @lambdatest/smartui-cli @lambdatest/playwright-driver playwright
  - npx smartui config:create smartui-web.json

post:
  - cat hyp-smartui-sdk.yaml

testDiscovery:
  type: raw
  mode: static
  command: ls sdk/playwrightCloud.js

testRunnerCommand: npx smartui exec node sdk/playwrightCloud.js --config smartui-web.json

jobLabel: ["smart-ui-sdk", "hyperexecute", "playwright"]
It is mandatory to mention these commands in the pre flag to download all the necessary dependencies
pre:
  - npm install @lambdatest/smartui-cli @lambdatest/playwright-driver playwright
  - npx smartui config:create smartui-web.json
Step 5: Execute your Test Suite
NOTE : In case of MacOS, if you get a permission denied warning while executing CLI, simply run
chmod u+x ./hyperexecuteto allow permission. In case you get a security popup, allow it from your System Preferences → Security & Privacy → General tab.
Run the below command in your terminal at the root folder of the project:
./hyperexecute --config RELATIVE_PATH_OF_YOUR_YAML_FILE
OR use this command if you have not exported your username and access key in the step 3.
./hyperexecute --user undefined --key undefined --config RELATIVE_PATH_OF_YOUR_YAML_FILE
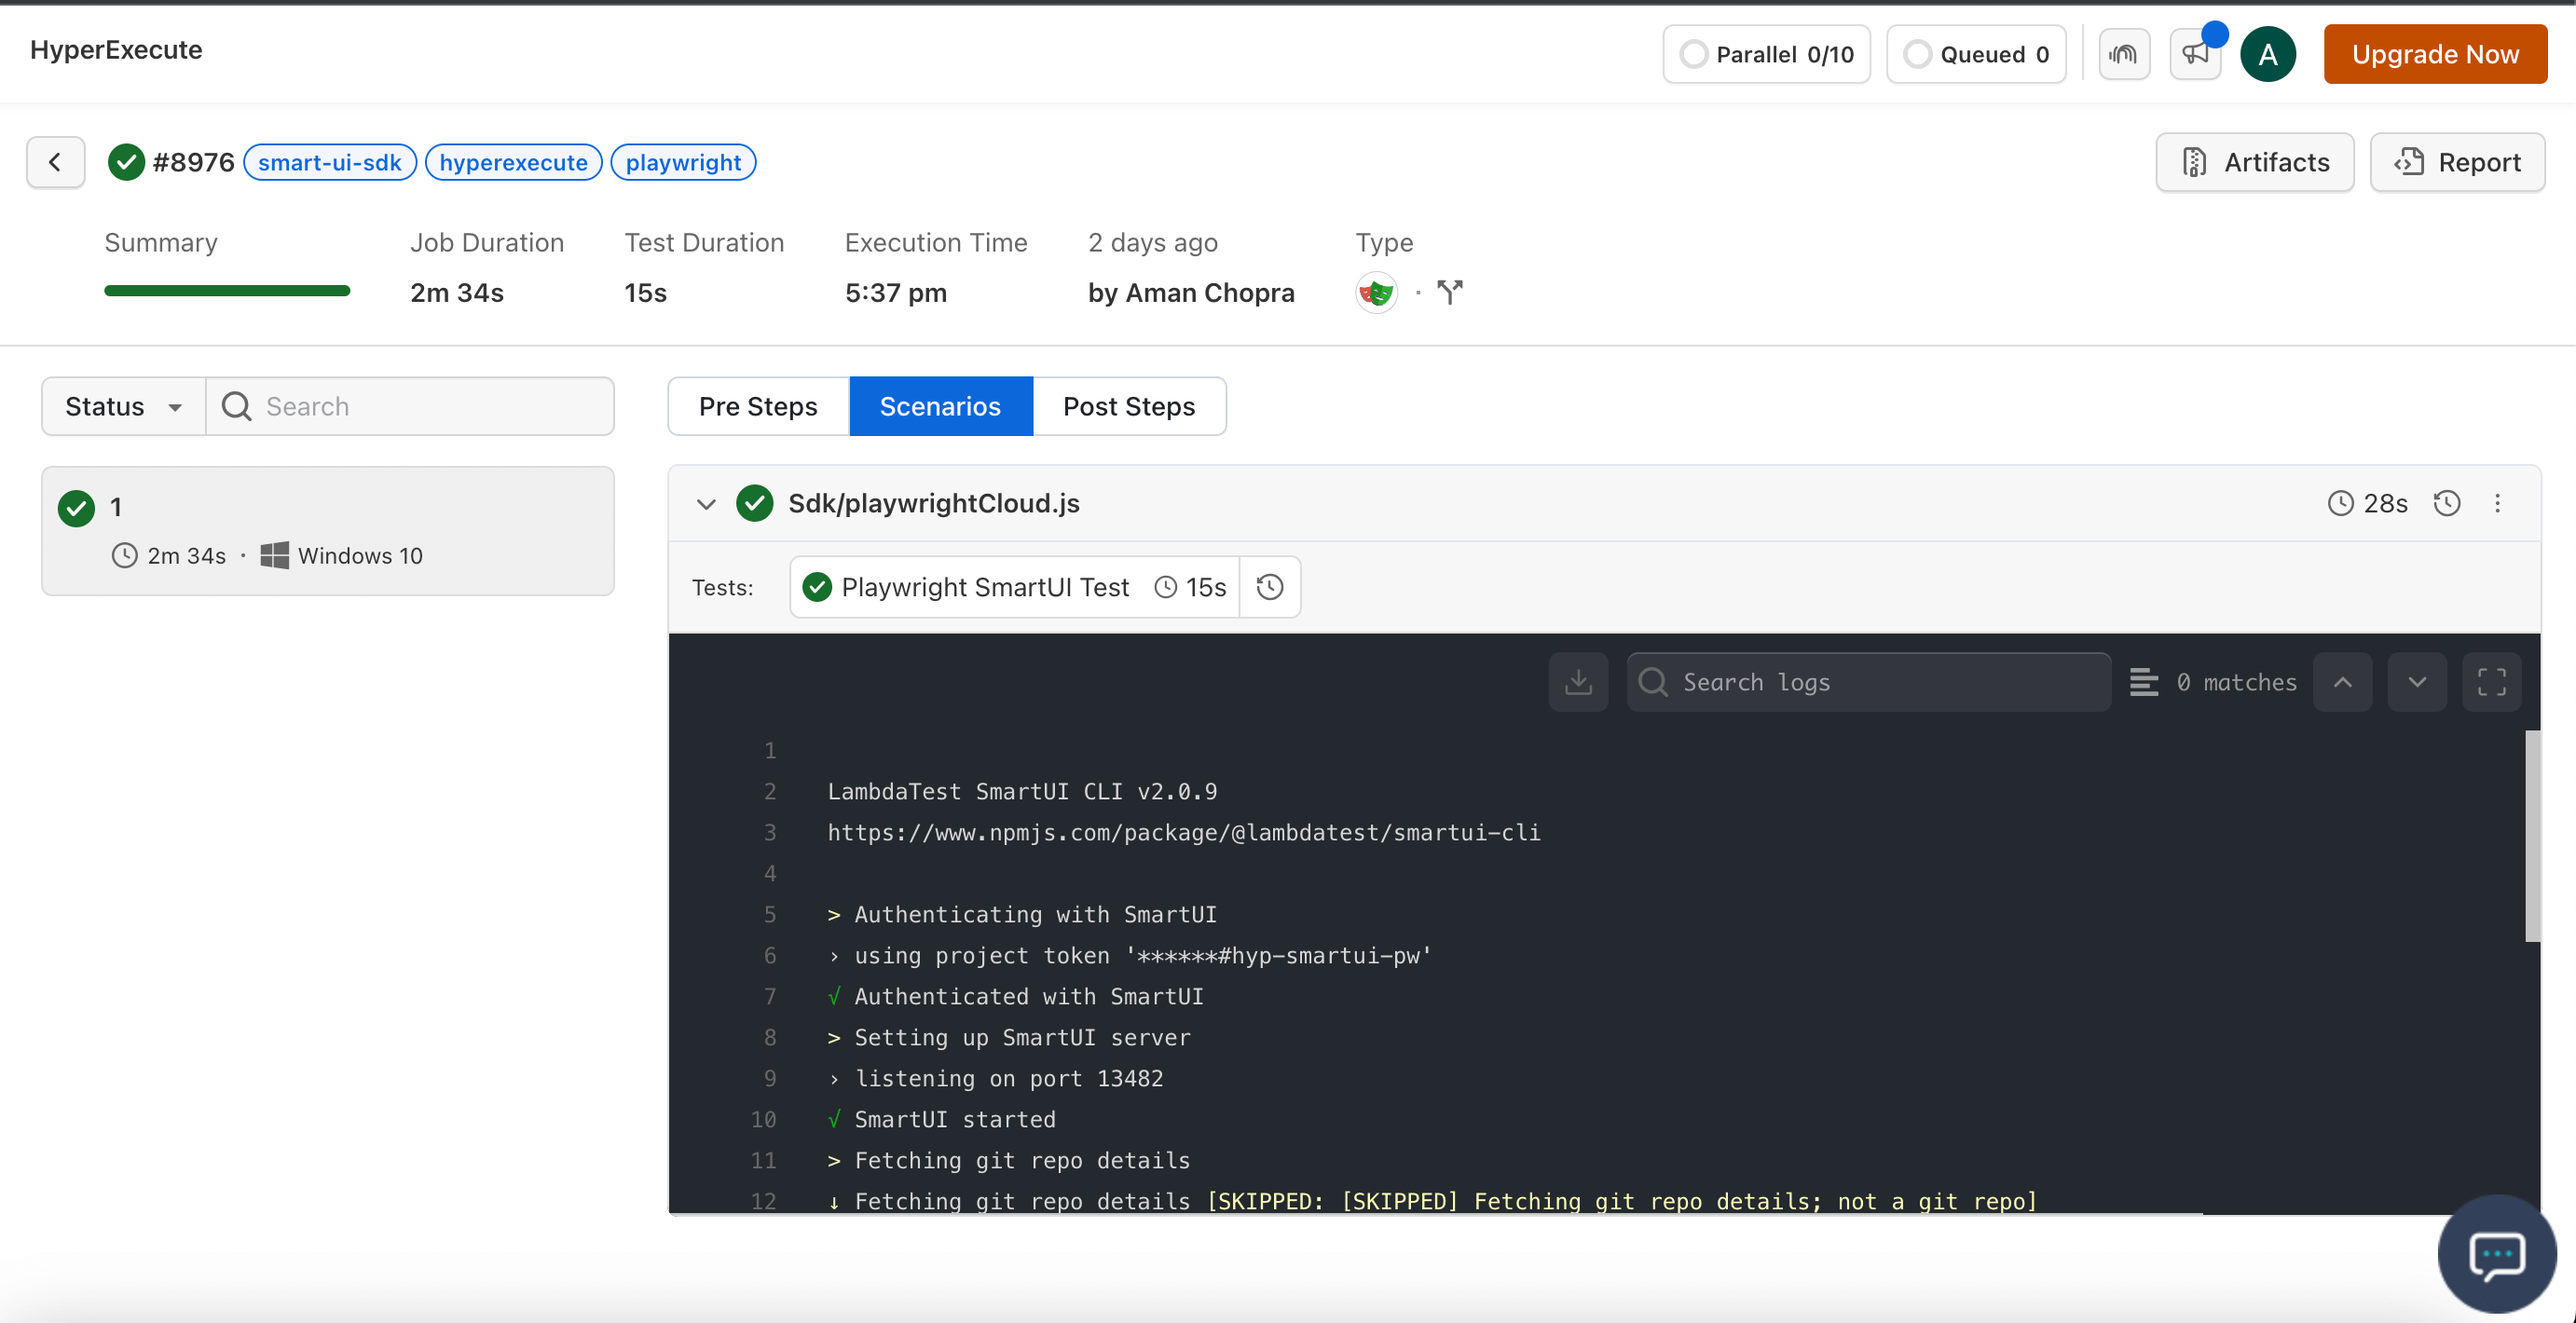
Step 6: Monitor the Test Execution
Visit the HyperExecute Dashboard and check your Job status.
Step 2: Setup Your Test Suite
To configure and test it, you can use your own project. We are using the sample repository for demonstration purposes.
Download or Clone the code sample for the Puppeteer framework from the TestMu AI GitHub repository to run the tests on the HyperExecute.
View on GitHubConfigure Your Test Suite
In the sdkCloud.js file, update the following capabilities
  const capabilities = {
    "LT:Options": {
      "build": "Puppeteer SmartUI Build", // Mention your desired build name
      "name": "Puppeteer SmartUI Test", // Provide the name of your test
    },
  };
Step 3: Setup the CLI in your Test Suite
Following the download or cloning of the sample repository, you must configure the environment variables and the CLI.
Download the HyperExecute CLI
The tests on HyperExecute are started using the Command Line Interface (CLI). To run the tests on HyperExecute, it is advised to download the CLI binary to the host system and store it in the suite's root directory.
You can download the CLI for your desired platform from the below mentioned links:
Setup Environment Variable
Now, you have to export your environment variables LT_USERNAME and LT_ACCESS_KEY that are available in the TestMu AI Profile page.
Run the below mentioned commands in your terminal to setup the CLI and the environment variables.
- Linux / MacOS
- Windows
export LT_USERNAME="undefined"
export LT_ACCESS_KEY="undefined"
set LT_USERNAME="undefined"
set LT_ACCESS_KEY="undefined"
Step 4: Configure YAML in your Test Suite
Edit the PROJECT_TOKEN: "YOUR_PROJECT_TOKEN" flag and enter your project token that show in the SmartUI app after, creating your project.
---
version: 0.1
globalTimeout: 90
testSuiteTimeout: 90
testSuiteStep: 90

runson: win

autosplit: true

retryOnFailure: true
maxRetries: 1

concurrency: 1

env:
  PROJECT_TOKEN: "YOUR_PROJECT_TOKEN" #Enter your project token here

pre:
  - npm install @lambdatest/smartui-cli @lambdatest/puppeteer-driver puppeteer
  - npx smartui config:create smartui-web.json

post:
  - cat hyperexecute-smartui-sdk.yaml

testDiscovery:
  type: raw
  mode: static
  command: ls sdk/puppeteerCloud.js

testRunnerCommand: npx smartui exec node sdk/puppeteerCloud.js --config smartui-web.json

jobLabel: ["smart-ui-sdk", "hyperexecute", "puppeteer"]
It is mandatory to mention these commands in the pre flag to download all the necessary dependencies
pre:
  - npm install @lambdatest/smartui-cli @lambdatest/puppeteer-driver puppeteer
  - npx smartui config:create smartui-web.json
Step 5: Execute your Test Suite
NOTE: On macOS, you can grant permission by running
chmod u+x./hyperexecuteif you receive a permission denied warning when using the CLI. If a security pop-up appears, click the Allow button on the System Preferences → .Security and Privacy → .General tab.
Run the below command in your terminal at the root folder of the project:
./hyperexecute --config RELATIVE_PATH_OF_YOUR_YAML_FILE
OR use this command if you have not exported your username and access key in the step 3.
./hyperexecute --user undefined --key undefined --config RELATIVE_PATH_OF_YOUR_YAML_FILE
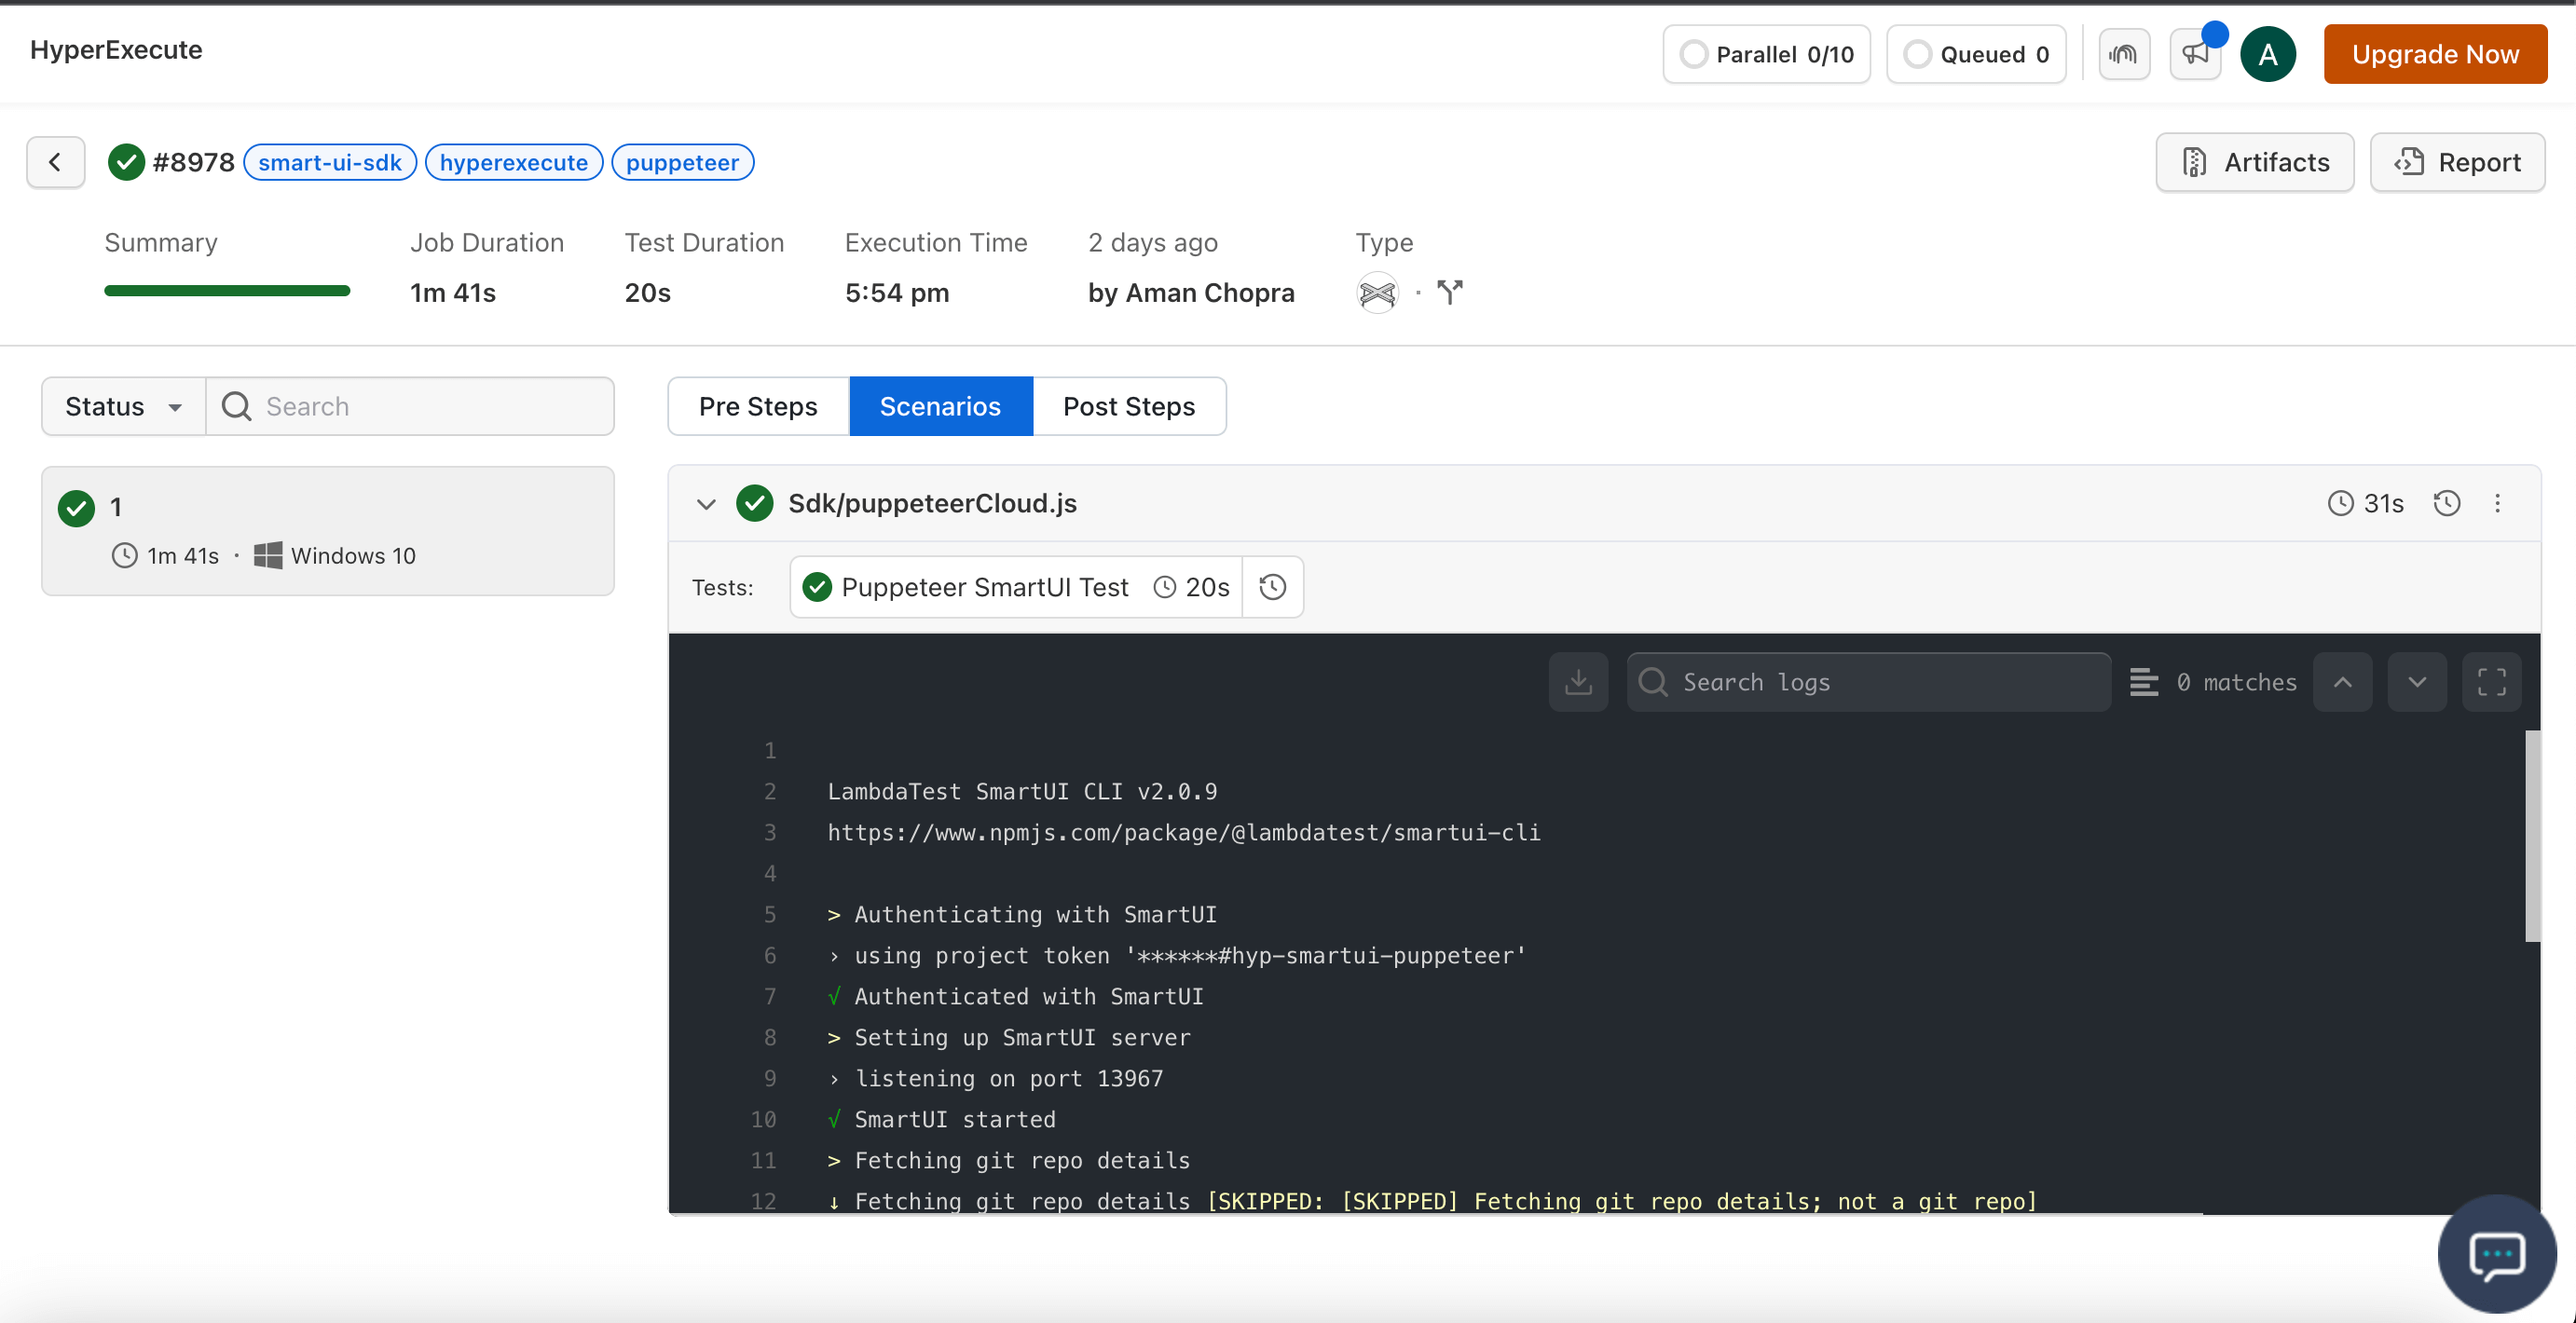
Step 6: Monitor the Test Execution
Go to the HyperExecute Dashboard to see the status of your job.
This flow guides you on how to perform visual regression testing for your Android applications by running your Maestro tests on the HyperExecute platform and capturing screenshots with the SmartUI SDK.
Step 2: Clone The Sample Repository
You can configure your own existing Maestro project or get started quickly by cloning our sample repository.
git clone https://github.com/LambdaTest/smartui-maestro-sample
cd smartui-maestro-sample
You can find the complete code for this example in the following TestMu AI GitHub repository.
View on GitHubStep 3: Upload Your Application
To run your tests on TestMu AI real devices or emulators, you need to upload your Android app (.apk) and get an appId.
Run the following cURL command in your terminal. Ensure you have set your LT_USERNAME and LT_ACCESS_KEY as environment variables.
curl -u "undefined:undefined" -X POST "https://manual-api.lambdatest.com/app/upload/realDevice" -F "appFile=@"<YOUR_LOCAL_APP_PATH>"" -F "name="sampleApp""
From the JSON response, copy the value of app_url. It will be in the format lt://.... This is your appId.
Step 4: Configure Your Test Suite
Now, let's set up the test suite to integrate with SmartUI.
4.1. Install SmartUI CLI
The SmartUI CLI is required to capture and upload screenshots. Install it in your project directory:
npm install @lambdatest/smartui-cli
If you face any problems executing tests with SmartUI-CLI versions >= v4.x.x, upgrade your Node.js version to v20.3 or above.
4.2. Add SmartUI Screenshots to Your Maestro Flow
In your Maestro test YAML files (e.g., maestro-test/test.yaml), add the takeScreenshot command wherever you want to capture a visual checkpoint. The path specified will be used to name the screenshot in the SmartUI dashboard.
- launchApp
- takeScreenshot:
    path: ./screenshots/home-screen
- tapOn: "Login"
- takeScreenshot:
    path: ./screenshots/login-page
4.3. Set Up Environment Variables
Now, you need to export your environment variables LT_USERNAME and LT_ACCESS_KEY that are available in the TestMu AI Username and Access Key Page.
Run the below mentioned commands in your terminal to setup the CLI and the environment variables.
- Linux / MacOS
- Windows
export LT_USERNAME="undefined"
export LT_ACCESS_KEY="undefined"
set LT_USERNAME="undefined"
set LT_ACCESS_KEY="undefined"
Step 5: Configure the HyperExecute YAML
The HyperExecute YAML file is the blueprint for your test execution. It tells HyperExecute how to set up the environment and run your tests.
You need to add your PROJECT_TOKEN (from Step 1) and your appId (from Step 3) to the YAML file. Below are example configurations for running Maestro tests on Emulators and Real Devices.
- Android-Real Device
- Android-Emulator
loading...
To enable this for your organizaton, connect with us through our 24/7 chat support or drop us an email to support@testmuai.com.
loading...
In the real device configuration, the testDiscovery and testRunnerCommand are handled internally by the maestro framework integration on HyperExecute. You just need to specify the framework block.
Step 6: Execute Your Test Suite
Run the below command in your terminal at the root folder of the project:
./hyperexecute --config RELATIVE_PATH_OF_YOUR_YAML_FILE
OR use this command if you have not exported your username and access key in the step 2.
./hyperexecute --user undefined --key undefined --config RELATIVE_PATH_OF_YOUR_YAML_FILE
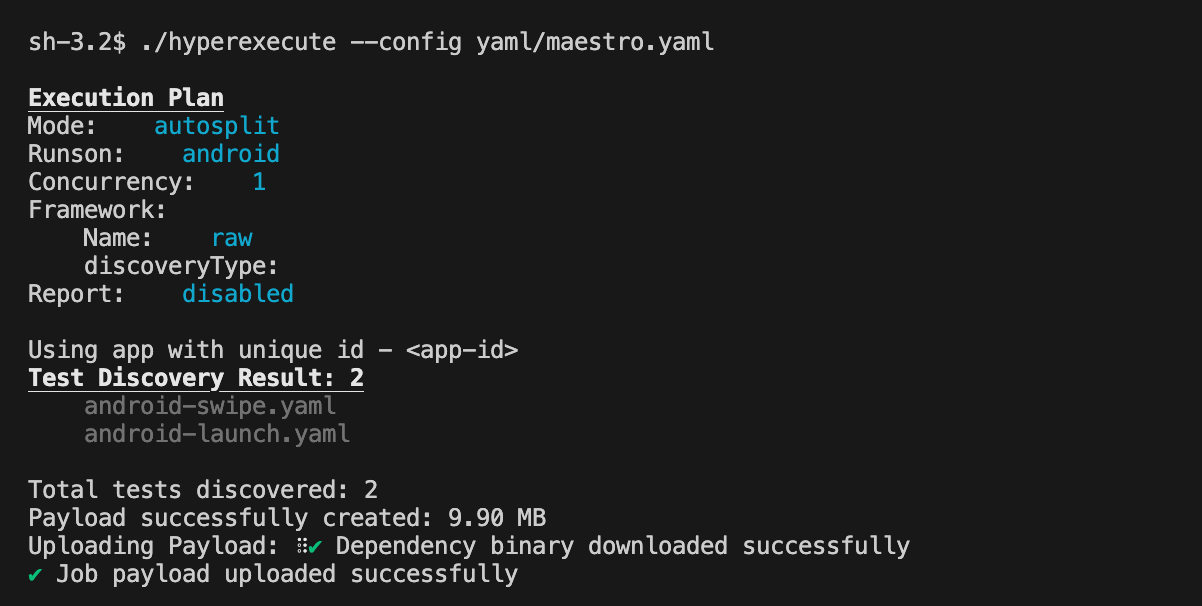
Step 7: View Your Visual Test Results on SmartUI
After the HyperExecute job is finished, all screenshots captured using the takeScreenshot command will be available in your SmartUI project for review.
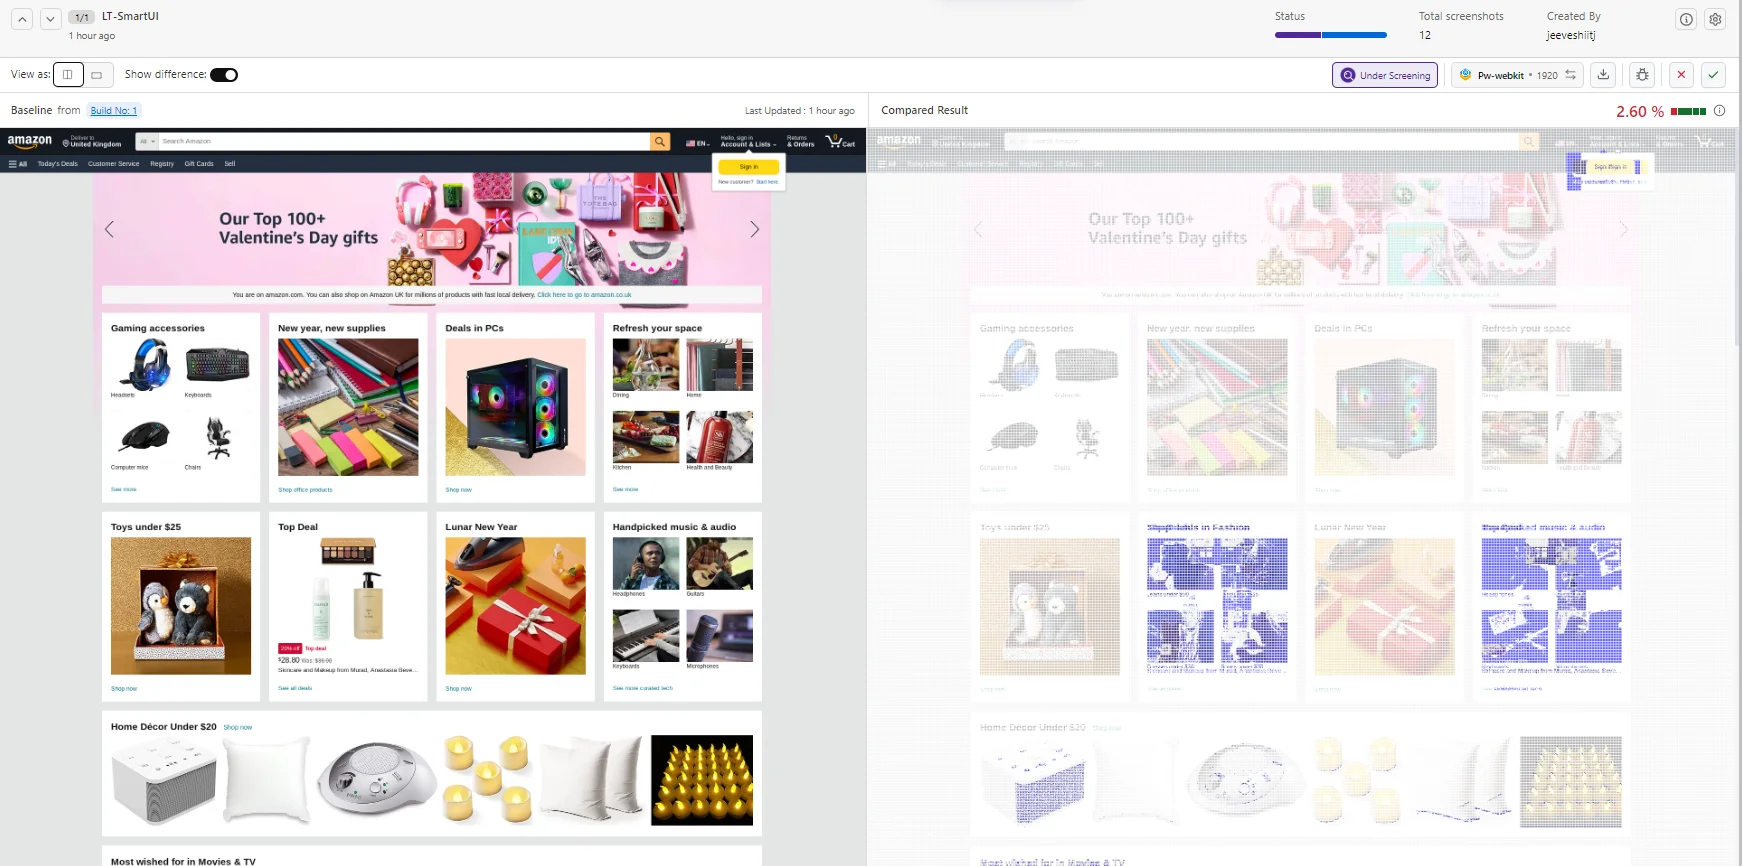
- Navigate to the SmartUI Dashboard.
- Select your project and the most recent build.
- Here, you can compare screenshots against the baseline, highlight differences, and approve or reject changes. You can use features like Smart Ignore to mask dynamic areas for more stable comparisons.
 Chat with Us
 Ask the Community