Run Your First Selenium Test
This guide walks you through running a sample Selenium test on the TestMu AI cloud grid using Java and TestNG. Clone a sample project, set your credentials, and execute a test.
All the code used in this guide is available in the sample repository. Clone it to get started.
 View on GitHub
Prerequisites
Make sure you have the following set up before you start.
- Create a TestMu AI account if you don't have one.
- Get your Username and Access Key from the TestMu AI Dashboard.
- Install Java Development Kit (JDK) 11 or later.
- Install Maven.
Step 1: Clone the Sample Project
Pull the sample repo to your local machine and navigate into the project directory.
git clone https://github.com/LambdaTest/java-testng-selenium
cd java-testng-selenium
Step 2: Set Your Credentials
Add your TestMu AI credentials as environment variables so the test can authenticate with the grid.
Visit the TestMu AI Dashboard, navigate to the left sidebar, and select Credentials. Copy your Username and Access Key, then set them as environment variables:
- macOS / Linux
- Windows
export LT_USERNAME="undefined"
export LT_ACCESS_KEY="undefined"
set LT_USERNAME="undefined"
set LT_ACCESS_KEY="undefined"
Step 3: Configure Your Test Capabilities
Define which browser, version, and OS your test runs on.
The sample project includes a preconfigured capabilities object that tells the grid which browser and OS to use. Here is an example:
ChromeOptions browserOptions = new ChromeOptions();
browserOptions.setPlatformName("Windows 10");
browserOptions.setBrowserVersion("latest");

HashMap<String, Object> ltOptions = new HashMap<String, Object>();
ltOptions.put("build", "My First Test");
ltOptions.put("name", "Sample Test - Single");
ltOptions.put("w3c", true);

browserOptions.setCapability("LT:Options", ltOptions);
You can customize these values to test on any browser, version, or OS. Use the Capabilities Generator to auto-generate the capabilities code for your target configuration.
For the full list of supported capabilities, see Desired Capabilities in Selenium.
Step 4: Run the Test
Trigger the test from your terminal using Maven.
Execute a single test or run multiple tests in parallel:
- Single Test
- Parallel Test
mvn test -D suite=single.xml
mvn test -D suite=parallel.xml
Step 5: View Your Results
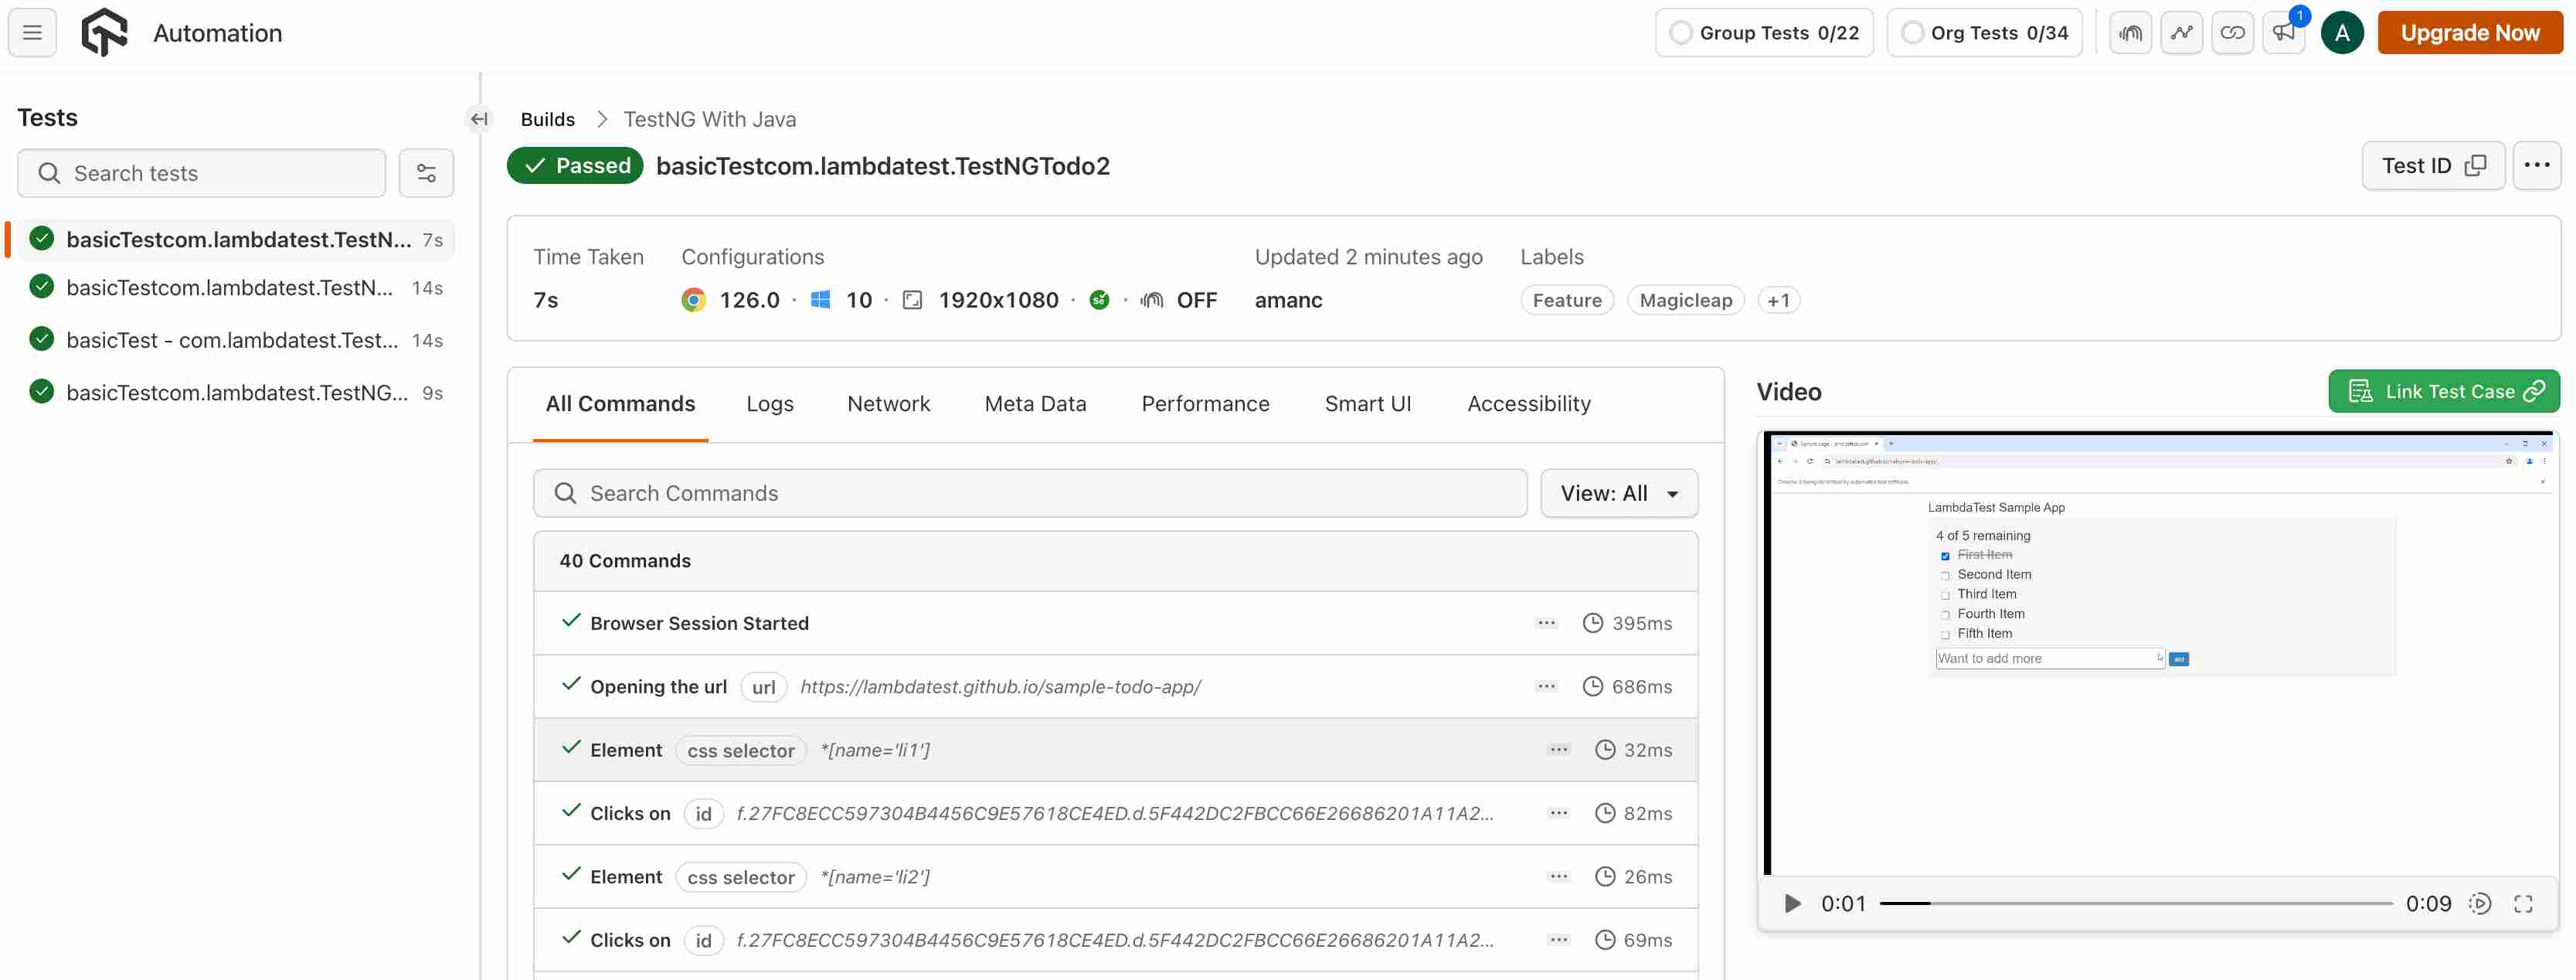
Check the Automation Dashboard to see exactly what happened during your test.
Visit the TestMu AI Automation Dashboard to see your test results. Each session includes:
- Video recording of the full test execution
- Screenshots captured at each step
- Console logs from the browser
- Network logs for every request and response
- Selenium command logs showing each driver action
Next Steps
Now that your first test is running, explore what else you can do.
- Explore the dashboard - understand timelines, analytics, and automation logs
- Configure capabilities - set browsers, versions, OS, and advanced options
- Pick your language - find framework-specific guides for Java, Python, JavaScript, C#, and more
- Test locally hosted apps - use TestMu AI Tunnel to test staging or internal sites
- Debug your tests - enable extended logging and diagnostics
