Selenium With Gauge
Run Gauge tests on the TestMu AI cloud grid. This guide covers setup, running a sample test, configuring capabilities, and testing locally hosted pages.
All the code used in this guide is available in the sample repository.
 View on GitHub
Prerequisites
Make sure you have the following set up before you start.
- Create a TestMu AI account if you don't have one.
- Get your Username and Access Key from the TestMu AI Dashboard.
- Install the Java development environment (Java 11 recommended).
- Install Maven. Download it from the official website or install it on Linux/MacOS using Homebrew.
- Install the Gauge framework from the official Gauge website.
Step 1: Clone the Sample Project
Pull the sample repo to your local machine and navigate into the project directory.
git clone https://github.com/LambdaTest/gauge-selenium-sample
cd gauge-selenium-sample
You may also want to run the command below to check for outdated dependencies.
mvn versions:display-dependency-updates
Install the mandatory Selenium dependencies for Maven:
mvn compile
Step 2: Set Your Credentials
Add your TestMu AI credentials as environment variables so the test can authenticate with the grid.
Visit the TestMu AI Dashboard, navigate to the left sidebar, and select Credentials. Copy your Username and Access Key, then set them as environment variables:
- macOS / Linux
- Windows
export LT_USERNAME="undefined"
export LT_ACCESS_KEY="undefined"
set LT_USERNAME="undefined"
set LT_ACCESS_KEY="undefined"
Step 3: Configure Your Test Capabilities
Define the browser, version, and OS for your test run.
ChromeOptions browserOptions = new ChromeOptions();
        browserOptions.setPlatformName("Windows 10");
        browserOptions.setBrowserVersion("latest");

        HashMap<String, Object> ltOptions = new HashMap<String, Object>();
        ltOptions.put("build", "LambdaTestSampleApp");
        ltOptions.put("name", "LambdaTestJavaSample");
        ltOptions.put("network", true); // To enable network logs
        ltOptions.put("visual", true); // To enable step by step screenshot
        ltOptions.put("video", true); // To enable video recording
        ltOptions.put("console", true); // To capture console logs
        ltOptions.put("w3c", true);
        browserOptions.setCapability("LT:Options", ltOptions);
Use the Capabilities Generator to auto-generate capabilities for any browser, version, and OS combination.
Below is the sample Gauge test used in this project:
package driver.driver;

import com.thoughtworks.gauge.Step;
import driver.driver.DriverFactory;
import org.openqa.selenium.By;
import org.openqa.selenium.WebDriver;
import org.openqa.selenium.WebElement;

import java.util.concurrent.TimeUnit;

import static org.junit.Assert.assertEquals;

public class StepImplementation_ToDo {

    private final WebDriver driver;

    public StepImplementation_ToDo() {
        this.driver = DriverFactory.getDriver();
    }

  @Step("Open the todo app")
  public void gotoApp() throws InterruptedException {

        System.out.println(DriverFactory.getDriver());
        driver.get("https://lambdatest.github.io/sample-todo-app/");
        String title = driver.getTitle();
        assertEquals(title,"Sample page - lambdatest.com");
  }

  @Step("Select the desired items")
  public void selectItems() throws InterruptedException {

      WebElement itemOne = driver.findElement(By.name("li1"));
      itemOne.click();

      driver.manage().timeouts().implicitlyWait(10, TimeUnit.SECONDS);

      WebElement itemThird = driver.findElement(By.name("li3"));
      itemThird.click();
  }

  @Step("Add new item <itemName>")
  public void addNewItem(String itemName) throws InterruptedException {

      WebElement addItem  = driver.findElement(By.id("sampletodotext"));
      addItem.sendKeys(itemName);
      Thread.sleep(2000);

      WebElement addButton = driver.findElement(By.id("addbutton"));
      addButton.click();
  }
}
Step 4: Run the Test
Trigger the test from your terminal.
mvn test
or
mvn clean install
Gauge framework supports parallel test execution on the TestMu AI grid. To run parallel tests, update more than one browser specification in the env folder of the project. Once the test executes, all parallel browser specifications hit the TestMu AI grid and run simultaneously.
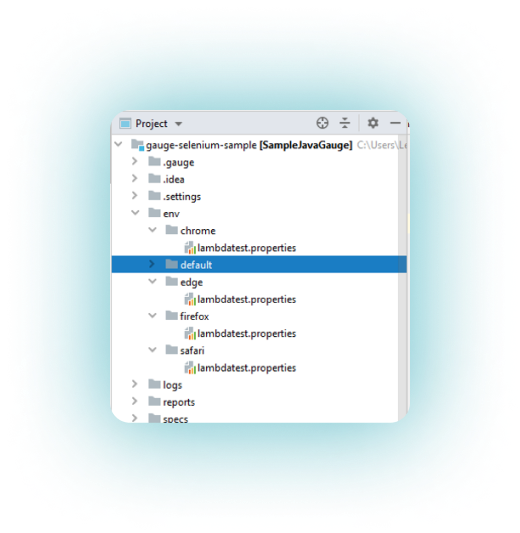
To remove a browser from parallel execution, delete its folder or comment out the code in it.
Step 5: View Your Results
Check the Automation Dashboard to see exactly what happened during your test.
Visit the TestMu AI Automation Dashboard to see your test results. Each session includes:
- Video recording of the full test execution
- Screenshots captured at each step
- Console logs from the browser
- Network logs for every request and response
- Selenium command logs showing each driver action
Run Gauge Tests Using Agent Skills
Use AI coding assistants to generate and run Gauge tests with the TestMu AI Agent Skill.
The gauge-skill is part of TestMu AI Agent Skills - structured packages that teach AI coding assistants how to write production-grade test automation.
Install the skill:
git clone https://github.com/LambdaTest/agent-skills.git
cp -r agent-skills/gauge-skill .claude/skills/

# For Cursor / Copilot
cp -r agent-skills/gauge-skill .cursor/skills/
Install all available framework skills at once by cloning the repository directly into your tool's skills directory (e.g., .claude/skills/, .cursor/skills/).
