TestMu AI SSO & PingIdentity Integration
TestMu AI provides seamless integration with Ping Identity through SAML (Security Assertion Markup Language) to enable Single Sign-On (SSO) for your organization. By integrating Ping Identity with your TestMu AI organization, you can streamline user authentication and enhance security.
Key Features of Ping Identity Integration:
- SP-Initiated SSO : Single Sign-On initiated from the TestMu AI platform.
- IdP-Initiated SSO : Single Sign-On initiated from Ping Identity.
Prerequisites
Before configuring the integration, ensure you meet the following requirements:
- TestMu AI Enterprise Plan : Your organization must have an active Enterprise plan.
- SSO Enablement Request : The admin of your TestMu AI organization must request SSO enablement.
Raise a request via email at [email protected] or through TestMu AI’s 24/7 in-app chat support.
- Ping Identity Admin Access : You need administrative access to your Ping Identity account.
Configuring TestMu AI & Ping Identity Integration
Follow the steps below to configure the SAML-based integration between TestMu AI and Ping Identity.
Step 1: Log in to Ping Identity
Log in to your Ping Identity account using admin credentials.

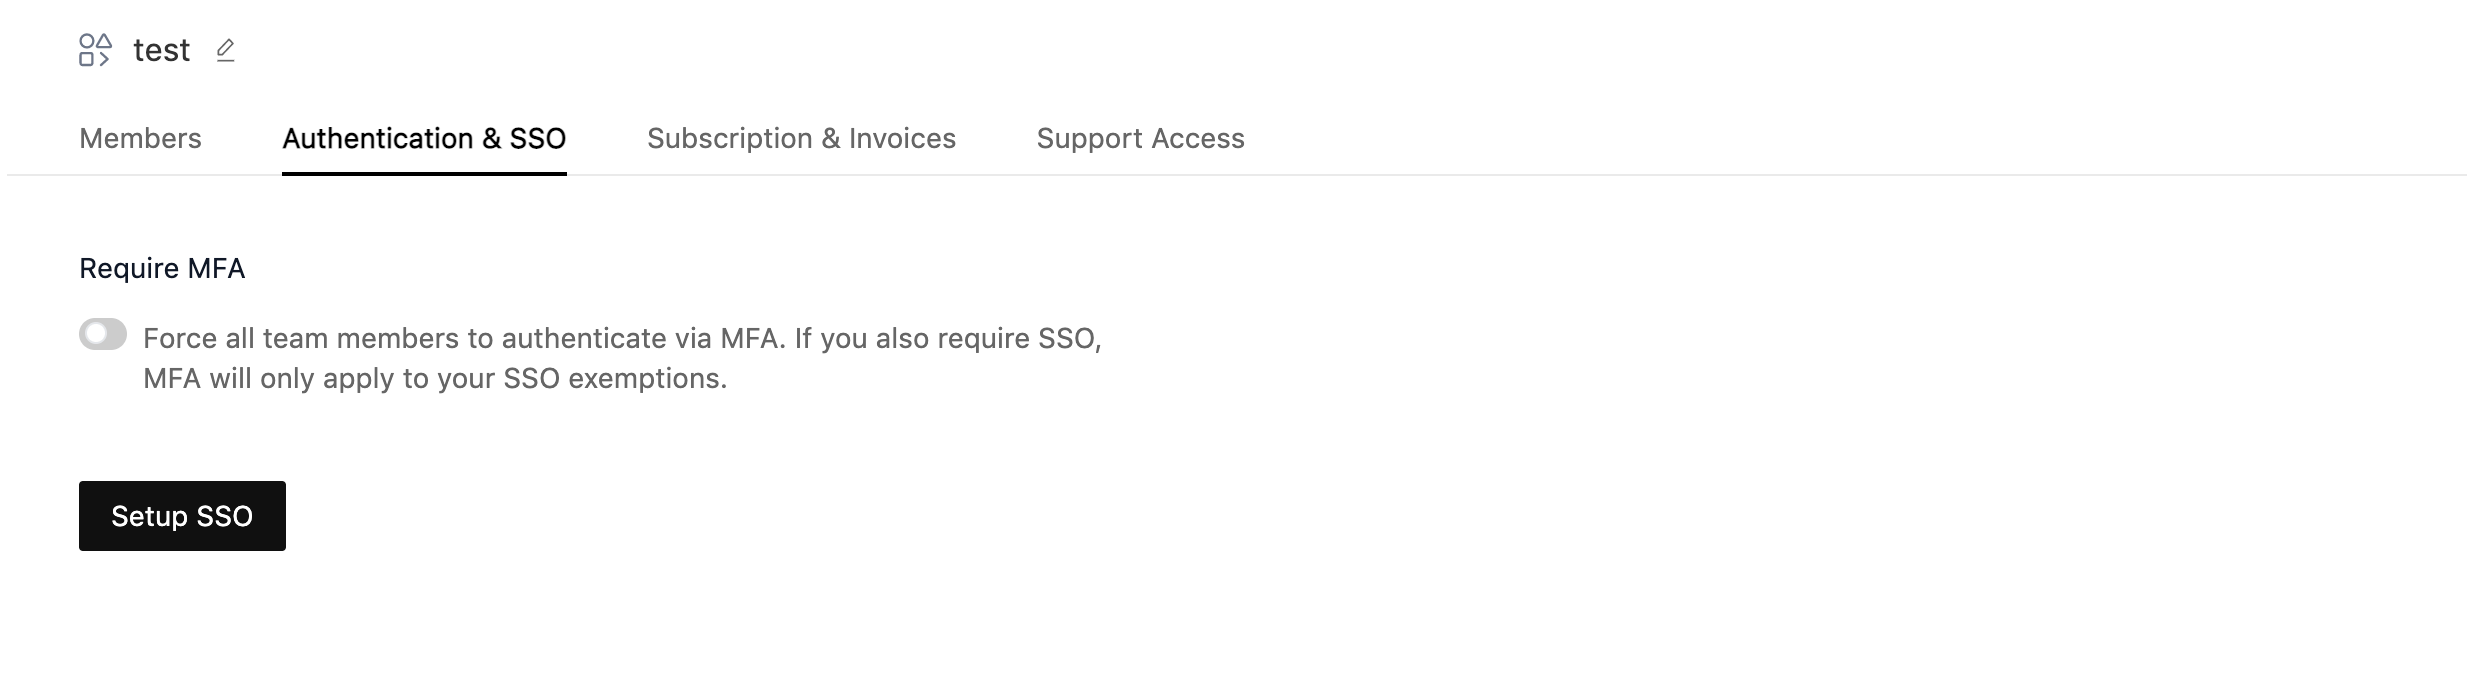
Step 2: Setup SSO in TestMu AI
-
Go to TestMu AI Authentication & SSO settings and click on Setup SSO.
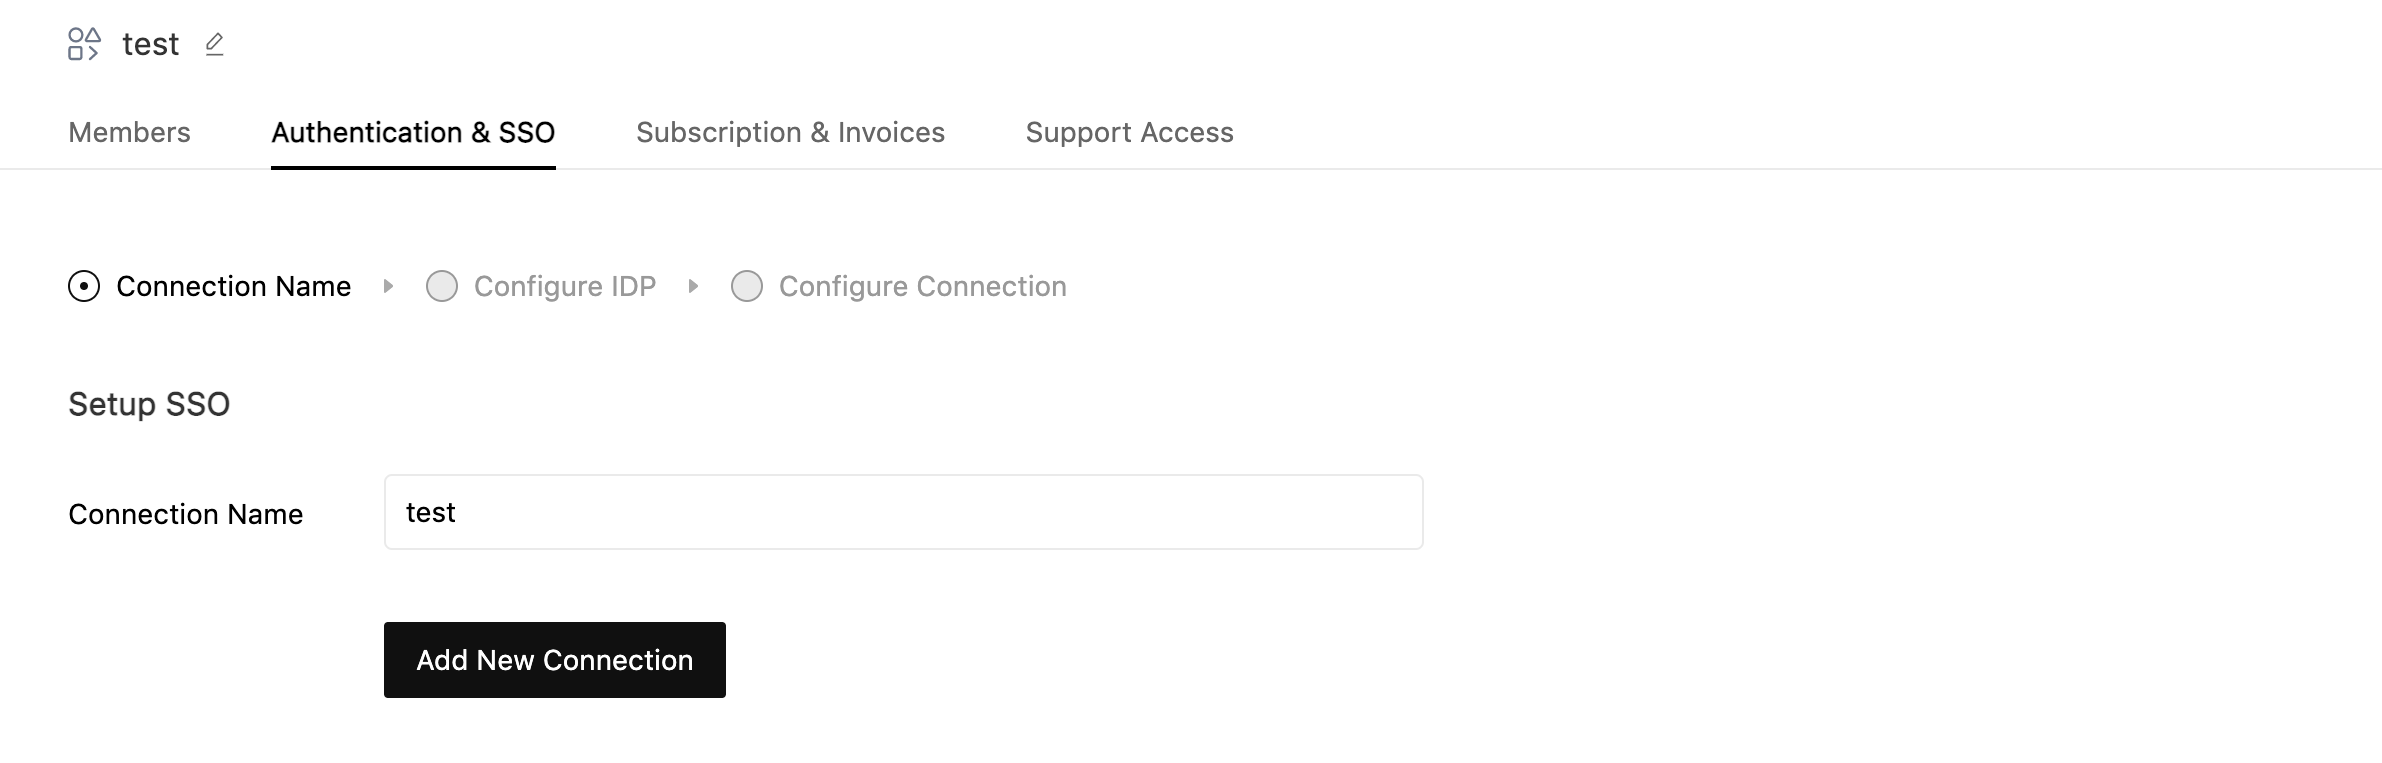
-
Enter Connection Name and Click on Add New Connection.
-
Select PingFederate as your identity provider (PingIdentity & PingFederate has identical setup from TestMu AI side).

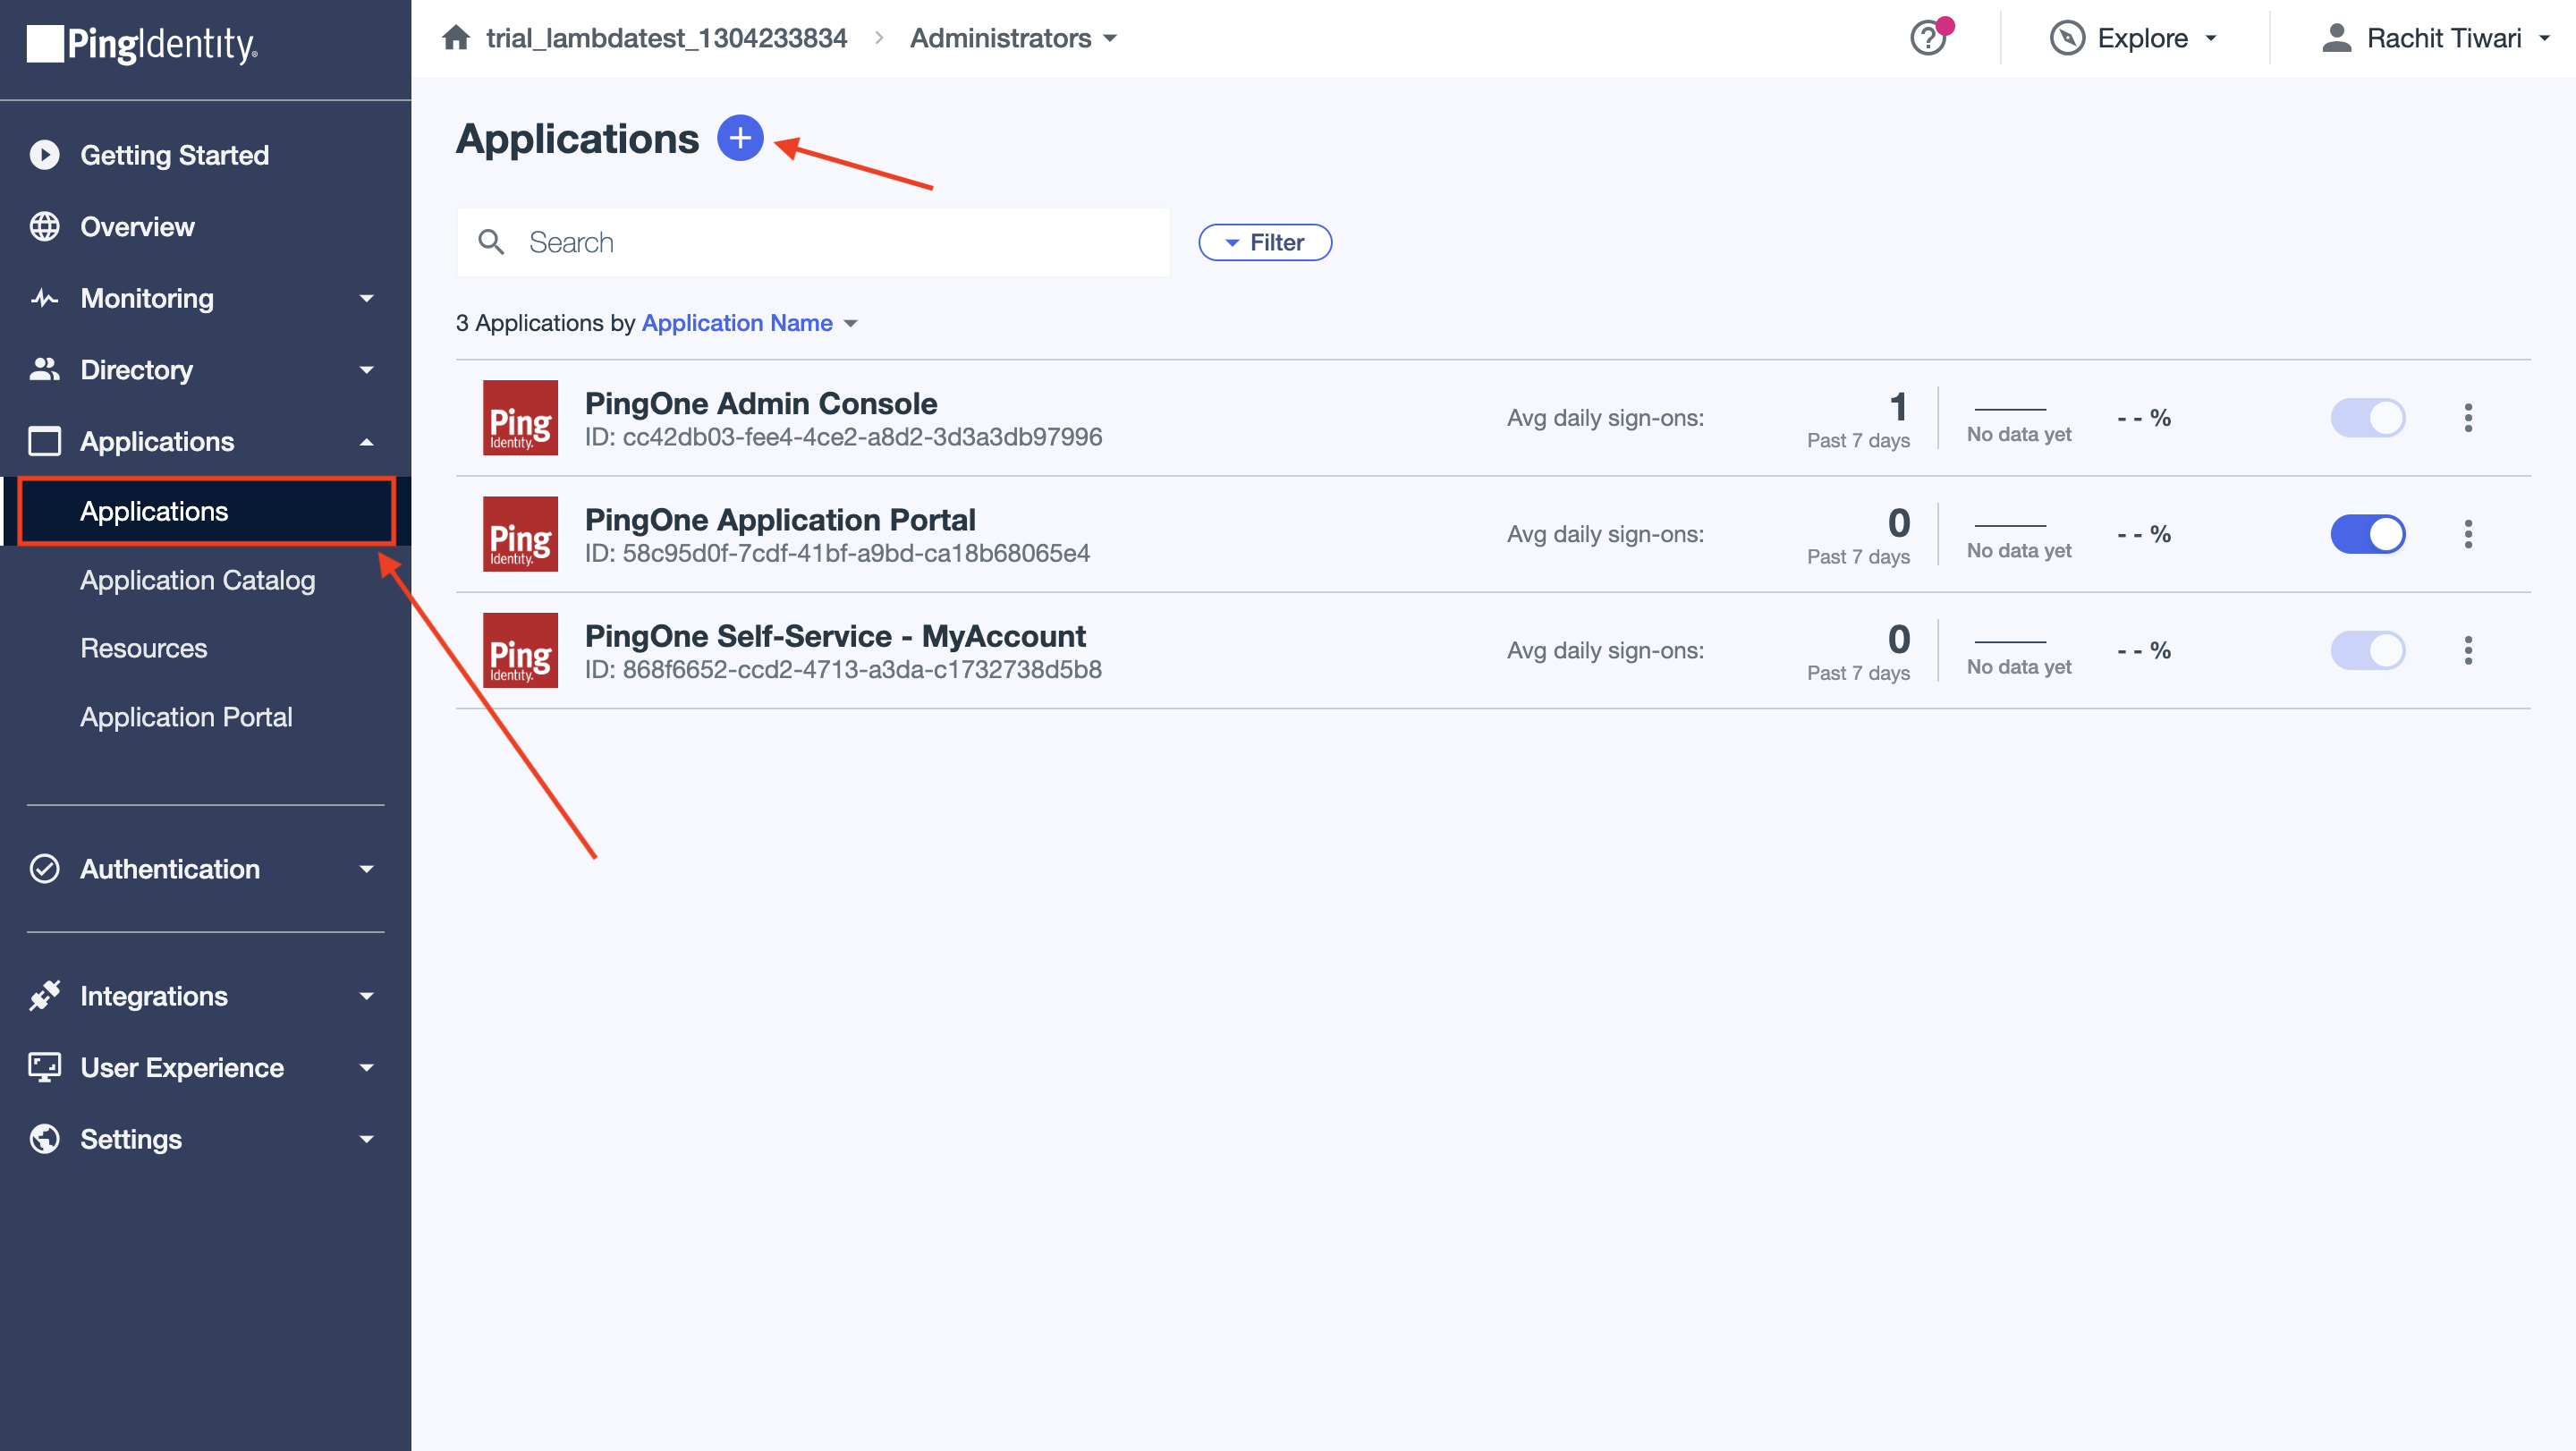
Step 3: Add a New Application in PingIdentity
-
Navigate to the Applications menu on the toolbar.
-
Click on Add Application.
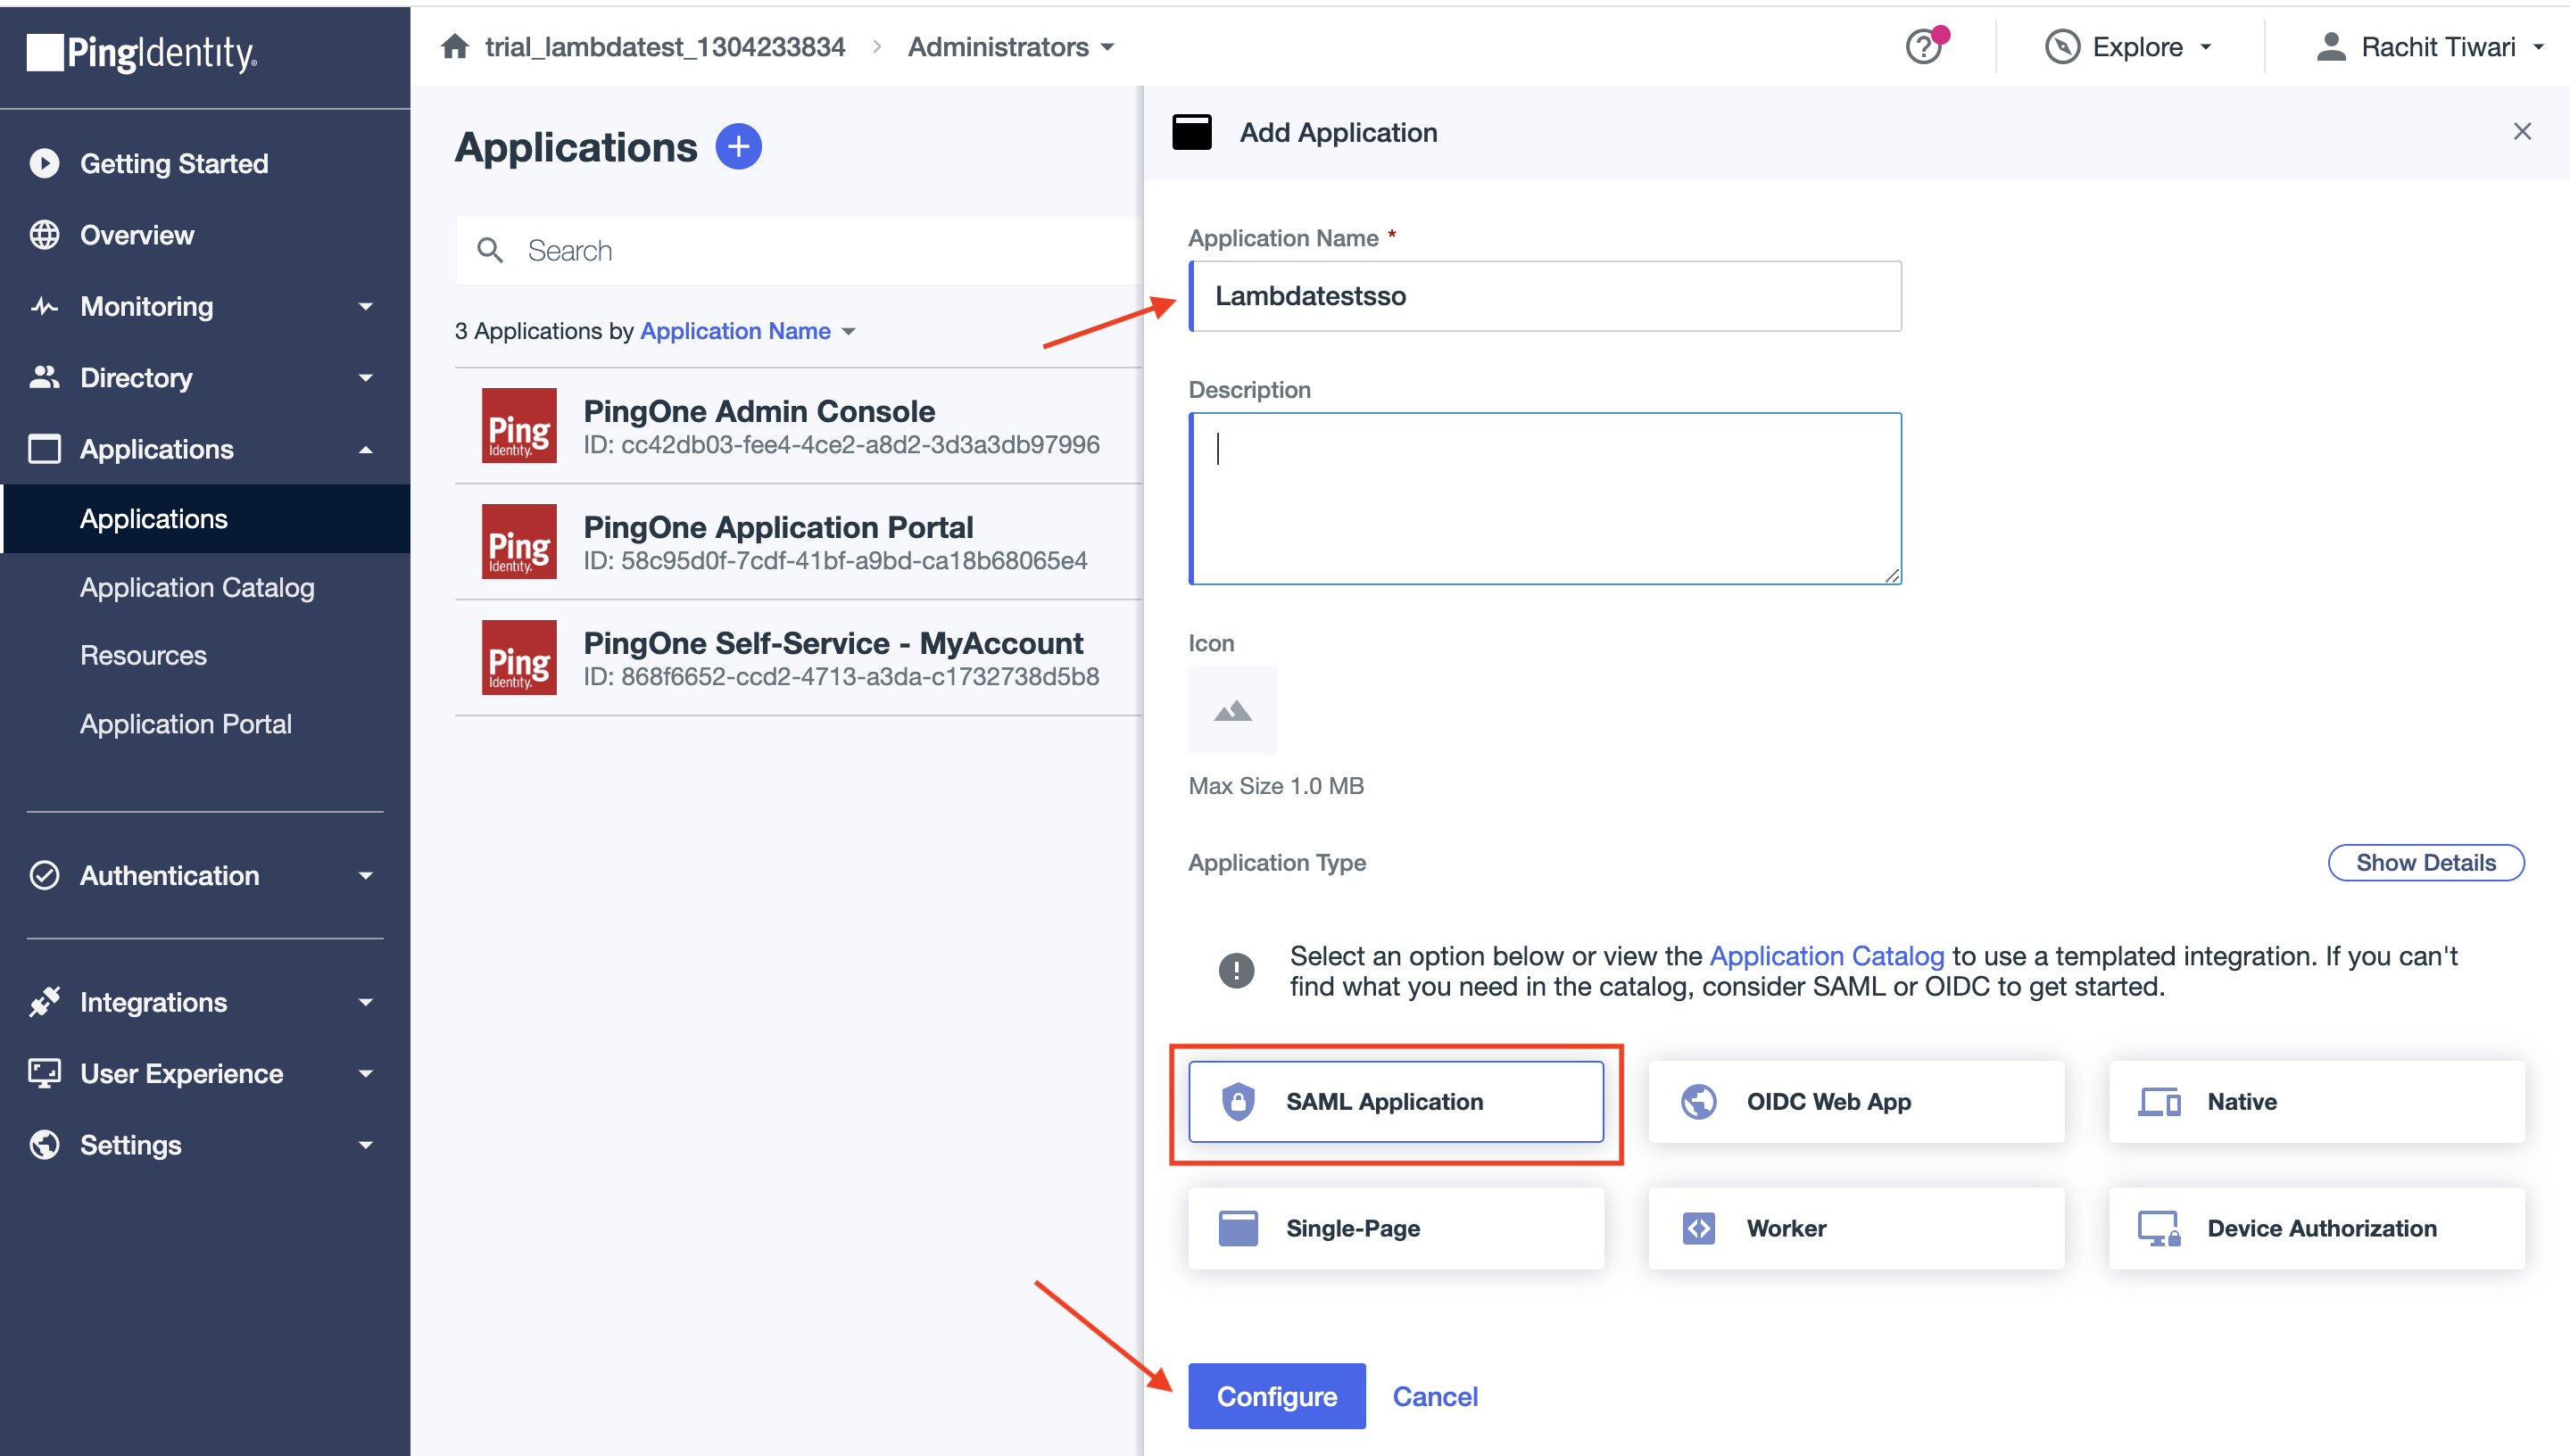
-
In the Add Application window, select Create New App to create a new application for TestMu AI SSO integration.
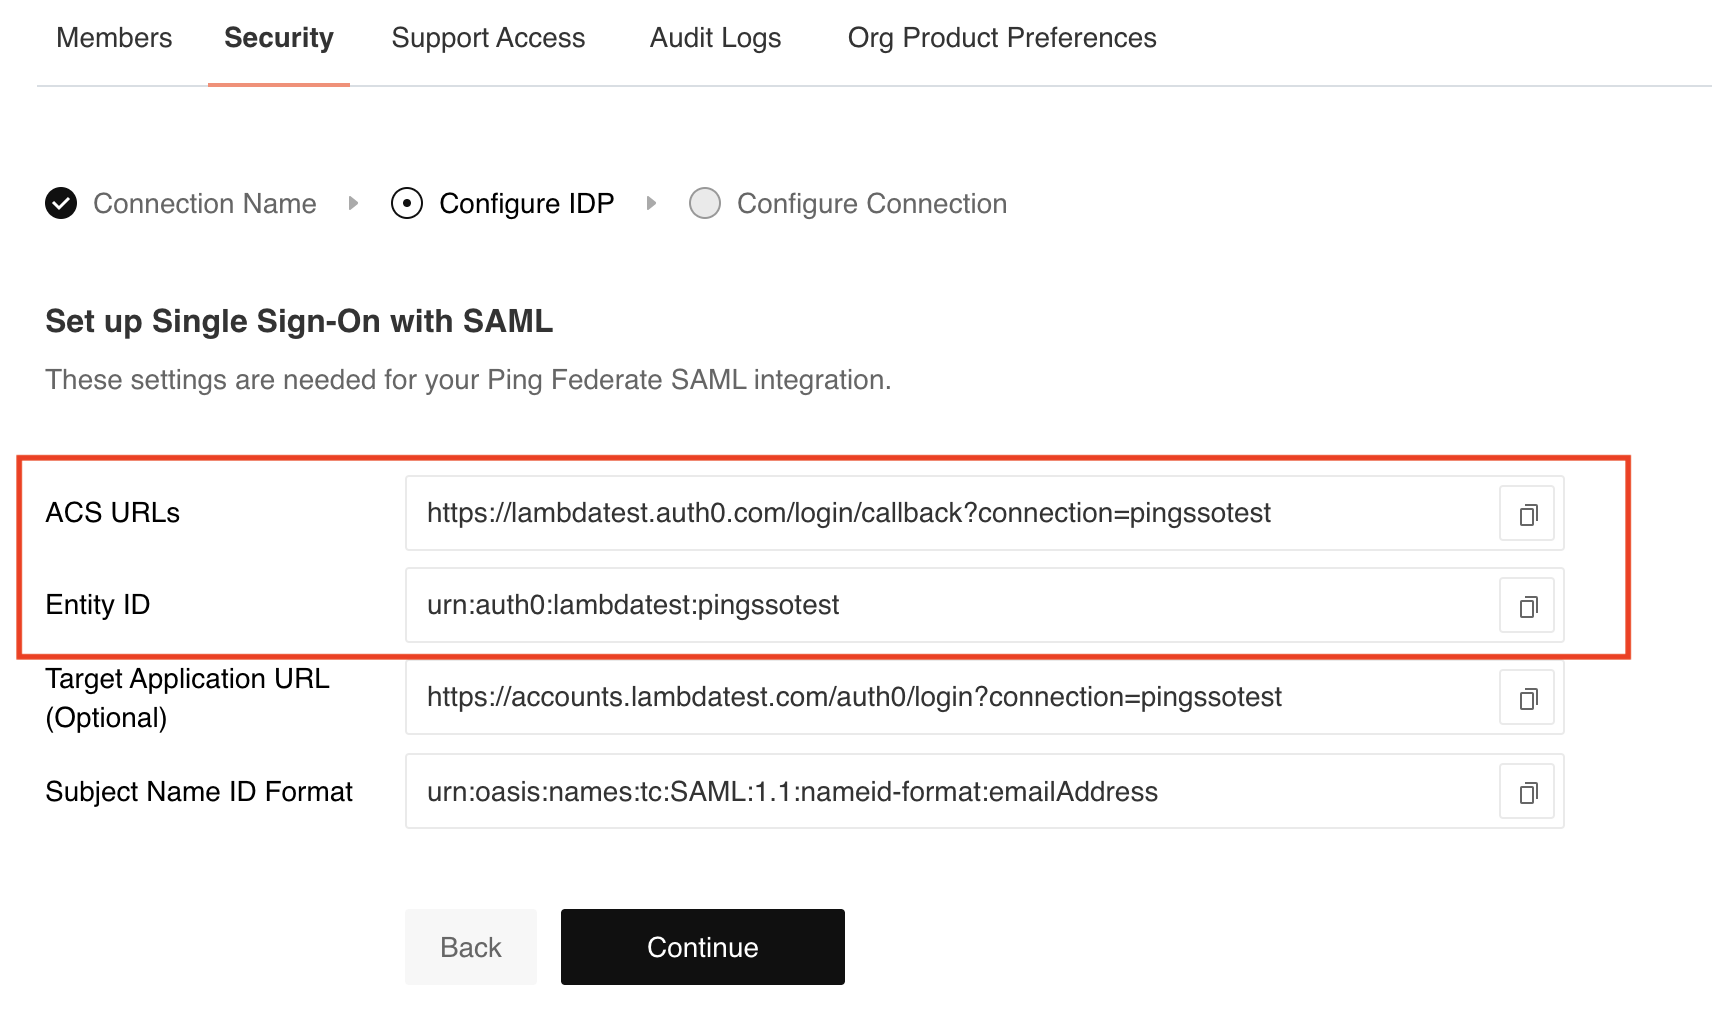
Step 4: Add SAML configuration
-
In TestMu AI SSO setup copy the ACS URLs and Entity ID.
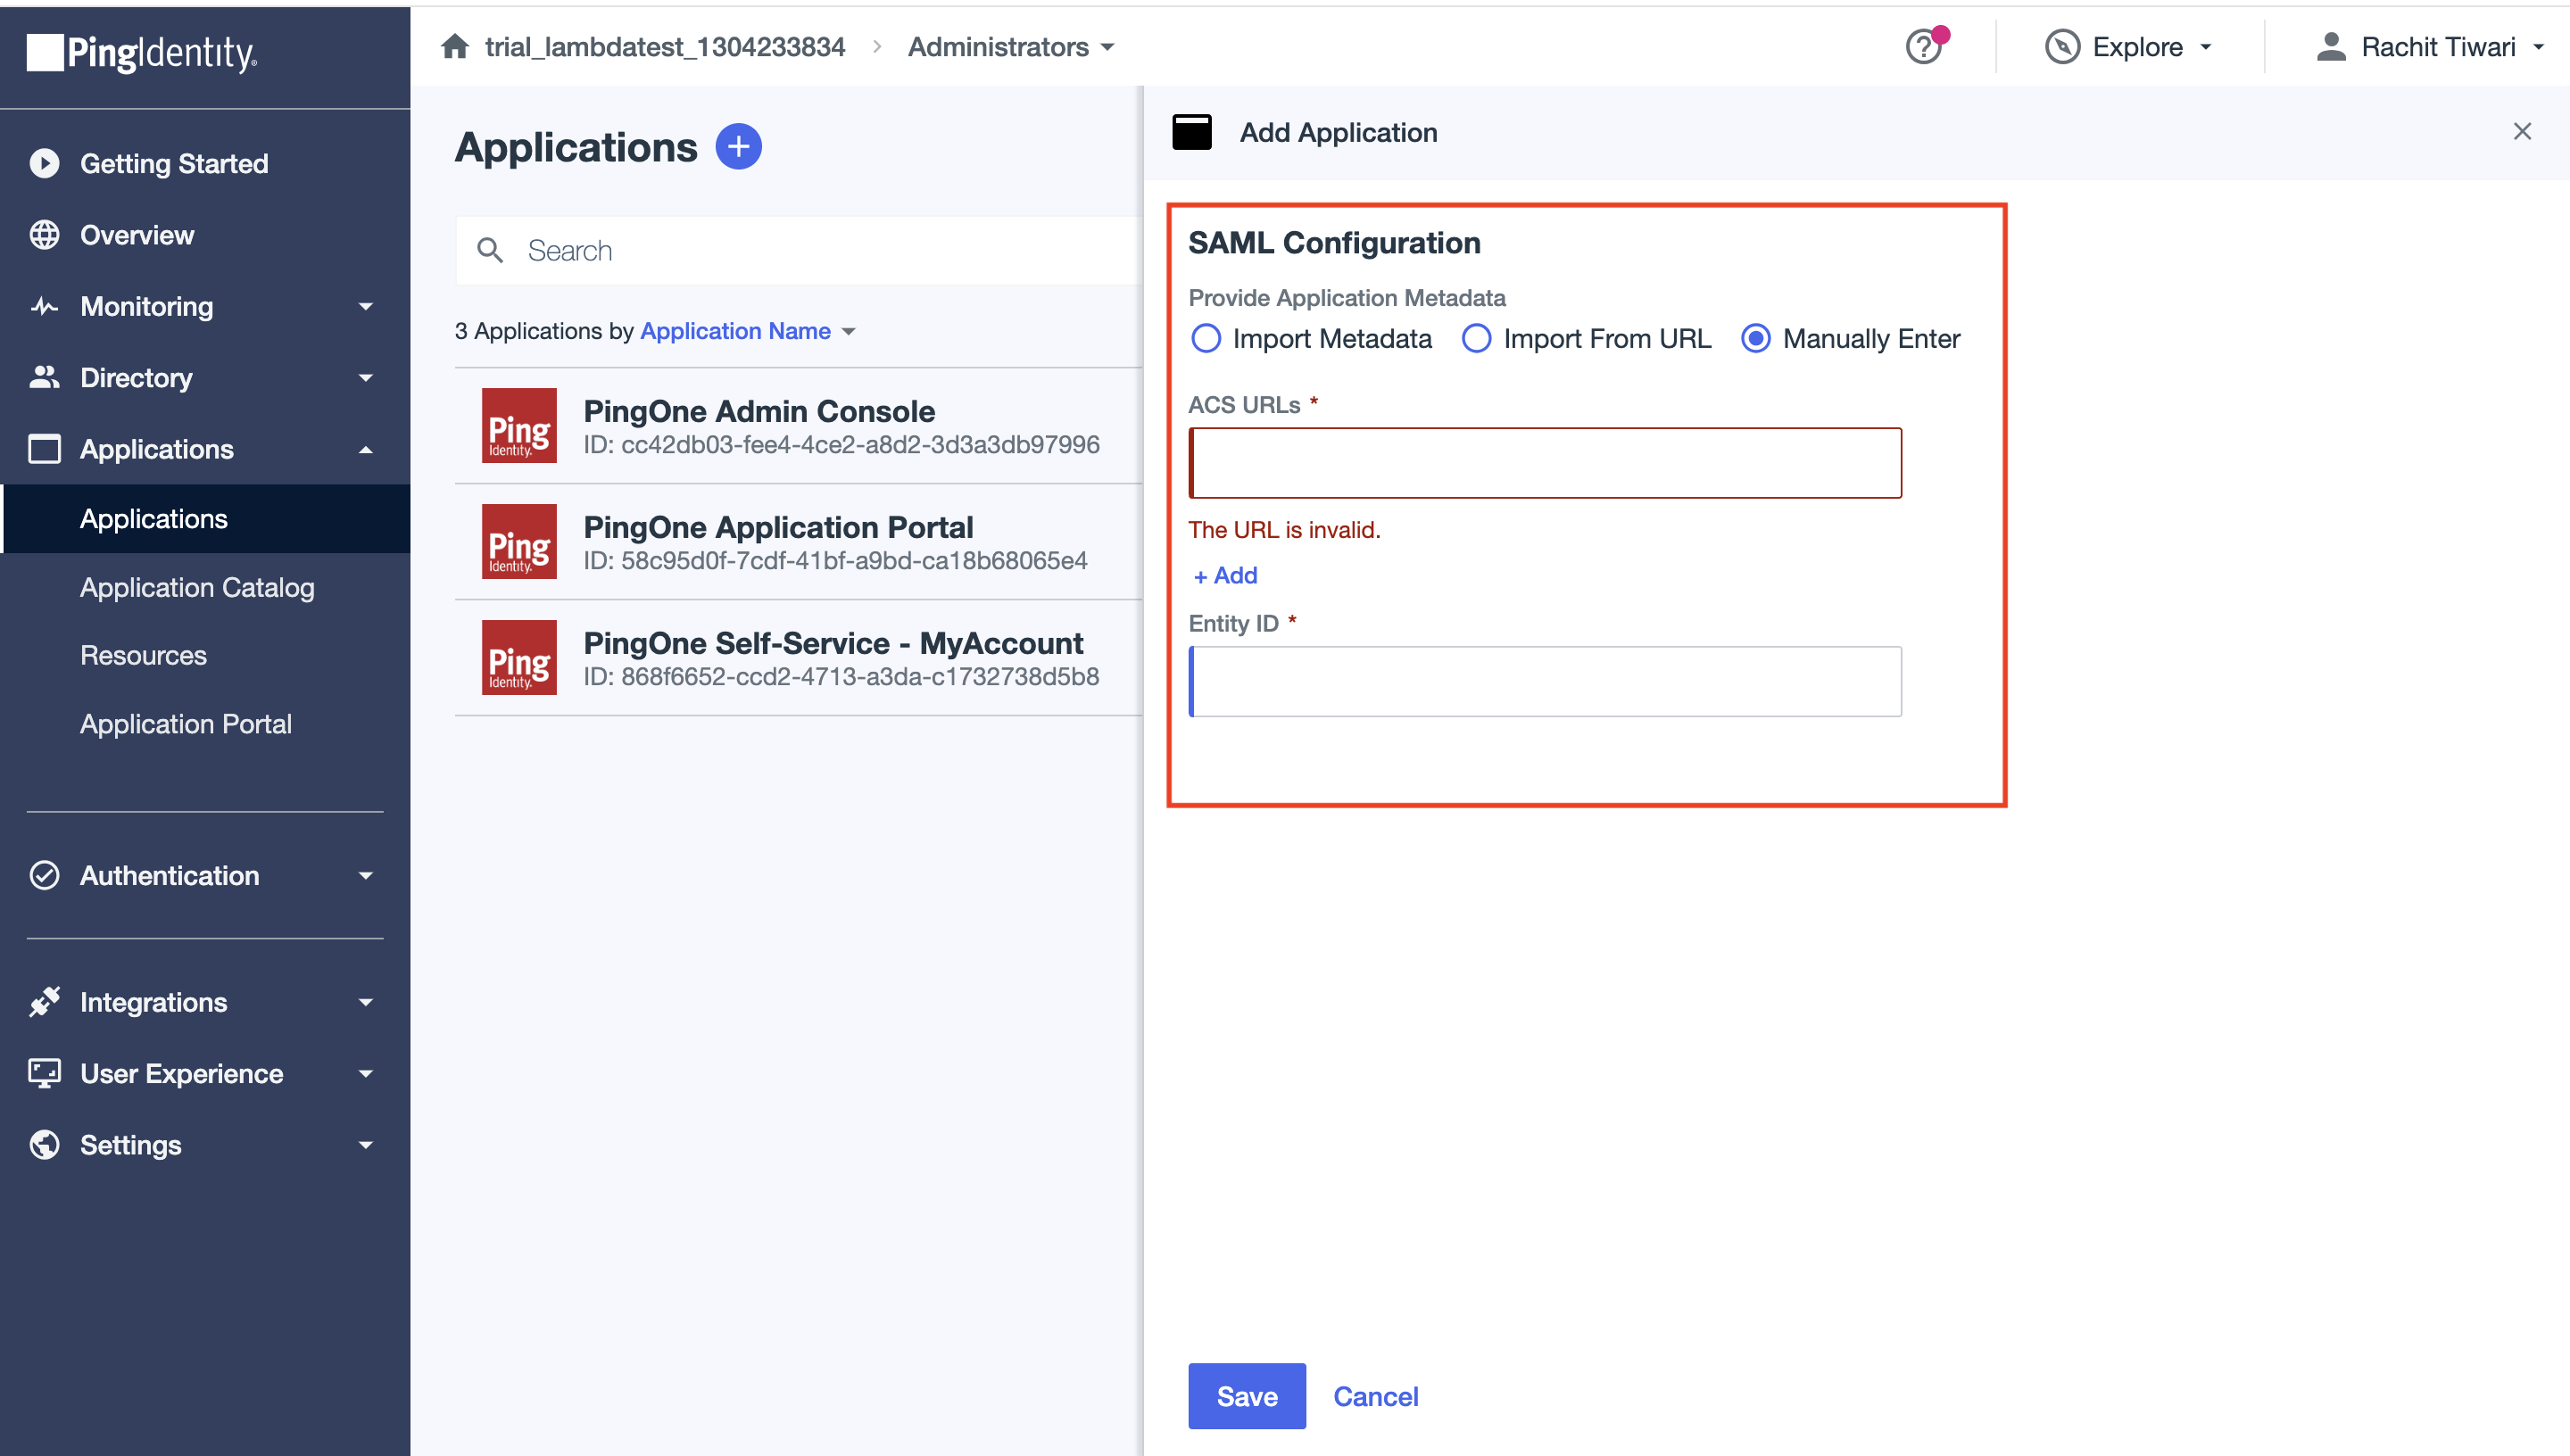
-
In Pingidentity, select the Manually Enter option in SAML Configuration and enter ACS URLs and Entity ID copied from above step.
Step 5: Configure Attribute Mappings
- Copy following attribute from Lambdatest SSO setup.
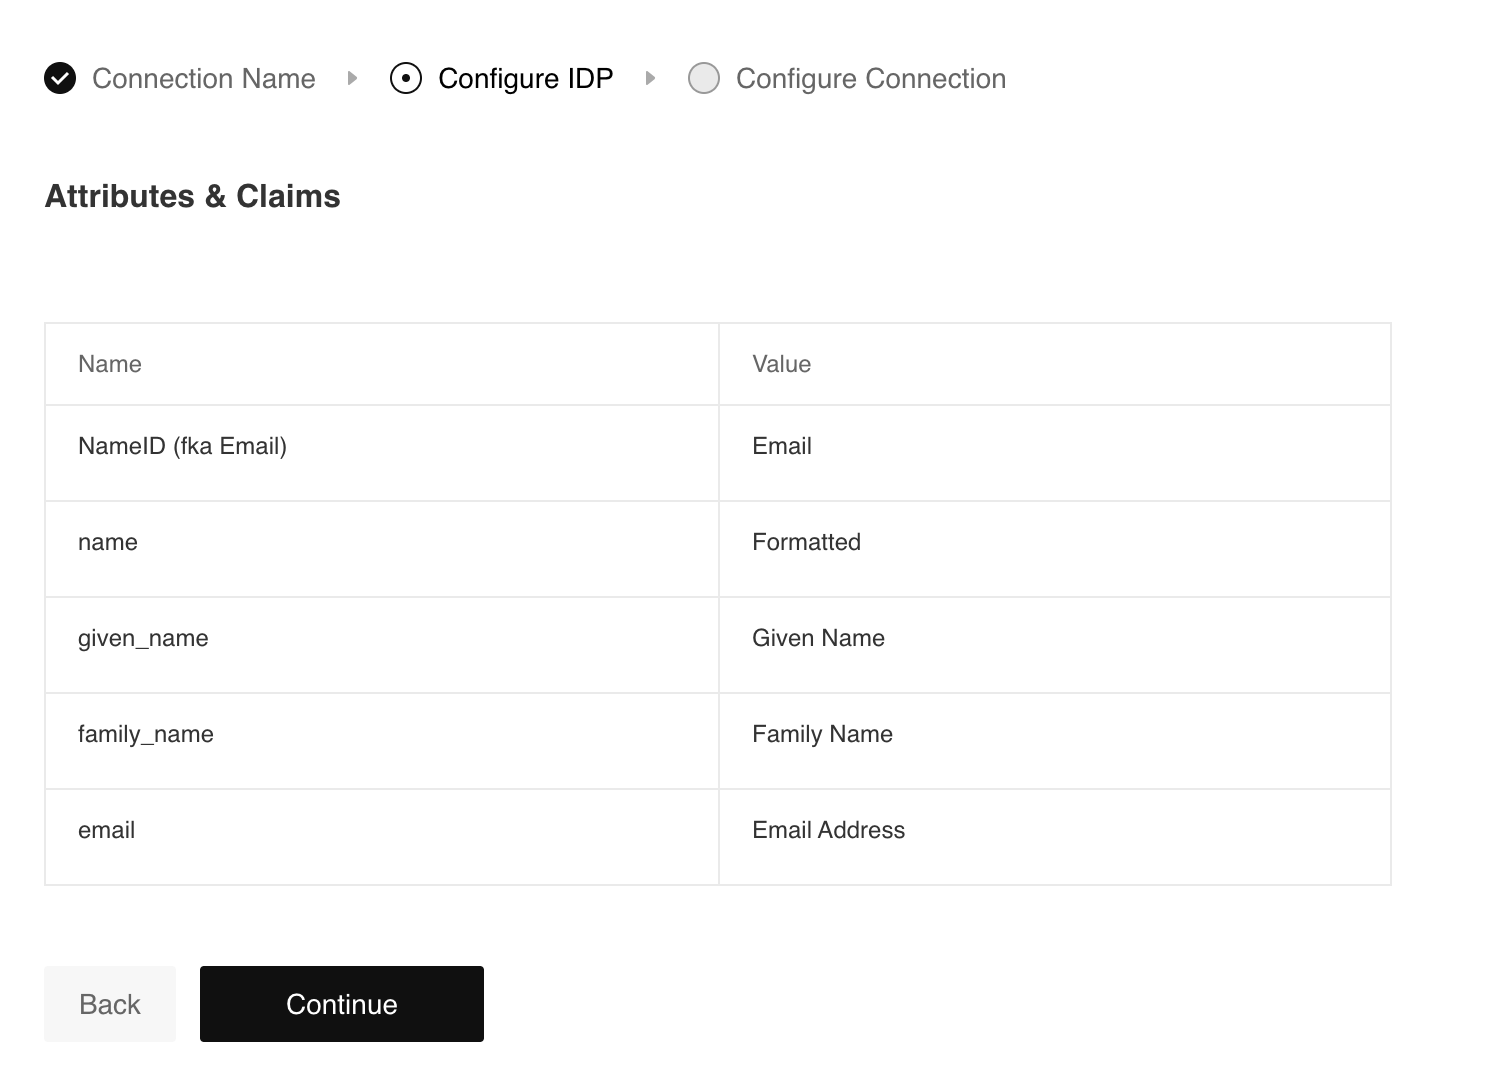
- Go to the Attribute Mappings tab of the created application in PingIdentity.
- Update the saml_object attribute value from user_ID to emailaddress.
- Add and update the other attributes

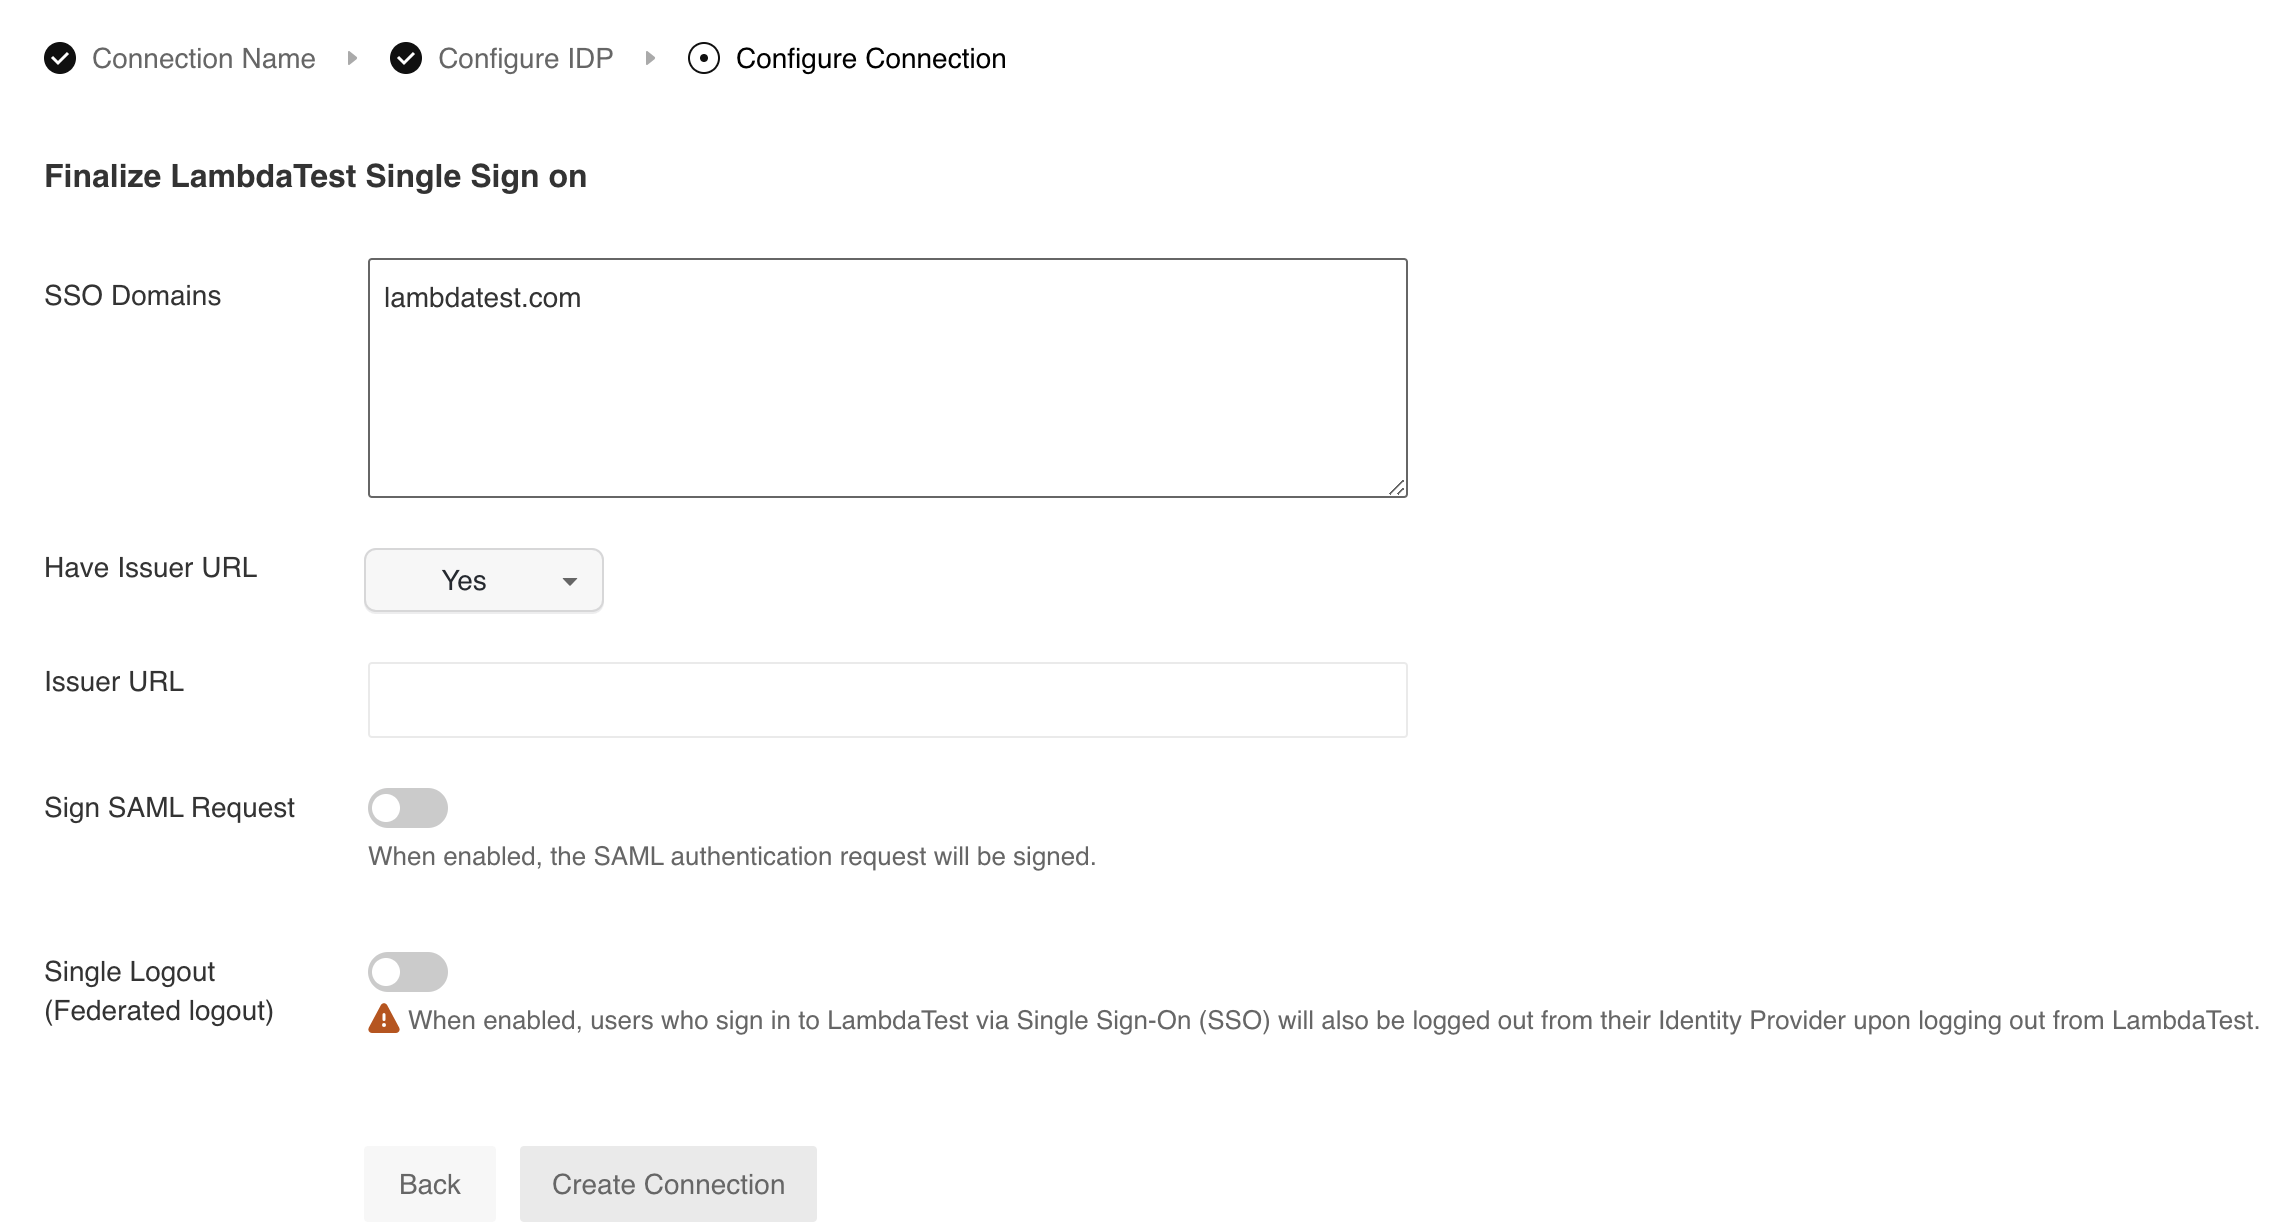
Step 6 : Upload Metadata URL & SSO Domain
-
SSO Domains (Comma-separated list of the domains that can be authenticated in the Identity Provider.)
-
Copy the IDP Metadata URL from PingIdentity
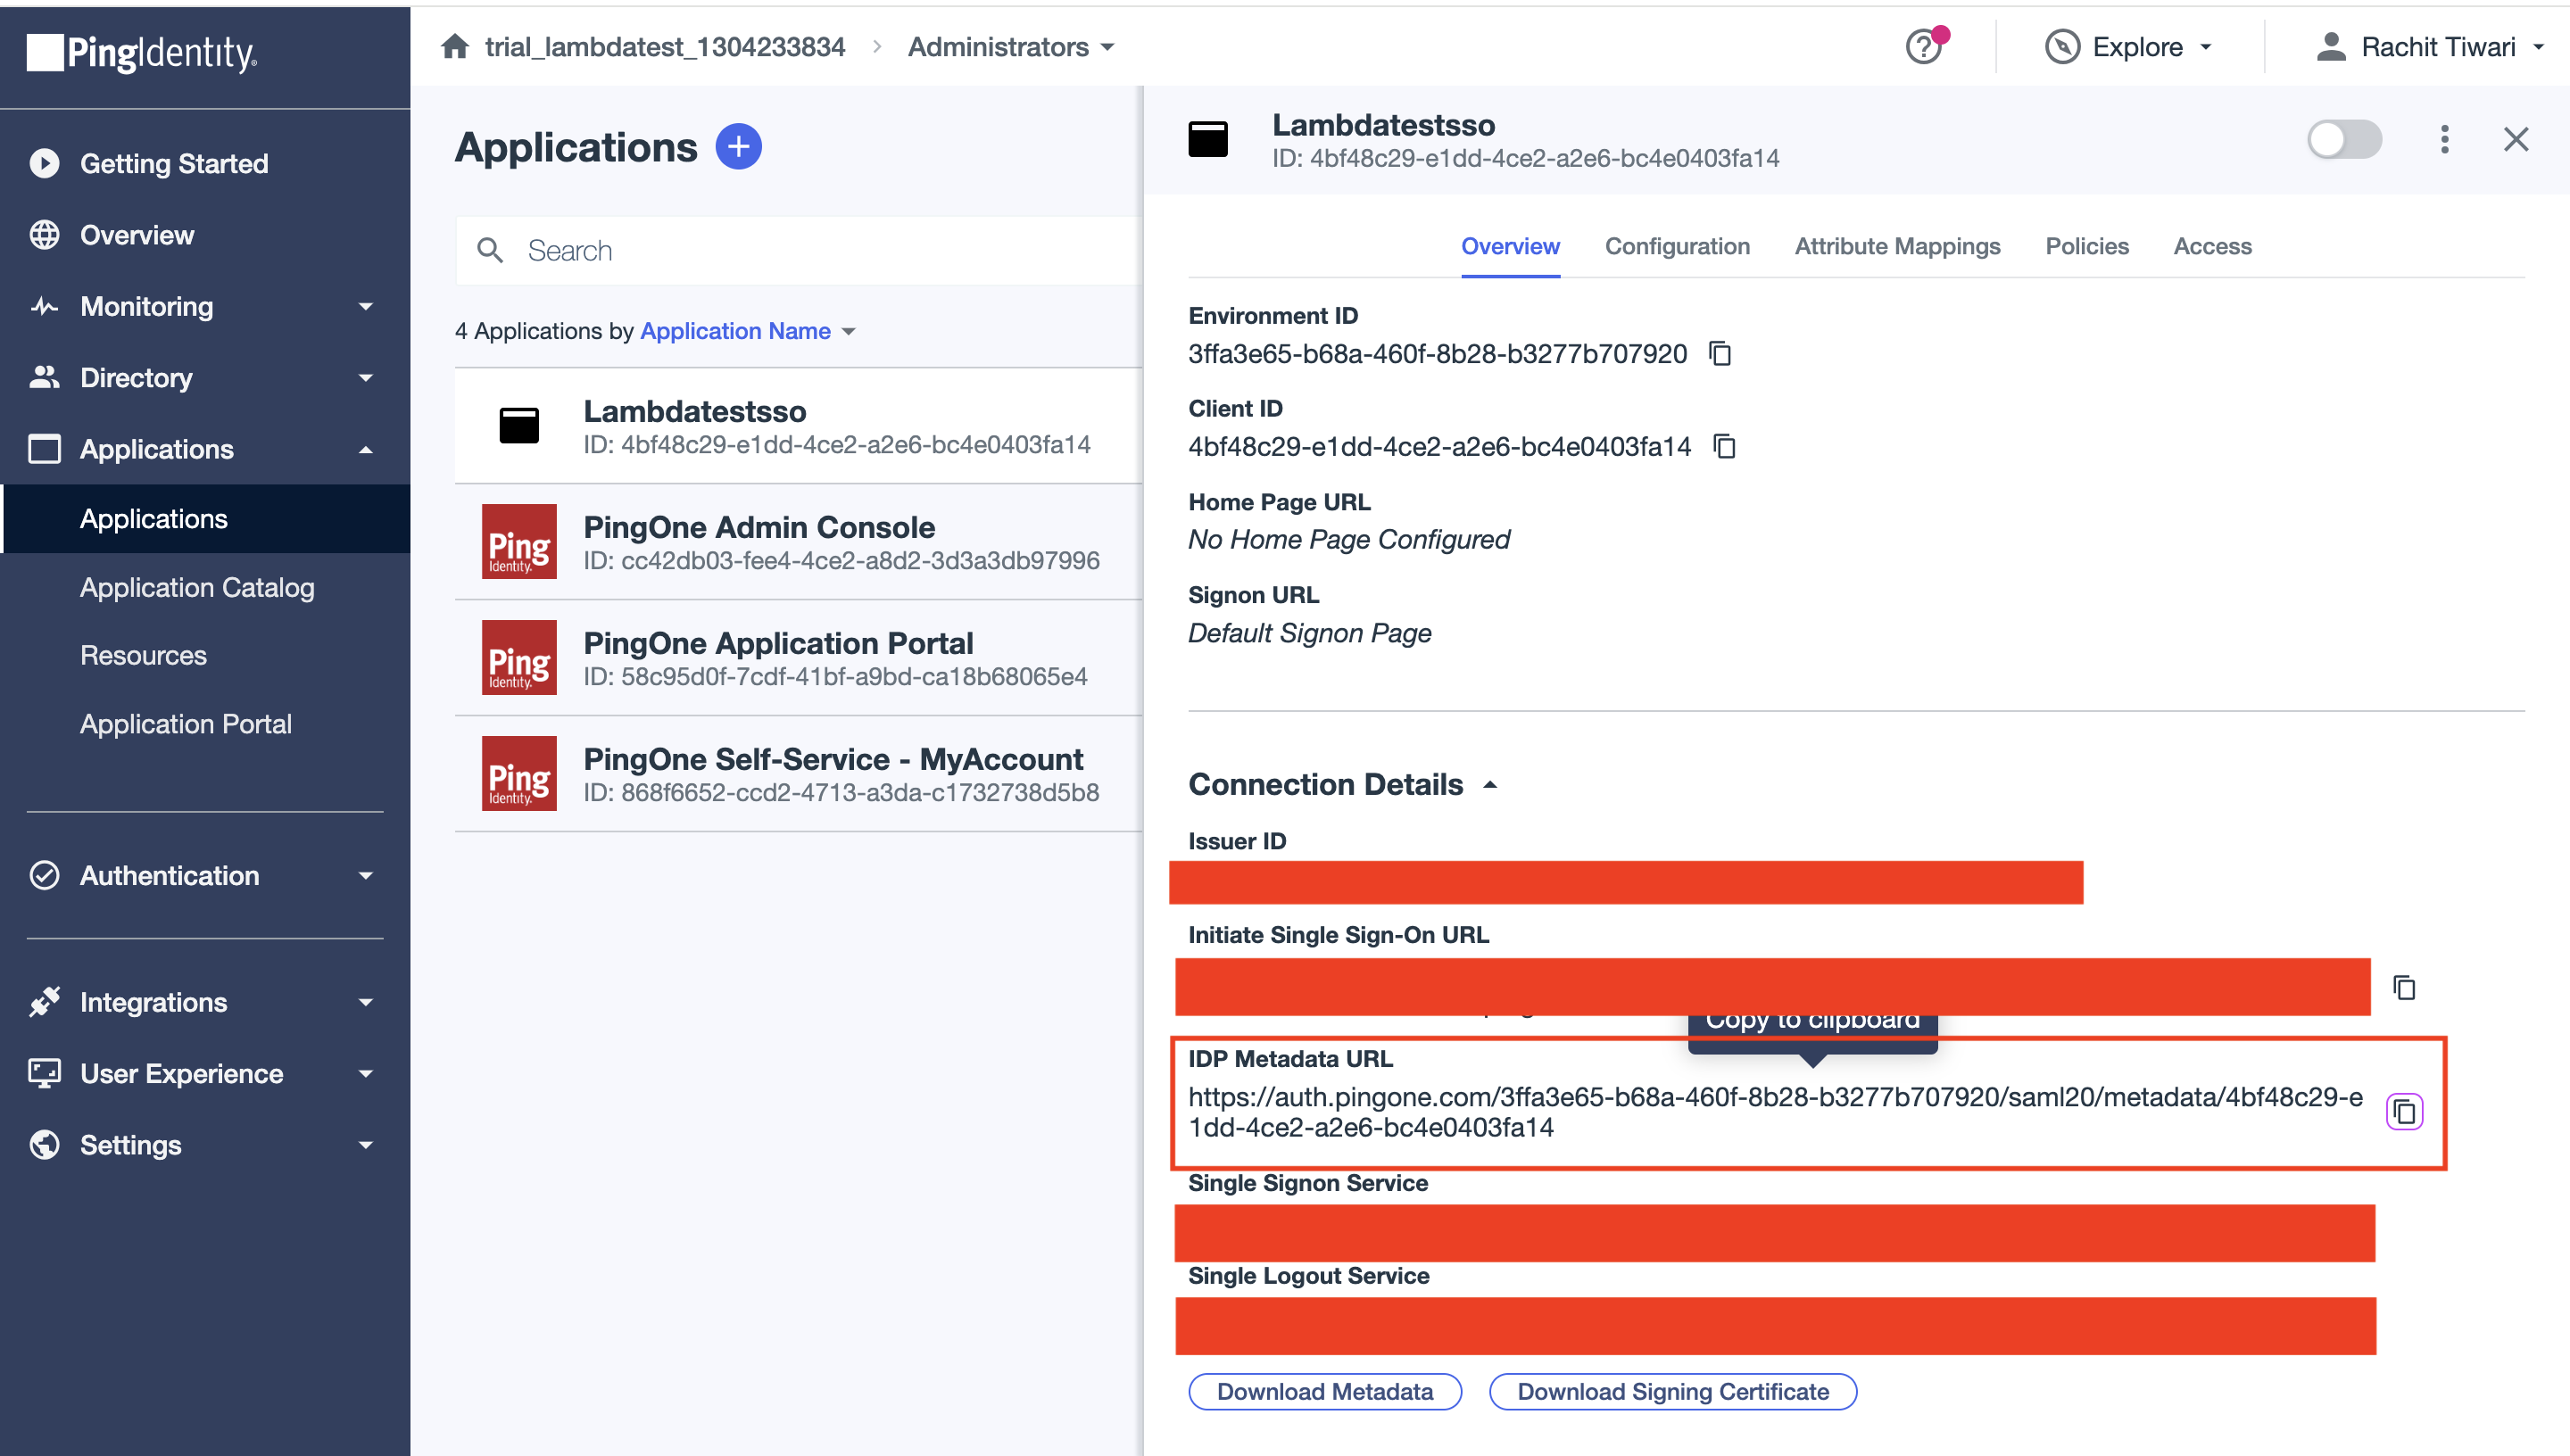
-
Go back to TestMu AI and paste the copied URL in the Issuer URL field and click on Create Connection:
After completing these configurations, your TestMu AI and Ping Identity integration for SSO will be ready to use. Both SP-initiated and IdP-initiated SSO flows will be enabled, and you can manage users and groups via Ping Identity.
