TestMu AI SSO & OneLogin Using SAML
TestMu AI allows you to integrate an external user directory with your TestMu AI Organization through an IDP so that your team could leverage the Single Sign-on setup. This document will help you integrate your TestMu AI organization with your OneLogin identity provider to configure SSO(Single sign-on).
Prerequisites
To set-up and use OneLogin & TestMu AI Single Sign-on (SSO) feature:
- An Enterprise plan with TestMu AI. ( Learn how to manage your subscriptions. )
- The Admin level access to your TestMu AI organization.
- The Admin level access of your organization’s OneLogin instance
Configure TestMu AI SSO & OneLogin Integration
-
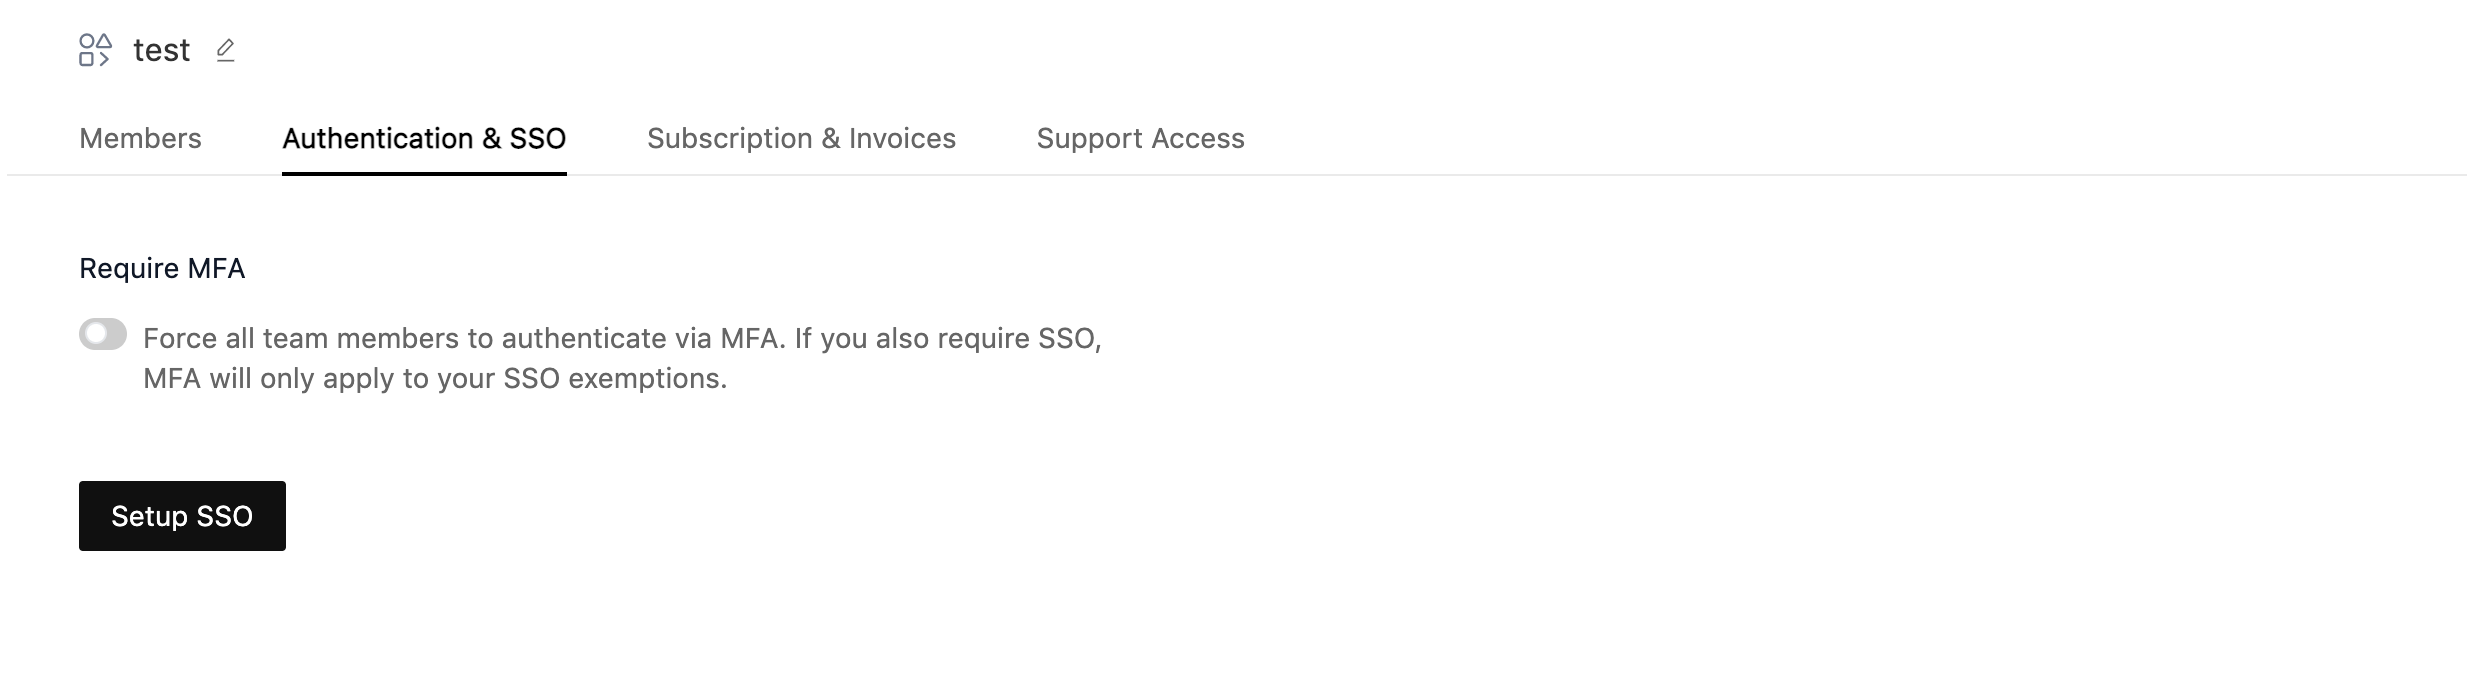
Go to TestMu AI Authentication & SSO settings and click on Setup SSO.
-
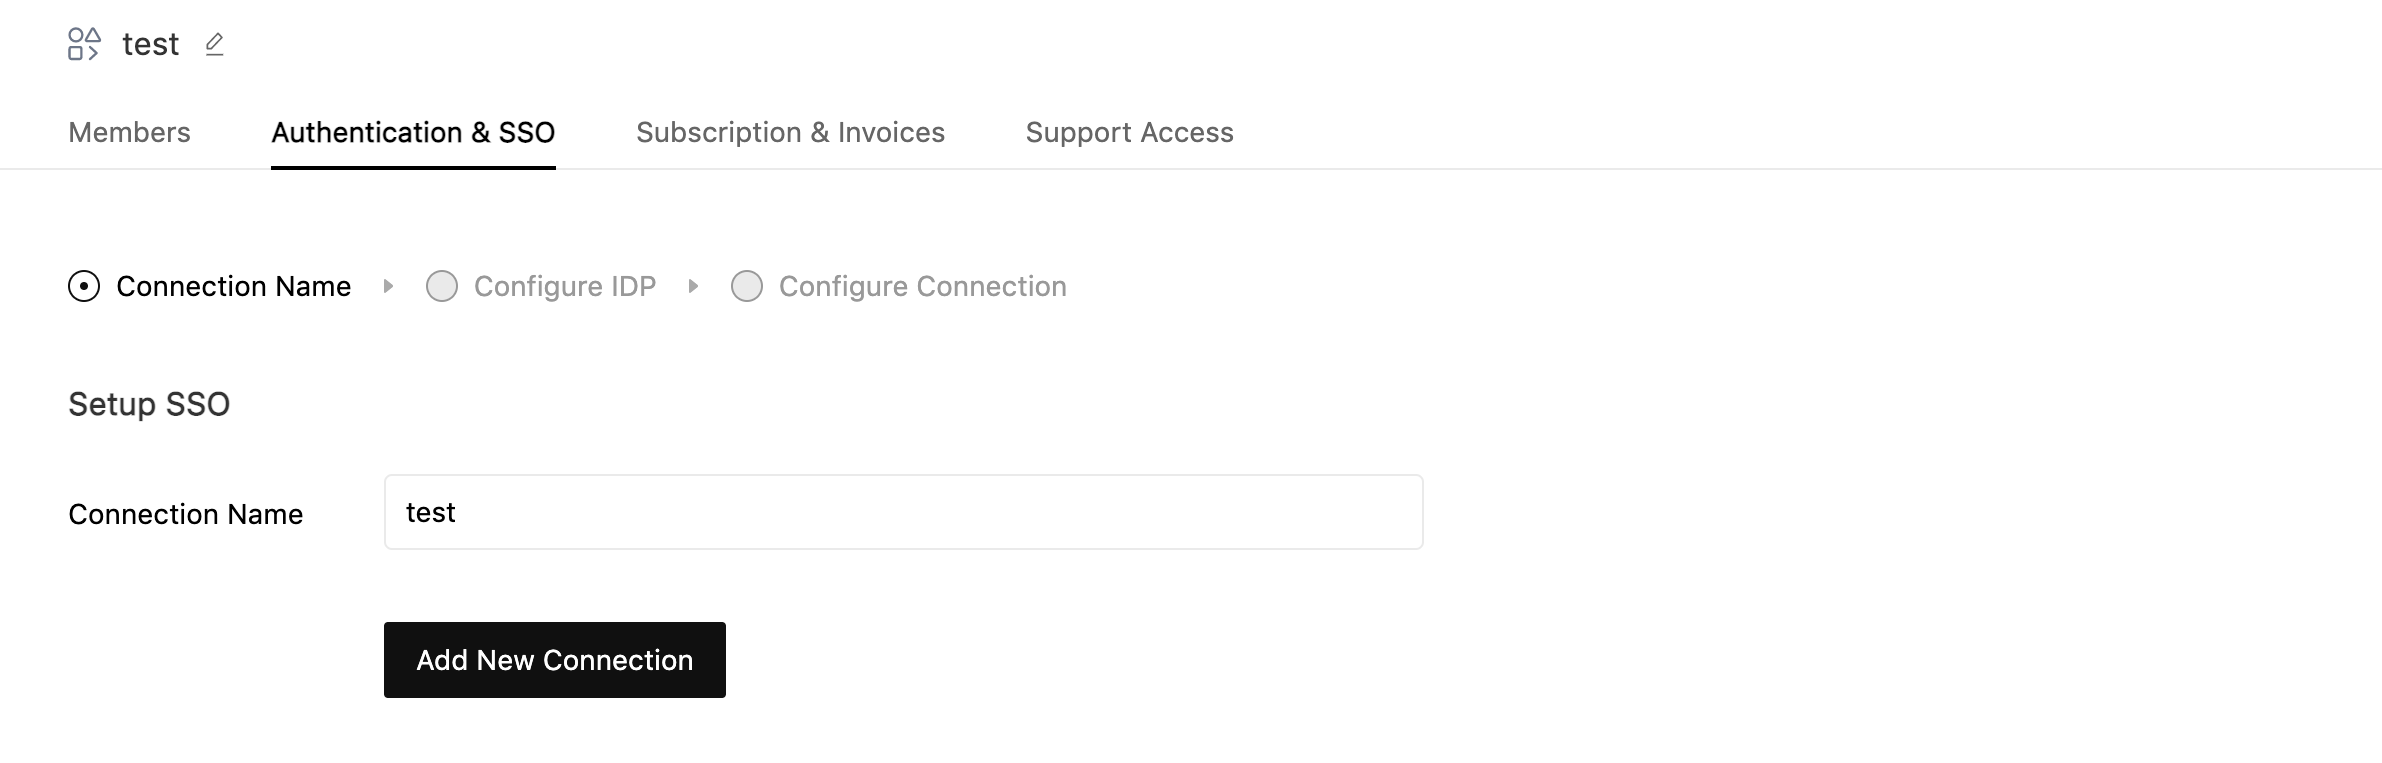
Enter Connection Name and Click on Add New Connection.
-
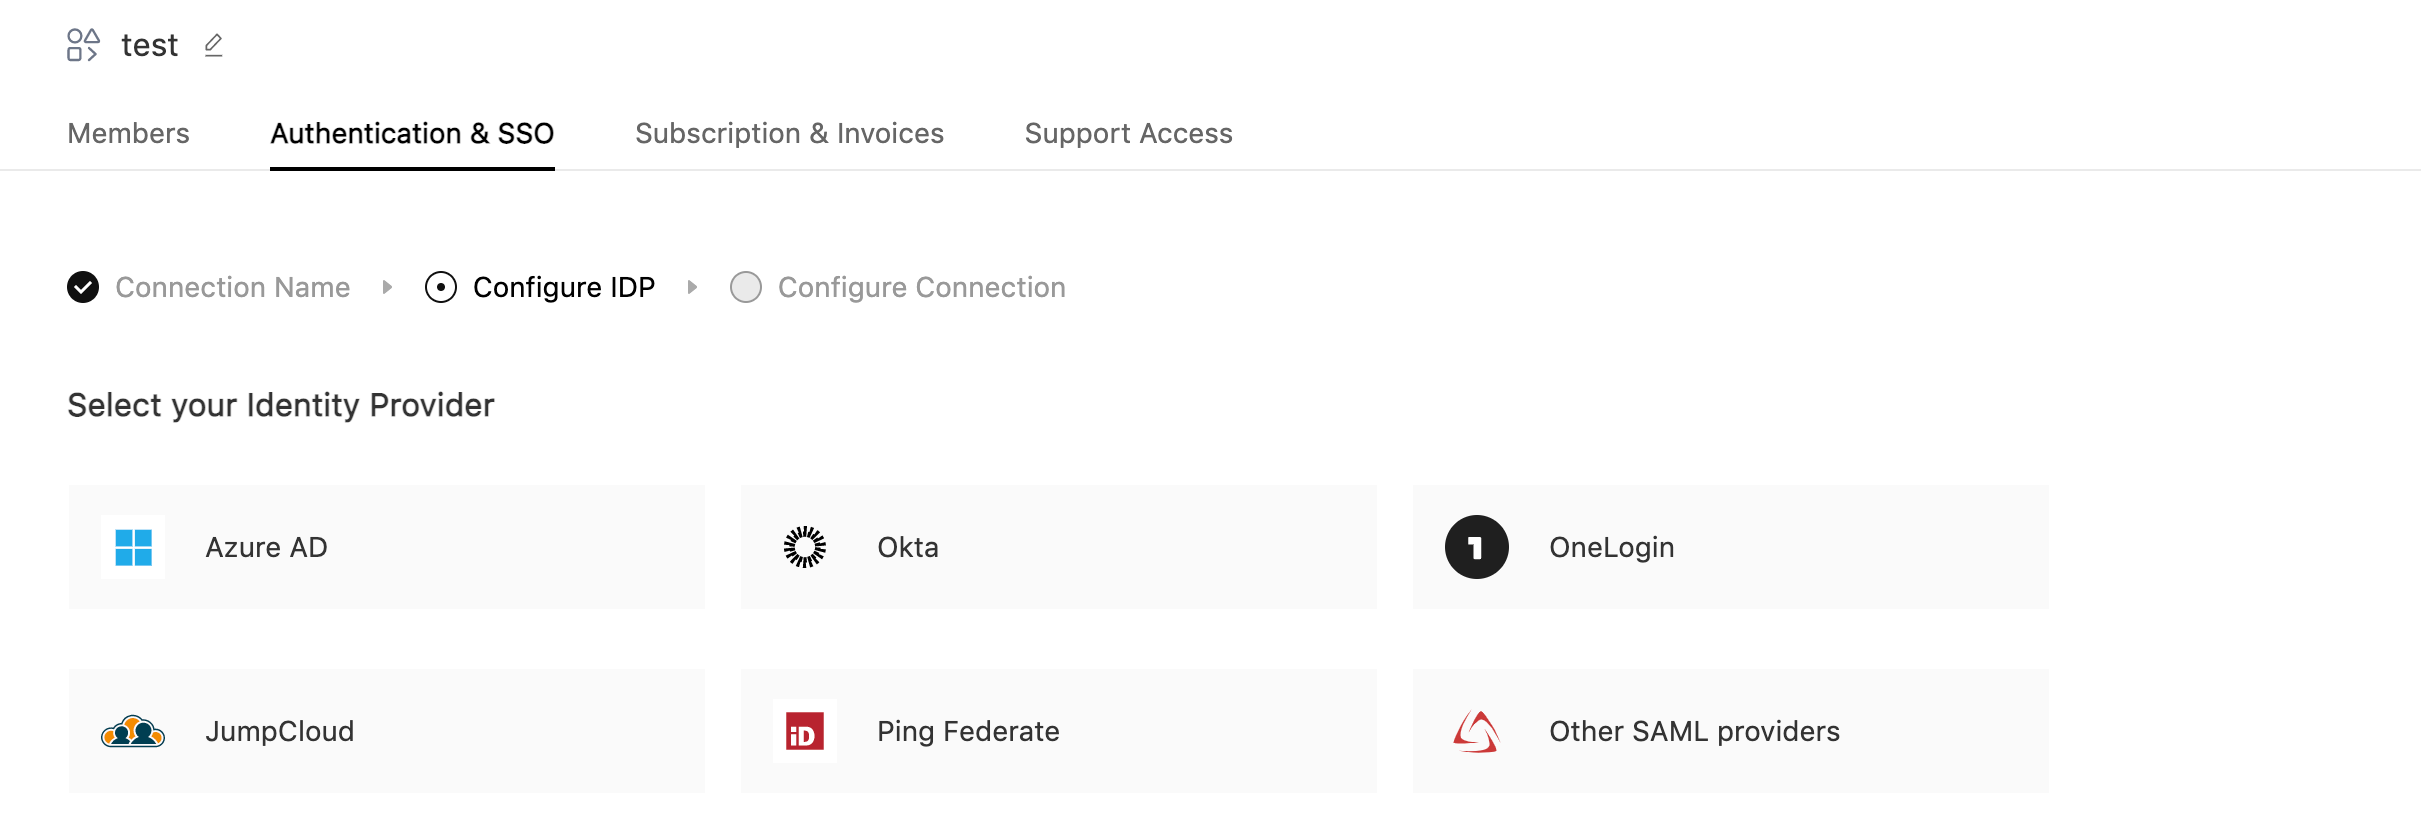
Select OneLogin as your identity provider.
-
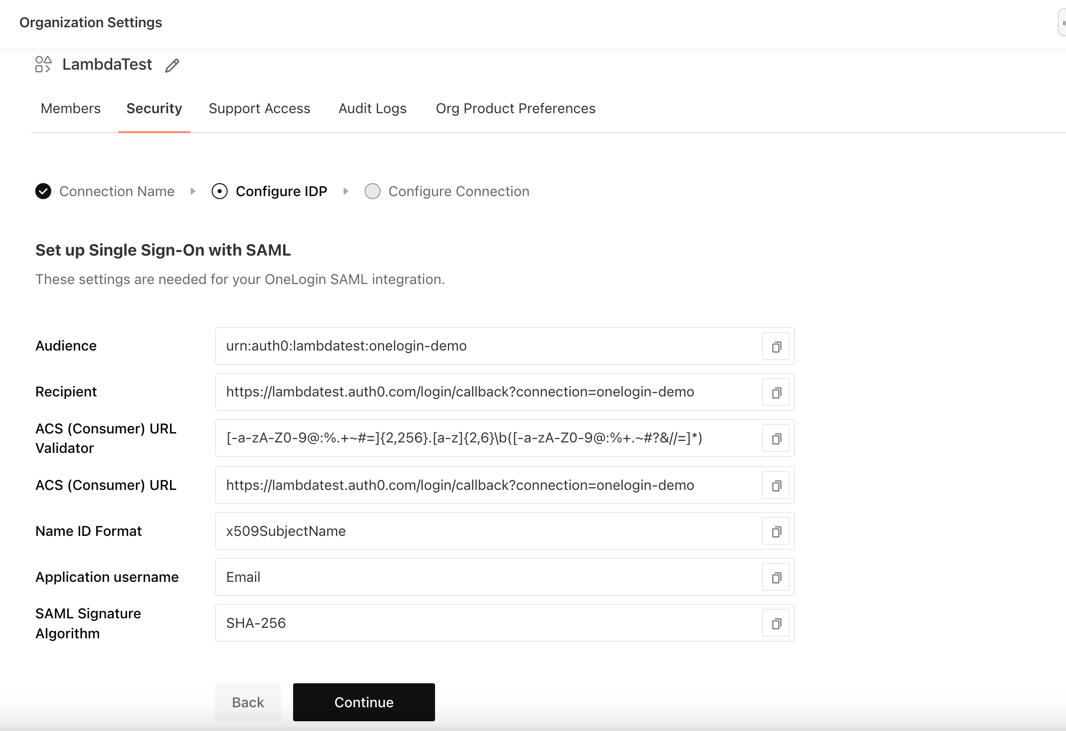
Now copy the details required for setting up SSO connection in your Identity Provider. Once configured, click on continue
-
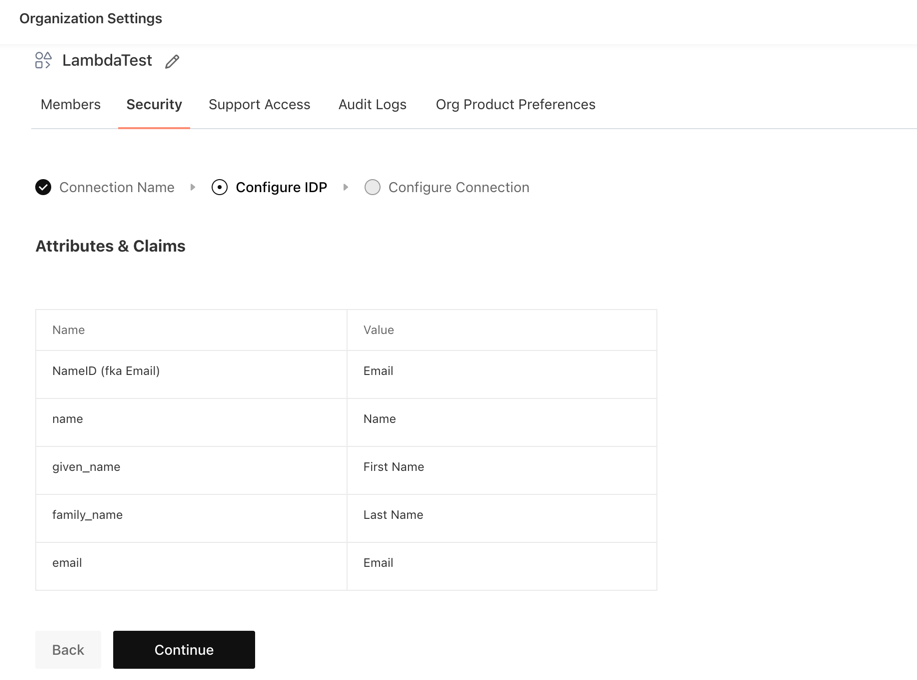
Now Configure the Attributes and Claims in your Identity Provider. Once configured, click on continue
-
Log in to the OneLogin Dashboard.

- Go to Applications

- Add a new Application, by clicking on Add App.

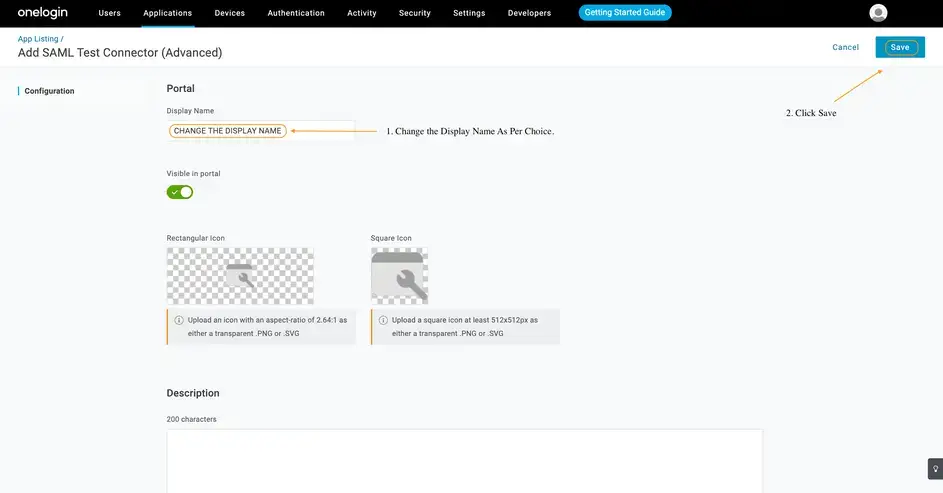
- Search for SAML Test Connector and select Add SAML Test Connector (Advanced)

- In the window that appears, choose a suitable name for your app, and save.
-
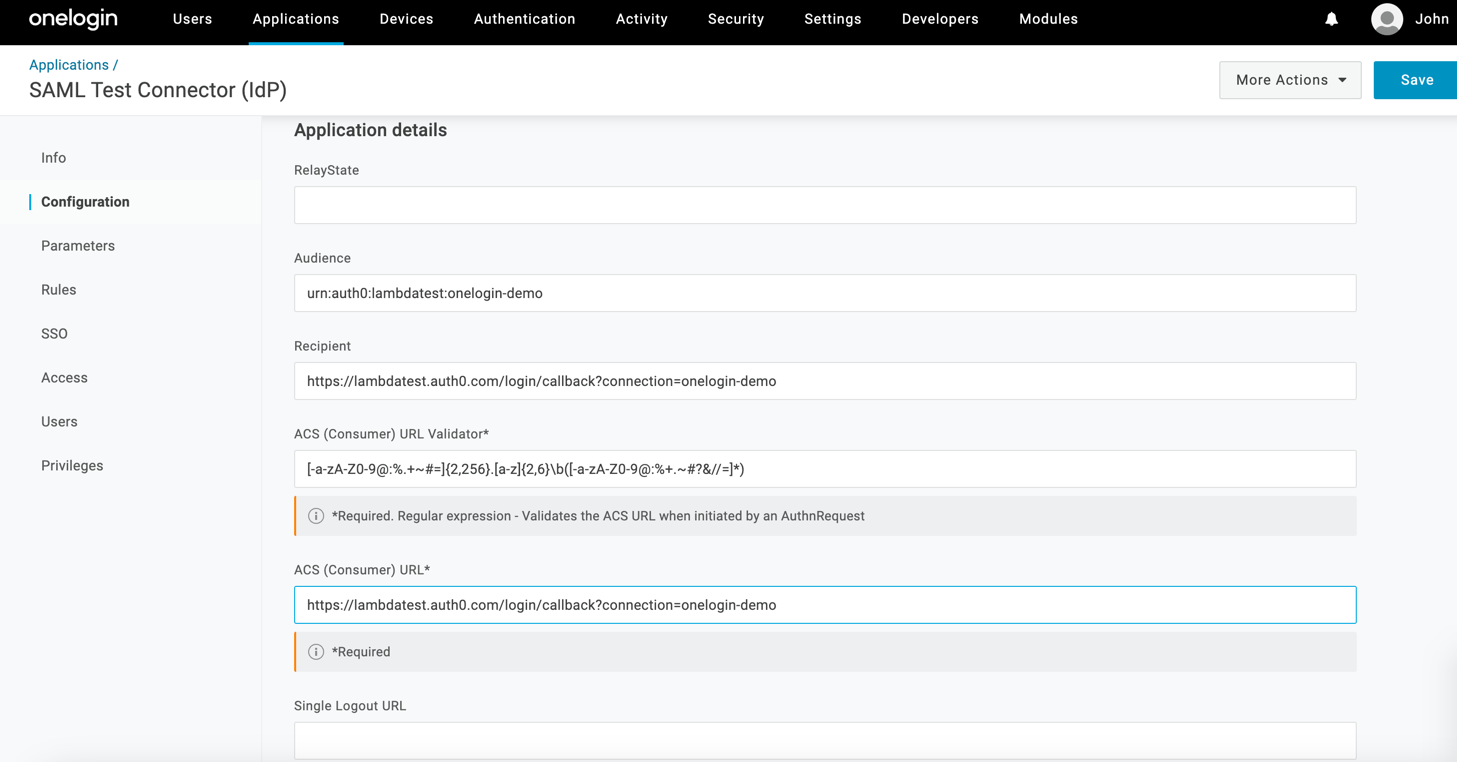
Click on configurations tab in the sidebar and fill the details as per the details copied from TestMu AI in step 4.
-
Click on the parameters tab and fill the details as per the details copied from TestMu AI in step 5.

-
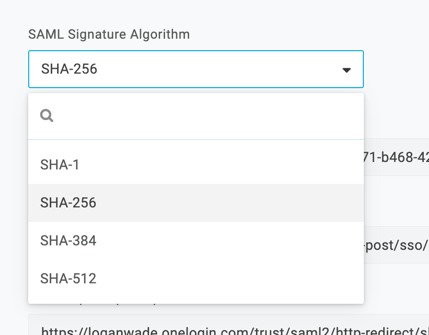
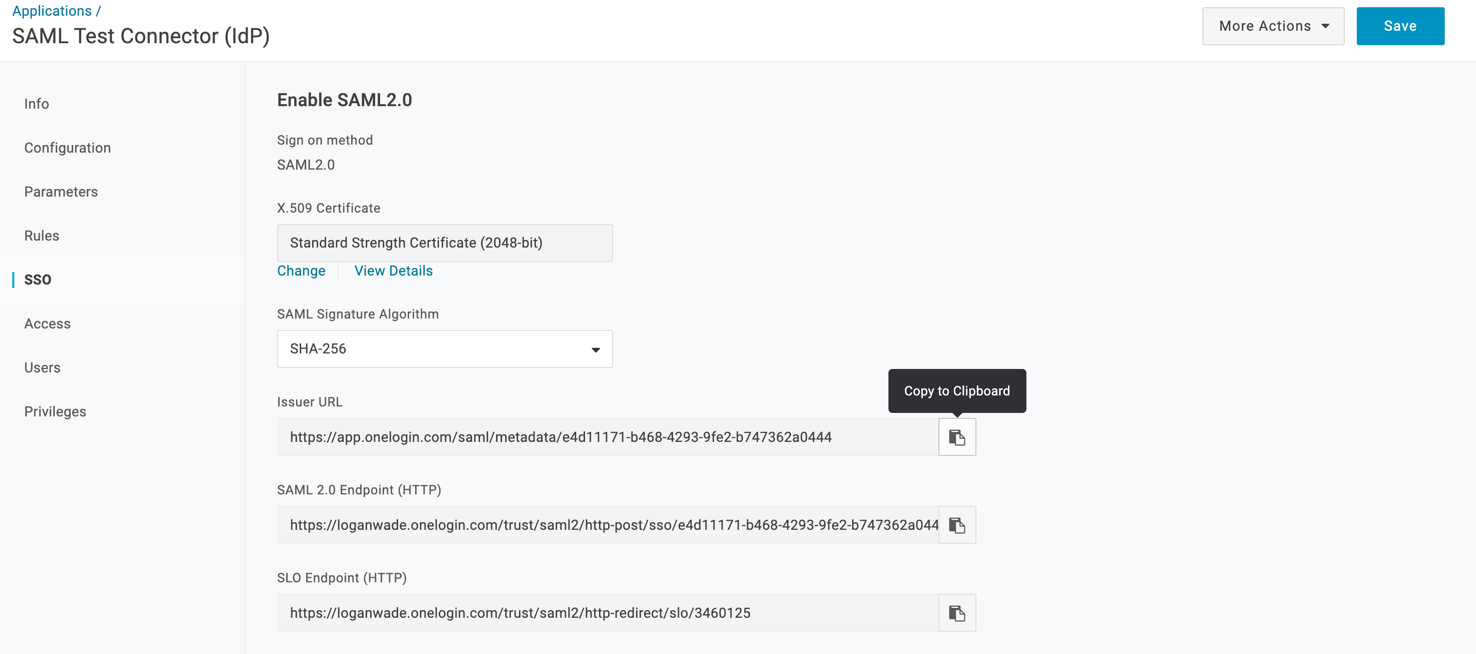
Now go to the SSO tab set the SAML Signature Algorithm to SHA-256
-
Copy the Issuer URL
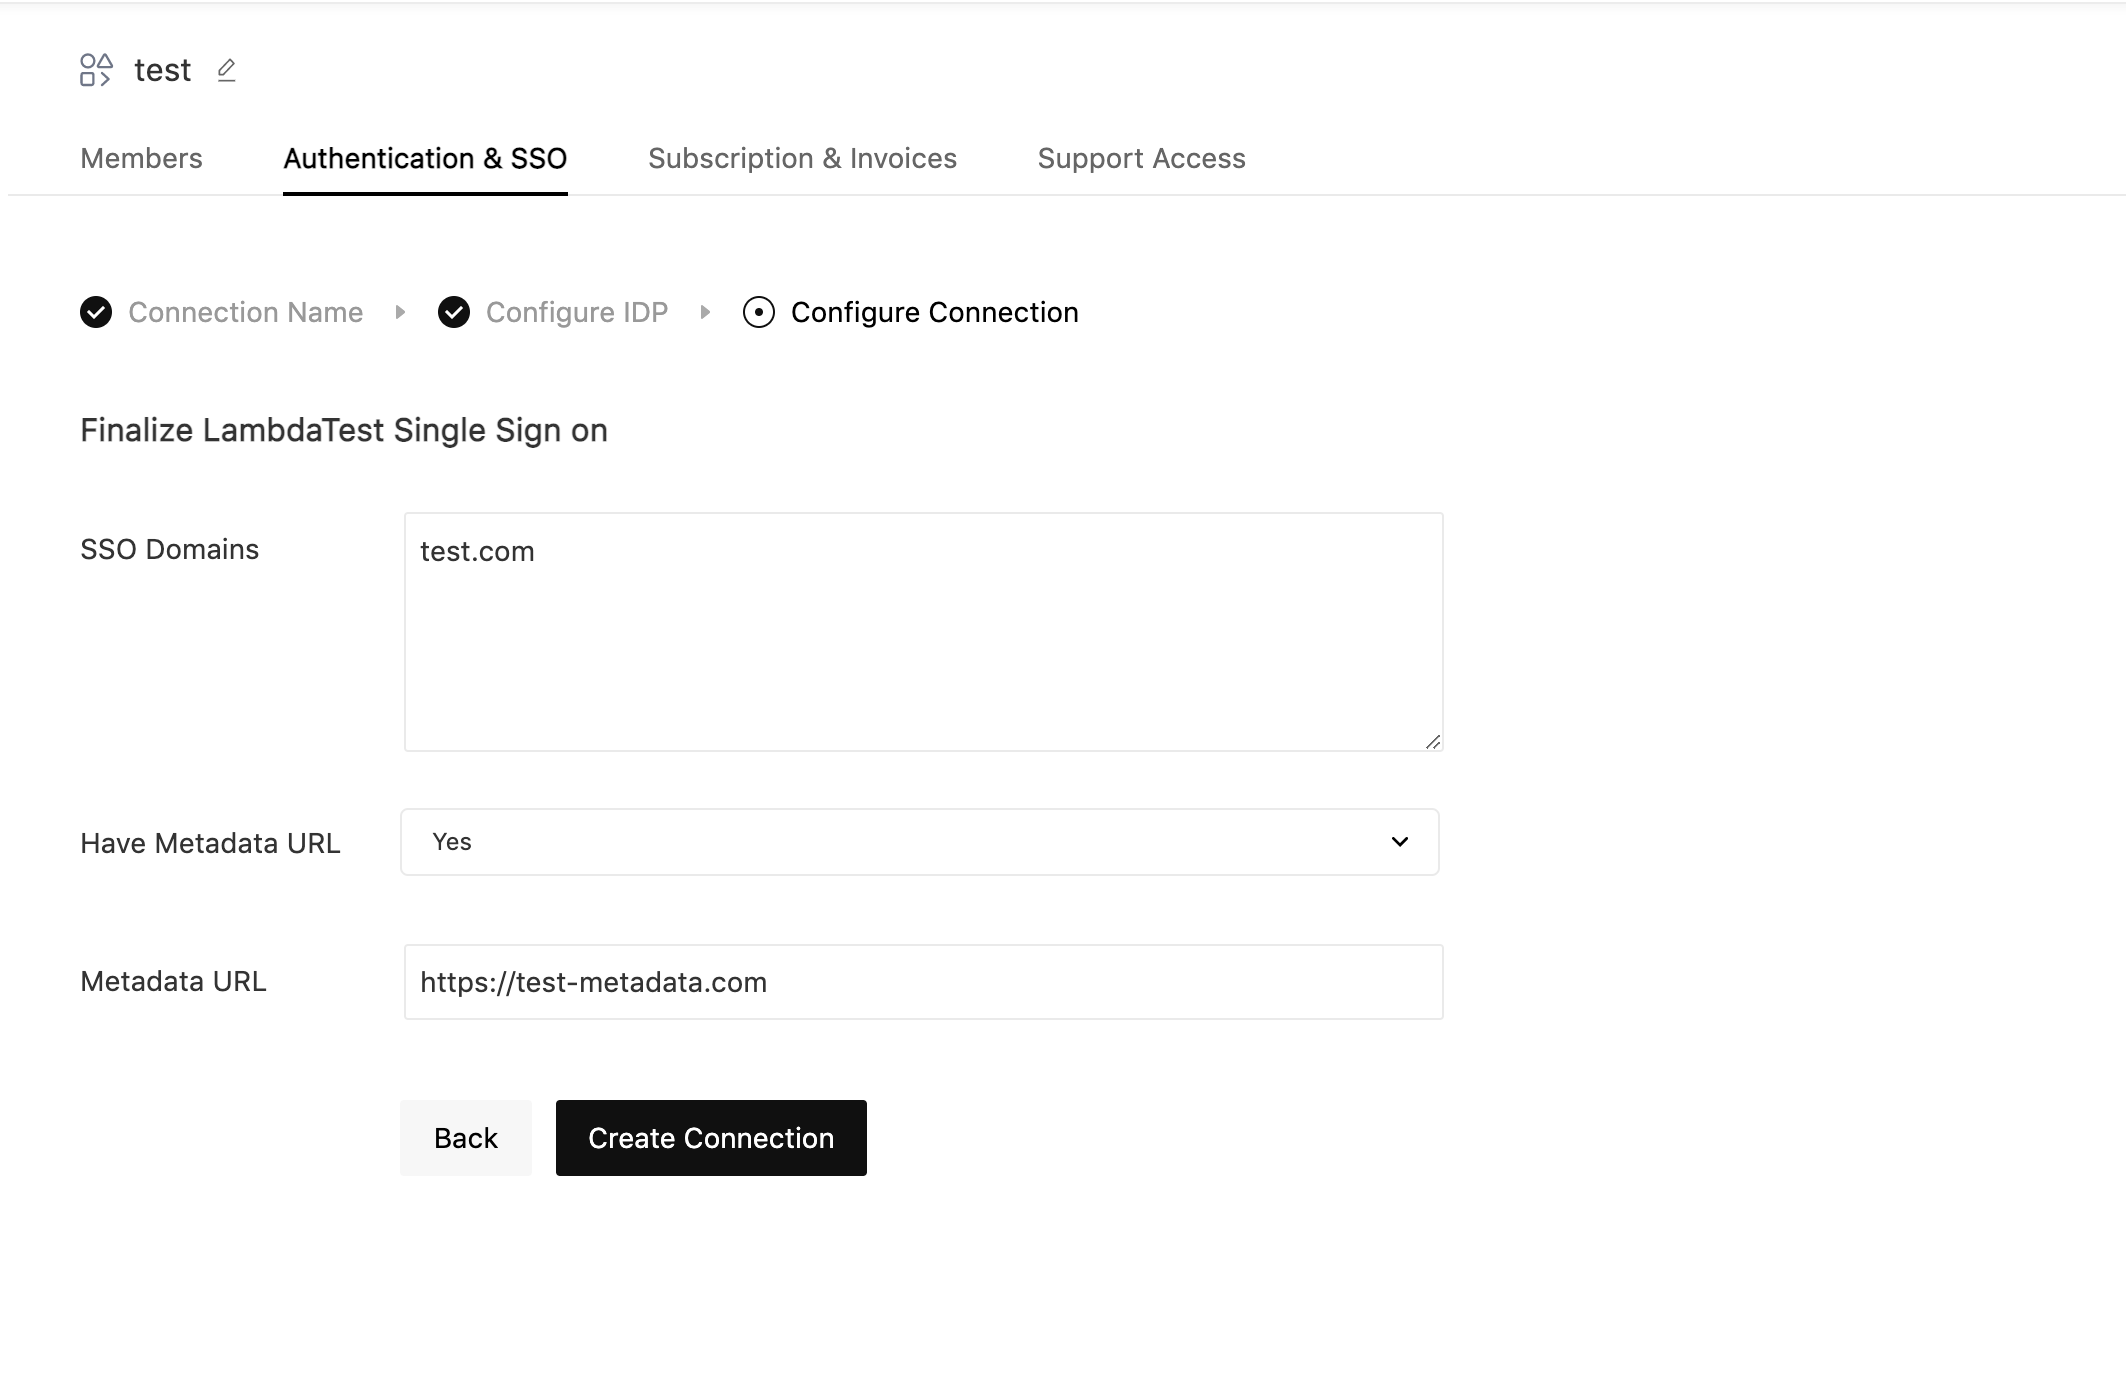
- Go back to TestMu AI and paste the copied Issuer URL in the Metadata URL field. Fill the required fields and click on Create Connection:
- SSO Domains (Comma-separated list of the domains that can be authenticated in the Identity Provider.)
- Have Metadata URL (Select this option if you have metadata file URL of your Identity Provider.)
- Metadata URL (Enter the metadata URL of your Identity Provider.)
That's it. Your enterprise's TestMu AI SSO and OneLogin has been integrated successfully. If you face any challenge, or come across any issues, please feel free to contact our Support Team. You can even mail us at [email protected]. Happy Testing!
