TestMu AI SSO Integration Using OIDC
TestMu AI provides seamless Single Sign-On (SSO) integration with various identity providers using OpenID Connect (OIDC), enabling your team to access TestMu AI using their existing organizational credentials. This managed SSO solution streamlines user management and enhances security by centralizing authentication through your identity provider.
This comprehensive guide will walk you through configuring OIDC-based SSO between your TestMu AI organization and your identity provider, using Azure AD as the example throughout the documentation.
What is OIDC (OpenID Connect)?
OpenID Connect (OIDC) is a simple identity layer built on top of the OAuth 2.0 protocol. It allows clients to verify the identity of the end-user based on the authentication performed by an authorization server, as well as to obtain basic profile information about the end-user in an interoperable and REST-like manner.
Key Benefits of OIDC:
- Simplified Integration: Easier to implement compared to SAML
- Modern Standard: Built on OAuth 2.0, widely adopted
- RESTful: Uses JSON and HTTP, making it developer-friendly
- Flexible: Supports various authentication flows
- Secure: Industry-standard security practices
Prerequisites
To enable TestMu AI SSO through OIDC integration, you will need:
- Identity Provider Access: Administrative access to your identity provider
- TestMu AI Enterprise Plan: An active TestMu AI organization subscription
- Administrative Access: Admin-level access to your TestMu AI organization
- SSO Request: Contact TestMu AI support to enable SSO for your organization
Note: If you don't have SSO enabled for your TestMu AI organization, please contact our support team at [email protected] .
Step-by-Step Integration Guide
Step 1: Create Application in Your Identity Provider
The exact steps vary by identity provider, but the general process involves creating a new application or client registration. We'll use Azure AD as our example:
-
Access Azure Portal: Sign in to the Azure Portal using an administrator account.
-
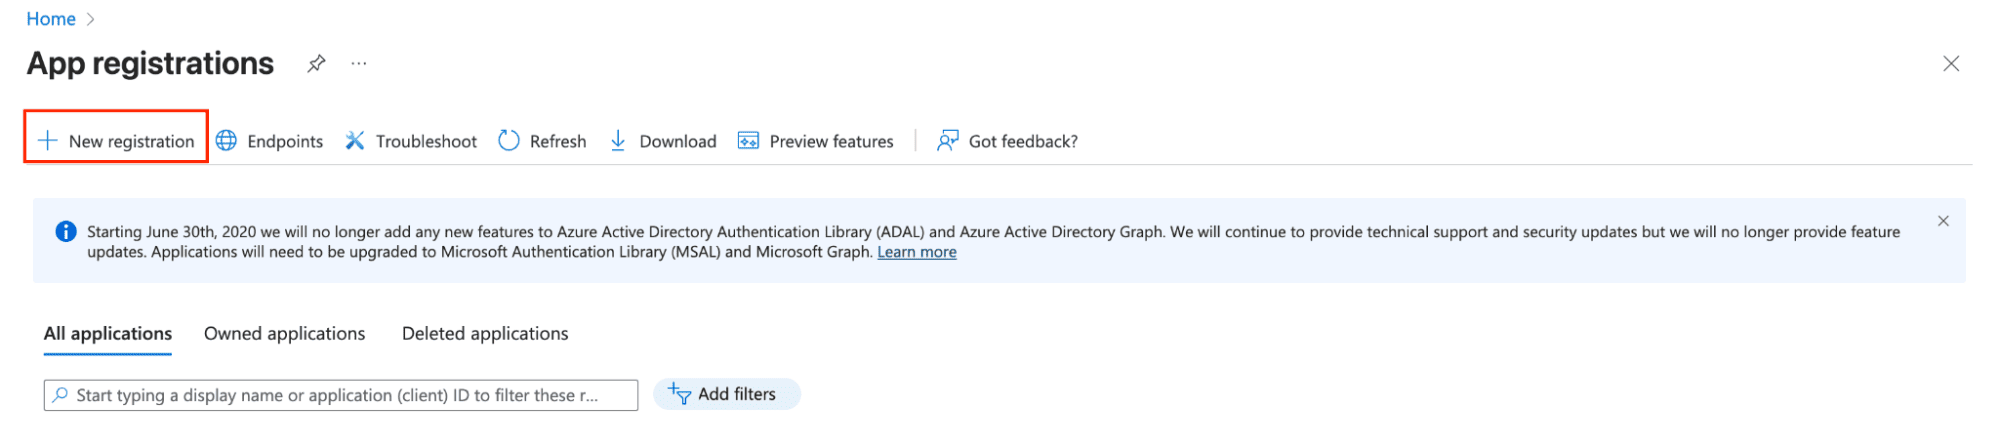
Navigate to App Registrations: In the Azure Portal, search for "App registrations" in the search bar and select it from the results.
-
Create New Registration: Click New registration to create a new application registration.
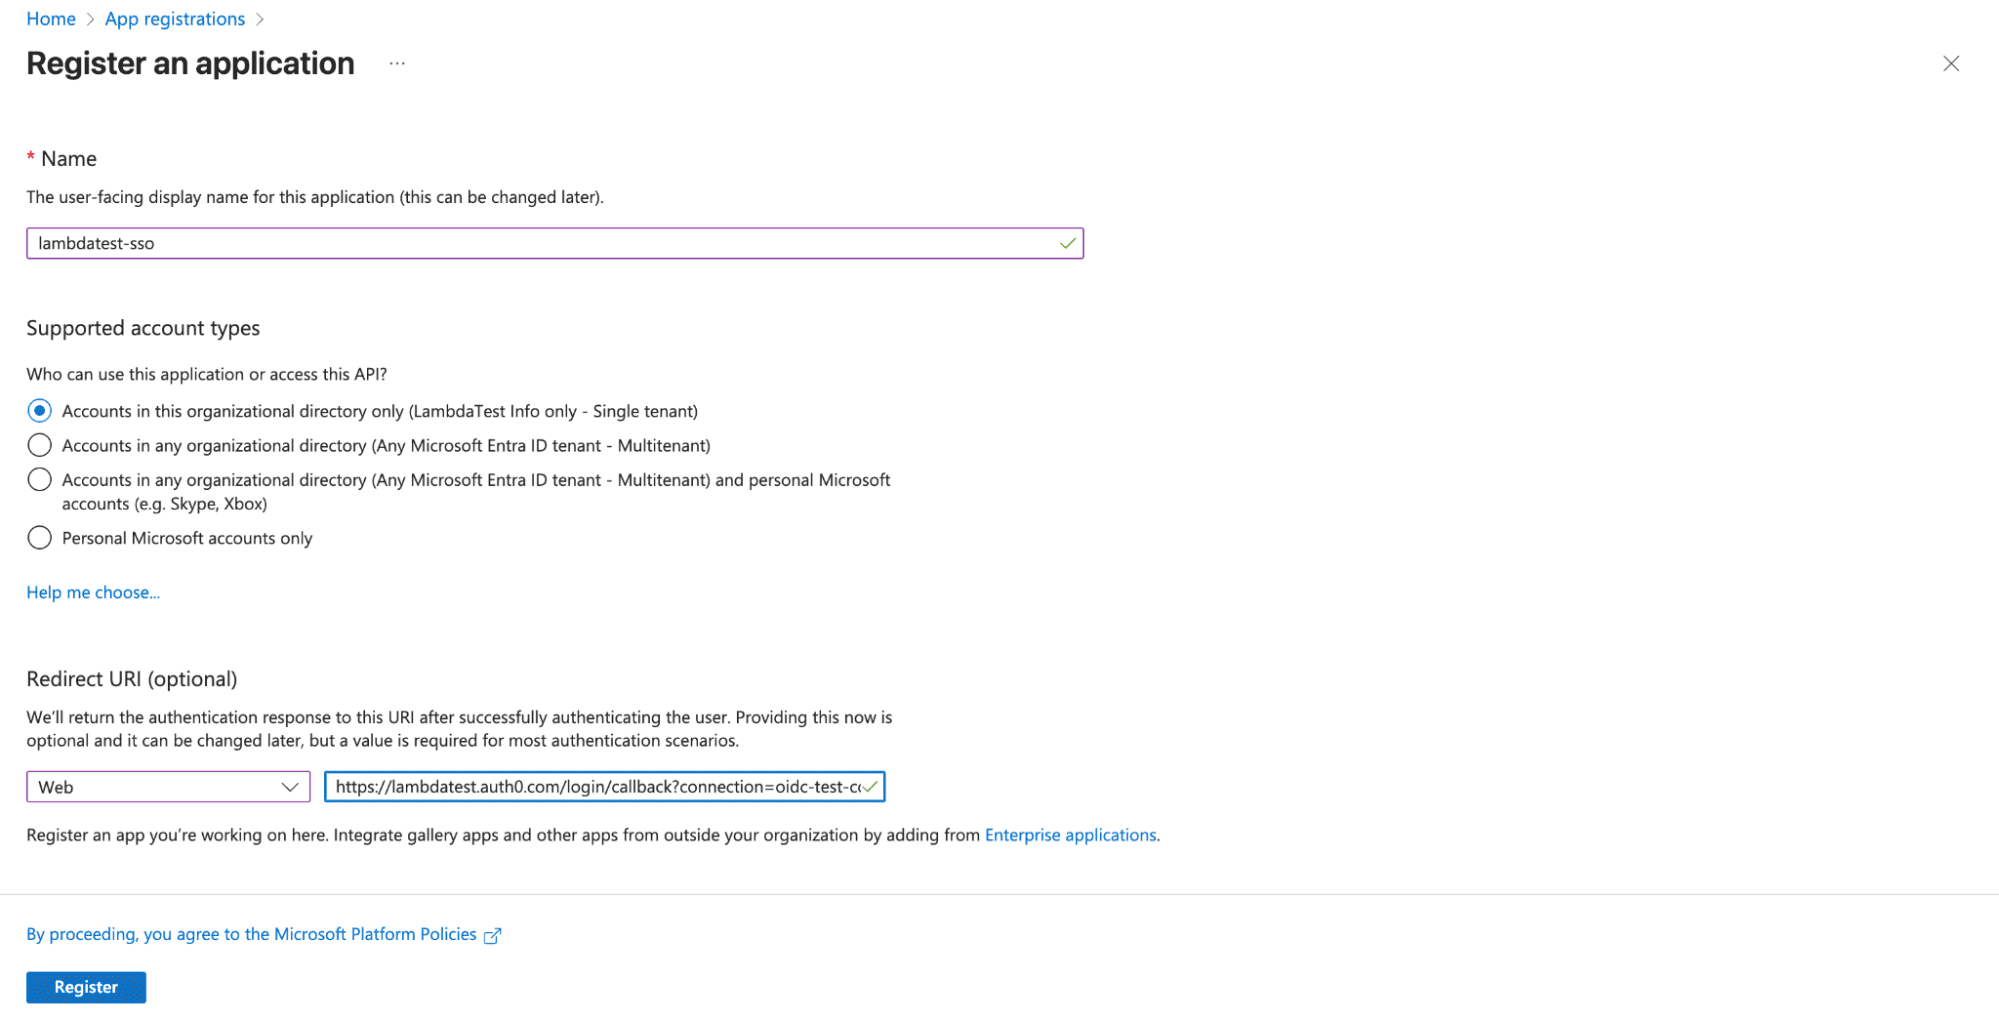
- Configure Application Details:
- Name: Enter a descriptive name such as "TestMu AI SSO" or "TestMu AI OIDC Integration"
- Supported account types: Select "Accounts in this organizational directory only"
- Redirect URI: Leave this blank for now (we'll configure it later)
- Click Register to create the application
Step 2: Configure Application Settings
-
Access Application Overview: After registration, you'll be redirected to the application overview page.
-
Copy Client ID:
- Note down the Client ID (also called Application ID in Azure AD) - you'll need this for TestMu AI configuration
- This unique identifier represents your application in your identity provider
-
Copy Tenant/Domain Information:
- Note down the Directory (tenant) ID - this identifies your Azure AD tenant
- You'll need this for the OpenID Connect metadata document URL
Step 3: Create Client Secret
-
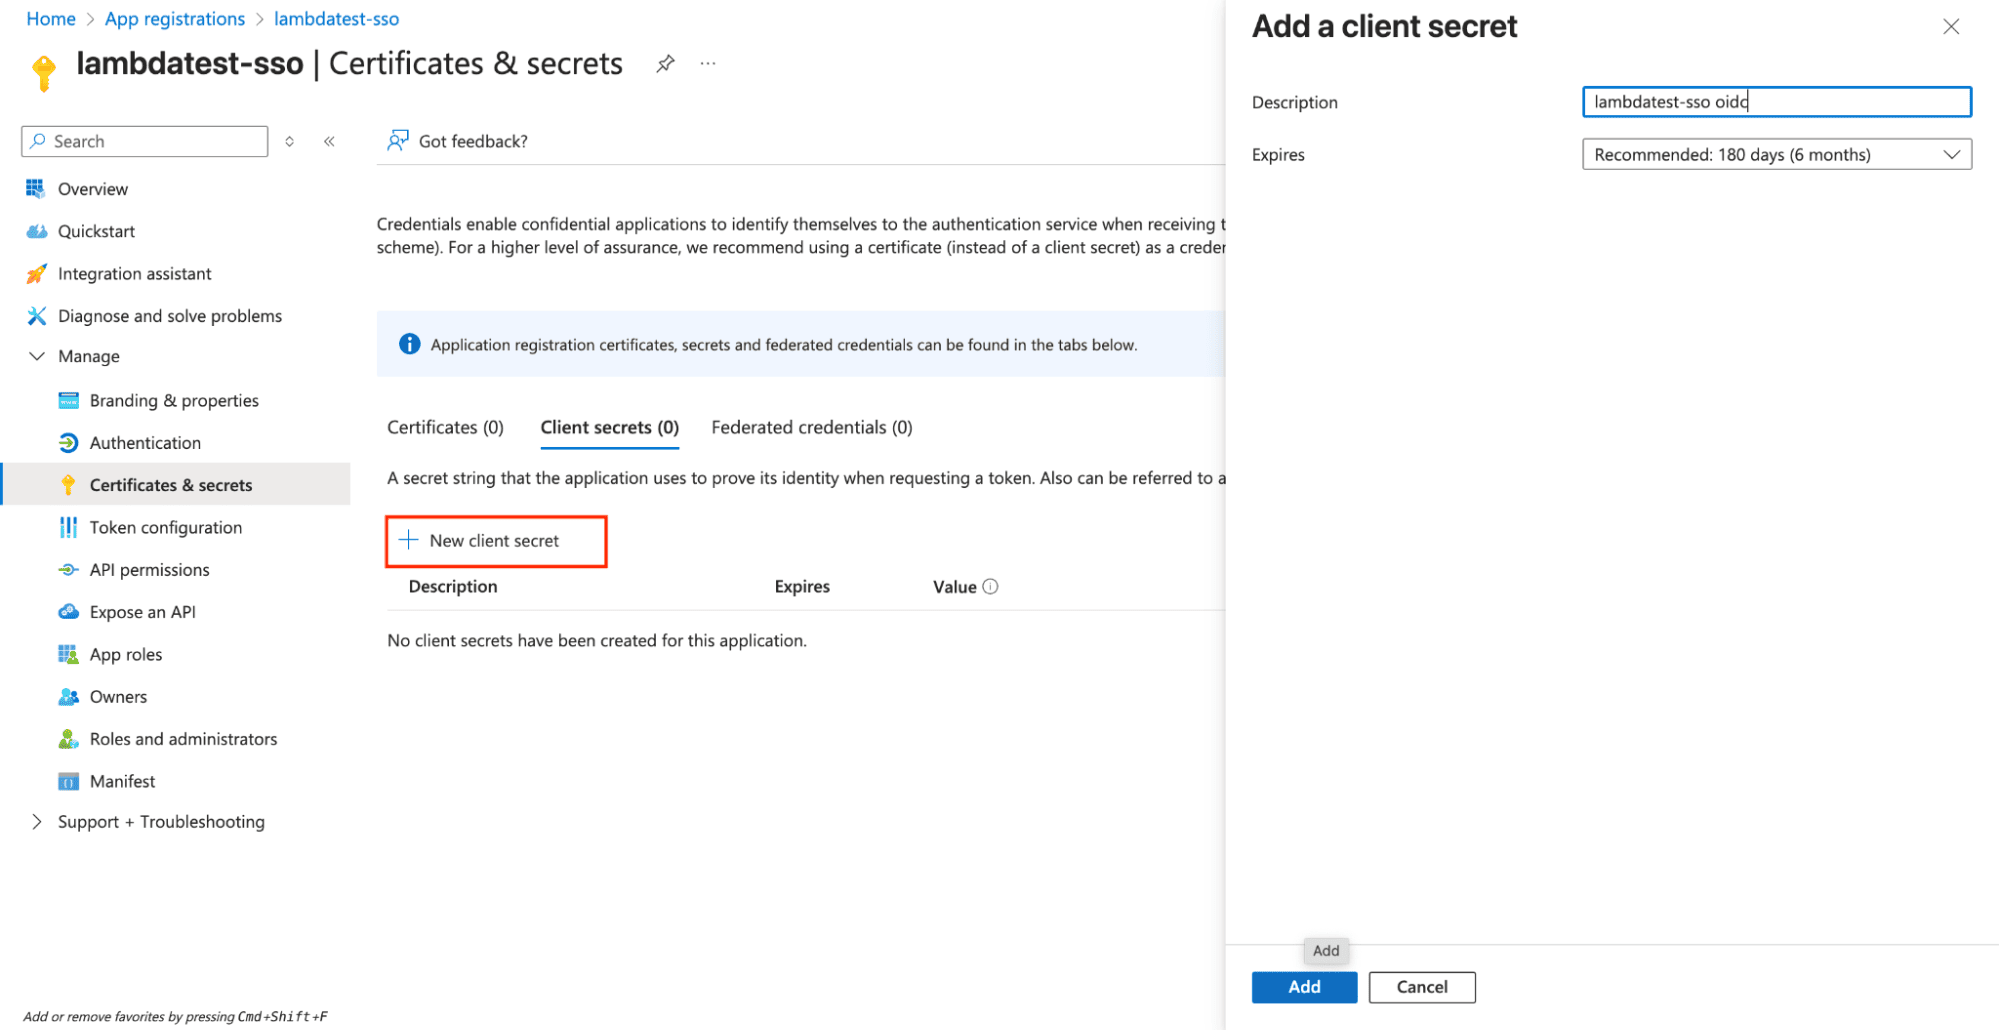
Navigate to Certificates & Secrets: In your application's left sidebar, click Certificates & secrets.
-
Create New Client Secret:
- Click New client secret
- Description: Enter a descriptive name like "TestMu AI SSO Secret"
- Expires: Select your preferred expiration period (recommended: 24 months)
- Click Add
- Copy Secret Value:
- Important: Copy the secret value immediately - it won't be shown again
- Store this securely as you'll need it for TestMu AI configuration
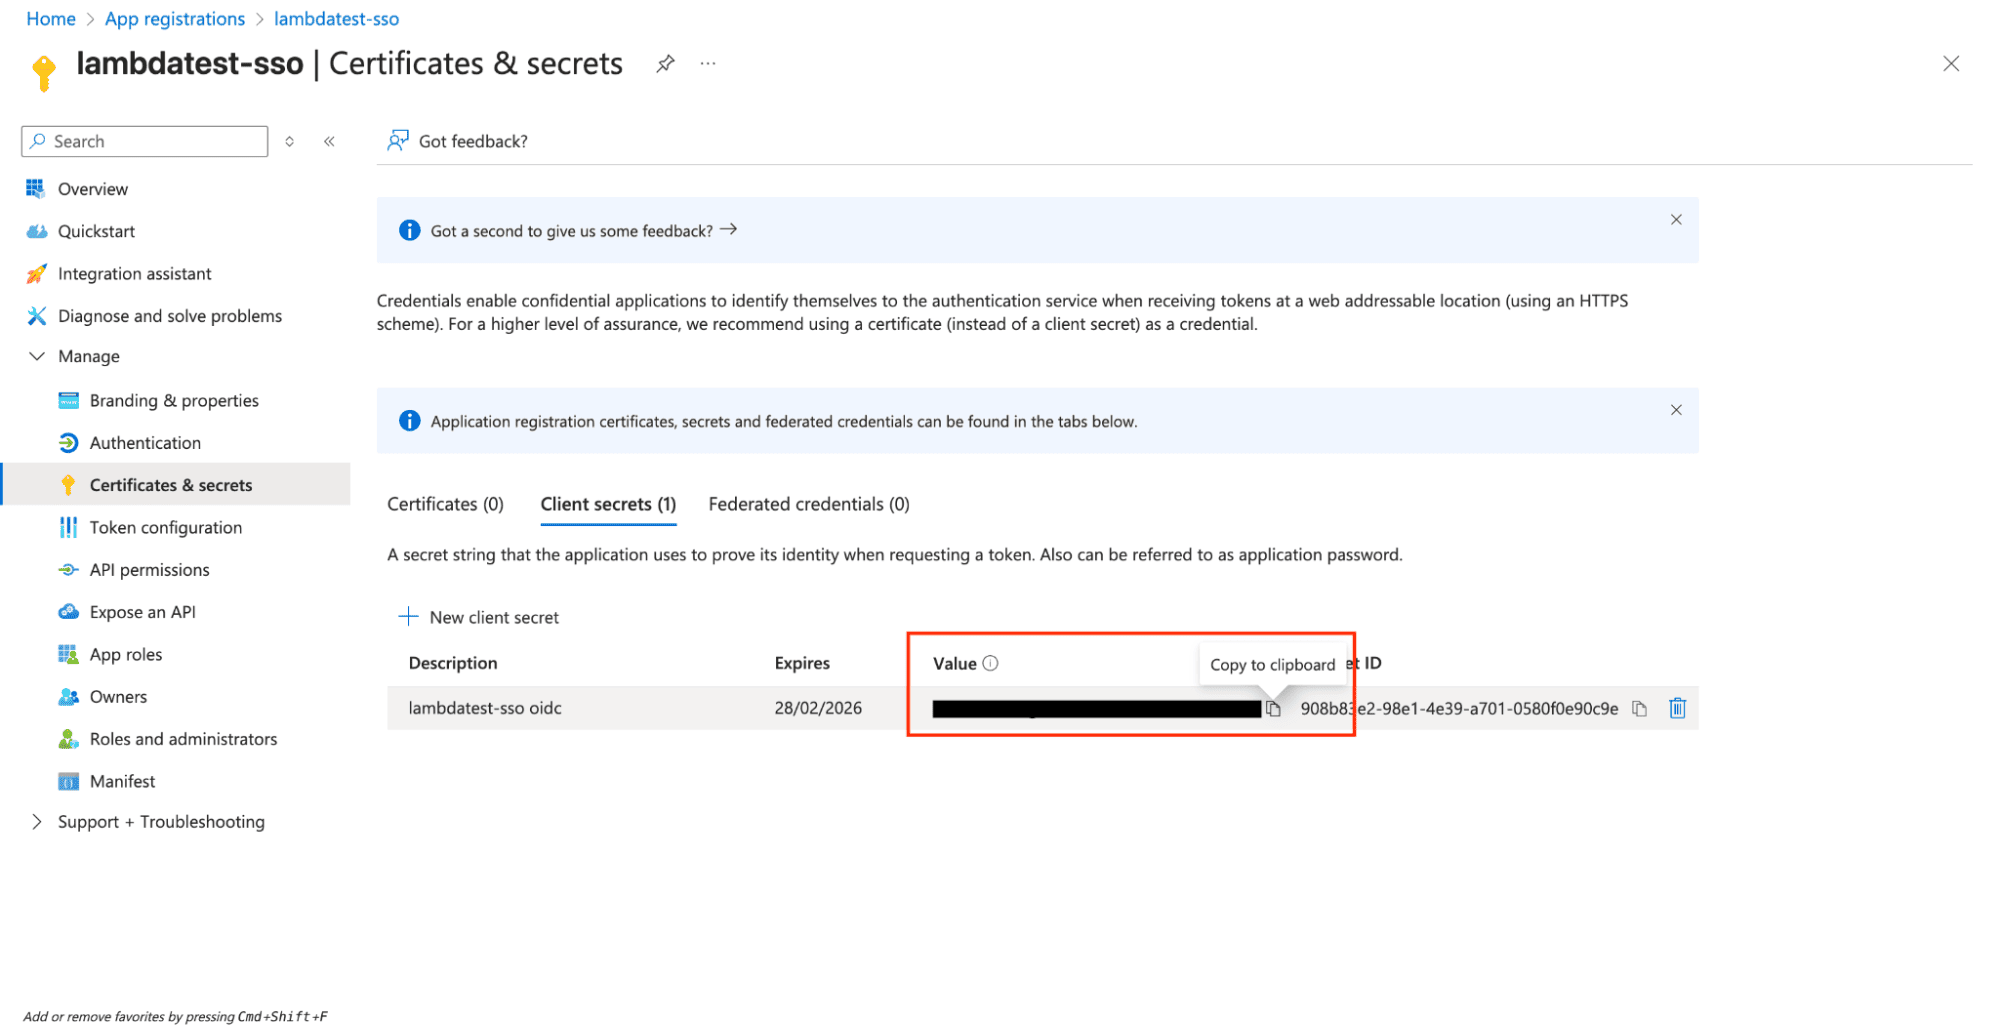
Important: Store the client secret securely as you'll need it for TestMu AI configuration. Most providers only show the secret once.
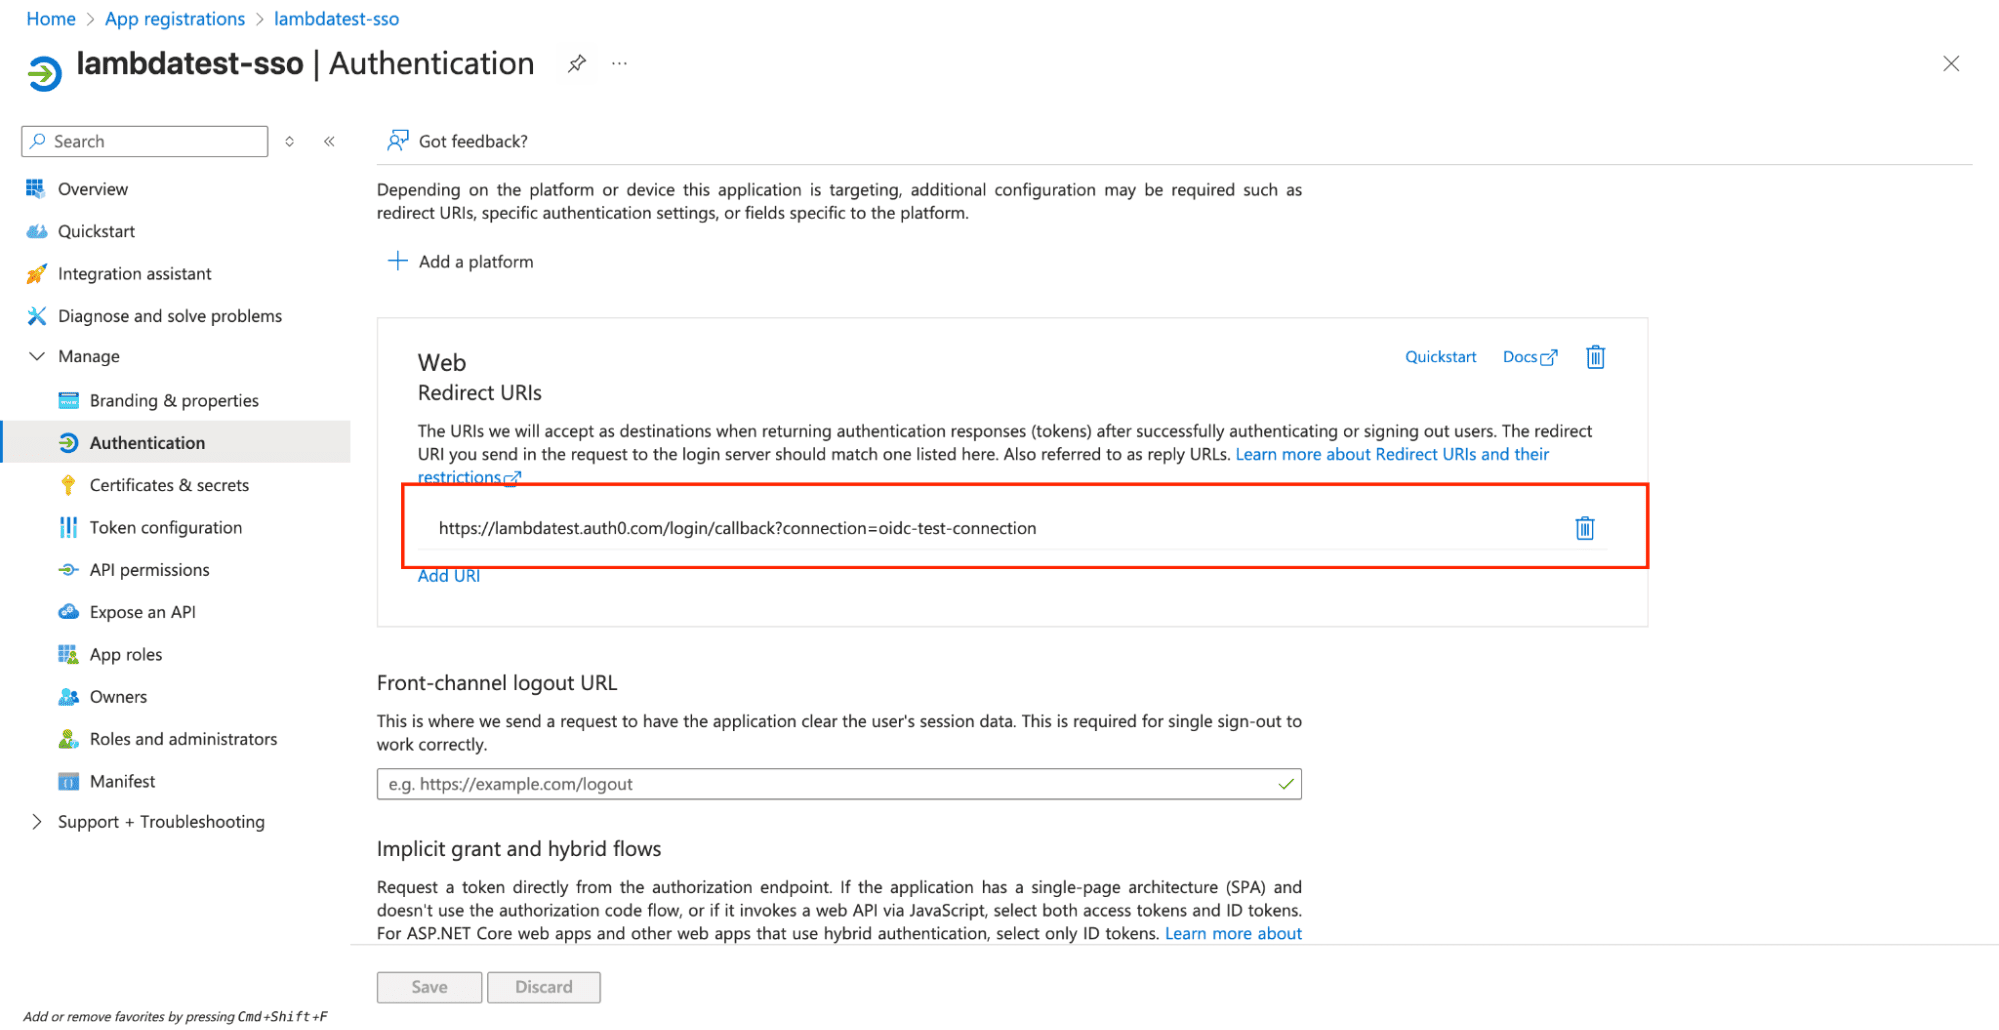
Step 4: Configure Redirect URI
-
Navigate to Authentication: In your application's left sidebar, click Authentication.
-
Add Redirect URI:
- Click Add a platform
- Select Web
- Redirect URI: Enter the redirect URI provided by TestMu AI (typically:
https://lambdatest.auth0.com/login/callback) - Click Save
Step 5: Collect OpenID Connect Metadata
-
Get Well-Known OIDC URL: The OpenID Connect well-known configuration URL follows this pattern:
https://login.microsoftonline.com/{tenant-id}/v2.0/.well-known/openid-configurationReplace
{tenant-id}with your Directory (tenant) ID from Step 2.Examples of Well-Known OIDC URLs:
- Azure AD:
https://login.microsoftonline.com/12345678-1234-1234-1234-123456789012/v2.0/.well-known/openid-configuration - Google Workspace:
https://accounts.google.com/.well-known/openid-configuration - Okta:
https://yourcompany.okta.com/.well-known/openid-configuration - Auth0:
https://yourdomain.auth0.com/.well-known/openid-configuration
- Azure AD:
-
Verify Well-Known URL: You can test the URL in your browser to ensure it returns valid JSON configuration.

Verify Well-Known URL: Test the URL in your browser to ensure it returns valid JSON configuration.
Step 6: Contact TestMu AI Support for OIDC Configuration
Since OIDC integration requires server-side configuration, you cannot create the connection directly through the TestMu AI interface. Instead, you need to contact our support team to configure the OIDC integration for you.
-
Gather Required Information: Collect the following details from your identity provider configuration:
- Client ID: The client ID from Step 2
- Client Secret: The secret value from Step 3
- OpenID Connect Metadata URL: The metadata document URL from Step 5
- Connection Name: A descriptive name like "Company OIDC" or "TestMu AI SSO"
-
Contact TestMu AI Support: Reach out to our support team with the configuration details:
- Email: [email protected]
-
Provide Configuration Details: Include the following information in your support request:
Identity Provider: Azure AD
Client ID: [Your Application (client) ID]
Client Secret: [Your Client Secret]
Well-Known OIDC URL: [Your OIDC Well-Known URL]
Connection Name: [Unique Connection Name] -
Wait for Configuration: Our support team will configure the OIDC integration on your behalf.
Step 7: Configure User Access (Optional)
-
Set User Assignment: In Azure AD, navigate to your application and click Users and groups.
-
Assign Users:
- Click Add user/group
- Select the users or groups who should have access to TestMu AI
- Click Assign
-
Configure App Roles (if needed): You can define custom app roles for different access levels within TestMu AI.
Testing Your OIDC Integration
Method 1: Direct SSO Login
-
Access TestMu AI SSO: Navigate to https://accounts.lambdatest.com/sso
-
Enter Email: Enter your Azure AD email address
-
Initiate SSO: Click CONTINUE WITH SSO
-
Complete Authentication: You'll be redirected to Microsoft's login page. Enter your Azure AD credentials.
-
Verify Success: After successful authentication, you should be redirected to your TestMu AI organization.
Method 2: Direct OIDC Login (For Testing)
Since OIDC doesn't support classic IDP-based SSO login, you can use this URL to simulate the login process:
https://accounts.lambdatest.com/auth0/login?connection={connection-name}
Replace {connection-name} with the connection name you created in TestMu AI.
Troubleshooting Common Issues
Application Not Found
- Issue: "Application not found" error during login
- Solution: Verify that the Application (Client) ID is correct and the application is properly registered in Azure AD
Invalid Client Secret
- Issue: "Invalid client secret" error
- Solution: Ensure the client secret is correctly copied and hasn't expired. Create a new secret if needed.
Redirect URI Mismatch
- Issue: "Redirect URI mismatch" error
- Solution: Verify that the redirect URI in Azure AD exactly matches the one provided by TestMu AI
User Not Assigned
- Issue: "User not assigned to application" error
- Solution: Ensure the user is assigned to the application in Azure AD under Users and groups
Well-Known URL Issues
- Issue: "Invalid well-known URL" error
- Solution: Verify the OpenID Connect well-known URL is accessible and contains valid JSON configuration
Domain Configuration
- Issue: Users from different domains cannot access TestMu AI
- Solution: Ensure all required domains are configured in both Azure AD and TestMu AI settings
