TestMu AI SSO & Azure AD Integration
TestMu AI allows you to integrate an external user directory with your TestMu AI Organization through an IDP so your team could leverage the Single Sign-on setup. This document will help you integrate your TestMu AI organization with your Azure AD directory to configure SSO(Single sign-on). After you integrate your Azure AD instance with your TestMu AI for Single Sign-on, you can benefit from the following features:
- Monitor who access to TestMu AI
- Manage your account in Azure Active Directory.
- Sign-in directly to the TestMu AI with Azure AD credentials.
To know more, refer How SSO is implemented in Azure.
Prerequisites
To enable TestMu AI SSO through Azure AD integration, you will need:
- Azure AD Subscription. If you haven't subscribed, you can subscribe by creating a free Azure account.
- An Enterprise plan with TestMu AI.
- The Admin of your TestMu AI organization needs to raise a request for enabling SSO. They could drop us an email over [email protected] or could reach out to us via our 24/7 in-app chat support.
- The Admin level access to your TestMu AI organization.
- The Admin level access of your organization in Azure AD.
How To Configure TestMu AI & Azure AD Integration
Step 1: To begin, you will need to login with your Microsoft Azure account.
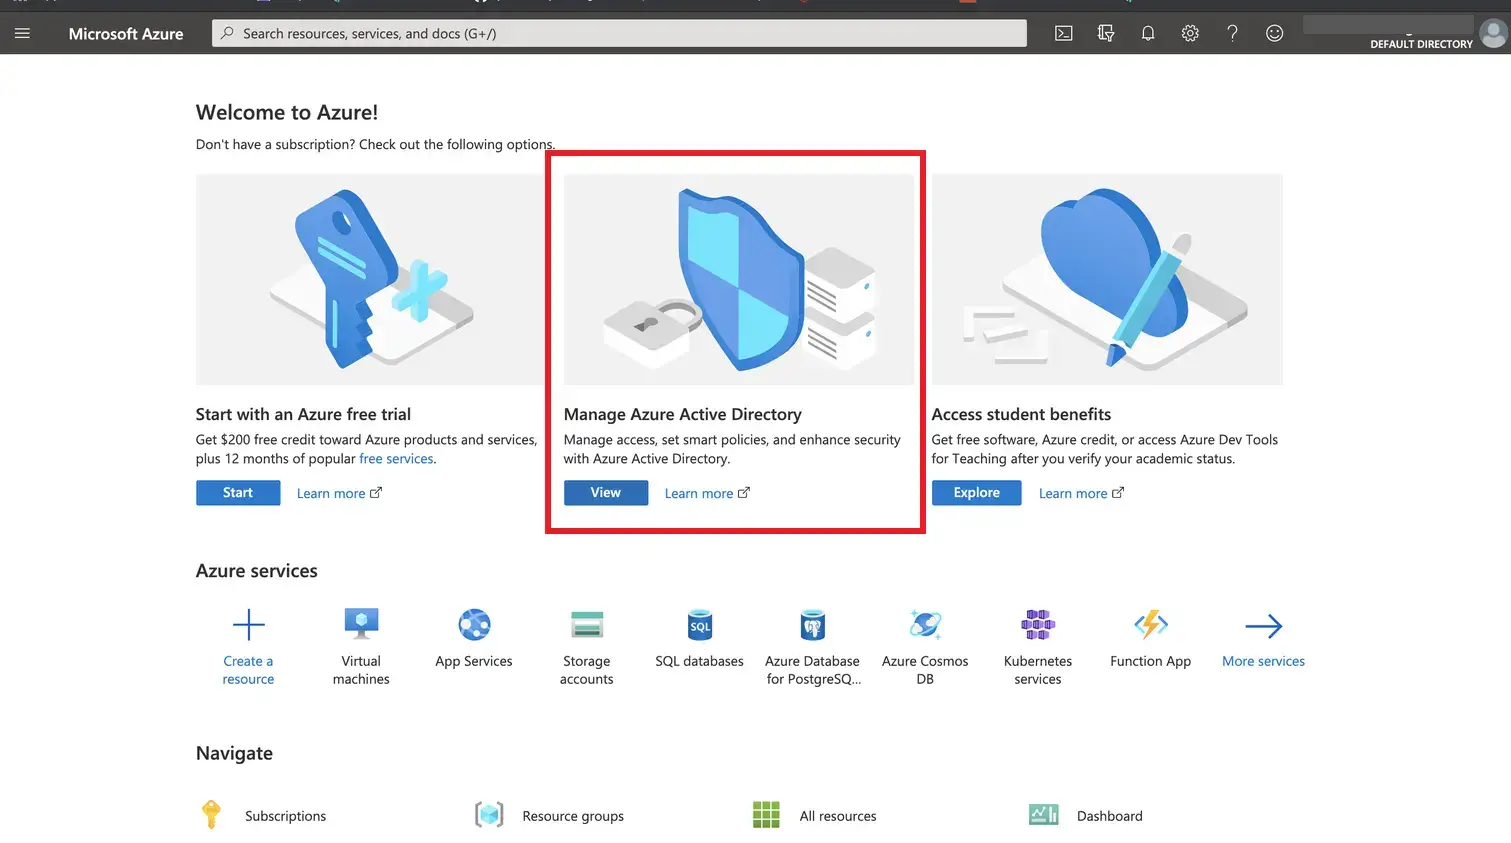
Step 2: Navigate to Manage Azure Active Directory.
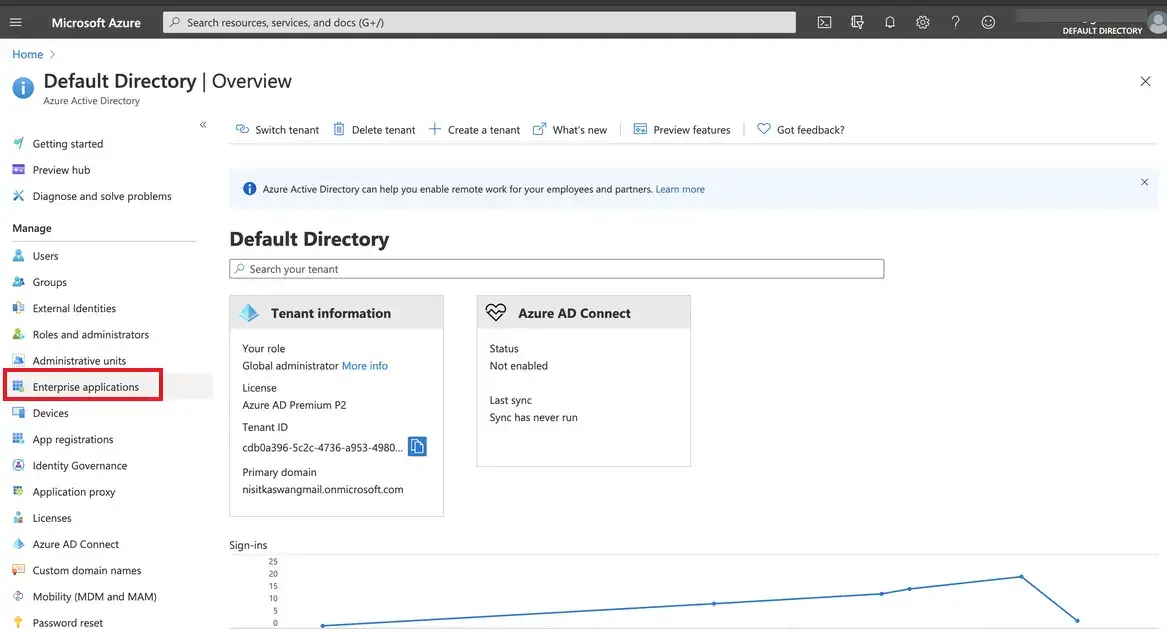
Step 3: Select the Enterprise Application from the left sidebar.
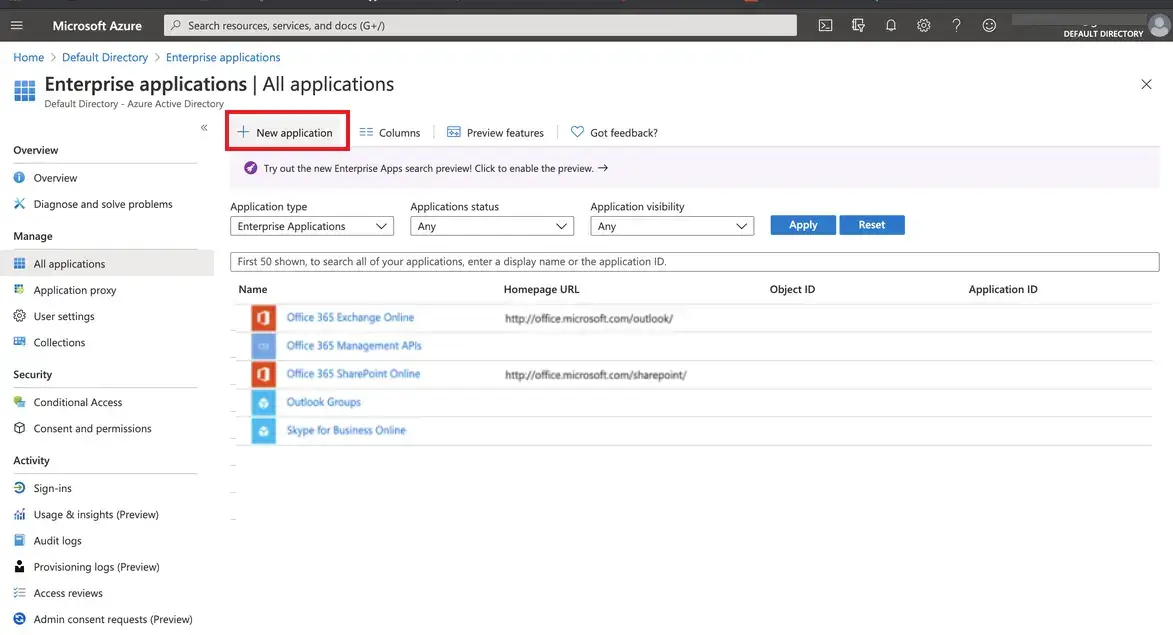
Step 4: Click on New Application.
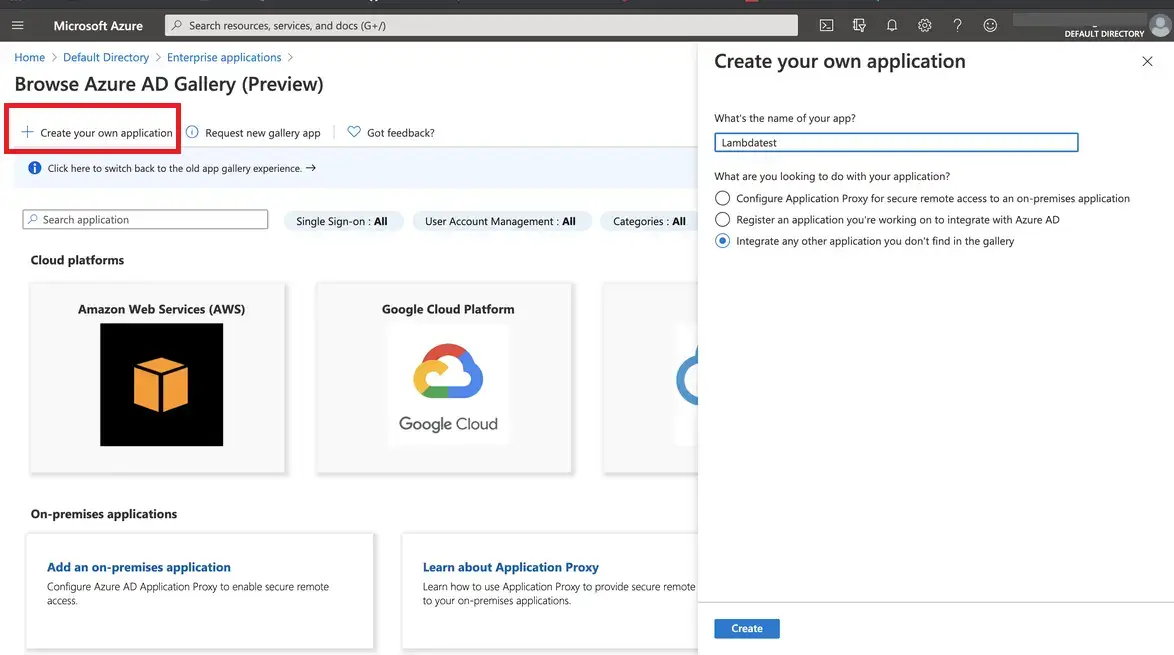
Step 5: Then click on Create your own application.
Step 6: Now navigate back to the Enterprise applications category. Select the application that you just created and then click on Set up single sign on.

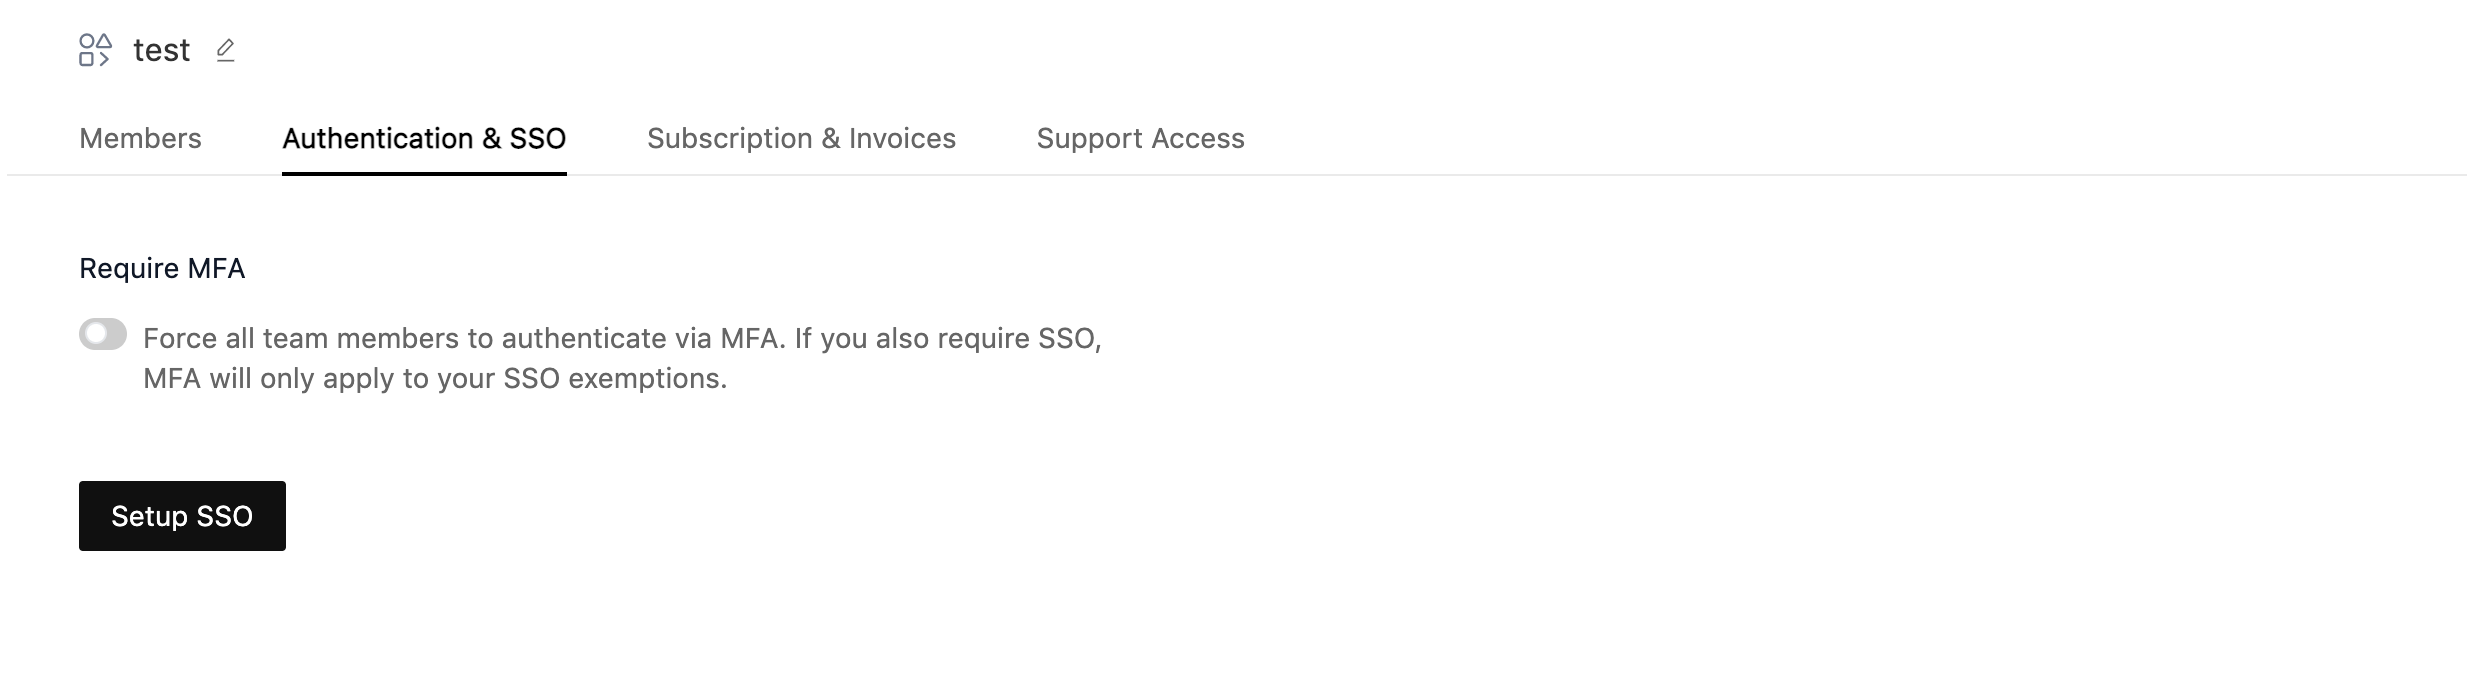
Step 7: Go to TestMu AI Authentication & SSO settings and click on Setup SSO.
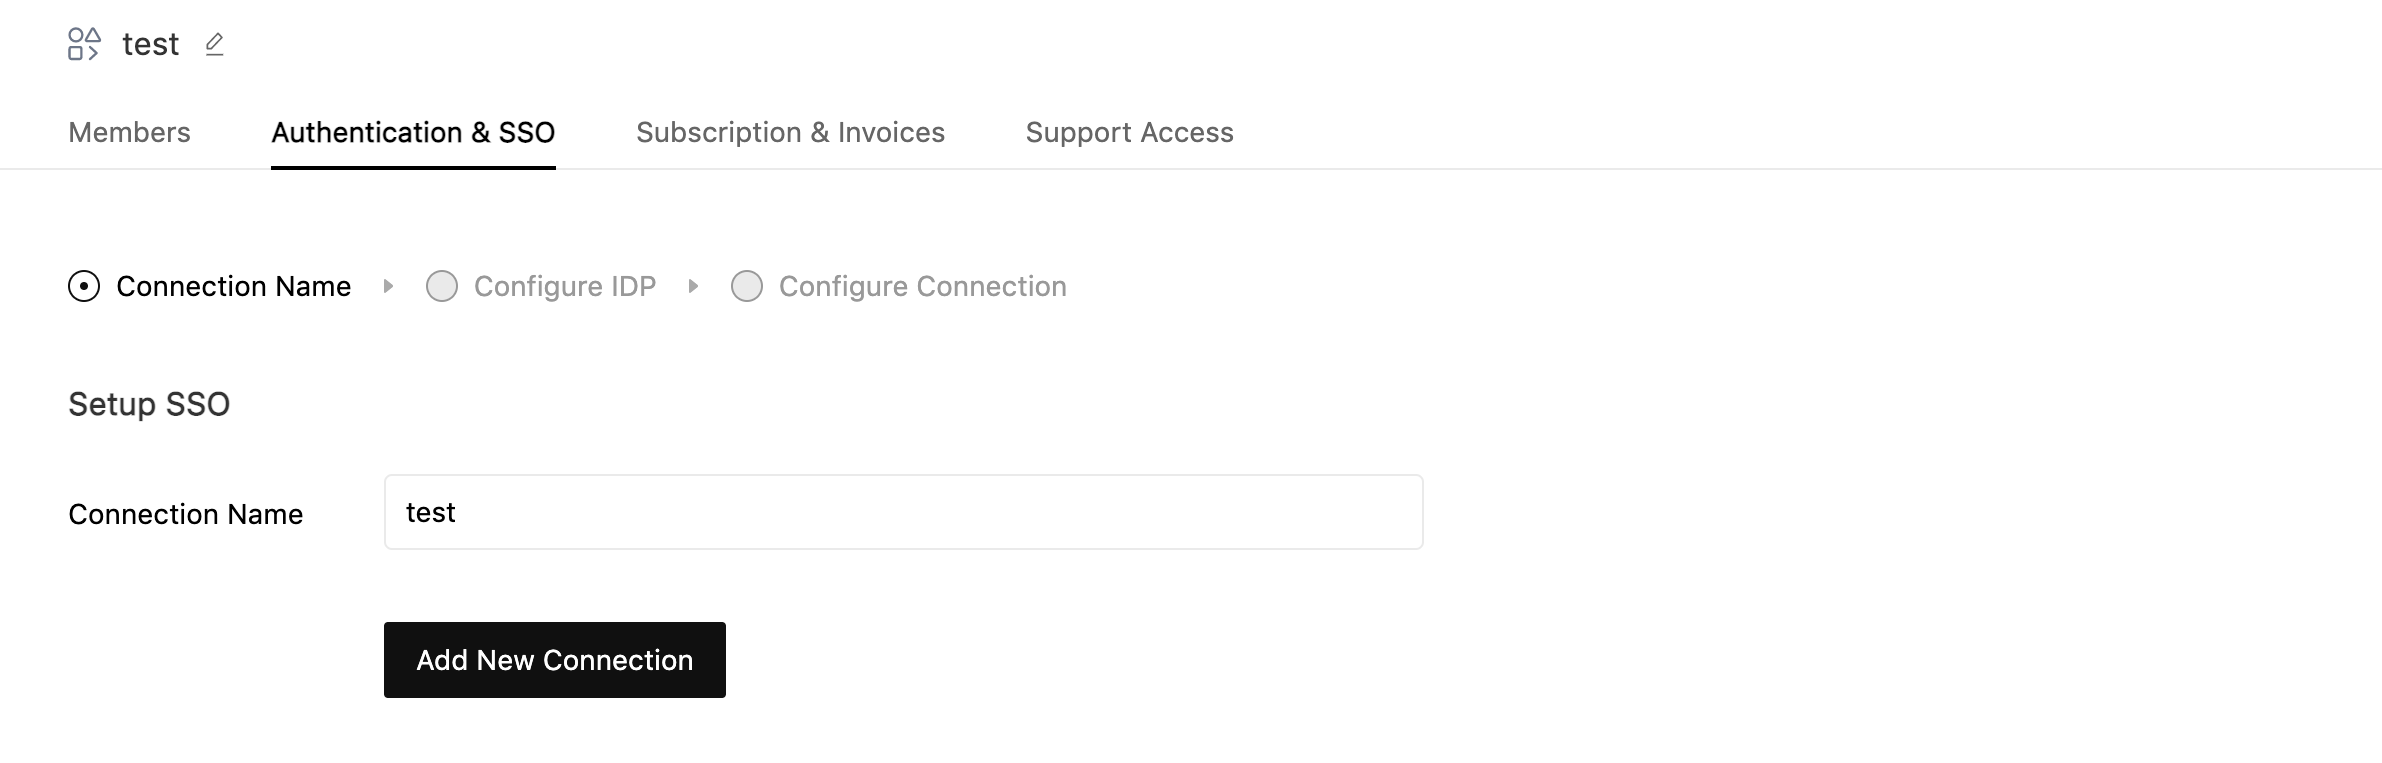
Step 8: Enter Connection Name and Click on Add New Connection.
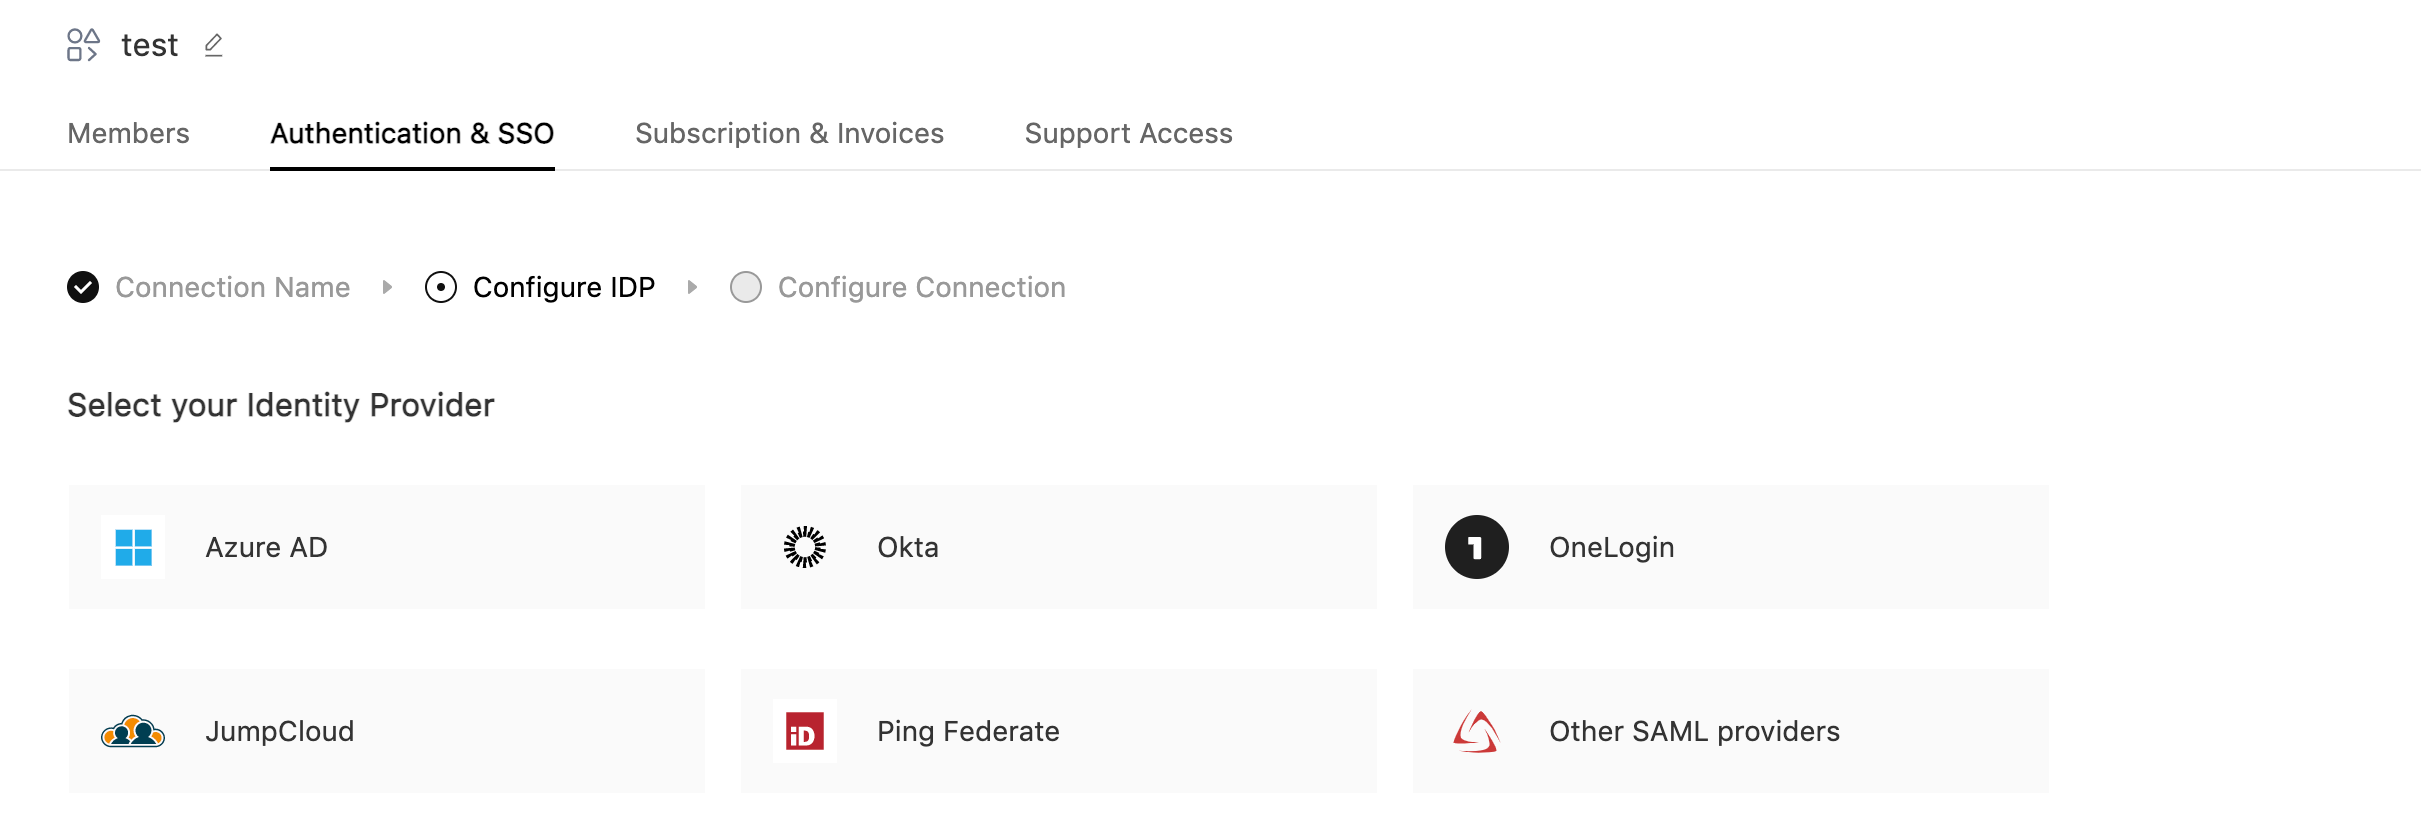
Step 9: Select Azure AD from the list of Identity Providers.
Step 10: Now copy the details required for setting up SSO connection in your Identity Provider.
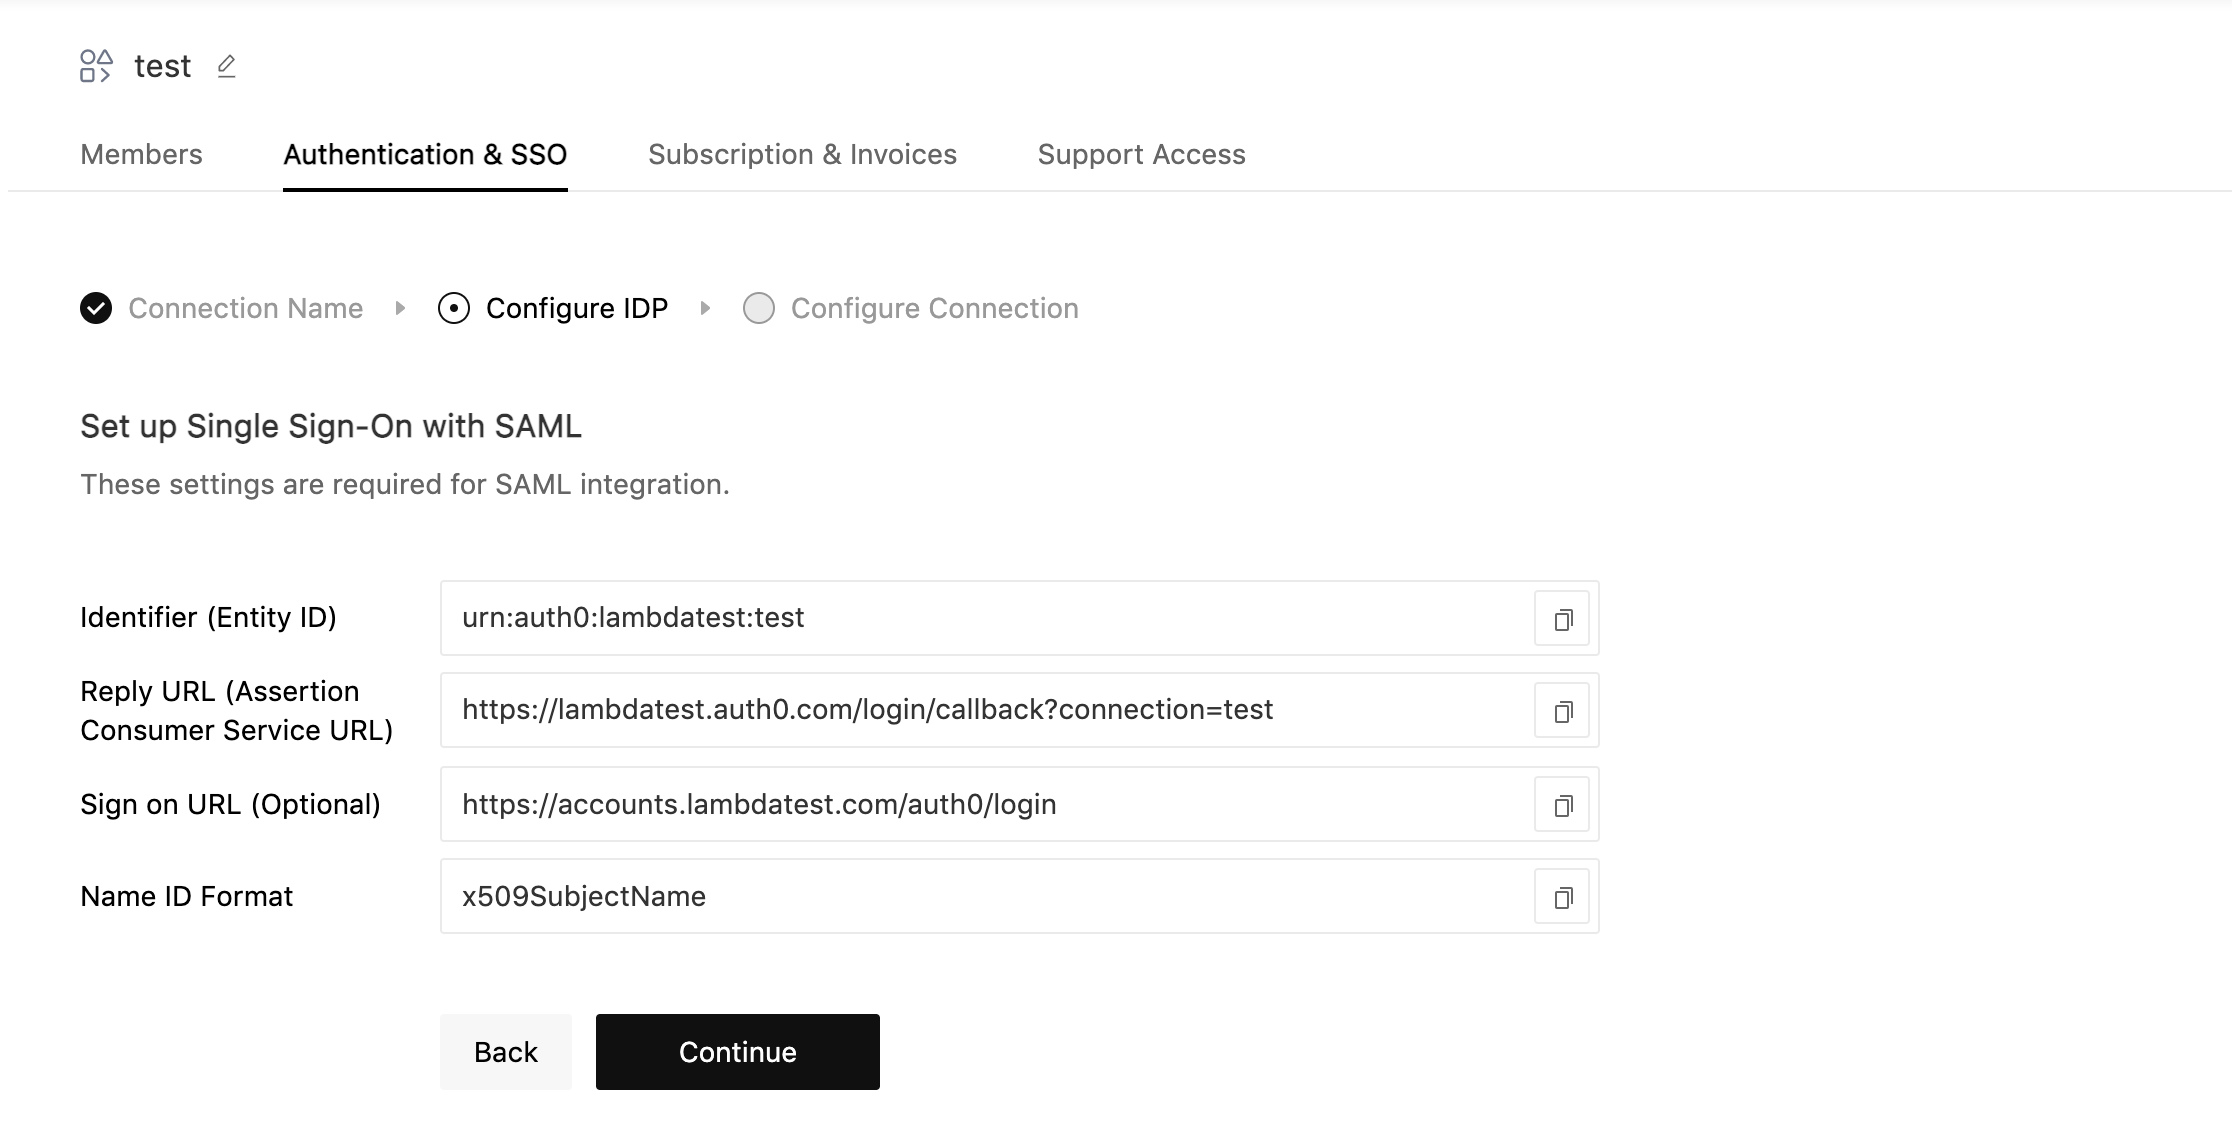
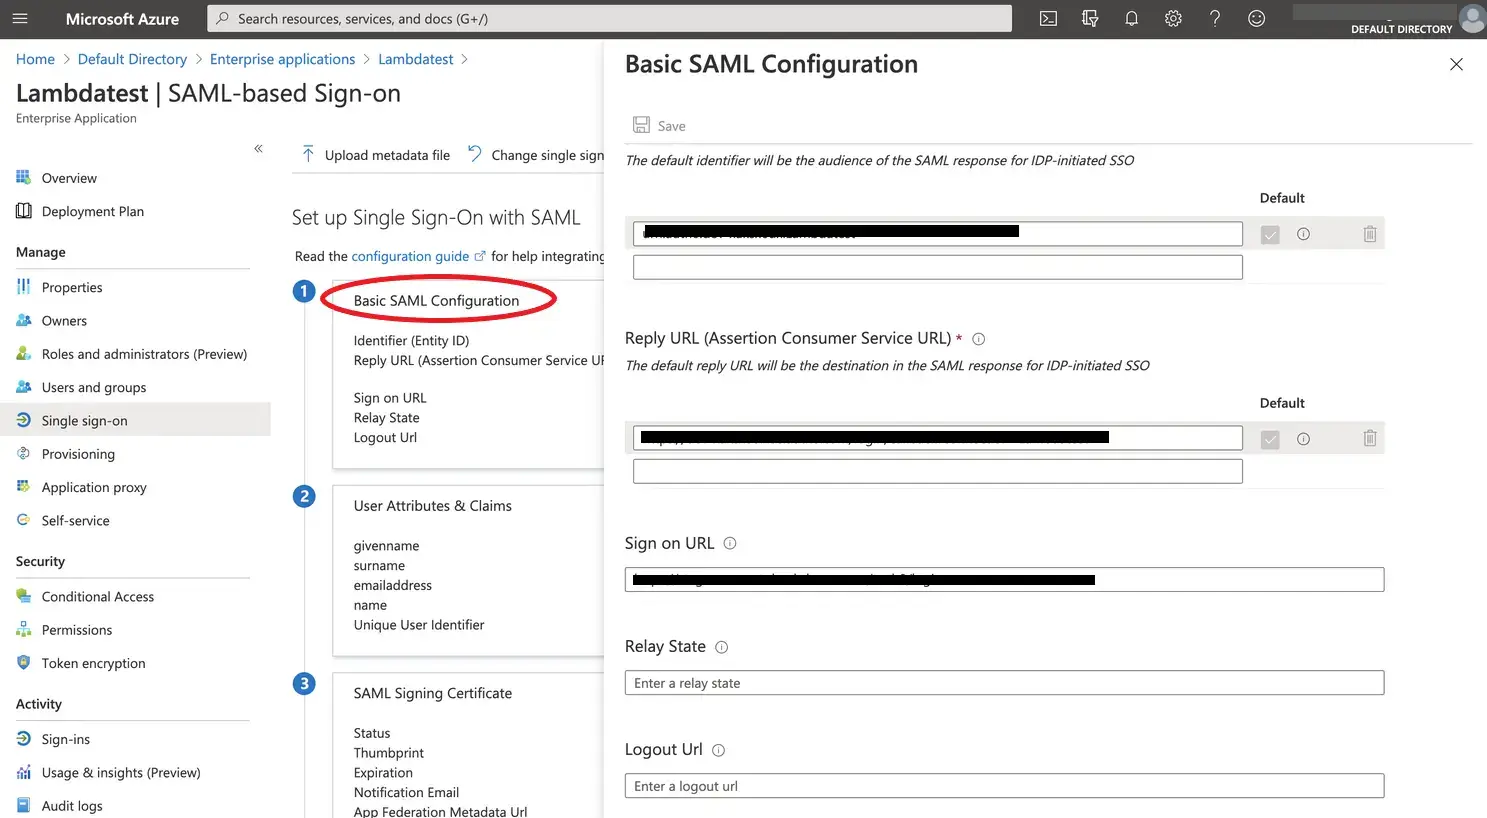
Step 11: Click on Basic SAML Configuration. Enter your SSO identifier ID and Reply URL information that you copied from TestMu AI SSO setup page and click on Save.
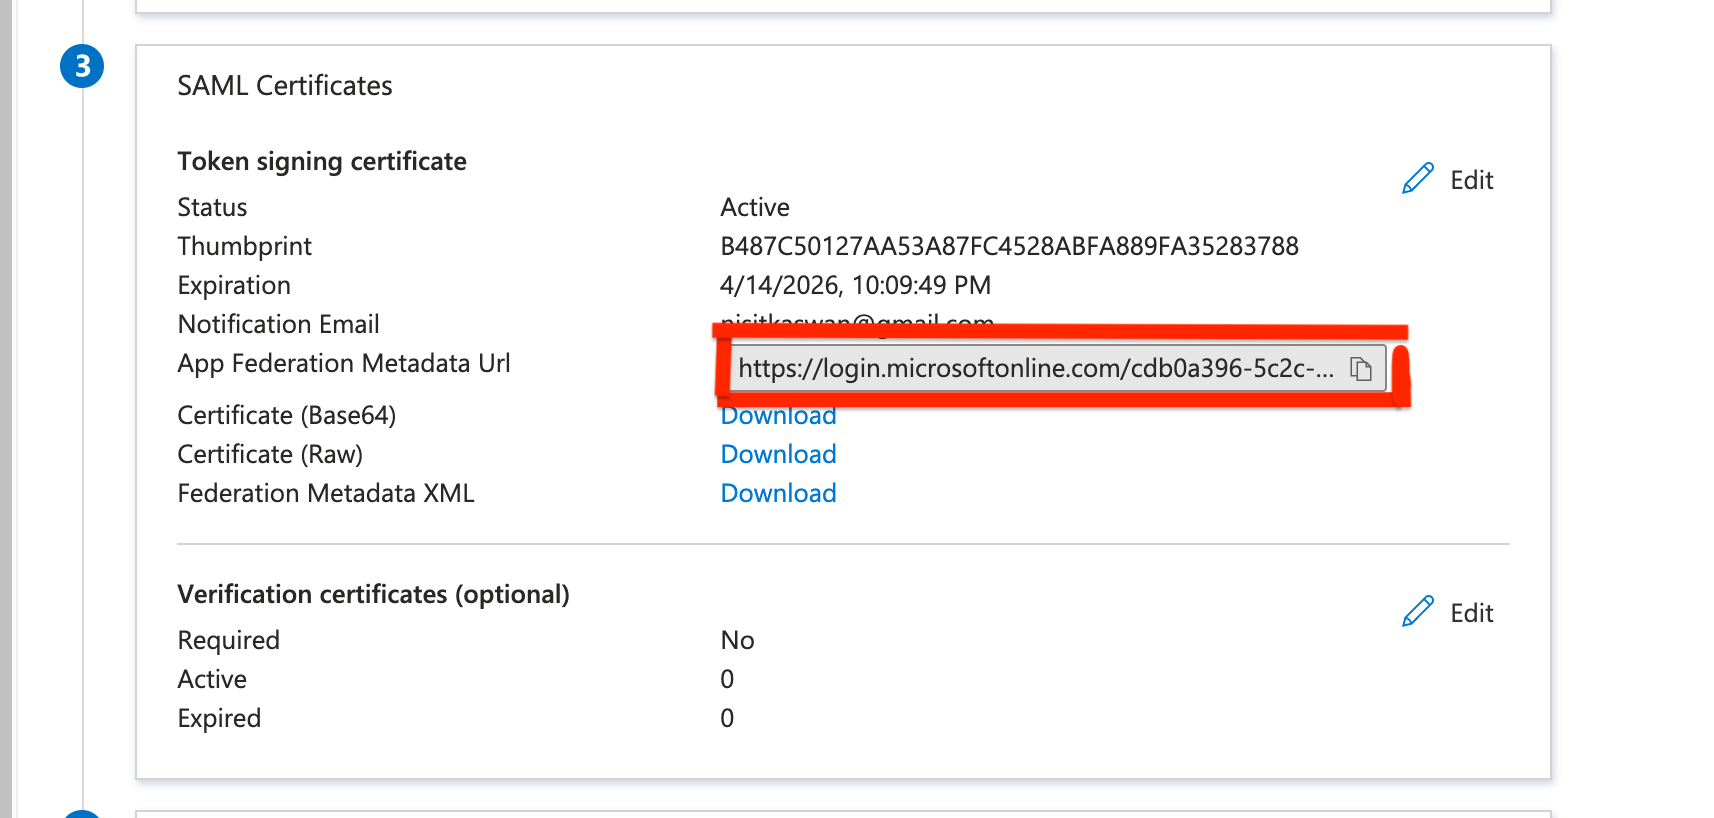
Step 12: Copy the App Federation Metadata URL and paste it in the Metadata URL field in the TestMu AI SSO setup page.
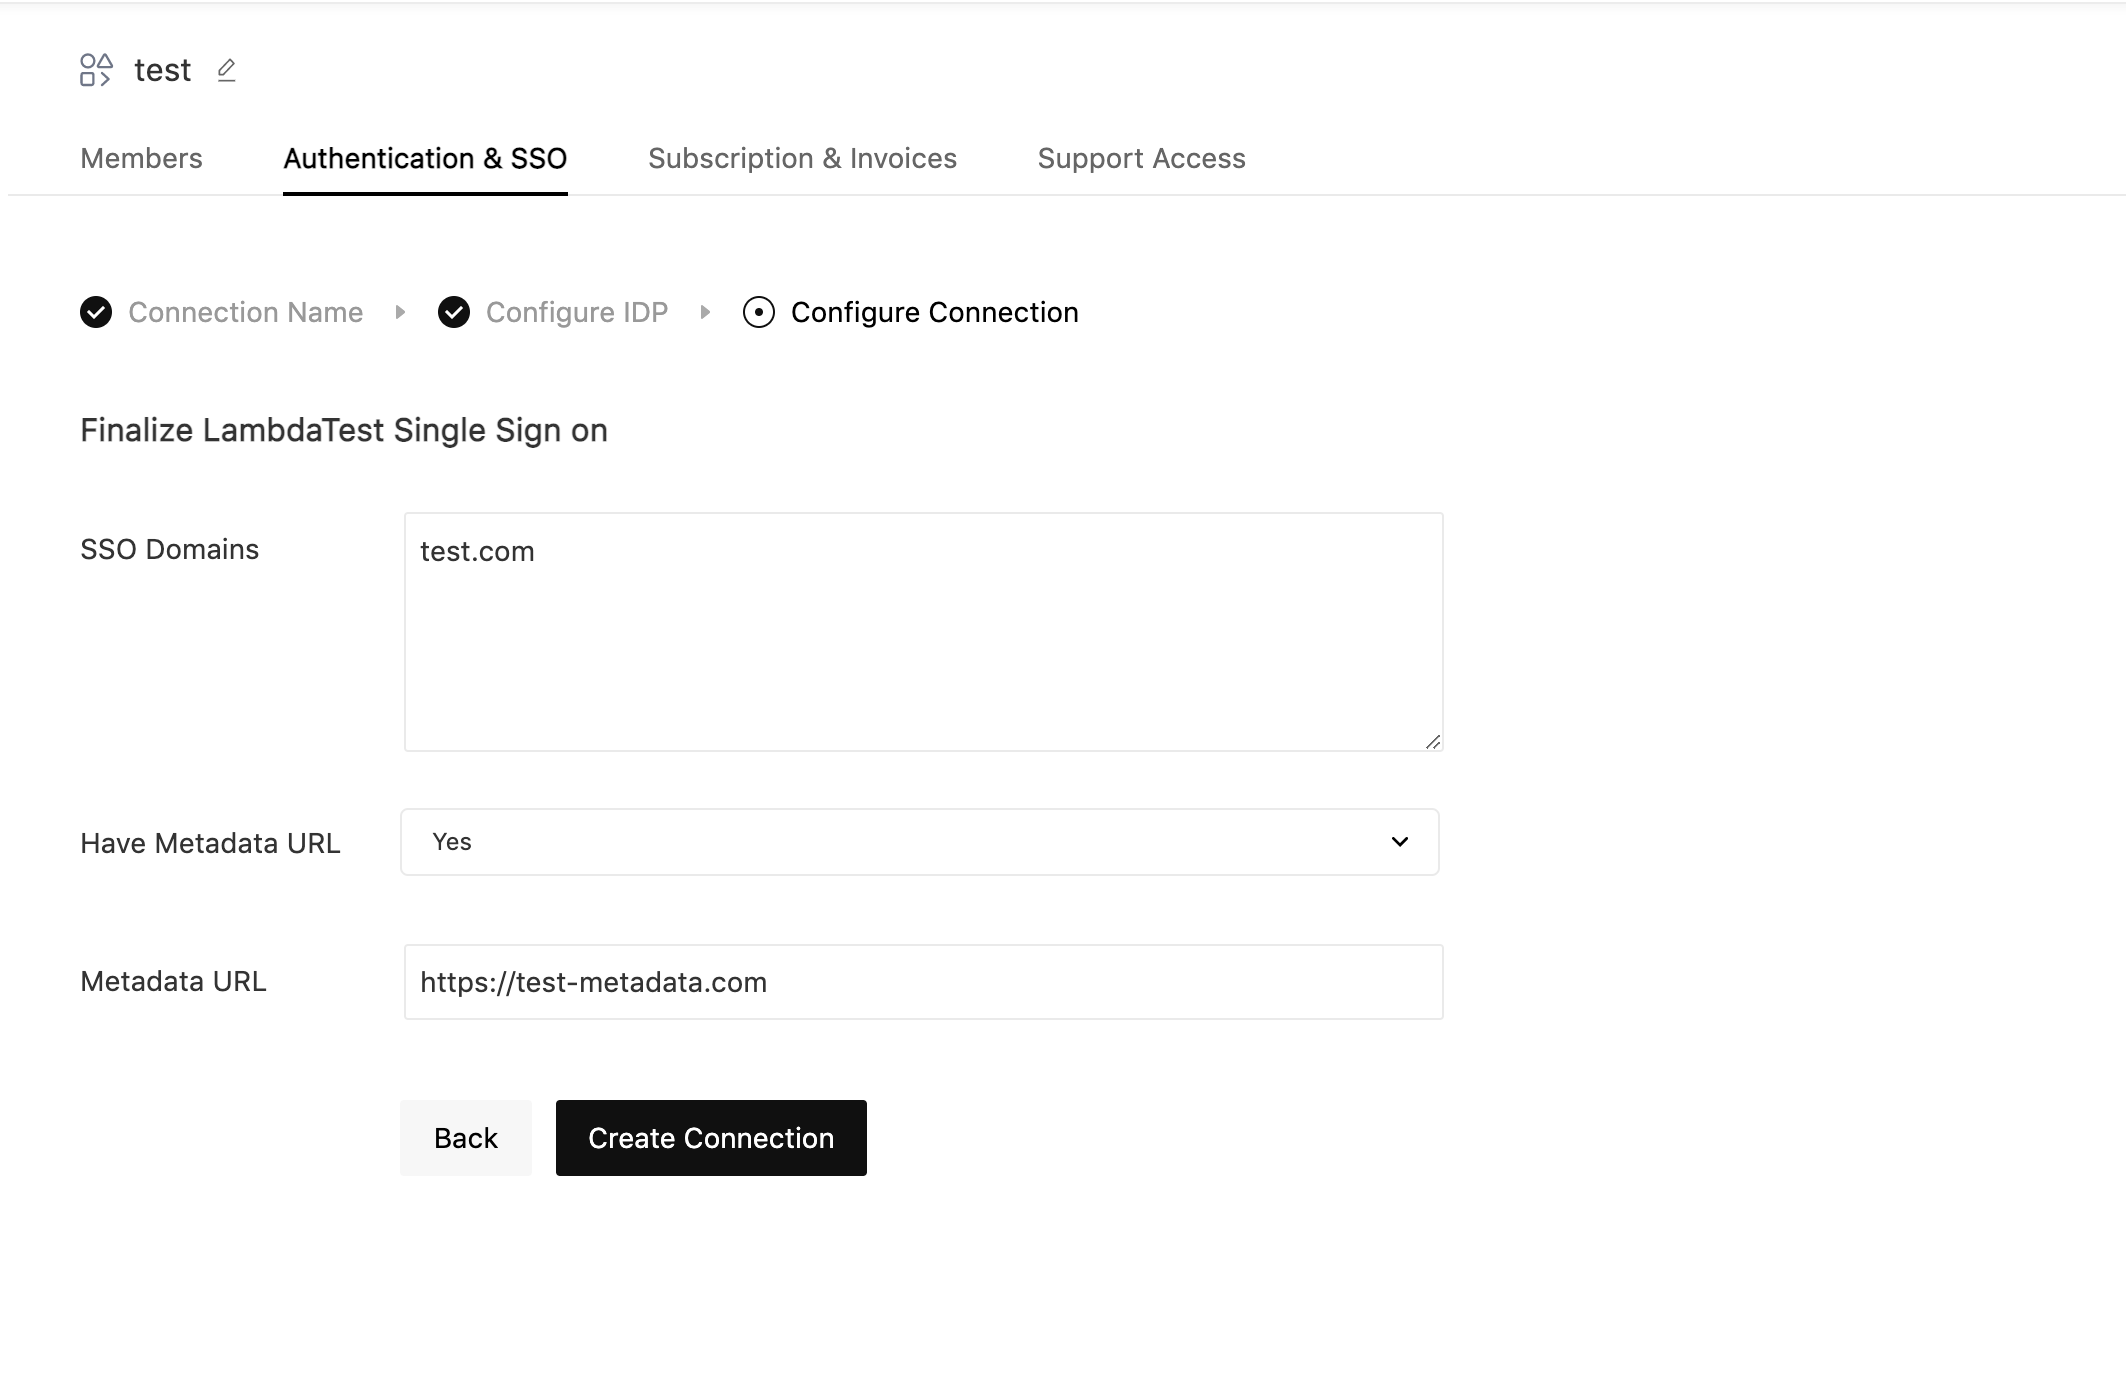
Step 13: Fill the required fields and click on Create Connection:
- SSO Domains (Comma-separated list of the domains that can be authenticated in the Identity Provider.)
- Have Metadata URL (Select this option if you have metadata file URL of your Identity Provider.)
- Metadata URL (Enter the metadata file URL of your Identity Provider.)
Create Connection with Metadata URL
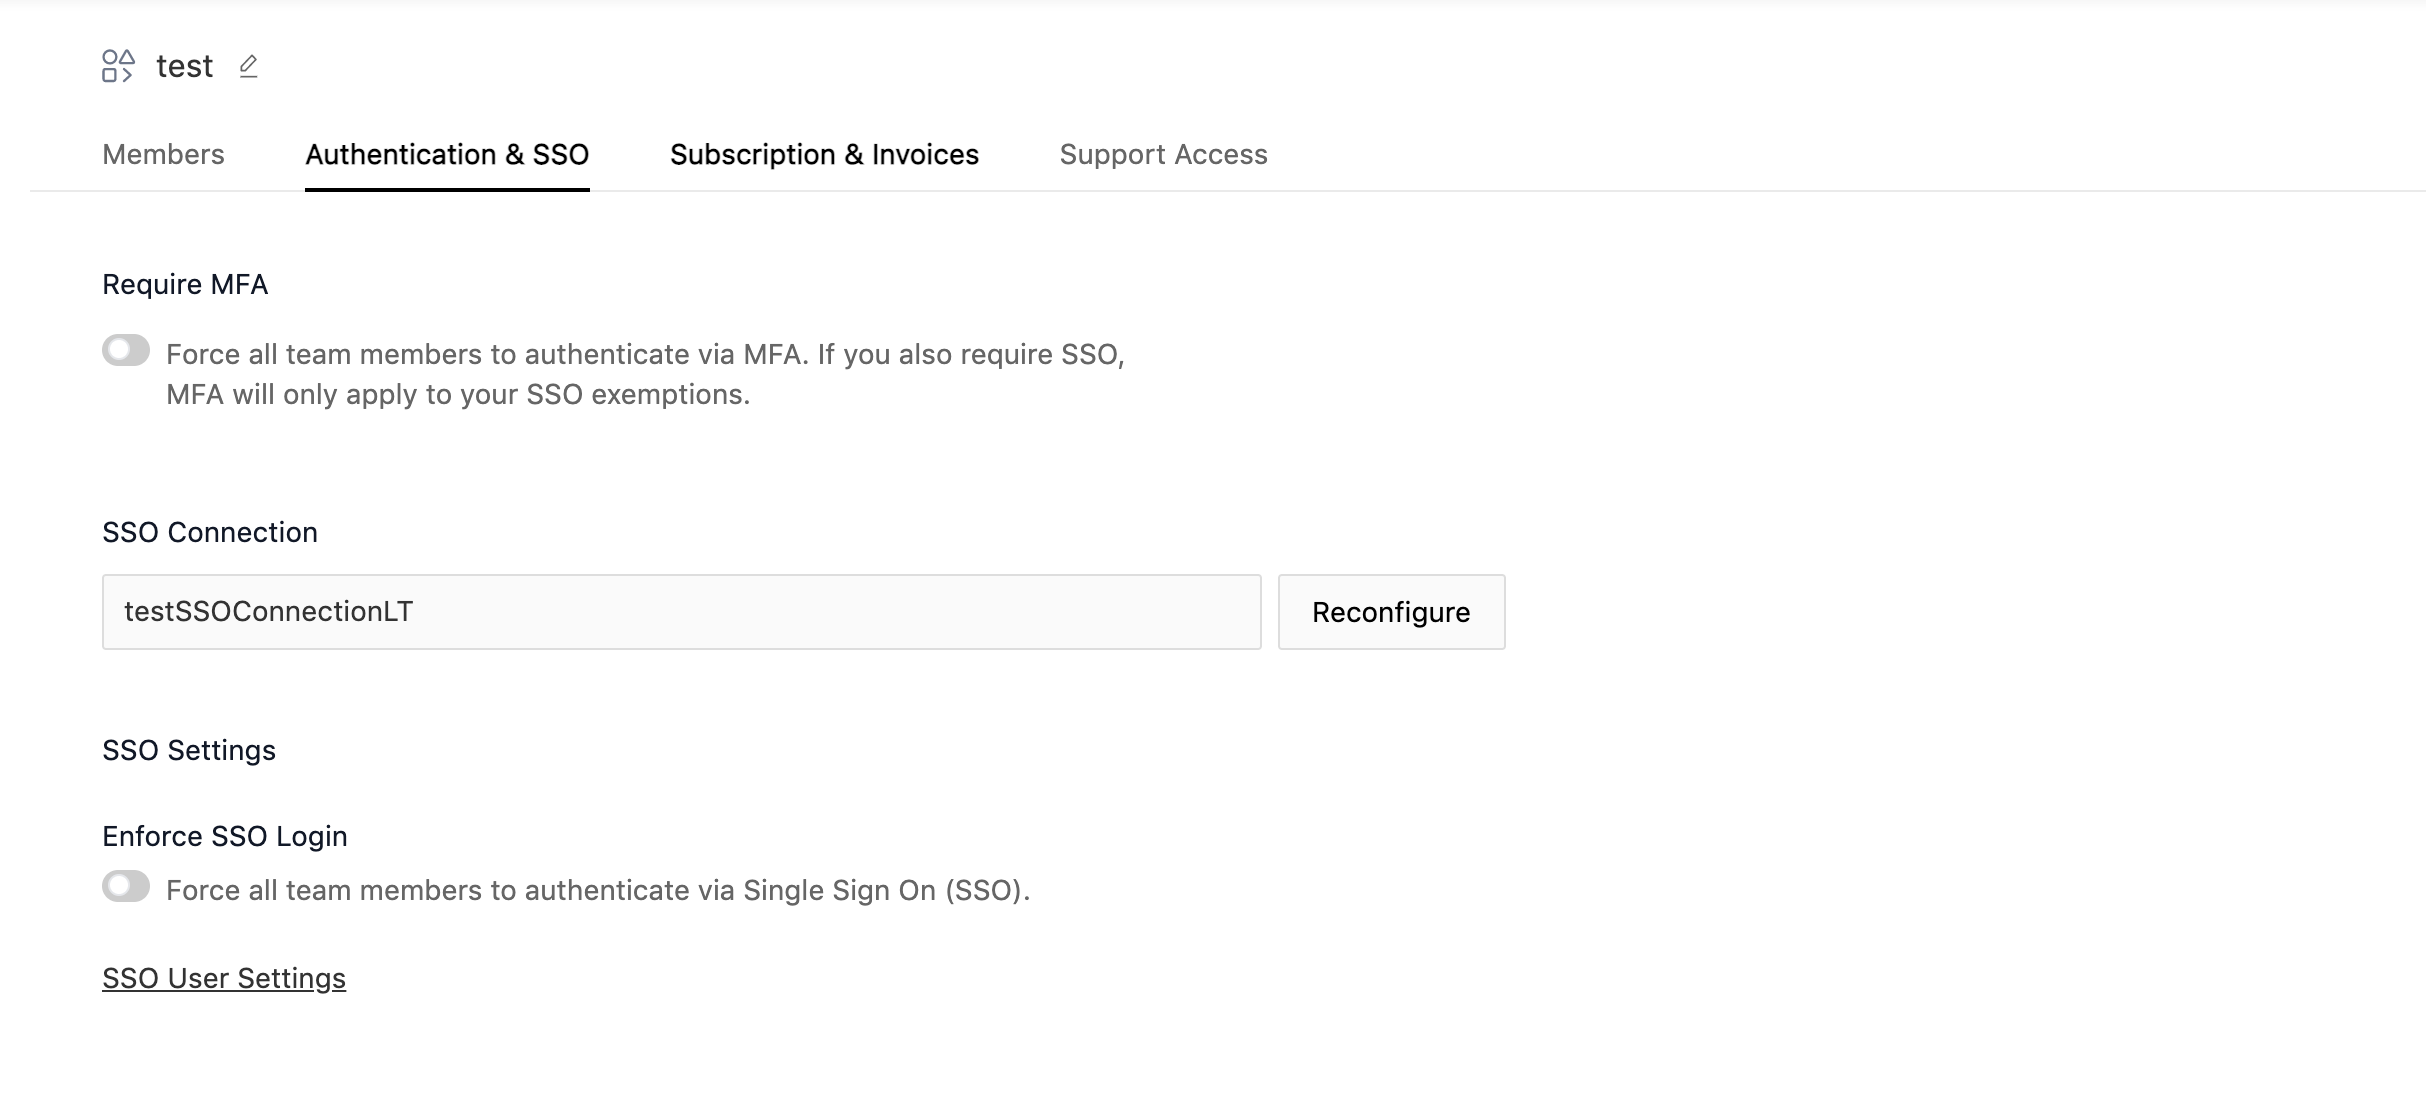
Step 14: Once the connection is created, you will be redirected to the SSO settings page. From here you can Manage SSO Connection.
That’s all you need to know TestMu AI and Azure AD integration. In case you have any questions please feel free to reach out to us via the 24/7 chat support or email us over [email protected].
