Automating Accessibility Testing with Selenium
This document walks you through the process of evaluating the accessibility of your website through the execution of automated tests using TestMu AI's Accessibility Tool.
Compatible only with Chrome and Edge browser versions >= 90.
Prerequisites
- Your TestMu AI Username and Access key
- Setup your local machine as per your testing framework.
Step-by-Step Guide to Trigger Your Test
Step 1: Setup Your Test Suite
You can use your own project to configure and test it. For demo purposes, we are using the sample repository.
Download or Clone the code sample from the TestMu AI GitHub repository to run your tests.
 View on GitHub
If you are using your own project, make sure you update the Hub endpoint in your tests file. By setting up the Hub endpoint, you establish the communication channel between your tests and the browser nodes, enabling effective test distribution and execution.
Configure the desired capabilities based on your test requirements. For example:
DesiredCapabilities capabilities = new DesiredCapabilities();
capabilities.setCapability("browserName", "chrome");
capabilities.setCapability("version", "70.0");
capabilities.setCapability("platform", "win10"); # If this cap isn't specified, it will just get the any available one
capabilities.setCapability("build", "LambdaTestSampleApp");
capabilities.setCapability("name", "LambdaTestJavaSample");
You can generate capabilities for your test requirements with the help of our inbuilt 🔗 Capabilities Generator.
Step 2: Establish User Authentication
Now, you need to export your environment variables LT_USERNAME and LT_ACCESS_KEY that are available in the TestMu AI Profile page.
Run the below mentioned commands in your terminal to setup the CLI and the environment variables.
- Linux / MacOS
- Windows
export LT_USERNAME="undefined"
export LT_ACCESS_KEY="undefined"
set LT_USERNAME="undefined"
set LT_ACCESS_KEY="undefined"
Step 3: Configure the Necessary Capabilities
To enable the accessibility testing within your automated test suite, set accessibility: true in your configuration file.
There are two primary ways to run accessibility tests:
1. On-Demand Scans (via Hooks)
For precise control over which pages are scanned, you can trigger scans manually at specific points in your test execution. This is the recommended approach to reduce test execution time and focus only on relevant pages.
To use this, simply enable accessibility in your capabilities:
capability.setCapability("accessibility", true); // Enable accessibility testing
Then, trigger the scan directly within your test script when the desired page is fully loaded:
// Execute the LambdaTest accessibility scan hook
driver.executeScript("lambda-accessibility-scan");
Note: If you do not execute the hook in your script when using this method, no accessibility reports will be generated.
2. Continuous Auto-Scanning
If you want the accessibility scanner to run automatically on every single page navigation throughout the entire test session without writing manual hooks, you can pass the accessibility.autoscan capability:
capability.setCapability("accessibility", true); // Enable accessibility testing
capability.setCapability("accessibility.autoscan", true); // Automatically scan all pages
Advanced Capabilities
You can also define other settings capabilities to refine your scan rules as described below:
capability.setCapability("accessibility.wcagVersion", "wcag21aa"); // Specify WCAG version (e.g., WCAG 2.1 Level AA)
capability.setCapability("accessibility.bestPractice", false); // Exclude best practice issues from results
capability.setCapability("accessibility.needsReview", true); // Include issues that need review
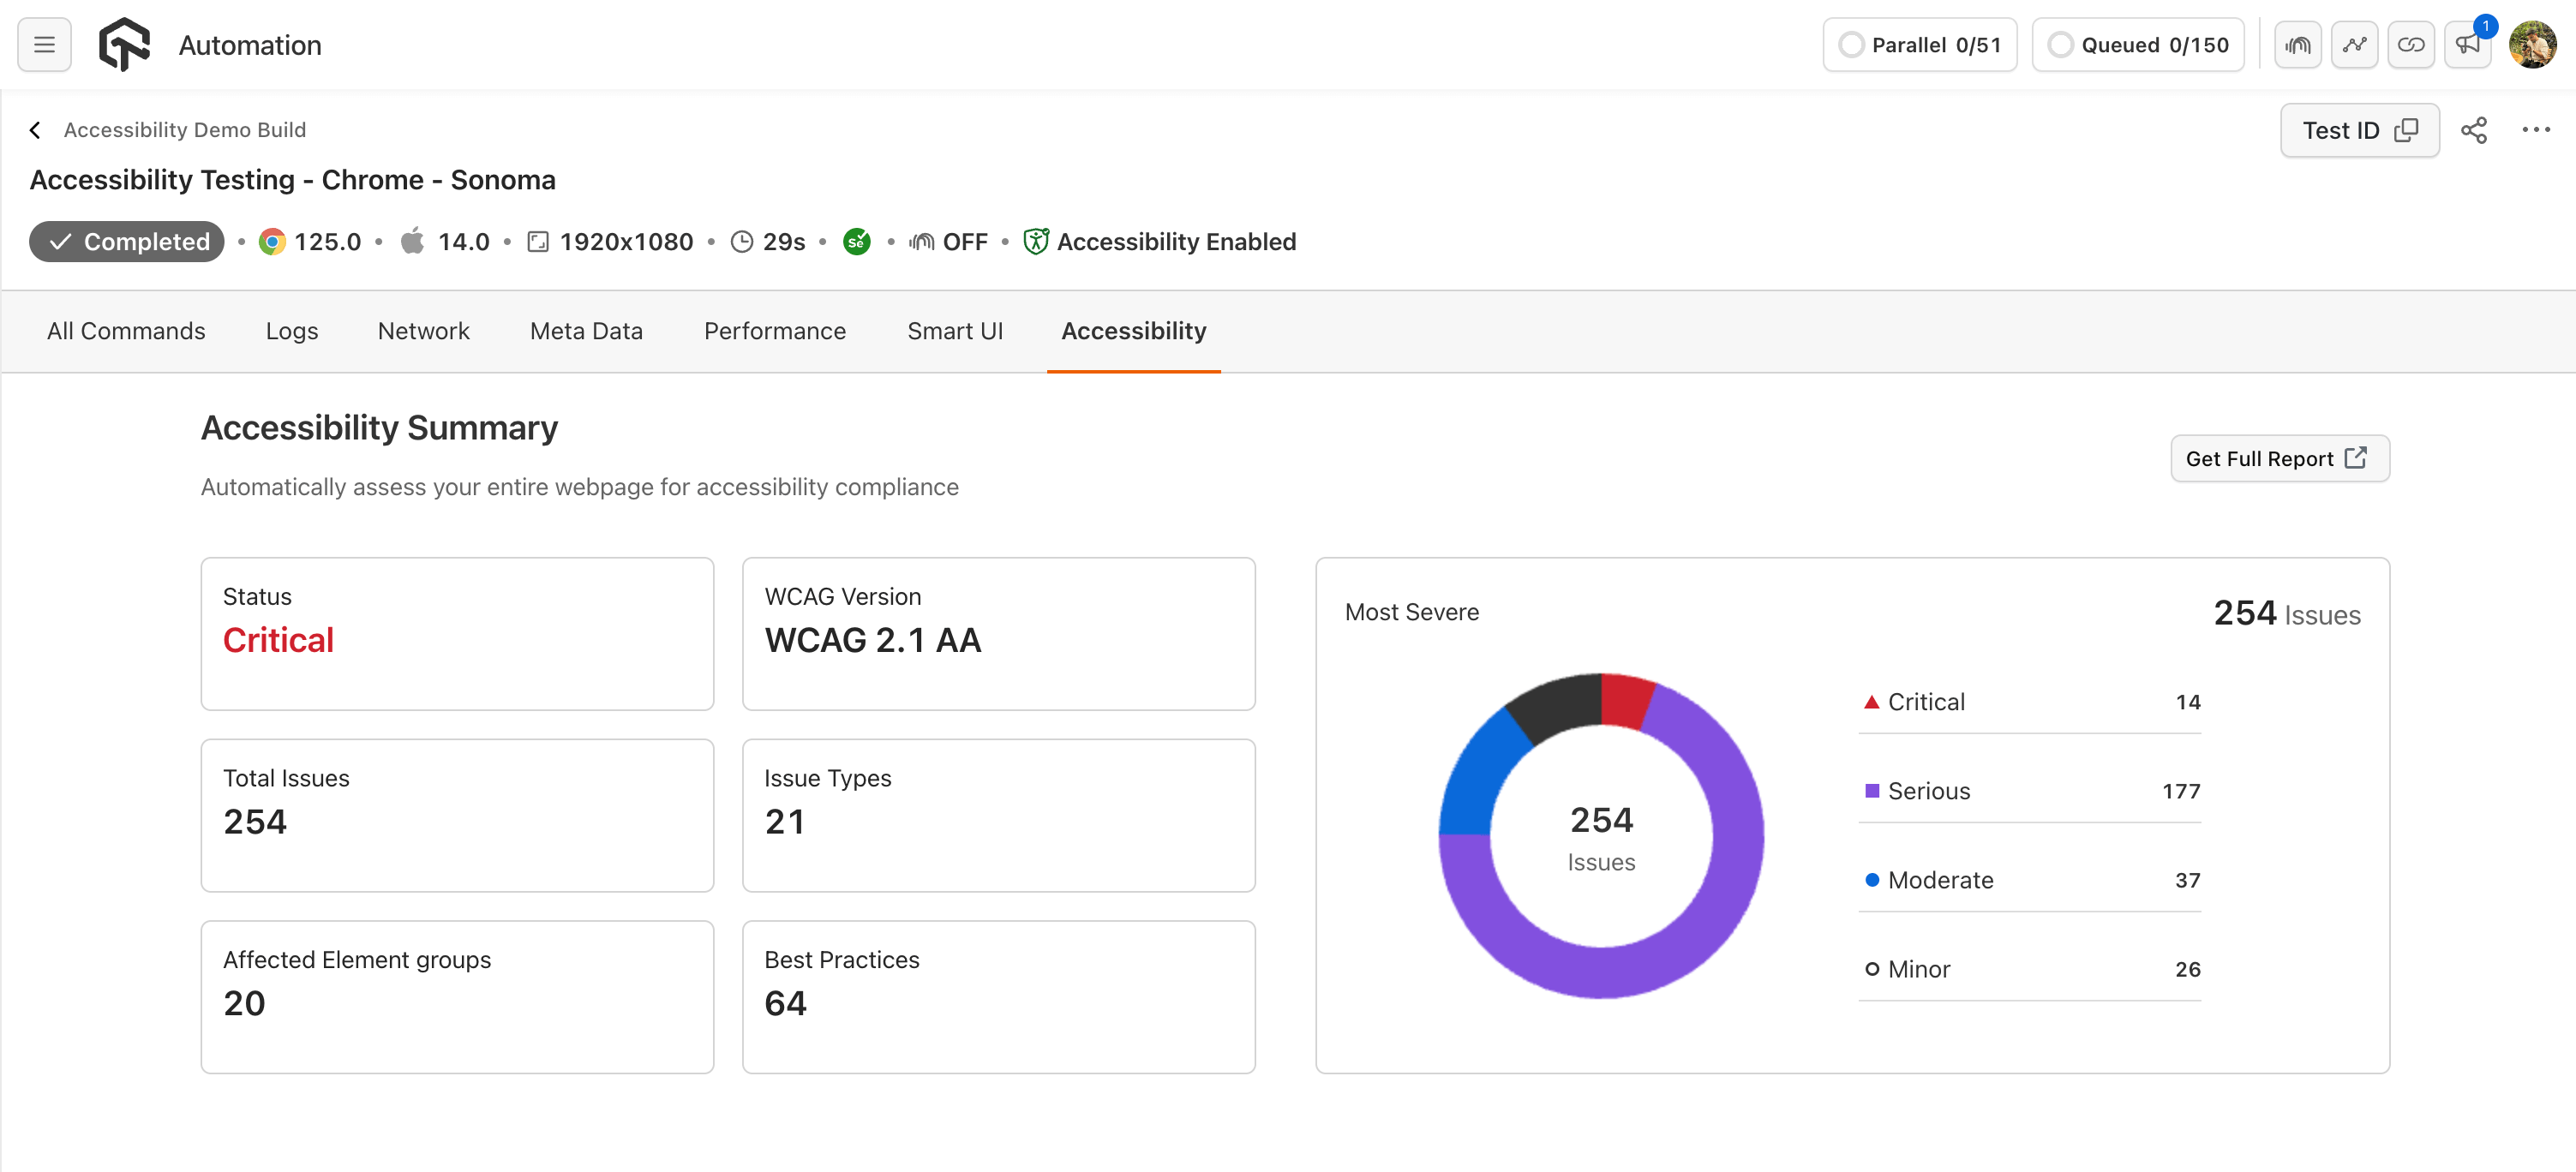
Step 4: Execute and Monitor your Test
Now execute your tests and visit the Automation Dashboard. Click on the Accessibility tab and check the report generated.
mvn test